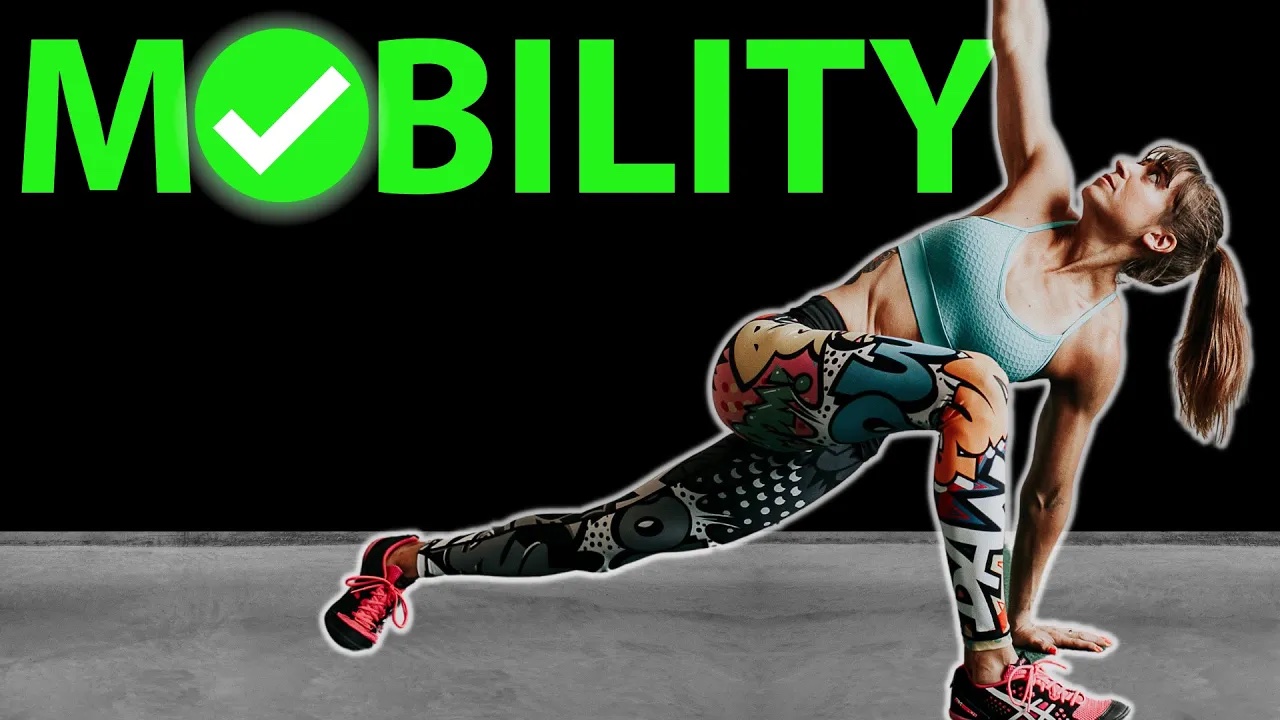
How to Unlock TIGHT HIPS (With 6 Exercises)

How to Unlock TIGHT HIPS (With 6 Exercises)

Are you one of the many people out there struggling with tight hips or hip pain? 

Whether it’s caused by a previous injury, sitting for long periods, or a sedentary lifestyle, hip pain and tight hips can be a major roadblock to your daily routine. 

Rehab work can help improve our movements, BUT we have to KEEP doing it to see those results maintained.

Rehab must become prehab. 

That’s why I want to share 6 moves to help you keep those hips, and even your lower back and knees, healthy and happy. 

And at the end I’ll share a quick series you can do combining these moves to use daily!

Exercise #1: Rectus Femoris Foam Rolling

Especially if you spend a ton of time seated, you want to spend some time relaxing tight and overactive hip flexors.

One key hip flexor muscle to focus on is the rectus femoris. This quad muscle is the only one to impact both the knee and the hip so tightness can not only perpetuate your hip pain, but also your knee and even lower back aches and pains.   

To roll out this muscle, a ball works best but will apply more pressure so if needed modify with a roller. 

Lie face down with the ball in the middle front of your thigh. Relax over the ball, propping yourself up on your forearms.

Extend your leg out flexing that quad then relax. Repeat as you hold on the ball, breathing to help the muscle relax and release.

If you find you’re only tensing against the pressure, start with a softer trigger point tool.

Repeat for a few extensions then move the ball slightly up or down your thigh.

Exercise #2: Adductor Foam Rolling

Tightness of our adductors or inner thighs can perpetuate hip pain as well, causing hip alignment issues and even knee tracking issues. 

 If you find your knees tend to cave in and you struggle to feel your glute medius or side butt working, you may want to address any adductor tightness. 

The adductors are also a hip flexor, so tightness there may be limiting your hip extension as well. 

To roll out your adductors, a roller works best.

Place the roller to the side fo you and bend your knee to about 90 degrees placing the inside of your thigh by your knee on the roller. You can roll up toward your groin and work all along your inner thigh. 

When you find a spot that is tight, lift your lower leg and then relax it back down and even push down into the roller then slightly release.

Don’t just roll up and down quickly but instead focus on holding on any tight spots to help the muscle relax and release.

Then you want to include stretching. If you are doing this as part of your warm up series, stretches that get your joints moving through a full range of motion is key. 

Exercise #3: Bench Hip And Quad Stretch 

This stretch will help improve your hip extension and stretch out any short and tight hip flexors. The key with this move is to focus on that back glute engaging to drive that back hip forward.

This stretch will isolate each side independently and really start to warm up your legs as well as it is basically a balance lunge!

To do this stretch, set up with a bench behind you. As long as your knee allows, set up at the bottom of the stretch kneeling on the ground. If you need to reduce the range of motion, put a block or even a pillow or cushion down on the ground to kneel on.

Place your back foot up on the bench and make sure your front foot is firmly pressed into the ground. Engage that back glute to help you kneel up nice and tall and drive your hip into extension from the bottom.

Then pressing off your front and back foot, lift up.

Squeeze that back glute the entire time and lower back down. Pause at the bottom on the ground for a breath and repeat.

If you find balancing a challenge, you can use a suspension trainer, chair or foam roller to hold on to just make sure you aren’t leaning forward but instead staying upright.

Leaning forward would put your hip back into flexion! 

Exercise #4: Alternating Pigeon Pose

The pigeon pose stretch is an amazing stretch to improve your hip mobility, especially if you’ve ever had sciatic pain, lower back pain or even IT band and knee issues.

However, the static version isn’t a great way to warm up your body for work. 

With this variation, moving through that range of motion, you can implement this stretch while really mobilizing those hips.

To do this stretch, start on your hands and knees. Then begin to walk your hands to one sides on the ground as you swing the leg on the side you’re walking toward back behind you and across your other leg.

Your body will rotate as you move into that pigeon pose, sitting into the glute of that front leg with your shin perpendicular to your body. Flex your foot if you do feel any pressure in that front knee.

Focus on squaring your hips up toward the ground as much as possible as you reach that one leg straight back. Engage that back glute to drive that back hip into extension as you feel the outside of your front glute stretching.

Pause for a breath then move back onto your hands and knees before rotating into pigeon on the other side.

If this feels like too much, or you can’t put pressure on your knees, try a seated bench variation, alternating pigeon pose on each side, pressing the knee gentle open as you hinge forward and sit back up before switching sides.

Next you want to include focused activation exercises.

While with the stretching you want to focus on what you feel even working to drive the stretch and begin that activation process, these moves are really key to get those underactive muscles working and improve your hip and even pelvic stability.

This first activation exercise focuses on activating those glutes. 

Exercise #5: The Wall Side Lying Lateral Raise 

Too often, especially if we’ve had previous lower back, hip or knee injuries, our glutes aren’t working as effectively as they should be and we need to work to improve that mind-body connection.

Isolation moves like this to create a slight pump and burn, but not fatigue the muscle, prior to our training are key.

The Wall Side Lying Lateral Raise is an amazing glute activation move to include because it targets both the glute medius and glute max to improve your hip stability.

The one thing we have to remember is the “right” moves only benefit us if the correct muscles are working.

And often we will allow our TFL or piriformis to compensate during lateral raise movements. 

That’s why this variation of the lateral raise is so helpful.

Turning your toe down toward the ground even just slightly vs letting it rotate open can really help you avoid that hip flexor or piriformis from taking over and the slight kick back helps also engage your glute max and avoid any hip flexor engagement to better activate that glute medius.

To do this exercise, set up lying on your side with the bottom leg bent and your butt a few inches from the wall.

You can fully lie on your side with your bottom arm straight out on the ground or you can prop yourself up to rest your head in your hand.

Lift your top leg up a few inches off your bottom leg and even slightly turn that top toe down toward the ground.

Drive your heel back into the wall behind you and feel your glute engage pushing into the wall.

Slide your heel up the wall lifting your leg and focus on the side of your butt lifting as you drive hard back into the wall. 

Do not let your body rotate or your toe turn open just to try to lift higher. 

Perform this lateral raise but do not rotate your hip open to raise up higher.

To advance this move, add a mini band around your legs above your knee.

The final exercise in this series will work on pelvic stability, engaging your core, glutes and even your hamstrings.

Exercise #6: Is Alternating Pelvic Tilt Leg Glides 

Often our hamstrings feel tight and we turn to stretching. 

But in many cases they are weak.

And even being weak they may want to take over for underactive glutes. 

That’s why exercises like this that work on core bracing as you strengthen your hamstrings can help improve your hip stability while also helping you avoid hamstring strains and injuries!

To do this move, lie on your back with a slider or towel under each heel and your heels a few inches from your butt. Feel the space between your lower back and the ground.

Engage your abs to get rid of the space as you press your lower back into the ground. Taking a deep breath and then exhaling as you draw your hip bones up toward your ribs can help you engage those abs.

Keeping your abs engaged, slowly slide one heel out, straightening your leg out.

Then curl that heel back in, pulling the heel in with your hamstring almost as if you are trying to drive the slider into the ground as you curl it back in.

Feel your hamstring work to pull it back in and avoid your pelvis shifting.

Move slowly and alternate sides, extending the other leg out. 

If you feel your hips shifting, stay on one side versus alternating.

Really focus on feeling your hamstring with that pull back in. Drive your heel down hard into that sliders to engage it and even your glute. 

If you don’t create that tension you won’t get the benefit of this move.

To combine these 6 moves, try this series below.

I like using intervals as it really allows us to focus on maximizing the movement over counting reps. While you can do each move up to 1 minute per move or side, even 30 seconds is a great place to start!

CIRCUIT:
30-60 seconds per side Rectus Femoris Foam Rolling
30-60 seconds per side Adductor Foam Rolling
30-60 seconds per side Bench Hip And Quad Stretch
30-60 seconds Alternating Pigeon Pose
30-60 seconds per side The Wall Side Lying Lateral Raise
30-60 seconds Alternating Pelvic Tilt Leg Glides

Ready to improve your mobility EVERYWHERE?!

Check out my RStoration!

9 BEST Exercises for AMAZING Mobility

9 BEST Exercises for AMAZING Mobility

Aches and pains add up as we get older. But it’s not our age we should blame.

We instead need to assess our previous injuries and the rehab we did.

As well as the PREHAB we are currently doing. 

Because we can never stop doing what makes us better.

Use it or lose it. 

Hey guys, it’s Cori from Redefining Strength where we help you move, feel and look your best at any and every age.

Maintaining our mobility means constantly working on our mobility. 

But it doesn’t have to mean stretching for hours or full recovery sessions each and every day. 

Even 10 minutes as our warm up can really add up AND even help us get more out of our training sessions.

That’s why I want to share 9 moves that address not only commonly tight muscles but also help improve your joint mobility and stability. 

These moves cover the full 3-part prehab process of foam rolling, stretching and activation.

This process is so key because the foam rolling helps start to relax tight and overactive muscles so you can then stretch to restore muscles to their proper length tension relationships while mobilizing those joints before you include activation exercises to engage underactive muscles and improve your mind-body connection. 

And at the end of this video I’ll share a quick mobility series combining all 9 moves!

So let’s start with 3 amazing foam rolling moves.

First up is Peroneal Foam Rolling.

Your feet and ankles are your foundation. Immobility there can lead to movement compensations up your body. 

And that ankle-butt connection is so key.

It’s why we need to address any previous ankle injuries or we may end up with hip, lower back or SI joint aches and pains. 

That is why Peroneal Foam Rolling is often an important move to include.

To do this move, a ball works best. Place it on the ground and then relax your leg open so that the outside of your shin is pressed into the ball. Press down into your leg as you start the ball in the top part of the outside of your lower leg.

Circle your foot to create tension and relax it as you press into the ball and breathe.

Then move the ball down to another spot along the outside of your leg and repeat.

Move #2: TFL Foam Rolling

Hip pain, lower back pain, IT Band and even knee issues seem to add up more and more as we get older.

That’s why often we want to focus on our hip mobility and foam rolling our TFL or tensor fasciae latae.

This hip flexor muscle can not only hinder our glute medius from firing correctly, which can lead to hip stability issues, but it can create tension through our IT Band which can even create ankle aches and pains.

To roll out your TFL, a ball works best. The larger or softer the ball, the less it will dig in and if a ball is too much pressure you can start with a roller. 

To locate your TFL, lie on your back and place your hands at the side of your pelvis toward your hip bones and then rotate your foot inward. You should feel your TFL flex (this also shows you the far reaching connection this muscle has). 

Then move to your side, placing a ball below that muscle and relax over the ball. 

Breathe as you hold. You can lift and lower your leg to tense and relax the muscle to help it release. 

Move #3: Chest Foam Rolling 

Finding after years of hunching over your computer, your posture has become more slouched? 

Upper back, neck or shoulders tight and achy? 

Then you don’t want to ignore relaxing those pecs!

Tight chest muscles can perpetuate that rounded posture and even restrict your scapular movement, or the movement of your shoulder blades, which not only perpetuates the hunched look but also can lead to neck, shoulder and upper back aches and pains.

While we may feel like there are always trigger points in our upper back, part of that may be due to muscles being overstretched because of our pecs being tight!

To roll out your chest, a ball in a doorway is often most comfortable and easiest to control. 

Stand with the ball right inside that shoulder joint under your collarbone and press your chest into the ball in the doors edge. Using a doorway allows you to reach that same arm up in front of you as you hold and apply pressure. 

Reach your arm up overhead as you breathe and hold on the spot. You can also move your arm open to the side to stretch and relax. 

Then adjust the ball, working down toward your armpit or even toward your sternum.

BUT be careful as you move away from the meatier part of the muscle.

You do want to be gentle as you work along the pec toward your sternum.

You can spend 90% of your focus around that shoulder joint where you will even hit that pec minor! 

After foam rolling, you will want to include some stretching.

Especially if you are stretching prior to your workout, you want to include moves that will help you warm up and begin to mobilize those joints, working to improve your range of motion.

The next move we’ll look at is the Ankle Mobility And Groin Stretch.

This is a great move to start working on your ankle dorsiflexion of the ability to draw your toes up toward your shin.

Especially if you’ve worn heels for decades or been an endurance athlete, you don’t want to ignore this amazing ankle stretch! 

This is key if you want an efficient running gait or to be able to squat lower without hip or knee pain!

This move will also address your adductor flexibility and help you start to engage those glutes to stabilize your hips.

To do this stretch, set up half kneeling on the ground and move that front foot so it is in line with your back knee and facing perpendicular to that back leg, pointing out.

You want your knee to be in front of your ankle, although you can adjust the position based on your ankle mobility. 

Squeeze that front glute to pull the knee open and in line. Then shift your weight to drive that knee forward over that toe without letting your heel lift. Then press back. 

Do not rotate toward that leg as you shift laterally. 

If this is too much pressure, move your knee back to be in line with your ankle. 

Or if you can’t kneel, try standing instead while still focusing on that shift to drive the knee past your toe. 

Move #5: Bench Hip Stretch

Lower back, hip and knee pain is something so many of us will experience in life and it is often due to hip flexor tightness and a lack of glute activation. 

This hip flexor stretch allows you to focus on activating your glutes to stretch your hips while addressing each side independently. 

And by lying on the bench, you help yourself avoid arching your lower back to compensate instead of actually stretching out and mobilizing those hips! 

If you don’t have a bench you can do this off a couch, coffee table or even your bed!

To do this stretch, lie back on a bench with the bottom of your butt right at the edge and one leg hanging down toward the ground. This knee will be bent to about 90 degrees.

Bend the other knee and hug it in slightly toward your chest. 

Holding that knee in, tuck the other knee up toward your chest, then focus on engaging your glutes to drive that heel back down toward the ground as you extend the leg back down. Feel your butt even kind of lift you a bit on the bench as you extend that hip and feel the stretch.

Pause then tuck the knee back in and repeat.

Move #6: Active Foam Roller Star Stretch

A lack of thoracic mobility as we get older can lead to that humped back posture that non of us want. 

And it can also lead to neck, shoulder, upper back and even LOWER back aches and pains.

For instance, a lack of proper thoracic extension can lead to shoulder pain when overhead pressing or us even arching our lower backs to compensate and seek out mobility since we can’t properly extend our mid and upper backs!

This star stretch variation is a great way to really isolate and mobilize our thoracic spine as it is even easy to cheat in other spinal stretches and get mobility from other areas. 

To do this stretch, a roller works best although you can put a yoga block or even books to hold your knee on to help isolate your thoracic spine. 

Bend your hip to about 90 degrees and place your bent knee on the foam roller to the other side of your body. Pull your knee across your body and press your opposite hand down into your knee to help stabilize.

Put your other hand behind your head. Touch that elbow in front of your face, across your body. 

Then, pulling with your back, open that elbow up and open and down toward the ground, opening your chest up toward the ceiling.

Make sure you aren’t just flapping your arm but twisting through your spine. Exhale as you try to relax the back of your shoulder toward the ground then rotate closed and repeat.

Move slowly and really focus on your chest stretching as you engage your back to twist open. Don’t let your knee come up off the roller or block.

After you’ve done your stretching, you then want to focus on activation exercises to establish that mind-body connection and really engage those muscles to feel them working.

Move #7: Single Arm Scapular Push Ups

Scapular control is key if we want to avoid neck, shoulder, upper back and even elbow aches and pains.

It is also key if we want to lift more or achieve that first full pull up! 

And being able to truly isolate and control each shoulder blade is key, especially if we’ve had previous injuries that may make us compensate and end up overusing the other side.

This move will really help you focus on that scapular retraction with a very isolated exercise that takes out elbow flexion. 

To do this activation move, set up facing a wall and place one hand on the wall at about shoulder height.  Your arm will be straight and make sure you aren’t shrugging.

Then keeping your shoulders down and arm straight, but elbow not locked out, pinch your shoulder blade toward your spine.

Do not try to make the move bigger than it is and bend your elbows. 

Draw the shoulder blade toward the spine, then push the wall away to draw the shoulder blade back forward. 

Focus on this move being small and your upper back working. 

Move #7: Side Plank Clams

Core work is key. Most of us even seek out ways to include more. Because our core is the link between our upper and lower bodies, it is key we keep it strong to properly transfer force and react quickly in every day life. 

And moves like the side plank clam not only help us avoid spinal issues and back pain but also help improve our shoulder and hip stability.

This move will really target and activate your lats, obliques and glute medius.

To do this activation move, set up in a side plank position with your elbow under your shoulder and your knees bent and legs stacked. 

Turn your top foot down in front of your bottom foot. 

This internal rotation of your lower leg will help you better target that glute medius without your TFL taking over.

Then as you lift up into the side plank, open that top knee up toward the ceiling. Press your hips forward as you lift and feel your obliques also working to drive that bottom hip up. 

Make sure to engage your upper back to support your shoulder. 

Do not rotate open with this move, but almost try to stop the leg opening up wider with the side of your butt. Feel your bottom glute medius also working to lift you into the side plank. 

Then lower the top leg down as you come back close to the ground and repeat. You can fully lower down but try not to just slump out of the move but maintain some tension. 

To modify, you can put your elbow up on a stair or block for a slight incline.

Because the clam itself is an often misused move, I will below to a video with more tips to optimize this exercise, especially if you struggle to activate your glute medius!

Overrated Glute Move: https://youtu.be/6xx-H057YY4 

Move #9: Single Leg Reverse Hypers

So many of us struggle to properly engage our glutes, which results in lower back, hip and knee pain…not to mention even ankle issues and injures.

And often, because we aren’t able to engage our glutes optimally, we compensate and rely on our hamstrings. 

When our hamstrings start to take over, we can end up with hamstring pulls and strains not to mention perpetuate our back and knee pain.

That’s why moves like the reverse hyper, where we can isolate our glutes and learn to engage them FIRST, are key to include. And doing a single leg version helps you address both side independently. 

To do this activation move, lie face down on the ground and relax your chin or forehead into your hands. Bend one knee to about 90 degrees with the heel up toward the ceiling.

Drive that heel up as you press your pelvis down into the ground. Feel your glute lift your quad up as you hyperextend your hip. 

Do not arch your lower back or use it to lift and keep your hamstring relaxed, even relaxing your foot if needed. 

Focus on your glute lifting and then stopping the move. Pause at the top and lower down.

This isn’t a big move so don’t try to cheat and make it bigger. 

Because this move is deceptively challenging if your hamstrings want to compensate, I will link to a video below with more tips and common mistakes.

Underrated Glute Move: https://youtu.be/oiECA2118GI 

Bonus Tip:

Now….How can you include these 9 moves in a quick series?

Set a timer for 30 seconds and perform one round through the series. If you’re really focusing on doing this as a warm up, you may consider two rounds through the last 3 activation moves only.

SERIES:
30 seconds per side Peroneal Foam Rolling
30 seconds per side TFL Foam Rolling
30 seconds per side Chest Foam Rolling
30 seconds per side Ankle Mobility And Groin Stretch
30 seconds per side Bench Hip Stretch
30 seconds per side Active Foam Roller Star Stretch
30 seconds per side Side Plank Clams
30 seconds per side Single Arm Scapular Push Ups
30 seconds per side Single Leg Reverse Hypers

For more mobility moves and more on the full 3-part prehab process, check out this video with a full body fix next…

–> The Perfect Mobility Routine (FULL BODY)


Is An Injury Why You Can’t Lose Fat?

Is An Injury Why You Can’t Lose Fat?

Let’s face it. Injuries suck but so often they aren’t what’s truly holding us back from losing weight.

Often it’s a case of the more you do, the more you do…and our diet starts to slide as we’re thrown out of our normal routine.

However, ultimately we can’t always change our situation…we can only control our perspective.

We can see it as an obstacle or as an opportunity.

How can you see this as an opportunity to actually get better fat loss results over feeling like injuries keep sabotaging your progress?

What are some new things you can EXPLORE?

– New recipes
– New hobbies
– Dialing in your rest and recovery
– Learning about rebuilding from injury – looking for perspectives on your issues and even why they occurred to ask better questions of your health care professionals.

See this as an opportunity to come back STRONGER even with so many habits dialed in to build off of!

But we’ve got to focus on controlling what we can control.

And you 100% can control how you’re fueling.

While you definitely need to train to build muscle, because you need that challenge to adapt and grow stronger. And while training can really help make the fat loss process easier and your results easier to maintain, you can honestly lose fat without doing any activity at all.

Aka being injured really isn’t an excuse!

Sure you may not be able to train exactly how you’d like, but you can see that as giving you more time to try new ratios or learn to track your diet.

Tracking your diet can also make you feel a bit more secure you’re doing what you need and have the power to adjust as you’re lifestyle evolves.

And being out with injury doesn’t mean slashing your calories lower.

While I know we often go straight to this because we feel our activity level has decreased so we’re burning fewer calories, this can also lead to more muscle mass being lost!

It can lead to impaired recovery as healing takes energy!

EAT ENOUGH!

And honestly, if you want a magic pill, protein is it!

It is the building block of all of your tissues aka all of the things that need to repair from injury.

So while you want to avoid an extreme deficit, your energy intake will decrease. And you don’t want your protein levels dropping too much during this time.

Protein can aid in your recovery and help you retain lean muscle mass, which can also help you keep lean while not training the way you’d like.

Studies have shown that “insufficient protein intake will impede wound healing and increase inflammation to possibly deleterious levels.”

It’s honestly why I even have clients take BCAAs when out with injury as they can help improve muscle mass retention and are no calories to avoid consuming too much.

And, partly due to the fact that BCAAs can help us build and retain lean muscle, but also due to the fact that isoleucine and leucine help improve glucose tolerance and increase energy expenditure and fat oxidation, they may also help you increase fat burning and fat loss. Especially when insulin sensitivity has been decreased due to a reduction in exercise.

https://www.ncbi.nlm.nih.gov/pmc/articles/PMC4672013/

It’s also why I promote Collagen use during recovery periods especially as well.

Collagen is the most abundant protein in the body and is used to make connective tissues.

Type 1 and 3 collagen are for skin health and help with sagginess, wrinkles and wound healing. Type 2 collagen is for joint health and may help relieve joint pain, swelling and stiffness.

Even take collagen with Vitamin C as vitamin c boosts natural production of collagen as well.

Plus vitamin c itself helps with tissue repair and growth

Even jut 5-15 grams of collagen with 50mg of Vitamin C can be a great bonus!

Drink enough water! Hydration is key to you healing quickly, not eating out of boredom and sleeping well!

NOW BEFORE YOU NOD YOUR HEAD AND START TRACKING WHILE HEADING BACK TO THE COUCH….

Realize you CAN truly do so much to keep training!

And this doesn’t mean pushing through the pain!!

We have to stop thinking that because we can’t train how we normally would that we can’t do anything at all.

Even just some form of training can go a long way in maintaining the muscle mass and strength we’ve built. Even if we aren’t training those same areas in the exact way we would like.

It’s sometimes about doing the minimum you can to keep that muscle memory, put the breaks on muscle mass loss and create that anabolic environment to avoid muscle catabolism.

Because even if we can’t do enough to BUILD, often we can do enough to MAINTAIN!

And there are so many ways to modify around injuries.

Ankle injury?

Try kneeling squats.

Shoulder injury, try lower body workouts.

Knee pain and want to do cardio? Try even battle ropes seated.

See this as an opportunity to have fun training around.

Even depending on the ache or pain, you can sometimes modify the exact movement to engage the correct muscles.

And then focus on this as a chance to rebuild your foundation stronger!

Do that prehab. Focus on the mind-body connection.

Learn about and address what lead to the overload.

Even find other weaknesses to work on!

Maybe this is the chance to do a deload and address other mobility restrictions or areas that have been achy in the past.

Studies have even shown that training one limb can improve strength gains in the untrained limb. So while we don’t want to go crazy, it does show that doing SOMETHING can even pay off.

https://pubmed.ncbi.nlm.nih.gov/31136543/

And then rebuild slowly.

Don’t just do less, truly meet yourself where you’re at so you even crave more.

And during this time as I mentioned to start, see this as an opportunity.

Dial in other areas of your healthy habits, even including your sleep.

For more on even mobility work and that full 3-part rehab process, check out the links below…


For two essential fat loss tips: https://youtu.be/hFk0UylZYX8


For more injury prevention, or prehab exercises:

Shoulder Mobility: https://youtu.be/elmpc3U3xHU

How to Build Muscle At Any Age (7 TIPS!)

How to Build Muscle At Any Age (7 TIPS!)

“I’m too old to gain muscle.”

Stop lying to yourself. Stop giving yourself an excuse to not work hard and move forward.

Because while our body, needs and goals do change as we get older, and yes it 100% becomes harder to build and retain lean muscle, we can achieve fabulous results and build muscle at any and every age.

And honestly, often the reason we don’t see the results we want as we get older is because we cling to improper dieting and workout practices that we may have “gotten away with” when we were younger.

But at every stage of life, we need to be adjusting our training and fueling. Nothing works forever.

Our body and lifestyle are constantly evolving and so should our diet and training habits to meet us where we are at currently so we can always move forward and be functional strong till our final day on this planet!

That’s why I want to share 7 tips to help you not only maintain your muscle mass but gain muscle as you get older.

Tip #1: Use It Or Lose It.

So often the reason we see more dramatic shifts in body composition and lose more muscle mass as we get older is because we’ve STOPPED doing what makes us fitter and stronger.

We accept decline and use age as an excuse instead of finding ways to really challenge ourselves.

Things do get harder. We may feel more awkward with balance moves. We may feel like we recover slower.

We may even dislike coordination moves because they are uncomfortable.

Even mainstream media tells people to stop doing what once kept them strong.

But if you don’t use it, you lose it.

If you want to maintain your muscle, you’ve got to challenge your body.

If you want to keep your mind-body connection strong, which can lead to better muscle hypertrophy as well, you’ve got to do moves that challenge your coordination.

And if you not only want to gain muscle but stay functionally strong and avoid falls, you’ve got to do those awkward balance moves.

Use it or lose it. Keep challenging yourself and training those movement patterns in the gym so you move better in every day life!

Tip #2: Stop Dieting.

Muscle helps keep our metabolic rate higher. It helps us burn more calories at rest and stay leaner.

And we get older we become less able to utilize protein as efficiently making it even harder to build and retain lean muscle mass.

But this is why it is even more key we stop the dieting and extreme deficits.

While it can feel harder and harder to lose any weight we’ve gained so we feel we need to turn to larger and larger calorie deficits, this ultimately sabotages our results.

It leads to more muscle being lost in the process of us trying to lose weight which only leads to metabolic adaptations and worse body composition.

It leads to us actually making it harder on ourselves to lose the weight and keep it off. Plus the metabolic adaptations mean we burn fewer calories at rest.

This leads to us then slashing our calories lower and lower to try to keep losing, perpetuating the horrible weight gaining cycle as we get older.

Instead we need to FUEL that lean muscle.

We need to focus on macros first and a very slight calorie deficit so we can help ourselves retain that lean muscle even as we want to lose fat.

Or we maybe even need to first retrain our body to eat more so we can build lean muscle with a small calorie surplus before we consider a slight deficit to lose!

Tip #3: Do Moves That Challenge You.

Many of us have heard that strength training is key to gaining muscle especially as we get older.

And it is.

By challenging our muscles, we force them to rebuild and grow stronger.

It’s why we don’t want to fear lifting heavy as we get older.

The key is recognizing what lifting heavy is for us.

It may mean bodyweight training starting out, especially if you haven’t trained before or trained consistently in awhile.

Or it may be using resistance bands or dumbbells over barbells.

The key is not fearing loads and truly challenging yourself instead of going lighter just because you’ve hit a certain age.

Fitness is about ability PERIOD.

We always have to meet ourselves where we are at.

This also means we can’t avoid awkward and uncomfortable moves that challenge our mind-body connection.

Neuromuscular efficiency, or the ability to recruit muscles quickly and in the right sequences to perform movements properly, is key to us moving well and even improving our reaction times and coordination in every day life.

Not to mention that ability to recruit muscles quickly, that muscle activation, will also IMPROVE our muscle hypertrophy.

So if you want to be able to gain more muscle, you want to improve that mind-body connection with moves that challenge your balance and your coordination while also challenging yourself with loads!

Tip #4: Increase Protein Portions Per Meal.

As we get older we can develop anabolic resistance and we are less able to utilize protein as efficiently.

This means we actually need to increase our protein intake, especially when we’re training hard and lifting to build muscle.

Because our muscles don’t respond by increasing muscle protein synthesis in the same way as when we were younger, increasing a portion of 20 grams of protein to 30 may be super key.

And if we’re training harder, you may see an even better benefit from 40 grams, especially after a hard training session.

However, the reason I don’t just say increase protein intake overall is because, as we get older, we can also often see a decline in our appetite.

This decline can be purely age related but also based on how we’ve trained our body to fuel when trying to lose weight in a more extreme deficit, which can make it hard to eat a ton of protein in one sitting, especially because it is so satiating and can make us feel fuller.

By increasing each meal over trying to get in a ton extra at one meal, and even adding in a pre and post workout snack that is protein-centric, we can break up our protein intake to see results.

You may even find that you can see added benefits from a BCAA supplement consumed DURING your workout as Leucine especially is so critical to stimulate muscle protein synthesis.

There can also be some benefits of breaking up your protein to keep a positive protein balance at multiple times a day to promote better muscle growth!

Tip #5: Do Your Mobility Work.

We can see changes in our recovery and aches and pains can feel like they’re adding up as we get older.

Too often we simply blame our age over recognizing the movement compensations, imbalances, overuse and overload that have been occurring for years that we haven’t addressed.

But whatever the reason, we can’t ignore these issues if we want to be able to train hard consistently to see results.

It’s why mobility work is so key.

It can help us move better and recover faster, even helping us better manage chronic inflammatory conditions that could fight our muscle gains, so we can train consistently and challenge ourselves to build that lean muscle.

Without proper recovery, we end up training to a point of diminishing returns where we are just constantly beating our body down over allowing for proper recovery and growth.

When we rest, we rebuild!

Here is a full body mobility routine with the complete 3-step prehab process to address common aches and pains.

But it is key we do this mobility work in every warm up so we can train to build that lean muscle more efficiently!

You’ll be surprised by how much even just 5-10 minutes of mobility work a day helps you train harder without needing extra days off to recover!

Tip #6: Be Strategic In Your Meal Timing.

I say this as a person who personally loves intermittent fasting as a meal timing…

Fasting can backfire when gaining muscle is your goal – especially if you are a hardgainer.

And as we get older, we have to realize that fasting and fasted training may hinder us from gaining muscle, as in a fasted state, your muscle protein balance is negative.

Basically you break down more muscle than you build.

So we put ourselves at greater risk for losing muscle the more we put ourselves in this negative protein balance.

Not to mention, when you train fasted, you don’t necessarily have the readily available stored fuel you need to truly push through a hard session or rebuild from the damage you’ve created.

So consider including a pre-workout meal with protein to have amino acids readily available in your system and even a carb source for immediate fuel to allow you to push harder in your session without fatigue.

This meal will help create a positive protein balance even before your session.

Then post workout, consider consuming another 40grams even of protein.

Studies have found that resistance exercise combined with amino acid ingestion elicits the greatest anabolic response and may assist the “elderly” in producing a ‘youthful’ muscle protein synthetic response provided sufficient protein is ingested following exercise.

This post workout protein consumption can also even help you improve your recovery so you can include more hard training sessions over the week.

Tip #7: Stay Active On Days Off.

Recovery and rest days don’t have to be “do nothing days.”

And the more we can actually use these days to prep our body to move better during our training sessions, the better off we will be.

Include 5-10 minute mobility routines.

Go for a long walk.

Honestly, walking is one of the most underutilized tools we have to stay functionally stronger and improve our body composition even as we get older.

Walking can help us avoid unwanted fat gain, keep our aerobic base strong and even recover from previous training sessions without being catabolic to our muscle mass unlike more intense forms of steady state cardio.

Walking can also be a great way to destress and help our body, and mind, rest!

So as much as it can be hard to take a day off, your body needs it. Your muscles repair and rebuild when you give them time to recover.

But to stay active, don’t be afraid to include light movement and mobility work on those days off!

You may be surprised by how much even this light activity helps you sleep better!

SUMMARY:

We can, and should, focus on building muscle at any and every age.

We are NEVER too old to see results.

And our workout routine and diet should always be based on our needs and goals, meeting us where we are at. But our age, that simple number, should never determine what we can or can’t do.

We have to remember that if we want to stay strong, it really is a case of use it or lose it.

So use these 7 tips to help you feel lean, strong and fabulous till your final day on this planet!

And for even more motivation to never say you’re too old, check out the Fitness Hacks Podcasts I’ve linked to below.

FHP S2:E7 – Can You Gain Muscle As You Get Older? If So, How!?

FHP S2: E46 – I’m too OLD!

MORE STUDIES:
https://pubmed.ncbi.nlm.nih.gov/22313809/
https://www.ncbi.nlm.nih.gov/pmc/articles/PMC6582369/
https://www.tandfonline.com/doi/abs/10.1080/15438627.2020.1770251
https://journals.physiology.org/doi/full/10.1152/jappl.2000.88.2.386
https://journals.physiology.org/doi/full/10.1152/ajpendo.00488.2005

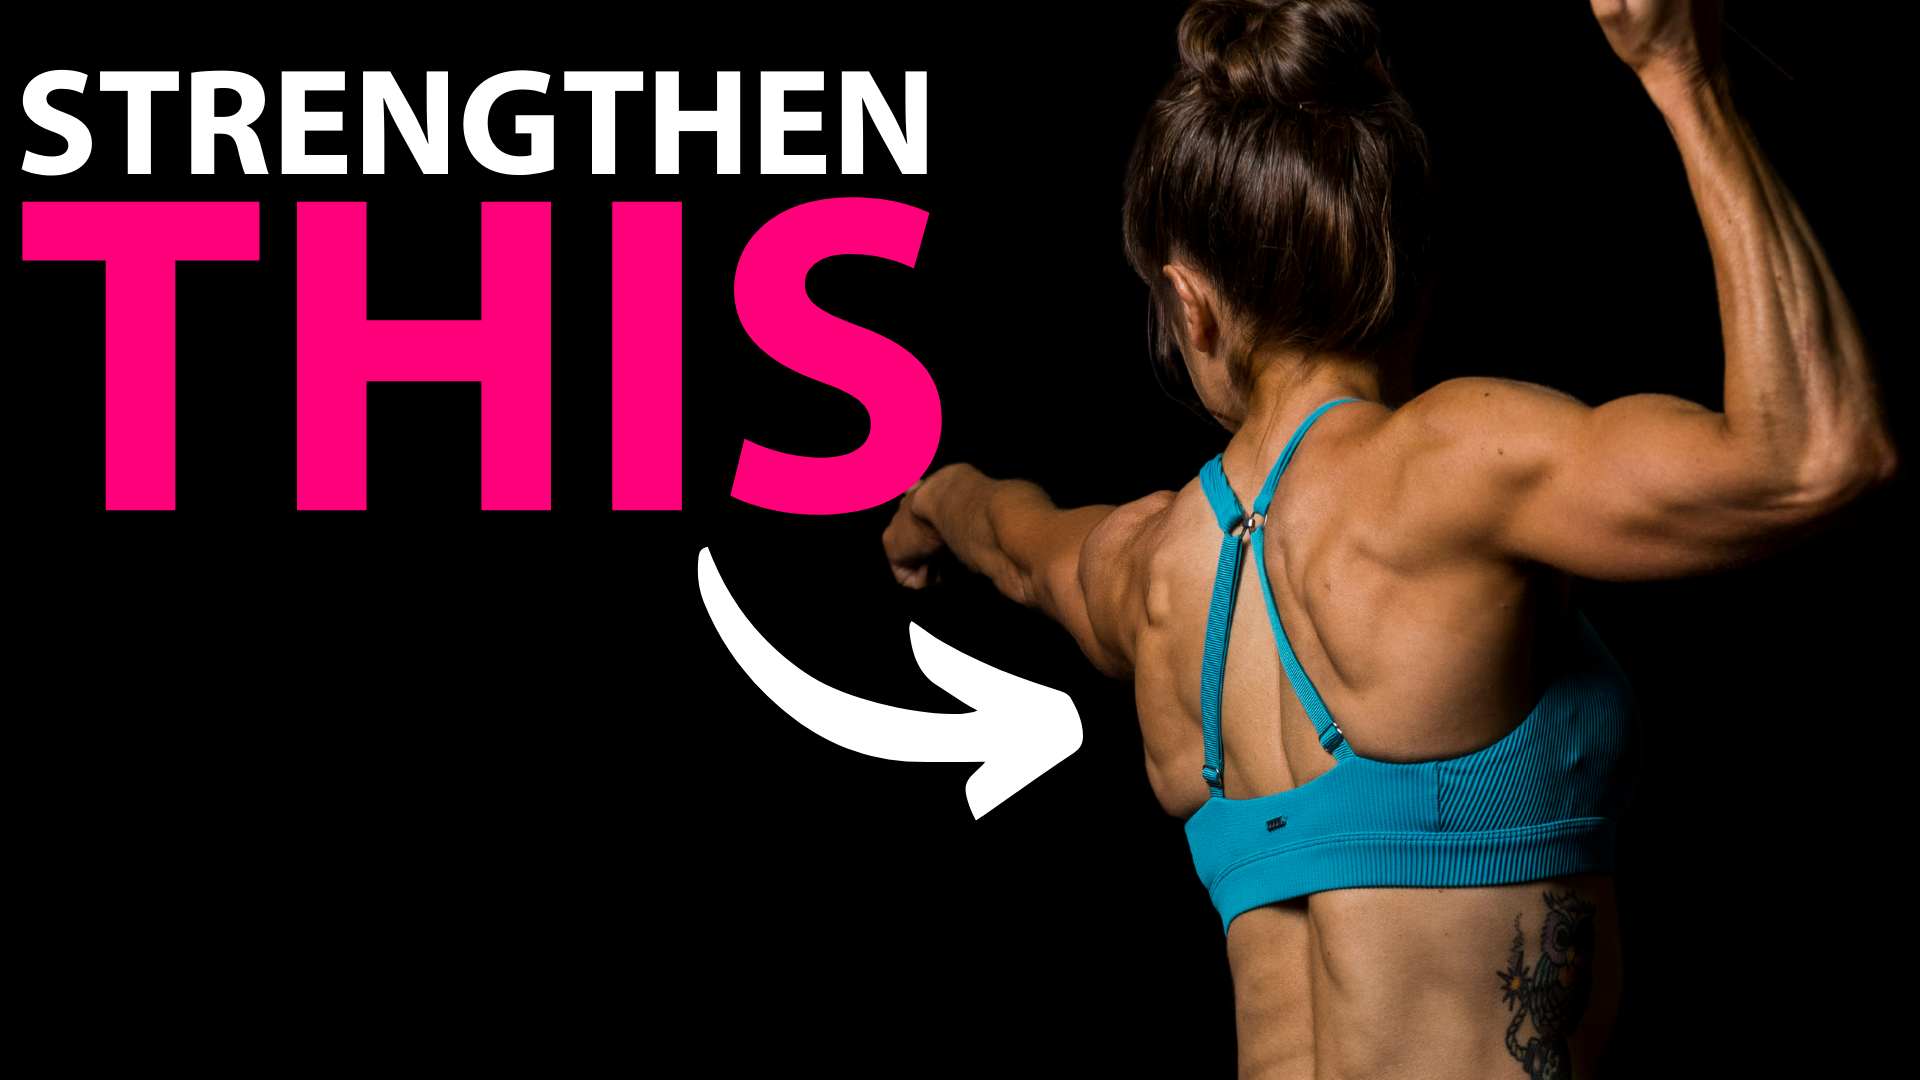
Want A Strong Back? (Do This Back Exercise!)

Want A Strong Back? (Do This Back Exercise!)

Too often we waste exercises by not actually working the muscles intended.

And then we wonder why we aren’t seeing the results we want.

But we have to remember that if we don’t feel the correct muscles working, those muscles aren’t reaping the benefits.

For example, if you feel your lower back during ab work, your lower back is what is being worked, not your abs. So all of that ab work isn’t going to pay off the way you’d like.

And it may even result in injury as your lower back becomes overworked and overloaded. This can even lead to your lower back engaging when it shouldn’t in other compound moves and lifts.

So not only is the muscle group we want benefiting NOT benefiting, but we may be creating recruitment patterns that can lead to other issues and injury.

The same thing goes for those back exercises you’re including in your workouts.

Tend to feel your neck or shoulders or even your biceps working instead of your upper back during rows or pull ups?

Struggling to feel like all of that back strengthening work is leading to the results you want, like improving your pull ups so you can do that first full one?

Then you need to make sure your back is actually what is powering your pulling moves.

And if it isn’t, you need to potentially modify so your arms can’t compensate.

You need to start by addressing your scapular mobility and stability to actually get your back powering the pull!

That’s why I love this amazing move – The Back Shrug.

While we need to include mobility work and that full prehab process of foam rolling, stretching and activation in our warm up routine, we can’t out mobility work improper movement and recruitment patterns when we lift.

It’s why we need to be intentional with moves and see every exercise as a a chance to assess.

And it’s why, when the correct muscles aren’t working, we sometimes need to modify moves and even try other variations to improve that mind-body connection.

It’s why if you struggle with with using your back during rowing, you may want to switch to the Back Shrug to start focusing on that scapular retraction to engage your back and power the pull.

How Do You Do The Back Shrug:

This move boils the row down to just that initial scapular movement to learn to control that back engagement.

When you row, the movement should start because you’re you’re drawing your shoulder blade toward your spine to use your back to pull.

This movement isolates just this component of the row, removing any elbow flexion that may lead to us compensating and using our bicep instead.

Too often with rows, we end up performing a bicep curl, curling our wrist in toward our chest over driving the elbow down and back as our shoulder blade moves toward our spine.

That’s why focusing on just that scapular movement to start can be key.

To do the Back Shrug, hold a dumbbell in each hand and hinge over standing with your feet about hip-width apart.

Let your arms hang down and unshrug your shoulders while keeping a neutral spine. Make sure you’ve hinged over to load your glutes while keeping your knees soft.

From this bent over position, you are going to try to pinch your shoulder blades together while letting your arms hang down.

Draw your shoulder blades toward your spine. Don’t just shrug your shoulders. Focus on that scapular movement.

Do not bend your elbows or start to row.

Just pinch the shoulder blades together, pausing, then relaxing the weights back toward the ground. Do not shrug your shoulders up toward your ears as you retract!

You will be able to add weight as you can fully control and feel the movement on both sides.

This is a small movement. Don’t try to make it bigger by standing up or bending your arms. Make sure to keep your neck long. Your only focus is on drawing the shoulder blades toward your spine then relaxing them away. Even pause as you do the pinch over rushing.

Variations:

There are so many ways you can then vary this move based on the types of rows you general include in your training and even the other muscles you want to target and tools you have available.

You could do this with a band instead of dumbbells. Or even off a suspension trainer. All of these are great to include to prep your body to row using these different tools and postures.

Because we can struggle with that scapular retraction in different positions, it can be key to include a diversity to make sure we’re initiating those rows with our back.

And if you find you struggle even with proper mobility and strength on one side, you can even make this movement a unilateral exercise, working only one side at a time or even doing rounds or reps on only one side.

If you don’t have any equipment, you can even do a unilateral variation called the Single Arm Scapular Push Up. This is great as an activation move in your warm up before any strength work even.

But as you really work to translate that activation to the full row with weight, consider the these variations to prep the body to initial that pull with that proper scapular movement.

SUMMARY:

Moves are only as good as their implementation. And if we want to get the full benefit of an exercise, we need to make sure we’re actually engaging the correct muscles to power the movement.

If you’ve struggled with feeling your back during rowing exercises, try this scapular retraction focused back exercise to really isolate and work on that initial back engagement.

It can easily be included as part of your accessory work for a few rounds of 10-15 reps! Focus on that scapular movement over just going heavy, but don’t be afraid to progress the movement by adding loads as you can truly control that retraction!

For more amazing videos and tips, subscribe to my YouTube:

–> Redefining Strength On YouTube

The Most Underrated Cardio Exercise

The Most Underrated Cardio Exercise

Want a great move to include in your bodyweight interval cardio workouts that isn’t jumping, but will for sure get your blood pumping?

Want a full-body core intensive move you can utilize in so many different ways?

Ready for a move you can modify to match your fitness level and progress when ready?

Then you’ll love this amazing bodyweight cardio move that will target your shoulders, arms, abs, obliques and even quads –

The Tabletop Crawl!

But wait?! Babies crawl…isn’t crawling easy?!

HECK NO!

This crawl will not only challenge your body but also your mind and coordination.

Unlike the Baby Crawl, your knees are going to hover off the ground.

And with the Tabletop Crawl, unlike the Bear Crawl, you want to focus on keeping your butt down and knees just a few inches off the ground.

You also want to focus on that contralateral movement pattern, or opposite arm and leg working together. This is a great way to improve your coordination, especially for movements like running!

While you can focus on moving faster only and allow a bit more rotation of your core as you crawl, you can also use this move to work on that anti-rotational core strength.

And then you can crawl in every direction using this tabletop or bulldog position, even mixing things up by adding in rotational moves like the Sit Thru, holds or even other crawl variations to the flow!

All of these things make this crawling variation a killer cardio move.


So how do you do the basic Tabletop Crawl?

Start on your hands and knees with your knees under your hips and hands under your shoulders. Starting out or to modify this move if you get out of sync as you go through this move, you can always come back to crawling on your hands and knees.

Tuck your toes under and then lift up onto the balls of your feet and hands so your knees hover just a few inches off the ground.

To start with the crawl forward, step forward with one hand and, as you do, step the opposite foot forward, bringing your knee in. Start with small steps and focus on keeping your hips still as you step.

Then step the other hand forward and other foot.

Think small steps as you brace your abs and keep your knees close to the ground. You can continue taking steps forward in this way with the opposite arm and leg moving together or you can reverse your direction and crawl backward.

When you crawl backward, be conscious of taking small steps, especially to start. This requires a bit more upper body strength than the forward crawl oddly enough and often we get more spread out, as we have a tendency to reach further back with our feet when crawling backward, placing more load on our upper body.

As you step one foot back, remember to step back with the opposite hand.

Using this basic forward/backward crawl, you can then add in occasional holds, or even a Sit Thru on each end of the length you’re crawling in. You can also add in little jacks or side to side hops if you want. Or you can even turn over to add in a crab crawl with this tabletop crawl.

You can also use this same crawling position to move LATERALLY.

How do you do the Lateral Tabletop Crawl?

The lateral crawl is a great move to improve your coordination and you may find the movement pattern a bit more challenging to start.

And if you’re thinking I’m too old for this move, you’re wrong! As we get older, including moves that work on our coordination and neuromuscular efficiency are even more key!

They keep us functional strong!

While you can make the lateral crawl an ipsilateral or same side working together movement, it is a great contralateral move.

To do the lateral crawl as a contralateral movement pattern with the opposite hand and foot working together, set up with your hands together under your chest and feet and knees about shoulder-width part.

Then step one hand out wide to the side so your hands are about shoulder-width apart as you step the opposite foot in toward the other. As your hands move apart, your feet move together.

Then to continue laterally, your foot on the same side as the hand you just moved will step to the side as you bring the opposite hand in to meet your other hand.

Move slowly to start keeping your knees hovering just off the ground. You can move as many steps as desired across the space you have then come back the other direction.

Focus on keeping your hips still as you move side to side.

Modifying The Basic Crawl:

While you can always go down to your hands and knees, to start, another way to modify this move that is often a bit more comfortable for the knees if your surface isn’t padded, is to use an incline.

For lateral crawls, you can use a bench as your incline and move along the length of it.

For forward/backward crawls, stairs actually work best as you can place your hands up on a higher step and crawl up a step at a time!

While often we will cheat and modify by allowing our butt to go up in the air during the basic crawl off the ground, we want to recognize this changes how we are activating muscles and will not give us the same ab or quad benefit that the basic tabletop or bulldog position does.

So using an incline can help us really master that positioning!

SUMMARY:

Crawling can be a great way to improve our coordination and our conditioning. It is a great move to include in an interval workout even with traditional moves we love like burpees, if we want to include jumping. It will work our entire core and get our blood pumping.

Try a fun Sit Thru crawling variation in this workout below:

–> 5 Cardio Moves For Fat Loss Workout