Plantar Fasciitis? Tight feet and ankles?
4 Exercises To Prevent Foot And Ankle Pain
Build strong and pain-free feet and ankles with these 4 exercises!
- Have you suffered from Plantar Fasciitis? Achilles issues? Calf strains?
- Are you a runner who’s had foot pain or calf injuries?
- Do you walk in high heels?
These 4 moves are key if you’ve ever had foot or ankle pain or injury.
It is important to take care of your feet and lower legs to not only prevent aches and pains there but also prevent aches and pains all the way up your body!
A strong foundation, aka strong feet and ankles, can help you prevent knee, hip and even low back pain!
Start using these 4 moves to take care of your feet and ankles!
4 Exercises To Prevent Foot Pain:
Exercise #1: Foot Foam Rolling

If the fascia under your feet is tight, this can cause not only Plantar Fasciitis but also calf, ankle and knee issues. That is why it is important to roll out your feet if you run, cycle or wear any sort of dress shoes…especially heels!
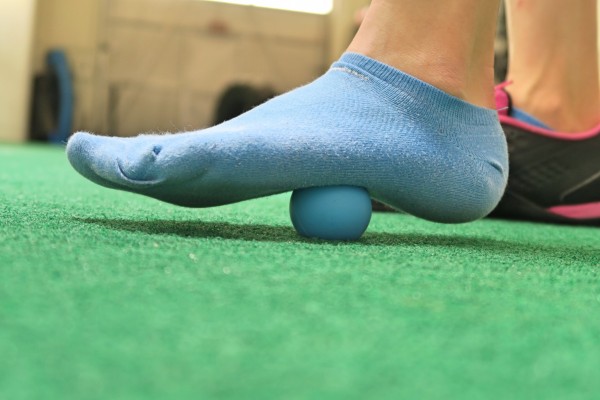
To roll out your feet, a tennis ball, lacrosse ball or golf ball works well. Place the ball on the ground and then place one foot on top of it as you stand. Shift your weight onto your foot on the ball. Start with the ball in the arch of your foot and then slowly roll it back toward your heel and then up toward your toes. You can even work toward the inside and outside of your foot.
Relax your foot as you roll. And don’t just roll quickly up and down. Hold on any tight spots and even flex and relax your toes as you hold on the spot to help it release.
Apply as much pressure as desired by standing more or less on the foot on the ball. You can also lessen the pressure by using a bigger or softer ball.
Exercise #2: Foot Stretch To Bear Squat

Did you know that even your TOES can get locked up? And because everything is connected, if one area is tight, that can cause other areas like your ankles or calves to perpetually be tight as well.
That is why the Foot Stretch to Bear Squat is such a great stretch to loosen up your toes, feet, ankles and calves!
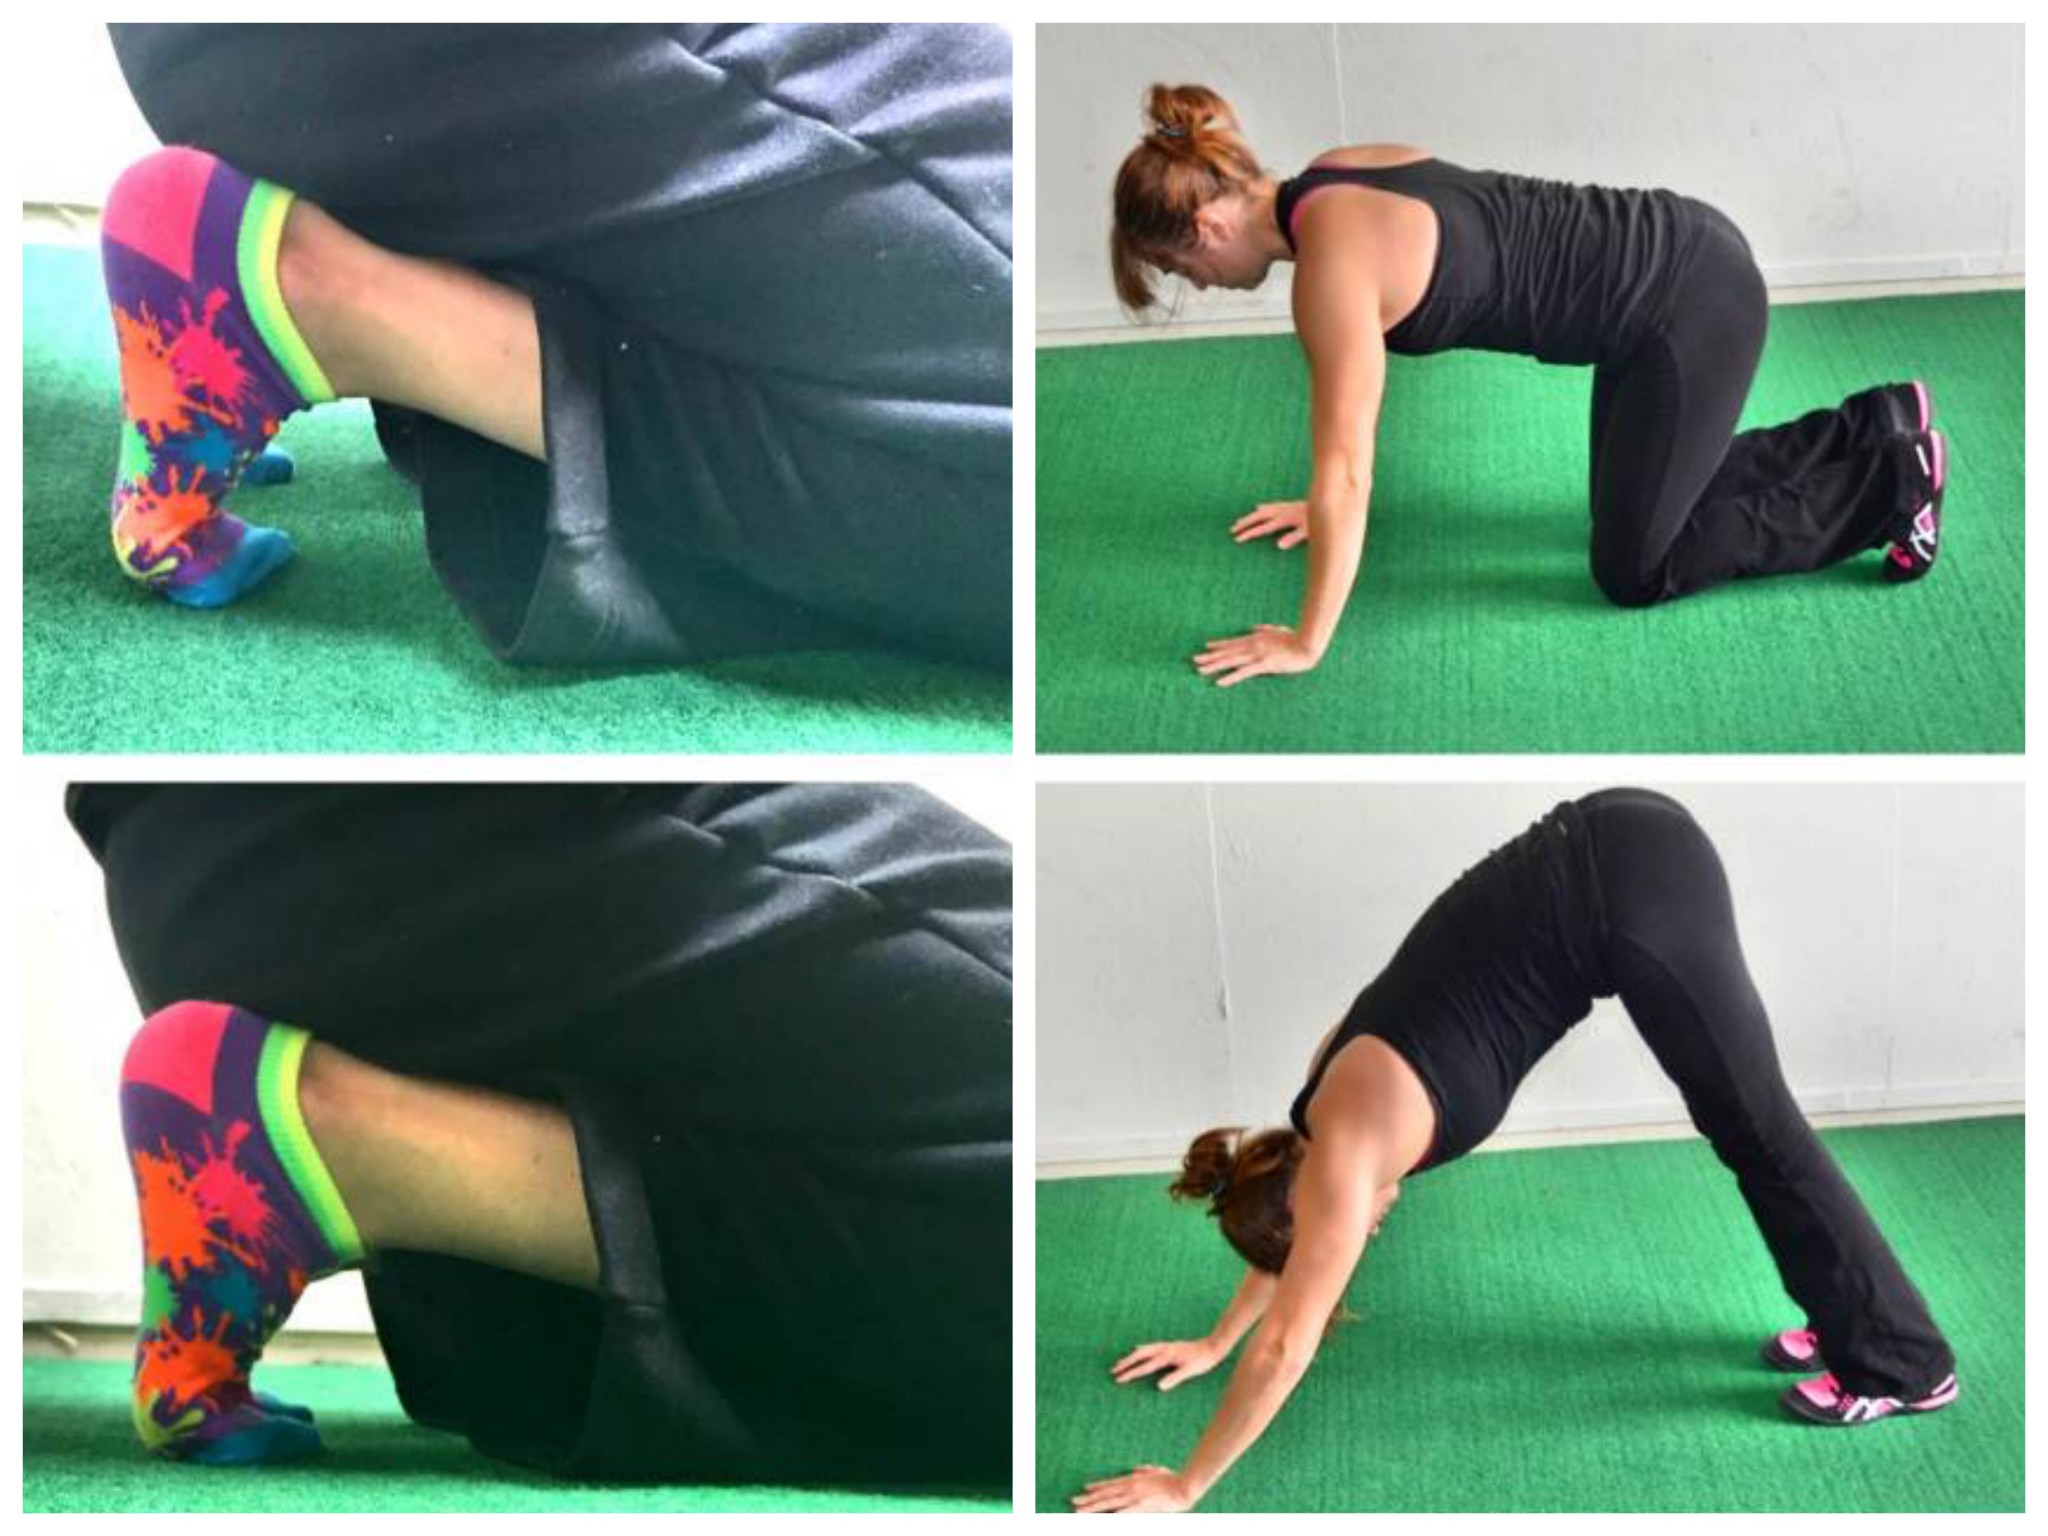
To do the Foot Stretch to Bear Squat, start kneeling on the ground with your feet flexed. Then sit back onto your heels. Rock side to side to stretch your feet.
Then place your hands down on the ground out in front of you and press your butt up into the air, driving your heels down to the ground. Relax your calves and try to get your heels down to the ground. Feel a nice stretch down your calves and even up into your hamstrings. Hold for 1-2 seconds and then drop back down to your knees and sit back on your heels again to stretch your feet.
Make sure that as you drive your butt up, you are pressing yourself back so that you are driving your heels down. Don’t simply pike up and lower back down. Actually drive back and feel the stretch down your calves.
You can walk your hands in just a little bit closer to your knees to help you feel the stretch a little bit more, but do not walk them in too close.
Exercise #3: Calf Raise Circles

To prevent and alleviate aches and pains it is important you not only roll and stretch, but also get the correct muscles working.
That is why Calf Raise Circles are so important to include. Because you work from little toe to big toe and back out again, you’ll strengthen your entire foot and lower leg.
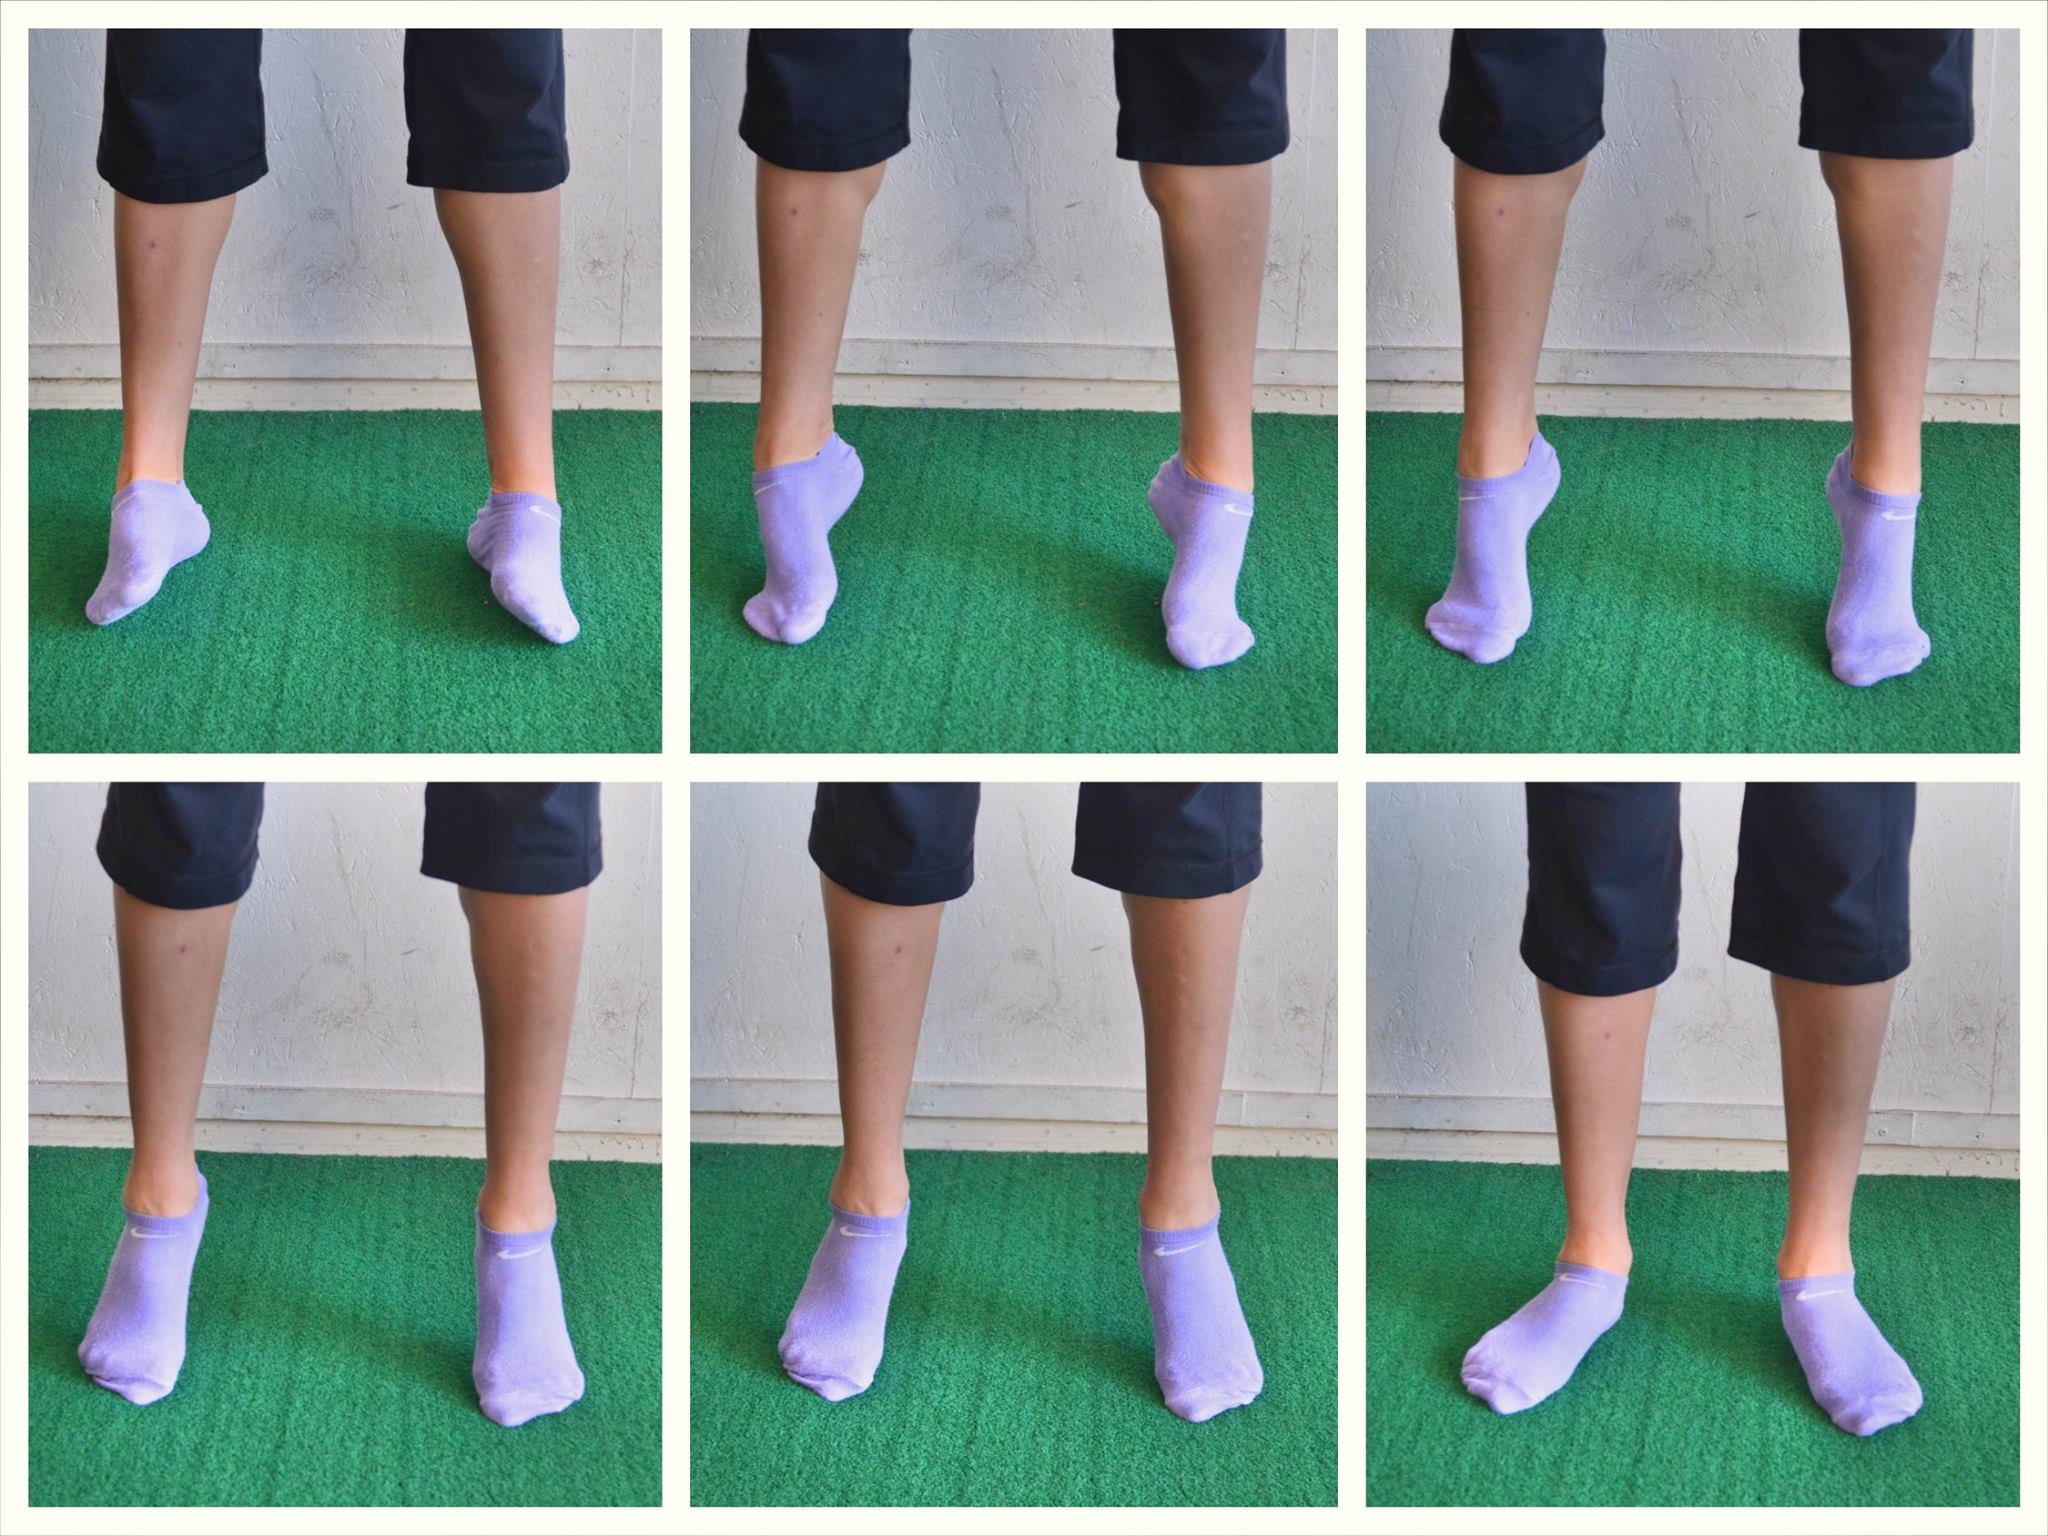
To do Calf Raise Circles, start standing with your feet about hip-width apart. You can face a wall or table if you need a little help balancing so that you can really focus on circling.
Then start to circle by rocking to the outside of your feet. Slowly come forward toward your pinky toe. Then come up onto your toes slowly circling from your pinky toe toward your big toe. Come up as high onto your toes/balls of your feet as you can. Then reach your big toe and circle in toward the inside of your feet as you come down.
Then come back up, this time starting with the big toe and circling out toward your pinky toe before coming down on the outsides of your feet. Repeat circling back up and in. Really feel yourself getting as big a circle as you can while feeling your calves work to help you come up onto your toes. In order to really circle, you may need to lightly keep your hand on the wall.
Exercise #4: 3-Way Ankle Mobility

If your ankles are immobile that can cause pain and injury throughout your foundation and even all the way up to your lower back. Using this move, you can improve your ankle mobility and your dorsiflexion (aka how much you can pull your toes up toward your shins). This can not only help prevent injury, but help you also run faster and squat lower!
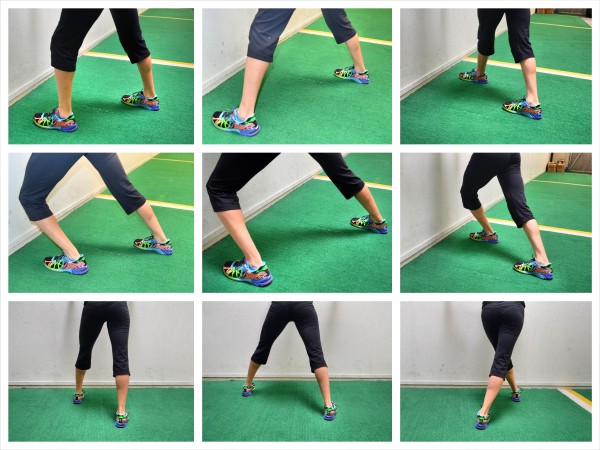
To do the 3-Way Ankle Mobility Stretch, stand facing a wall with your hands on the wall for balance or support.
Stand in a staggered stance with one foot slightly in front, but your knee at least a few inches from the wall. This front foot is the ankle that is being worked on.
Then try to drive the front knee straight forward over the toe and into the wall while keeping your heel on the ground. Do not worry if your back heel comes up. Focus on that front foot and driving the knee into the wall while keeping the heel down.
Do that 10 times and then take a step out a bit wider to the side and repeat (second set or line of photos in the picture above). The foot should be pointing straight toward the wall and you want to drive the knee forward over the toe while keeping the heel down. Complete 10 reps, driving the knee forward into the wall then relaxing out of the stretch.
Then step your foot across in front (shown at the bottom of the photo) and repeat 10 more knee drives. Make sure that your toe is always pointing directly toward the wall and that you are keeping the heel down as you drive your knee forward.
SMR + Stretch + Activate = RStoration!
What is RStoration? It is my 3-part method to prevent and eliminate aches and pains FOR GOOD!
So if you’re ready to spend just 10 minutes a day to prevent aches and pains, you need to check out my 21-Day RStoration program!
Click below to learn more!
