Lower Body Blast

Lower Body Blast

WARM UP
Stretch and Roll Out:
Calves
Quads
Hamstrings
Adductors
Hips/Glutes

WORKOUT

Set a timer for 20 minutes. Complete as many rounds of the circuit below as you can in that time. Challenge yourself with weights and variations, but make sure you can keep moving quickly and don’t have to spend a long time resting.

CIRCUIT:
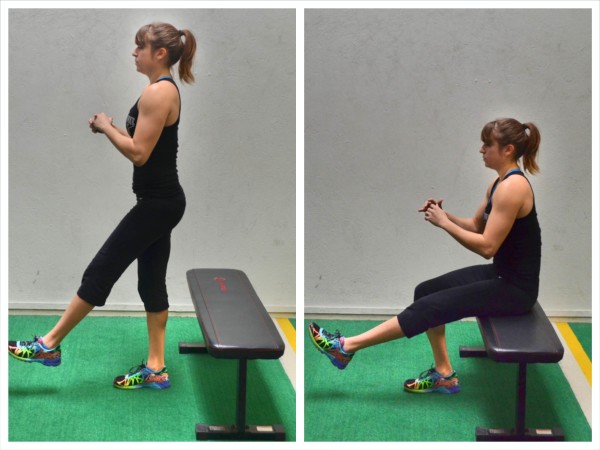
5 reps per side Single Leg Squats
10 reps Leg Lowers
15 reps Glute Bridges Off Box
20 reps Kettlebell Swings

BURN OUT – The Quad Killer:
Set a timer for 20 seconds of work, 10 seconds of rest, 10 rounds. Cycle through the Wall Sit, Squat Pulses and either Squats for reps or Squat Jumps. Keep moving the entire 20 seconds and do not rest during that time. Burn out those quads!

COOL DOWN
Stretch and Roll Out:
Calves
Quads
Hamstrings
Adductors
Hips/Glutes

NOTES:
It is very important that you move quickly from one move to the next while still challenging yourself with each move. Record the rounds you complete and to try to beat it next time!

EXERCISE DESCRIPTIONS:
Single Leg Squats – 
To do the Single Leg Squat to bench, choose a bench that is as low as possible. The lower the bench, the harder the move. Stand in front of the bench and lift one leg out in front of you. Then sit back and squat to the bench. The more you completely sit and reset on the bench, the easier the move will be, especially if you lift your standing leg and then stomp it back into the ground. If you just barely touch and go, you may find that the move is harder. Also, the more you swing your arms, the more momentum you will have to help you stand back up. Make sure to keep the heel of the standing leg down as you squat and drive back up to standing.

single-leg-squat
Leg Lowers – To do Leg Lowers, lie on your back with your arms behind your head or down by your sides and brace your abs by setting up in the pelvic tilt. Then lift your legs straight up toward the ceiling, keeping them together and as straight as possible. Then with your low back firmly against the ground and your abs braced, lower both your legs down toward the ground. Lower them as close to the ground as possible without touching or without letting your low back come up off the ground. Keep your legs as straight as possible as you lower them down. Then lift them back up, keeping your low back against the ground and your legs striaght. Use your abs to lift and lower. If at any point while you lift and lower your legs, your low back comes up off the ground, stop and reset. Then either decrease your range of motion (not lowering as close to the ground) or regress to single leg lowers, lowering one leg down at a time. If you can keep your abs engaged and not let your low back take over, lower your legs down so your heels are no more than an inch off the ground before raising them back up. You should also engage your glutes as you lower down and hover just off the ground. And make sure that your legs stay as straight as possible throughout the movement.

leg-lowers
Glute Bridges Off Box – To do the Glute Bridge Off Box, place your heels up on the box or right on the edge. You want your knees bent to about 90 degrees or your butt to be even closer to the box. Do not let your butt get too far away from the box. You may need to play around with exact positioning so that you feel your glutes working and not your low back or hamstrings taking over. Bend your arms to 90 degrees with just your upper arms on the ground. Then driving through your heels on top of the box, press your hips up as high as you can. Squeeze your glutes and keep your core tight as you bridge up so that you don’t hyperextend your low back. Also, do not let your knees fall in or out as you lift up. Keep your knees in line with your hips and ankles. Hold for a second or two and then lower down.

glute-bridge-feet-on-box
Kettlebell Swings – To do the Kettlebell Swing, set the kettlebell (or bell) down on the ground and slightly in front of you. Hinge over, bending your knees slightly and pushing your butt back as you lean forward. Keep your back flat and then reach your arms out and place both hands on the handle, tilting the bell back toward you. Hike the kettlebell back between your legs like you would a football. Pull it back and up between your legs toward your butt. To power the bell up and forward, squeeze your glutes and drive your hips forward as you stand up nice and tall. Pop your hips forward and propel the kettlebell up off your hips. Do not worry about how high the bell goes. It shouldn’t go higher than your shoulders. Squeeze your glutes as you stand tall. You may lean back a little at the top, but make sure you are squeezing your glutes and not loading your low back. Then, keep your glutes tight, wait as the bell comes back down before you hinge back over. Your forearms need to connect with your hips before you hinge back over and bring the bell back down and through your legs. Do not lean forward and hinge over before the kettlebell comes back down. You want to maintain the connection between your hips and forearms to protect your low back. Also, don’t allow the kettlebell to sink low between your legs. You want the bell up close to your crotch. As your forearms connect and you hinge over, sitting your butt back, make sure to lean forward to counterbalance the kettlebell going back through your legs. Let the kettlebell reach through toward the wall behind you. If the bell comes up and taps you in the butt, it may be too light. Then squeeze your glutes again and thrust the kettlebell back up as you come back up to standing. With the swing, you may keep a straighter leg or bend your knees a little as you swing. They are both acceptable just different styles. Make sure to squeeze your glutes at the top of each swing and make sure you don’t come up onto your toes. While you may lean back a little, you don’t want to lean back and load your low back. You should not feel this move in your low back at all. Maintaining the connection between your forearms and hips as you hinge is essential for keeping your glutes working and your low back from feeling strained. Do not sit your butt back while the kettlebell is still out in front of you. You almost want the kettlebell to be pulling you back and that is why you are hinging over. The hinge is a reaction to the bell instead of you anticipating the kettlebell coming back down and hinging over before it lowers. Start small with the swing to focus on the connection. You don’t have to get the kettlebell all the way up to your chest to get a lot out of the movement.

kb-swing

Wall Sit – To do the Wall Sit, stand with your back to a wall and your feet about hip-width apart. You can change up your exact foot position to hit slightly different aspects of your quads. Then sink down into a squat, pressing your back into the wall behind you as you try to get your quads as close to parallel to the ground as possible. When you sink into the squat, keep your ankles aligned under your knees and drive back into the wall through your entire foot. Do not rock forward onto your toes. Also, do not sink past parallel. Hold there and drive your back into the wall. If you start to feel this in your low back, make sure to brace your abs. Also, do not hunch or lean forward as you hold. Stay up nice and tall. To make this move easier, don’t sink as low in the squat or move your feet out just a bit from the wall. Do not let your ankles get too far out in front of your knees though.

wall-sit
Squat Pulses – To do Squat Pulses, stand with your feet between hip-width and shoulder-width apart. Then sit your butt back and sink into a squat. Pulse up and down, coming up toward the top of the squat and then sinking back down. Stay within that working range sometimes doing bigger movements and sometimes small pulses right around the bottom of the squat.

squat-pulses
Squat Reps – To do the Basic Bodyweight Squat, stand nice and tall with your feet about hip-width to shoulder-width apart. Your feet should be parallel and pointing straight ahead. You can place your hands across your chest on your shoulders or reach your hands out in front of you. Then squat down, sitting your butt back and down as you. Bend your knees to sit back and squat as you keep your chest up. Keep your heels down as you drop your butt as close to the ground as you can. Do not let your back round or chest fall forward as you squat. Also, make sure to keep your heels down. Only squat as low as your mobility allows. Then come back up to standing, driving through your heels. Do not come forward onto your toes or lean forward as you stand back up. Squeeze your glutes at the top. If your back rounds or if you shift your weight to one side or the other as you squat, do not squat as low and work on your mobility before increasing weight. You may also need to work on correctly imbalances if you shift your weight to one side or the other. Also beware of your knees caving in or bowing out. Your hips, knees and ankles should all be in line as you squat.

basic-squat-form
Squat Jumps – To do Squat Jumps, stand with your feet between hip-width and shoulder-width apart. Sit your butt down and back into as low a squat as you can with good form (aka your heels stay down and your chest stays up and your knees don’t cave in). You can then swing your arms back as you squat or reach your hands down to touch the ground. Then explode up out of the squat and jump as high off the ground as possible. You can swing your arms and reach your hands overhead to help propel you up. As you jump, extend your body fully. As you land, sink right back into the squat so you can explode right back up. Do not land with your legs straight. Make sure to bend your knees as you land and try to land softly to protect your knees. Beginners may need to rest between each rep; however, that doesn’t mean landing with your legs straight. You should never land with your legs completely locked. Bend your knees to help you absorb the impact of landing even if you pause between jumps. Beginners can also start with a quick Basic Bodyweight Squat and even come up onto their toes as the stand up instead of completely leaving the ground. If they have good mechanics, they may want to leave the ground but not jump as high. To make the move harder, jump up and sink right back into the squat to repeat as quickly as possible. Really focus on a soft landing and then exploding quickly into as high a jump as you can.

squat-jump

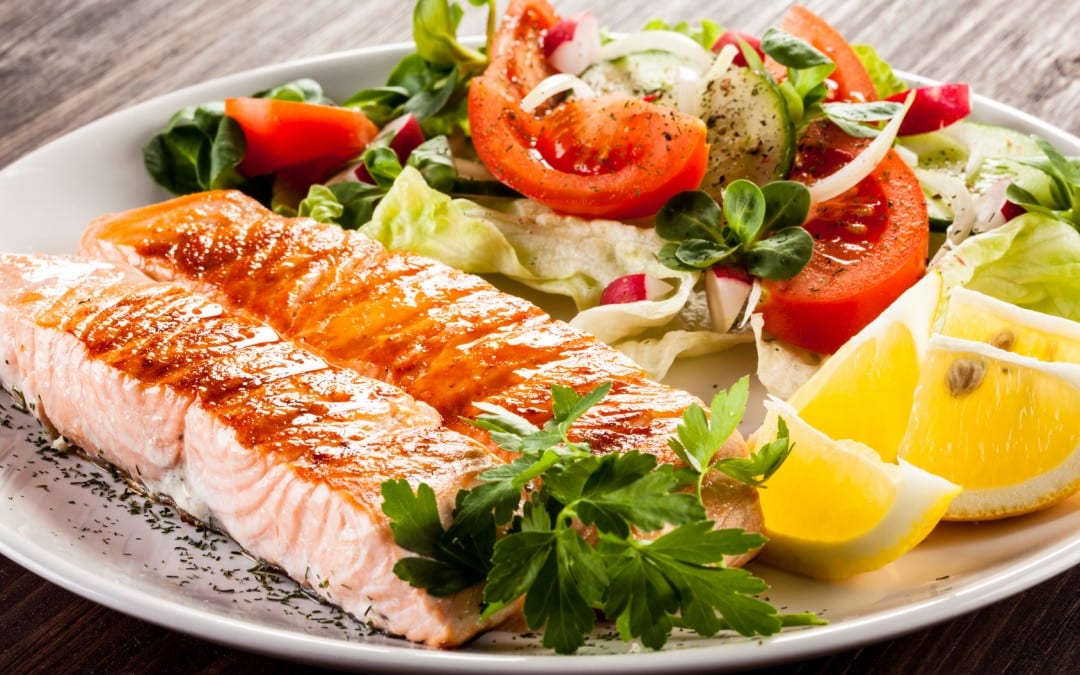
Mexican Salmon Salad

Mexican Salmon Salad

Mexican Salmon Salad

CALORIES

GRAMS PROTEIN

GRAMS CARBS

GRAMS FAT

Servings 2

Ingredients:
For Salmon:
2 (5 – 6 oz) skinless salmon fillets
1/2 tsp ancho chili powder
1/2 tsp ground cumin
1/2 tsp paprika
1/2 tsp onion powder
1 Tbsp olive oil, plus more for cooking
Salt and freshly ground black pepper
1 lime, halved
For Salad:
1 head Romaine lettuce
10 oz grape tomatoes, halved
1 cucumber, peeled and chopped
3/4 cups fresh corn
1/2 red onion, sliced
1/4 cup cilantro leaves (optional)
Toppings:
1/2 cup natural salsa
1/2 avocado

Directions:

For the salmon:
Preheat a skillet over medium-high heat. In a small bowl whisk together chili powder, cumin, paprika and onion powder. Brush both sides of salmon with olive oil then season both sides with salt and pepper then sprinkle spice mixture evenly over both sides of each fillet. Add salmon to the pan and cook about 3-5 minutes per side, or to desired doneness. Remove from the pan and squeeze fresh lime juice over the fillets.

For the salad:
Divide all salad ingredients among 2 containers then top with salmon fillets. May want to keep salmon off and even cook right before eating.

Spoon salsa and slice avocado over salmon and salad.

Serve immediately….So if not eating right away, store dressing on side! You may even want to keep fish frozen until serving and cut up stuff right before eating as well.

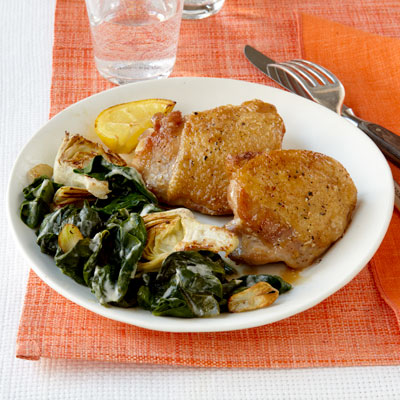
Chicken, Spinach Artichoke Bake

Chicken, Spinach Artichoke Bake

Chicken, Spinach, Artichoke Bake

CALORIES

GRAMS PROTEIN

GRAMS CARBS

GRAMS FAT

Servings 4

Ingredients:
3 tablespoons extra virgin olive oil
1lbs Chicken Breast
Salt and fresh ground pepper, to taste
1 can (14-ounces) quartered artichokes, rinsed and drained
1 yellow onion, thinly sliced
1 red onion, thinly sliced
1 large carrot, sliced into thin rounds
2 garlic cloves, finely chopped
1 bag (6 to 8 ounces) baby spinach
½ cup chicken broth

Directions:
Preheat oven to 425.

Heat olive oil in a large nonstick skillet that’s safe for stovetop and oven. (You can also transfer to a baking dish before placing in the oven if you don’t have a skillet that is oven safe.)

Season chicken with salt and pepper. Add to skillet and brown on both sides; about 5 minutes on each side.

Remove from skillet and set it on the side, leaving oil in skillet.

Add artichokes, onions, carrots and garlic to the skillet. Cook for 5 minutes, or until vegetables are slightly tender, stirring occasionally,. Add chopped garlic and spinach; continue to cook for 1 minute, stirring occasionally.

Remove from heat and add broth and chicken.

Place in the oven and bake for 18 minutes, or until chicken is thoroughly cooked. Remove from oven and let stand 5 minutes. Plate and ladle liquid and veggies over chicken pieces.

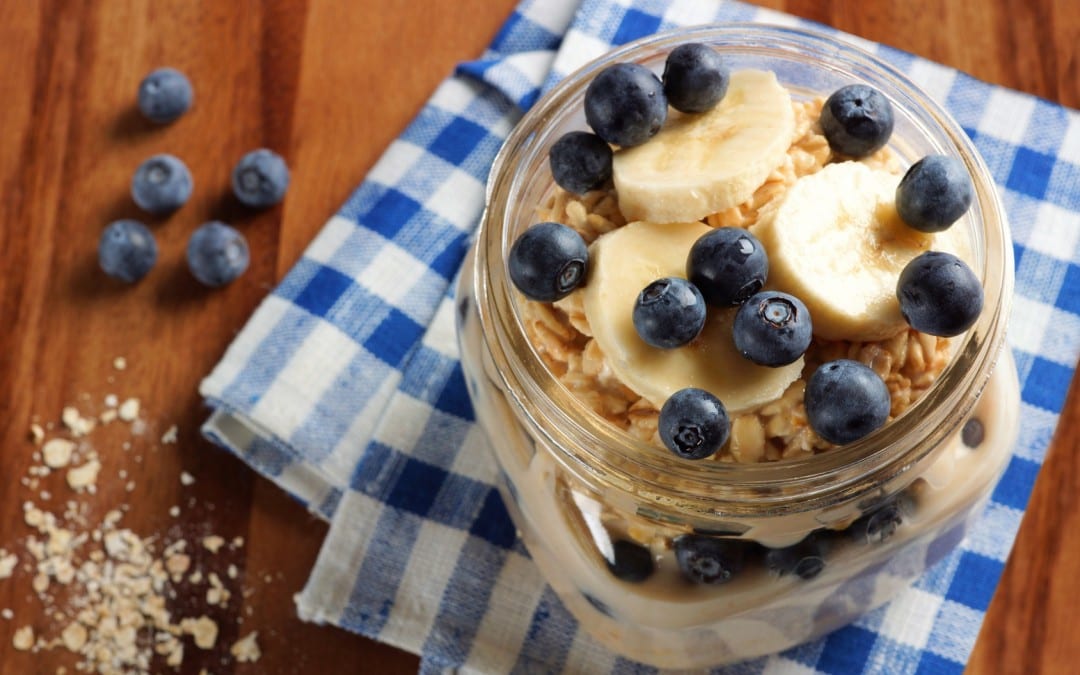
Blueberry Banana Overnight Oats

Blueberry Banana Overnight Oats

Blueberry Banana Overnight Oats

CALORIES

GRAMS PROTEIN

GRAMS CARBS

GRAMS FAT

Servings 3

Ingredients:
1 banana, smashed
1 cup dry old fashioned oats
2 cups Greek Yogurt *
2 scoops Protein Powder
1/2 cup Frozen blueberries
Sprinkled Sliced almonds

Mix together mashed banana, oats, yogurt and protein. Then divide between three jars or tuber wares and top with blueberries and almonds.

*Can sub in Almond or Coconut Milk for Yogurt.

Want more delicious recipes and meals to hit your macros?

Check out my 6-Week Macro Cycling Shred!


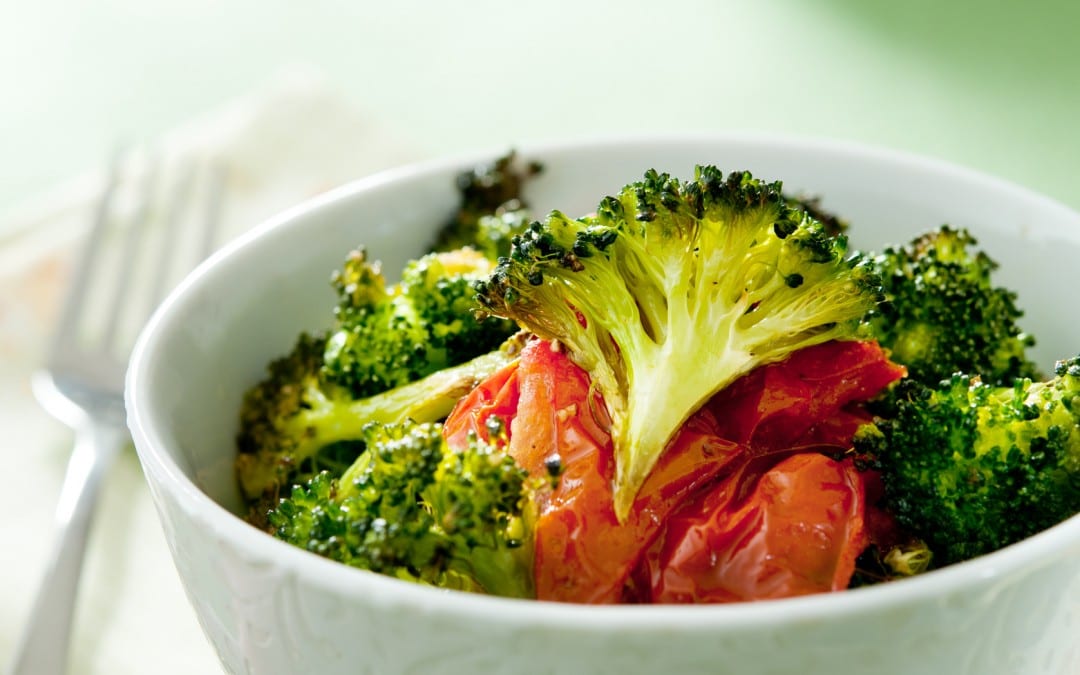
Mediterranean Broccoli Salad

Mediterranean Broccoli Salad

Mediterranean Broccoli Salad

CALORIES

GRAMS PROTEIN

GRAMS CARBS

GRAMS FAT

Servings 6

Ingredients:
5 cups broccoli, cut into bite-size florets
2 cup grape tomatoes
3 tablespoon extra-virgin olive oil
4 cloves garlic, minced
1/2 teaspoon salt
1 teaspoon freshly grated lemon zest
2-3 tablespoon lemon juice
20 pitted black olives, sliced
2 teaspoon dried oregano

Directions:
Preheat oven to 450 degrees F.

Toss broccoli, tomatoes, oil, garlic and salt in a large bowl until evenly coated. Spread in an even layer on a baking sheet. Bake until the broccoli begins to brown, 10 to 13 minutes.

Meanwhile, combine lemon zest and juice, olives, and oregano in a large bowl. Add the roasted vegetables; stir to combine.