I’m always looking for new tools and instruments to not only improve my personal health and wellness, but also improve the quality of training that I can provide for my clients.
And if those tools come in a nice kit that clients can even get for their homes so that they are doing more things throughout the day to move and feel better, that makes me even happier.
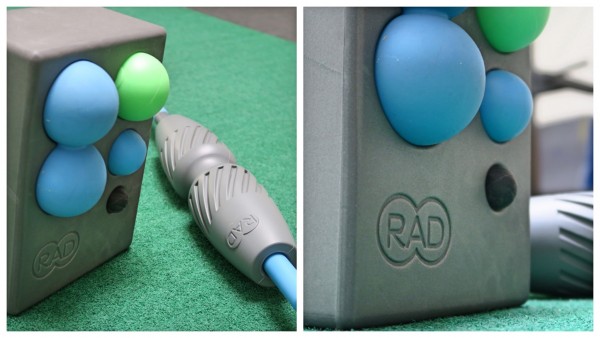
So of course I was super excited when I found RAD Roller at the LA Fit Expo. After seeing their great product, the RAD Roller, which was a nicer variation of the Peanut I teach everyone how to make, I went to their site and ordered my own RAD Kit. I wanted to test out their complete line so I got the RAD All-In Kit.

It was $140, which some may think is expensive but it came with, what I felt, were the tools to roll out EVERYTHING. It wasn’t just a big roller for $70 bucks (although I do love my full-sized Rumble Rollers as well).
I got the entire kit, and here are all the moves and ways I felt you could truly use it to roll out everything from head to toe. And the best part, if you are a messy person like me, it is easy to store everything in one place because the balls have spots in the blocks! WOO HOO! No more random balls all around the apartment!
SIDE NOTE: I have fallen in love with the RAD Roller so much that I’ve become an affiliate of their products. So of course I think you should get their stuff to do the movements below. HOWEVER, if you have other variations of these tools, you still need to do these moves as I’ve found these are some of the BEST to help prevent pain and injury especially if you sit at a desk all day!
Full-Body Foam Rolling Moves – The RAD Kit
After working with a variety of clients who’ve come in with a variety of injuries, mainly from poor posture and poor movement patterns throughout the day, I’ve found these moves to be the most helpful.
They start to loosen tight muscles and begin the process of restoring proper functioning to the muscles and joints. Foam rolling using these moves is the first step to improving your posture and loosening tight muscles so that you can learn how to engage the proper muscles to lift and move and run.
These moves below address common aches and pains from your neck all the way down to your feet using the RAD All-In Kit. While you don’t need to do every move every day, you should pick the moves that address your specific problems. And that doesn’t necessarily mean that if you have hip pain, you only focus on your hips. Sometimes there can be tightness and dysfunction in other areas that leads to points of pain in other places.
Where the pain is, is NOT always where the problem is.
I recommend trying out many of these moves to find areas of tightness even if those places aren’t the achy ones because those other tight areas may be perpetuating or even causing the pain elsewhere.
Thoracic Extension and Spine Rolling – The RAD Roller is IDEAL for improving your thoracic extension and spinal mobility in general. It is basically a nicer peanut that allows you to dig in more (plus they have three different densities to allow you to adjust the pressure).
Improving your Thoracic Extension and spinal mobility in general is important to help prevent injuries since most of us sit in flexion for 9 hours a day hunched over a computer. This forward flexion leads to dysfunction which causes us to overuse the small muscles around our shoulders and even in our necks instead of the big muscles of our back. Overusing those small muscles that can’t handle the load leads to pain and injury.
It also means we can’t necessarily lift as much as we would like! It puts us at higher risk for injury when we go press overhead. And it may be hurting your chances at doing a full Pull Up (or more Pull Ups!).
So if you want to avoid neck, shoulder, upper back, even lower back and hip pain, you need to use the RAD Roller all along your spine and improve your mobility.
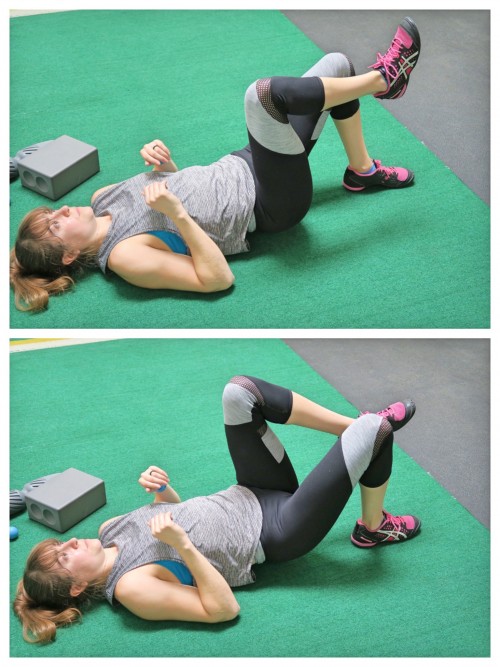
To use the RAD Roller to improve your Thoracic Extension and spinal mobility, set up so that the RAD Roller (or what I generally refer to as a Peanut) has one ball on either side of your spine just below your shoulder blades. Really make sure to line the balls up so that one is on each side of your spine. You do not want to roll the bone just the muscles along your spine.
Lie on your back with your knees bent and feet flat on the ground. The RAD Roller will be along your spine and you will want to relax over it. You can then relax the arms straight overhead and back toward the ground. As you relax your arms back toward the ground, try to touch the backs of your hands down to the ground.
Breathe and relax your arms overhead. You can then engage your abs slightly while trying to relax your arms overhead before fully relaxing back again.
You can also bring your arms down to the sides and either then cross them over your chest or swing them back up overhead as if making a snow angel in the snow.
Make sure to hold and relax over any tight spots. Don’t quickly roll the roller up and down.
You can make your way up and down your spine using the RAD Roller, making sure to hold on any tight spots. As you work down toward your lumbar spine, you will want to tuck one or both knees in as you hold on a spot.
No matter where the roller is, you will want to try to relax your butt down toward the ground. Especially while in your mid and upper back, you do not want to tense the muscles along your spine by keeping your butt up off the ground.
Do not roll quickly up and down. Make sure to hold on tight spots. If you find you can’t relax because the roller is applying too much pressure, you may want to try one of their softer RAD Rollers or the Peanut made of tennis balls!
You can also use the Helix. While still a very firm density, it isn’t as pinpointed and allows you to still align the roller to hit muscles along each side of your spine. You can use it up and down your spine although you will want to be careful if using it in your low back as it is bigger and you don’t want to hyperextend your low back.
The Helix is best used for rolling your mid and upper back and working on Thoracic Extension while rolling out your entire back at once. It is a great substitute for the basic foam roller that will dig in more, but still allow you to roll out a bigger area at once.
Neck – When your neck gets sore, tight, tired and achy from sitting hunched over a computer, a nice neck massage feels great. And while there are definitely other tight areas you need to address and other muscles you need to get activated and working to truly prevent the pain, a nice neck massage can help release some tension.
And the Rad Roller is a great tool to roll out your neck, especially because the RAD Kit comes with the block to help you get a better angle.
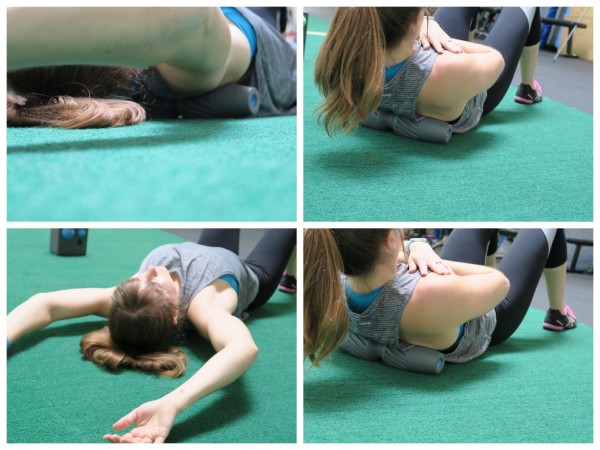
To roll out the back of your neck, place the RAD Roller up on the block and then lie on your back so that you can place your neck over the roller on the block.
Start with the roller at the base of your skull and the balls of the roller on either side of your spine. Relax your head back over the roller and breathe. If you need to support your head, you can place your hands behind your head to help you keep the roller in place so that it digs into the muscles.
Hold on any tight spots. You can even slightly turn your head slowly from side to side to help get slightly different aspects of your neck, but make sure to move slowly.
Work your way down your neck to your upper back. Take your time and hold on any tight spots, but make sure to go easy with the pressure to start.
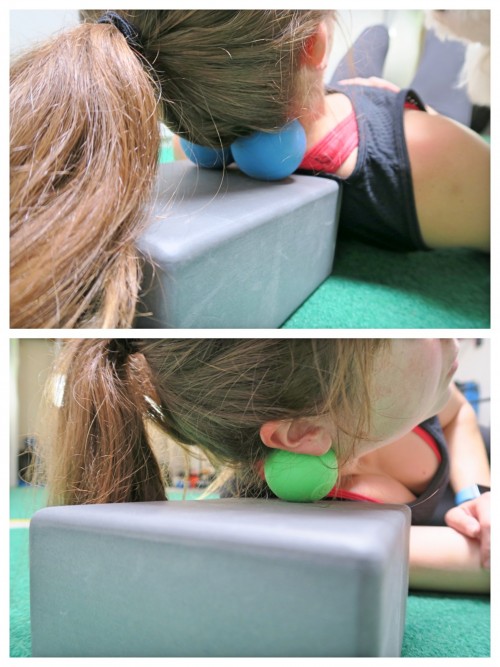
You can also use the Helix again to roll out the back of your neck, especially if you needs something that won’t be as pinpointed or dig in as much. (See the top photo for back of the neck foam rolling and the second photo for rolling out the side of your neck.)
You can also even use the small ball to work into the muscles along the side of your neck that connect up under your ear and can contribute to forward head posture.
You will want to use something on the softer side to really start, but the small RAD Rounds can be a great tool to use.
To help loosen up your neck to prevent forward head posture, place one of the rounds on the block and lie on your side with the side of your neck over the ball so that the round is under your earlobe on the side of your neck.
Relax the side of your neck down into the ball. You may slightly want to use your hands and elbows to prop yourself up so that all your weight isn’t right on top of the round (just don’t tense your neck as you slightly support yourself). You can also do this against the wall to reduce the pressure.
Slightly rotate your head as you hold on the round, looking slightly up toward the ceiling and then back down to the ground. Then move the ball down your neck and slightly toward your jaw. Again relax over the ball. Then slightly rotate your head to look up toward the ceiling and down toward the ground. Move slowly.
Repeat on both sides. Remember to start with a softer ball or do this with a bigger ball against the wall to start. You can again also use the Helix to apply some pressure without being as pinpointed.
Traps – “My traps are tight” is one of those things you hear all the time because most of us sit hunched over our computer with our shoulders up by our ears. And tight upper traps can lead to shoulder, neck and upper back pain. They may also be causing horrible tension headaches!
Tight upper traps can prevent the big muscles of your back from working correctly, which can lead to not only pain and injury, but also prevent you from being able to lift more and do more Pull Ups!
To roll out your Traps using the RAD Kit, I found that the RAD Rounds or even the RAD Helix and Rod worked well depending on if you had a partner there to help you out.
If you use the Rounds, you can use them against the wall to make it a bit easier to control and target your upper back and traps. If you want to apply more pressure, you can use them against the ground.
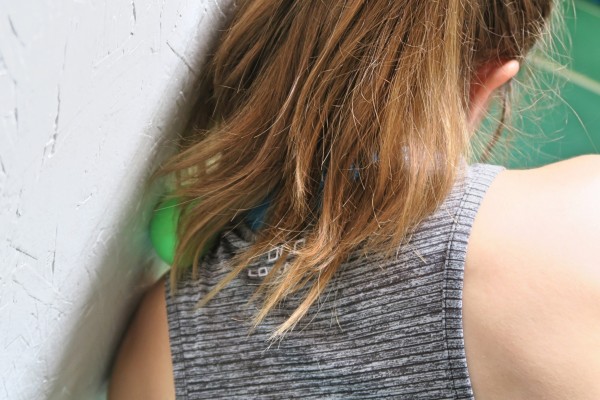
To use the Rounds against the wall and roll out your traps, take either size ball and place it against the wall with it right to the side of the base of your neck. The smaller harder Round will dig in more than the bigger, “softer” one.
Slightly angle your shoulder down and roll the ball along the top of your shoulder blade and then slightly down your back along the shoulder blade. You can then roll it toward your spine and back up to the base of your neck.
If you angle your shoulder down more and lean your head towards the wall, you can even really get to the side of your neck.
Make sure that you relax your shoulders as you roll out and that you also hold on any tight spots.
You can even lift and lower your arm or put it out in front of you and move it left to right if you find a nice tight spot near your shoulder blade.
You can also use the Helix against the wall and even angle it to get right at the base of your neck.
If you have a friend or partner, they could also use the Rod on your traps. Make sure they start light because they will be able to apply more pressure.
To use the Rod, your partner will hold the Rod in both hands and stand behind you with you seated and relaxed on the ground. They will then angle the Rod near the base of your neck and lightly push down.
Have them hold here as you breathe and relax. They can then move the Rod slightly out toward your shoulder and again apply pressure. Do not roll. Just have them lightly press down as you relax and breathe.
Chest – If you have a desk job, it is essential that you roll out your chest, especially if you want to do any sort of overhead lifting and avoid neck, shoulder and upper back pain and injury.
Most of us sit in flexion, hunched over a computer, which means that our chests get tight. And while we should also stretch to open everything up, foam rolling can begin to help loosen everything up so that our posture improves and we are able to proper engage the big muscles of our backs to prevent injury.
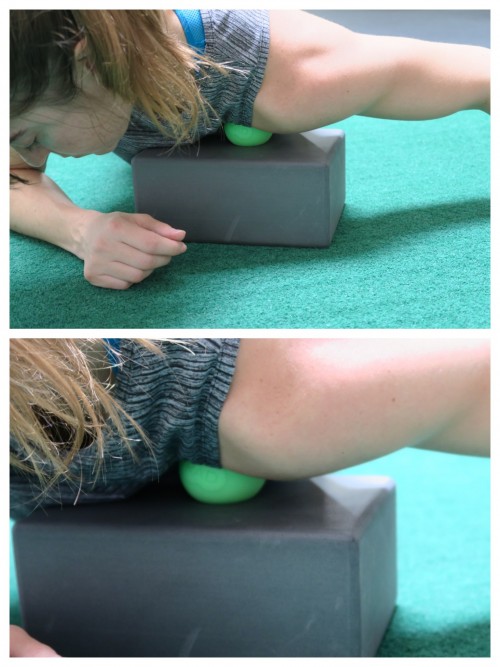
One reason the RAD Kit is so nice is because it comes with a block you can use to help really dig out your chest if you don’t have a useable doorway or a big foam ball. By placing one of the Rounds up on the block, you can really work all around your shoulder joint and across the entire pec.
To roll out your chest, place one of the Rounds up on the block. I found the bigger one worked better or even that even simply one side of the RAD Roller worked well. Then lie face down and place your chest over the ball on the block so that the ball is right inside your shoulder joint.
Relaxing your head down while looking toward the arm on the block, begin to sweep your arm up toward your head and then back down toward your feet.
As you sweep your arm, hold on any tight spots. Work the ball up from under your collarbone all the way down toward your armpit and then back up under your collarbone all the way toward your sternum.
Make sure to hold on any tight spots and relax over the ball.
The Helix on the block or against the wall can also work, but I prefer the ball.
Lats – Tight lats can also contribute to not only poor posture, but also neck, shoulder and upper back pain and injury. That is why it is important to roll out your lats.
To roll out your lats, you can use either the Helix or even one of the Rounds, depending on the specific area you want to target and how much you want to dig in.
If you use one of the Rounds to roll out your lats, you can really get into not only your lats, but also the muscles right at the top of your armpit that also intersect there and can cause shoulder and neck pain and injury.
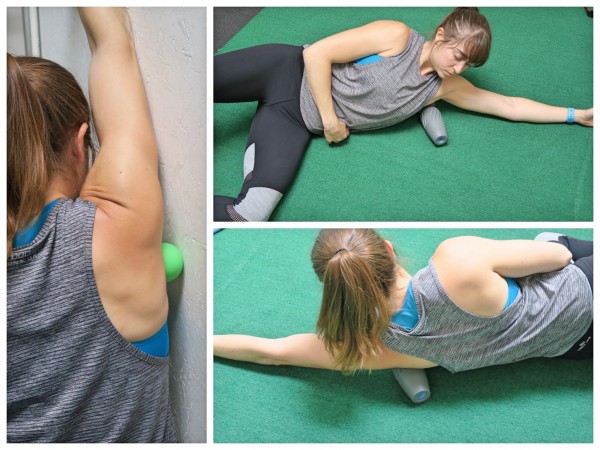
To use one of the Rounds to roll out your lats, place the ball at the top and of your back right to the back of your armpit and under your shoulder. You can roll it there against the wall for more control and less pressure or you can do this against the ground.
Relax back into the ball and as you do you can perform some slow internal and external rotation with your shoulder or even lift and lower your arm or pull it across your chest. This will help you dig in more and get the muscles to relax.
Then you can move it down the side of your back and target other tight spots. Relax and hold on any super tight spots.
If you would like to cover more of your lat and not dig in quite as much, you can use the Helix against the ground.
To roll out your lat with the Helix, place the Helix on the ground and then lie on your side with the Helix under your armpit and along the side of your back. You can use your legs to roll the side of your back along the Helix.
Especially when you find a tight spot, drop your butt to the ground and try to relax over the roller. Extend your bottom arm overhead and even rock slightly forward, dropping your chest toward the ground, and then slightly backward, opening your chest up toward the ceiling.
When you roll out the side of your back and work up toward your armpit, you can also do the internal and external shoulder rotation. As you work down the entire side of your back toward the end of your ribs, you can even move your arm across your chest and back open.
Make sure to relax and breathe on any tight spots you find.
Shoulders – Relax those muscles around your shoulder that may be overworked because of poor posture by foam rolling using the RAD Kit.
You can use almost any of the RAD Kit tools, except the Rod, to roll out your shoulders. You can use them against the ground or the wall or even the block. I prefer the control I have over the Rounds and Roller when I use them against a wall although the Helix works well against the ground if you want.
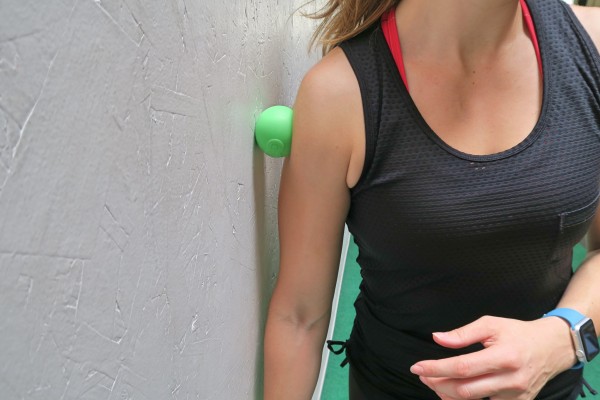
To use the Rounds against the wall, place one of the rounds against the wall and lean the side of your shoulder into the Round. You can circle your shoulder to roll the Round the side of your shoulder. Hold on any tight spots.
You can also then rotate to face the wall to roll out your anterior deltoid or you can rotate so your back is to the wall to roll out your posterior deltoid.
Hold on any tight spots and even sweep your arm as if making a snow angel to dig into any tight spots you find on either the front or back of your shoulder.
If you want to use the Helix, it is great to use on the side of your shoulder against the ground.
Arms – If you sit at a computer typing all day, chances are you need to roll out both your triceps and your biceps. Tightness in your upper arms can cause pain and injury at both your elbow and your shoulder so you need to make sure to roll out your arms.
The Helix is best to roll out both your bicep and your tricep. You can use it on the block or even on a bench if you want something a bit higher.
To roll out your bicep, place the Helix up on the block. Kneel or lie on the ground and place your arm over the Helix so your bicep is pressing down into it. You can press down on your arm with your other hand to apply more pressure.
Then rock your arm from side to side and even slightly bend and extend your elbow. Hold on the area if it feels tight and try to relax your arm. Then move the roller up or down your bicep to hit a new spot. Again rock side to side and even flex and relax the bicep to help release the muscle.
To roll out your tricep, flip your arm over on the Helix so that the back of your arm is on top of the roller. You will want to face the roller more than you did to roll out your bicep. Use your other hand to press your arm down into the Helix to apply more pressure.
Rock your arm side to side and even flex and extend your elbow to tense and relax your tricep. Hold on any tight spots then move the roller up or down your tricep to work on another spot.
If you want to dig in more to any specific area, you can use one of the rounds against a block. Or if you don’t have the block, you can even roll out your arms against a wall or using a desk.
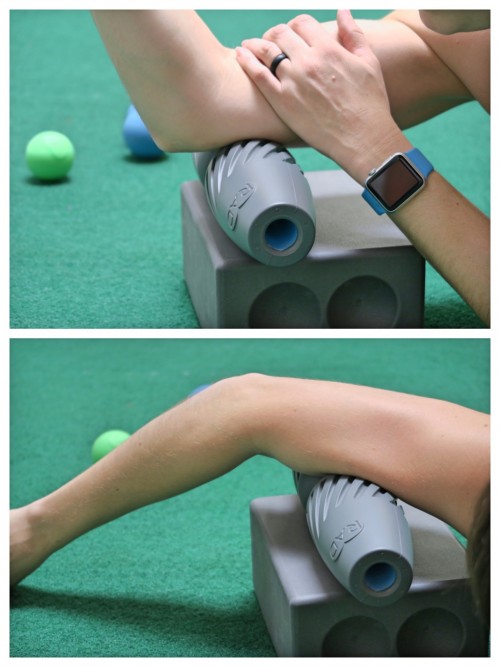
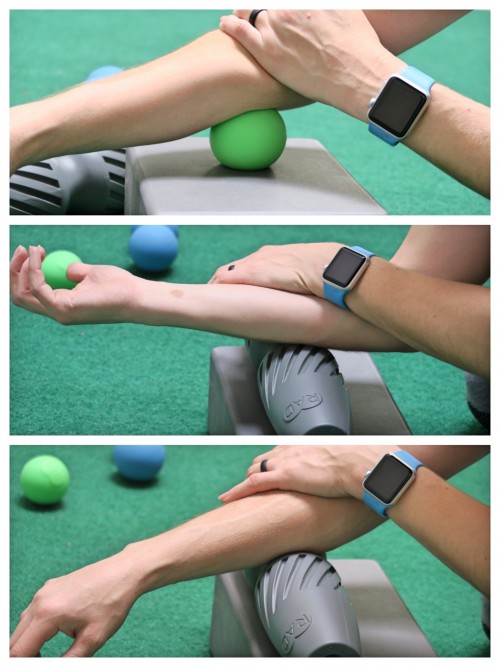
Forearms – We often ignore and forget about our forearms until we have wrist and elbow pain or our forearms are on fire from gripping during exercise. But it is important to roll out your forearms, especially if you have a desk job. Because your wrists and elbows are constantly in flexion typing at your computer, your forearms can become tight, which will lead to wrist, elbow and even shoulder and neck pain and injury.
To roll out your forearms, the Helix works best. Place the Helix on the block or up on your desk. Place your forearm over the roller with the roller right below your elbow. You can start on the outside or underside of your forearm, but you will want to make sure to get both sides as there can be trigger points in both places causing pain.
Use your other hand to press your forearm down into the roller. Then rock your arm side to side on the roller and even flex and relax your wrist. You can even circle your wrist as you hold.
Hold on any tight spots and work down the fleshy part of your forearm on both sides. Make sure to really work right below the elbow though.
If you have one specific point that really hurts, you can use the Rounds or the RAD Roller. The roller is a bit easier to control than the Rounds if you really need to target one specific spot.
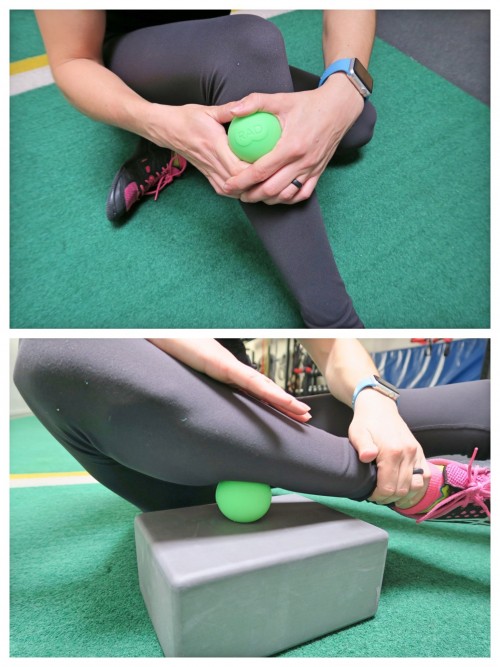
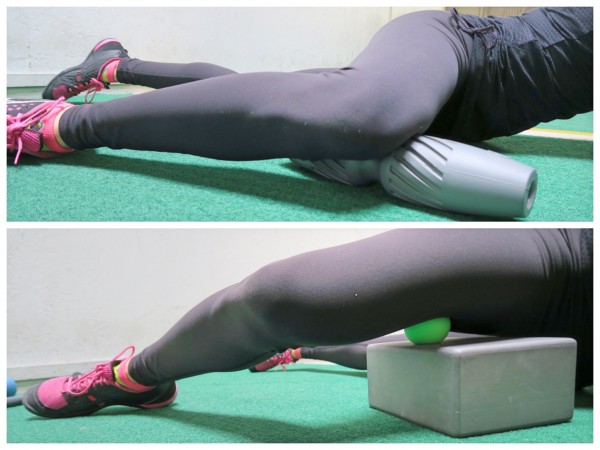
Calf – If you wear high heels or even dress shoes in general, or if you are a runner, you need to roll your calves. Tight calves can lead to foot, Achilles or even knee pain and injury.
But it can sometimes be hard to really dig out your calves. Basic rollers generally don’t dig in enough or really let you target specific spots. But using a ball against the ground can sometimes not be enough pressure.
That is why I was so excited that the RAD Kit came with a block. Using the block and Round, you can really dig out your calves. You could even use the Helix on the block if you didn’t want as much pressure.
To roll out your calf, place a round up on the block and then place the fleshy part of your calf over the ball. Start at the top of your calf below the back of your knee. Cross your other leg over to apply more pressure.
Holding on that spot, circle your foot or even flex and relax your foot to tense and relax your calf to help the muscle release. Then move the ball to another spot on your calf and again circle and flex and relax.
You can work all around the big fleshy part of your calf and then even down slightly toward your ankle. If you choose to go lower, you may find the Helix is better, but you should really focus your attention on the fleshy part or right below.
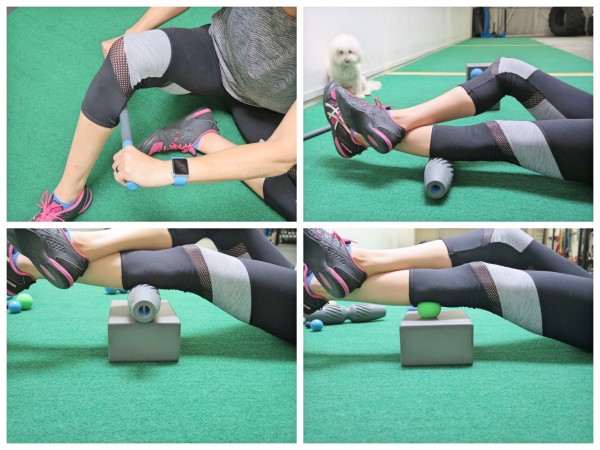
Shins/Peroneals – If you’re a runner, this is a must-do move. Even if you aren’t a runner, if you find you tend to pronate and walk on the inside of your shoes or squat and rock to the inside of your shoes, you need to roll out the front and side of your lower leg. Tight shin muscles and Peroneals lead to foot, ankle and knee pain and are also slightly responsible for Shin Splints.
To roll out your Shins, you can use the Rod or one of the Rounds. It is best to sit on the ground with one leg in front. Bend the knee and place the foot flat on the ground so you can easily reach your shin.
If you use the Round, you will hold it in both hands and press it into your shin to the side of the bone right below your knee. You will make small circles as you press in then move it lower down the front/side of your leg.
If you use the Rod, you will hold it in both hand and angle it to hit the front of your lower leg without going over the bone. You can then roll up and down your shin below your knee down toward your ankle. Hold on any tight spots and even rock slightly forward, toward the bone, and backward, toward your calf. Do not just quickly roll up and down with the Rod. Really hold on any tight spots.
To roll out your Peroneals, you can again use the Rod or the Rounds. You can even use the RAD Roller or Helix, if you want a little less pressure. To use the Rounds or roller, you may want to use the block as well.
To roll out using the Round, place the ball on the block and then let your knee fall open as you place the outside of your lower leg on the ball. Start with the ball at the top below your knee.
Press down on your leg to put pressure on the ball. You can circle your foot to tense and relax the muscle as you hold on the ball. You can even more your leg up and down very slightly as you hold.
Then move the ball down the side of your leg and hold on the new spot. Work down the outside of your lower leg.
Instead of using the Round, you can also use the Rod. Just like you did to roll out your shin, hold the Rod in both hands with your foot flat on the ground in front of you. Hold the roller outside your lower leg and press in right below the side of your knee.
Hold then begin to make small rolls up and down the side. You can even rock forward toward your shin or back toward your calf as you hold on a tight spot on the outside of your lower leg. Don’t simply roll quickly up and down.
Quads/Hips – Tight quads and hips can lead to knee, hip and low back aches and pains. They can cause your abs and glutes to work incorrectly so that your low back ends up trying to take on a load it can’t handle. That is why you need to roll out your quads and hips, especially if you sit in flexion at a computer all day!
To roll out the front of your leg, you can use the Rod or the Helix. You can even use the Helix on the Rod if you want a little less pressure. And if there are specific points you want to target, especially around your hip, the Rounds work well. But if you want to cover the entire expanse quickly, I recommend the Rod or Helix.
Using the Helix on your quad and hip is basically just like using a slightly smaller harder foam roller. To roll out your quad using the Helix, place it on the ground and then lie on top of it as if you are going to do a forearm plank with the helix at the top of your quad below your hip. Place only one leg on the roller and even cross the other leg behind the one on the roller to help apply more pressure.
Then rock slightly side to side with the roller at the top of your quad. You can make small rolls up and down as you rock open to hit more toward the outside of your leg and rock closed to hit more toward your groin and inner thigh.
Slowly move down your leg rocking not only side to side, but also up and down as you hit the entire frontside of your leg.
Work all the way down to around the top of your knee, holding on any tight spots as you go. Then switch and work on the other leg.
If you want even more control over how much pressure you apply, or don’t feel like lying on the ground, you can also use the Rod to roll out. The downside to using this roller is that, if you sit, your hip is still in flexion. But if you stand, you could tense your quad, defeating the purpose of rolling out.
However, the Rod can allow you to roll out even at work without having to lie on the ground. Plus, if you are watching to TV, you can easily use it while still sitting on the couch!
To use the Rod to roll out your quad, sit with your leg out in front of you and quad relaxed. I find it best to allow my leg to go out straight. Holding the Rod in both hands, press it down into your quad and apply the pressure you’d prefer. Rock the Rod from side to side and then start to make small rolls up and down your quad.
Angle the roller to hit toward your inner thigh and then outer quad. Hold and press into any tight spots. Make sure to keep your quad relaxed.
As you hold on any tight spots though, you can flex and extend your leg at the knee to flex and relax your quad. This can help loosen up any tight spots you are holding on.
Slowly work your way down to the top of your knee. Make sure to work toward the inside of your quad and the outside of your leg as well.
If you slightly lean back while seated, you can even get right into the muscle below your hip to the outside of your leg (your TFL). Just make sure to relax as you roll and apply as much pressure as you can.
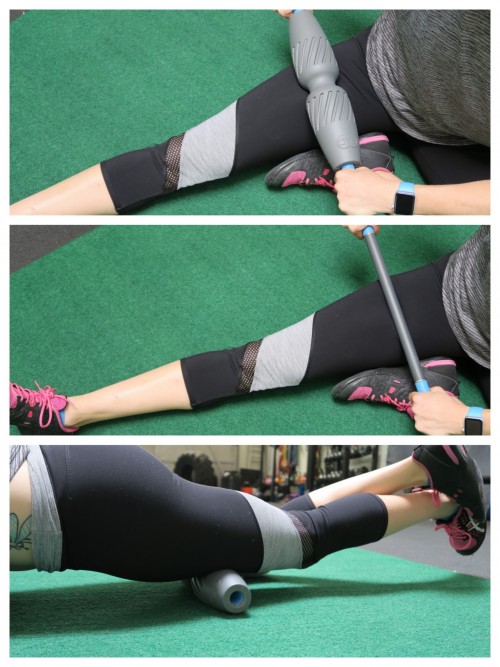
Hamstrings – If you want to prevent low back, hip or knee pain, or you want to run faster and avoid the dreaded hamstring pull, you need to roll out your hamstrings.
And while roller is a great way to start rolling out your hamstrings, especially if they are super tight and sensitive, it isn’t really the best way to dig into those hamstrings and loosen them up. You can’t really apply as much pressure sitting straight on the ground. Which is why having the block as part of the RAD Kit was so nice!
If you didn’t have a chair or table that works to sit on, you can simply place the roller or round up on the block and sit down on that instead. The block gives you just enough elevation to be able to truly dig into those hamstrings.
While you can easily use the Helix or even the Rad Roller, I prefer the rounds to dig out my hamstrings, especially right under the glute.
To use the Rounds and block to roll out your hamstrings, place a round up on top of the block and then sit on top of the ball on the block with the ball at the top of your hamstring right under your glute. You may need to place your hands on the ground behind you or next to you to support you as you roll.
Roll the ball along the top of your hamstring just under your glute. Hold on any tight spots you find there and even slightly flex and relax your hamstring as you hold. Work all the way from the outside of your leg toward your inner thigh.
Once you work under your glute, you can work down the entire back of your leg using the Round or you can use the Helix up on the block.
You can also use the Rod if you want to quickly work over the entire hamstring. The Rod can be great if you want to really be able to control the pressure you apply to your hamstrings.
To use the Rod, sit on the edge of a bench or chair and then place the Rod behind your leg while holding it in both hands. Start toward the top of your hamstring and press the Rod into the back of your leg. Keep your leg relaxed as you press in.
Rock the Rod from side to side as you hold on a spot then roll it lower down your hamstring toward your knee or even change where you are hitting to make sure you hit all the way from the outside of your leg toward your inner thigh.
Do not tense your leg as you roll. Hold on any tight spots. When you roll up and down, keep the rolls small, especially over any tighter spots.
Adductors/Inner Thighs – Knee pain, hip pain, even low back pain can be caused by tight inner thighs. They can also contribute to pronation syndrome and your knees caving in when you run or squat. That is why it is important to not forget about rolling out your Adductors!
The IT Band gets a ton of attention, but the Adductors don’t get enough.
To roll out your inner thighs, almost all the tools in this kit work. Whether you are very flexible or not so flexible, there is a way to roll out your inner thighs with these tools, even if it is simply with the handheld Rod.
If you want more pinpointed pressure one of the Rounds or the Rad Roller up on the block will work. If you are more flexible, but don’t necessarily want as much pressure, you can also use the Helix up on the block. The block is a great tool to really help you dig out the inside of your leg, especially if you are more flexible.
If you are less flexible, you may want to start with the Helix on the ground or even a Round on the ground, especially when working right on your inner thigh by your knee.
For rolling out the inner thigh, the Helix is really great. Place the Helix on the ground (or on the block if more flexible) and then lie face down with one knee bent out to the side over the Helix. The Helix will be perpendicular to the leg you place over it and your knee will be out to the side of your body and bent to about 90 degrees.
Start with the roller right inside and above your knee. Rock the leg forward and backward slightly over the roller. Then make small little rolls up and down. Hold if the area is tight and relax and breathe.
Then move the roller up your inner thigh and repeat. Work all the way up your leg toward your groin. Make sure to rock forward and backward to work toward your quad and back toward your hamstring. Hold on any tight spots and even roll slightly up and down as you hold.
If you find any extra tight spots, you can always use the Round there to dig in more.
If you use the Rod instead to control the pressure more, you will want to sit and relax your leg as you hold the roller in both hands and roll out your inner thigh. This can be a great way to really target the muscles in your groin, especially if you are less flexible and have troubles in the position on the roller.
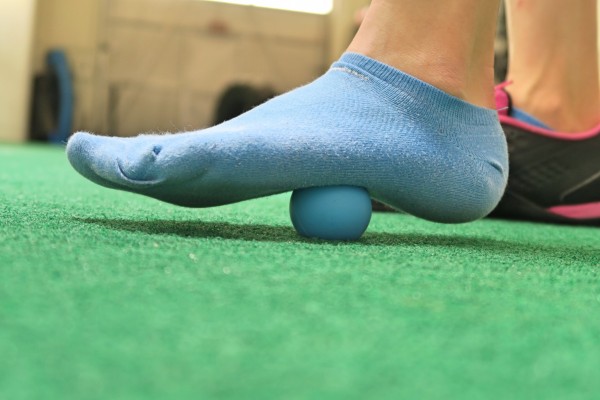
Feet – Rolling out your feet is super important, especially if you wear dress shoes, high heels or run a lot. Rolling out your feet can help prevent and even alleviate Plantar Fasciitis as well.
To roll out your feet, the Rounds or even the Helix works, depending on how tight and sensitive your feet are. And if you have carpet at home, you can even stand on the ball or roller up on the block if needed.
I personally prefer the Rounds to roll out my feet, specifically the smaller harder one. To use the Round, place the ball on the ground and then stand on top of it with your bare foot. Start with the ball in the arch of your foot and then slowly roll it back toward your heel and then up toward your toes. You can even work toward the inside and outside of your foot.
Relax your foot as you roll. Hold on any tight spots and even flex and relax your toes as you hold on the spot to help it release.
Apply as much pressure as desired by standing more or less on the foot on the ball. You can also lessen the pressure by using the bigger, softer round or the Helix.
Using this awesome RAD Kit, you can roll out from head to toe and really target any areas that may be causing you pain or injury. Even if you don’t happen to have the kit, although I obviously highly recommend it, you can still do these moves using tennis balls, foam rollers or even a Peanut and other handheld roller.
The point is, no matter what tools you have, these moves are essential if you want to avoid pain and injury and move better in everyday life!


Hi could you tell me if the rad products are in which currency? NZ dollar?
I think it is the US dollar, but bought mine I think through paypal…
The best exercise (that can be than with this product or just a tennis ball) is the one on the feet.
Anyway the rolling kit you described looks very interesting, overall. I’ve already inquired the producer to see weather I can get it also in my country (Italy)
The one on the feet is great…But I define best based on what you need. If you are a runner or have plantar fasciitis, yes that is a good one. However, in both those cases you should also roll your calves and shins.
If you have neck pain though, the foot rolling probably isn’t best 😉 Hope you can get it as it is a great kit! -Cori