At Redefining Strength, our goal is to help you learn to move better so you feel better and stronger in every day life.
And one of our go-to training tools to help you move and feel better is the Suspension Trainer. So when CoreX sent us their Suspension Trainer, we were excited to play around with it!
Here are 10 Suspension Trainer Exercises you can do to work your entire body!
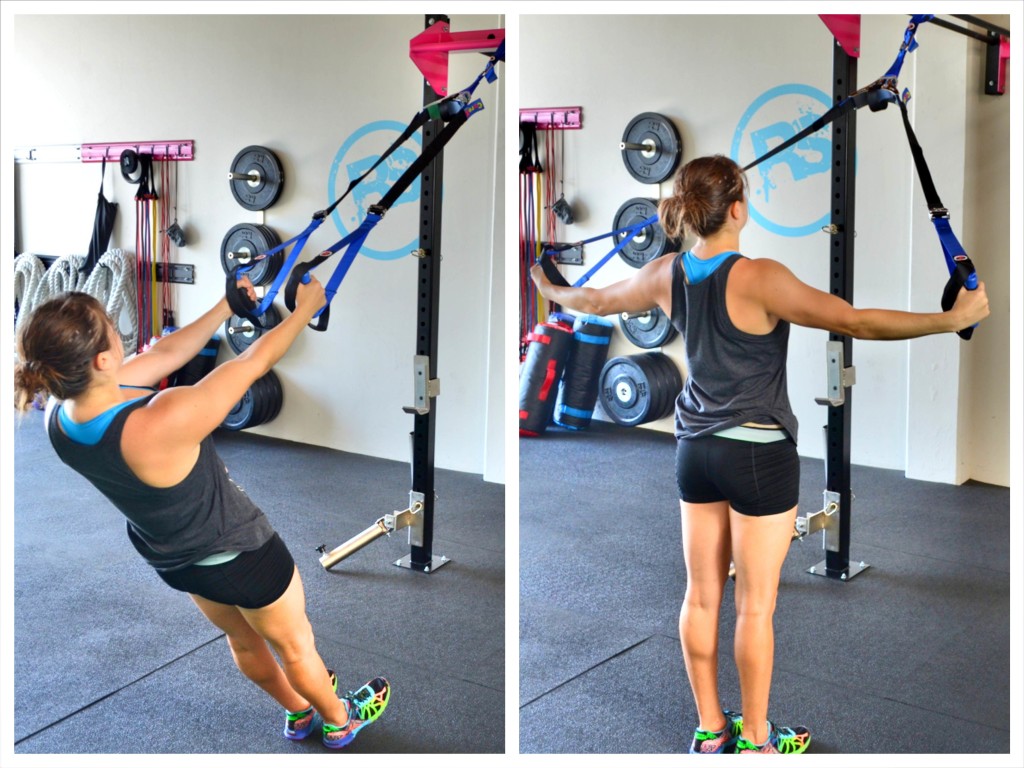
1. Back Flyes – Activate the muscles of your upper back to prevent injury and improve your posture with Back Flyes.

To do Back Flyes, hold a handle of the trainer in each hand. Walk your feet forward toward the anchor point. You will not want to walk them in as far as you do with the inverted row.
Keeping your body in a nice straight line from your head to your heels, open your arms out to the side. Keep your elbows soft, but do not bend your arms as you open to the side. Pull yourself up so your arms are even with your body and then lower back down, bringing your hands back together. Keep your body in a nice straight line as you row.
Do not let your hips sag or arch. Squeeze your glutes and keep your abs engaged. Also make sure you don’t shrug your shoulders as you open. Keep your chest pressed out as you perform the fly. Move slowly and don’t bounce off the bottom.
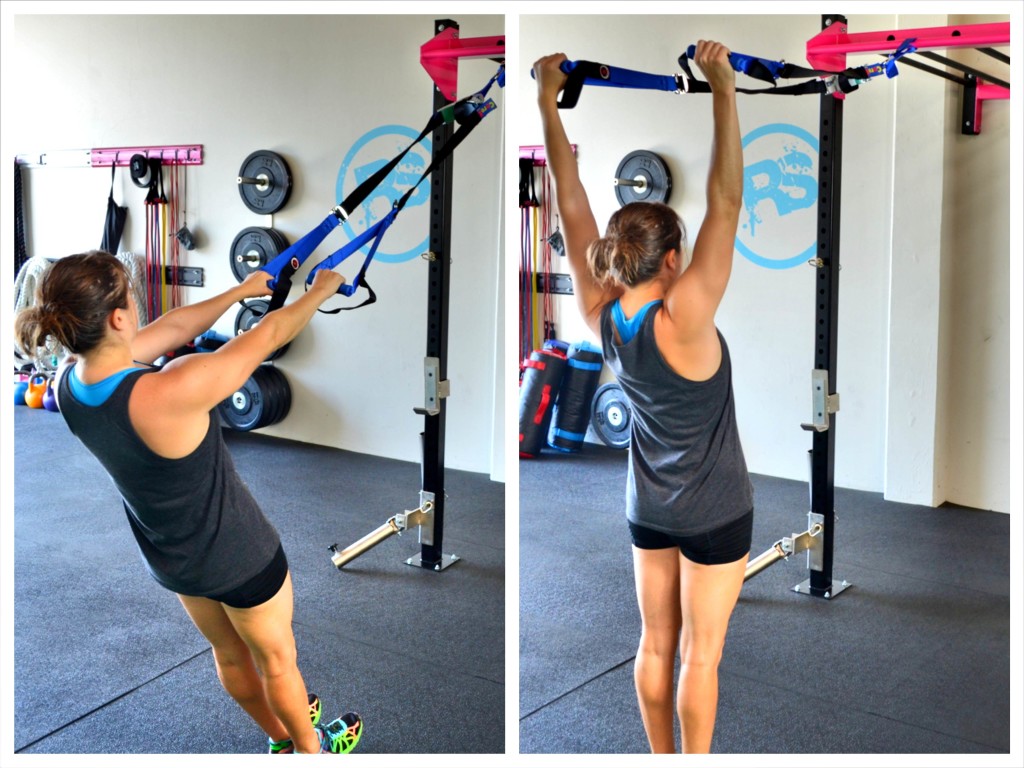
2. “Y’s” – YTWL’s are great exercises to rehab and strength then muscles of your back and rotator cuff. You can do YTWL’s a variety of ways and one of them is by using the suspension trainer.
“T’s” are basically the Back Flyes shown above.
To do “Y’s,” hold a handle in each hand with your arms out straight in front of you. Walk your feet forward toward the anchor point. The move of an incline you are at, the harder the move will be. You don’t need to be super close to the ground to feel this move.
Then keeping your body in a nice straight line, raise your arms up to the ceiling, bringing your biceps up by your ears. Keep your arms straight as you raise.
Do not let your hips arch or sink as you raise your arms up.
Keep your arms straight as you raise and lower. If your body isn’t moving as one unit or your arms are bending, you are probably at too much of an incline. Walk your feet back so you are more vertical instead of parallel to the ground.
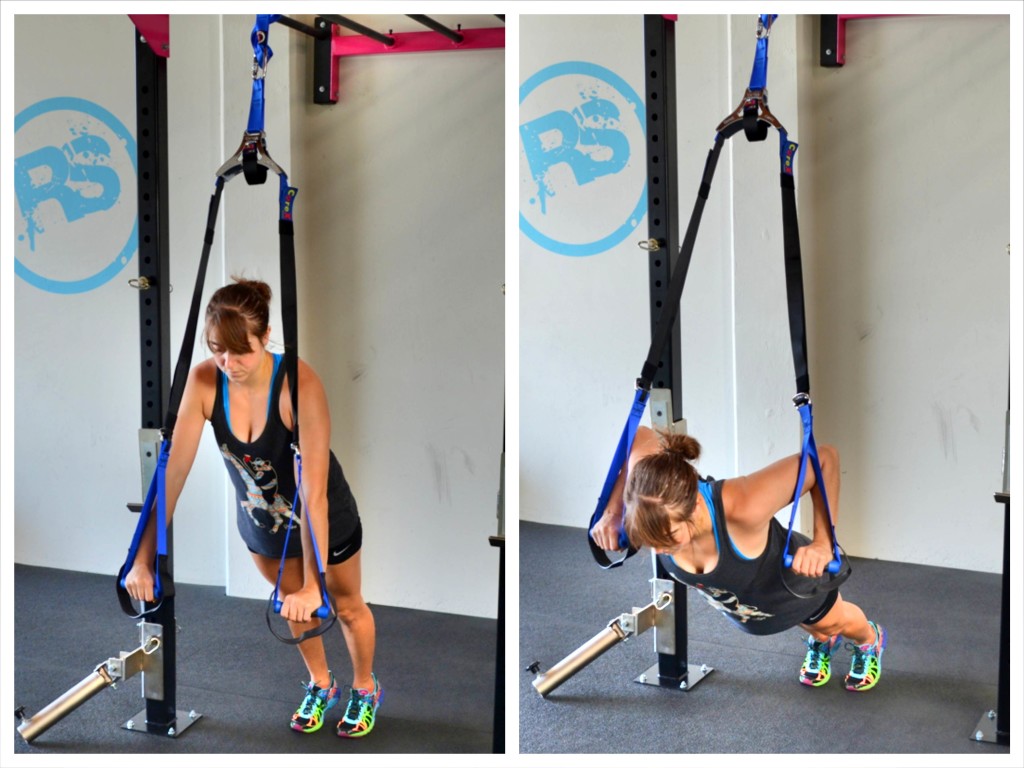
3. Push Ups – Push ups are one of the best bodyweight exercises out there. But it is always fun to add in new variations.
To do a Suspension Trainer Push Up, you can either put your feet in the straps and your hands on the ground for a decline push up or you can place your hands on the handles and your feet on the ground for an incline push up that requires a lot of stability.
Today we did the push up with our hands holding the CoreX handles. The closer to parallel to the ground you are, the harder this move will be. Be careful the first time you do this as the suspension trainer makes the move harder on your upper body because it is less stable than having your hands on the ground.
Hold a handle in each hand. Walk your feet back and set yourself up at an incline you can handle. Engage your legs and abs and straighten your arms. Keep your core engaged as you bend your elbows and lower your chest down to the handles. Lower all the wall to the handles and then press back up. Make sure your body moves as one unit.
Do not let your hips sag or your butt go up in the air. Also make sure your elbows don’t flare up by your shoulders. If your elbows do really flare up, it will put more strain on the shoulder.
To help you keep your body in a nice straight line from your head to your heels, make sure to drive back into you heels instead of coming forward onto your toes. Also, make sure that you don’t tuck your chin as you do the push ups!
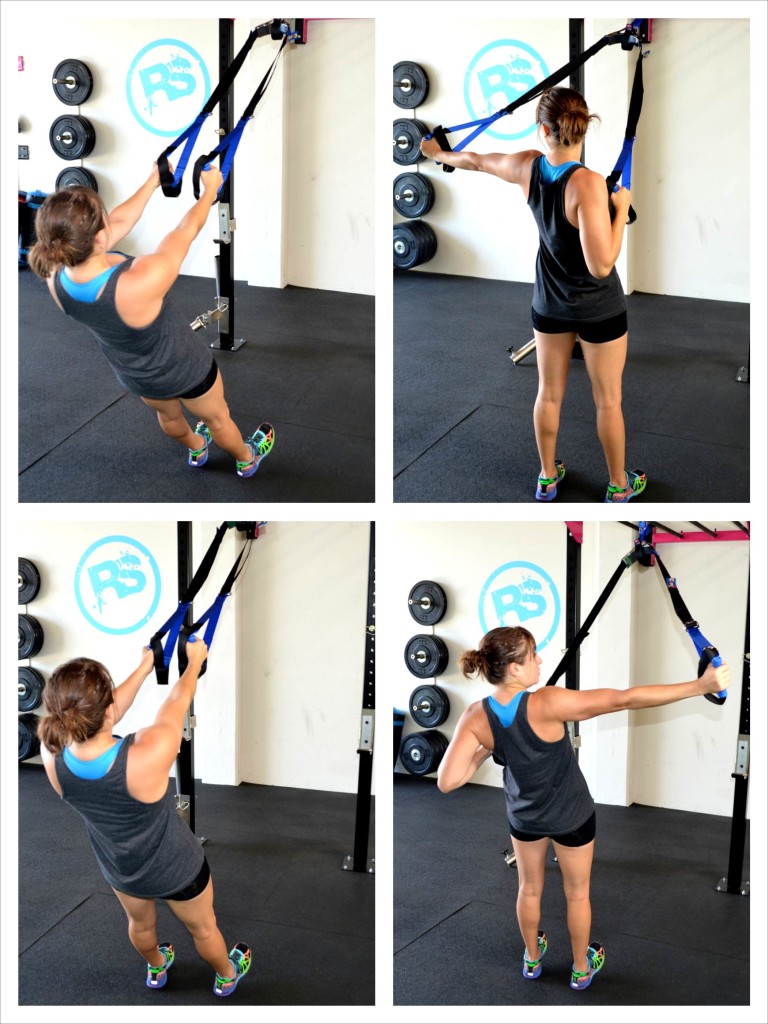
4. The Archer – This is a great back exercise because it is both a fly and a row at the same time.
To do The Archer, hold a handle in each hand with your feet together and your body in a nice straight line. Keeping your left arm in by your side, you will row up, bringing your chest up to the handle. As you row up with your left arm, you are going to bring your right arm out to the side, keeping it straight (but not locked out). Your right arm will be performing a “fly” motion like with the back fly as your left arm “rows.”
Make sure that as you do this move, your body stays in a nice straight line. Do not let your low back arch or your shoulders shrug. Move slowly and under control. Alternate sides until all reps are complete.
To make the move harder, walk your feet forward so that you are closer to parallel to the ground. To make it easier, walk your feet back away from the anchor point.
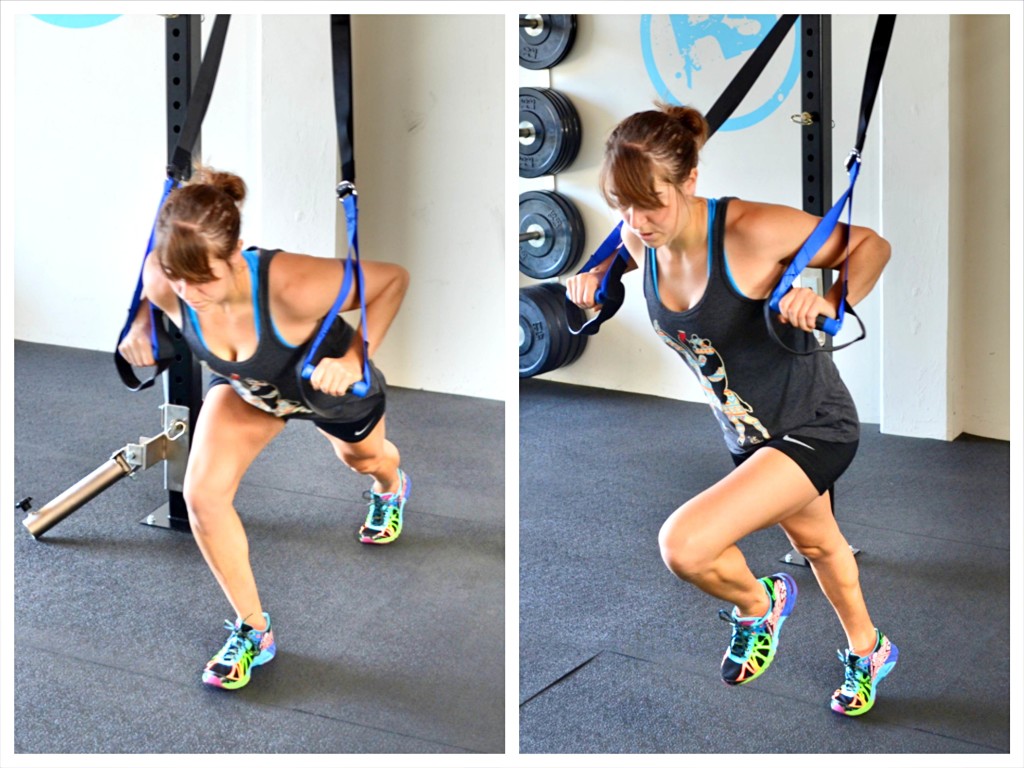
5. Runner’s Start Lunge – This is a great move to work your legs and really target your glutes. It is a good hip extension and power move as well.
To do the Runner’s Start Lunge, hold a CoreX strap in each hand with your arms bent. Start back behind the anchor point with one leg lunged back and the front knee bent. Then driving through the foot of the front leg, bring the back leg forward and up. Drive the back knee up as you straighten the standing leg and push all the way up onto your toe. Then quickly bring the knee back down and sink back into the lunge, dropping the front heel back down to the ground.
Complete all reps on one side before switching. Make sure to maintain a nice tall posture and not round your shoulders forward as you lunge. You also really want to focus on driving off that standing leg and extending the hip as you squeeze your glute to bring the back knee forward.
This is an explosive move. You can make it more challenging by completely jumping off the front leg as you drive the back knee forward and up instead of just coming up onto the toe.
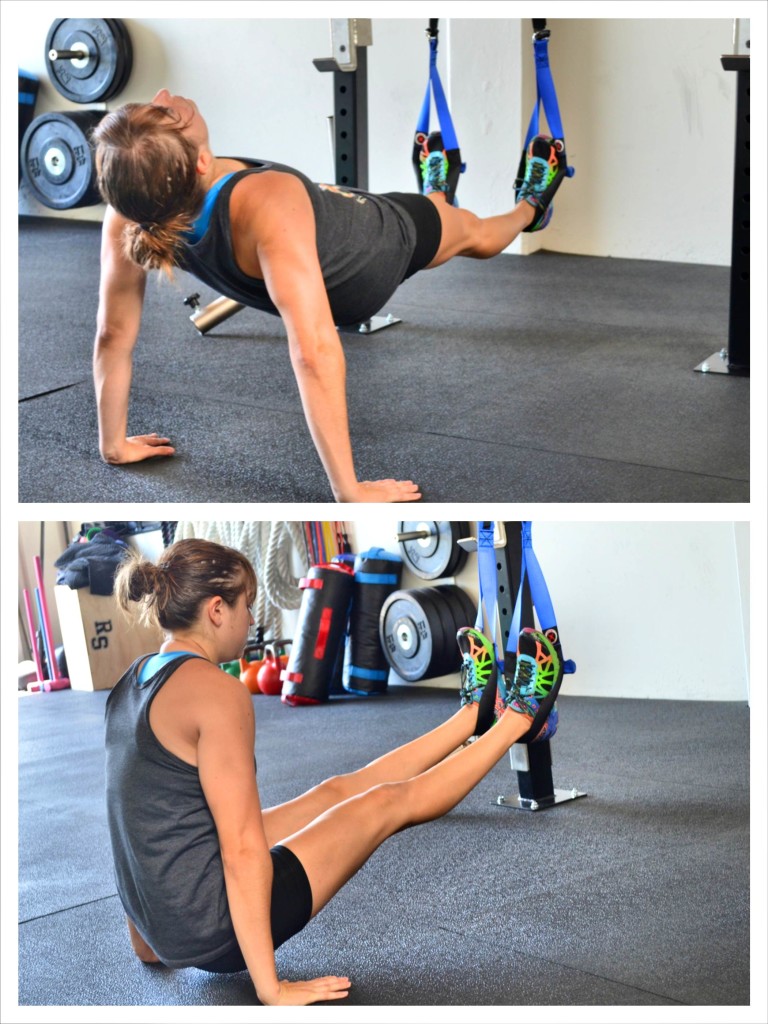
6. L-Sit to Posterior Plank – A great move to challenge your entire body, the L-Sit to Posterior Plank will light up your entire core.
To do the L-Sit to Posterior Plank, place your heels in the foot straps. With your legs straight in front of you, sit on the ground and place your hands on the ground behind your butt. Then drive your hips up, pressing down through your hands and heels. Try to get your body in a nice straight line, leaning your head back as you lift. Then lower your hips about an inch from the ground and pull your butt back in between your hands. Keep your legs straight the entire time. Then press your hips back up into the posterior plank before repeating the L-Sit. Keep your arms straight throughout the entire movement.
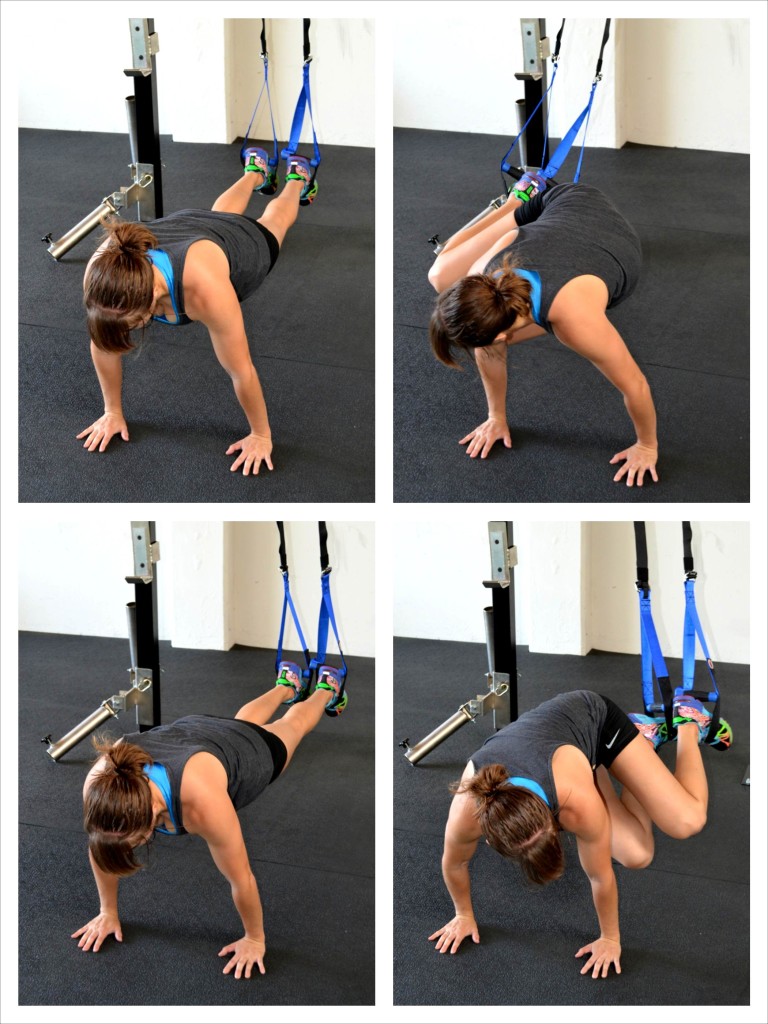
7. Twisting Knee Tucks – Another great core exercise is a moving plank variation called Twisting Knee Tucks. It is important to move your body in every plane of motion and Twisting Knee Tucks force your core to work in more than one plane of motion.
To do Twisting Knee Tucks, place your feet in the straps and walk your hands out on the ground away from the straps until your body is in a nice straight line like at the top of a push up.
Then tuck your knees in toward your right elbow. Bring them all the way in keeping your legs close together. Then straighten your legs back out center.
Then tuck your knees in toward your left elbow before straightening them back out center.
Keep your butt down as you tuck and do not tuck your chin.
The more you tuck toward the side, the harder the move will be.
Also, the further from the anchor point you walk your hands, the more the trainer will want to pull you backward, making the knee tuck harder.
Beginners may want to start with a straight knee tuck instead of twisting to each side.
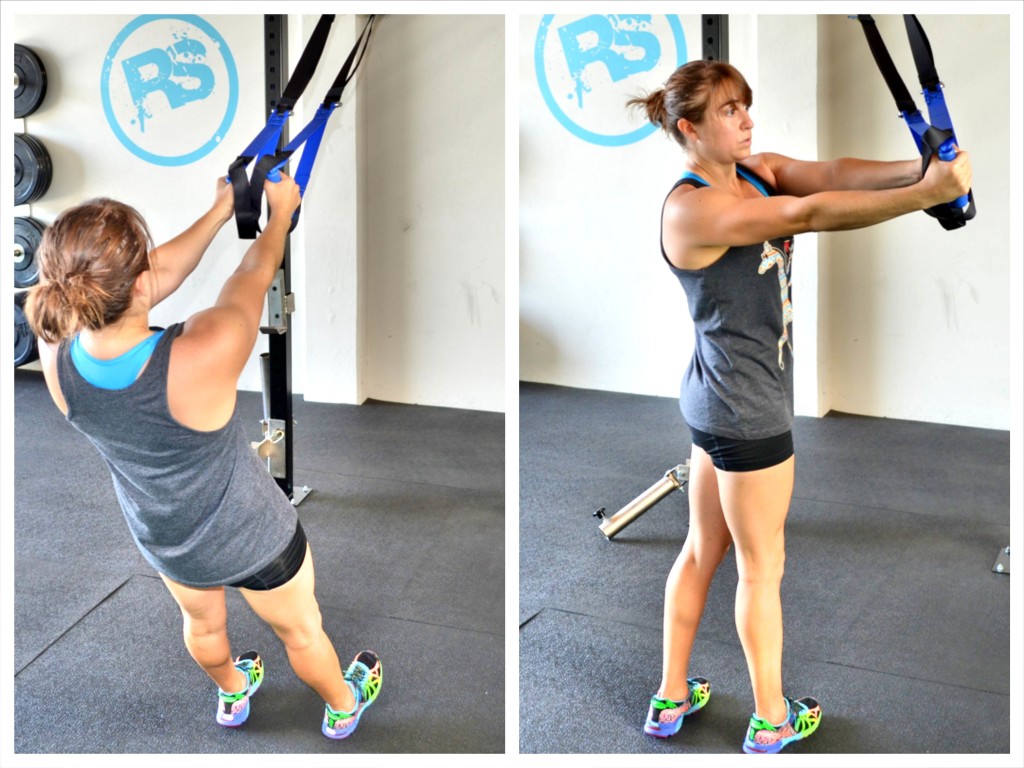
8. Row to Rotational Press – A great move to work your back and core through different planes of motion.
To do the Row to Rotational Press, hold a strap in each hand and walk your feet forward so that your body is at an appropriate incline. The closer to parallel to the ground you are, the harder the move will be.
Even if you are completely parallel for the Inverted Row, you may not want to start as low for this movement because the rotational press makes it more difficult.
Once you are set at an appropriate incline, place your arms outstretched in front of you with your hands together. Row your hands in toward your chest, driving your elbows down and back. Once you’ve brought your chest up to your hands, rotate and press your hands out to the right. Then bring them back center and lower back down, straighten your arms out in front of you.
Throughout the entire movement, keep your legs and body straight. You want a nice straight line from your head to your heels. Do not let your hips sag toward the ground or your low back arch as your row and press. Make sure you do not shrug your shoulders as you press out.
Alternate sides until all reps are complete. As you fatigue, do not bounce or swing to get up. If you need to, walk your feet back so that you are more vertical.
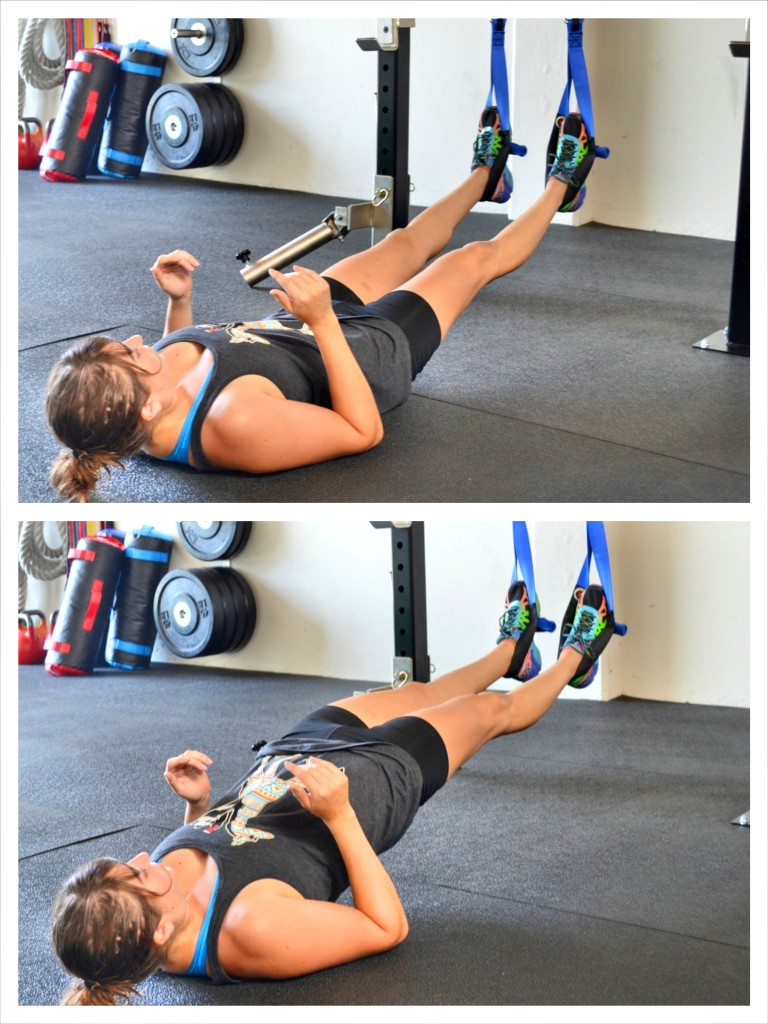
9. Straight Leg Glute Bridge – The suspension trainer Straight Leg Glute Bridge is a great way to work your entire backside and really torture those hamstrings and glutes.
To do the Straight Leg Glute Bridge, place your heels in the CoreX foot straps. Lie back on the ground with your legs out straight in front of you. You can either bend your elbows to 90 degrees or leave your arms on the ground down by your sides.
Squeezing your glutes and driving down through your heels, lift your hips up as high as you can while keeping your legs straight. Keep your abs engaged so that you don’t hyperextend your low back as you lift. Hold at the top for a second and lower back down.
10. Ab Roll Out – I love doing the same exercise just using a different tool. For instance, the ab wheel or Power Wheel roll out can also be done using a suspension trainer.
To do the Ab Roll Out on the suspension trainer, kneel on the ground behind the trainer with a hand on each handle. With your arms straight, begin to reach your hands out in front of you, leaning forward as you do. Keep your body in a nice straight line as you lean forward. Squeeze your glutes and brace your abs so that you don’t feel the move in your low back.
Reach out as far as you can and then bring your arms back in and, as you bring your arms back in, come back to vertical. Do not let your butt sit back first as you come back up. You want your body to move as one unit.
Repeat, reaching out as far as you can each and every time.
These are 10 Suspension Trainer Exercises to work your entire body demonstrated on the CoreX.
**NOTE: CoreX provided Redefining Strength with one of their suspension trainers for free. We played around with the product and after reviewing it, decided to include it in our workout routine especially for the exercises listed above!
[call_to_action_small title=”Want More Suspension Trainer Exercises?” excerpt=”Check out our Full-Body Suspension Trainer Workout Course and E-Book! Get over 30 Suspension Trainer Exercises and 5 Workouts.” buttonText=”Get The Course Now” buttonUrl=”https://www.udemy.com/the-full-body-suspension-trainer-workout-program/?couponCode=CoreXPost” buttonNewWindow=”true” /]


This is perfect! Thanks! I’m a runner with a TRX that hasn’t been used much and am looking for a good workout to build muscle.
These moves are great. Also here is a link to our free workout library. There are some great TRX workouts in there as well as some workouts for runners.
https://redefiningstrength.com/50-free-workouts/
If you need anything, don’t hesitate to email us as well ([email protected])
Absolutely LOVE this workout!!! Such a great combo love ?
Glad you like the moves! 🙂