STOP Torturing Your Rotator Cuff (Do This Instead)
Rotator cuff injuries are all too common.
And often when a muscle gets injured we blame it for being weak.
So in our attempts to recovery we include a ton of moves to work and strengthen those muscles.
But what if this extra strengthening work is actually holding you back?
What if these exercises are actually perpetuating the issues long-term instead of addressing the true culprit of the problem?
Because so often muscles, like our rotator cuff, become injured because they are actually OVERWORKED and OVERUSED.
These smaller, weaker muscles end up overstrained and overworked because of joint mobility restrictions and other muscles not pulling their weight.
That’s why rotator cuff injuries especially are becoming more and more common.
That’s why a proper recovery and mobility program can’t just focus on rotator cuff strengthening moves.
It actually needs to focus on your thoracic, scapular and shoulder mobility as well as proper engagement of the larger muscles of your upper back as well as your serratus anterior.
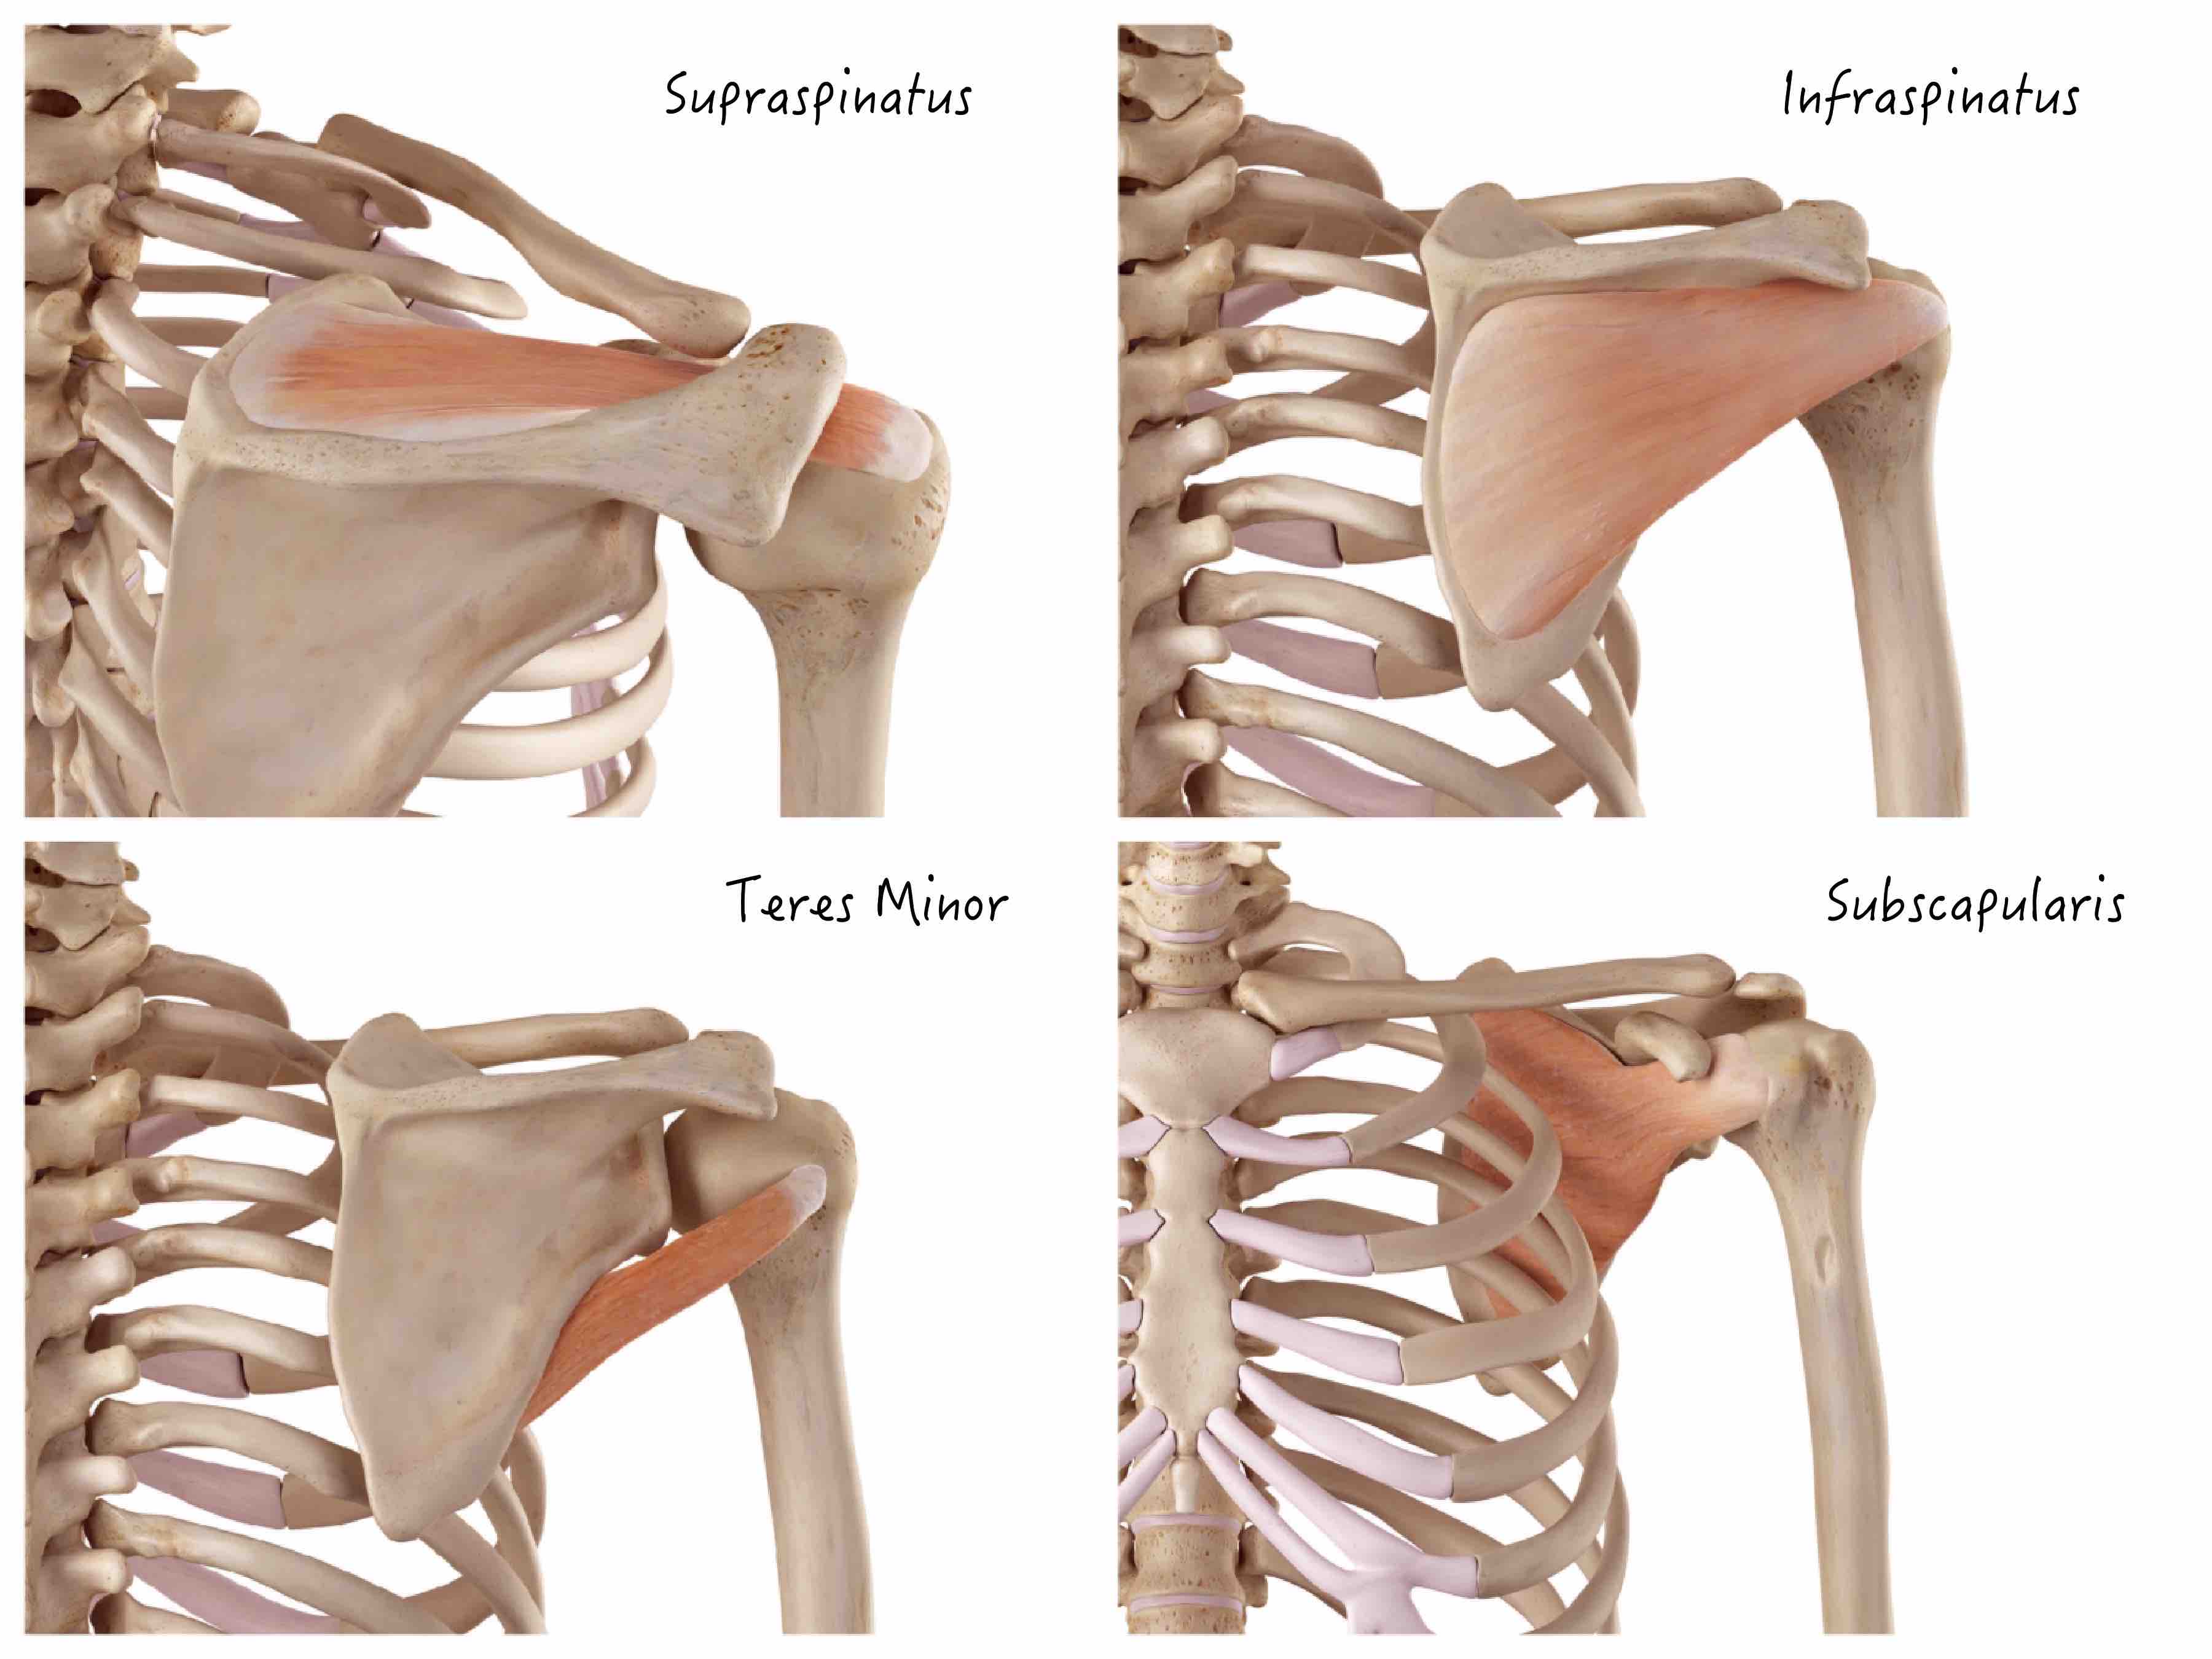
But before we dive into the moves you need to include, it’s key we have a better understanding of the muscles that make up our rotator cuff and what they do.
What does your rotator cuff do?
While each of the 4 rotator cuff muscles does contribute to a different joint action, all four muscles play an important role in stabilizing your shoulder, which is a ball and socket joint.
A great way of understanding the importance of these muscles and their role in shoulder stability is to think of your shoulder as a golf ball on a tee. Your rotator cuff muscles hold that golf ball in place so it doesn’t rotate off the tee.
However because each rotator cuff muscle does contributes to a different joint action, it can be helpful for your recovery to know which one is injured and have a better understanding of how they function.
What are the 4 muscles of your rotator cuff?
– Supraspinatus
– Infraspinatus
– Teres Minor
– Subscapularis
The Supraspinatus abducts the shoulder or helps you raise your arm out to the side.
The Infraspinatus and Teres Minor externally rotate the shoulder. For a visual example of this, place your elbow in by your side and bent it to 90 degrees with your hand out in front of you. Then open your arm out to the side. That movement is external rotation.
The Subscapularis, on the other hand, internally rotates your shoulder. So if your elbow was bent in the same position, your hand would move in toward your body.
Your rotator cuff muscles are also made up of mainly type I muscle fibers. So if you are working to strengthen them to improve your shoulder stability, higher reps and lower loads will be key.
But remember, while keeping these muscles strong for stability is key, if that golf ball isn’t properly aligned on that tee, or other muscles aren’t pulling their weight, your rotator cuff can easily become overworked which can lead to injury.
That’s why you want to include these 4 exercises to foam roll, stretch and activate and keep your shoulders healthy and happy! These moves will help you work on your thoracic, shoulder and scapular mobility and stability.
They are important to include in your upper body training routines if you have a desk job especially and can easily be combined even into a quick warm up before your workouts.
4 KEY MOVES TO DO INSTEAD TO PREVENT ROTATOR CUFF OVERUSE INJURIES
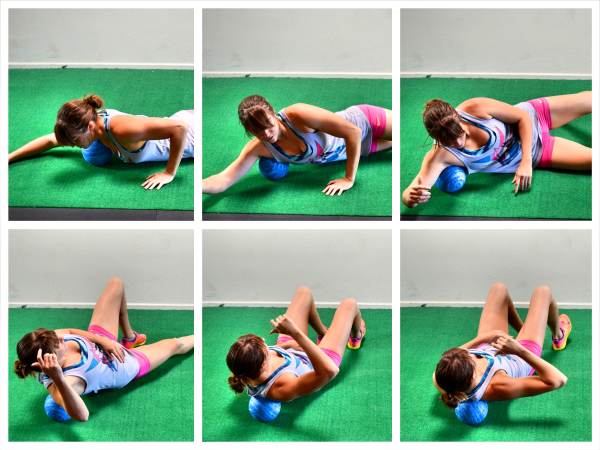
EXERCISE #1: Chest Foam Rolling
Your pec minor and major can become shortened and tight, especially if you spend a ton of time hunched over throughout the day.
This can lead to both internal shoulder rotation but also anterior tipping and downward rotation of our shoulder blades and create overuse of the rotator cuff.
That’s why it’s key we first use foam rolling to relax this overactive muscle!
To roll out your chest, you can use a larger ball against the ground or a smaller ball in a doorway.
Start with the ball just inside your shoulder joint and under your collarbone. You will not roll back and forth but hold and relax as you apply pressure. Be careful and very gentle if you start to work the ball toward your sternum.
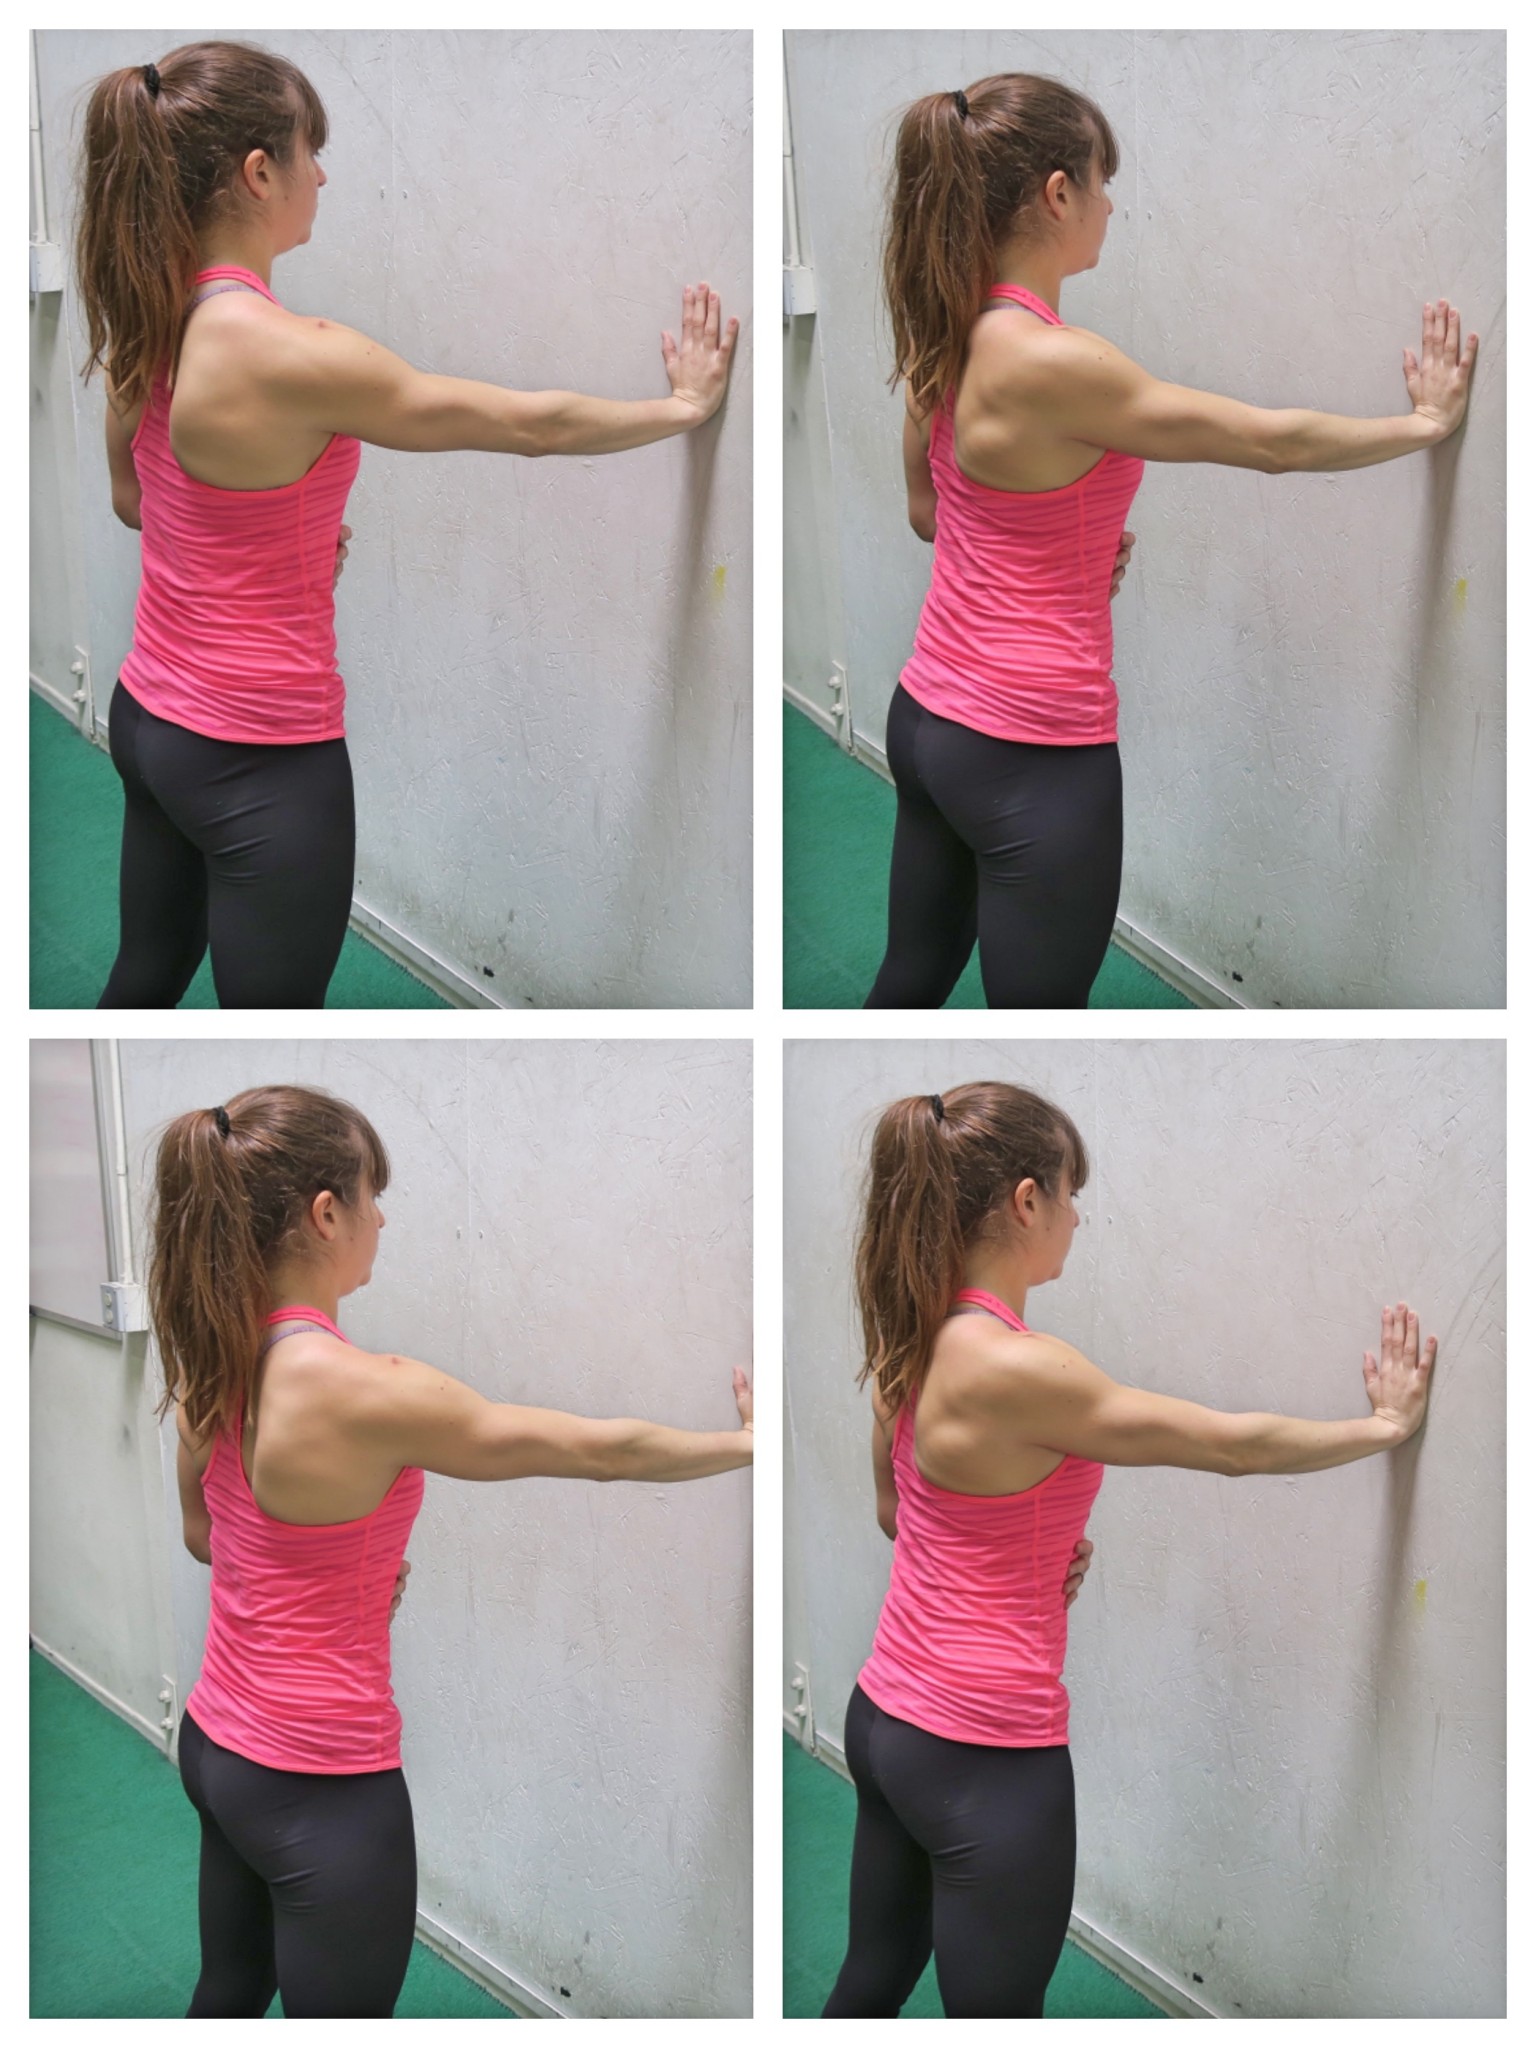
As you hold with the ball pressing in to your chest just inside your shoulder, you can lift your arm overhead and slowly lower it down if standing in a doorway or rolling out against a pole.
If you’re lying on the ground, you can make a snow angel movement as you hold to help create tension and then relax to help the muscle relax and release itself.
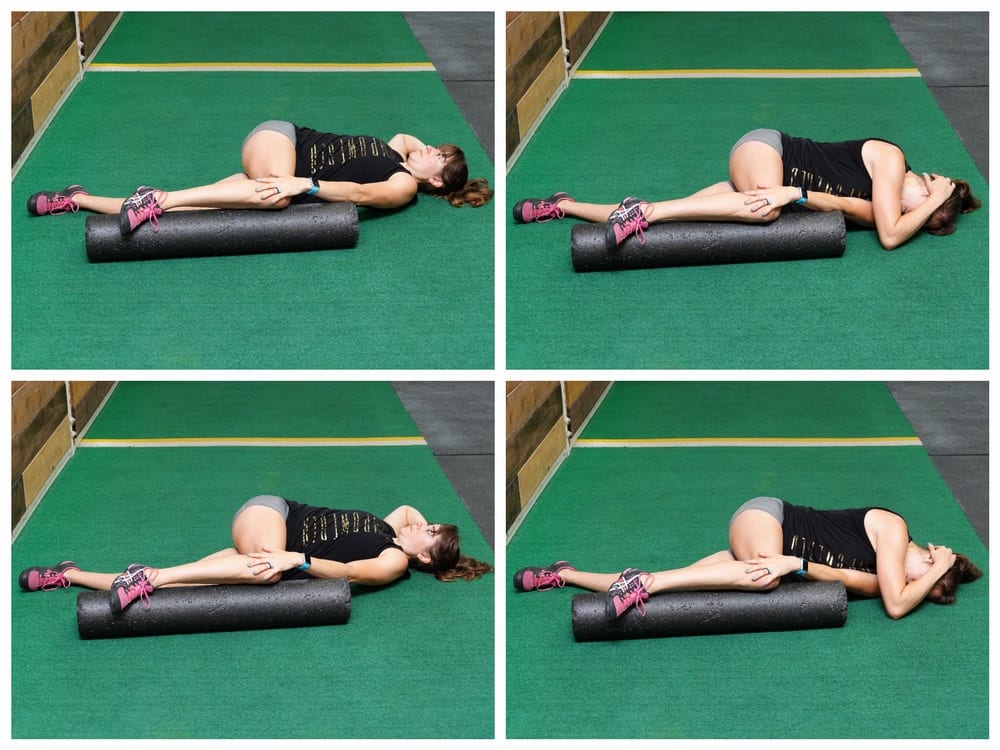
EXERCISE #2: Active Foam Roller Star Stretch
Spinal mobility is key so that we don’t seek out extra mobility from our shoulders to perform exercises like the overhead press, which can strain our rotator cuff.
Proper spinal mobility also allows us to have proper scapular movement so we properly engage the muscles of our upper back to support our shoulders.
That’s why the Active Foam Roller Star Stretch is a great move to include.
Place a foam roller or block on the ground to one side.
Lie on your back with the roller running parallel to your body and bend your knee on the side further from the roller to about 90 degrees.
Pull your knee across your body to place it on the roller with your opposite hand as you place your other hand behind your head so your elbow is open and out.
Rotate that elbow in front of your face to touch the elbow down to the ground in front of you.
Then lift the elbow up as you rotate your chest open toward the ceiling. Rotate through your spine as you try to touch your shoulder open to the ground.
Focus on twisting through your spine without letting your knee come up off the roller. Open up, pause and then rotate back closed. Repeat all reps on one side before switching. Do not just flap your arm.
EXERCISE #3: Lying W Pulldowns
To help support your shoulders and improve your posture, you then want to activate the muscles of your upper back, like your mid and lower traps especially.
A great way to improve your shoulder health and target these muscles, as well as your lats, is with activation moves like the Lying W Pulldowns that work on retraction and scapular depression.
To do Lying W Pull Downs, lie face down on the ground with your arms extended overhead, thumbs facing up toward the ceiling as if giving a thumbs up. Engage your upper back to lift your face and arms just off of the ground. You can also put a towel under your forehead if you struggle with engaging your neck.
Then begin to bend your elbows, pulling them down and in toward your sides.
Feel your shoulder blades pinch slightly together as you pull them down. Feel yourself initiate the movement by the movement of your shoulder blades.
Pull your elbows down and in as if you pulled your chest up to a pull up bar.
Then keeping your hands off the ground, extend your arms straight out toward the wall in front of you. Reach out overhead the bring your hands back down and in.
Feel your back and even your lats as you pull your elbows back down and in to your sides.
EXERCISE #4: Serratus Anterior Press
The serratus anterior is a primary scapular stabilizer and weakness of this muscle has been linked to neck, shoulder and even upper back aches and pains.
A strong serratus anterior is key as it will help posteriorly tip the shoulder blade as well as help you perform proper upward rotation of the shoulder blade. It will help you avoid those rotator cuff muscles becoming overworked!
To strengthen your Serratus Anterior include the Serratus Anterior Press in your activation routine.
Start in a staggered stance with the opposite foot forward from the hand holding the band in at your chest.
Then press the band out from your chest and slightly up. Feel yourself pulling your shoulder blade forward around your ribs as you reach out. You aren’t just doing a unilateral chest press.
Then slowly bring your hand back in toward your chest. Do not rotate toward the anchor point.
You want to focus on the movement being felt around your ribs as you protract your shoulder blade or pull it away from your spine.
SUMMARY:
To keep those shoulders healthy and happy and avoid rotator cuff issues, try combining these 4 moves into a quick mobility routine or use them as a warm up, performing 30-45 seconds per move or side.
With these moves remember you are working to improve your shoulder, scapular and thoracic mobility while activating the muscles of your upper back to help prevent those rotator muscles from becoming injured because they’re overworked.
We want to make sure we’re addressing the underlying cause of the injury and not just torturing our rotator cuff more!

