The Slider Upper Body And Core Burner
When you have access to limited space and equipment, sliders are a great way to make basic bodyweight moves even more fun and challenging while being easy to take with you anywhere!
So whether you need a quick go-to option at home or a workout when you’re short on time and traveling, try this Slider Upper Body And Core Burner that’s just about 10 minutes long!
(And if you need a set of sliders, and would like a booty band too!, check out the RS Trislides and Booty Band Bundle!)
The Slider Upper Body Core Burner
Set a timer for 30 second intervals of work and move right from one exercise to the next. The final exercise in each circuit can also be modified to be a full rest interval if needed. Complete 2 rounds through each circuit, resting up to 1 minute between circuits.
CIRCUIT #1:
30 seconds Knee Tuck Push Ups
30 seconds Alternating Slider Tabletop Curls
30 seconds Slider Ab Extensions
30 seconds Banana Hold
CIRCUIT #2:
30 seconds Fly Push Ups
30 seconds Slider Plank to Bulldog
30 seconds Body Saw
30 seconds Superman Wave
EXERCISE DESCRIPTIONS:
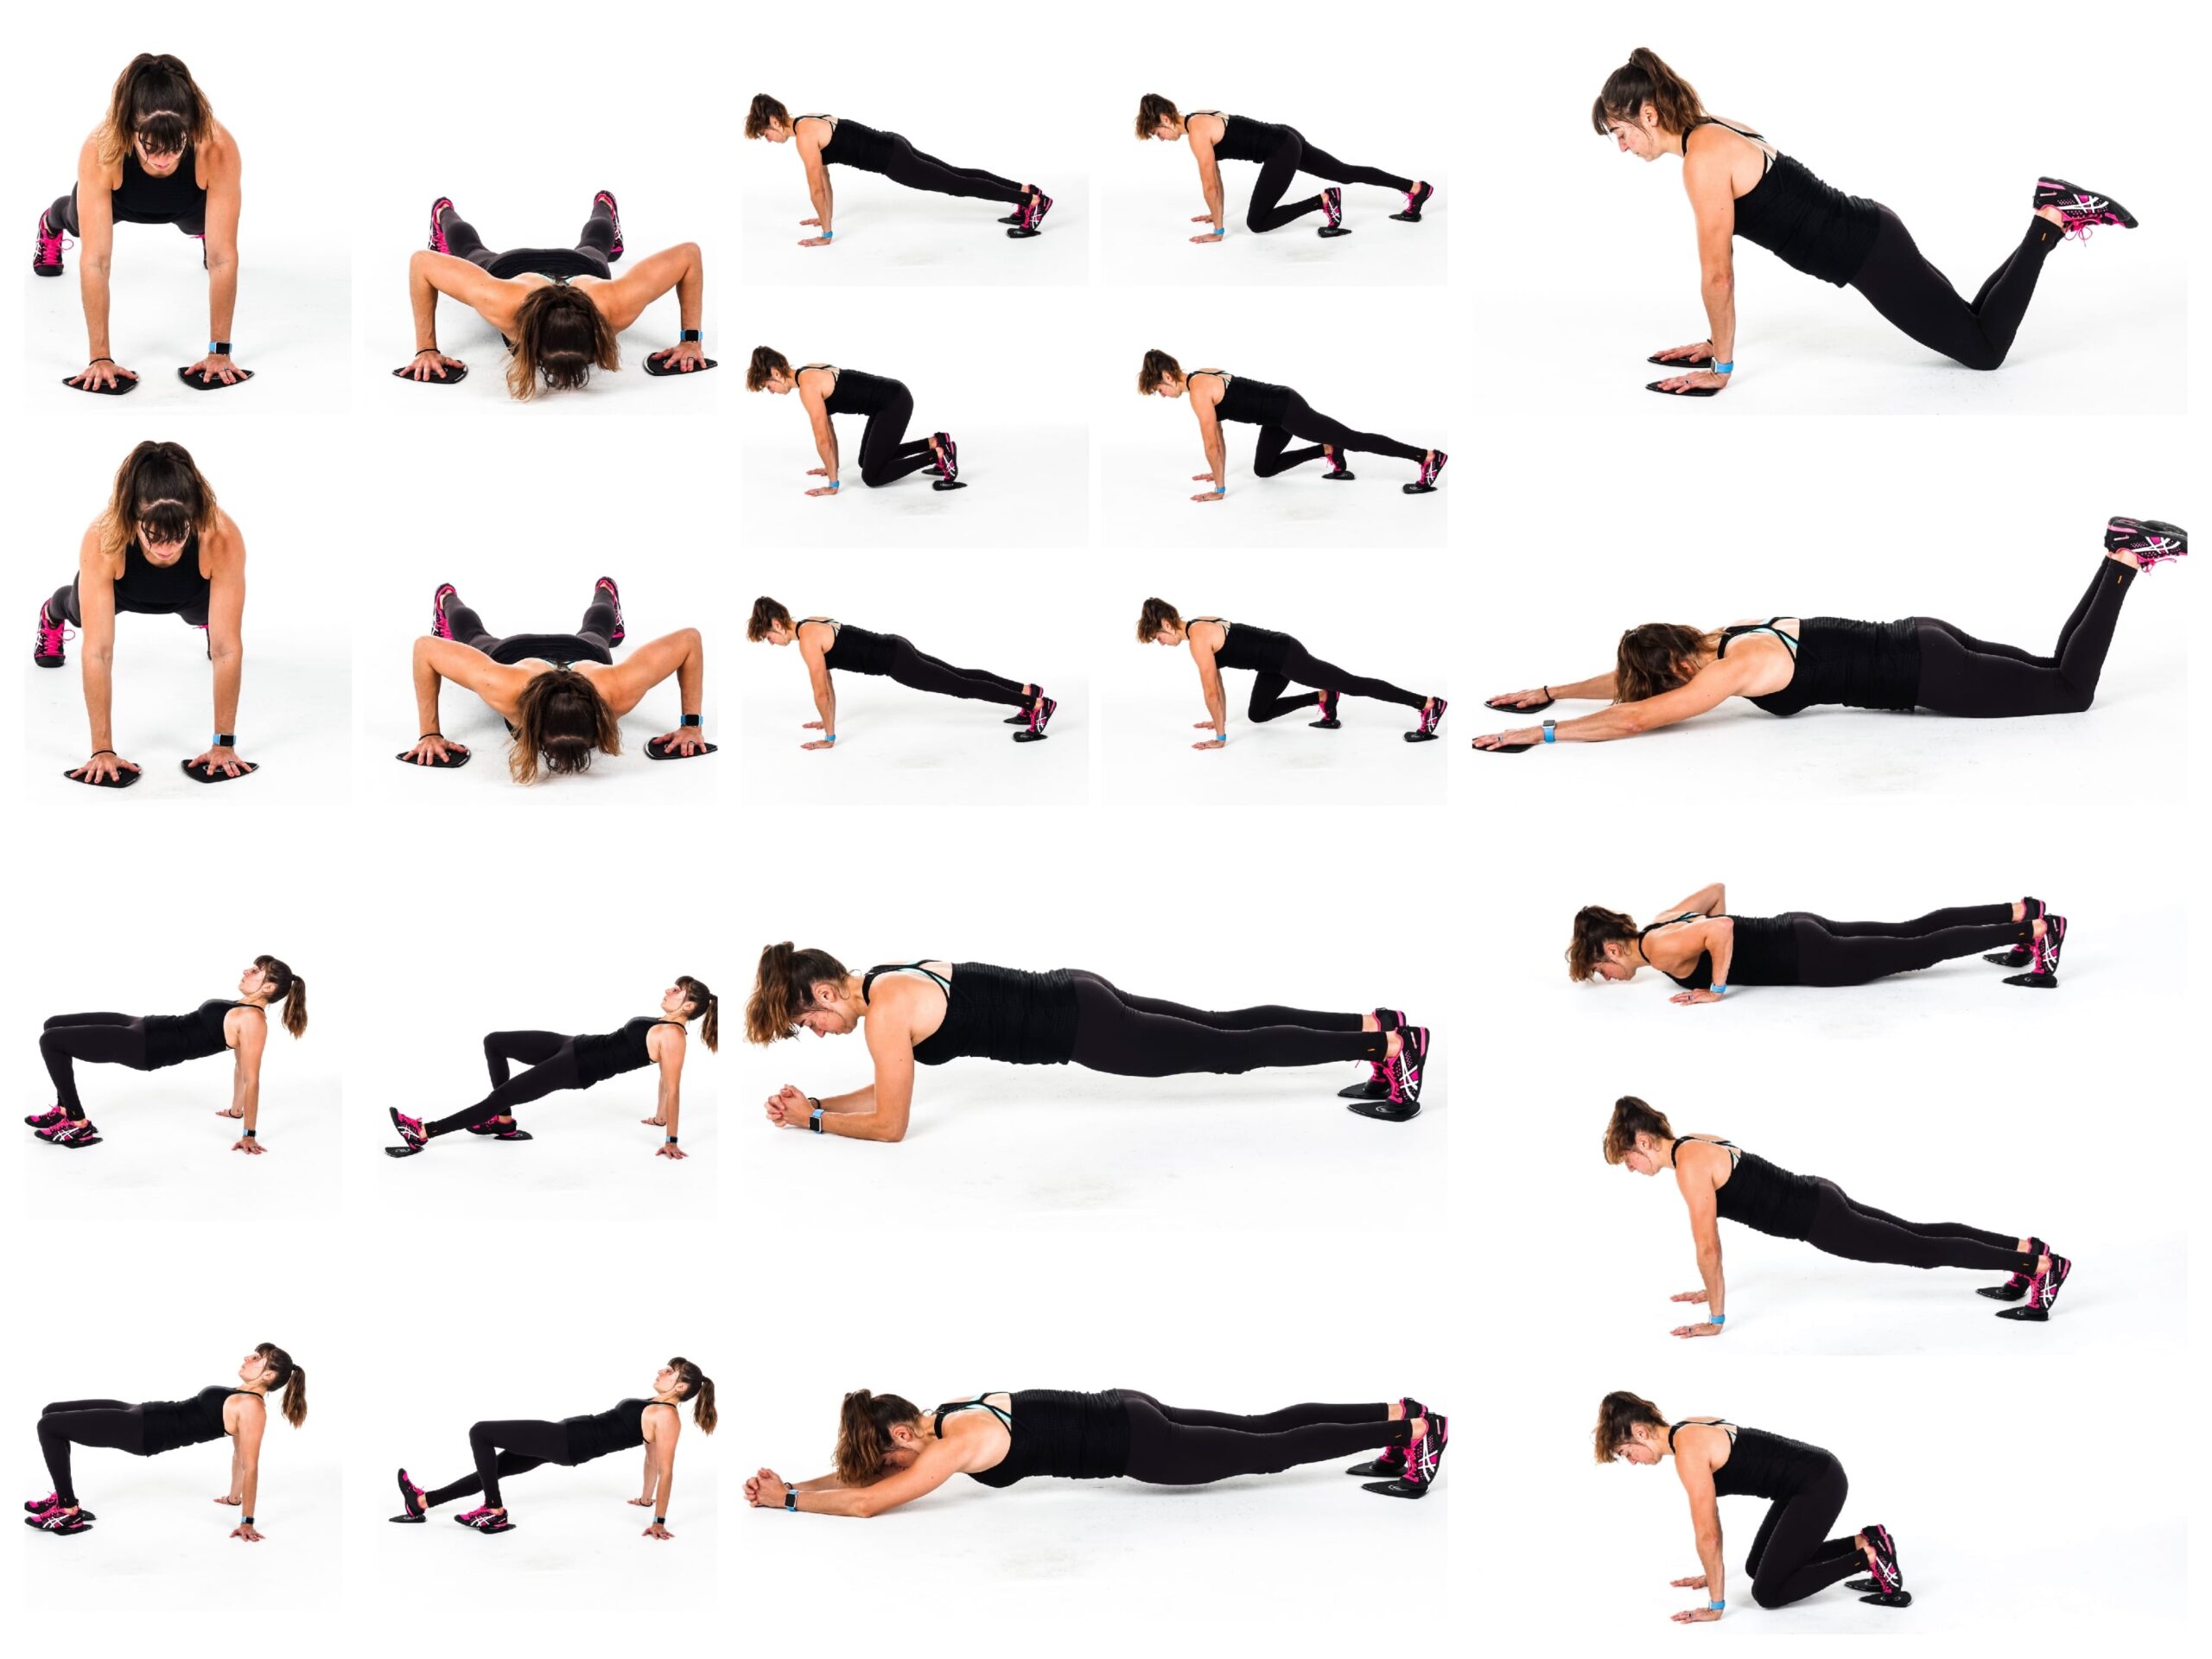
Knee Tuck Push Ups:
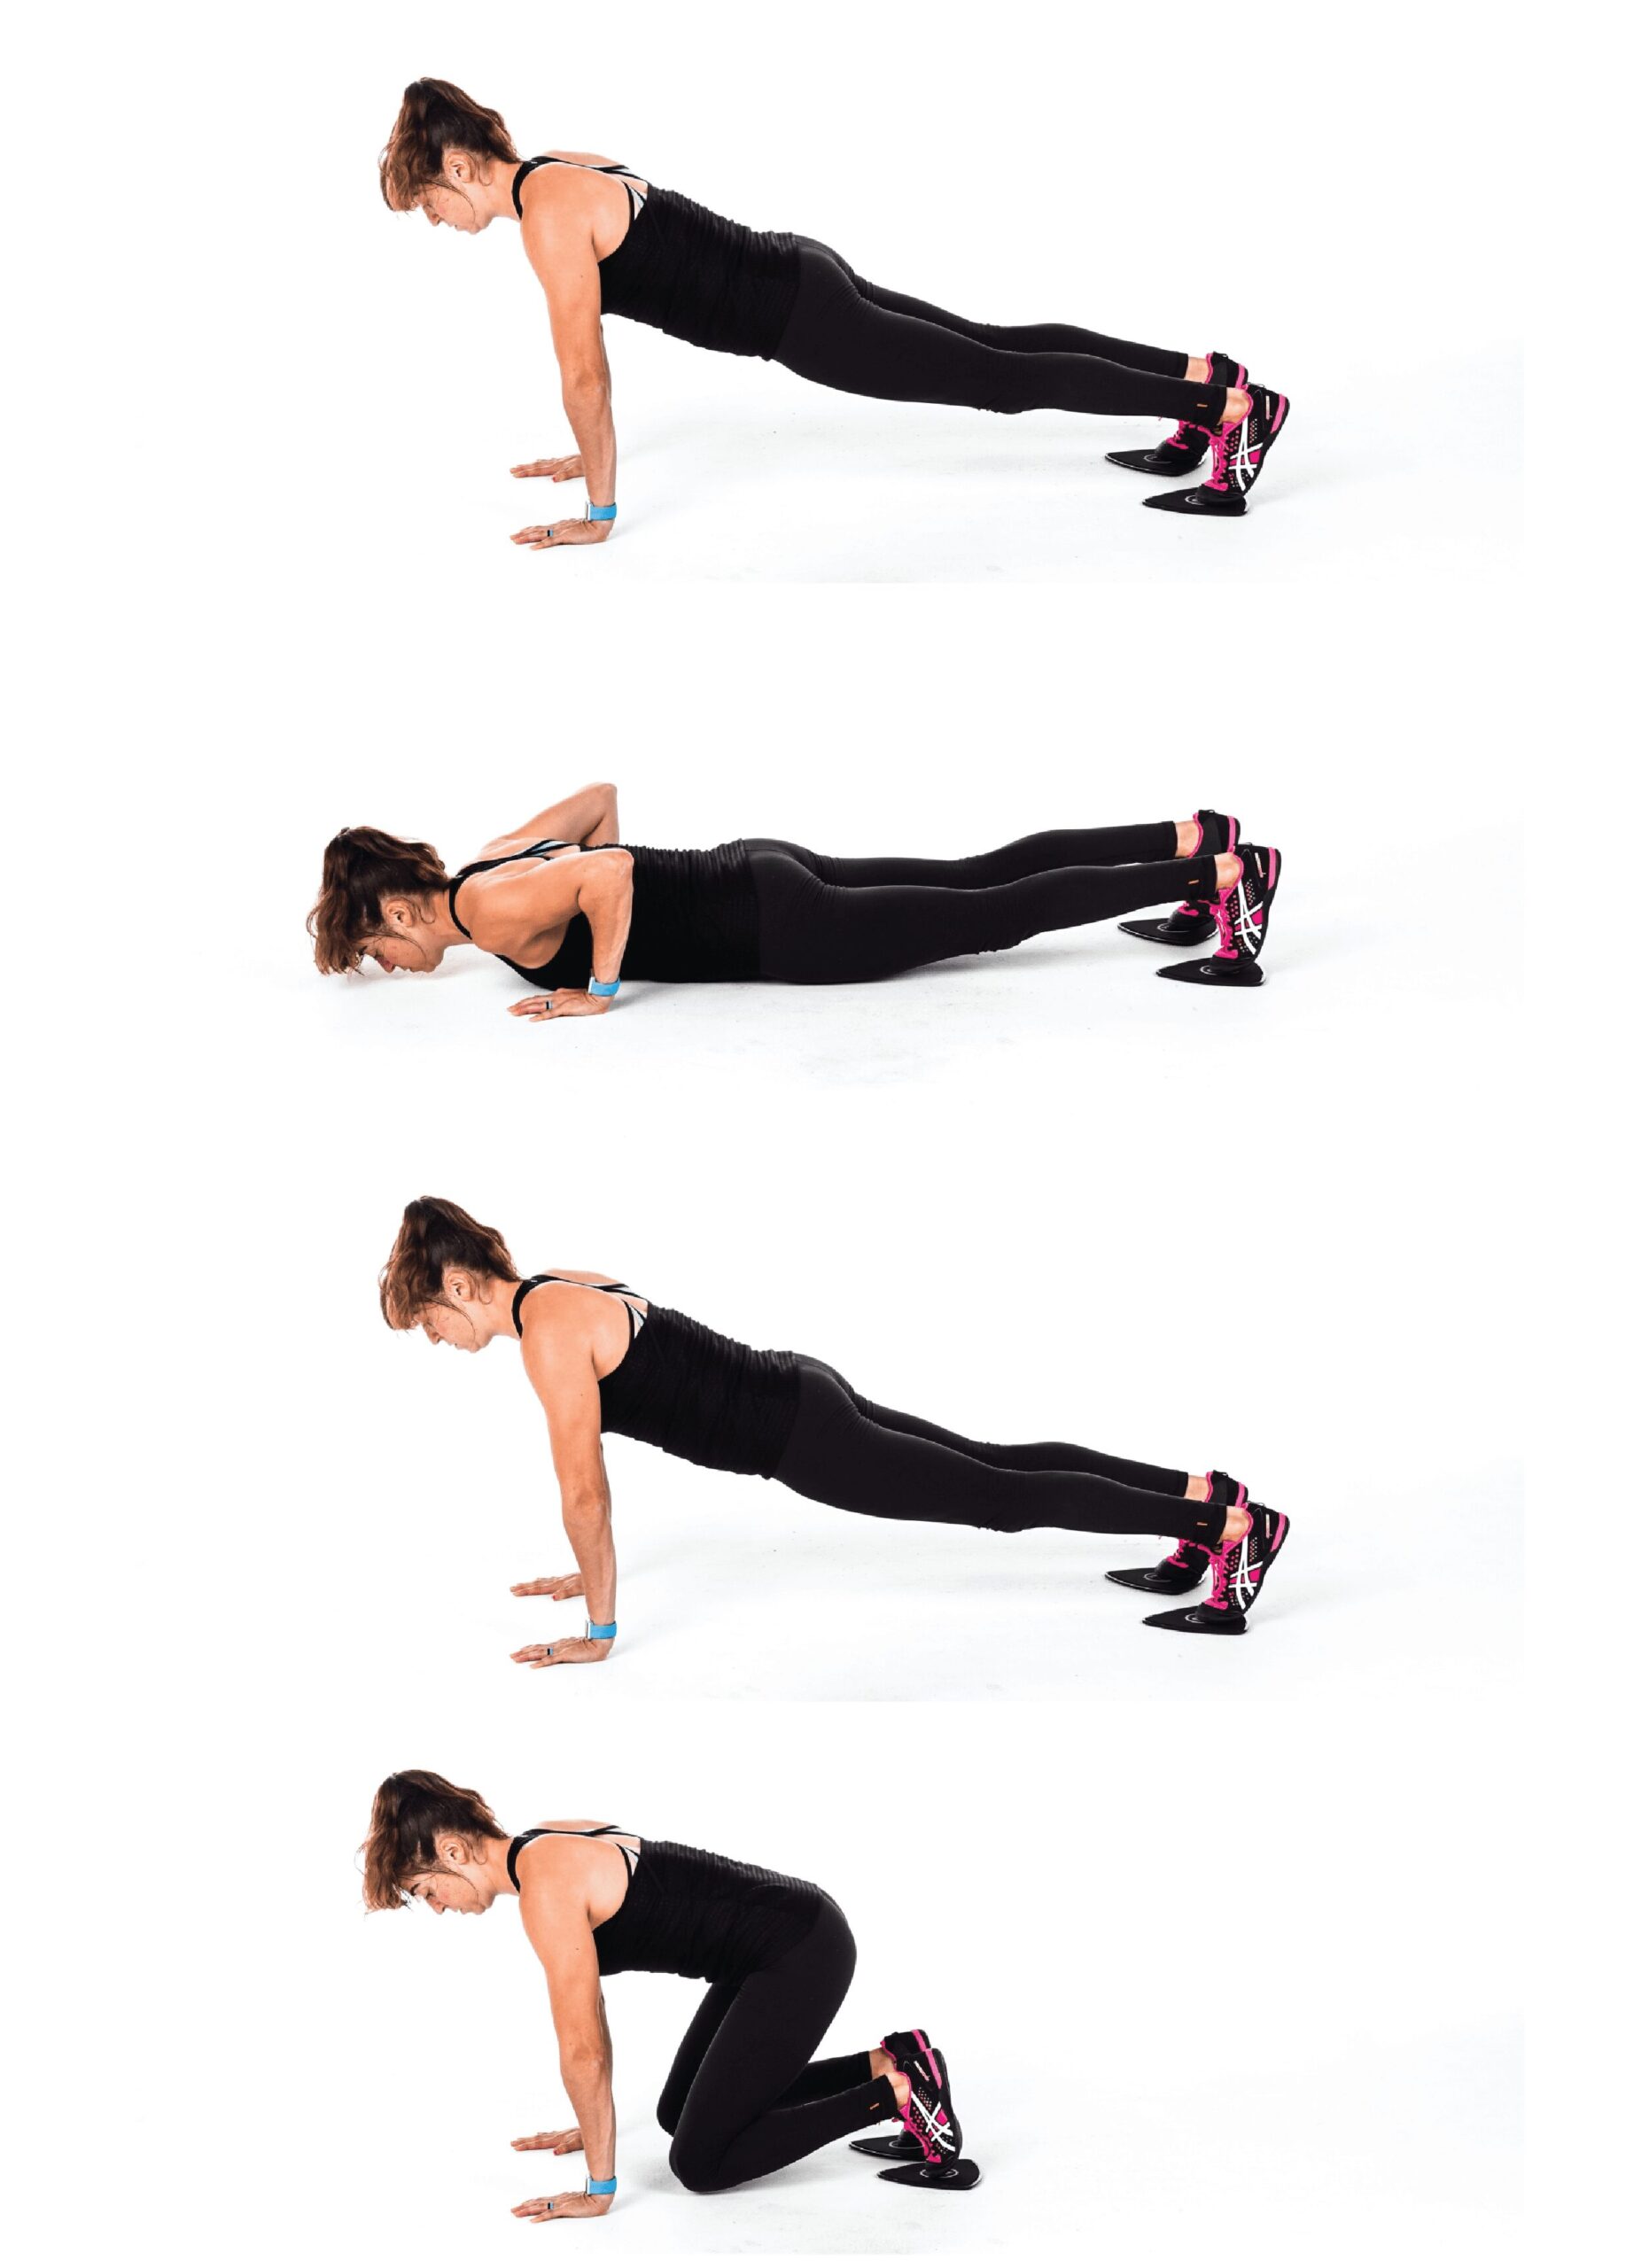
To do Knee Tuck Push Ups, place your feet on sliders and set up in a plank position with your hands under your shoulders.
Then perform a push up, keeping your body in a nice straight line as you drop your chest to the ground. Press back up with your body moving as one unit. Your arms should made an arrow shape with your body. Do not shrug or let your arms form a T.
In the high plank position, tuck your knees in. Do not let your butt go way up in the air as you tuck or use the tuck as a chance to rest. Pull your knees in using your abs and then straighten your legs right back out and repeat the push up.
As you return to the plank position, do not sag your hips or let your butt go up in the air. Also, make sure your hands stay outside your chest and don’t creep forward past your shoulders.
Beginners can do this off an incline and do a single knee tuck at a time without the sliders or they can do a push up from their knees then move to the high plank position to perform the tuck.
Alternating Slider Tabletop Curls:
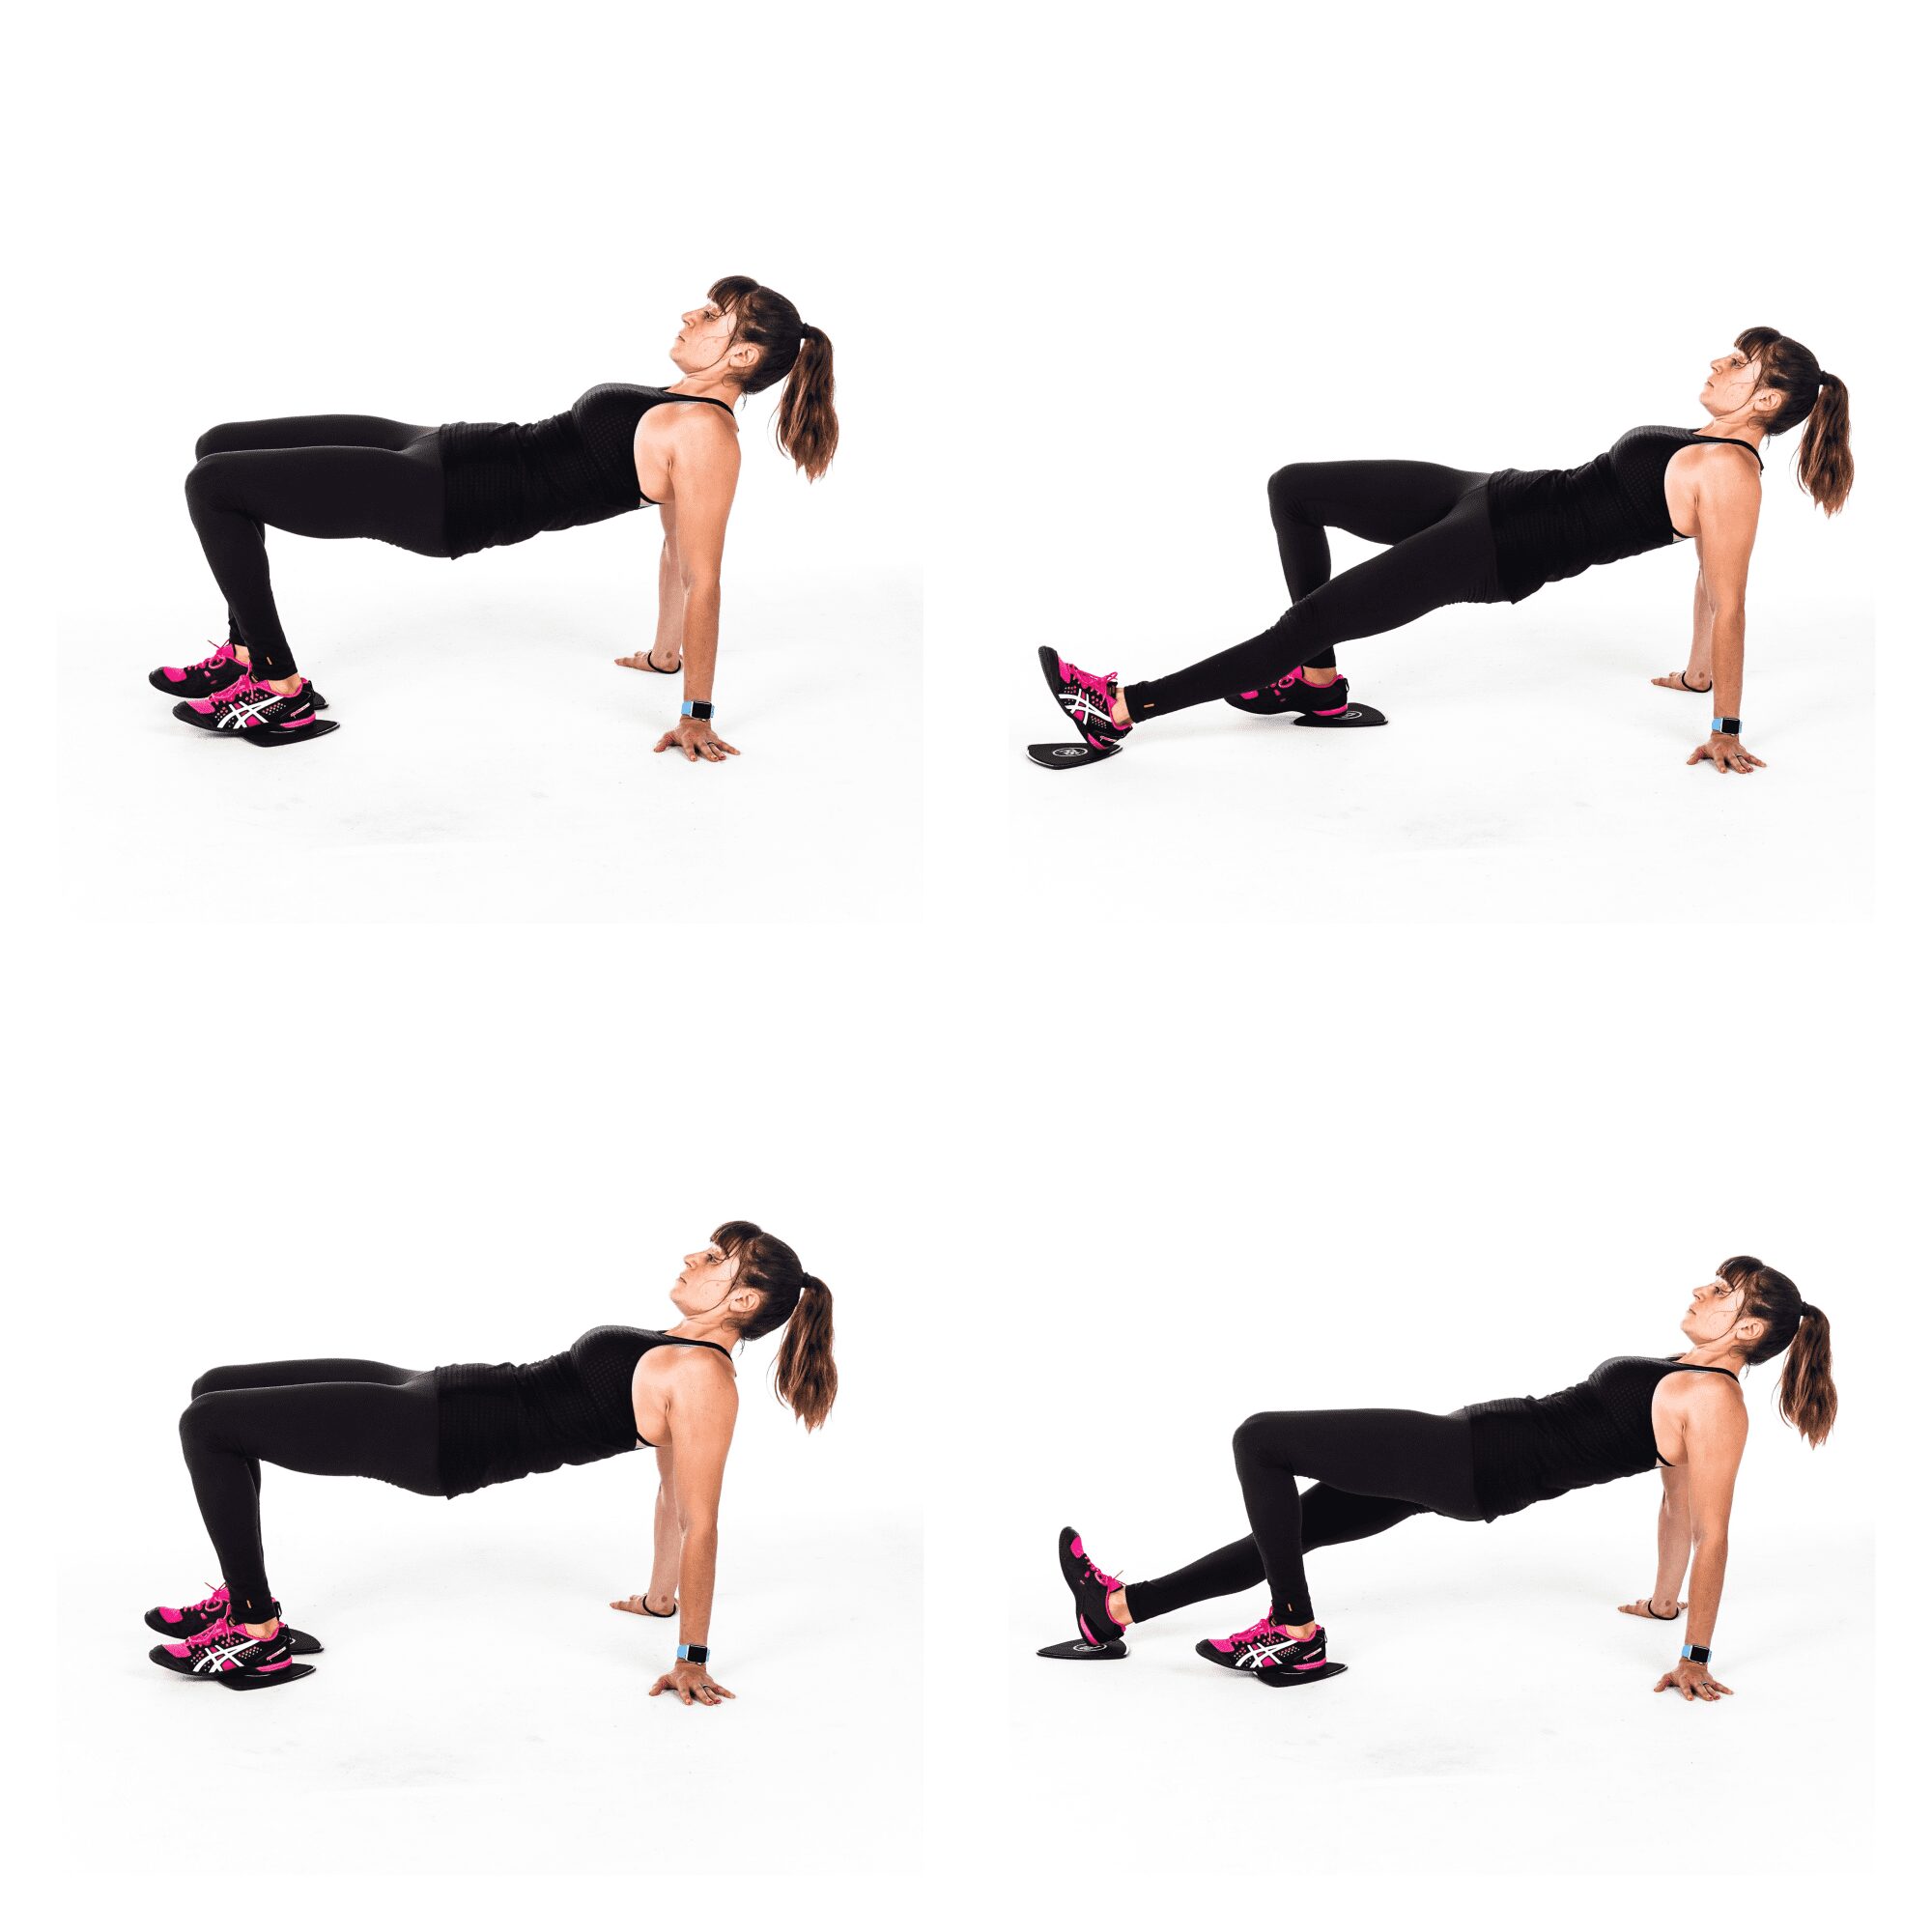
To do Alternating Slider Tabletop Curls, place a slider under each foot and sit on the ground with your heels on the sliders and hands behind you on the ground. Turn your hands out or back as you place your hands on the ground behind your butt.
Bend your knees and bring your heels back close to you so you can bridge up into a tabletop bridge. Squeeze your glutes as you lift your butt up and press your chest out.
You can perform a posterior pelvic tilt to help engage your abs as you hold this tabletop position and even slightly tuck your chin to look out beyond your knees.
The slowly extend one leg out before using your hamstring to pull your heel on the slider back in. Then extend the other leg out, pulling the heel back in again with your hamstring.
As you pull the slider back in, really even think about driving the slider down into the ground to help work your hamstring more.
Do not let your hips drop toward the ground as you extend. You want to keep your abs and butt engaged the entire time as you slowly alternate sides.
Slider Ab Extensions:
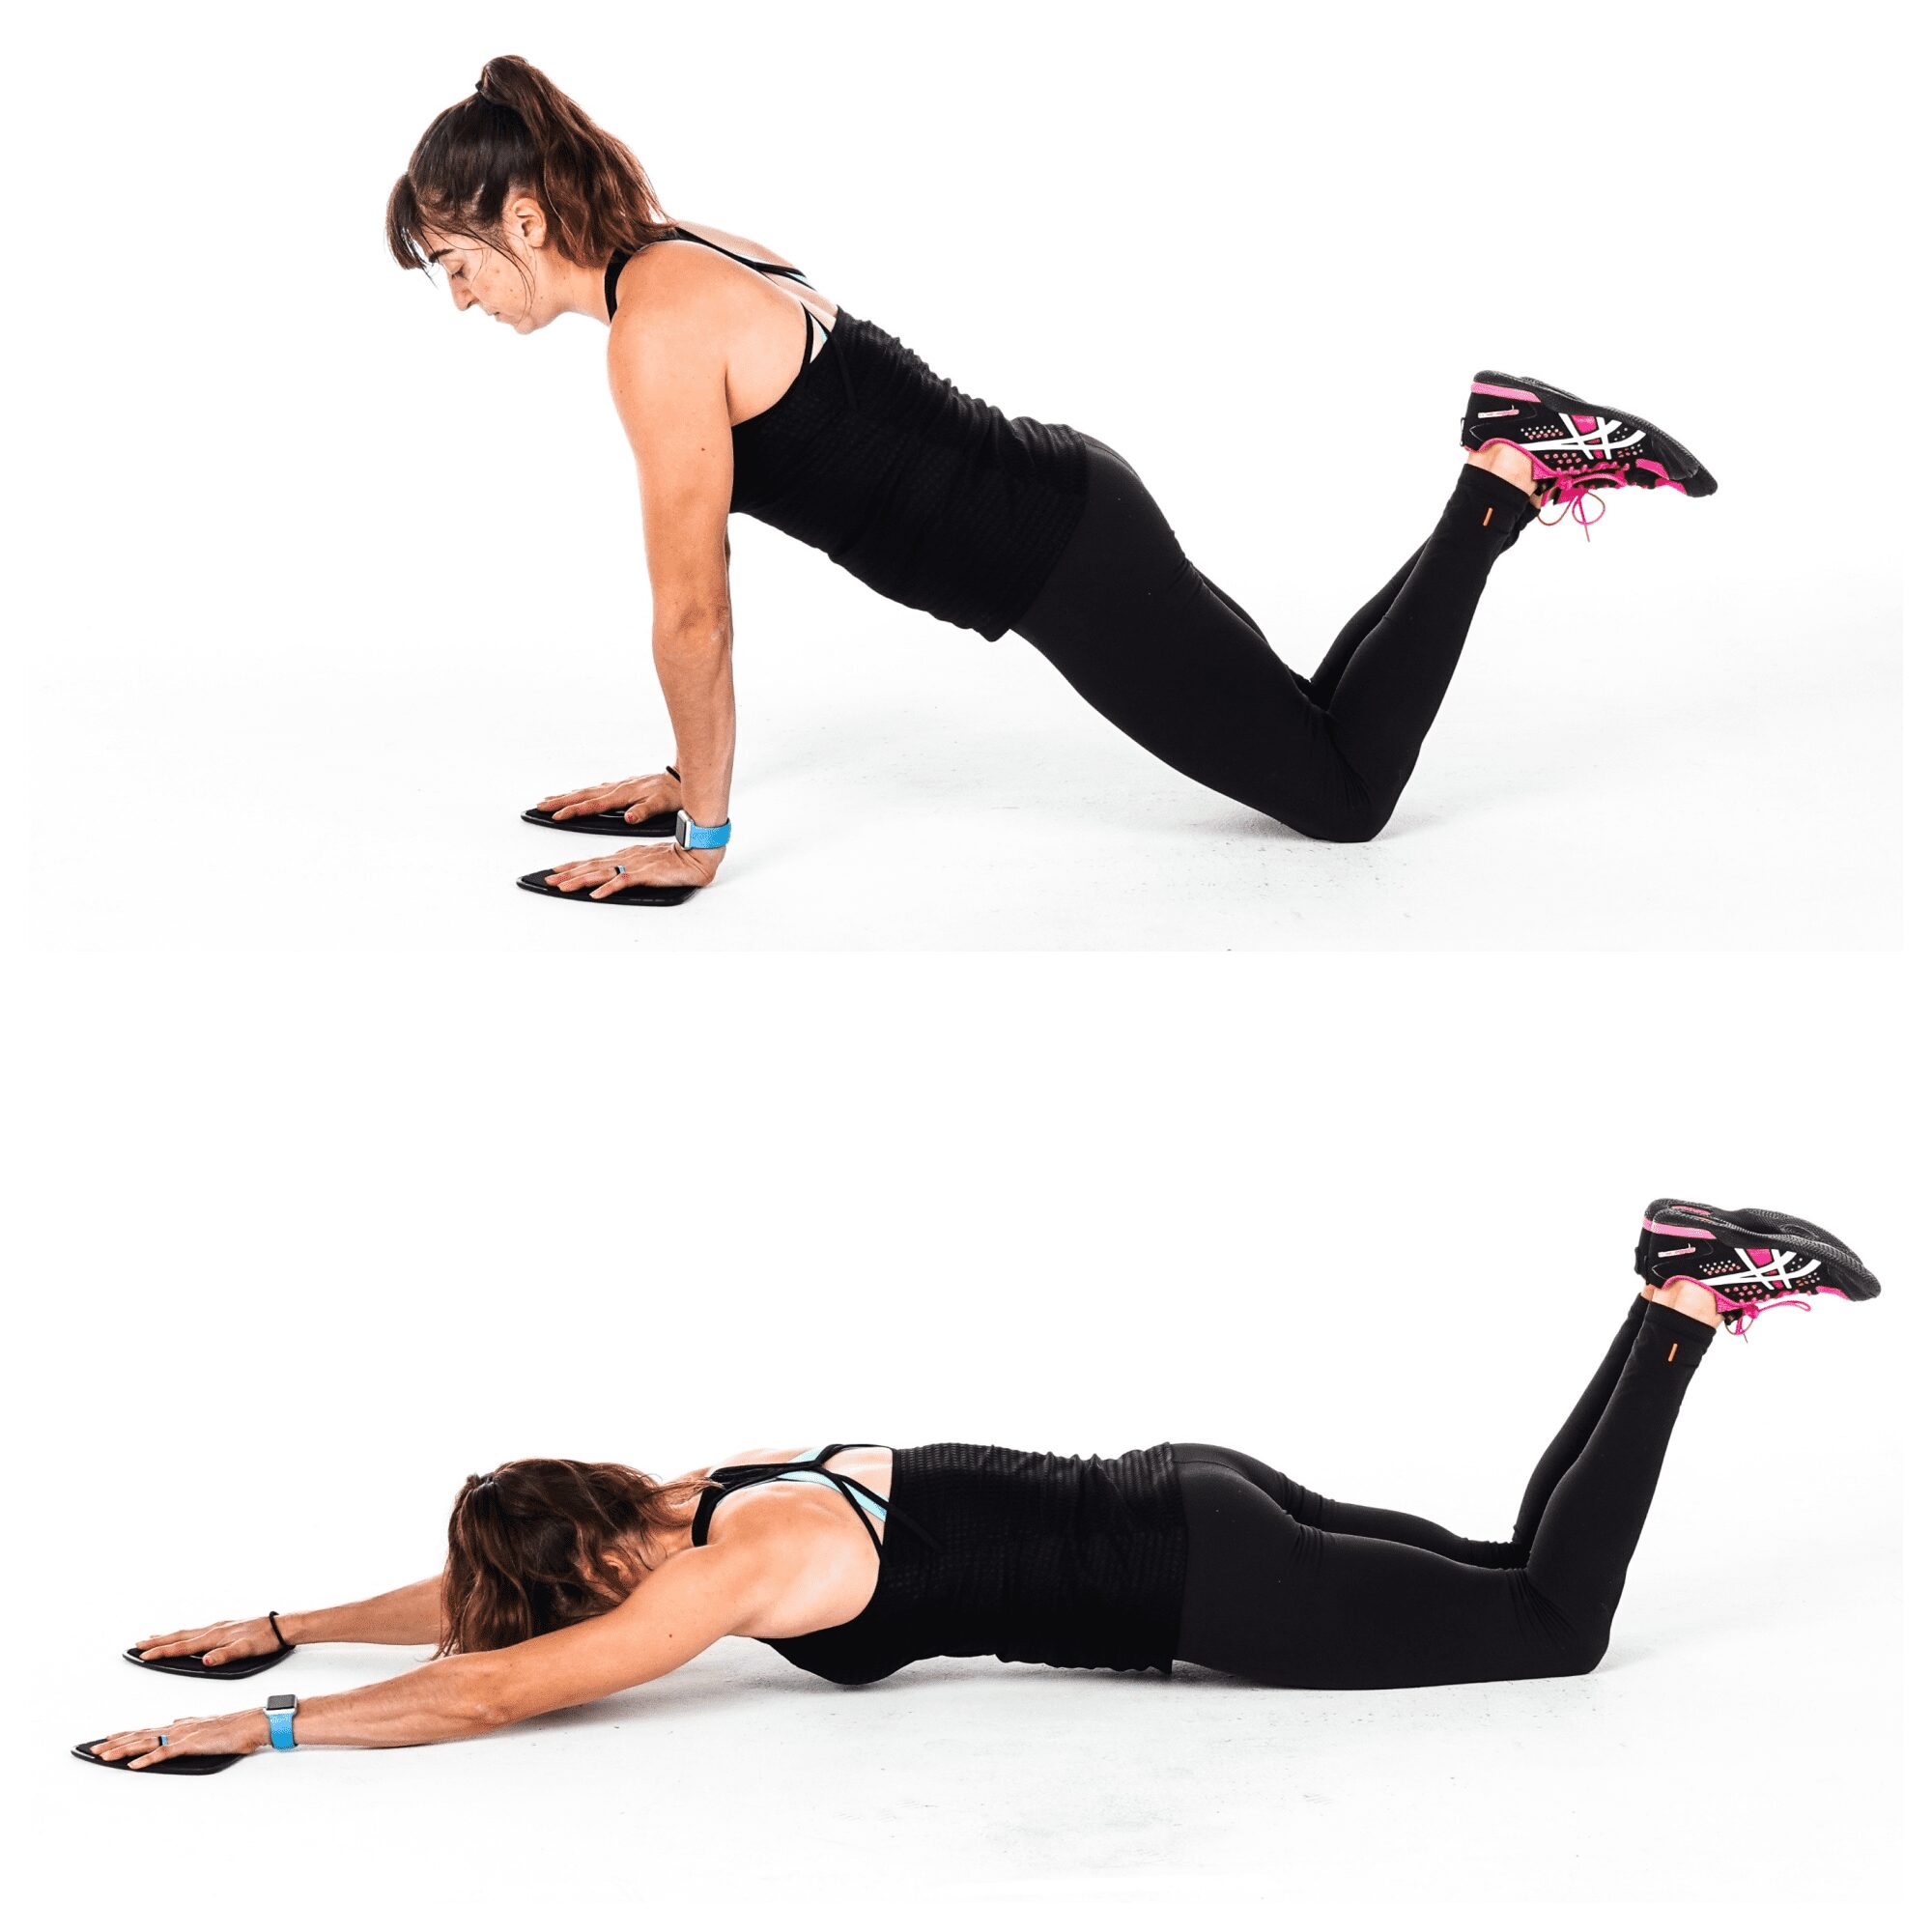
To do Slider Ab Extensions, place a slider under each hand and set up as if you’re doing a push up from your knees.
You want to have your hands under your shoulders and your body in a nice straight line from your head to your knees. Brace your abs and squeeze your glutes.
Slide both hands out as far as you can, lowering your body toward the ground. Extend out, if you can, until you’re hovering just above the ground.
Then pull the sliders back under your shoulders without bending your arms as your body moves back into the plank position. By sliding your hands back under, pulling with your back to bring your hands back in, your body will move back into the plank position.
Do not sit your butt back or let your lower back engage as you extend out or pull your hands back in. You want to brace your abs and keep your body in a nice straight line the entire time.
Once back in that knee plank position, repeat the slide back out. Do not let your hips sag, lower back arch or butt go up in the air. Also, make sure you don’t sit your butt back to help pull your arms back in. You only “rise up” because your hands come back under your shoulders.
Beginners may not slide out as far or they may extend one hand, then the other, then pull one in at a time.
Banana Hold:
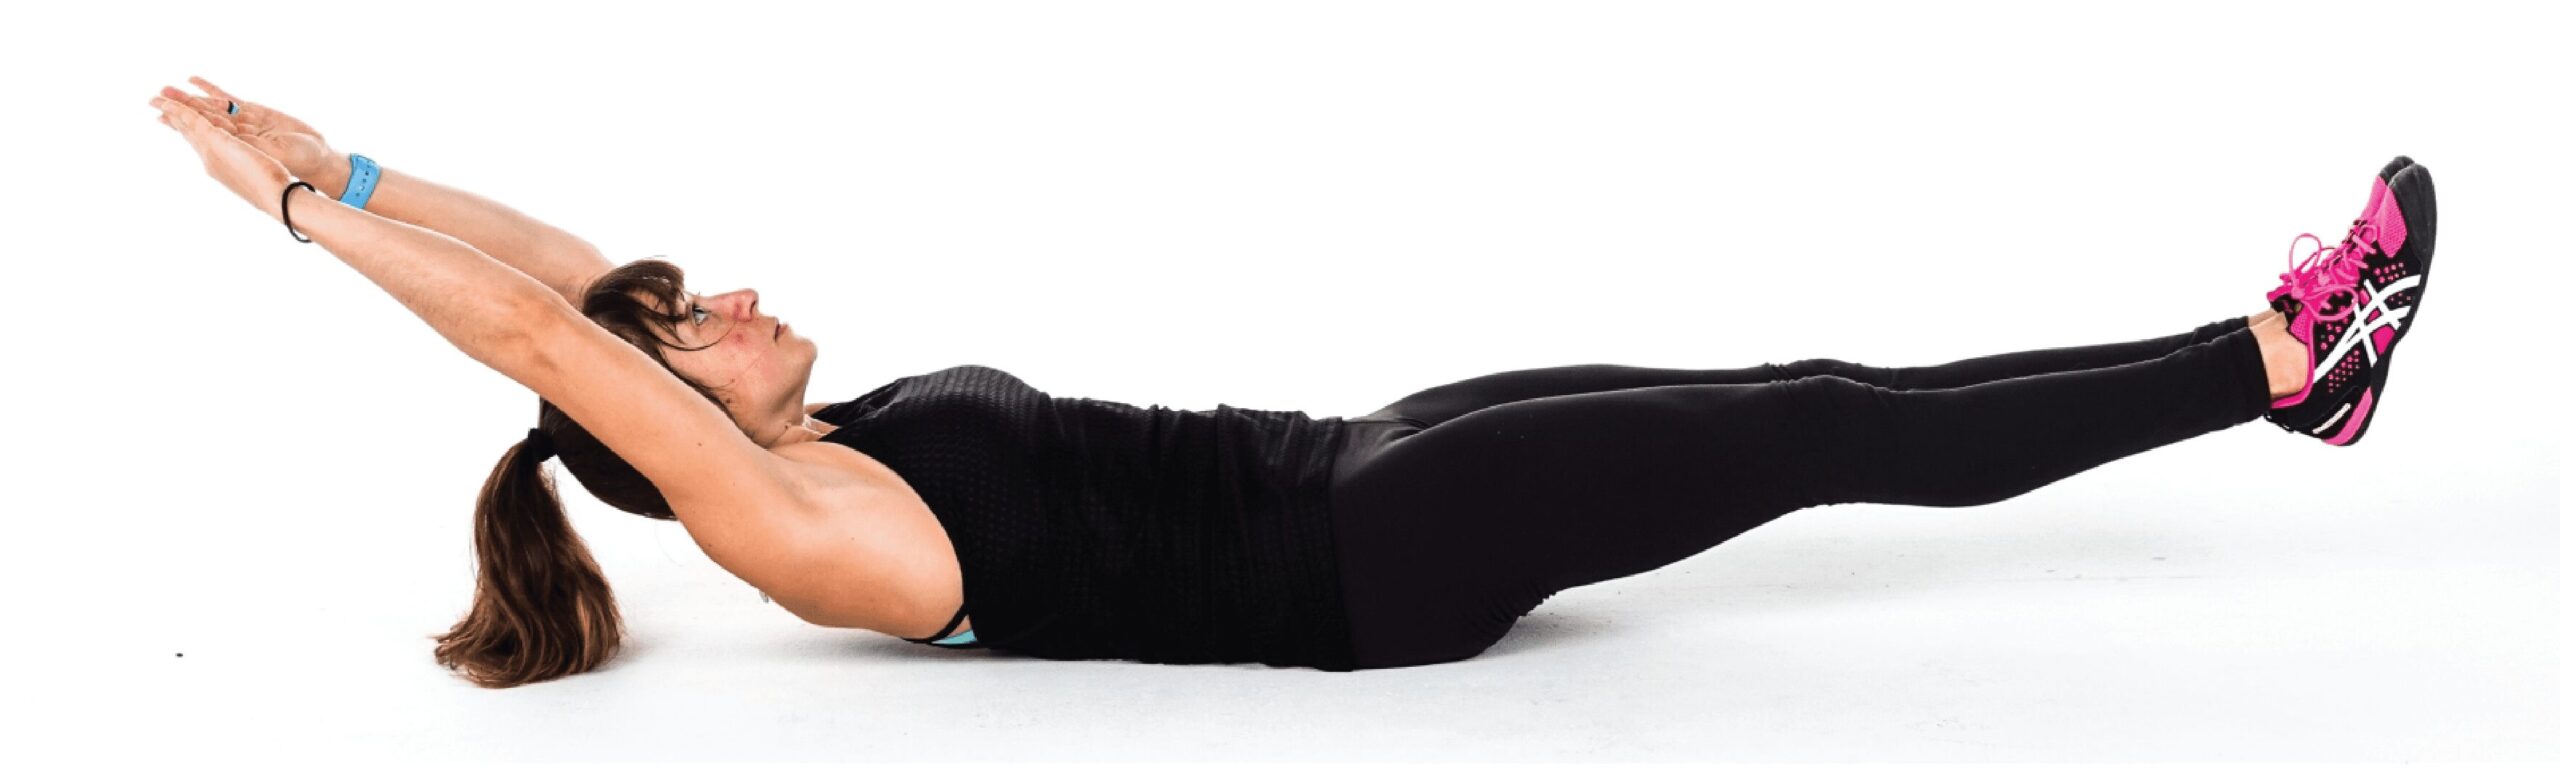
To do the Banana hold, start by lying on your back with your legs out straight and your arms reaching overhead on the ground. Your legs should be together and your arms should be right by your head.
Press your low back into the ground and draw your belly button in toward your spine as you lift your legs and arms up off the ground. Your neck and head should be in a neutral position between your arms and your legs should be together and out straight a few inches off the ground.
Hold here, squeezing your legs together as you try to get your shoulder blades up off the ground while keeping your low back against the ground and abs engaged.
Beginners may find they need to lift their legs up higher toward the ceiling or bend their knees to keep their low back against the ground and their abs engaged. Beginners can also try an easier variation of the Pelvic Tilt if they feel their low back taking over.
Fly Push Ups:

To do the Fly to Push Up, set up in a push up position with a towel or slider under each hand. You can do the Fly to Push Up from your knees (beginner) or toes (advanced).
Beginners may also want to start with one hand on a slider and the other hand on the ground (black frame). They will then slide the hand on the slider out to the side and perform a push up. As they push up, they will slide the hand back in toward their hand on the ground. They will complete all reps on one side before switching.
If the single slider Fly to Push Up is too much, this move can be done by just stepping the hand out to the side on the ground or even on an incline. To advance the Fly to Push Up, you will use two sliders. Start at the top of a push up and then slide one hand out to the side and perform a push up. After the push up, slide the hand back into the starting position. Even though this is a wider push up, don’t let your elbows flare way out by your ears. Then slide the other hand out on the slider and perform a push up. Keep alternating sides until all reps are complete.
If you want to do the Full Fly to Push Up, you will have a slider on each hand. You will then slide both hands out to the side as you lower into the push up and then pull them back in as you come back up out of the push up. You will perform the fly as you perform the push up instead of sliding out, doing a push up and sliding back in.
Slider Plank to Bulldog:
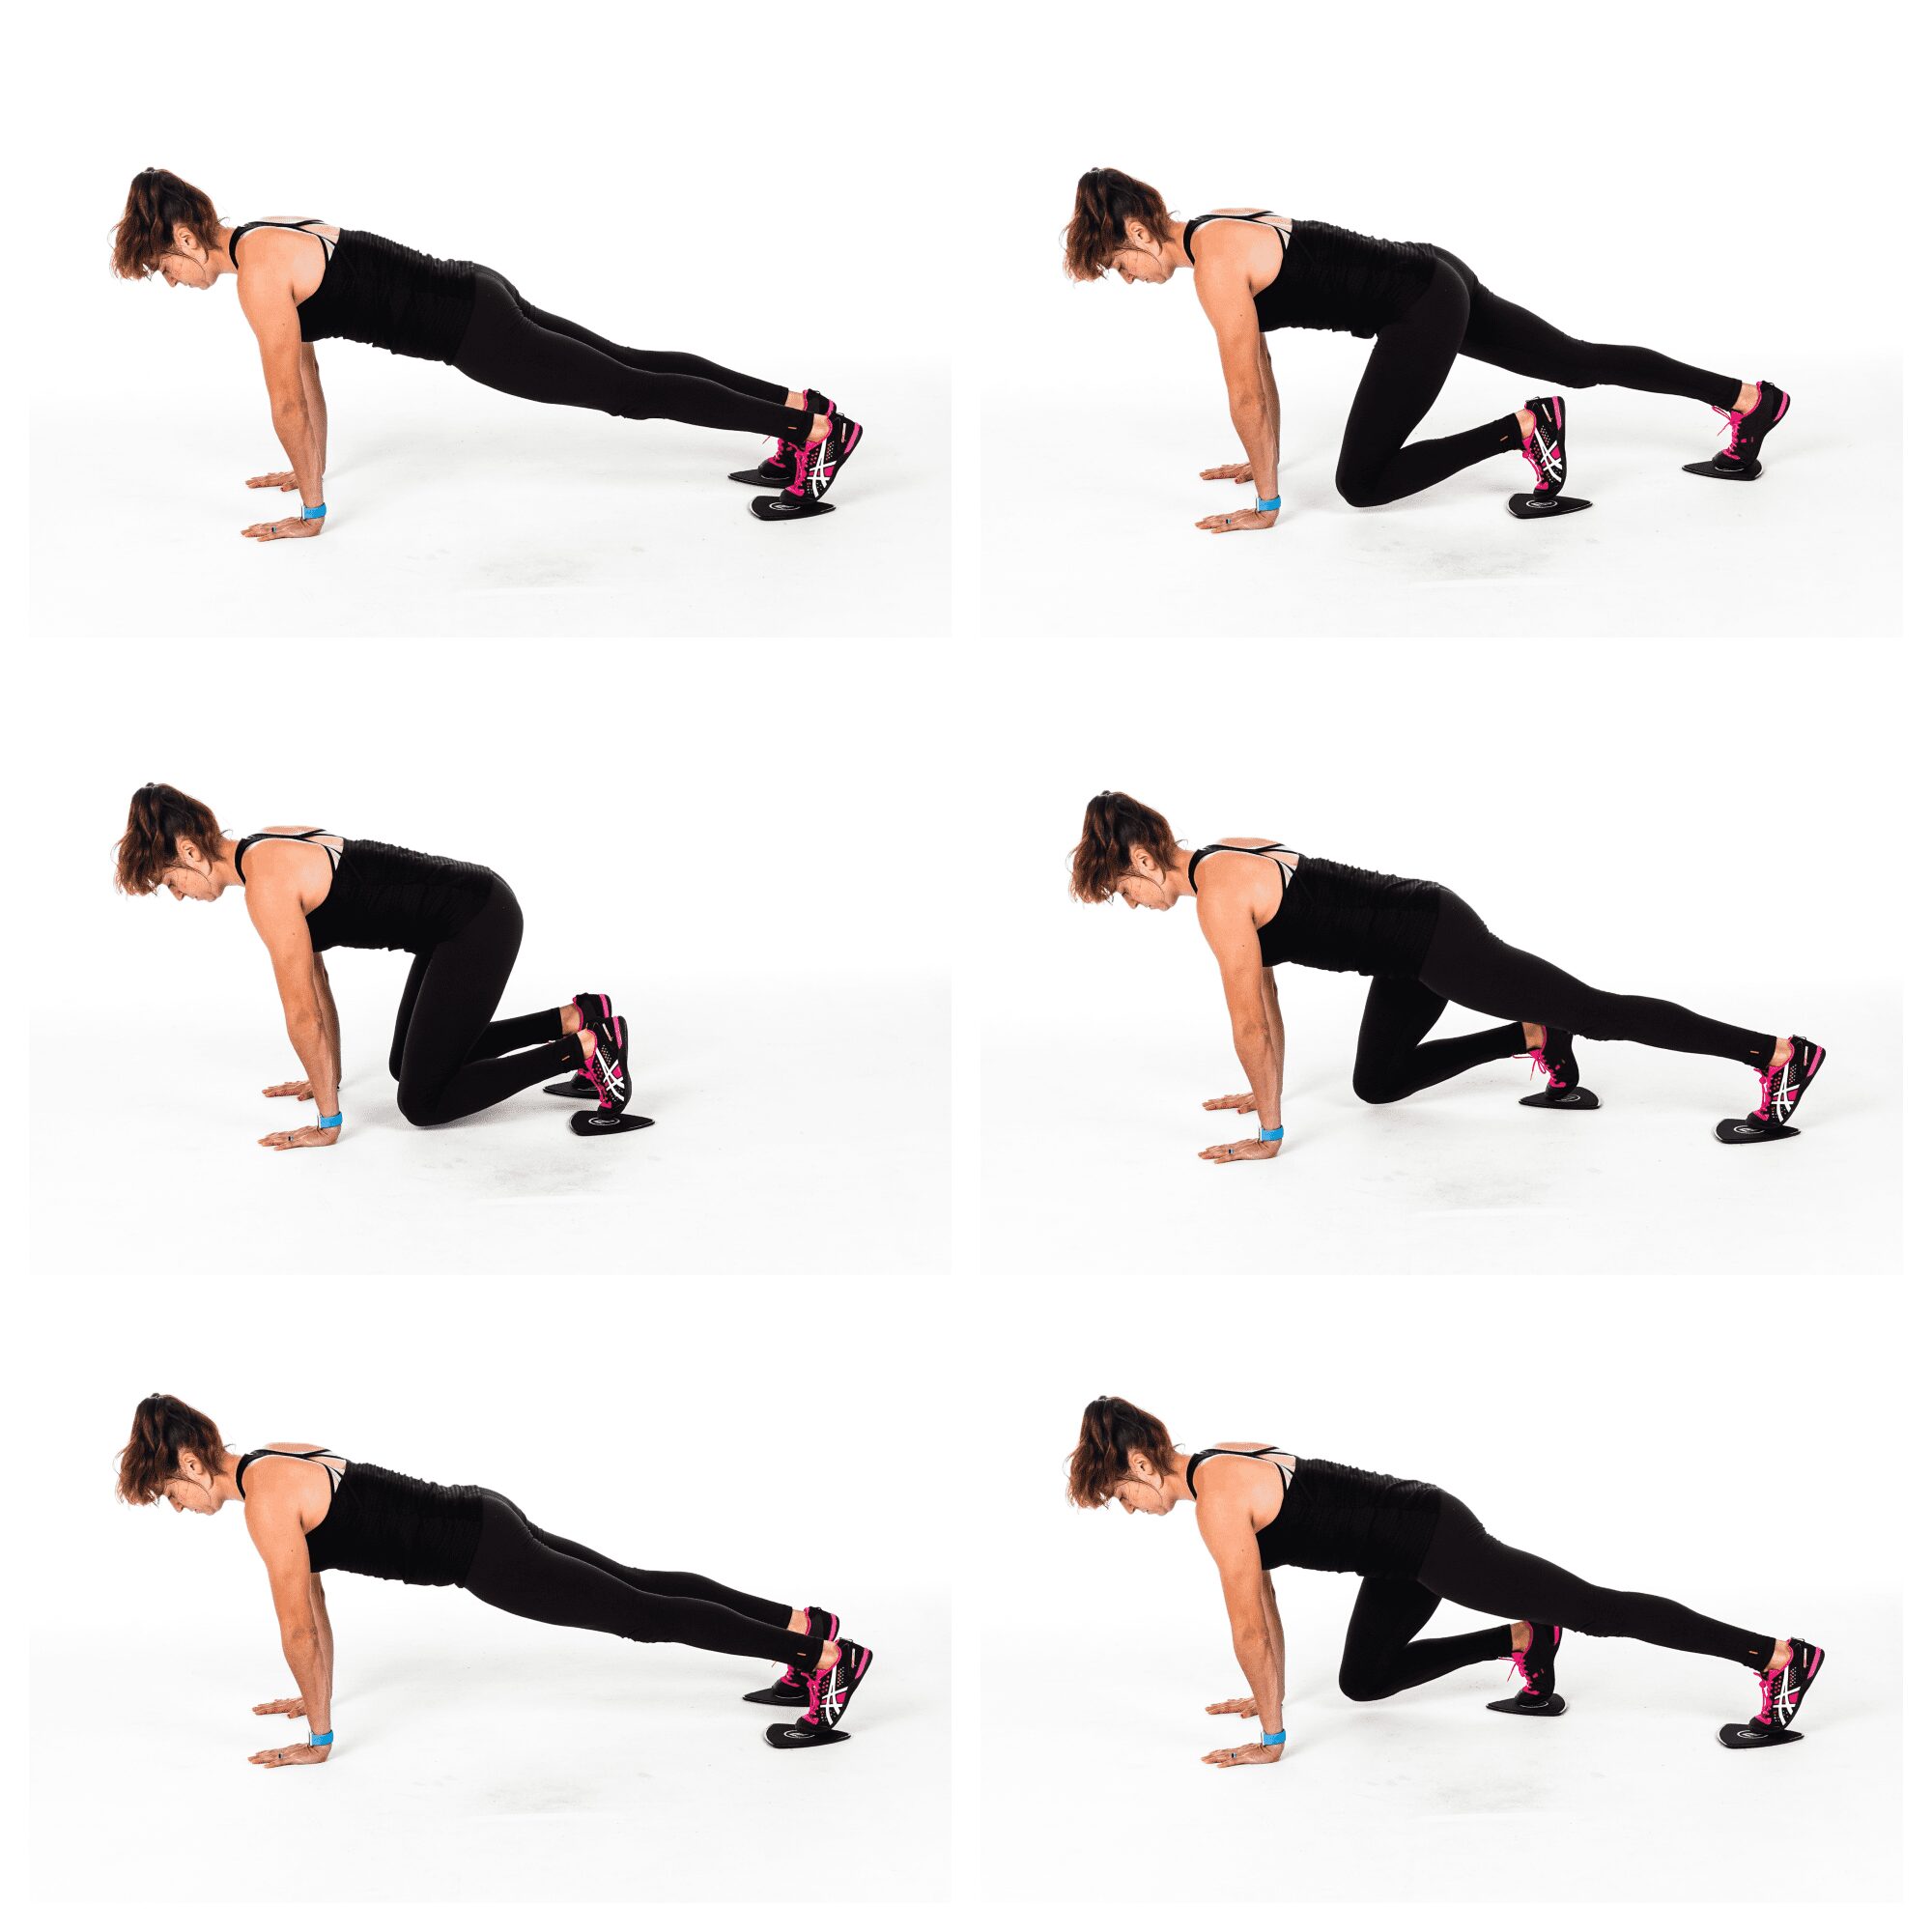
To do the Slider Plank to Bulldog, place a slider under each foot and set up in a high plank position with your hands under your shoulders and your body in a nice straight line down to your feet. Your feet should be no wider than hip-width apart.
Holding this plank position, use your abs to tuck one knee in and then the other to come into a bulldog position.
Your knees should be about under your hips or in slightly closer in, but do not tuck them so far in you can sit back on your heels. Really focus on using your abs to slide them in, bracing your core to keep your body in a nice straight line the entire time.
Then extend your legs back out, one at a time. Make sure your butt stays down and you don’t slide back too far, but instead keep your hands under your shoulders. Then repeat, drawing one knee in then the other.
Body Saw:
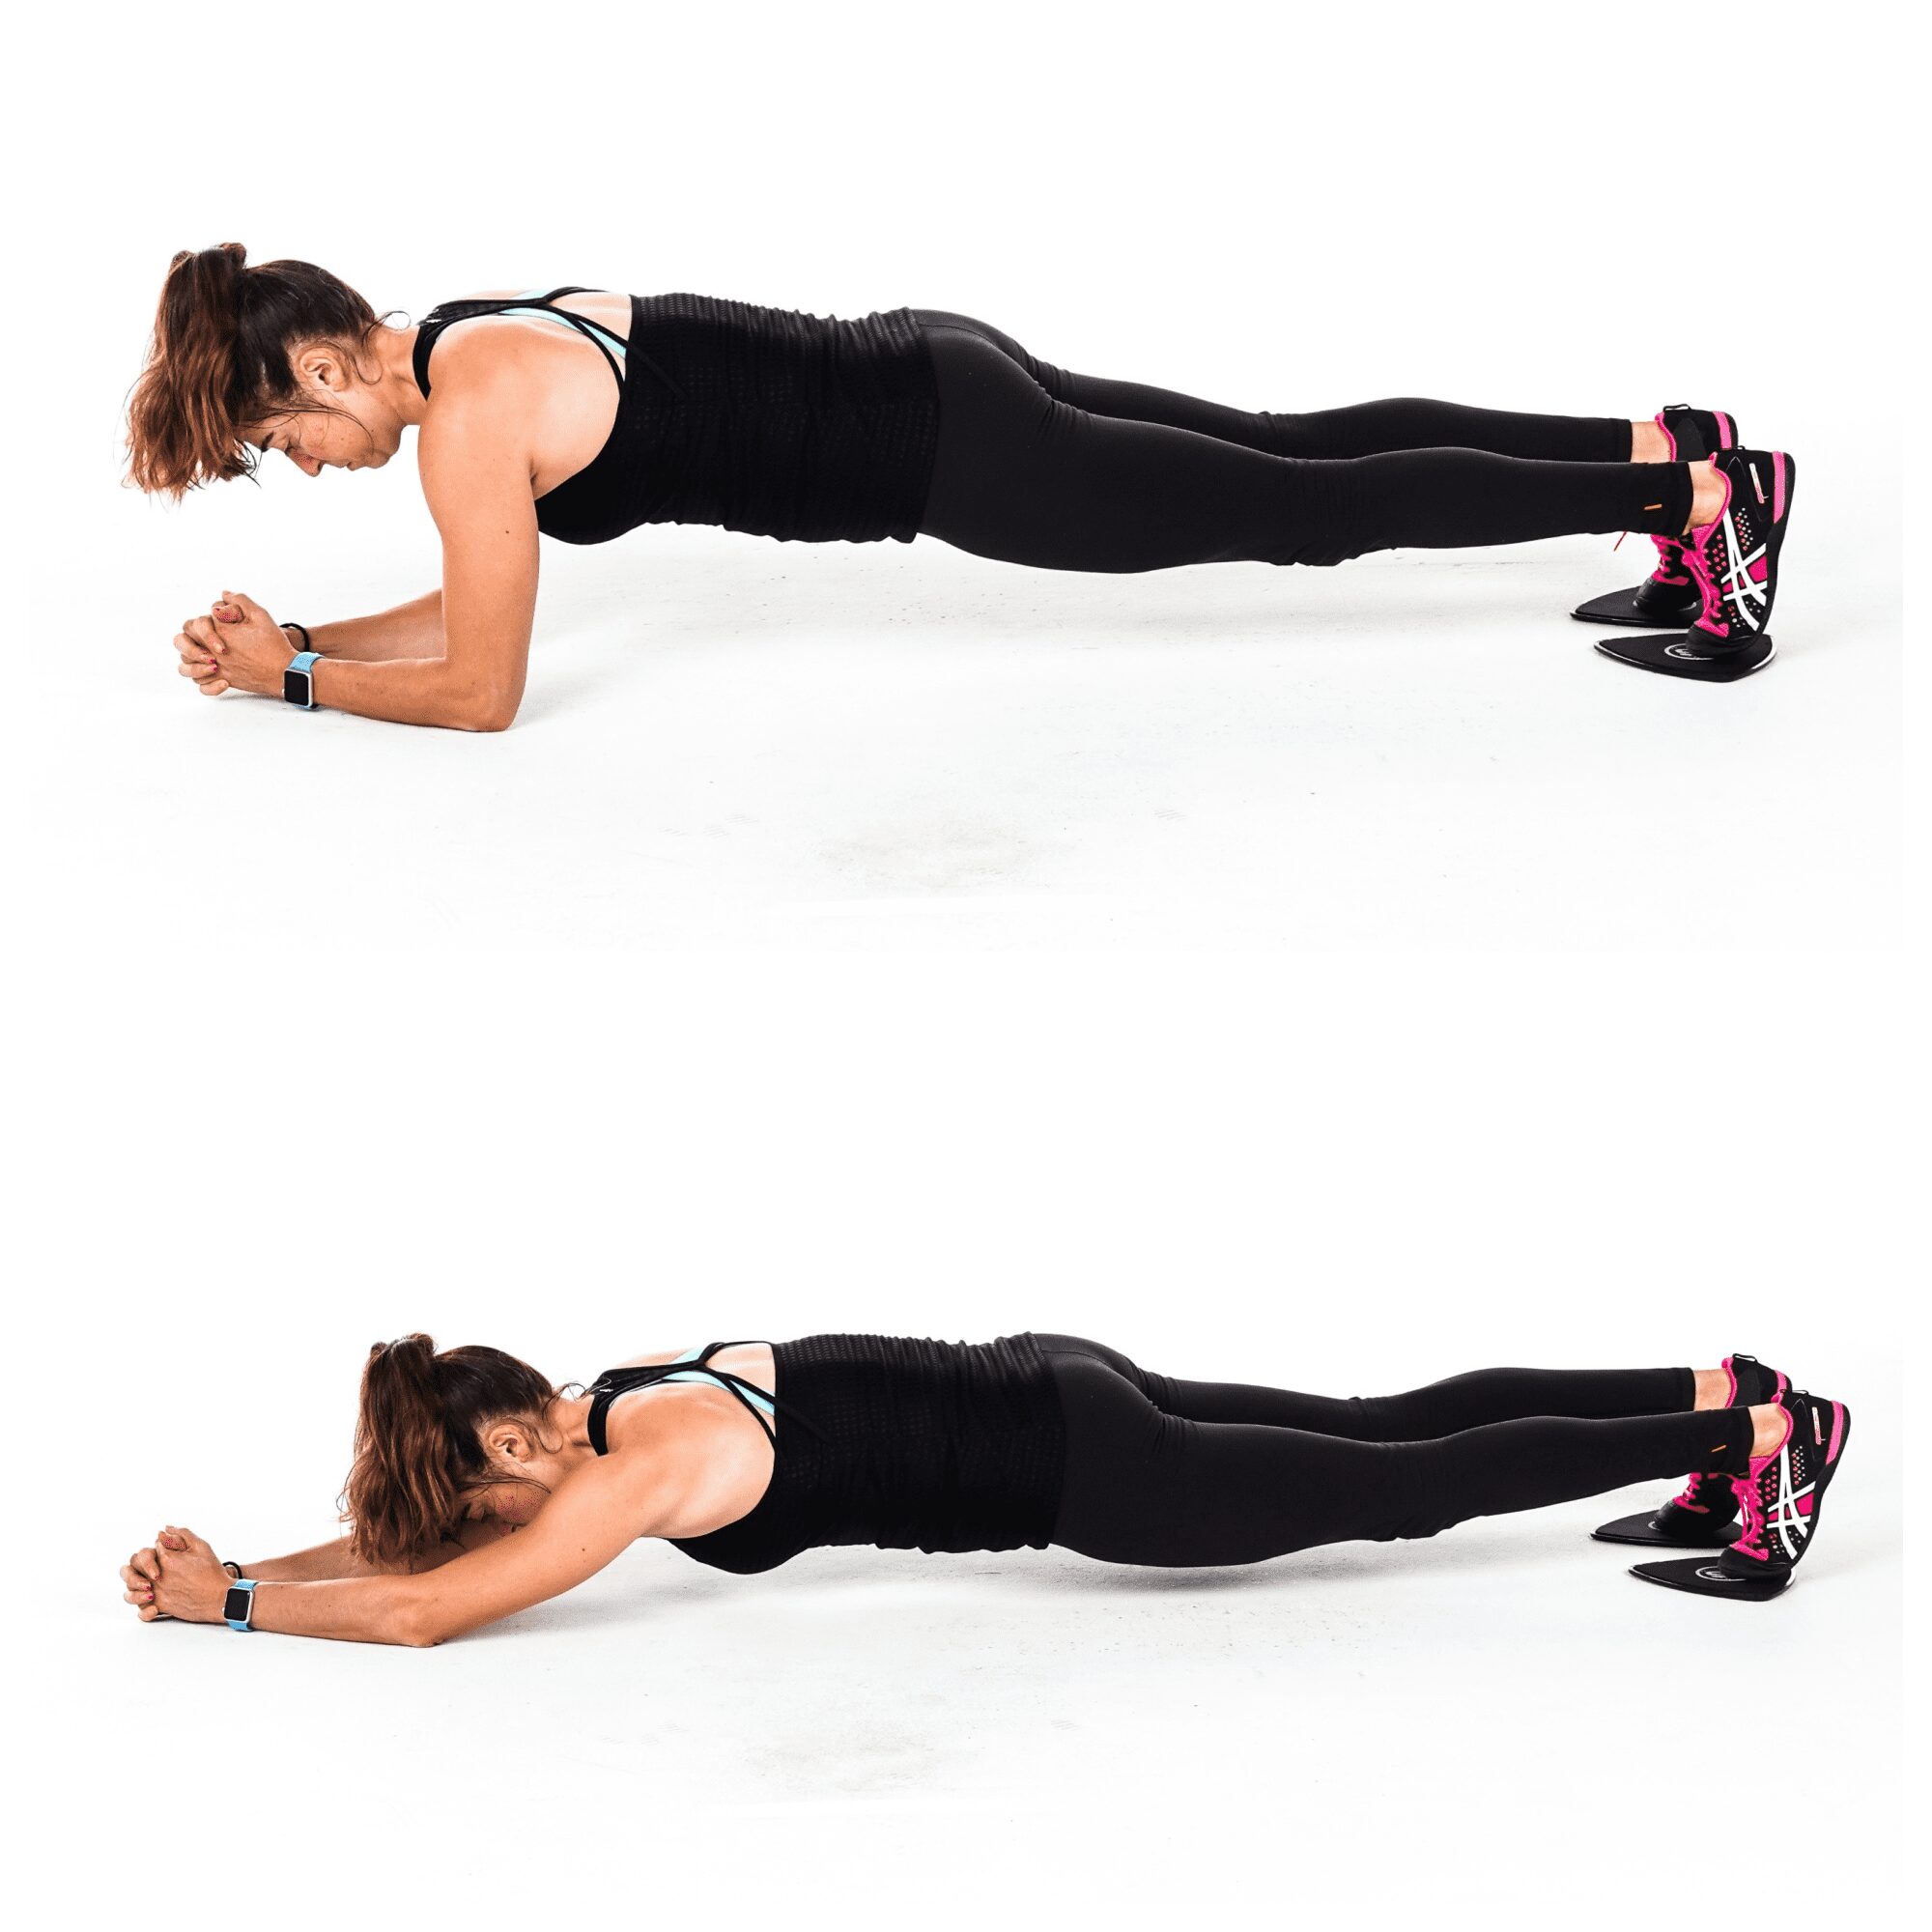
To do the Body Saw, set up in a plank position on your forearms with your feet on the sliders. Elbows should be under your shoulders and your feet should be together or no wider than hip-width apart.
With your body in a nice straight line from your head to your heels, slide your feet back and lengthen through your arms. As you slide back you should extend your body down to your elbows, shifting your shoulders back behind your elbows. Do not let your hips sag as you slide back. You are extending your triceps as you slide back.
Then, using your lats and core, pull your feet back in to the plank position. When you come back into the plank position, do not let your butt go up in the air. Make sure your hips don’t sag either.
Then slide back out, lengthening your body out as much as you can. Again do not let your low back take over. Make sure that you also aren’t simply sliding forward and then back to the start but are actually sliding back and lengthening through your arms.
Superman Wave:
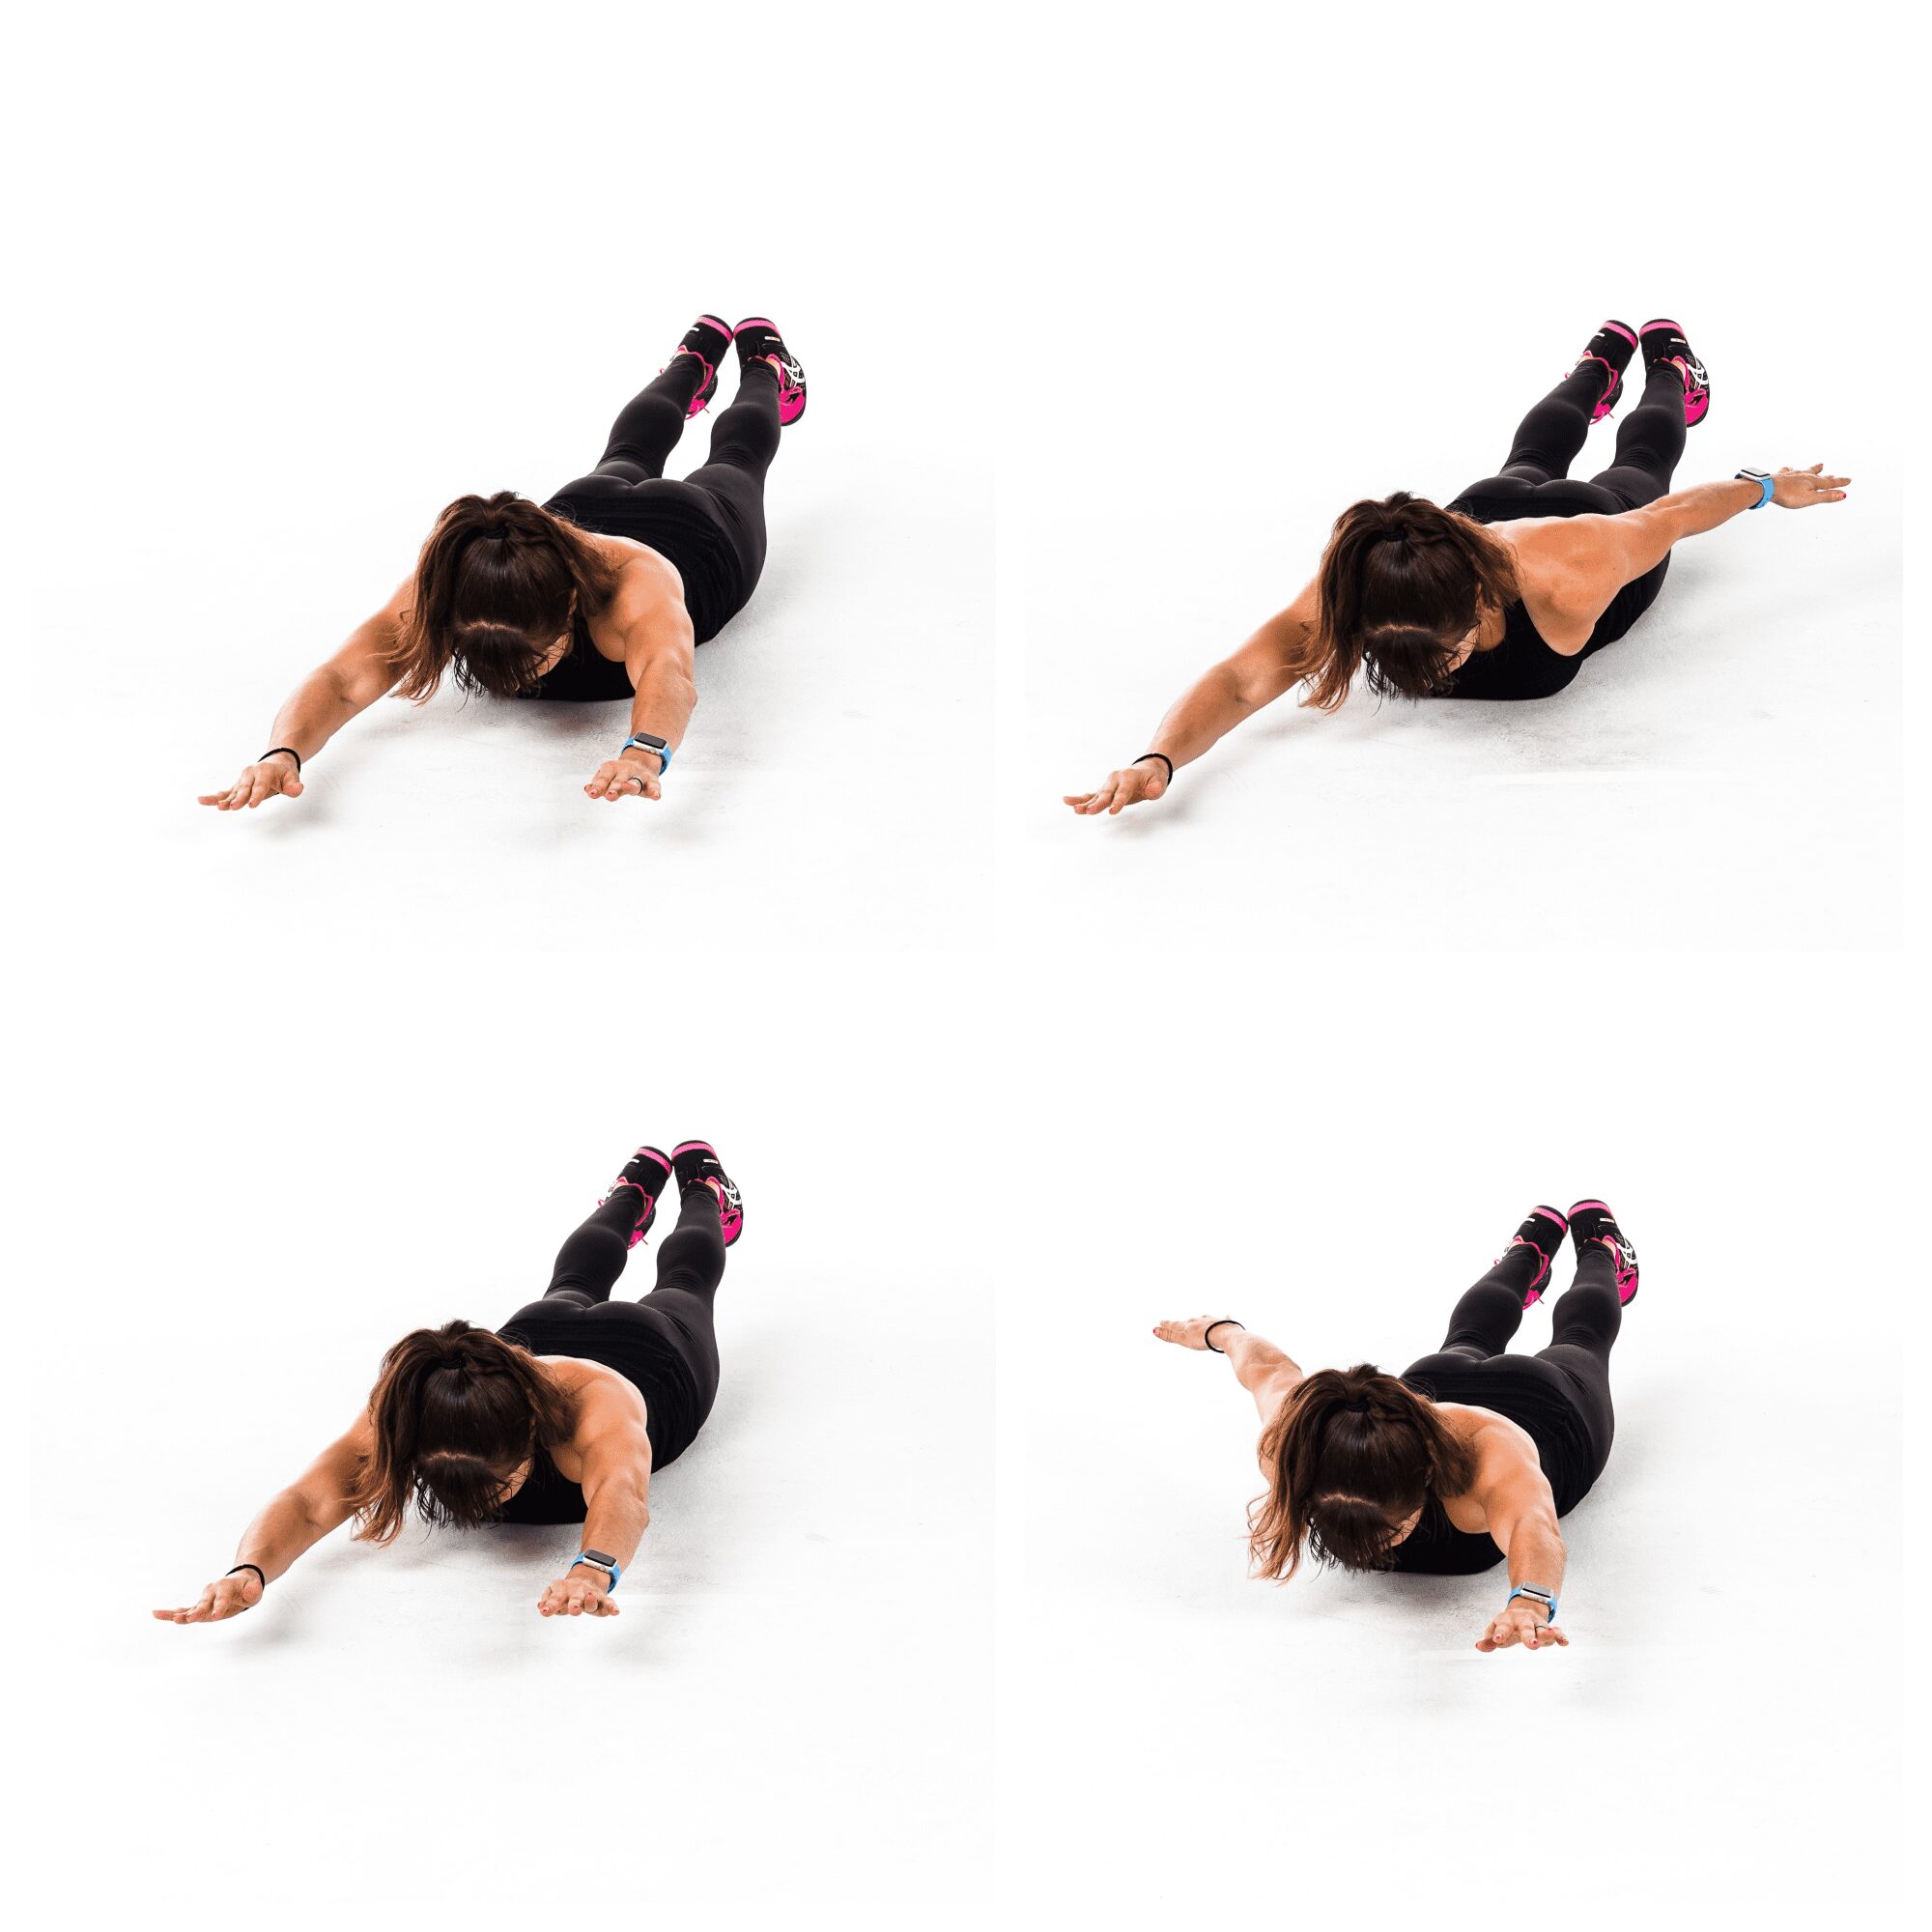
To do Superman Waves, lie face down on the ground with you arms reaching overhead and your legs out straight behind you.
Then lift your arms and legs off the ground, engaging your glutes and back to lift. Try to lift your chest up as high as you can and get your quads off the ground as much as possible.
Holding here, sweep one arm out and down toward your side, keeping your arms straight. Keep the other arm reaching straight out overhead as you wave the other arm down.
As you lower one arm down by your side, keep it as high off the ground as possible to work the back of your shoulder.
Wave the arm back overhead then sweep the other arm out and down to your side. Keep alternating sides as you engage your back and butt to stay up in the superman position. Move at a controlled pace.

