Bodyweight exercises need to be included in every workout routine. And while we all know this, we often only include bodyweight moves like the single leg squat, push up and pull up.
But there are a ton of other bodyweight exercises that we need to include in our routines.
Below are some more “untraditional” exercises that need to be included in your workout program.
10 Bodyweight Exercises You Need To Do:

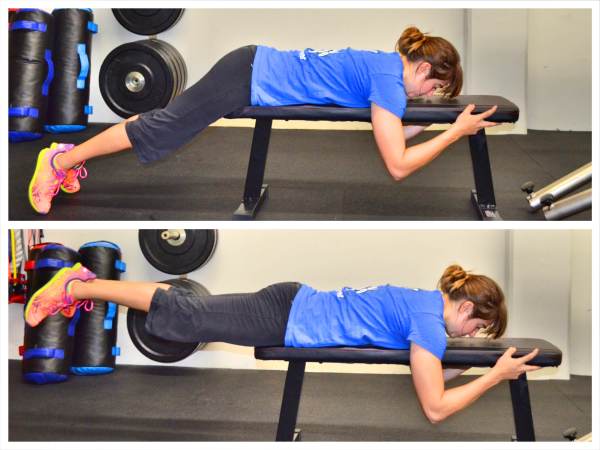
1. Reverse Hypers – Seriously one of the best exercises out there to isolate the glutes and get them activated. The key with reverse hypers is to hold for a second or two at the top. Also, you don’t want to hyperextend your back at the top.
To do the Reverse Hypers, lie face down on a table, bench or box. Make sure your hips are right at the edge. Hold on to something in front of you if you want. Keep your upper body relaxed. Squeeze your legs together and point your toes out. (Pointing your toes out helps you activate your glutes more.) Lift your legs to basically parallel to the ground, keeping your legs straight. Do not hyperextend your back and lift way higher than parallel. You do not want to feel this in your low back. Hold for 2-5 seconds and then lower down. Keep your core tight and really squeeze your glutes as you lift. Then lower back down and repeat.
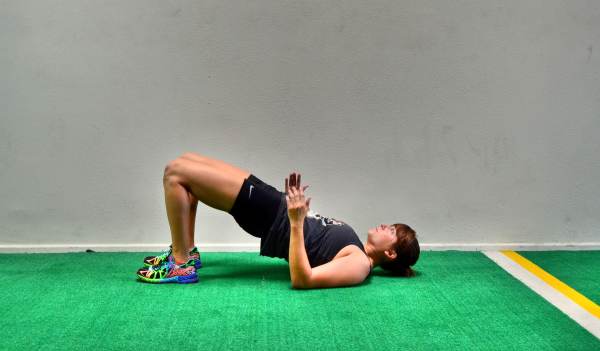
2. Glute Bridge – The glute bridge is a great activation exercise with so many different variations to work your glutes and hamstrings. There are also plenty of variations to challenge everyone from the beginner to the advanced lifter. The key with the glute bridge is to fully extend at the top. At that end range of motion is where you recruit the most muscle fibers. If you can’t fully extend on a variation, you need to regress it!
To do the basic glute bridge, lie on your back with your feet about hip-width apart. You should basically be able to touch your heels with your finger tips. Then bend your elbows to 90 degrees. Drive your elbows, shoulders and heels into the ground as you drive your hips up. Make sure your knees do not fall apart. Actively squeeze your butt as you drive your hips up. If you only feel your hamstrings working, make sure that you aren’t driving off your heels backward. You shouldn’t feel like you are driving back into your shoulders. You want to actual feel like you are driving your knees forward over your toes even though you are driving through your heels. Drive your hips straight up. Hold for 2-5 seconds at the top.
For 19 more Bridge Variations, click here.
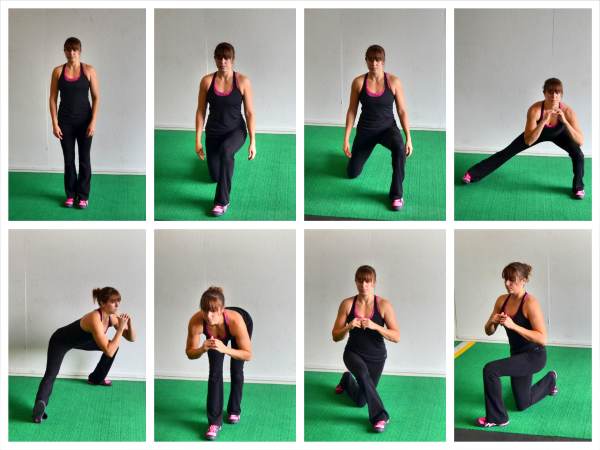
3. Lunge Matrix – We should be able to move in every direction, which is why doing the lunge matrix is so important. To make lunges harder, we usually add weight. But with the lunge matrix, it can be good to advance the move with arm drivers (reaching the arms up, down and left and right while holding the lunge). While this won’t necessarily improve your leg strength drastically, it will help open your body up and improve your movement patterns. So that you can move quickly and efficiently in every direction!
To do the lunge matrix and add in the arm drivers, check out this lunge matrix warm up!
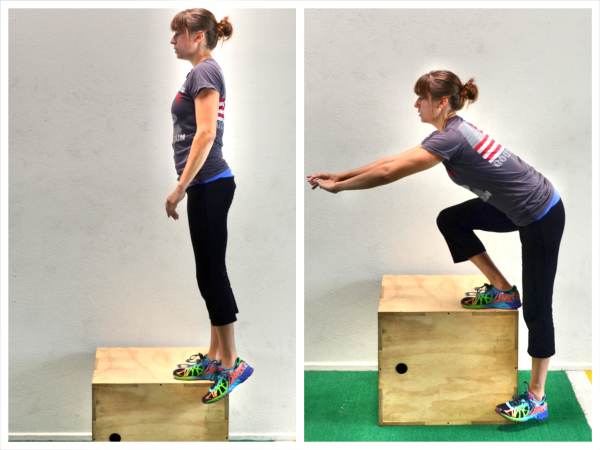
4. Step Down/Step Up – A great move to work the butt that doesn’t need to be progressed by adding weight. Actually my favorite way to progress the step up or step down is by using a higher box because a higher box activates the glutes even more! (Lower step ups are also a great way for people with knee pain to work their legs.)
To do a Step Down, start standing on the bench or box so that you can step off of it to the side with your left foot. Your right foot will be near the edge of the bench as if you are going to step down onto your left foot. Slowly hinge forward, keeping your back flat. Push your butt back as you bend your right knee, dropping your left foot toward the ground. Do not touch your left foot down. Once you go as low as you can, drive right back up to standing. Do not do more than touch your left toe down. You don’t want to be able to push off your left foot at all. Make sure you are only driving through your right heel and not using your left foot on the ground.
For more Functional Leg Exercises like the Step Down, click here.
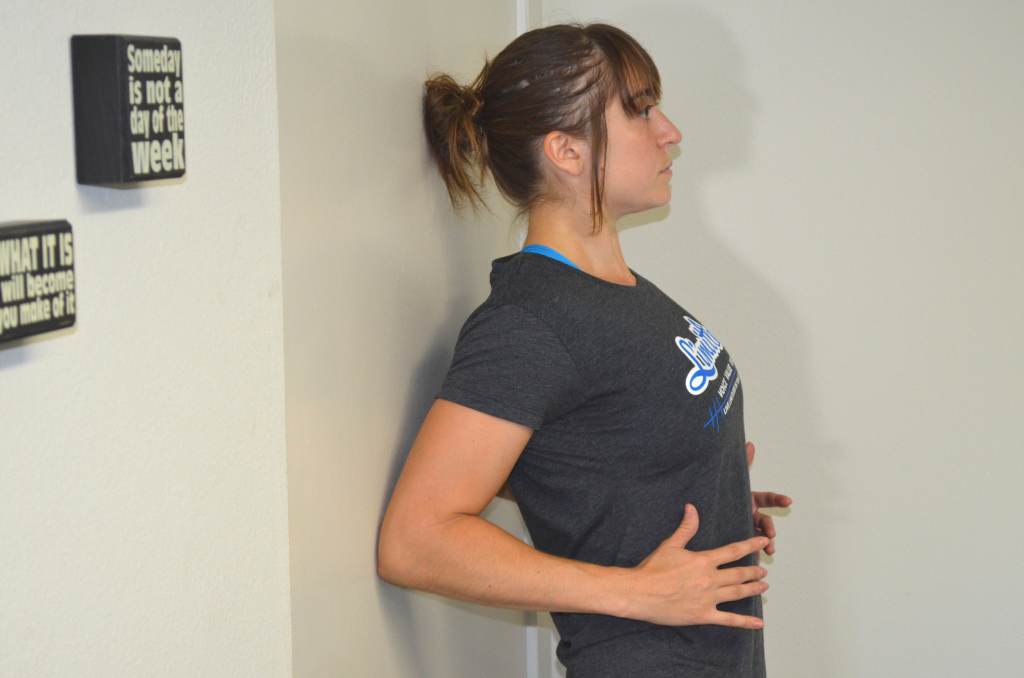
5. Scapular Wall Hold – A MUST-DO exercise for anyone with a desk job and/or shoulder and neck pain. It is also a great exercise to help you get the correct muscles activated so you can do more pull ups!
Here are is a great post about the scapular wall hold and other “bat wing variations!”
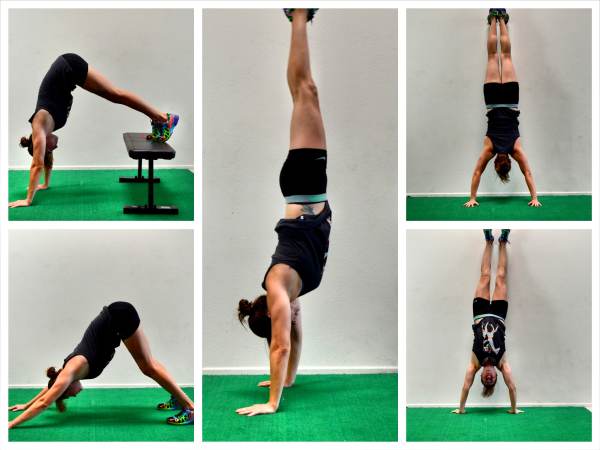
6. Handstand – Often when I tell a new client they are going to be doing handstands they give me a look like I have two heads. But handstand holds can be regressed so that even a beginner can do them. And honestly, they are safer for most people than overhead pressing because, while they work the shoulders and core, they also help open up your back and lats. The key with handstand holds is to progress them as your core and shoulders get stronger. You shouldn’t feel the holds in your low back.
To do a couple variations of the handstand hold:
Beginners will want to do a modified handstand, almost like a downward dog. Set up on your hands and knees. Then push your butt up in the air and drive your chest back toward your knees. Try to get your back as flat as possible, driving your butt up. Do not worry if your legs stay straight. If your hamstrings are tighter, you will definitely need to bend your knees to push your butt up higher and get your back flat. Do not walk your hands in too close to your feet. The most important part is pressing your chest toward your knees so your back stays flat.
To advance, you can put your feet up on a table or chair. However, the hardest variation is walking your feet up the wall while getting your hands as close to the wall as possible. The closer and more parallel to the wall you are the harder the hold. Make sure that on each variation, you draw your shoulder blades down and back and draw your belly button in toward your spine. Squeeze your glutes also to keep your low back safe.
For a complete Handstand Progression with beginner and advanced variations, check out our How to do a Handstand post.
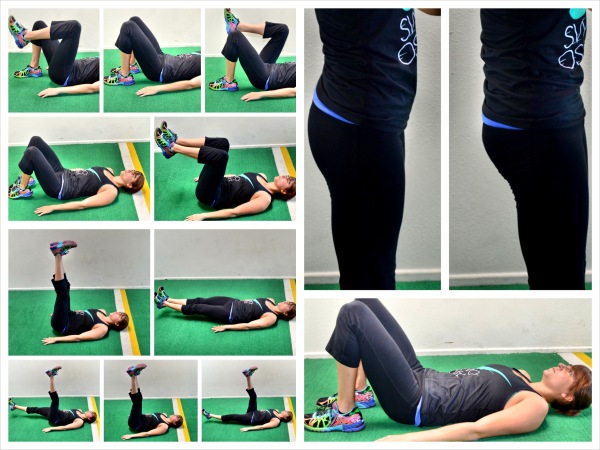
7. Pelvic Tilt – Often an exercise only prescribed for women post-pregnancy, this is an essential exercise for everyone. The pelvic tilt works on developing core strength so that you suffer from low back pain and can perform more advanced exercises.
To do the pelvic tilt, lie on your back with your knees bent and your feet flat on the ground. You should almost be able to reach your hands down by your sides and touch your heels with your finger tips. Feel the space between your low back and the ground as you lie there. Then draw your belly button in toward your spine and press that space away. You should feel your low back against the ground. Hold there, making sure to not hold your breath.
Once the basic hold becomes easy, you will want to do a bent knee march then a bent knee two leg lift and then finally straight leg lifts. Advance the pelvic tilt slowly. Make sure that as you progress, your low back stays firmly connected with the ground. If you can’t keep your low back against the ground, you aren’t ready for the progression.
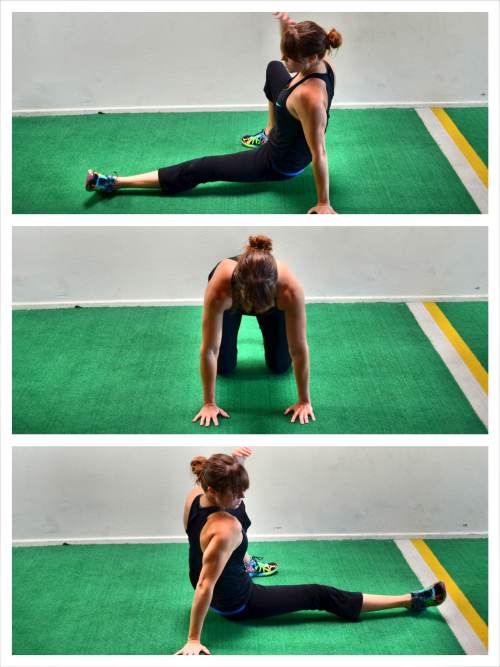
8. Sit Thrus – A great core move, sit thrus work everything from your shoulders to your knees. They also work on strength as well as mobility, making them an essential core exercise for your workout routine.
To do sit thrus, start on your hands and knees. Flex your feet and press up onto your hands and toes with your hands under your shoulders and your knees under your hips. You will then rotate open toward the right and bring your left leg under and through toward where your right hand is. As you bring your left leg forward and through, lift your right hand. You should be almost sitting with your left hand down to support you. Then bring the left leg back through so you are back in the starting position. Next rotate to the left and kick your right leg through and forward as you lift your left hand. Move as quickly as you can back and forth. Beginners may need to move slowly or even start in a more spread out position with their legs out straight.
For more Bodyweight Crunchless Core Moves, click here.
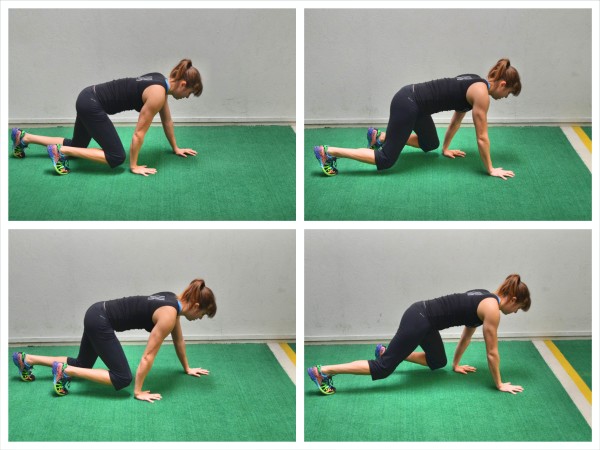
9. Crawling – A great core exercise that is also SUPER CARDIOVASCULAR. Plus, it really really works on your coordination and can improve your mobility as well. Crawl in every direction and mix up the types of crawls you do (bear crawl, table top crawl, gorilla crawl, crab crawl….)
To do the basic table top crawl forward and backward, set up on your hands and knees with your knees under your hips and your hands under your shoulders. Then flex your feet and lift up onto your toes. Take a step forward with your left foot and right hand, keeping your knees close to the ground and your back flat. Then step forward with your right foot and left hand. Keep alternating moving the opposite arm and opposite leg together. Once you’ve crawled forward the 20-50ft, you will then reverse the crawl. Take a small step back with your right foot as you step back with your left hand. Take small steps, especially moving backward. If you reach too much with your leg, you are going to put more strain on your shoulders and your movement will get off. The opposite arm and leg need to move together. Keep your knees close to the ground as you move backward. Beginners may need to perform a baby crawl from their knees and hands.
For more fun crawling variations, check out these 21 Crawling Exercises.
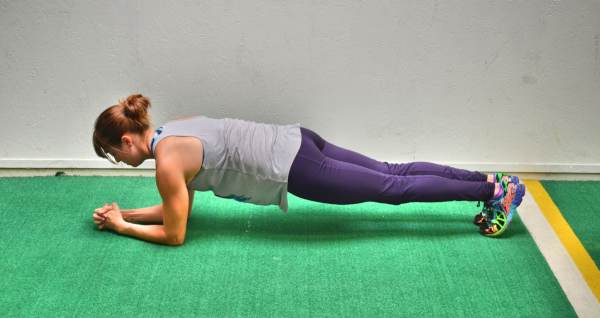
10. Planks – Some people love planks, some people hate them. And while I believe some variations are more worthwhile than others, planks are super important for core stabilization. They force your body to have to work together.
Here is a great article with a ton of different plank variations.


0 Comments
Trackbacks/Pingbacks