The Dumbbell Hybrid Burner
Short on time?
Or maybe you just need a quick burner to end your workout to torch some extra calories or completely burnout the muscle groups you were working.
Either way, having a few BURNERS on hand, like this Dumbbell Hybrid Burner from my Arm Burner cards, is key!
Quick burners like this one are even a great way to create a little extra training volume during the week to increase your training frequency and improve your results without you having to do a full workout.
So try this Dumbbell Hybrid Burner as a quick standalone routine when you are short on time or as a finisher after your upper body or lower body lifting session!
The Dumbbell Hybrid Burner
Complete 2-4 rounds of the circuit below without resting. Modify moves as needed so that you don’t have to rest during the 30 seconds of work. Better to regress than to rest if it is more than a very brief pause.
CIRCUIT:
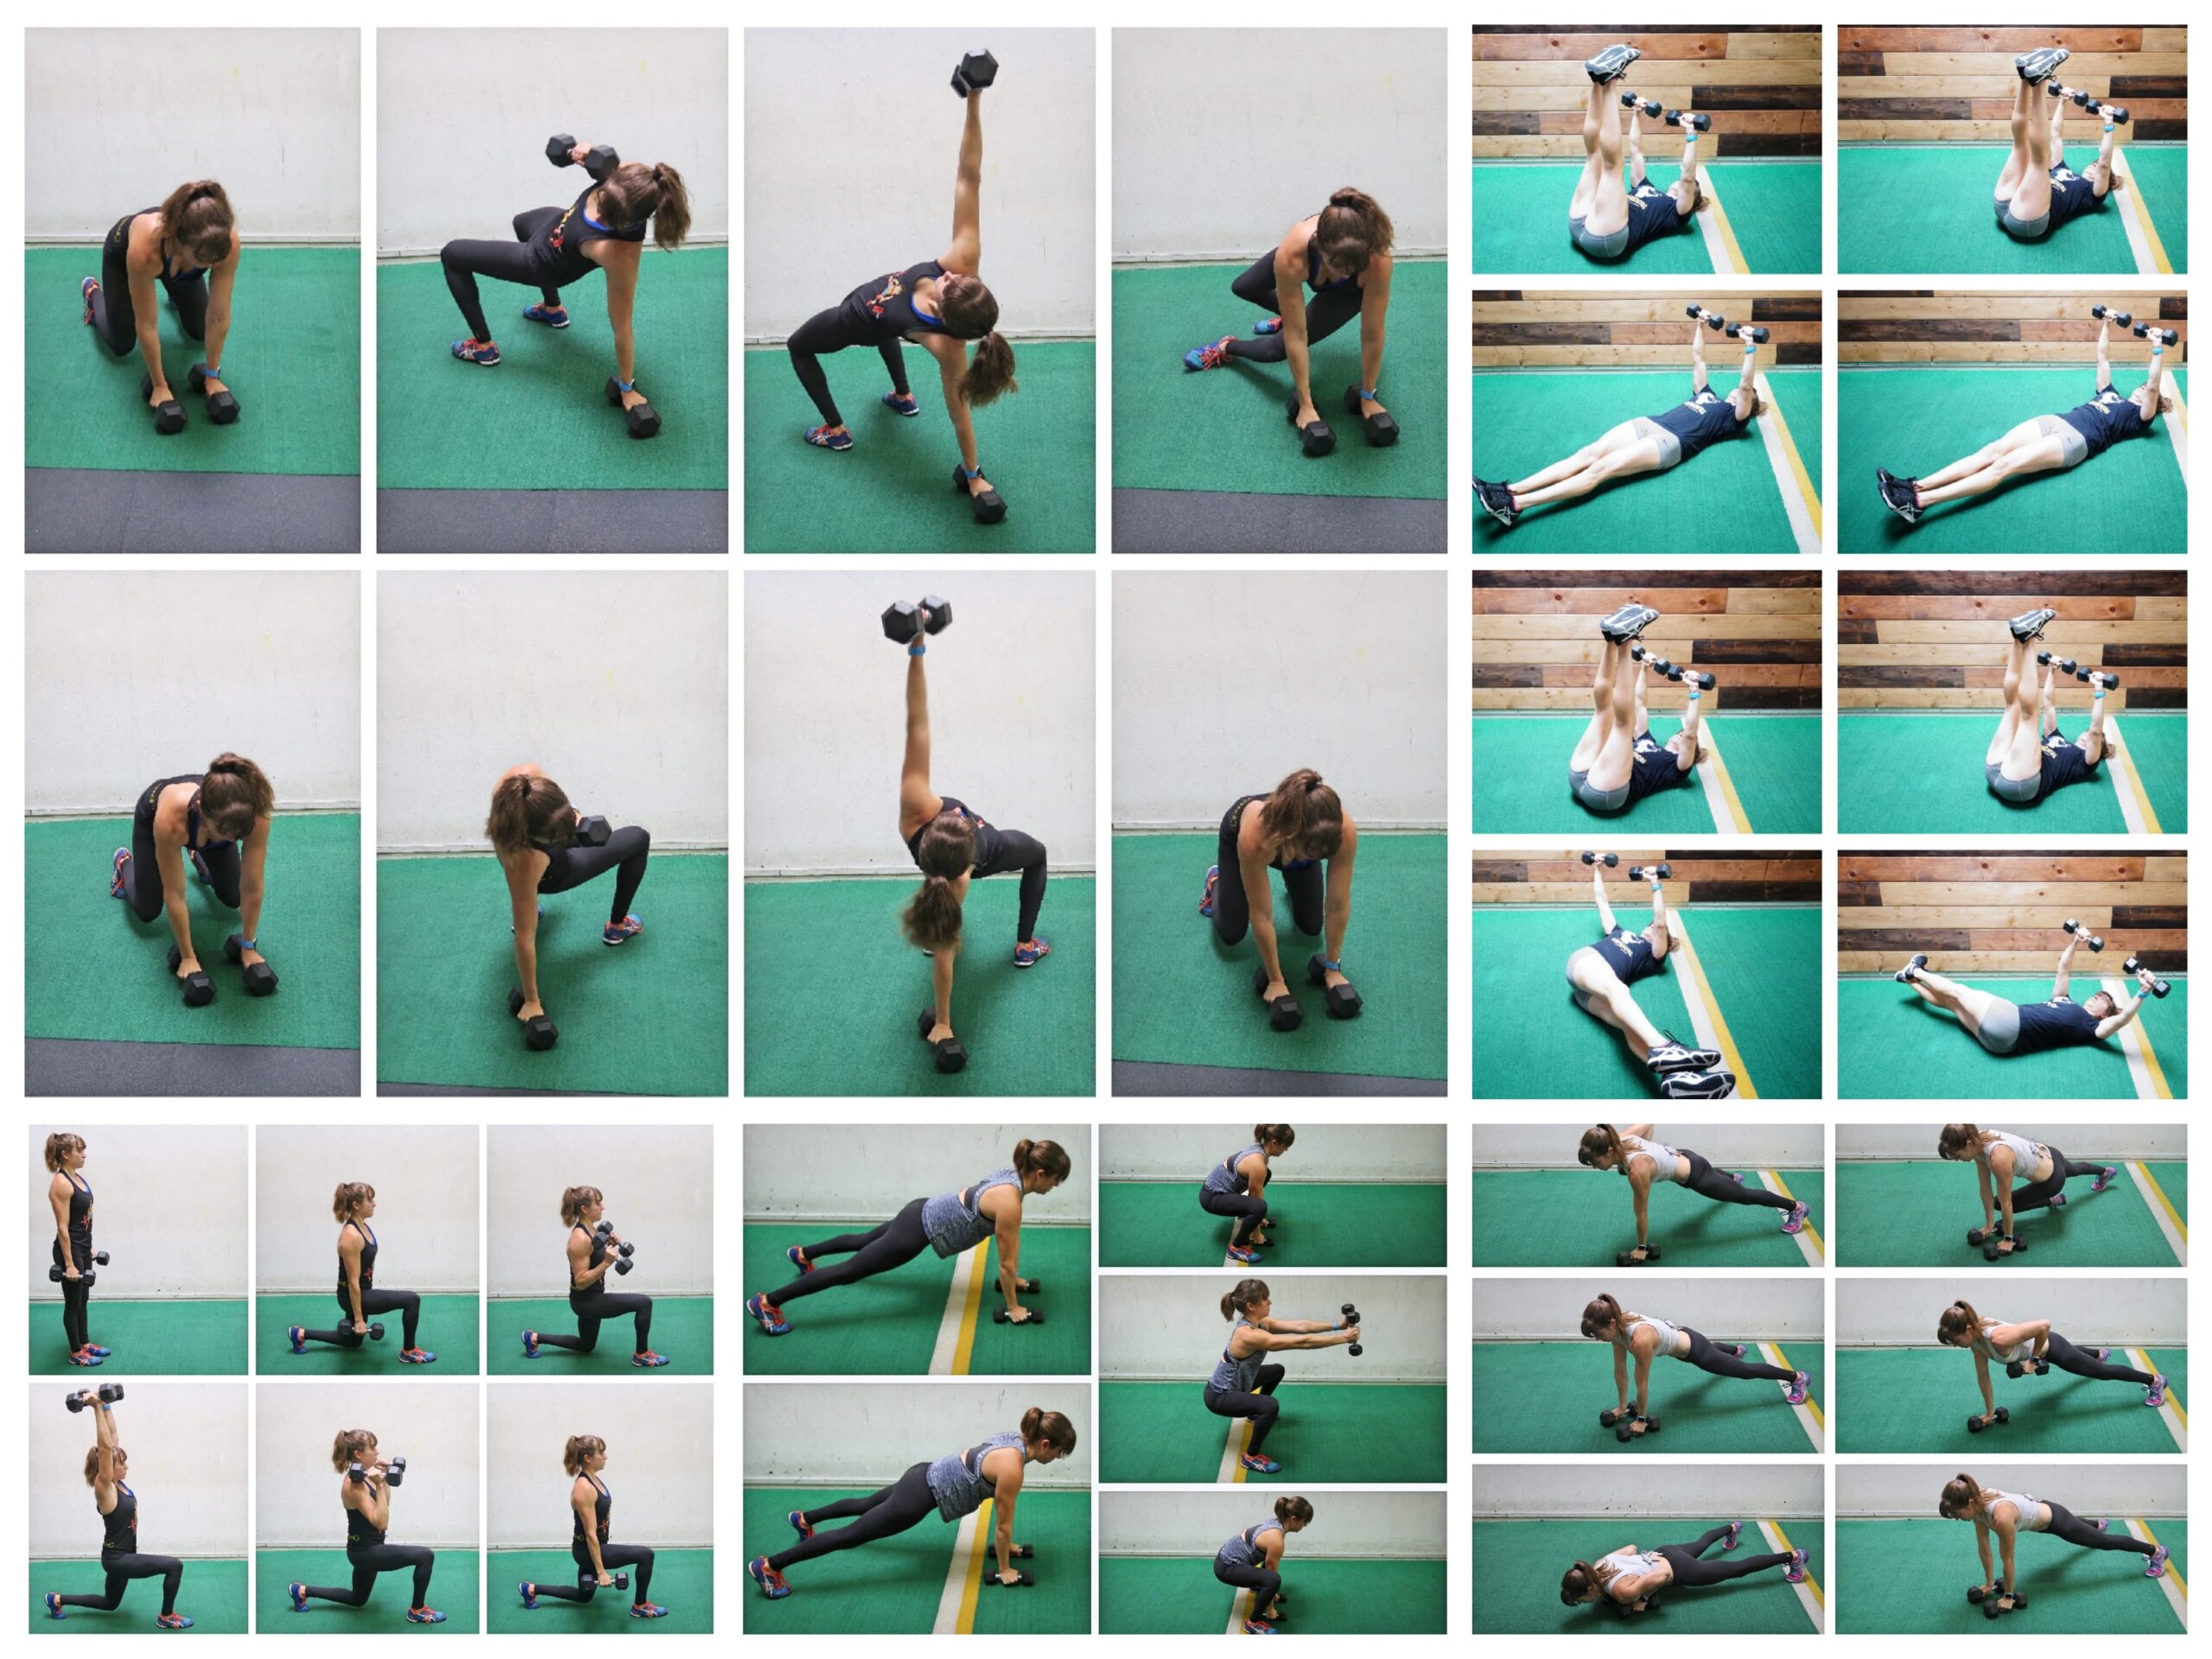
30 seconds Squat Burpee with Front Raise
30 seconds Lunge Curl Press
30 seconds Mountain Climber Row Push Up
30 seconds Sit Thru Bridge and Press
30 seconds Leg Raise Wipers

EXERCISE DESCRIPTIONS:
Squat Burpee with Front Raise:
To do the Squat Burpee with Front Raise, start in the plank position with a light dumbbell in each hand. You can also use a single dumbbell if you don’t have a weight pair light enough although you’ll then want to set it between your hands. Then jump your feet up and outside your hands or as close as you can get. Jump your feet out wider as you so that you can come into a squat position. As you do, lift your arms up straight in front of you to about shoulder height, holding the dumbbells. If you use a single dumbbell, you will pick it up in both hands as you lift your chest and come into the squat. Use jumping into the squat to help you raise the weights up to shoulder height with your arms straight. Lower your hands back down as you stay in the squat then jump your feet back and repeat! Make sure the weights are challenging but light enough you can fully control the movement. Beginners can also step back instead of jumping.
Lunge Curl Press:
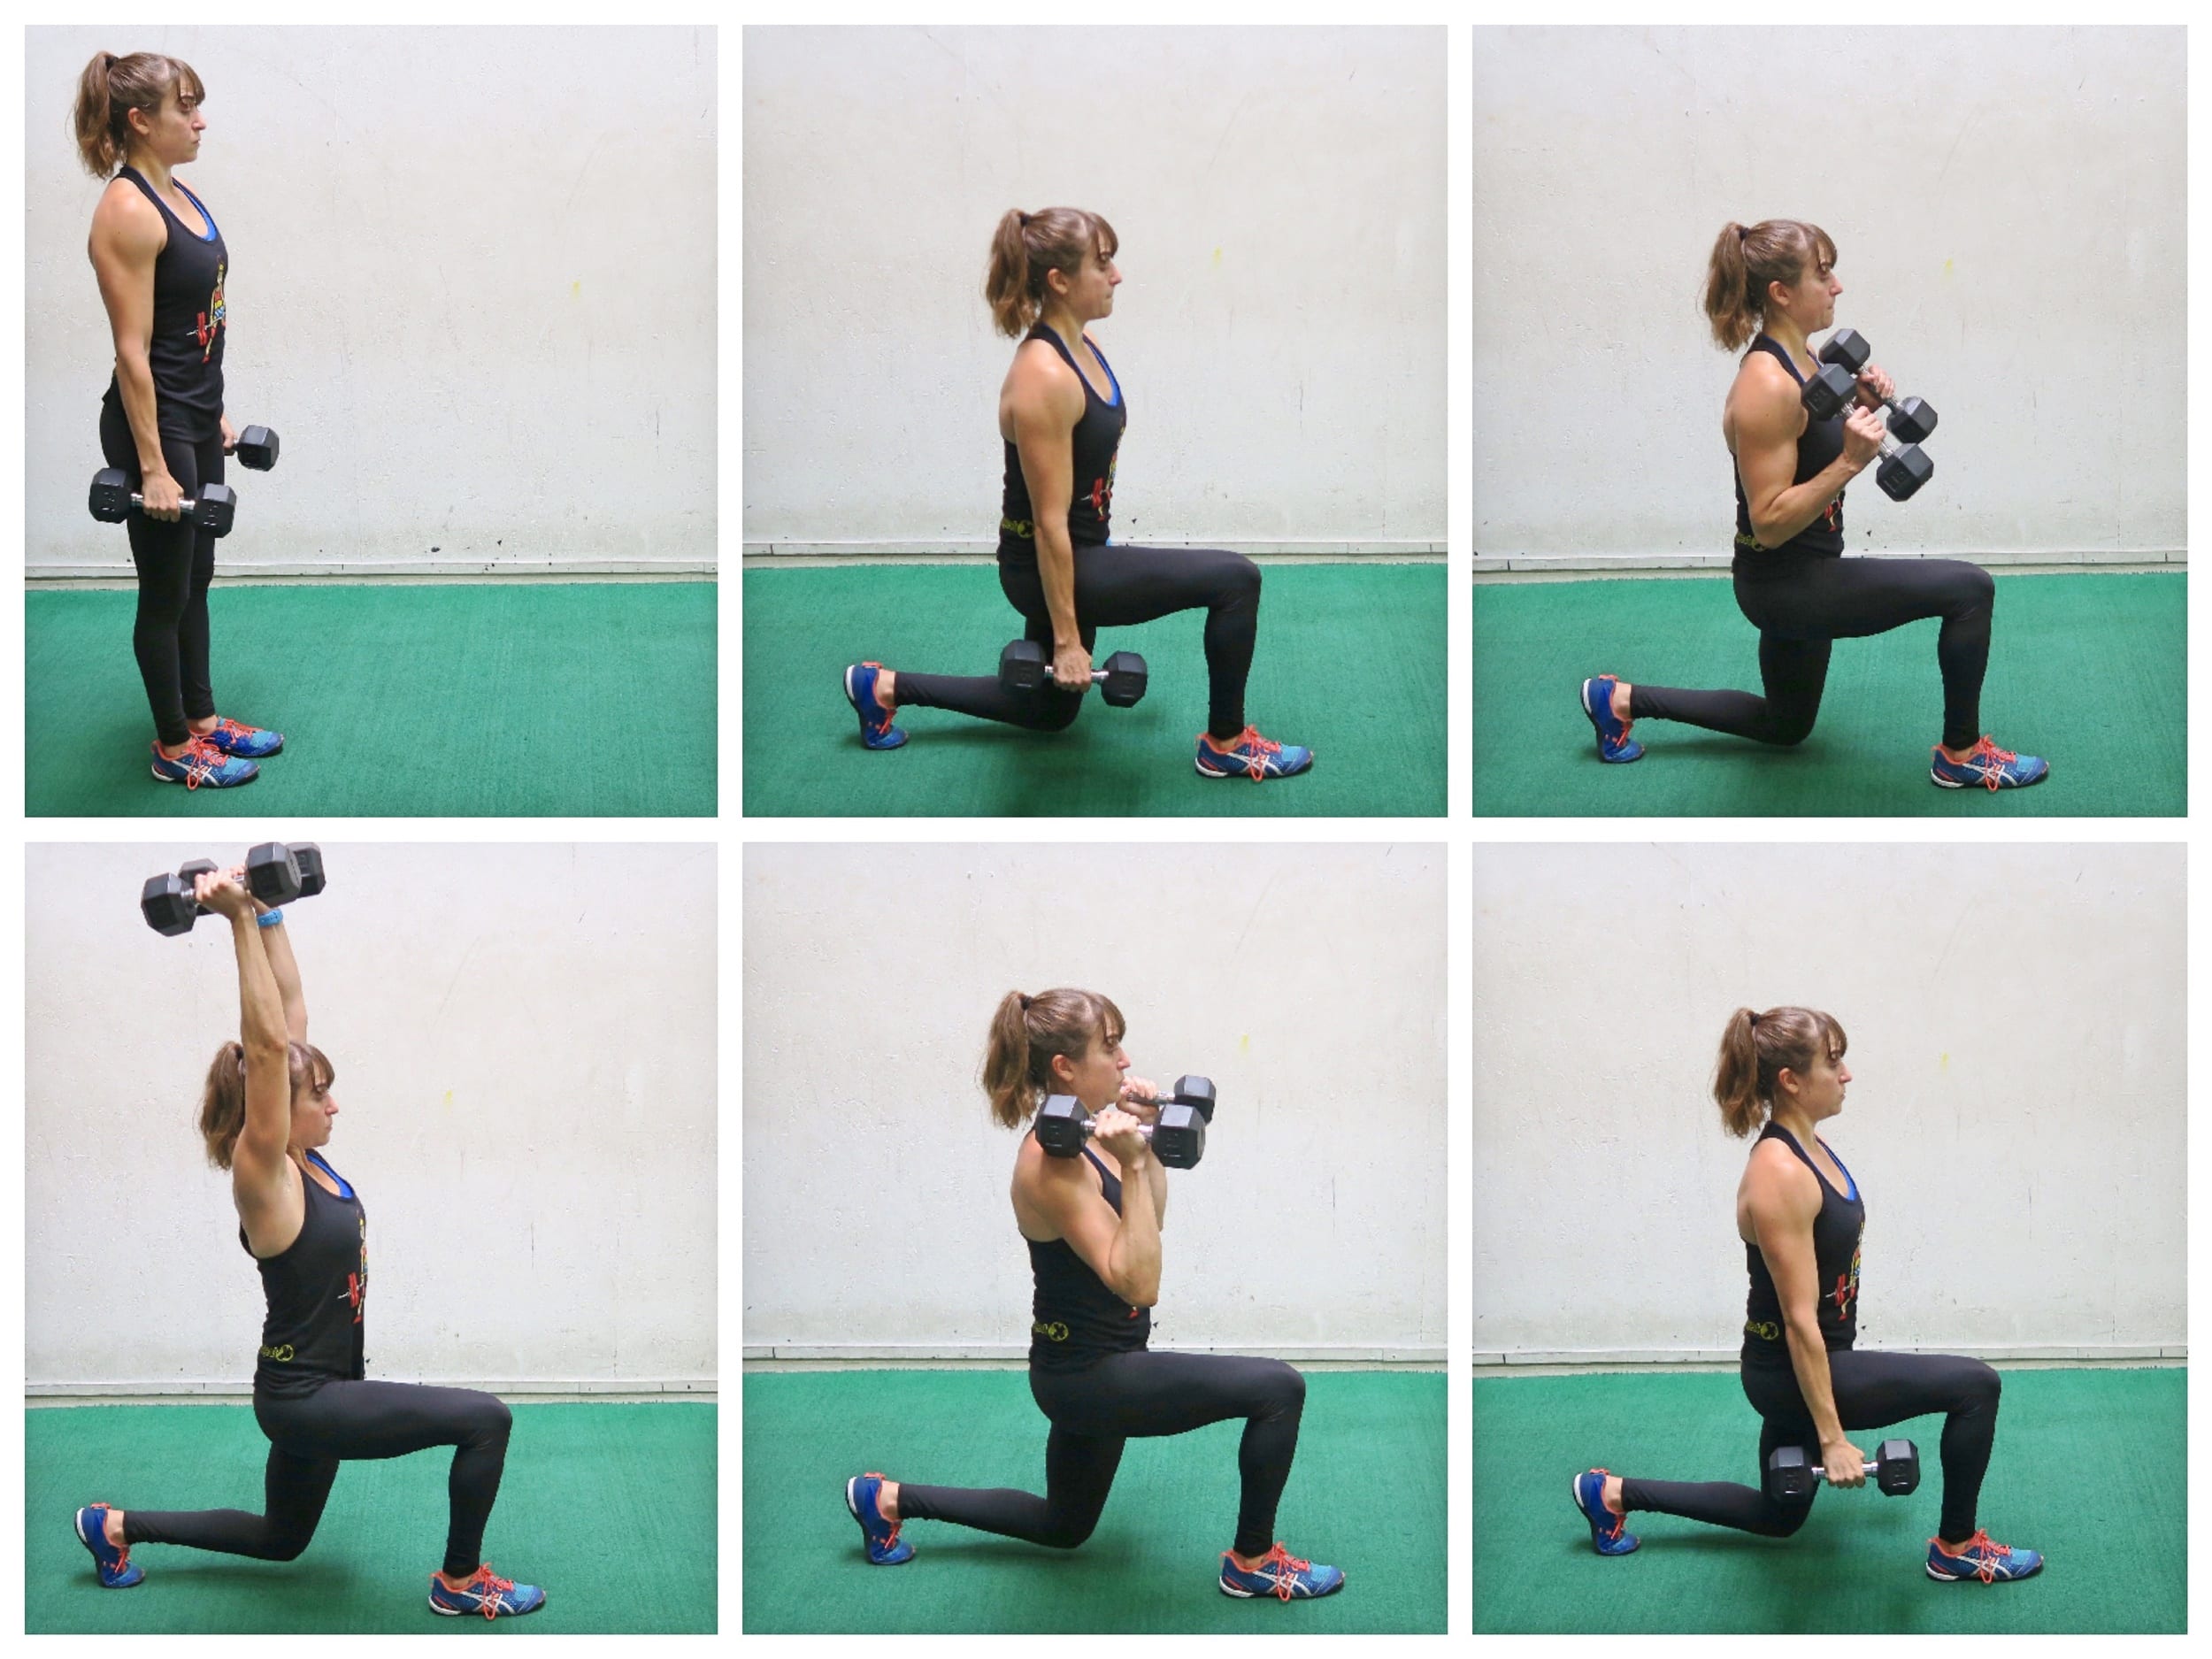
To do the Lunge, Curl and Press, start standing tall with a dumbbell in each hand down by your side. You can choose to have your palms facing forward or even in toward each other to perform both the curl and the press. Lunge forward with your arms down by your sides. Holding the lunge, perform a bicep curl, curling the weights up to your shoulders. Keep your chest up as you curl to maintain good form. Once you curl up to your shoulders, press the weights overhead, staying nice and low in the lunge with your abs engaged. Press all the way up, then bring them back down to your shoulders and reverse the curl. Once the weights are back by your sides, push back up to standing in one movement. Beginners may not lunge out as far or as deep. They may also choose to lunge then perform the curl and press while standing. You can stay on the same side or perform lunges alternating sides.
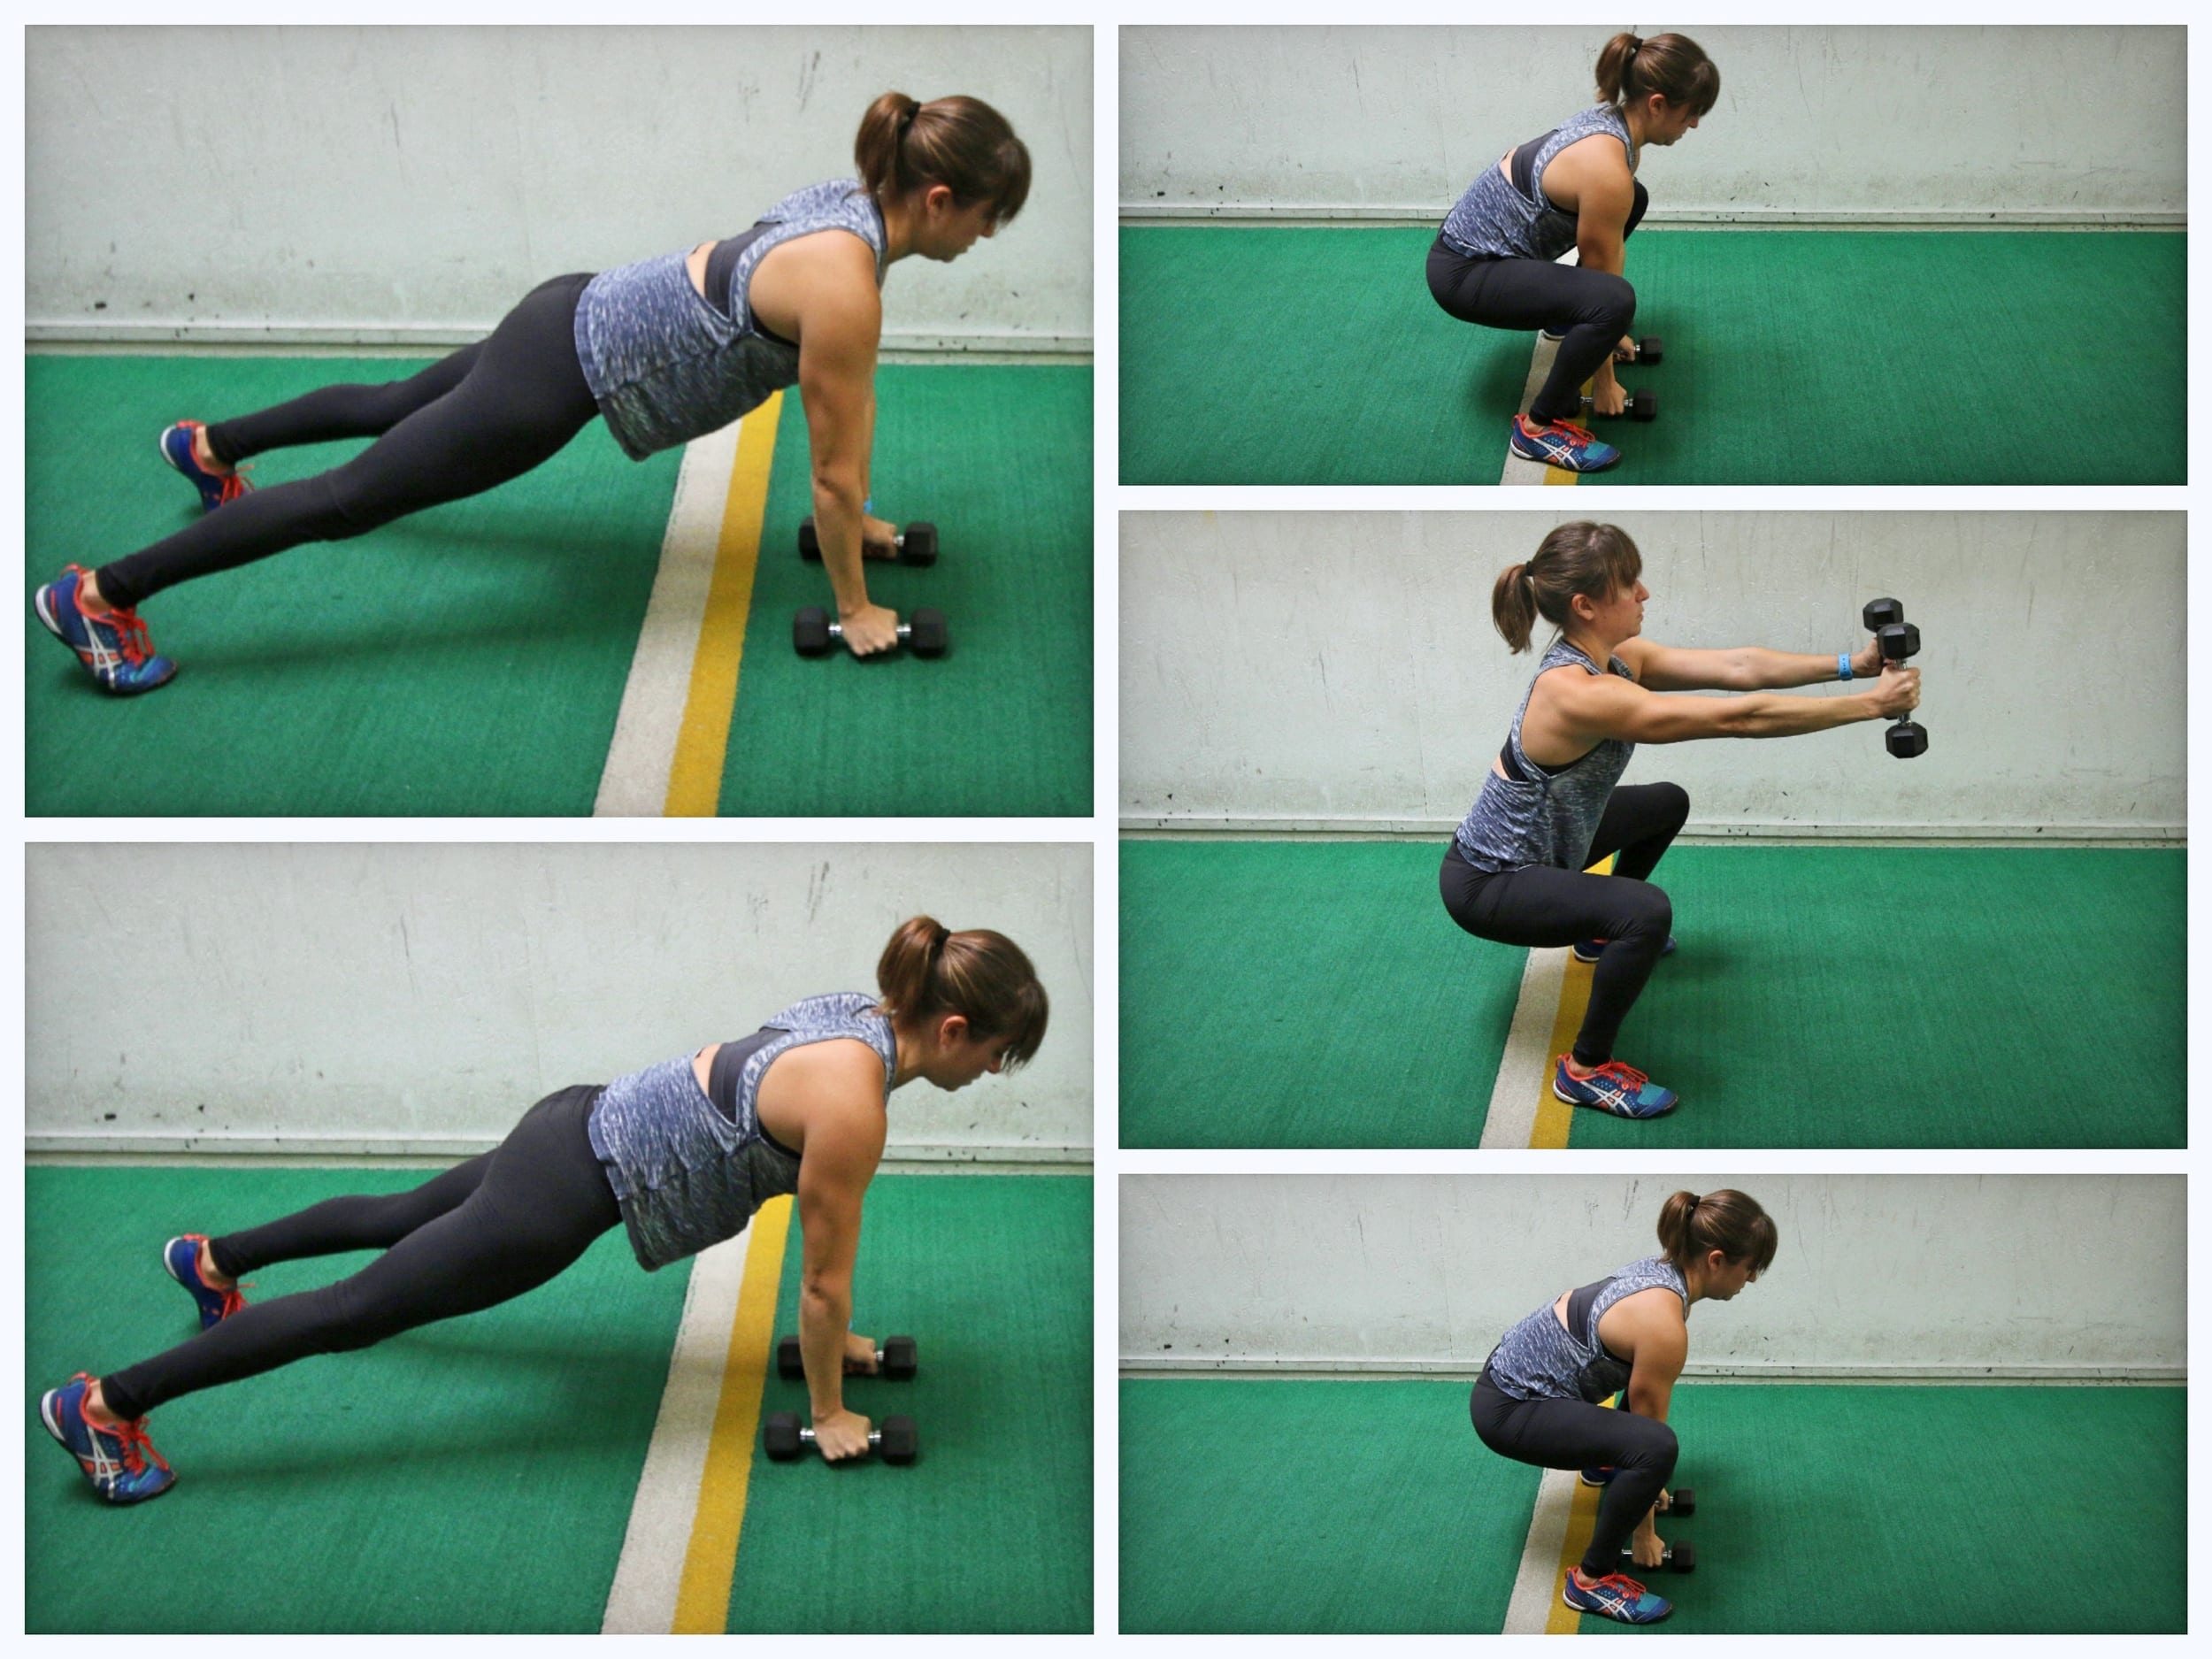
Mountain Climber Row Push Up:
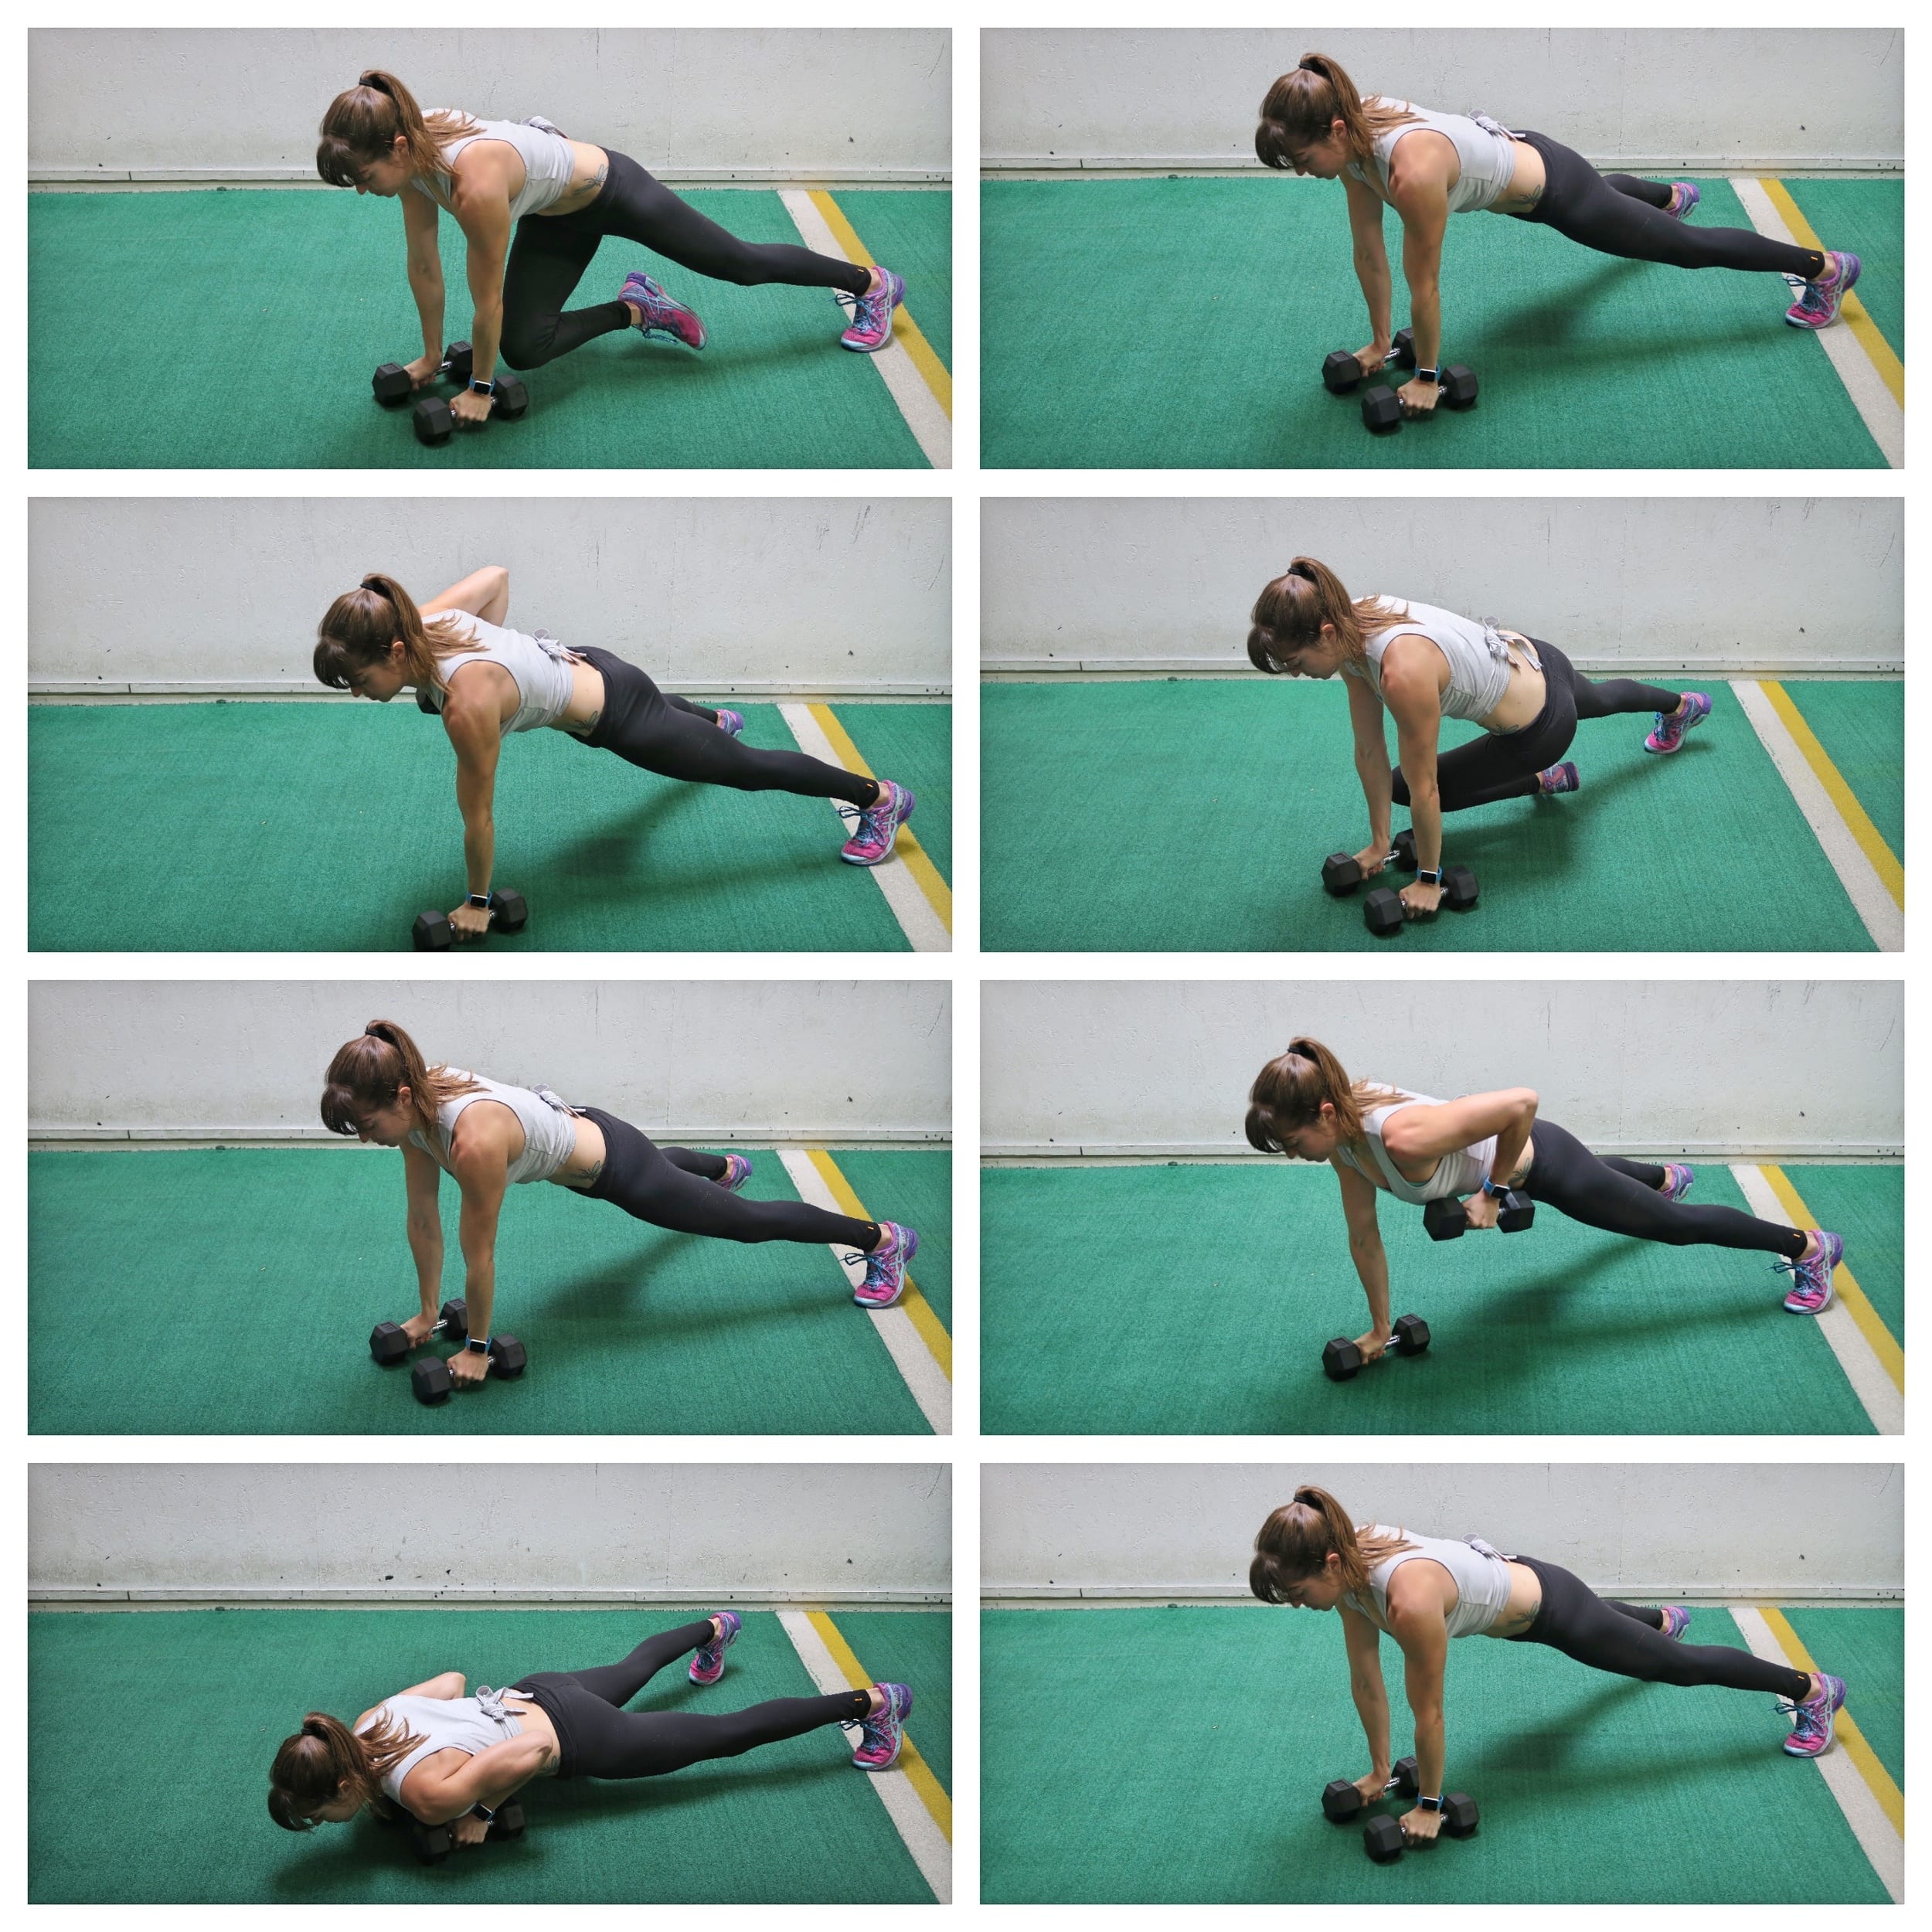
To do the Mountain Climber Row Push Up, set up in a high plank position with a dumbbell in each hand. Your feet will be wider apart to help stabilize and your hands should be under your shoulders. Then from this high plank position, draw one knee in and across toward your opposite shoulder. Perform a cross body mountain climber, moving slowly. Straighten the leg back out and then row the weight in the hand on the same side as the leg you tucked in up to your side. Perform the row without rotating or letting your butt go up in the air. After rowing the weight up to your side, feeling your back work to row it up, lower it back down so you’re back in the high plank. Then perform a push-up (you can do this from your knees too). Come back to a plank then perform a mountain climber cross body on the other side and a row before another push up. Keep alternating sides.
Sit Thru Bridge and Press:
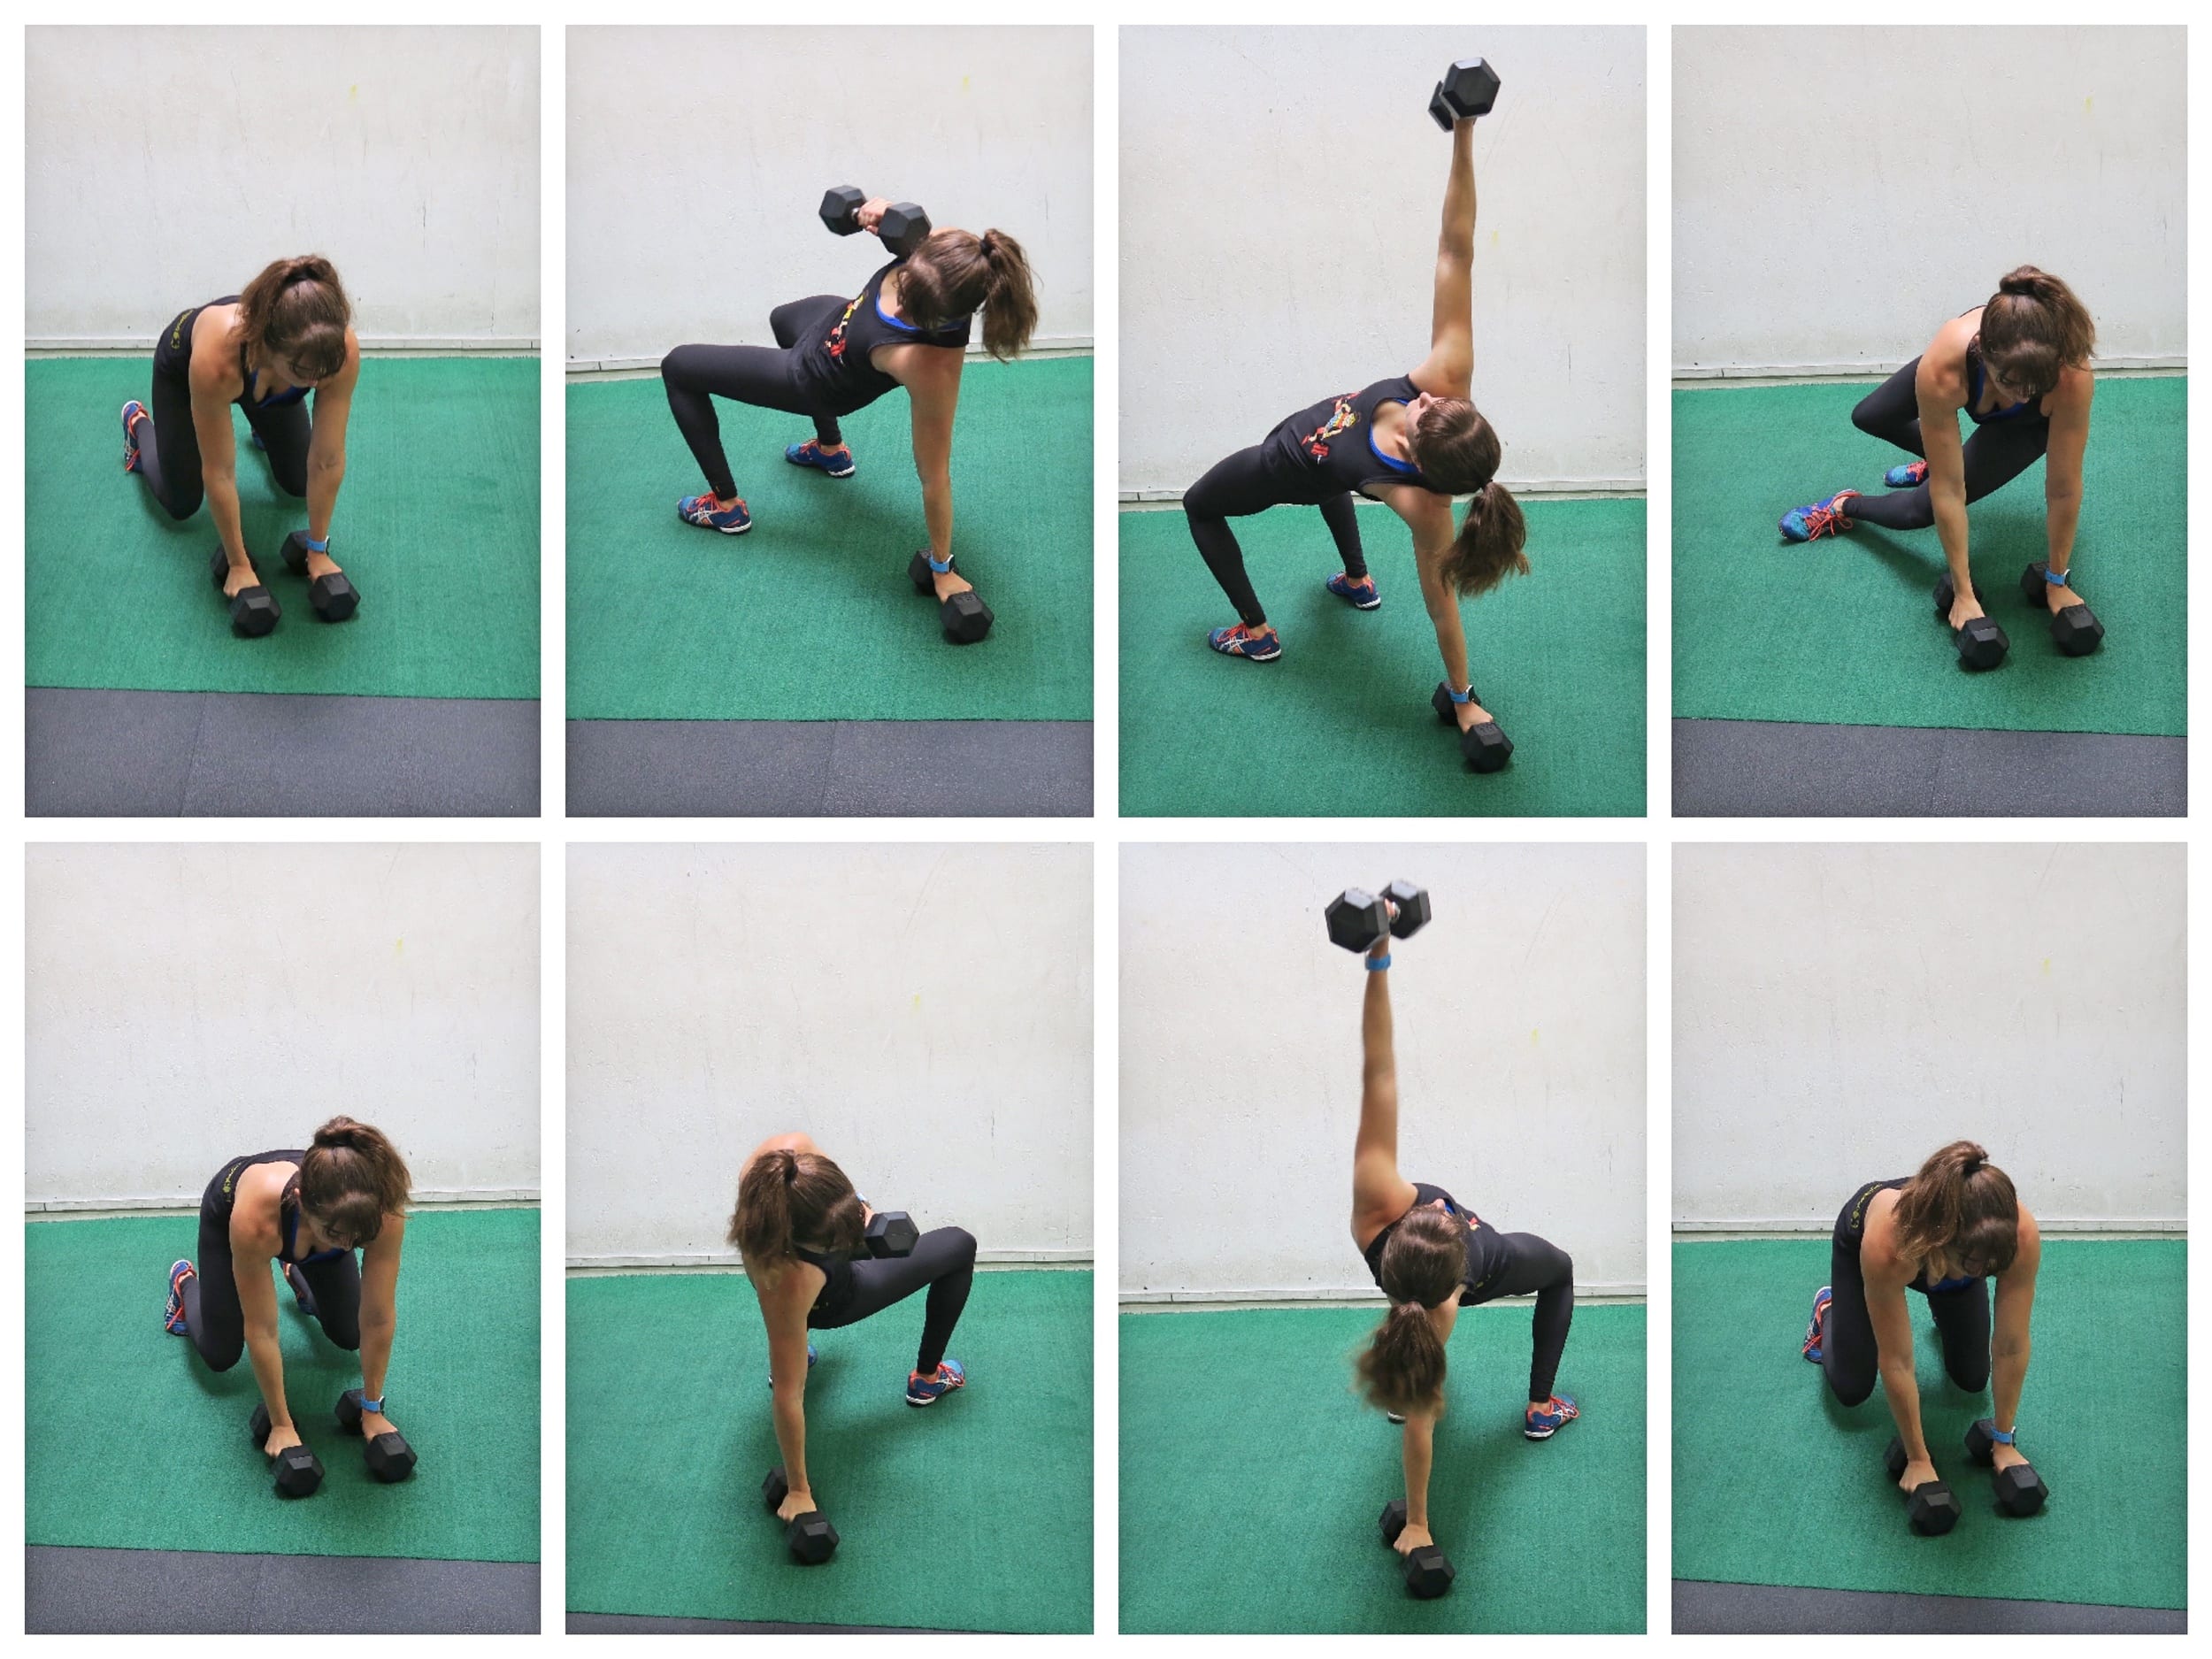
To do the Sit Thru Bridge and Press, start on your hands and knees with a dumbbell under each hand. Then flex your feet and lift up onto your hands and feet with your knees under your hips and your hands under your shoulders. From this position, step your right foot under your body as you raise your right hand and dumbbell up toward the ceiling. As you step through and put your foot flat on the ground, rotate your hips open to the ceiling as you press the weight up overhead. Really squeeze your glutes as you bridge up and press. Then rotate your right leg back under your body as you bring the weight back down to the ground. Come back into that bulldog front position then step your left leg under to lift your right hand up and press the weight overhead as you bridge up. Really bridge up and squeeze your glutes at the top. Keep your abs engaged and do not hyperextend your low back. Keep alternating sides.
Leg Raise Wipers:
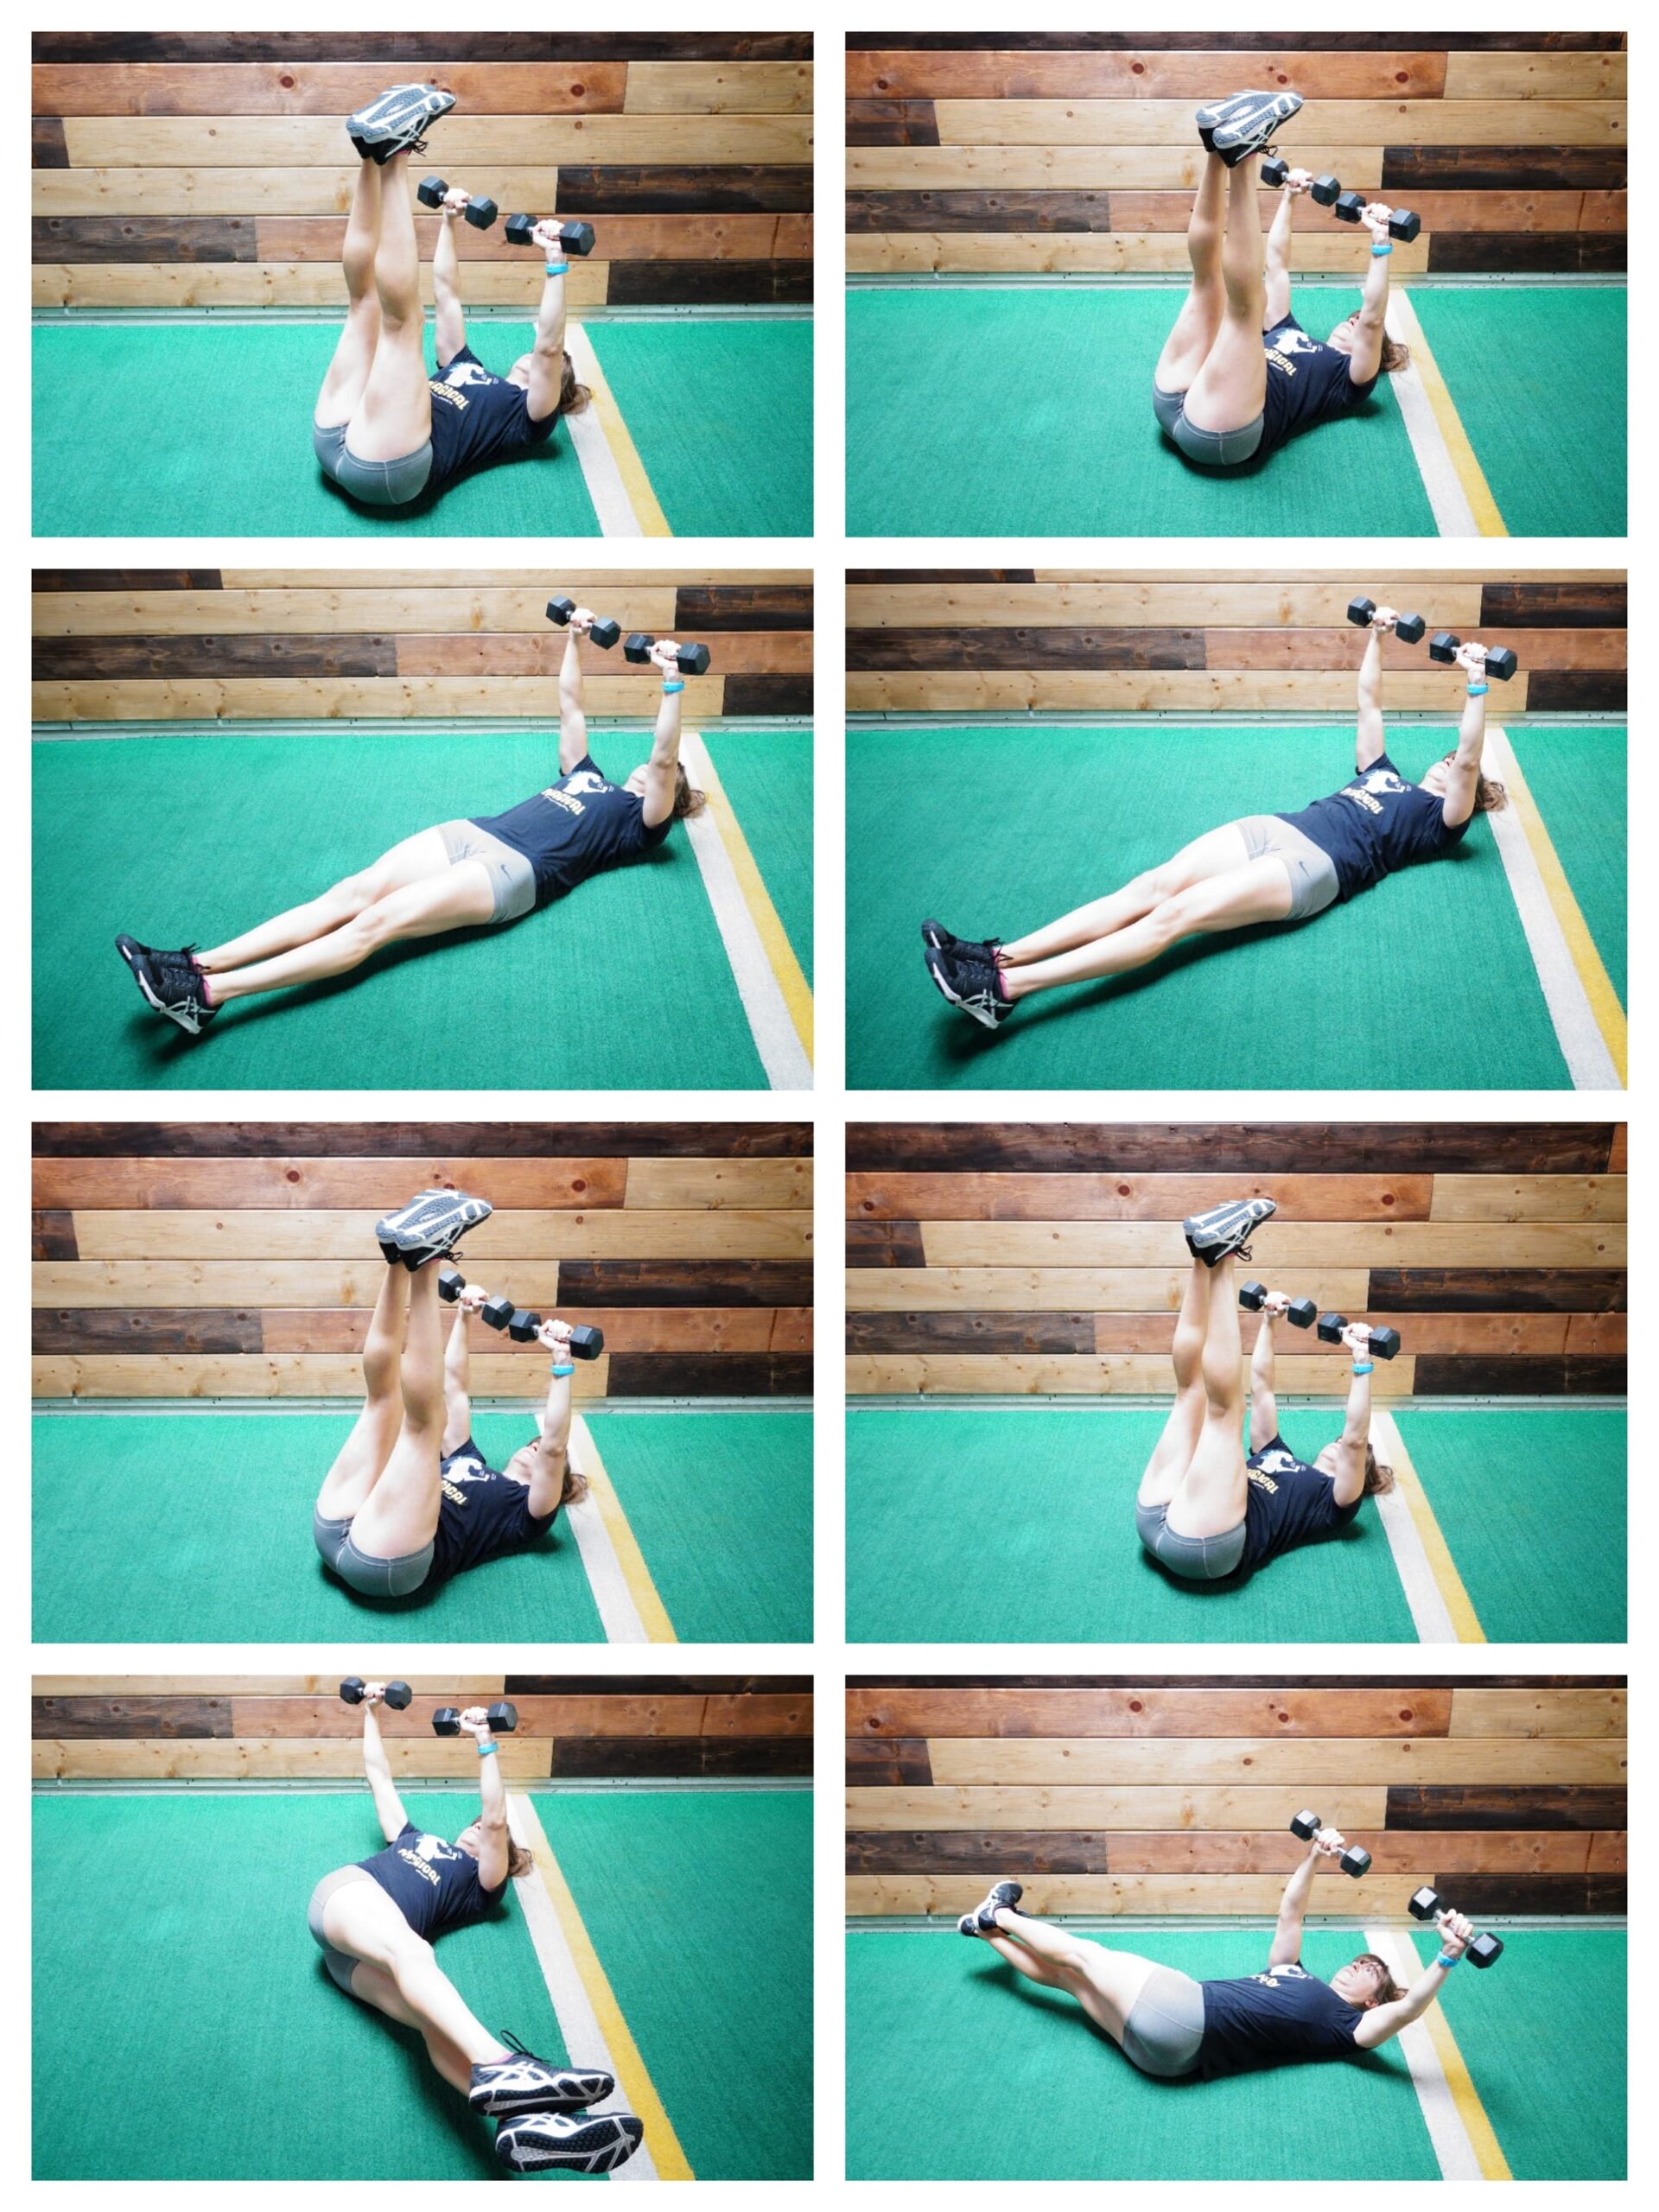
To do Leg Raise Wipers, hold a dumbbell in each hand as you lie on your back with your legs out straight in front of you. Press the weights up toward the ceiling at about chest height. Full straighten your arms and don’t let the weights fall out to the sides. Brace your abs and lift your legs straight up toward the ceiling together. Then, keeping your abs engaged, lower your legs straight down to hover an inch off the ground. You want to lower as close to the ground as you can without your lower back taking over. Beginners may not lower as low. Raise your legs back up toward the ceiling then lower them both down to the right. Try not to let your legs drift away from you as you lower to the side. Keep the weights pressed up toward the ceiling as you twist and lower. You want to lower about 6 inches from the ground. Do not touch down or release the engagement by going to low. Then use your abs to pull your legs straight up toward the ceiling. Perform another straight leg lower down the center. Once your legs are back up toward the ceiling, lower to the other side. Feel your abs working to lower to the side but make sure you don’t go too low and either disengage or need to use your lower back to pull your legs back up toward the ceiling. Keep the weights pressed up toward the ceiling the entire time. Beginners can bend their knees to 90 degrees to start and tap their toes down center for the leg raise.
Want a killer Upper Body and Core program with some great cardio finishers like this one?
Check out my Arm Burner Cards!