Unlock More Pushups With 3 Tips

Unlock More Pushups With 3 Tips

Push-ups aren’t just hard. They’re deceptively hard.

Because what looks like a simple bodyweight upper body move…Is actually a moving plank.

It’s why mastering the full push up isn’t just about upper body strength – it’s about creating full body tension.

It’s a mind-body connection challenge!

So if push-ups have felt frustrating, painful, or even impossible —

I want to walk you through exactly how to build up to that strong, picture perfect push up from your toes with not only the best modification to use but 3 key form cues.

These tips will help you build up to multiple reps in a row without dropping to your knees, compromising form or guessing at what’s actually working.

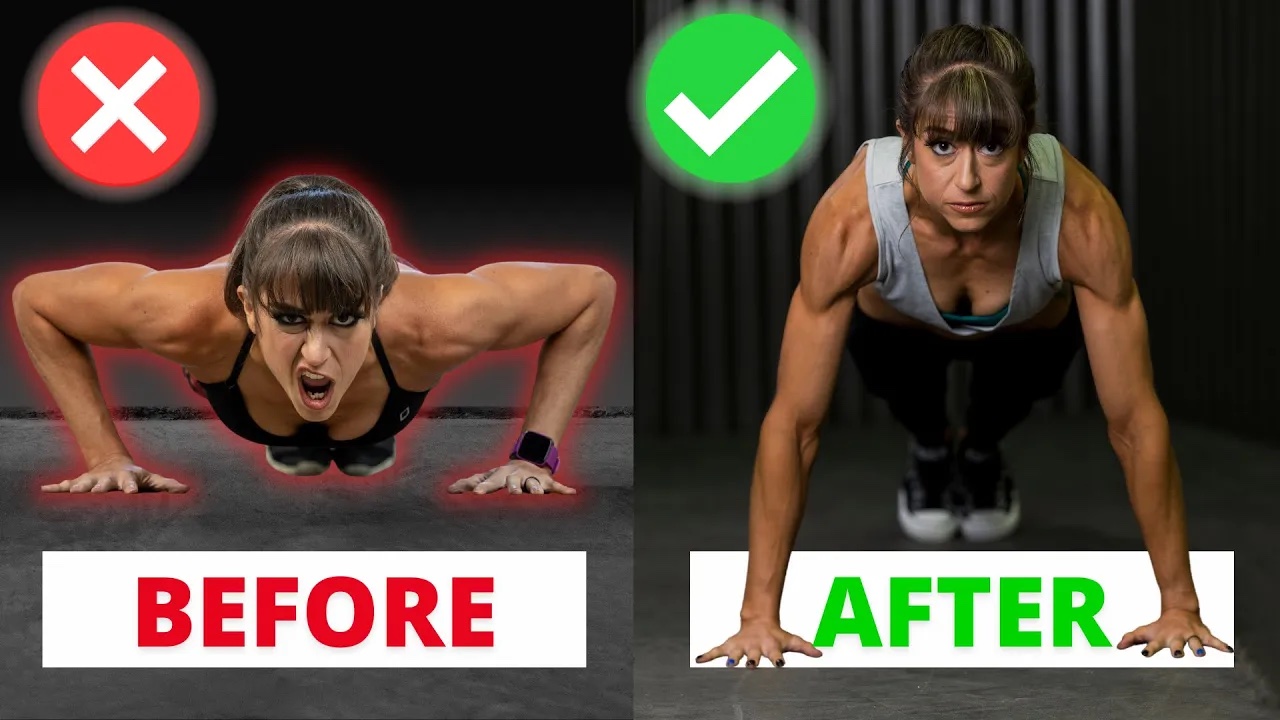
So what’s the best way to modify the push up to regress to progress?

Stop dropping to your knees…Use an incline!

That’s right. The best modification isn’t off your knees.

It isn’t partial reps. It isn’t powering through fugly reps hoping they get better as you get stronger…

It’s using an incline that meets you where you are at – whether that’s off a wall, counter, bench or barbell in a rig.

An incline works best because you’re not changing the movement – it’s still that full plank off your toes.

You’re just adjusting the resistance.

An incline allows you to scale the difficulty without changing the form.

This allows you to learn to set up in that full plank position and create tension through your core in the right way as you build up strength.

You learn to drive back through your heels.

You learn to flex your quads and use that posterior pelvic tilt, or tuck of your pelvis toward your ribs, to brace your core.

You learn to maintain this core engagement as you have to power the press using your chest shoulders and triceps with proper scapular control.

You learn the form you’ll need even as you lower the incline closer to the floor.

And this is what makes this modification better than the knee push up, where you only learn to engage down to your knees.

Everything moving together is what makes the push up hard and a mind-body connection challenge over just a strength one.

The incline allows you to slowly master that control.

And as you get stronger, you lower that incline.

The wall becomes a countertop. The countertop becomes a bench or the edge of a couch. The bench becomes the floor.

You’re building strength with real push-ups and you can make sure your form is solid before you lower down further.

But with using the incline you have to be conscious to not just add more reps at the incline you’re doing.

Instead lower it if you can do more than 5.

Because too often when we do modified moves, we just make ourselves better at the modification by adding more reps.

While this builds strength endurance, it can also keep us stuck just getting stronger at the modification.

So if you can do 5 reps, lower the incline just a bit!

Better to even do 1 rep at a harder variation and have to rest to do more than 5 in a row at an easier one if you want to master that first full one off the ground!

And as you progress that incline, you need to focus not just on making your push ups look pretty, mimicking proper from – you’ve got to actually make sure you feel the correct muscles working.

That’s why I wanted to share 3 key push up cues to help you focus on having the most powerful and efficient movement possible.

Too often we forget that strength isn’t just brute force but about efficiency. Can we use the correct muscles to the correct extents at the correct times…

Here are 3 cues to make sure you do exactly that…

Cue #1: Drive through your heels.

Even though the push up is an upper body move – your lower body can’t be disengaged.

Driving back through your heels to flex your feet creates that tension all the way up your legs and through your core.

It actually reduces the pressure on your upper body to press, making your body move efficiently move as one unit.

Remember, you’re not just pressing. You’re planking.

This cue is so powerful to focus on as the tension it creates fixes a ton of common form problems.

Struggle with your hips sagging? Worming up from the floor? Butt too high in the air?

All of that starts to clean up when you drive back through your heels.

Cue #2: Grip the ground.

Have you ever really noticed what you’re hands are doing during a push up?

Too often we don’t pay attention to the pressure we’re applying down into the ground.

But your hands aren’t just passive in this movement – they’re your foundation.

You want to push that ground away to properly press and that starts with spreading your fingers wide to grip the ground with your entire hand.

This simple change and focus does two major things:

It protects your shoulders and elbows by allowing you to better engage your back and helps you avoid that elbow flare that can lead to more strain.
It activates your chest for a more efficient press and less overuse of smaller muscle groups.

A little bonus cue to create a more powerful press and better engage your pecs is to imagine trying to drag your hands together on the floor as you push up.

This focus on adducting without moving also helps you avoid rocking out on your hands which further protects your wrists and elbows while working your chest more.

So if you’ve ever struggled with elbow, neck or shoulder pain as you do more push up work, this cue is a game-changer.

And Cue #3: Engage your back.

Yes — your back.

Proper back engagement leads to proper shoulder blade movement, which in turn supports and protects your shoulders.

So your backs…It matters more than you think.

Here’s what proper scapular movement looks like in a push up so you can better use your chest, shoulders and triceps without overloading your neck shoulders or elbows…

As you lower down, engage your upper back to pull your shoulder blades toward your spine, retracting them.

As you press back up, push the ground away, pulling your shoulder blades apart or protracting them.

You’re not trying to lock them in place. You’re guiding them through the movement.

No pinching, no shrugging, no leading jutting your head forward.

Just your back engaged to stabilize your shoulders as your shoulder blades move.

This cue alone can make you feel like your upper body instantly got stronger!

And combining all three cues and the incline modification? Well that’s magic.

Here’s your cue checklist next time you do a push up.

Set up off an incline you can control and drive back through your heels to feel tension through your entire core. Grip the ground or bench or bar as you unshrug your shoulders engaging your back.

As you lower feel your shoulder blades come together.

As you push the ground away (yup that tension through your hands) and drive back through your heels, feel your shoulder blades come back apart.

And then repeat.

Test out a lower incline.

If you can only control the lower down, stop at the bottom and reset and know that’s where you max out for now.

Remember sometimes even a single rep done well at a lower incline can be better than more reps done with a higher one.

It’s not just about doing more. It’s about making our practice more perfect.

Quality reps lead to improvements. We don’t want to ingrain bad habits.

Regress to progress and use that incline as a way to build up.

So stop grinding through sloppy reps. Start training with intention.

And guess what? That picture-perfect push-up may be closer than you think!

Ready to conquer those push ups?

–> Take my 30-Day Push Up Challenge

4 Tips To Increase Your Push Ups (In 30 Days)

4 Tips To Increase Your Push Ups (In 30 Days)

If your push ups are…well…fuglier than you’d like, then it may be time to check your ego, break things down and focus on regressing to progress.

Sometimes little form deviations creep in and we don’t even realize it.

At times like this, it isn’t just about doing more push ups.

Because practicing improper form or recruitment patterns only further ingrains the movements we want to correct.

The question is….how do you change your form, get the correct muscles working and build up to those picture perfect push ups from your toes?

It isn’t just about simply modifying the push up.

There are actually 4 main forms of skill work that I’ve seen dramatically improve clients’ push up results when combined over the week.

I call it their “skill work” because we are working on specific push up variations or training techniques to improve their push ups skills.

And in this video I want to go over each of these 4 skills and how you can implement them into your weekly training routine, as well as one of the most unsexy secrets to improving your push ups, so you can see great improvements over the next 30 days!

Just remember with each of these techniques, you may need to check your ego and modify further than you’d like to make sure you’re feeling the correct muscles working and keeping that picture perfect form.

And FILM yourself with your push up practice!

By filming, you allow yourself to see your movements to change your cues and movement patterns while staying super intentional and focused on what you feel working as you do the actual work.

You’ll also have a great way to track your progress as your form improves and you advance those push up variations and the skill work you’re doing.

Now diving into the skill work…

I’ve mentioned multiple times you may have to modify moves.

That being said, so often we modify our push ups off our knees or an incline and find ourselves never really progressing.

It feels like we’re just getting stronger at the modification.

And that’s why I like to include Eccentric focused push up skill work first in one workout each and every week.

Once you’re warmed up, you will want to perform a few rounds of eccentric only, or eccentric focused, push ups before then going into whatever other workout you have planned.

Putting the skill work first allows you to do it when you’re freshest and focused so you can be very intentional and controlled with the moves. This also allows you to often do a harder variation than you could if fatigued.

And specifically want to use eccentric push ups because we are strongest in that eccentric portion of movements.

This means we’re able to often do a HARDER variation, even if for the eccentric part of the exercise only, than we maybe even can for the full exercise.

In push ups, the eccentric portion of the move is the lower down.

Eccentric means the elongation or stretch of the prime mover muscle. In the push ups that’s your pecs.

So in the lower down of your push up, you may find you do feel strongest.

You may find you can lower down in a full push up from your toes…but you just can’t seem to get back up!

And we want to use this to our advantage to help us PRACTICE and spend time under tension with a harder variation of the move than we can yet fully control.

Because if we do only work on that modified variation, we will never help ourselves truly progress forward.

So if you can, choose a variation harder than you can perform for the full push up movement, and simply do the lower down only with proper form. Spend about 5 seconds on that slow and controlled decent.

Then simply reset at the top.

This fully eccentric only option is great if you are really in between levels and can’t maintain proper form on the way back up.

If you are instead trying to build up your strength endurance a bit more to increase your rep number, or even in between variations where you can’t yet do the next level with control but your current incline or modification is just a bit too easy, you may find you use an eccentric focused push up instead.

With the eccentric focused variation, you WILL press back up but you’ll still use that slow 5 count lower down to really spend time under tension with the hardest variation you can control.

Just make sure that push back to the top allows you to maintain proper form.

This is great to even help you build up the number of reps you can do once you’ve got picture perfect push ups off the ground.

To use eccentric push up work, try this reps and sets layout…

Choose a variation you can do no more than 6 reps with. If you hit 8 reps, you need to advance the variation. Complete 2-4 sets, resting 90 seconds between sets. On your last set, do a drop set. Right after you finish your 6-8 reps, modify just enough that you can complete 6-8 reps more…but with those making you hit failure.

The next skill I like to include is Bottoms Up Push Up work because it addresses one of the hardest parts of a push up and complements the Eccentric work so well.

This push up variation helps you build the strength to push back up while maintaining that straight line from your head to your heels.

Because in that transition from lowering down to pushing back up is where we often see the most deviations in form pop up and tension being lost.

This skill though is the HARDEST to perform.

Seems simple but truly is deceptively challenging so to help yourself truly perform it well, modify more than you think to start.

You want to set up at the bottom of a push up, really focus on engaging everything even running through a set up checklist to make sure everything is engaged because you’re then going to push up off the ground with everything moving TOGETHER.

You can’t allow yourself to worm. Or your butt to go up in the air.

You want to have everything flexed and be pushing the ground away so you’re almost feeling like your body is hovering off the ground before you officially lift.

But this helps you learn to create and maintain tension throughout the movement and maintain full control while bracing your core.

Even think about that exhale as you push up.

And unlike the eccentric work, for this, you will need to start with a modified variation and even more of one than you usually use.

To include Bottoms Up push up work, you’ll again want to do your skill practice at the start of your workout after your warm up.

You will focus on a variation you can only do 5 reps of. And you’ll perform 4-6 rounds, resting 1-2 minutes between rounds. Do not skip the rest so you can keep working at the hardest variation possible. Do not be afraid to even add in 15-20 seconds rest between reps at points to complete the 5 each round.

Do fewer rounds if you find you’ll have to modify further to complete more than 4. Better to just do the most advanced variation you can for a few quality rounds.

The 3rd skill work I include for clients uses Cluster Sets to help them improve their strength and endurance and create a great training volume but also while using a harder variation of the push up than they usually would be able to for the same number of reps.

Think about the variation of a push up you can right now do for 10 reps.

Now think about what variation you may be able to perform if you could only do 2 reps.

It’s probably a bit more advanced, right?

Cluster sets allow you to do 10 reps but with that variation you normally would only use for 2.

With Cluster Sets, you’ll set your total rep count for the set and divide those reps into mini sets of just 2-3 reps at a time with about 20 seconds between mini sets before you rest longer between rounds after all reps are complete.

You want to choose a variation that really challenges you for just those 2-3 reps.

This helps you keep progressing the variation you can do while getting in more training volume (more reps) at that harder level.

This works because it helps your body adapt to the harder variation, not just get better at the modification, and builds strength to control that movement.

The short rest periods, in the most unscientific terms possible, basically trick your body into believing it can do 10 reps with a version you can really only do for 2 reps.

But this helps you build strength and control fast!

To include this skill work, you want to set a rep count of 8 for each set and perform 3-5 sets.

You should be able to do only 2-3 reps in a row of the push up variation you use for the 8 total reps. And even at the end may find you have to do some singles to get all 8. Rest 10-20 seconds between mini sets and then 90 seconds between full sets.

Better to rest longer though between sets over modifying as the whole point is using that harder variation!

Now the final skill work I like to include with clients is Push Up Holds.

Ever notice you sort of “stick” or fail at specific points in the push up?

Like you can’t lower all the way down without flopping?

Or you get stuck at the bottom or half way up?

That’s where push up holds can help.

You can hold right at your stick point to help you strengthen that position and learn to engage everything correctly where you usually stall.

When we eliminate the movement, we can often focus better on what we feel working and even work on that mind-body connection to recruit muscles harder.

This helps us really perfect and tweak our form and build that stability.

And holds are deceptively hard, building core and upper body strength.

But you may find that by setting up at specific spots in your push up, you can even use a harder or more advanced variation than you can do to complete a full push up.

This can really help you keep progressing toward that first full one from your toes. It can also help you increase your reps by strengthening where you normally fail.

So find the points you struggle with the most in your push up, and include timed holds at those spots really focusing on what you feel working and engaging those muscles harder.

I’ll often include push up holds for 20-30 seconds and 2-3 rounds for clients even as part of their activation work or in an isometric recovery workout for the week. Pairing them even with pull up holds can be killer for the core and upper body!

Now the final tip I want to give is the most unsexy of secrets, and something you probably don’t want to hear…but truly is often the missing component of all of our push up work…

It’s that PREHAB work that we can and should be including in every warm up.

We often think, “I’m weak! That’s why I can’t do more push ups!”

And while improving our strength is key, I know a lot of people that are very strong, can bench press a lot that aren’t that good at push ups.

It isn’t just upper body, or even core strength, that is needed.

It’s good scapular control and activation of so many muscles to work together from your head to your heels.

This means doing that foam rolling, stretching and activation to get things working correctly so you can move efficiently for the push up.

This prehab work will also help you avoid wrist or elbow or shoulder injuries which are so common as people include more push up work in their routines.

So don’t ignore the importance of that 3-part prehab process in your warm up so you can get the correct muscles working and avoid injury to keep working on those skills and building up!

Make all of your focused skill work pay off by getting on that mobility and stability work.

And as you add in that prehab, make sure you’re including all 4 of these skill sessions (1 time each per week) at the start of your workouts for the next 4 weeks.

Want more amazing workouts to improve your push ups and rock those results? Join my Dynamic Strength Program!

–> LEARN MORE

The Best Push Up Exercise (You Aren’t Doing)

The Best Push Up Exercise (You Aren’t Doing)

No matter how much equipment I have available, I still love including a push up variation in my upper body workouts.

They are an amazing move to target your chest, shoulders, triceps and core.

And not only are they an amazing way to build strength and muscle, but there are so many push up variations you can include to target different muscles more or less based on your needs and goals.

Want to work on shoulder stability or anti-rotational core strength?

Try the push up with shoulder tap.

Want to target your triceps more?

Include a close grip variation.

Want to work your upper pecs extra?

Try a decline variation.

But in thinking through all the different options out there, there was one variation that came to mind as often being underutilized…

The push up plus!

In this video, I want to go over how to do this essential push up variation and ways to modify the move if you can’t do a push up from your toes on the ground. 

But first I want to explain why I think this variation is so important to include….

This push up isn’t the fanciest variation out there, but it is one of the most essential to include if you want to be a push up rockstar, improve your overhead press or bench press weights or even avoid neck, shoulder or upper back aches and pains.

It is so important to include because of that simple rounding and scapular protraction at the top of the push up.

This seemingly simple extra movement added on to the basic push up works an often overlooked muscle – the serratus anterior.

The serratus anterior is an essential muscle when it comes to keeping your shoulder blades, shoulders, neck and upper back healthy and happy and functioning correctly! 

And the push up plus is an amazing move to work this muscle as it is easier often to target this muscle without letting your upper traps compensate.

Too often our upper traps take over in movements meant to work our serratus anterior, which only perpetuates the aches and pains we have.

This scapular control, and serratus anterior strength, will also translate to better movement of your shoulder blades during overhead pressing and even a better ability to support your shoulders during bench press. 

This push up variation is a great way to keep everything healthy and strong as you include more pressing!

So how do you do the push up plus? 

While you will be performing almost just a basic push up, you want to give extra attention to the movement of your shoulder blades and even your hands pressure down into the ground.

Our hands are our foundation and better tension through them into the ground can increase muscle activation of our upper body. And by also being conscious of fully gripping the ground with our entire hand we can help avoid wrist, elbow and even shoulder aches and pains.

To do this push up, set up with your feet together and hands just outside your chest. Spread your fingers and flex your quads as you drive back through your heels.

You may even find it helpful to ever so slightly turn your hands out. This can even further help you engage your serratus anterior.

Then pull your shoulders down feeling them unshrug as you engage your back.

With your body in a nice straight line, lower down keeping tension.

Feel your shoulder blades draw toward your spine.

Then at the bottom, push the ground away and feel your shoulder blades move away from your spine.

As you reach the top of the push up, push the ground away a bit extra as if pulling your shoulders forward.

Feel your thoracic spine round up as you try to pull your shoulder blades around your ribs.

You may tuck your chin as you round up to go with the natural spinal flexion.

But do not let your butt go up in the air. You may slightly tilt your pelvis under instead to engage your abs more with the posterior pelvic tilt.

But you really want to focus on pulling your shoulder blades around your rib cage as you push that ground away.

This action really works that serratus anterior.

You’ll then move back into that full plank position and perform the push up again.

Working your press with the freedom to move your shoulder blades and be able to control that full range of motion is what makes this move so amazing for your upper body.

Not to mention you get that little extra core work with the pelvic tilt on top of the fact that the push up is a moving plank!

Now what if you can’t do a full push up from your toes? How can you modify this move?

An incline variation is always a great way to modify while allowing you to train that full push up plank position. 

Too often we do turn to knee push ups but this doesn’t teach us to properly engage our legs and drive back through our heels. It can keep us stuck getting stronger at only a modified variation.

It’s why that incline and working down in reps as you lower the incline is so key. 

You can use a rack, adjusting the barbell height or even boxes, lowering them down as you progress. 

If you are limited on incline options, you can select one that is a bit too high and slow down the tempo.

If you only have one that is too low, consider just the eccentric portion of the movement and start with the “plus” BEFORE you lower down for the rep. 

A final tip to modify if you need to work around wrist pain, is to put a mat folded up under the heel of your palm. This reduces the wrist extension demands to make it easier on your wrist. 

Bonus Tip:

And one bonus tip if you’re ready for a bit more of a challenge with this move and to test your core strength and stability, try including a dead stop or even hand release at the bottom.

This forces you to really engage prior to pressing back up and even makes sure you work through the fullest range of motion possible without using any momentum! 

That press back up from a dead stop is harder than we give it credit for, especially if we are super conscious that everything moves together as if our body were a solid board.

But even as you add in this dead stop or hand lift, don’t rush through the protraction at the top of the push up. Really focus on feeling around your rib cage even working!

So whether you’re looking to mix up your push up work, improve your upper body strength and stability to lift more while avoiding injury or just want to build up to that first full push up from your toes, this is an amazing push up variation to include in your workout routine!

And for more tips to improve your push ups, here are two videos to help!

10 Tips to Increase Your Push Ups (in 7 Minutes) 

Things No One Tells You About Push Ups 

Can’t Do Push Ups? Try These 5 Tips

Can’t Do Push Ups? Try These 5 Tips

You’ve been working at them and working at them…

But you just don’t feel like your push ups are progressing no matter how hard you try.

Yet you feel like you’re soooo close!

That’s why I wanted to share these 5 tips to help you adjust your workouts and push up work to finally get over that hurdle and bust out picture perfect push ups from your toes.

Because we don’t just want to do one beautiful push up…we want to look like a push up rockstar!

First, don’t just include push ups for only reps and sets – use intervals instead to work on your push ups! 

A big part of improving our push ups is our mind-body connection, not just our overall muscular strength.

Often we are strong enough already, we just aren’t able to fully recruit the correct muscles in the correct order to work together as efficiently as we need.

It’s why our hips sag as we focus on pushing back up or our elbows flare or we can’t engage our back to support our shoulders.

That’s why interval work over counting reps can help.

Intervals allow us to focus on what we feel working during each and every rep. 

Because we don’t have to care how many we do.

We are just working for that set amount of time. We also don’t get to be “done” any faster by rushing through the reps.

So having that set time frame to work allows us to focus on each rep.

AND it allows us often to do a higher volume of work with a harder variation over getting focused on doing more reps while using a more modified variation.

Often when we see 3 rounds of 8-12 reps listed, we modify the push up to do more reps each round.

But this often only helps us improve our strength endurance to do more reps of that modified variation.

Using intervals, if you know you have 1 minute to work, you can do a rep of the hardest variation, pause. Reset and do another rep of that same challenging variation. Pause again and repeat. You can then modify if you can’t keep the rest about 10-15 seconds between reps.

This allows you to create a great training volume while using that harder variation to build up!

And you can stay focused on what you feel working over just trying to get a certain amount of reps done!

Next, don’t be afraid to mix up the push up variations you use! Push ups can be their own best accessory exercise! 

Often if we can’t yet do a full push up, we don’t consider mixing things up.

But different grips and push up variations can help us target our weak links and strengthen them while also allowing us to get in more push up work.

So instead of just using the standard push up multiple times over the course of the week, vary up the types of push ups you include.

Try close grip to work those triceps more while requiring less scapular control.

Try shoulder tap push ups to work on that anti-rotational core strength and shoulder stability.

Mix up the variations you use, modifying them even to target those weak links while still working on your mind-body connection overall for push ups.

And don’t be afraid to also change up tempos and ways of modifying. If you always use an incline, try a band assisted push up instead!

Which brings me to tip #3….Try doing push ups but ONLY the lower down. 

Often using even just one single aspect of a movement can help us strengthen it.

And when it comes to our push ups, we can see great gains by just focusing on the eccentric portion of the movement, or the lower down, because we are actually stronger during that part.

This means we may be able to slow down the tempo and spend more time under tension while doing a more advanced push up variation than we would be able to if we had to press back up.

So if you’re feeling stuck on an incline or modified variation, try going to that next advanced step up and do only the lower down, focusing on a slow 5-6 count.

Once you lower all the way down, simply reset at the top, don’t try to push back up.

Complete even just 3-5 reps this way or even an interval of work.

But focus on what you feel working and everything engaging correctly as you just control the lower down of the most advanced version you can!

And then even include PAUSES in your push ups, especially in this variation. 

While you can pause at points in any push up variation you include to work on those points you tend to get stuck, it can be extra beneficial to include pauses during the eccentric only push ups at the very bottom.

Hold in that perfect plank an inch or so off the ground. Focus on engaging everything as hard as possible and even run through a checklist of what you feel working in your head.

Hold here for a 3-5 count then relax down and reset.

This ability to hold tension at the bottom of your push up will ultimately help you maintain tension to do the full press back up.

Often when we hit the bottom of the movement, we struggle to shift from lowering down to pushing the ground away to press back up.

This ability to maintain that plank position at the bottom is key.

It’s honestly often the missing component in our mind-body connection and where we lose tension, holding us back from full range of motion perfect push ups!

So try using that pause at the bottom. Although you can also implement pauses throughout the movement if you find there are other points you tend to fail.

Like if you get stuck when your elbows are bent to 90 degrees, try holding there too!

But don’t be afraid to included these pauses to create more time under tension and even give yourself the mental ability to focus on what you feel working without having the movement factor in!

Then stop just trying to do more reps in a row. 

Often to build strength, we do want to do one more rep with a weight.

One more rep of that challenging movement to create progression and build strength and muscle.

But when working to progress a SKILL, simply doing more volume of a more modified variation can keep us stuck.

Instead we want to focus on fewer reps in a row of a harder variation.

We can build up volume by resting even 15-20 seconds between 1-3 reps to get the 8-12 reps we want to complete.

But we can’t just shoot to keep trying to do 10 reps in a row.

Or we will end up continuing to need to use the modified variation and only continue to get stronger with the modification.

Often when we get focused on hitting a higher rep range for a move too, we rush through the rest. This doesn’t allow us to fully recovery and requires us often to modify even more over the rounds.

Instead, rest more and do fewer reps in a row!

Seek to use a variation you can only do a single rep of. If you can even do 2-3 reps, try something harder!

If you’ve been stuck, feeling like you’re just at that tipping point to be able to do a full push up, try implementing these 5 tips in your workout progression.

Use intervals over counting reps.

Use different push up variations.

Focus only on the lower down and even include pauses.

And then don’t be afraid to do single reps in a row, building up that volume over the interval of work!

Want amazing workouts to build full-body strength?

Join my Dynamic Strength Program!


10 Tips To Increase Your Push Ups (In 7 MINUTES)

10 Tips To Increase Your Push Ups (In 7 MINUTES)

Are push ups your arch nemesis? 

Do you struggle to do even one?

Don’t worry, you’re not alone.

In this video I’ll share 10 tips to help you improve your push ups fast and be able to perform them flawlessly by addressing the common form issues and weak links we all tend to have!

Tip #1 is Regress to progress.

Sometimes you have to take that step back to truly improve. 

Often we just keep trying a variation we haven’t earned yet and wonder why things aren’t progressing.

And it’s because we keep cheating or compensating to do a harder variation than we can control. 

This can not only lead to injury but often keep us stuck.

Proper form, using the correct muscles to power the movement, is what makes us efficient with an exercise. And this efficiency is what strength truly is. 

You can’t be efficient with a move you aren’t doing properly!

So if you’ve stalled, try modifying the move even just one step backward, off an incline instead of the ground, to refocus on what you feel working and make sure everything is engaging correctly in the correct order. 

Get the correct muscles working. While it stinks to step back, this can help propel you forward!

Tip #2: Run through a set up checklist.

How often do you do a move and simply…well…do it?!

We don’t consider how we are positioning each part of our body or run through what we need to engage and how it needs to be engaged to do the move. 

While we want this process of engagement to become natural, when first starting out is key we run through a checklist to make sure we have everything ready to work as it should!

So as you set up for the push up, run through a checklist of what you often struggle to engage to make sure you’ve set yourself up to move well from the start. Don’t just rush through hoping to mimic the movement. 

A great set up checklist for overall form may be…

#1: Set your hands outside your chest and spread your fingers to drive down hard into the ground. 

#2: Engage your back to unshrug your shoulders. 

#3: Brace your abs, even squeezing your glutes to do a slight posterior pelvic tilt.

#4: Drive back through your heels as you flex your quads. 

This sequence helps you make sure you’ve put yourself in a position to have the correct muscles engaged from the start of the movement.

Tip #3 is Drive back through your heels.

Often we think about the push up as an upper body or even a core move. But our lower body needs to be engaged correctly if we want to be efficient with the movement. 

If we push ourselves forward over driving back, we can actually overload our upper body more. 

And we can make it harder on ourselves for our body to move as one unit.

Instead, as you set up for the push up, drive back through your heels and feel your quads flex. 

This will help you maintain proper plank alignment as you lower down. 

It can help you avoid your butt going up in the air or shifting backward or forward. 

It can even help you avoid those hips sagging because of the tension you’ve already set up through your legs! 

Tip #4 is Set up at the bottom.

If you struggle with that press back up in a push up, it’s key you target that engagement from a dead stop. 

A great way to do this is to actually set up at the bottom of your push up, whether you’re using an incline or doing these off the ground. 

Just realize this is HARDER than lowering down because everything has to be fully engaged to press correctly BEFORE you even move. So don’t hesitate to modify starting out with this. 

But set up at the bottom of the push up, run through your checklist to make sure everything is engaged, take a big breath in and then focus on that solid push up to the top as you exhale. 

Too often we just work on moves top down, but that bottom up work can be so key especially if we do struggle with that transition from lowering down to pressing back up in a push up.

Tip #5 is Practice stick point holds.

Often there is a part of the push up we struggle with the most. 

It could be maintaining a straight plank position at the bottom or in that push about half way up… 

By using some push up holds in even our warm up activation work or as a burner to end our workout, we can build our strength endurance by HOLDING in these positions we struggle with. 

You can not only cycle through these positions in a single interval, pausing in a spot for 5-10 seconds, but you can also do single longer holds just setting up directly at your stick point! 

As you hold, run through how you feel everything working and your set up to really ingrain that positioning and recruit those muscles efficiently!

Tip #6 is Use a band.

While I love incline push ups to help build up, the more variations of a move we can include, the more we can help ourselves really learn to engage everything correctly. 

Sometimes with incline or knee push ups, we can feel like we are getting stronger, yet still be slightly stuck.

The band is a great way to reduce tension on your upper body but work through that full range of motion off the ground. 

It can also be a great way to increase your strength endurance if you’re stuck only able to do a few reps off the ground currently.

To do this, set up a band at about elbow height in a rig and position yourself in the push up with the band under your chest. 

You can set the band up higher if you do need more assistance or have a higher stick point. 

Then lower down performing the push up. As you get deeper in the lower down, the band will take away some of the load on your upper body and even add assistance as you push back up! 

Tip #7 is Focus on pushing the ground away.

If you think about just lifting your body up, this often leads to our butt going up or some other version of the worm happening.

We lose tension on our foundation and a focus on the true movement pattern we are performing.

If you think about a bench press, your focus is on pressing the weights up. 

You want that same focus in a push up to best activate your chest, shoulders and triceps.

With the push up, focus on pushing the ground away with your hands.

This can help you avoid your elbows flaring way up into a T shape with your body. 

And it can help you remember to focus on powering that press with your upper body!

That tension down into the ground will truly better activate your pecs, shoulders and triceps!

Tip #8 is Include activation work in your warm up for your BACK.

Proper scapular control makes for a more powerful press. 

If you want to protect your shoulders, neck and elbows as you work to improve your push ups, you want to make sure you include scapular mobility and activation work in your warm up routine. 

If we are able to properly move our shoulder blades, we are better able to use our chest effectively in the push up as well.

In your warm up consider even a scapular wall hold as part of your activation series. This will open up your chest and engage your back, pulling your shoulder blades toward your spine. 

It is a great way to make sure your back is ready to work and support those shoulders throughout the push up movement! 

(It’s also a great move to improve your posture if you’re doing extra pressing).

Tip #9 is Use cluster sets.

If you want to be able to do more push ups in a row, you have to do more push ups in a row to build up that strength endurance. 

Instead of modifying over rounds, consider designing your push up work as cluster sets.

Set a total number of reps for the round, say even the goal is 6. 

And break it down into sets of what you can do well, even if that is just 2. Do 2 reps and rest 15-30 seconds then do 2 more. Do this pattern, even performing singles if needed to hit 6 then rest for longer between rounds. 

This way you are still hitting your desired number of reps BUT in a way you can do each rep with the most challenging variation and proper form.

By resting for so short, you don’t let your body fully recover which can so to speak trick it into believing you’re able to do 6 in a row. You will see your strength endurance and push up reps increase quickly implementing this technique! 

Tip #10 is Include anti-extension core work.

The push up is basically a moving plank. 

And while planks are a great move to include, they can also get a bit boring, especially if you’re just doing the basic front plank. 

So if you want to mix up your core work in a way that will really help your push ups, consider other anti-extension core exercises as part of a finisher to your workout.

It may be simply including a bird dog version of that front plank or even a dead bug variation that helps. 

Anti-extension exercises are ones that make your abs work to avoid arching of your lower back, which will help you avoid your hips sagging in push ups!

You may even include an anti-extension move in your warm up to get your core ready to work and establish that mind-body connection prior to your push ups. 

Just make sure you’re not doing too much to fatigue it prior.

Remember, the key to success is consistency and practice. So, make sure to incorporate these tips into your workout routine and track your progress over time. 

–> More Push Up Tips – Use Your Back