We’ve helped over 10,000 women improve their metabolic health to lose fat, gain muscle, and become their most confident with our STRONG System built for real women with busy lives.
Andrea brings over a decade of coaching experience and a deeply personal passion for health and fitness. She’s helped clients do everything from lose weight and clean up their nutrition to run marathons and, yes, even touch their toes. But for her, the most meaningful wins are the ones where someone finally feels confident in their own skin.
With a background in college softball, roller derby, figure competitions, and marathon running…including qualifying for the Boston Marathon… Andrea knows what it means to chase big goals. As a long-time vegetarian and holistic nutritionist, she’s also well-versed in how food choices fuel both performance and long-term health. She loves helping clients find doable, sustainable habits, especially when it comes to simplifying nutrition or fitting training into a busy, family-filled schedule.
Andrea’s coaching style is rooted in support, structure, and contagious positivity. She’s the coach who’ll cheer you on every step of the way…and also help you map out your schedule to make sure it actually happens. Whether you’re chasing a pull-up or learning to eat without guilt, she believes the best changes happen when you take it one win at a time.
Credentials: Certified Personal Trainer (CPT) Holistic Nutritionist Pilates Mat & Reformer Instructor
Dialog window
Allison
From a young age, Allison knew she was meant to teach and support others — a passion that led to 15 years in education before bringing her talent for coaching into the fitness space. Her mission? To help clients cut through the noise, build trust in their own bodies, and find confidence through sustainable change.
Having personally navigated struggles with body image, emotional eating, and binge cycles, Allison brings deep empathy and lived experience to her coaching. She loves helping women shift away from constant dieting, guiding them to lift heavier, eat more, and finally see the results they’ve been working for. With a background in behavior change and a strong foundation in pre/postnatal and menopause coaching, she supports clients through life’s transitions with strategy, structure, and encouragement.
Allison is known for her warm but honest approach — part cheerleader, part researcher. She’ll celebrate every win with you, but she’s not afraid to help align your actions with your goals when you need a little tough love. She believes that the best coaching isn’t just about results now…it’s about giving clients the tools and mindset to keep progressing for life.
Wrist pain during high planks and push ups is an all too common complaint.
However, we most often assume that our wrists are simply “weak” and need strengthening.
And while this can be the case sometimes, all too often we end up overworking the muscles of our forearms further in an attempt to strengthen our wrists, which then leads to elbow pain.
While muscle weakness can lead to injury, so can IMMOBILITY.
And guess what?
Our wrist pain is often related to mobility restrictions.
And because we lack proper wrist mobility, we compensate, which eventually leads to elbow, shoulder and even neck pain!
That is why it is key we work on our wrist mobility, and yes, even strength, as we modify moves to work around our lack of proper wrist extension to start.
We also have to remember that, just like our feet and ankles are our foundation during squats and such, our hands and wrists are our foundation during upper body moves!
First, I’ll go over proper push up form so you’re engage muscles effectively and efficiently to prevent wrist and elbow issues.
Then I’ll go over ways to work around your wrist issues during push ups and planks as you also work to CORRECT your mobility and strength issues!
It’s key we learn how to modify and work around AS we rebuild!
Proper Push Up Form To Prevent Wrist Pain:
While I want to share some great ways to work around wrist pain during push ups and planks as you work to mobilize your wrists and even strengthen your forearms, the first key is making sure you’re using proper form during your push up work.
You need to conscious even of your hands connection with the ground.
Yup. Your hands are your foundation. If you don’t have proper tension and placement there, everything else will not engage and work as efficiently.
And it’s funny too because….
When was really the last time you thought about how your hands were placed as you set up? About how you gripped the ground as you set up to do a push up?
Most of us have never really thought about it.
So the first step in proper push up form is spreading your fingers and focusing on placing tension in your hands to slightly GRIP the ground as you set in that high plank, or top of push up position.
For the standard push up, your hands will be right outside of your chest as you set up.
But the key is not squishing your fingers together but actually spreading them apart for a wide base of support so you can actually create tension down into that ground and effectively PUSH THE GROUND AWAY as you press up to the top of the push up.
Ever notice too when you do a push up, how you tend to rock to the OUTSIDE of your hands, especially as you struggle to press back up?
That extra pressure can also lead to wrist and even elbow issues….not to mention eventually even shoulder and neck pain.
Because that change at your foundation, affects how EVERYTHING then moves up your arm during the push up!
So a seemingly small form detail can impact your entire kinetic chain!
By paying attention to your hand set up and that grip on the floor, you can help prevent that overload and rocking out as you work to improve your wrist mobility!
But just like your grip on the ground and hand and wrist position can affect everything up to your shoulders, the reverse can also be true.
If you shrug your shoulders during push ups and let your elbows flare out, that is going to impact everything down to your wrists. You may even find as this happens that your hands turn IN.
So as you set up for the push up, don’t shrug your shoulders. Think long neck…not turtle hiding in its shell! Even feel the sides of your back engage slightly to pull your shoulders down.
Make sure your middle fingers are pointing straight ahead and place those hands outside your chest with your fingers wide.
Then as you lower down, think about your upper arms creating an arrow shape with your body.
Your elbows do NOT need to stay glued to your sides unless you’re doing a narrow grip push up. BUT you also don’t want your elbows flaring up to your shoulders so that your upper arms create a “T” shape with your body either. That is when you end to then place more strain on your wrists and elbows.
So focus on different widths of that basic –> arrow shape.
By focusing top down AND bottom up, you can ensure your hands connection with the ground perpetuates proper form while also making sure you’re engaging your upper body correct to prevent overload or compensations down to your wrists!
And then, of course, you also want to make sure the rest of your push up form is correct, keeping your head in line with your spine and a nice straight line from your head to your heels.
Remember, the push up is basically a moving plank.
For more on overall push up form, here is a great video – Master The Push Up.
Modifying Push Ups For Wrist Pain:
Even if your form is correct though, you may still find you have wrist issues.
So to start, you’ll need to modify the push up to work around your wrist aches and pains. Here are some great ways to do just that!
Most of these place the wrist in a neutral position or reduce the extension required to perform the push up.
Often the wrist extension required for a push up is what causes the annoying ache we feel.
Since we spend so much time with our wrists flexed, typing and texting and a multitude of other daily activities, we often lack the wrist extension needed to perform high planks and push ups.
These push up modifications help you work around that!
Mat Push Ups:
Using a mat is a great way to modify the push up partly because it’s easy to do and partly because it is a super simple way to reduce the amount of wrist extension required.
Basically, the mat acts like a little lift under the heel of our palm so that our wrist doesn’t need to be bent as far.
To do the Mat Push Up, roll a mat up a few times (the more you roll it the bigger the “wedge” under the heel of your hand so the less wrist extension you need). You want something probably about half an inch thick at most to start.
Then place only the heel of your palm on the mat with the rest of your palm and fingers spread out on the ground.
You will notice your wrist isn’t bent as much.
Then gripping the ground with your fingers spread, hold your high plank position or do your normal full push up!
As you improve your wrist mobility, you may notice you can slowly unroll the mat and use less and less padding.
Knuckle Push Ups:
Especially if wrist strength isn’t the issue but wrist mobility, specifically wrist extension, is the issue, doing push ups off your knuckles may be a great way to modify the push up. (It also doesn’t require equipment to do!)
It can also IMPROVE your wrist strength too.
However, some people do find the pressure on their knuckles uncomfortable, which may lead you to use the dumbbell push ups instead.
You can also use a little padding under your knuckles too just make sure the cushioning is stable.
To do knuckle push ups, do NOT tuck your thumb under your fingers. Make fists, keeping your thumb outside and even wrapped around your fingers. You do not want the tip of your thumb caught against the ground either.
Then set up with a neutral grip (your palms would be facing in toward each other) with your hands outside your chest.
The rest of your push up set up will be the same. Doing the move off your knuckles will allow you to keep your wrists in a neutral position.
Just be careful you are in control of your push up movement as the drawback to this grip is you can rock out and lose balance.
You may also use other knuckle hand placements even placing your hands so your palms are facing back toward your feet; however this is a less traditional set up AND a less stable set up.
It could be a good way if you are varying or progressing your push ups to continue to build wrist strength.
Dumbbell Push Ups:
If you don’t feel comfortable with knuckle push ups and they, well, hurt your knuckles, this is a great way to mimic that neutral wrist position without the irritation.
You can also use kettlebells or push up stands.
Especially if you aren’t yet fully able to do a push up from your toes off the ground, heavy kettlebells can be a great way to add a small incline while also placing your wrist in a neutral position.
The safest position for the dumbbells as you do push ups (or even stands or kettlebells for that matter) is with them parallel so your palms face in toward each other as you do the push up while gripping the weight.
You can also slightly ANGLE them to allow you to maintain that arrow shape with your arms and upper body. It can help you avoid shrugging. Just make sure the weights stay outside your chest and you don’t set up so they are out in front of you toward your head.
The one downside you may find to using the weights to help you maintain that neutral wrist position, is that they can apply more pressure on your palm, which may be uncomfortable.
If that is the case, a wider handle OR getting cushioned stands may be an option. (I only mention this to give you a “heads up” that you aren’t weird if you find this to be the case.)
Bar Incline Push Ups:
With many of these previous modifications, you will be doing a full push up from your toes off the ground or even modifying off your knees.
However, if you aren’t yet able to do a full push up from your toes off the ground, an incline variation may be even better than the knee push up modification.
AND, if you do the incline push up off a bar, you can even adjust your wrist positioning.
A bench can also work but won’t allow for the neutral wrist position that a bar will.
You can set up a smith machine bar or even a bar in a rack or rig with j-hooks to the height you need so you can perform a full push up range of motion with proper form. You want to set up so your chest will hit the bar about nipple height.
You want to set so your hands are just outside your chest gripping the bar. Your palms will face back toward your feet. You may find that your wrists feel more stable if you wrap your thumb around the bar; however, if you have elbow issues a thumbless grip may be best.
You will then perform your standard push up off the incline. You can slowly lower the incline over time until you’re able to perform a full rep from your toes on the ground!
Suspension Trainer Push Ups:
If you want to add some instability to your push ups and challenge your core and shoulders more, the suspension trainer is a great tool to use! You can also even do some fun variations using it to challenge your chest, shoulders and triceps in different ways.
And whether you need to modify the basic push up or advance it, the suspension trainer can also be a bit more “wrist-friendly” because you can keep your wrists in a neutral position.
Just like with dumbbells or push up stands, you’ll want to start by gripping the handles with your palms facing in toward each other just outside your chest. You can adjust the height of the straps, raising them up higher for more of an incline (easier) or lowering them down for less of one (harder).
Because the straps will not be as steady, they will force you to really brace your abs and stabilize your shoulders as you press. Be careful using this variation if you have shoulder stability issues or neck pain.
You can also vary your grip, rotating your palms back toward your feet while doing the suspension trainer push up. From there you can get even fancier, keeping that neutral grip while adding in flyes or reaches or other movements to the standard push up!
So even if you have wrist pain, you can have some fun and use different variations of the push up!
Anti-Rotational Band Chest Press:
Now if you find that NONE of these modifications are right for you at this time, sometimes it’s about focusing on your GOAL for an exercise while doing something different.
While the bench press can be a swap for the push up, it doesn’t provide the same core work that a push up does.
To work your chest, shoulders and triceps while also challenging your core, you may want to try an Anti-Rotational Band Chest Press instead.
This move will allow you to reduce pressure on your wrists while still really working your upper body and core.
To do the Anti-Rotational Band Chest Press, anchor a band at, or just below, chest height behind you. Grab a handle in each hand. If the band rubs on your arm, grab the handle so the band is actually BENEATH your arm.
Bring your hands up and in right below your chest and walk out from the anchor point. Stand with your feet no wider than shoulder width. To challenge your core more, bring your feet closer together.
Then, bracing your abs, press one arm straight out at shoulder height. Do not shrug your shoulder or allow your body to rotate. Press out at a controlled pace then bring your hand back in below your chest.
You can repeat on the same side OR alternate sides.
But this is a great way to modify if you do have wrist pain and push ups simply aren’t right for you at this time!
What About The High Plank?
So I mentioned that high plank position, so holding a plank from your hands, as also being a common move we have wrist pain during as well. Which makes sense…it’s the top of a push up!
But you may also have this pain during side planks from your hand as well.
Often because our wrists our in pain too, we tend to compensate by letting our hand sneak out beyond our shoulder toward our head. This can put more strain on our shoulders and lead to not only shoulder aches and pains but also neck pain.
We let our hand sneak out beyond our shoulder because this reduces the extension demanded of our wrists. But while this may help your wrist, it can lead to overload of other areas.
That is why it may be key we modify instead of just trying to push through!
The simplest work around in this case would be to do planks from your forearm/elbow as you work to improve your wrist mobility.
You can also use the mat modification, knuckles or dumbbell modification I shared for push ups.
Just make sure if you are doing side planks with any sort of “stand” to be VERY careful since you don’t have both hands to stabilize. (And honestly, it’s probably simply SAFER to modify off your forearm if you feel a stand is necessary).
If you aren’t yet able to do a full side plank or plank from your feet, the incline is a great work around too instead of going to your knees and can also be more wrist friendly.
Sometimes even using the bench, because it reduces the LOAD on your wrist, can be enough to alleviate the ache!
And if for any reason, you find you simply can’t work around your wrist pain with side planks especially, a stability press hold is always an option!
There is always a way to work around and stay focused on your goals for your workout!
How To Improve Your Wrist Mobility:
While we do need to modify around our aches and pains, we don’t want to simply avoid dealing with them. We want to work to CORRECT them!
So as you modify exercises, start including these moves below as part of your warm ups and recovery routines!
Spending even just 30-60 seconds per move (or per side) for one round through them as part of your routine daily to start can be helpful!
But these moves will improve your wrist extension, relax overactive muscles and help you activate underactive ones!
Two other things to note….
Pay attention to how you even GRIP things. If you tend to grip with only certain fingers, you’ll want to work on that as overuse of specific flexors COULD be perpetuating your wrist pain.
And if you’ve had shoulder mobility issues, if you hunch forward or your shoulders round forward, you also need to address those postural distortions. A lack of shoulder mobility can impact your elbows and wrists!
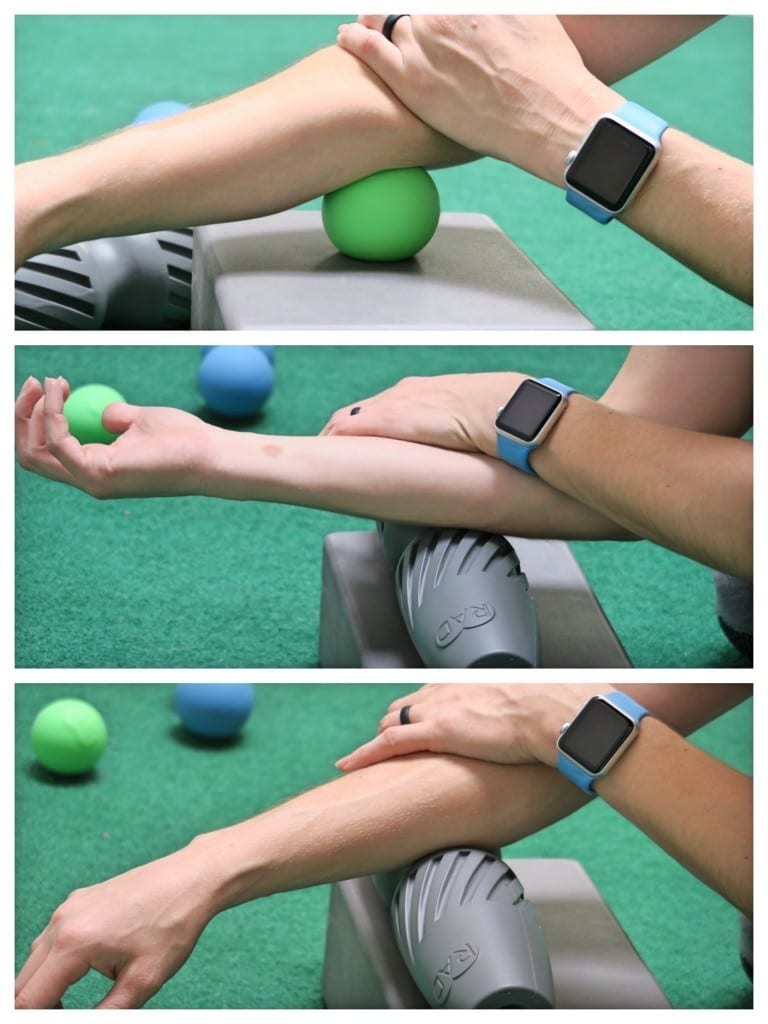
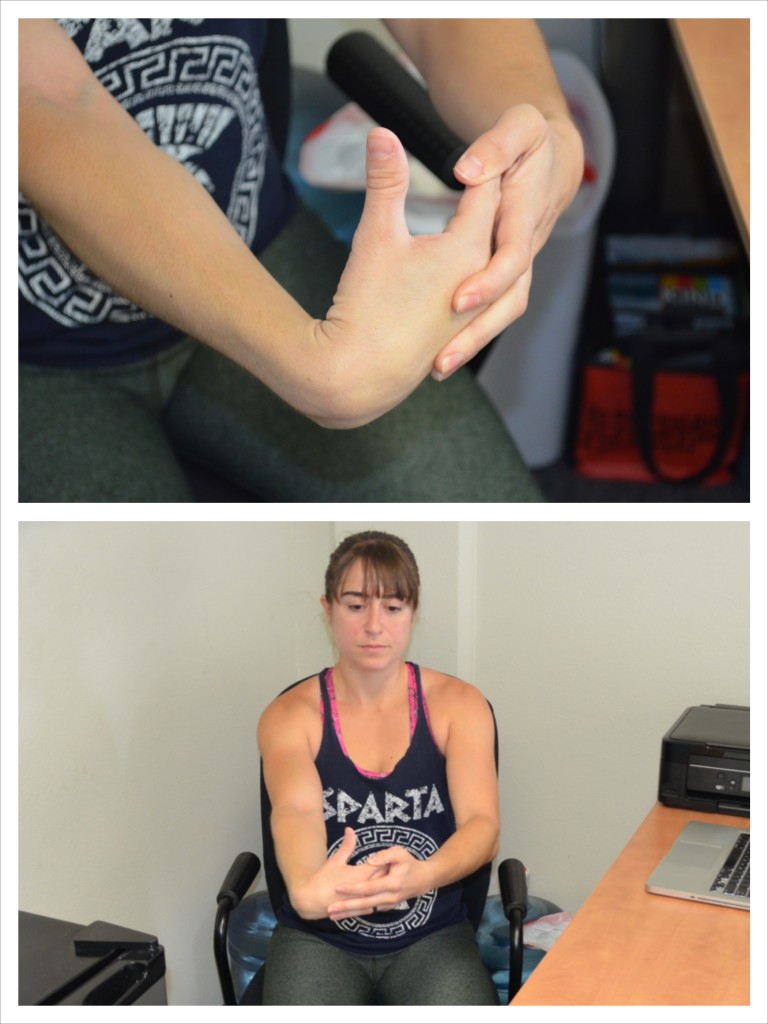
The first step is relaxing the overactive muscles of your forearms. You may find you address both your flexors AND your extensor with rolling.
Focus on using a ball or small roller right in the fleshy part of your forearm below the elbow. While you may have wrist pain, you don’t necessarily want to only roll, or focus, right at your wrist.
To roll out your forearm, place a small ball or roller up on a table or desk. Place your forearm over the ball with it right below your elbow. You can start with the underside of your forearm down on the ball.
Then press down on your forearm with your other hand to press it into the ball. Hold on any tight spots.
If you find a tight spot, you can also tense and relax your forearm to help the ball dig in further. To tense and relax your forearm, you can flex and extend your wrist or even make a fist and then relax your hand. You can also draw small wrist circles as you hold.
By flexing and relaxing the muscles, you help the ball dig in and release the tight spot.
Roll the ball all along the fleshy part of the underside of your forearm. Then move to the outside of your forearm. Make sure to get the outside and inside of your forearm as there can be trigger points in both spots causing potential wrist and elbow pain.
Don’t waste time on any areas that aren’t tight or sore. Seek out and spend time on any areas of pain.
Apply as much pressure as you can handle WHILE RELAXING and use as small and hard a ball or roller if you want a bit more pressure. You do not want to tense against the pressure because it’s too much.
Wrist Extension Stretch:
This stretch works on exactly what we are often lacking, wrist extension.
And as you progress this stretch, you may even find you use this wrist positioning during planks to help you build up wrist strength! (Same can be said for the flexion stretch below too.)
Here is the Plank Hold with Grips that you may eventually use in your programming or warm up!
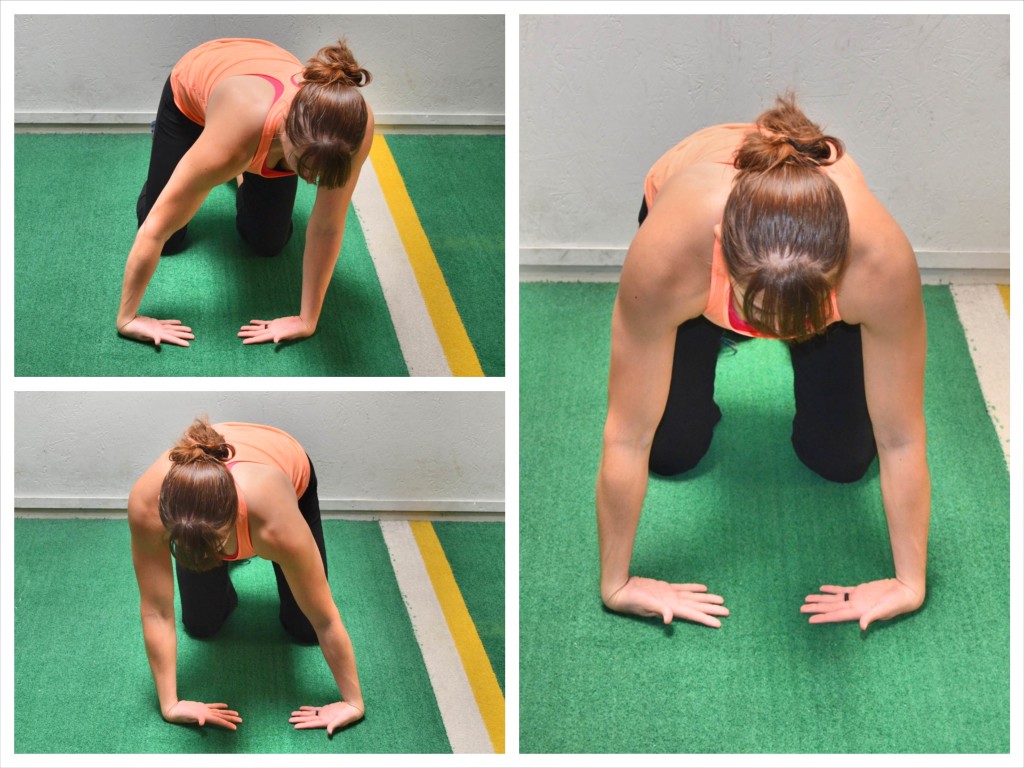
To do the Kneeling Wrist Extension Stretch, kneel on the ground and place your hands down on the ground in front of you. Place your palms down and turn your fingertips back toward your knees. Rotate your fingers out and then back toward your knees so your elbow pits are facing forward.
Then rock back, sitting back toward your heels. Rock back to feel the inside of your forearm stretch. Keep the heels of your palms down on the ground as you sit back.
Come back out of the stretch then sit back again, stretching down the inside of your forearms.
Wrist Flexion Stretch:
This can feel like a nice little release, and may even be something you use between rounds of push ups as you’re able to start doing them without pain.
To do the Kneeling Wrist Flexion Stretch, start kneeling on the ground. Place your hands down on the ground in front of you with the backs of your hands on the ground and your fingertips pointing in toward each other.
Shift your weight forward onto your hands. Place enough weight to feel your forearms stretching, but not too much to hurt your wrists. Keep your arms straight.
Then rock side to side slowly, holding for a second to each side so that you feel a stretch down the outside of your forearms. Make sure to keep some weight on your hands while also keeping your arms straight as you rock side to side.
If you can’t get down on the ground for either of these two wrist stretches, you can also do them standing with your hands on a desk or table. You can also do one side at a time, pressing on your hand with your other hand to work on both extension and flexion.
Rubberband Wrist Extensions:
Especially if you’re already doing a lot of weight training or even bodyweight moves like pull ups, you’re doing a lot of gripping and working your flexors a ton.
This move activates your extensors to help build wrist stability and strength.
To do the Rubber Band Extension, place a rubber band around the outside of your fingers and thumb. (If you find the bands slips, you can wrap it around each finger once to keep it in place if the band is big enough.)
Bring your fingers together and then spread them as wide apart as you can against the rubber band. Move at a controlled tempo and perform 10-20 reps before switching hands.
You can do this exercise a couple of times a day, but start slow. Also, if you can find a thicker rubber band, it will add more resistance.
Hair ties can also work, especially if you wrap them around each finger or they are flat.
Closing Notes….
Remember you want to include mobility work as part of your warm ups consistently EVEN once the pain is gone. And don’t be afraid to modify AS you work to correct the underlying problem!
I'm Cori Welcome To The Redefining Strength Podcast [dsm_content_toggle heading_one="HIDE TRANSCRIPT" heading_two="SHOW TRANSCRIPT" custom_content_two="Cori (00:00):Just lift heavy is probably the reason you're not seeing the body recap, the muscle gains and fat loss...
I'm Cori Welcome To The Redefining Strength Podcast [dsm_content_toggle heading_one="HIDE TRANSCRIPT" heading_two="SHOW TRANSCRIPT" custom_content_two="Suzy Welch (00:00):The hard truth is the answer's not in you. I remember one time going to take a yoga class and...
Thanks for this very comprehensive write up. I just started recently to experience wrist pain with pushups. I think it’s due to almost exclusively using my left hand to text and use my cell phone. The push-up modifications are working for me and the band exercise is helping my tendons get stronger. I also practice squeezing a tennis ball in my left hand and I think that’s be beneficial as well. Again, this was very helpful – I’m wanting to mobilize/strengthen my wrist(s) to get back to pushups! Thank you.
Glad it helps Mike! We definitely have to pay attention to the immobility and overuse caused by our modern lifestyle! Stay consistent with that prehab!
Thanks, some useful information there. I’m dealing with the return of De Quervain’s tenosynovitis and am teaching my Centergy classes on my knuckles as I wear a wrist brace that doesn’t allow flexion.


")


Thanks for this very comprehensive write up. I just started recently to experience wrist pain with pushups. I think it’s due to almost exclusively using my left hand to text and use my cell phone. The push-up modifications are working for me and the band exercise is helping my tendons get stronger. I also practice squeezing a tennis ball in my left hand and I think that’s be beneficial as well. Again, this was very helpful – I’m wanting to mobilize/strengthen my wrist(s) to get back to pushups! Thank you.
Glad it helps Mike! We definitely have to pay attention to the immobility and overuse caused by our modern lifestyle! Stay consistent with that prehab!
Well done! Excellent video!
Thanks!
Thanks, some useful information there. I’m dealing with the return of De Quervain’s tenosynovitis and am teaching my Centergy classes on my knuckles as I wear a wrist brace that doesn’t allow flexion.
Hope you’re doing that mobility work to help!
Love it Cori!!
Specific detail and explanations as well as correct form 👌
teena koa! Thank you 😎
Glad the post helps Tata!