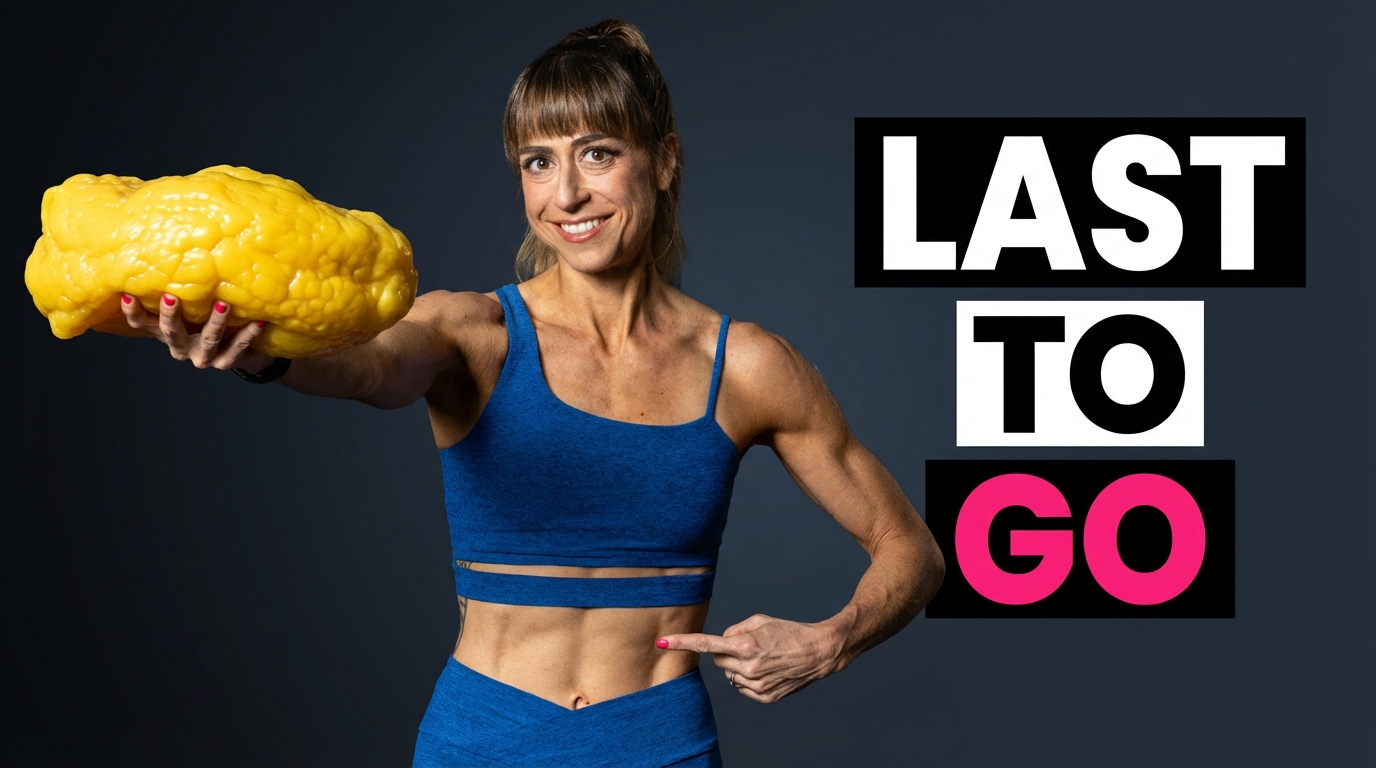
The lower belly fat is generally the last, and hardest spot, to lean down and lose fat from. It is also the spot that most people would like to tone. Go figure.
But the lower abs aren’t only important to work for aesthetic reasons…The lower ab area includes our deep core intrinsic stabilizers, which are also generally weaker than we would like. And weakness in these muscles may be one big reason you suffer from low back, hip and even knee pain!
So whether you have pain or simply want more toned looking abs, you need to learn how to truly engage and work those deep core muscles. Which isn’t as easy as doing sit ups or crunches or planks.
You know when you do double leg lowers and you feel your low back working? So you put your hands behind your butt to help?
Well your low back takes over because your core isn’t engaging and working correctly. And putting your hands behind your low back may fix the issue, BUT it doesn’t actually train you to engage your core correctly.
It’s a temporary fix but not a true solution!
So instead of continuing to put your hands behind your butt so your low back doesn’t engage…and instead of continuing to feel your low back during crunches and sit ups and planks…Learn how to engage your core correctly and strengthen those lower abs!
How do you learn how to engage your core correctly?
Well there are generally two schools of thought – you learn Hollow Body (what I often call Pelvic Tilt) OR you learn how to brace.
People will tell you one or the other is better. But I believe that both are very important to learn.
I recommend learning how to brace, like someone is about to punch you in the stomach, AND learning how to engage your abs with the pelvic tilt, where you draw your belly button in toward your spine.
Both have different uses in my opinion and both are valuable!
For instance, bracing is very important when squatting and deadlift. You want to learn how to tense your abs and you can even use breathing to engage your core. Pelvic tilt isn’t really appropriate here.
But right now I want to focus on the Pelvic Tilt because this move is super essential to learning to keep your core engaged during most of the more isolated core work we do – whether it is leg lowers, sit ups or planks. And it is a great place to start if you are suffering from low back pain (or are even pregnant or have recently given birth).
How do you do the Pelvic Tilt?
There are two basic variations I like to do. One is lying down and what I call the Basic Pelvic Tilt. One is quadruped called the Vomiting Cat.
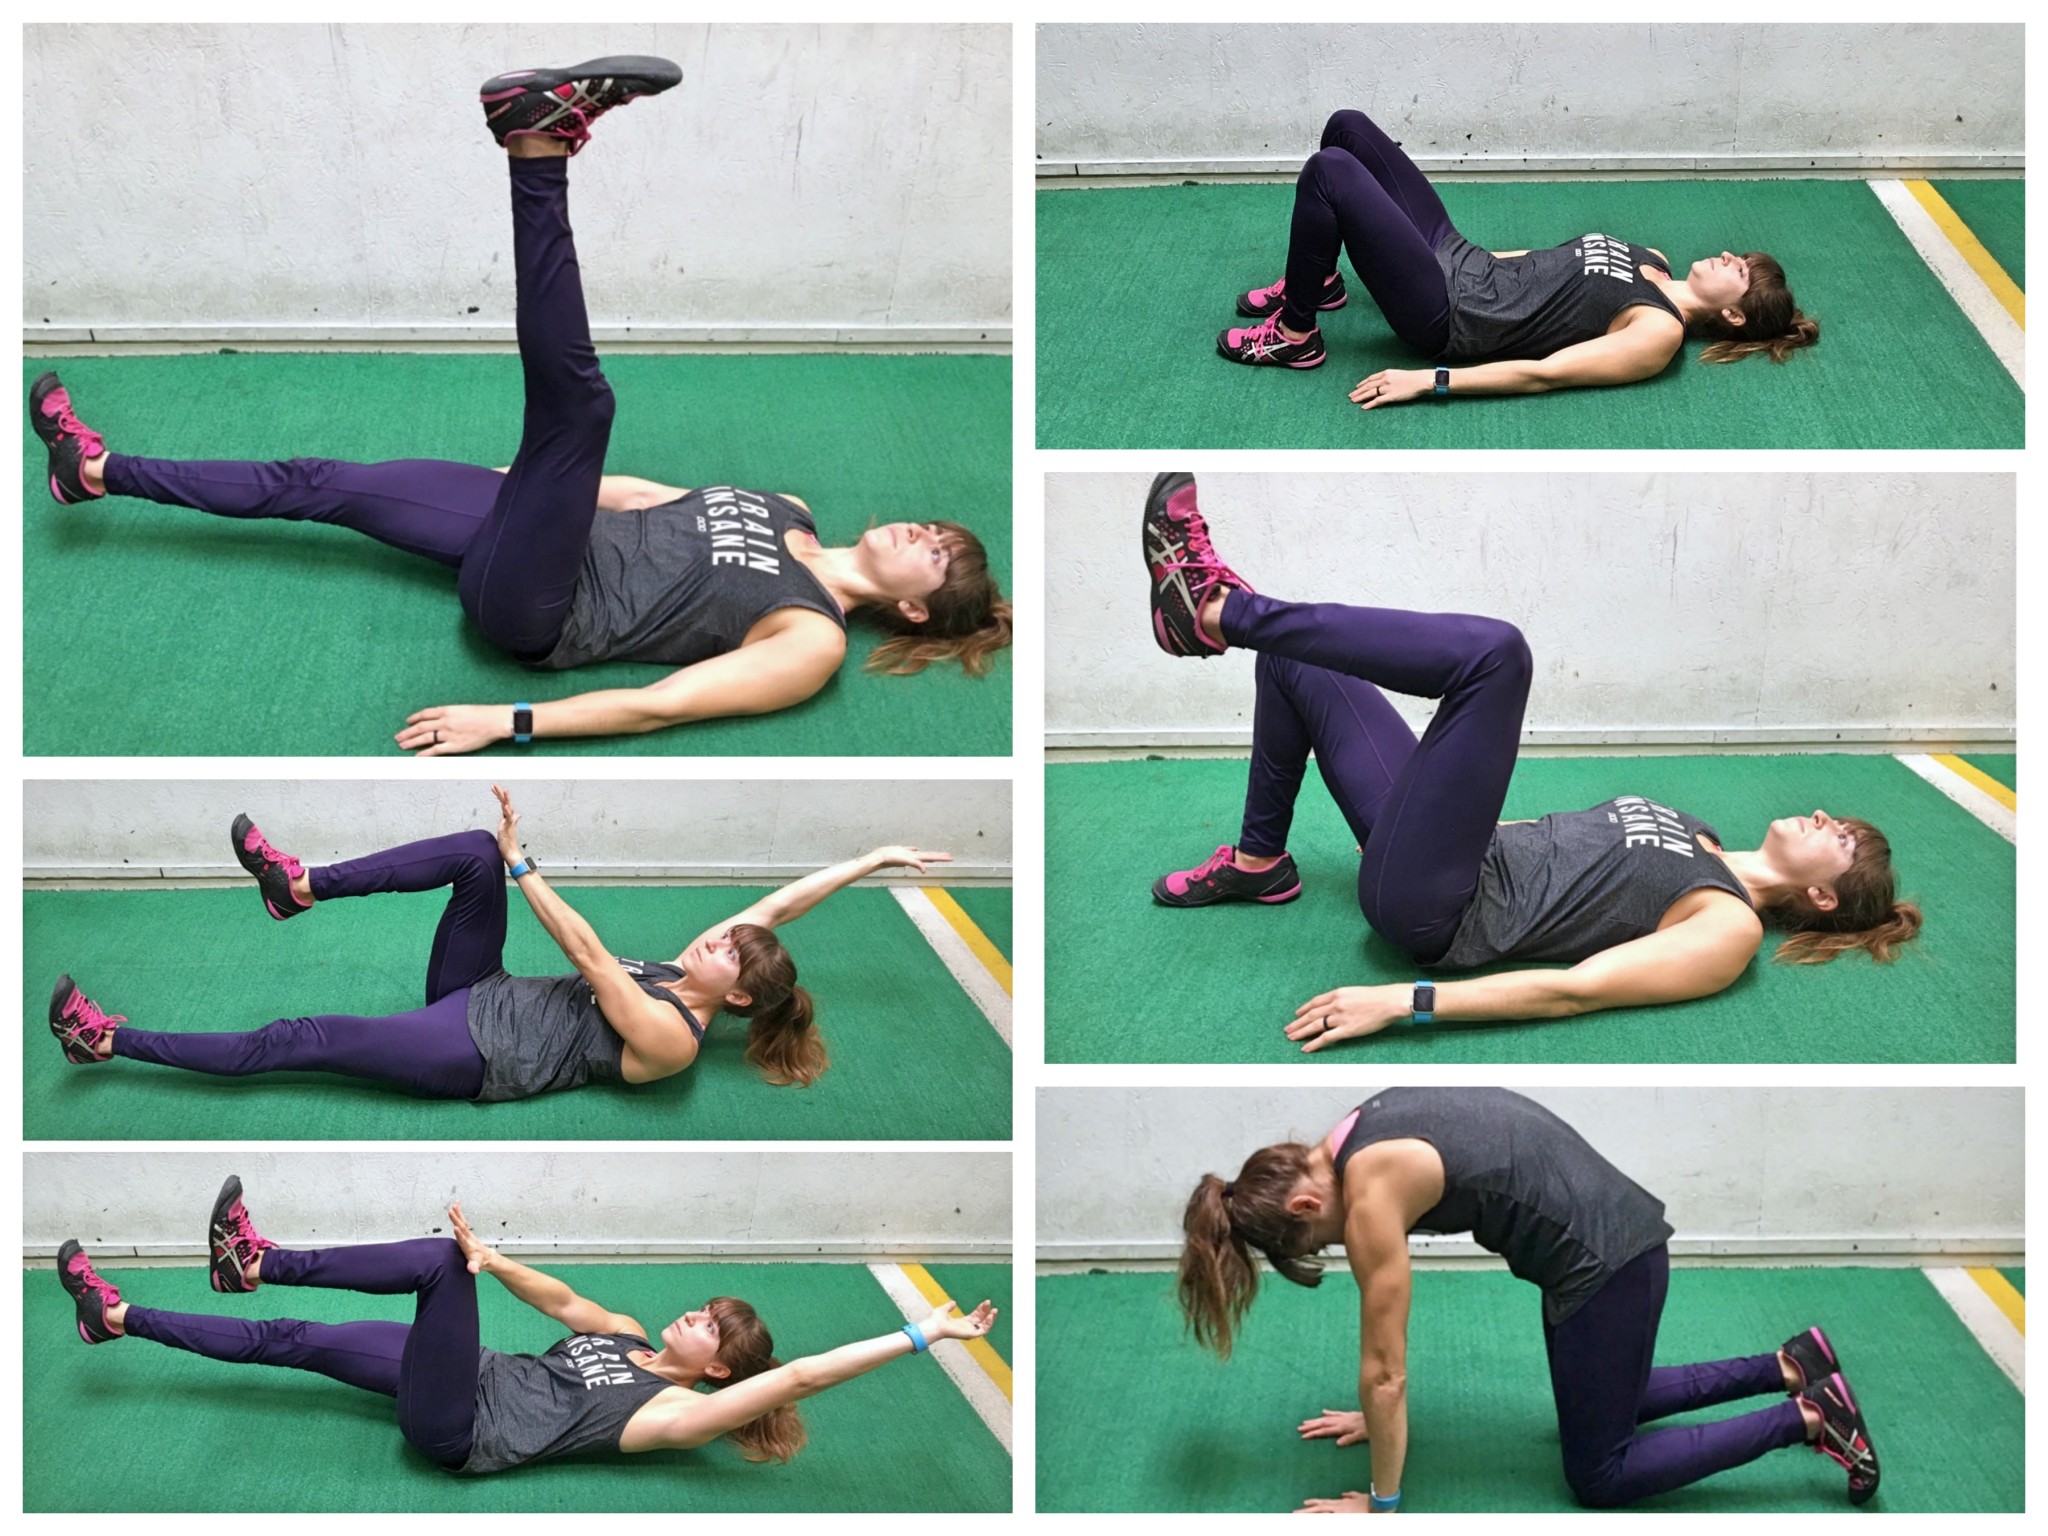
To do the Basic Pelvic Tilt, lie on your back on the ground with your knees bent and feet flat on the ground. Relax your arms down by your sides. As you lie on your back, you should feel a space between your low back and the ground.
Now draw your belly button in toward your spine as you “scoop out” your belly and press your low back into the ground. Feel your abs engage as you press your low back down into the ground. Hold for a count then release.
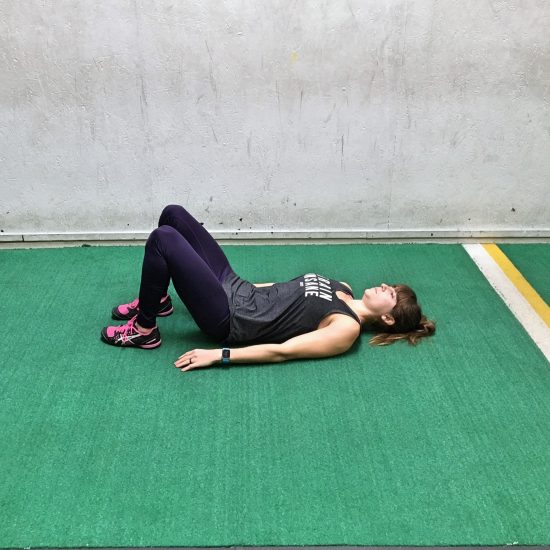
This engagement is what you should feel and do DURING double leg lowers. But to get to double leg lowers, you may need to start with the Basic Pelvic Tilt and slowly progress. First you can start with a march, keeping your knees bent.
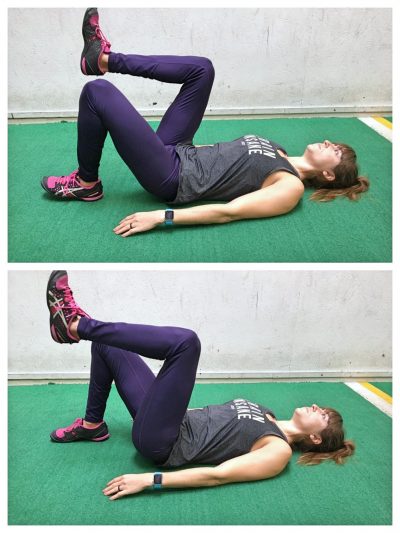
Then you can progress and do a double knee tuck before moving on to scissors.
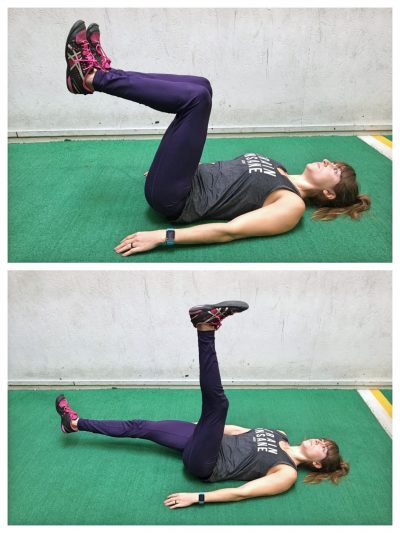
And finally, as long as you can keep your abs engaged throughout these, you will move to the double leg lowers.
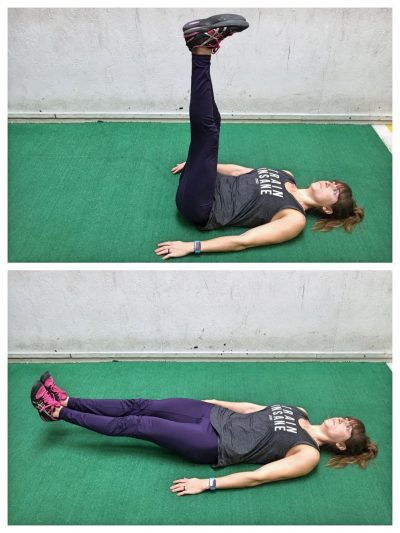
Double Leg Lowers are something you EARN. They aren’t just a move you do if you don’t feel your abs! And as you earn them, you’ll work to keep your legs straighter and lower them closer to the ground.
Variations of the Double Leg Lowers are a great way to work your lower abs, and I include many variations of this move in the 25 Lower Ab Exercises video below, BUT you have to EARN these.
Start with the Basic Pelvic Tilt and learn the full progression HERE. Work toward those Double Leg Lowers, Lower Ab Planks and all the fun variations with the Basic Pelvic Tilt. And get even more out of those moves BECAUSE your abs are actually engaged and working!
Another great way to activate your core using a form of the Pelvic Tilt is with the Vomiting Cat. This is often used as a stretch for your back, but it can actually be a KILLER way to build your ab strength and work those lower abs.
And it has a great name…RIGHT!?! 🙂 Actually the reason for the name is because you are drawing your abs in almost as if you are trying to cough up a hairball…Just don’t actually cough one up!
To do the Vomiting Cat, start on your hands and knees with your hands under your shoulders and your knees under your hips. Then draw your belly button in toward your spine as you round your back up toward the ceiling. Tuck your hips under as you try to draw your abs in as hard as you can.
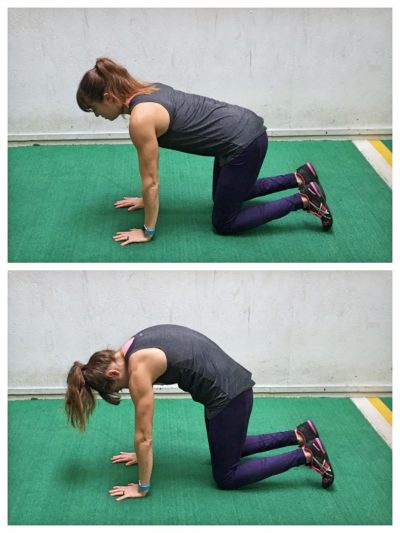
As I mentioned, you are trying to draw your abs in and round up as if you were a cat coughing up a hairball.
Hold as hard as you can for a count and then relax out.
With both of these moves, think about holding and activating everything instead of just trying to hold for longer.
Both of these are key moves to start with and use even in your warm up if you have pain or struggle to get your lower abs engaged and working. For beginners these are a MUST-DO!
From here you can even have some fun and use moves such as the Dead Bug (3:18), Butterfly Crunches (2:17), and the Plange Plank (4:46) shown in the video below…
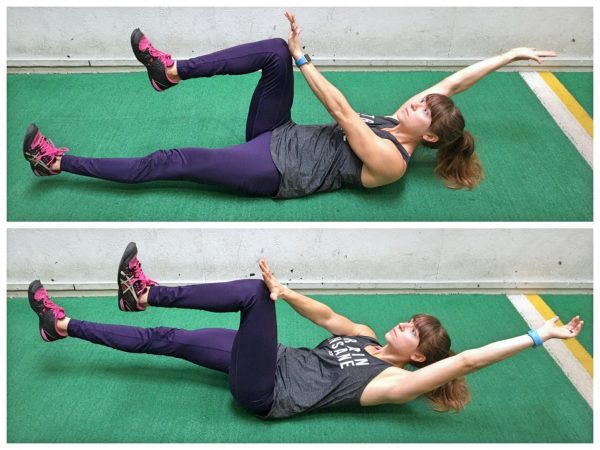
Actually the Plange Plank is the perfect way to progress the Vomiting Cat even! Plus, if you want to get the most out of your planks, you’ll want to do the Pelvic Tilt (even more reason to always return to the basics!). Here is more on improving your planks.
And after learning to engage your core, here are 25 fun Lower Ab Exercise Variations to play around with!
Remember though as you begin to have some fun with these variations that it is key you actually FEEL your abs working. Don’t simply put your hands behind your butt and put a “band-aid” on the problem. Learn how to ACTUALLY engage your abs with the Pelvic Tilt and Vomiting Cat.
And try this quick 5-Minute Lower Ab Burnout and build a stronger core NOW! 🙂
5-Minute Lower Ab Burnout
Set a timer for 20 second intervals. Complete 3 rounds of the circuit below. Try not to rest, but go straight from one move to the next and then rest 20 seconds before repeating so you can make sure your abs keep working and your low back doesn’t take over.
CIRCUIT:
20 seconds Plange Plank
20 seconds Butterfly Crunch
20 seconds Frog Kicks
20 seconds Dead Bug
20 seconds Rest
This quick workout is perfect as a warm up to get your core working OR as a quick core burnout after you finish your workout!
And if you want even BETTER results from your lower ab workouts, aka you want even more defined, lean, strong-looking abs, you may want to consider dialing in your diet…because abs are definitely made in the kitchen as well!
If you want more information on my Macro Hacks to help reveal those lower abs, learn more HERE!
Love your articles. Very informative.
Thank you so much for posting this.
After my back injury I have been doing exercises to strengthen my back,abs and legs.
I am slowly introducing exercises from this video to my morning routine.
Brilliant, thanks Cori
It takes a bit of time, but I can feel it working.
It’s added a spring to my step!
Thoroughly recommended, even for us er less young uns!
Thank you Tammy!
Awesome! Just make sure to always regress as needed and build that mind-body connection! Also, include foam rolling and lots of mobility work as well!
It does take time. It’s hard to learn to recruit those abs and we want to try the harder variations. But you can do it Mike! 🙂
I’ve been learning a lot of new moves to try. I mostly work on my glutes and abs.. didn’t even know about glute activation until I heard you talking about it. I try to not let my back take over in a lot of laying down ab exercises but the next day my back will hurt really bad.How can I correct this? I push my lower back into the floor. Thanks!
You may just need to regress for awhile and build up strength. Sounds like your low back is engaging during those moves, probably especially as you fatigue and lose the mind-body connection and just try to focus on “finishing”. I would also recommend hip stretching and foam rolling for your spine, glutes and hips.
Thank you so much Cori! Your posts are so informative but easy to understand 🙂 I find it so helpful, so many thanks. X
YAY! So glad you find them helpful Rebecca! Makes me so happy to hear!
I see this is actually an old post….but thank you so much anyway! I Always love your articles and videos!
I do have a question though.
I have a terrible struggle with not straining my neck when doing these types of exercises…I never do crunches for example because a day or two after I can hardly move my head.
Any tips to fix this? Or is my neck just supposed to get stronger?
You need to learn how to stack your chin so you are jutting your head forward. Think about almost making a double chin and make sure you are lifting from your shoulder blades and not your neck. Some chest and trap foam rolling would also be good.
Thanks a lot Cori! Will give it a try!
Well explained and informative with lots of examples. Thanks
Thanks!
Love these abs exercises. Thank you !
Glad they help!