4 Tips To Fix TIGHT Hamstrings (Stop JUST Stretching!)

4 Tips To Fix TIGHT Hamstrings (Stop JUST Stretching!)

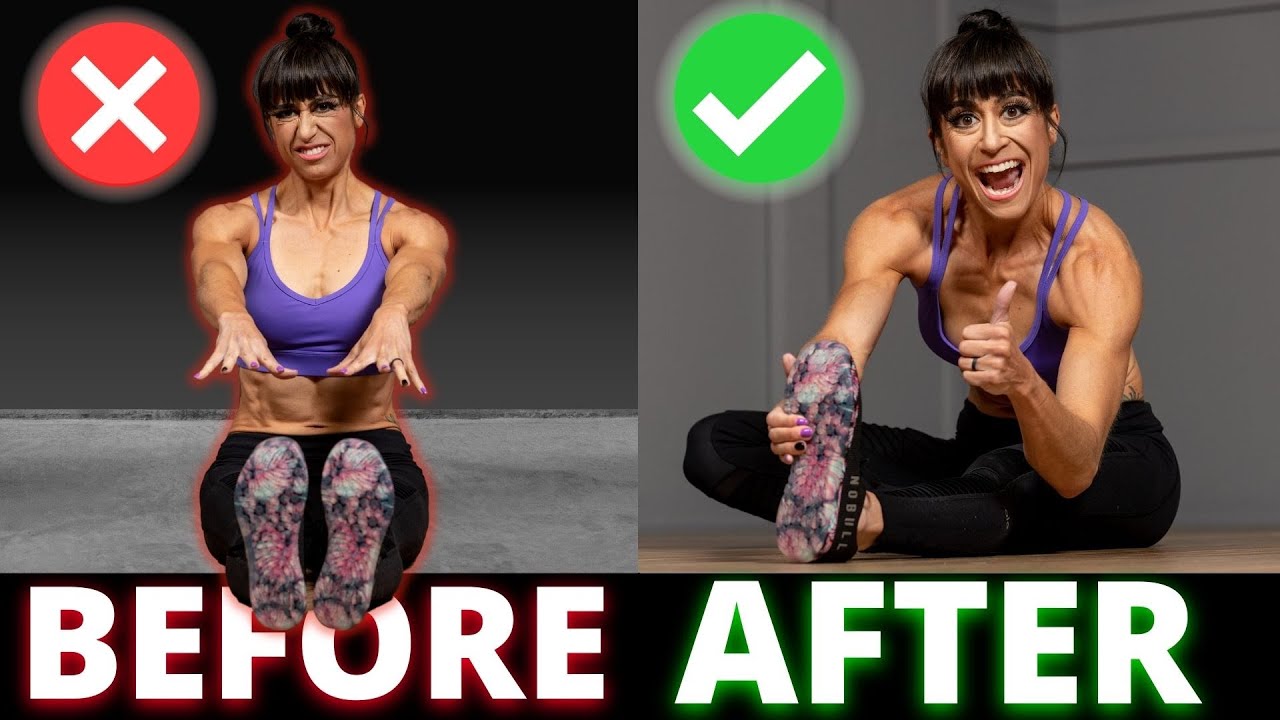
Can’t touch your toes?

Hamstrings always feel tight?

STRETCHING Alone isn’t the answer!

In this video I want to share why stretching your hamstrings more may actually be perpetuating the issues and what you should be doing instead.

Now I’m not saying stretching is bad, BUT just because a muscle feels tight doesn’t mean that stretching is the answer.

In the case of our hamstrings, we have to understand why they are tight to realize why stretching is often making matters worse.

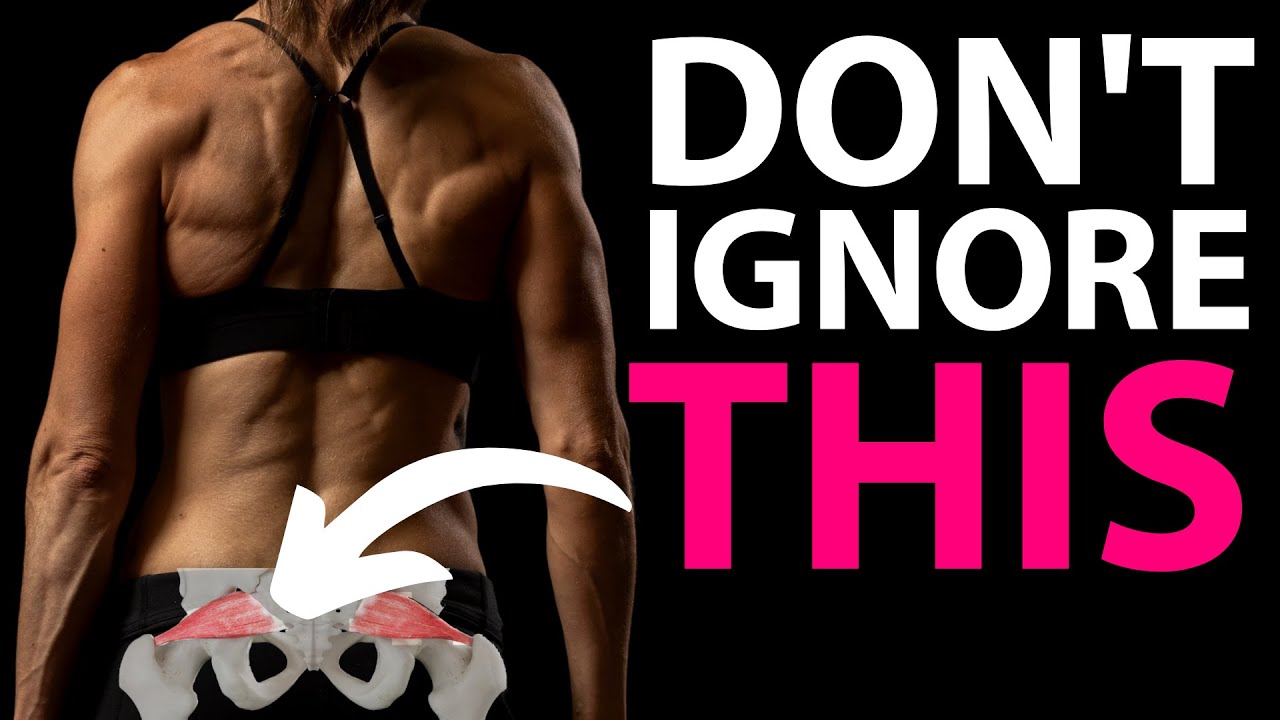
Our hamstrings can often become tight because they are actually already OVERSTRETCHED or even compensating for weak or underactive glutes.

This often happens because our hip flexors become tight and overactive or even our ankle mobility is lacking.

This shortening of our hip flexors can lead to excessive anterior pelvic tilt or a change in our posture that can lead to our hamstrings becoming overstretched.

And with this change in our posture, often our glutes don’t function as they should.

So then when we stretch our hamstrings, we may get temporary relief but we aren’t actually addressing the problem.

So what should you do instead?

These 4 steps can help us improve our hamstring flexibility by actually addressing the true mobility and stability issues!

First…Foam Roll Your Hamstrings.

If you always feel your hamstrings during any glute exercises they may be synergistically dominant and working instead of letting your glutes be the prime mover. 

Part of this happens because of our mind-body connection. We have that recruitment pattern ingrained which means our mind asks our hamstrings to work FIRST over using our glutes the way we should.

By first foam rolling your hamstrings, you can relax this muscle to better allow yourself to recruit your glutes. This is a great way to release the muscle WITHOUT stretching.

To roll out your hamstrings a ball on a bench works best. 

Sit on the ball with it under the back of your leg. Find a tight spot anywhere down your hamstring and hold on it. Lift your leg out in front of you to tense and relax the muscle.

Do this about 5 times and move to another spot. Focus on a few different tight areas before switching sides.

If you’re doing this for the first time, it’s not bad to roll along under your butt and then down toward your knee, even moving from the outside of your leg toward your inner thigh to find what’s tight for you!

Next…Stretch Your Hip Flexors And Ankles.

Part of that perpetual hamstring tightness might be a lack of mobility at our hips or ankles. 

This immobility leads to improper posture in everyday life, making our hamstrings feel like they’re constantly tight. 

That’s why you want to include this side lying hip and quad stretch in your routine to stretch out those tight hip flexors as well as the bear squat to foot stretch to improve your ankle and foot mobility. 

This can help you avoid your hamstrings being strained or overworked while being able to be better get those glutes engaged.

While you can do the side lying hip and quad stretch standing, the side lying variation is great if you have balance issues or can’t focus on that true hip extension while standing.

As you pull your heel back toward your butt, sqeeuze your glute to truly extend your hip. The knee flexion and hip extension will stretch out those hip flexors.

If you can’t reach your foot, you can loop a towel around your ankle to pull your heel back with that.

Relax out and repeat that same movement. Really focus on engaging the glute to truly extend that hip and stretch those hip flexors.

If you feel your hamstring cramp as you bring your heel back in, conscious relax your foot over allowing your ankle to flex. And focus on that glute!

With the bear squat with foot stretch, you’ll work to improve your ankle mobility as well as your foot mobility.

With this stretch, start on your hands and knees then sit back on your heels. You can rock side to side sitting back. Then place your hands back down on the ground and lift your butt up toward the ceiling as you drive your heels down toward the ground.

You can pedal your feet or hold for a second then lower down and sit back.

If you can’t sit back on your heels without pain, or have knee pain kneeling down, you can do a great ankle mobility movement, placing the ball of your foot on a plate weight or dumbbell and then driving your knee forward while keeping your heel down.

This move is best done without shoes on if you can but will then be more intense on your toes.

Now let’s address your glutes.

Focused glute activation moves like the glute bridge will not only stretch out your hip flexors but they’ll improve your hip stability through strengthening and activating your glutes. 

Strong glutes mean you won’t be relying on those hamstrings as much so they don’t just keep feeling tight from being overworked!

The one thing you have to be conscious of though is WHAT DO YOU FEEL WORKING?!

If you let your hamstrings compensate while doing the right moves, you’ll perpetuate your hamstring issues and they will keep feeling tight. 

In order for the glute activation work to pay off, you have to feel your glutes working as that prime mover.

If you struggle with even that bodyweight glute bridge, try the frog bridge instead. That external hip rotation can be helpful. Or you can use a mini band to even help engage that glute medius more which will help the glute max fire better. 

Just make sure you aren’t arching your back or pushing yourself backward as you do the move. 

Focus on a slight posterior pelvic tilt and only bridging up as high as you can control using your glutes! 

For more tips to help you really use the glute bridge to improve your hamstring flexibility by improving your glute activation, CLICK HERE.

Using these key moves you can improve your hamstring flexibility and see those results truly last.

Stop wasting time stretching and address the true mobility and stability issues that are going on!

IT Band Pain?! Don’t Ignore THIS Muscle

IT Band Pain?! Don’t Ignore THIS Muscle

IT Band issues that just won’t fully seem to go away?

Frustrated that every time you seem to build up the mileage or start lifting heavy that old pain comes back and even starts to aggravate your hips and knees….maybe even your ANKLES?!

If you’ve been struggling with annoying IT Band issues, it’s time you paid attention to this hip flexor muscle…

The TFL or tensor fasciae latae.

Before I go over 3 moves you can include in your prehab routine to prevent the pain and overload, I want to discuss how the TFL can lead to IT Band problems.

So let’s break down what the TFL does…

The TFL contributes to hip abduction (lifting your leg out to the side), hip flexion (bringing your knee up toward your chest) and hip internal rotation (rotating your hip to turn your leg in toward your other leg).

At your pelvis it assists in anteriorly tilting you pelvis, which, if the muscle is tight, can lead to excessive arching of your lower back.

And at the knee it also contributes to tibial external rotation, which is what causes your foot to turn out.

This hip flexor muscle has the power to impact your lower leg because of the tension it creates through your IT Band.

And this is why it’s key we look beyond just the exact point of pain.

When our TFL becomes tight and overactive it can have a far reaching impact.

But most notably it often starts to compensate for an underactive and weak glute medius.

The glute medius is supposed to be our primary hip abductor.

HOWEVER, if the TFL becomes shortened and overactive, it may restrict our glute medius from firing effectively and efficiently and even try to carry more of the load than it should.

This is then what can create tension through the IT Band and accumulate leading to overload and injury.

So how can you tell if your TFL is taking over for your glute medius?

Have you ever done Mini Band Monster Walks or Lateral Raises and really felt your hips burning?

Like you end up rubbing the front outside of your upper thighs instead of the sides of your butt?

That may be because the TFL is trying to take over for your glute medius instead of allowing it to work as it should!

That’s why I wanted to share 3 mobility and stability exercises, and some key form cues to help you relax your TFL if it has become overactive and tight while better activating your glute medius so you can avoid IT Band aches and pains.


3 Moves To Help Prevent IT Band Issues:

Exercise #1: TFL Foam Rolling

It is key we first start with relaxing the overactive and tight muscle. Often otherwise we tend to keep performing improper recruitment patterns during the moves meant to make us better.

For instance during any glute medius abduction activation move, we still tend to let our TFL take over when it is overactive as that muscle does assist in abduction.

So doing all of the “right moves” ultimately doesn’t pay off the way we had hoped.

That’s why before you do activation, you want to foam and relax the TFL.

To roll out your TFL, a ball works best but you can use a roller if a ball applies too much pressure.

To find your TFL, lie on your back with your legs out straight and hands just in front of your hip bones under your pelvis, internally rotate your hip and feel that muscle contract.

You will want to lie on your side with the ball positioned there. Hold and breathe, lifting and lowering your leg as you hold to help the muscle relax and release itself.

Exercise #2: Wall Side Bend

This is a great way to stretch your TFL without even going down on the ground.

It is key when you do this move you engage your glute max to drive your hips into extension, even using a slight posterior pelvic tilt as you do.

Because the TFL can contribute to anterior pelvic tilt, by performing posterior pelvic tilt you are actually stretching the short and tight muscle.

To do the Wall Side Bend, stand with your side to the wall and place your forearm and elbow on the wall at about shoulder height or just below. You will then want to step your leg closet to the wall a foot or two from the wall.

Cross your outside foot in front of you toward the wall to help you balance as you then drop your hip toward the wall.

Do not rotate as you drop your inside hip toward the wall. Squeeze your glute and maintain that posterior pelvic tilt even to make sure you don’t lean forward or flex your hips.

Feel a stretch through your TFL and even IT band. Then relax out of the bend before driving your hip again toward the wall.

Exercise #3: Extended ROM Side Lateral Raise

The Clam is such a common move to use for glute medius activation but one that is so often done incorrectly ultimately perpetuating the issue instead of correcting it.

It is also not the move I like to start with because it is so easy for people to allow the TFL to take over, partly because of the hip flexion.

That’s why I love to use the Extended Side Lying Lateral Raise.

Not only does this move put your TFL under a slight stretch while working the glute medius through an extended range of motion, but it also allows you to work from a hip extended posture.

This can help you make sure you engage your glutes.

To do the Extended ROM Side Lateral Raise, lie on your side on a bench so that your bottom knee is bent and your bottom leg is close to the end.

Prop yourself up on your elbow and position yourself so that your top leg can hang down over the edge and your foot is just a few inches off the ground.

Keep that foot parallel to the ground or even turn your toe to slightly face the ground. This internal rotation of your lower leg can help if you tend to feel your TFL engage with lateral raises. Do not rotate open as you lift.

Then lift that top leg up and kick slightly back, feeling your glute medius, or the side of your butt, working to lift your leg.

By kicking slightly back and extending your hip, you’ll engage that glute max to further inhibit your TFL.

Lower that leg back down and repeat the move. You want to fully lower the leg to work through that extended range of motion

To advance the move when you’re ready, you can hold a plate weight on the outside of your top thigh, or wear ankle weights. But don’t make the move harder or progress if you feel your TFL taking over!

If you don’t have a bench, you can try a variation of this from a modified side plank position. Make sure if you do the side plank position to give you that extended range of motion, that you engage your glutes to keep your hips fully extended.

SUMMARY:

We have to remember that it’s all connected. And tension in one muscle can alter the way we engage and use other muscles resulting in overload and injury.

If you’ve been suffering with IT Band issues, try including these 3 moves as part of your warm up before your runs, rides or lower body lifting sessions.

Complete even just one round through, working for 45 seconds per move per side. Follow the order of foam rolling, stretching then activating for the best results!

If you need even more quick mobility routines?

Improve your mobility and stability with my Injury Prevention Pack!


The Piriformis Muscle – A Real Pain In The BUTT

The Piriformis Muscle – A Real Pain In The BUTT

Issues with this muscle can be a real pain in the butt…(yeaaaa….bad joke)

I’m taking about the piriformis muscle.

This muscle can not only literally become a pain in the butt but it can also irritate the sciatic nerve leading to pain and irritation all down your leg.

And issues with this muscle can not only arise because of overuse during exercise but even honestly often simply because we’re spending too much time seated.

The first step in preventing and alleviating piriformis aches and pains is understanding what this muscle even does and it’s location.

What Does The Piriformis Do?

The piriformis muscle is a primary hip external rotator and helps with horizontal abduction of the hip when it is flexed to 90 degrees. It also helps stabilize your SI Joint. And can even potentially act as a weak hip extensor if the glute max is underactive.

This muscle becoming short and overactive can not only lead to piriformis syndrome and sciatic nerve compression but also hip and SI Joint issues not to mention lower back and even knee aches and pains.

However, this muscle can ALSO lead to sciatic nerve compression if it becomes lengthened, which creates the interesting question of…

To stretch or not to stretch?

But before I dive into whether or not to stretch this muscle and 3 key prehab moves to include to prevent and alleviate piriformis issues, I do just want to address one thing…

Are Sciatic Pain And Piriformis Issues The Same Thing?

While yes the piriformis muscle can compress or irritate the sciatic nerve and lead to sciatic nerve pain, and this is often what is termed piriformis syndrome, you can have piriformis issues that do not lead to sciatic nerve issues and you can have sciatic nerve compression NOT caused by the piriformis.

I think it’s key we note that sciatic nerve pain doesn’t always mean the piriformis muscle is the problem.

So if you have sciatic nerve pain, it is key you do address the culprit of the irritation or sources of the compression to address your specific mobility restrictions and overactive muscles.

You do want to determine if your compression is coming from your lower back or piriformis or even ankle mobility restrictions leading to compression at another point in your leg!

But if you have determined that the piriformis muscle is the issue, the question now is…..

Should I Stretch It?

The annoying answer is…IT DEPENDS!

Often when muscles become overactive and need to be relaxed and released to alleviate the issues, the muscles become shortened.

This means that you want to foam roll AND stretch the muscle before activating the muscle it is compensating for.

When it comes to our piriformis, when it is shortened and overactive we want to foam roll and stretch it while activating our glute max and our glute medius.

However, the piriformis muscle can also irritate the sciatic nerve when it becomes LENGTHENED.

And, in this case, stretching the muscle may provide even temporary relief but also PERPETUATE the problem.

So getting assessed to determine your exact imbalances and mobility restrictions is always key, but these 3 moves are a great place to start to not only relax an overactive piriformis whether it is shortened or lengthened while activating those underactive glute muscles!

So what are the 3 prehab moves you should be including?

3 Moves To Do To Help:

#1: Piriformis Foam Rolling

To relax and release the piriformis when it is overactive, foam rolling is a key first step. This can help decrease the tension this muscle is even applying to the sciatic nerve.

A ball works best to really apply more pressure, but you can use a roller especially starting out if you can’t relax against the ball. 

To do Piriformis Foam Rolling, find the spot where the top of your back jean pocket would be.

You can then cross the ankle of that leg over the other knee as you lean into that side

When you find a tight spot, hold there and breathe. If you can’t relax as you hold, use a larger or softer ball or even the roller.

You may even find it helpful to lift and lower the leg as you hold to help the muscle relax and release itself.

Or, if more comfortable, you can even relax back onto your forearms as you hold.

#2: Bench Rotational Half Kneeling Hip Stretch

Hip mobility restrictions and even a lack of spinal mobility can often perpetuate piriformis issues.

And also because of the Piriformis’s impact on the SI joint, this Bench Rotational Half Kneeling Hip Stretch can be a key move to include in your prehab work.

To do the Bench Rotational Half Kneeling Hip Stretch, set up placing the top of your back foot on a bench and move to half kneeling on the ground. Make sure you’re not right on your knee back but actually rocked toward your thigh.

Move your front foot out so that knee is bent to about 90 degrees while allowing you to extend that back hip using your glute.

Place your opposite hand from your front foot down on the ground at your instep.

Squeeze your back glute to drive that hip into extension and place your other hand behind your head.

Rotate to bring that elbow back toward your elbow of your arm on the ground. You’re twisting away from that front leg and focusing on rotating through your spine.

The rotate that elbow up toward the ceiling, twisting toward your front leg.

Make sure to squeeze that back glute as you do and do NOT rock out on that front foot to create space.

Rotate open toward that leg then twist back toward that starting position.

You should feel that back hip and quad stretching and even a stretch in the outside of that hip and glute of your front leg.

You’ll also feel this through your spine, especially your thoracic spine.

Move slowly and make sure you don’t just flap your arm!

To modify you can do more of a Spiderman lunge variation with your hand on a bench or incline as you twist!

#3: Wall Side Lying Mini Band Lateral Raise

Your piriformis can become overworked because your glute max and medius are underactive, not only on that same side but even on your opposite side.

That’s why unilateral activation work can become so key.

And because your piriformis assists with horizontal abduction when your hip is flexed to 90 degrees, it can be key to work on activating your glute medius while your hip is extended.

That’s why this Wall Side Lying Mini Band Lateral Raise is such an amazing move to include.

This move works on hip extension to engage your glute max while also working to improve your hips stability and glute medius activation.

To do this exercise, place a mini band around your thighs above your knees. Start light and focus on that control and mind-body connection to really feel your glutes working.

You can bend that bottom leg to help you stabilize and set up lying on your side with your back to the wall. You want to set up a few inches out from the wall so you can kick back slightly into the wall.

Lift your top leg up a few inches off your bottom leg and make sure you do NOT rotate that toe open. You do not want to externally rotate your hip or you’ll engage that piriformis more.

Feel the side of your butt engage as you lift just a bit to create tension through the band. Then drive your heel back into the wall.

From this position, slide your heel up the wall abducting your leg. Perform this lateral raise but do not rotate your hip open to raise up higher.

Lift up and then, keeping tension back into the wall, slowly slide the leg down. Do not lower completely down and lose tension on the band. You want your glute working the entire time.

Focus on feeling your glute medius lifting against the band as you feel your glute max working as you drive your heel back into the wall extending your hip.

SUMMARY:

If you’ve been suffering from piriformis issues, get on that prehab work! Start addressing this overactive muscle while activating those underactive glutes.

Even start with just 45 seconds per move per side for a quick mobility series.

For the complete prehab process to address aches and pains from head to toe, check out my Injury Prevention Bundle:

–> The Injury Prevent Pack