The Turkish Get Up is an underutilized full body exercise. And when it is utilized, it is often done incorrectly.
There is a point to every single step of the Turkish Get Up. You can’t simply turn it into a roll to stand up.
The Turkish Get Up teaches your body to work together to move efficiently. It teaches you to engage muscles in the correct sequence in more than one plane of motion. It also works on mobility and activation while under a load.
It is an exercise that EVERYONE, and I mean everyone, should be doing!
Turkish Get Up Form:
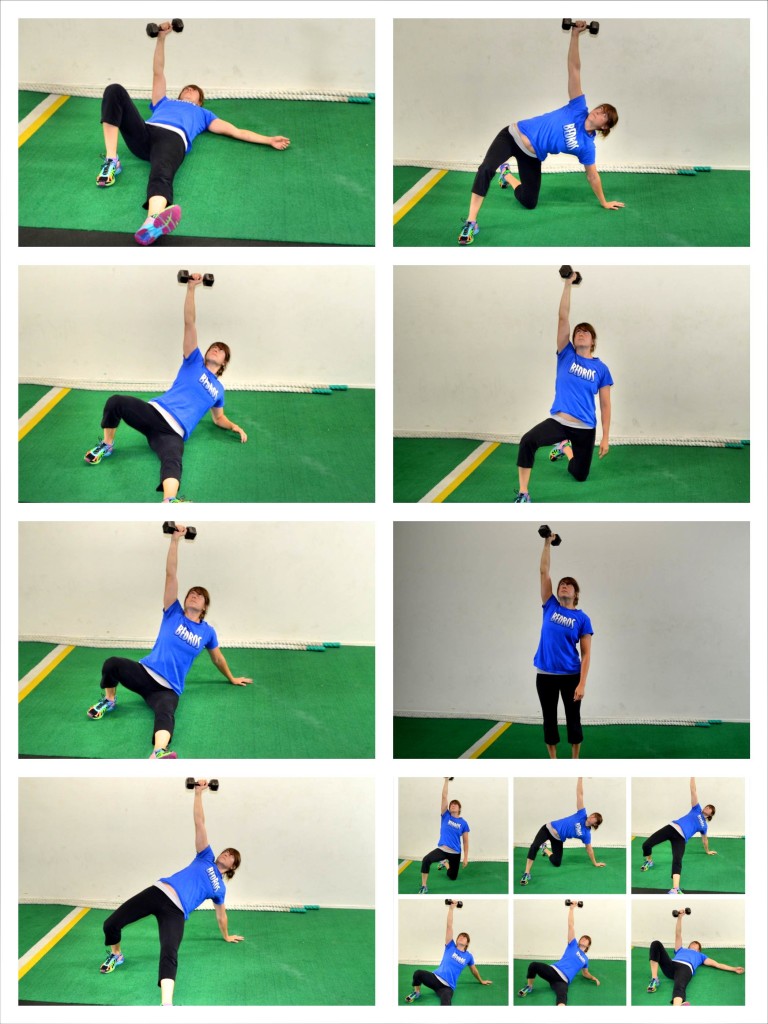
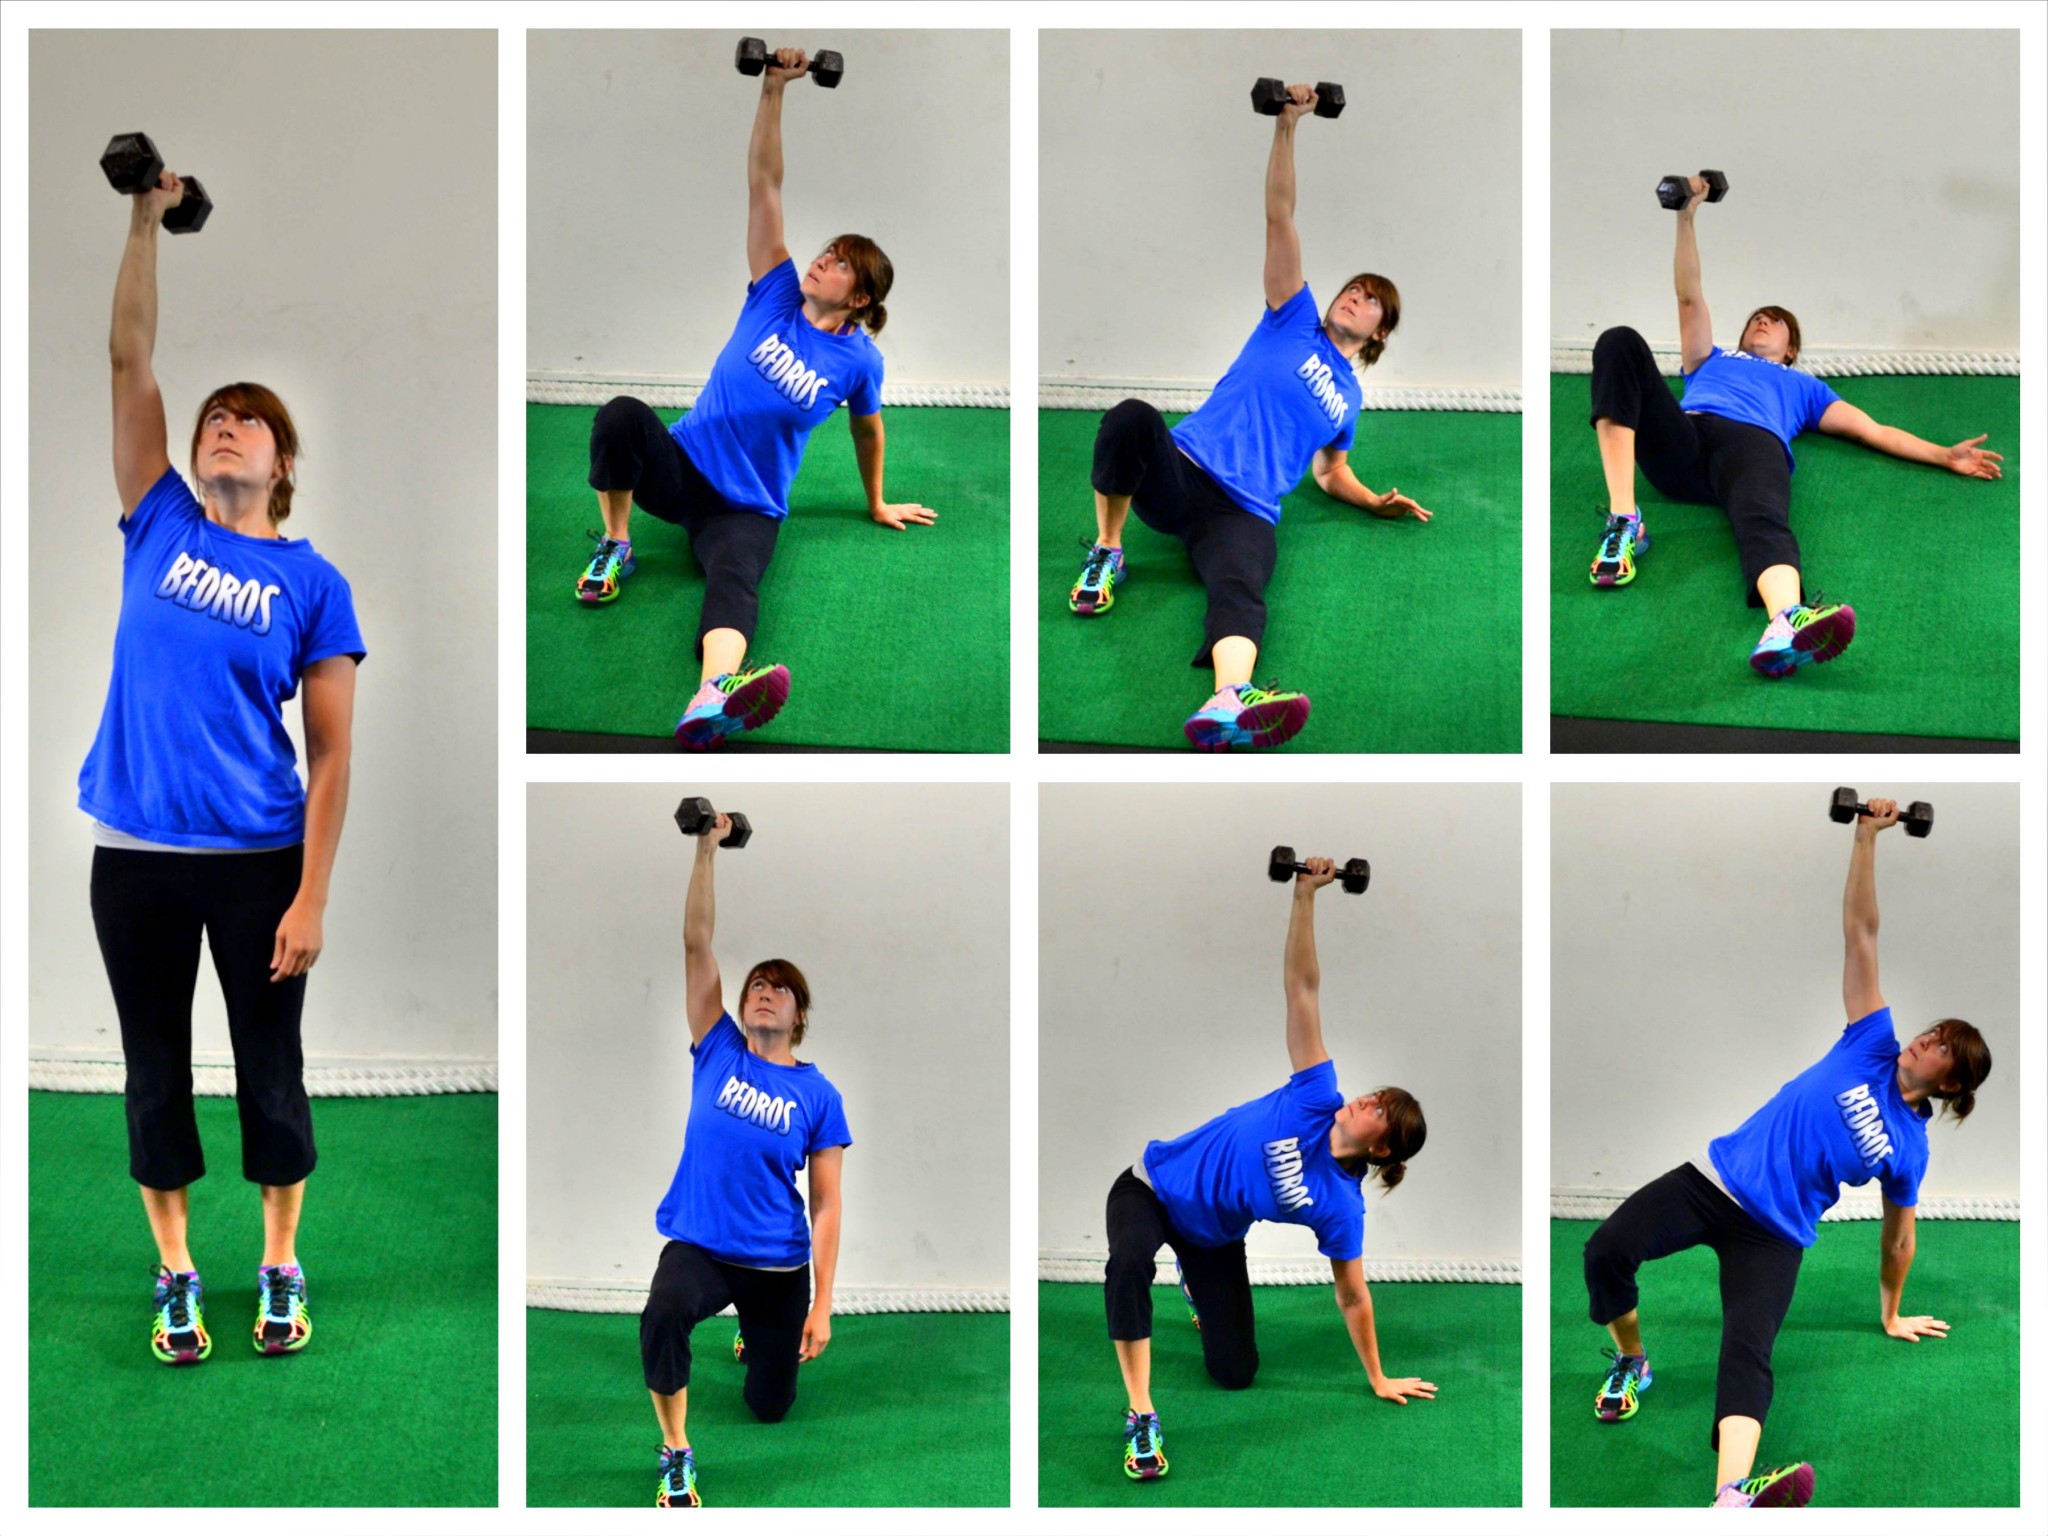
Start by lying on your back on the ground with your legs out straight.
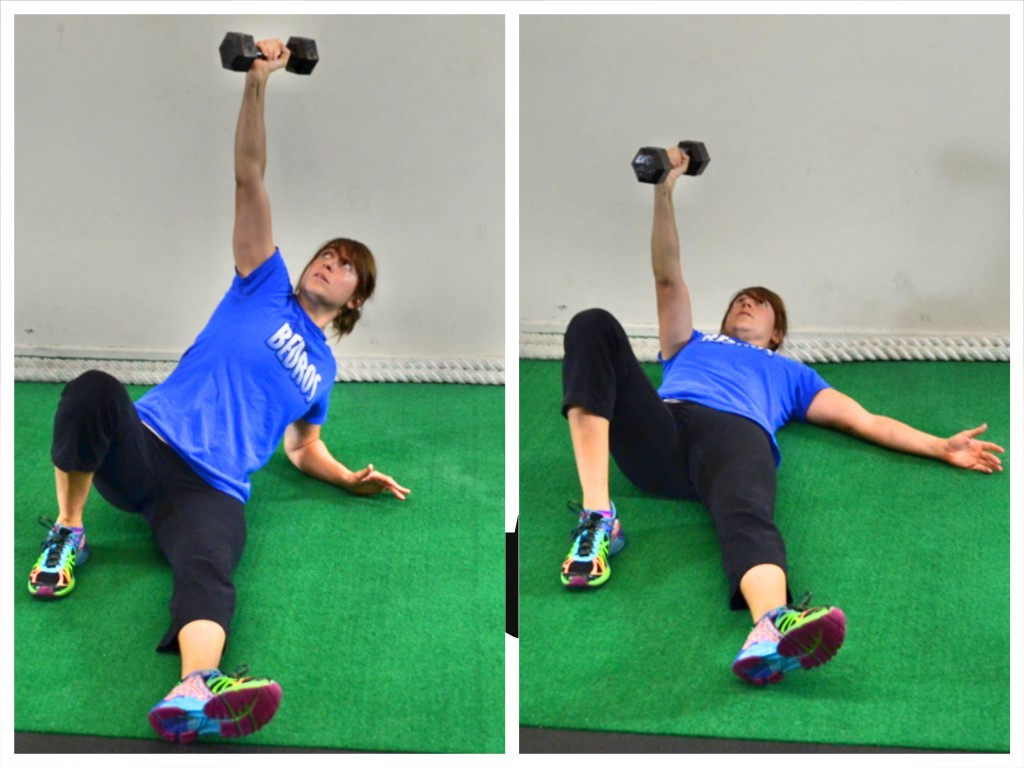
Then drive your right arm up straight and have your fist pointing up toward the ceiling. Bend your right knee and place your foot flat on the ground. Straighten your left arm out to the side (not straight out at shoulder height, but not right by your body). Keep your right arm straight up and pointed toward the ceiling at all times (it can even help to balance something on your knuckles to remind you of this while you are learning).
Then roll up on to your left forearm. Prop yourself up nice and tall on your left forearm. Press through your right foot on the ground. Do not let your right knee cave in and keep your left leg out straight on the ground.
Once up on your forearm, press up onto your left hand with your left arm going straight. Sit up nice and tall. Do not shrug your shoulders. And remember, your right arm is always straight and pointing straight toward the ceiling.
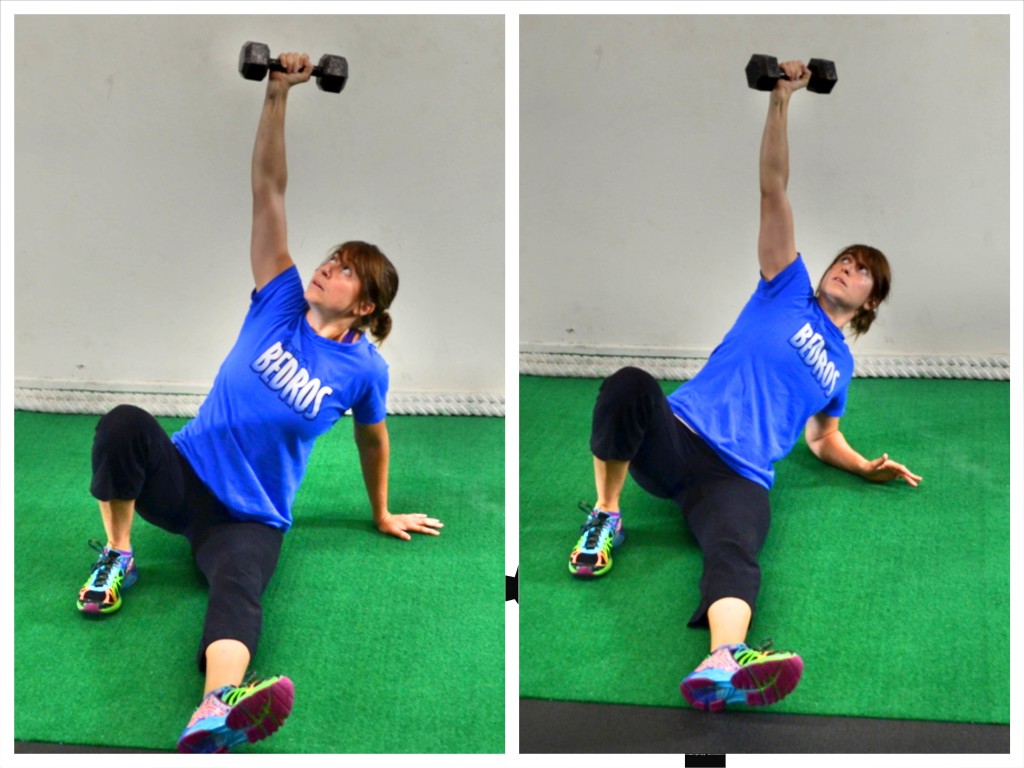
Then from the seated position you are going to bridge up, lifting your hips up as high as you can. You will press down through your left hand as well as your left heel and right foot. Keep your right foot flat on the ground and your left leg out straight. Do not let your right heel come up.
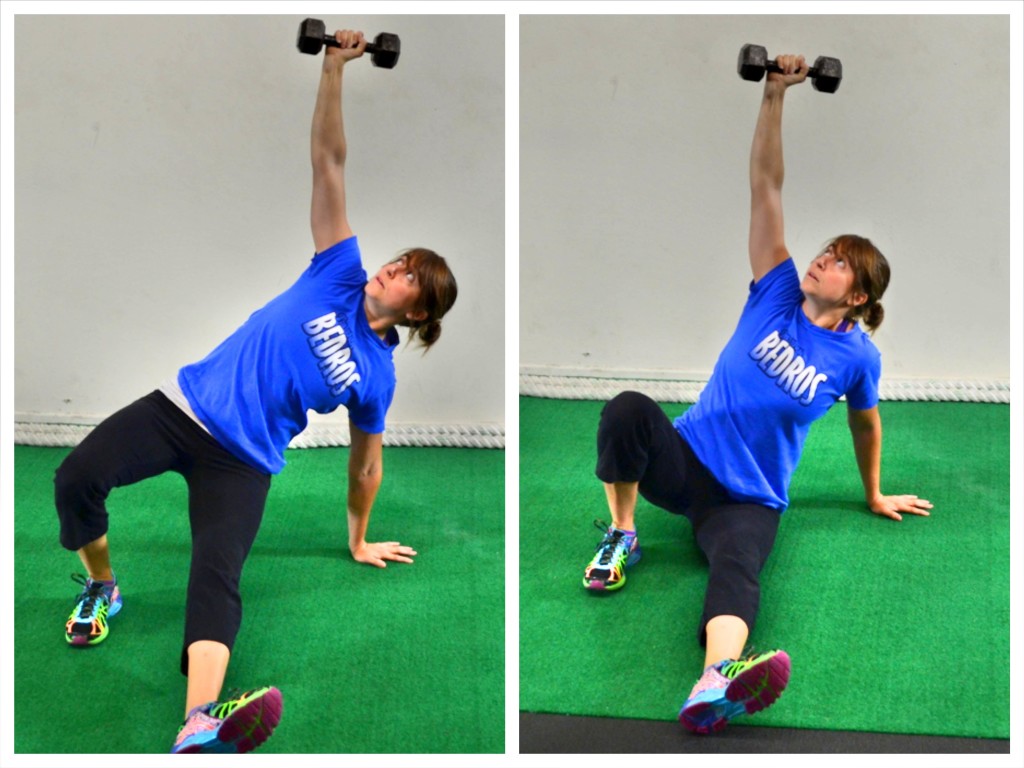
From the bridge position, slide your left leg back and under you so that you are in a kneeling position with your hand on the ground. Make sure you swing your leg back enough so you are in a strong supported kneeling position that will allow you to lift your left hand off the ground.
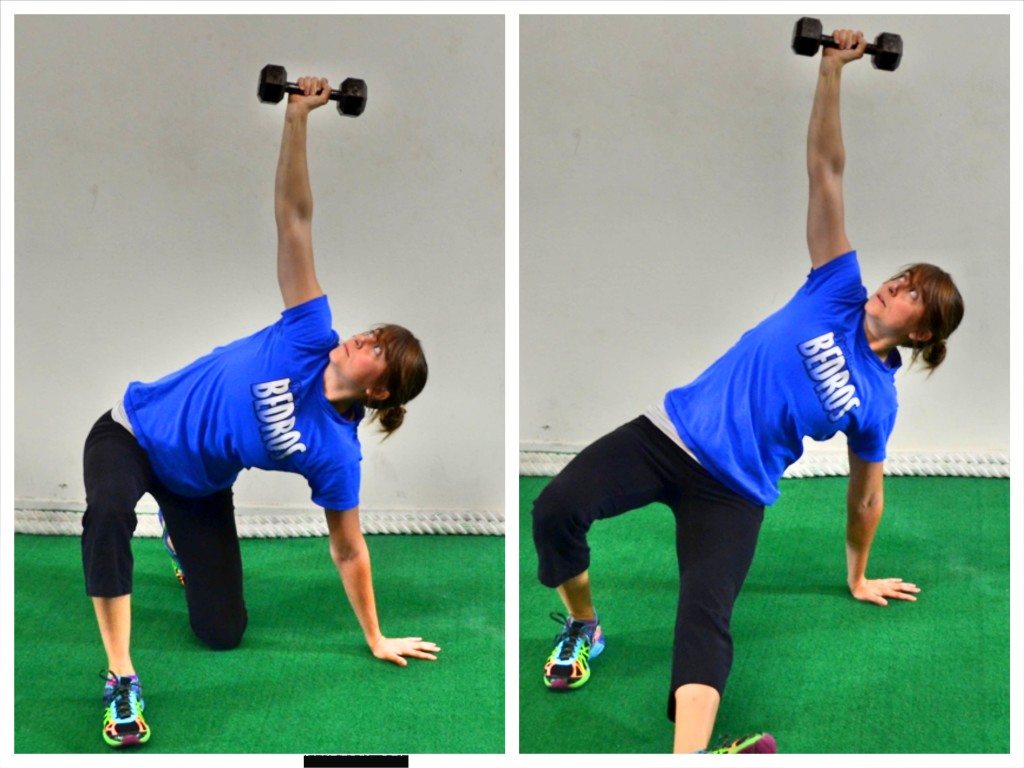
Staying nice and tall, lift your left hand and come to a kneeling position. Do not lean forward of slouch forward as you lift your hand up off the ground.
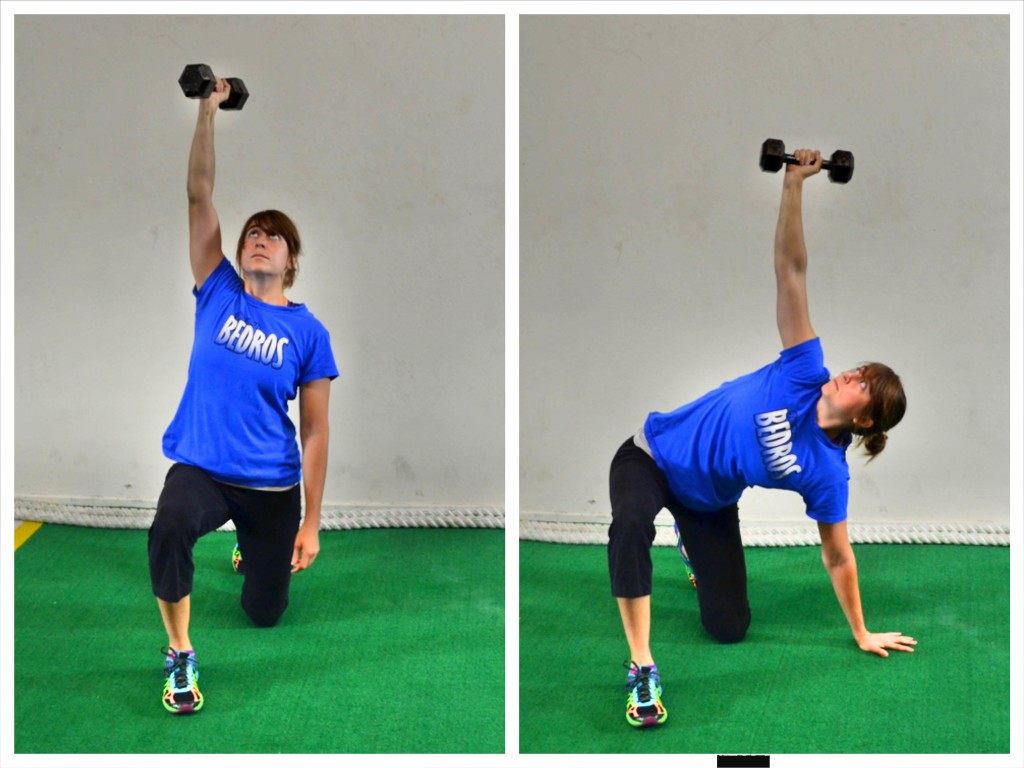
With your right arm still pointing up at the ceiling, stomp your right foot into the ground and come up to standing, bringing your left foot forward to be even with your right foot.
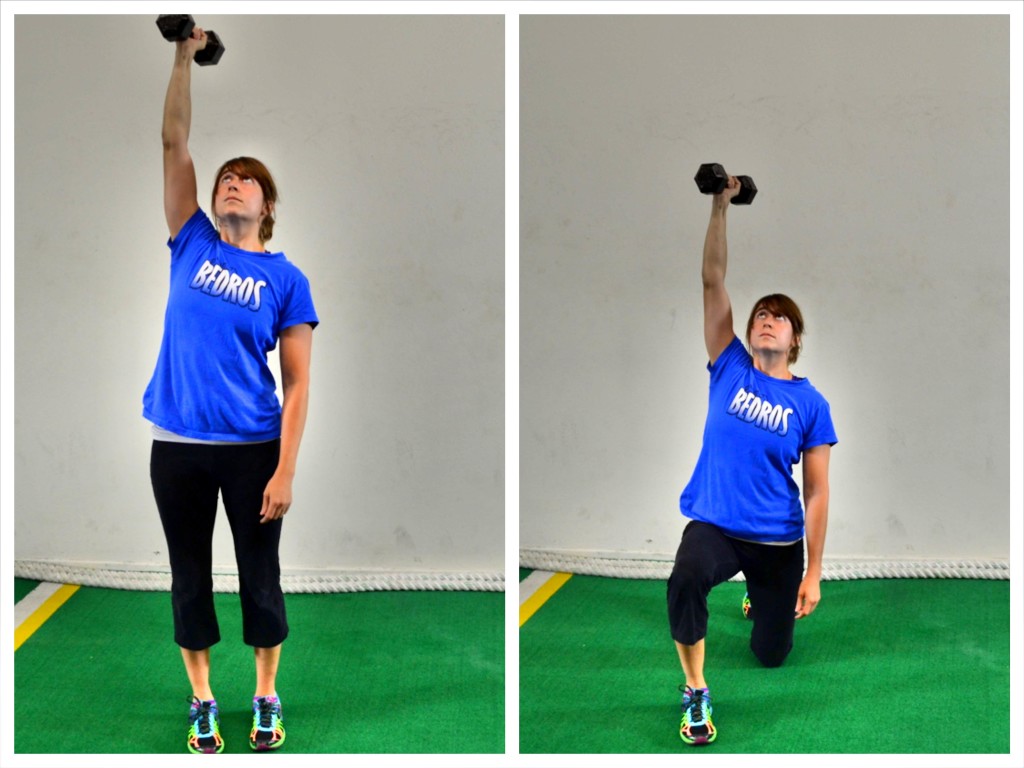
Once standing, you will reverse the steps until you are again lying on your back.
You will first go back to kneeling, stepping your left foot back. You will then place your left hand down on the ground out to the side and just a little back from your left knee. You will then bridge up and swing your left leg through so it is out straight in front of you. As you bridge, keep your right heel firmly planted on the ground.
From there, you will return to a seated position supported by your left hand. Then you will relax down to your forearm and finally roll on to your back. Do not slouch as you move back down.
Keep a nice tall posture throughout the entire move. Do not let your chest slump forward or your back round at any point during the move. You want a nice strong core.
Variations:
Beginners will do this move with nothing in their raised hand or maybe balancing a slider or shoe on top of their fist to help remind them to keep the arm straight up toward the ceiling.
This move can also be done with a dumbbell or kettlebell held in the raised arm.
These three variations (raised arm balancing, kbs or dbs) really work on shoulder stability as well as core strength.
If you want to work your core and legs with more weight, but don’t yet necessarily have the shoulder strength or stability to hold a weight overhead, you can also do a Sandbag Get Up Variation.
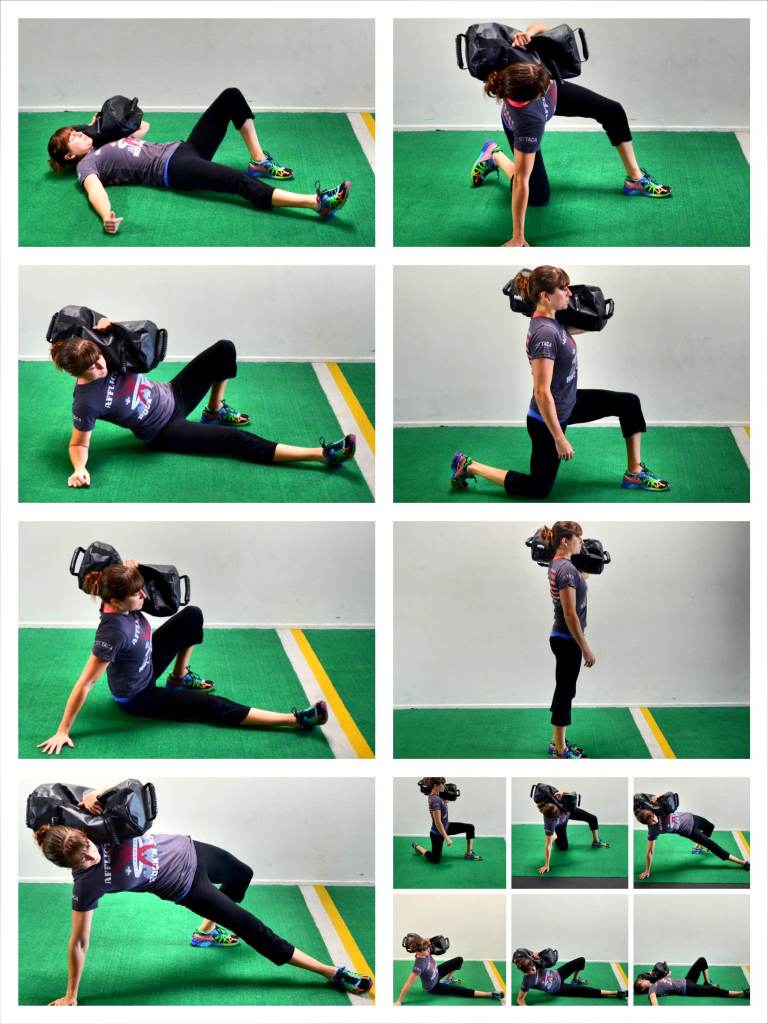
With the Sandbag variation, you will place the bag over the shoulder of the arm that would otherwise be raised. Instead of raising the arm up though, you will hold the sandbag on your shoulder.
While doing the sandbag variation, you must make sure that the weight doesn’t cause you to round forward or your chest to cave over. You must focus on keeping a nice tall posture throughout the entire move.
Because the Turkish Get Up is an advanced move, it is best to break it down to start.
You may want to start with a variation of the Turkish Get Up called the Windmill.
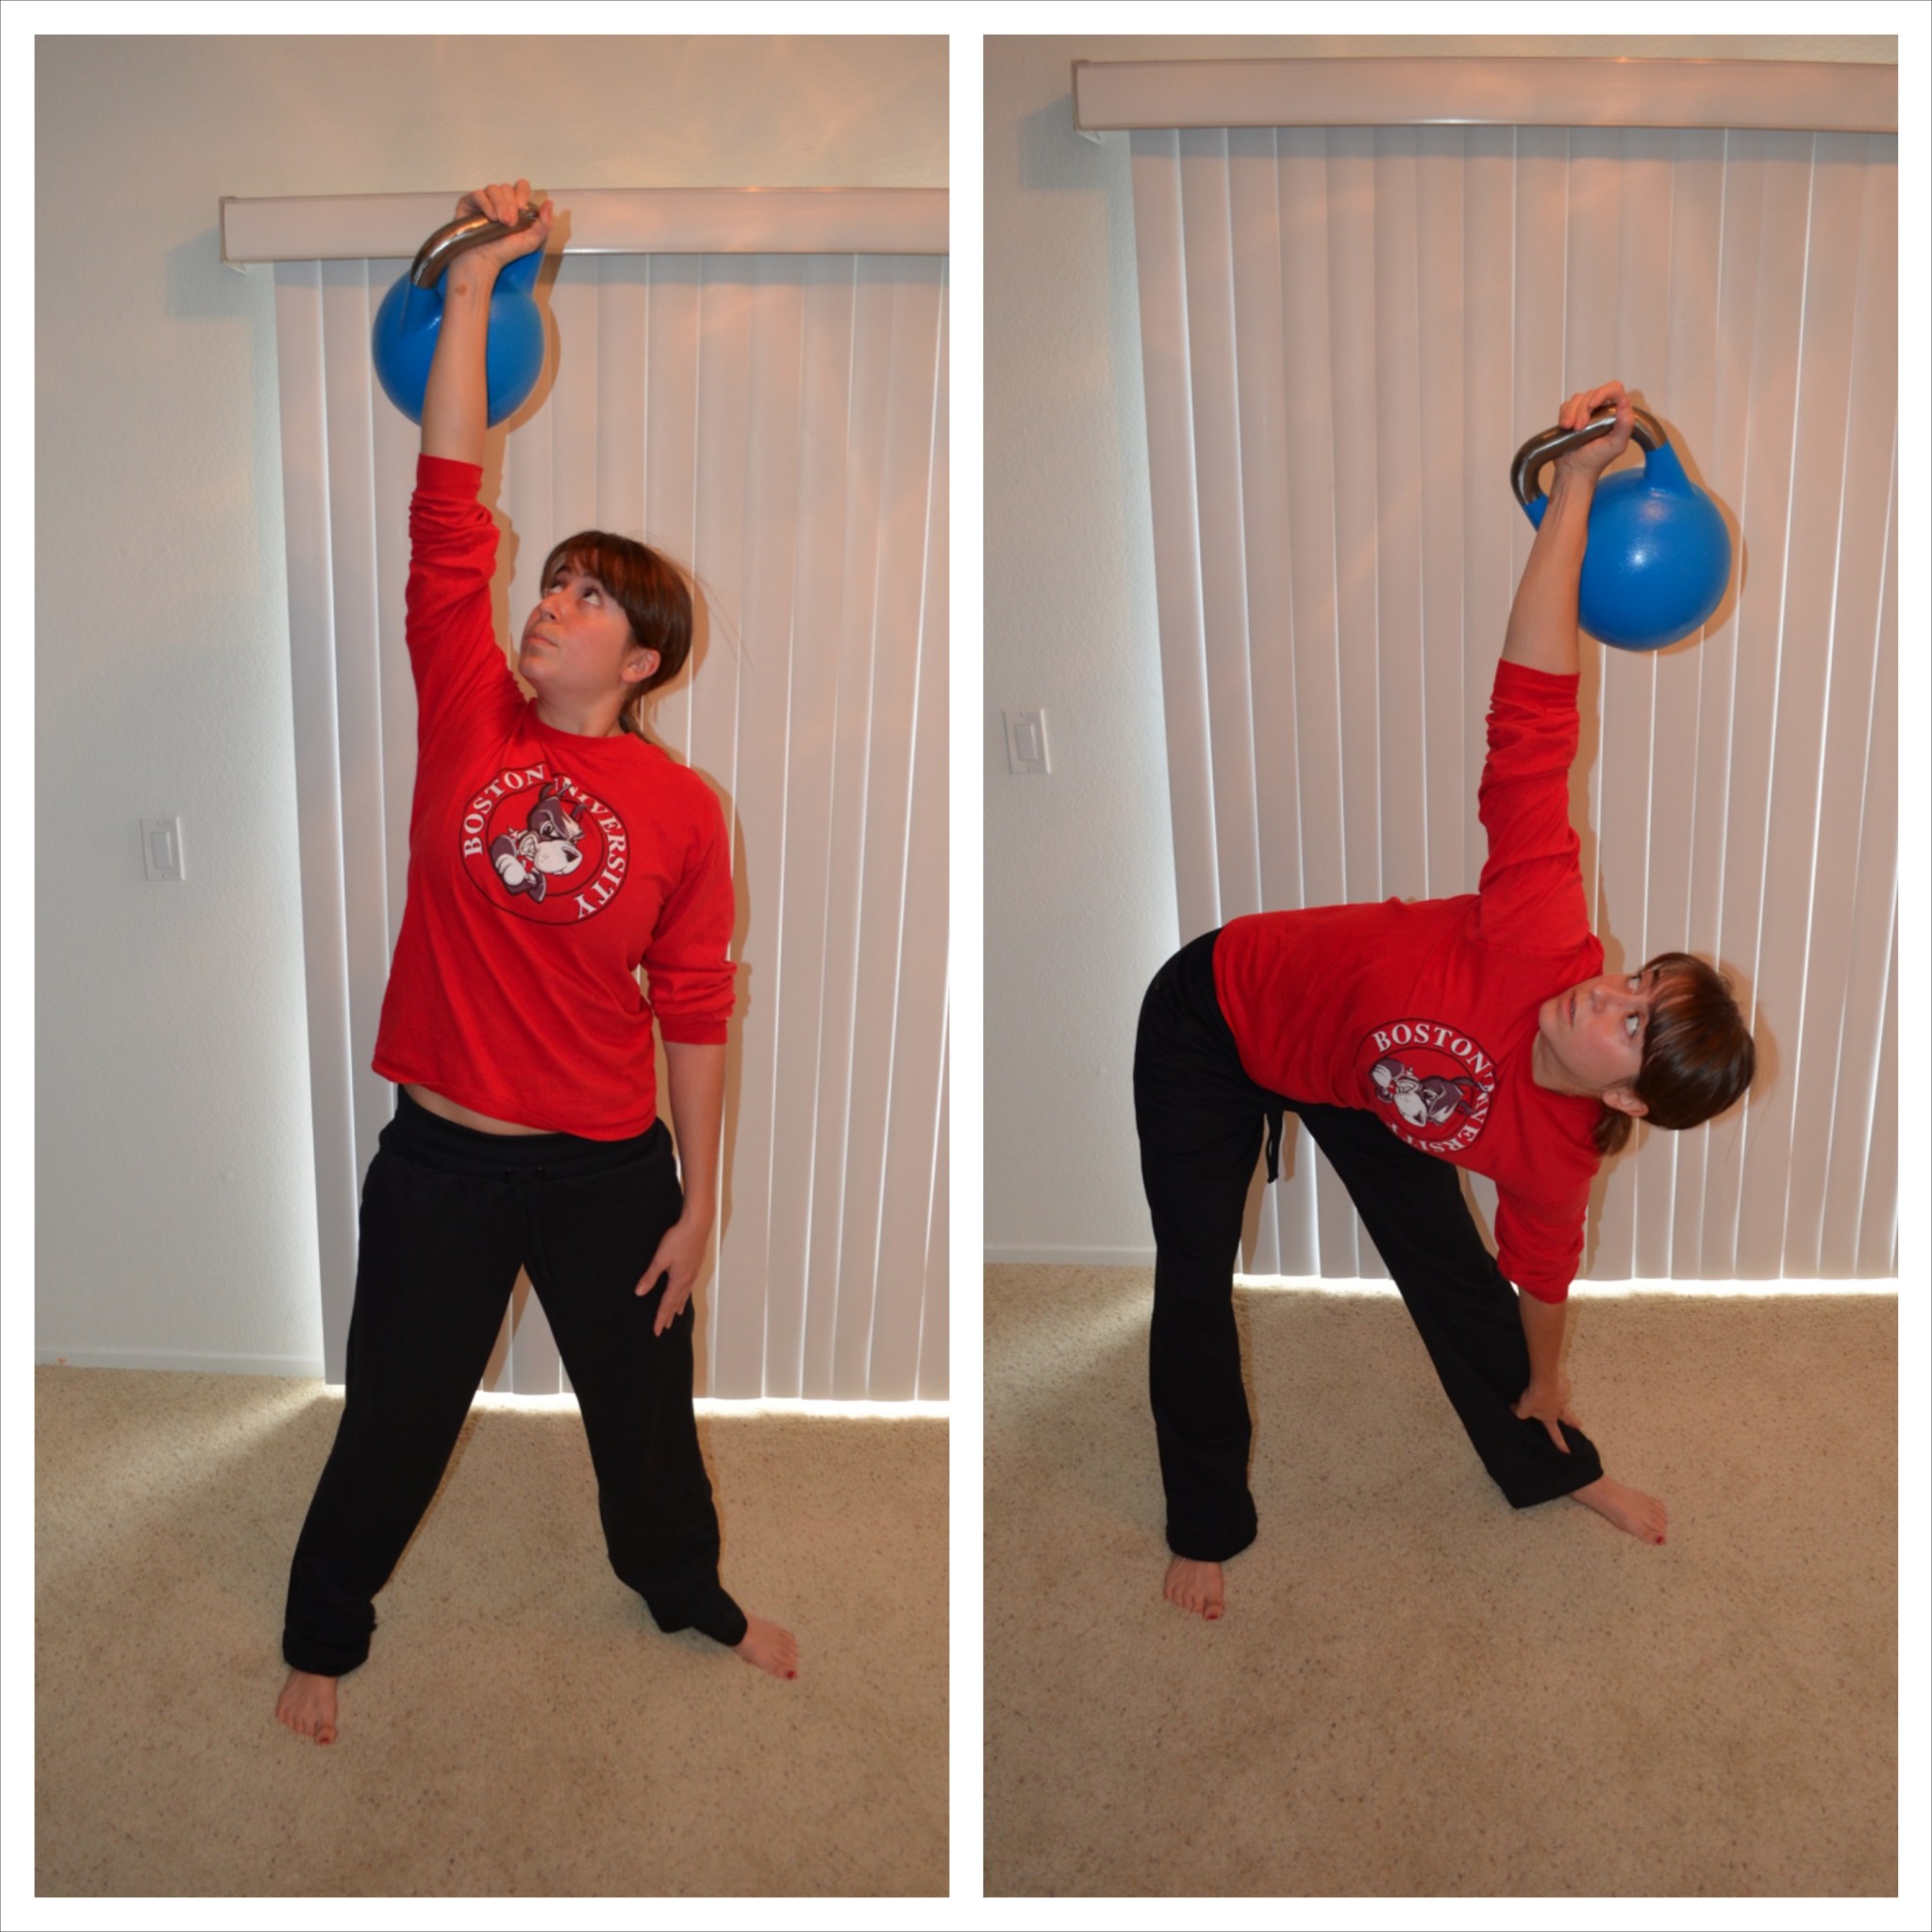
To do the Windmill, beginners will start with no weight or even something balanced on their hand. Advanced lifters will use a kettlebell or dumbbell.
If using a kettlebell, place your hand through the handle and let the weight rest on the back of your forearm. Your feet should be about shoulder width. Turn out the toe of the side without the kettlebell to about 45 degrees. Straighten the other arm (the arm with the kb) up toward the ceiling.
You are then going to hinge over, driving the butt cheek of the arm that is up out to the side as much as you can. Reach the arm without the kettlebell down your leg toward the ground.
Then you are going to stand back up, keeping the arm straight toward the ceiling the entire time.
As you hinge over, use your leg as a guide. Slide your hand down toward the ground. Keep the arm straight up toward the ceiling. Then hinge back up until you are standing nice and tall.
You will feel this in your obliques. You will also feel a nice stretch down your hamstring while you feel the glute of the arm raised working.
You will also feel your shoulder and upper back working to stabilize the weights. Make sure to engage your lat on the side with the weight to stabilize the shoulder.
It can also help to look up at the weight as you hinge over.
For other moves that help you break down and learn the Turkish Get Up, check out this workout.
NOTES: Turkish Get Up sets are best done with low repetitions so that you can focus on form.


0 Comments
Trackbacks/Pingbacks