Weight Training For Fat Loss (5 Simple Tips)

Weight Training For Fat Loss (5 Simple Tips)

Don’t waste your time commenting that diet is key for fat loss.

Yup. 100% it is.

BUT the best results always come when we dial in our overall lifestyle as a system to work together.

And too often we turn to cardio when we want to lose fat.

We think we even need MORE cardio to improve our results.

But not only do workouts NOT have to be just cardio or just strength, but you could technically see BETTER results by dialing in your strength training over simply adding in more cardio type workouts.

That’s why I wanted to share 5 tips to get better fat loss results from your strength workouts.

But before I do, I want to highlight why strength training and building muscle is so key if we want to look leaner and KEEP the fat off…

Why Strength Training Is Key:


To build muscle, we need to challenge our body to grow stronger.

While you can 100% lose weight without working out by just adjusting your diet, you need the challenge of training to help you build that muscle.

Not to mention a consistent workout routine can make it so much easier to lose fat faster and maintain those results long term.

Working out though isn’t just about burning more calories. And weight training especially improves your hormone levels for easier fat loss and a better body composition. 

Weight training, and increasing muscle mass, can even increase insulin sensitivity for better fat burning benefits and a higher metabolic rate.

And that is why paying attention to your workouts and not just your diet is so key.

Through your strength training, and creating progression in your workouts, you can build lean muscle.

While we often think about creating progression through using heavier loads, progression can also occur by adding in instability, using variations of movements, changes in tempos and even changing up the range of motion you’re performing during movements.

But we need that clear challenge to create the change no matter how we create it.

We can’t just see our workouts as a time to burn more calories, and do MORE, which is why we often turn to cardio.

We have to also recognize that cardio can be catabolic to muscle tissue and, when combined with a calorie deficit for fat loss, can actually lead to us losing more muscle mass over the course of our weight loss journey.

It’s why strength training is so key.

It helps us do what we can to increase lean muscle mass and at least preserve even the muscle we have.

And we want to do everything in our power to preserve our lean muscle mass to make sure the weight we are losing is as much fat as possible to look our leanest.

While, especially if we have more weight to lose, some muscle mass loss will occur, the leaner we get, the more we want to do what we can to avoid more muscle loss than necessary.

Because muscle is metabolically costly.

What this means is it requires more calories to maintain more muscle on your body.

More muscle therefore means a higher metabolic rate and more calories burned at rest.

So if you’re looking to lose more fat faster, you want to retain and even add muscle.

Focusing on strength training to build and retain lean muscle will help you avoid some of the metabolic adaptations that often occur with weight loss and allow you to eat more as you lean down.

Muscle will then make it easier to maintain your weight loss long term not to mention actually LOOK LEANER because you truly will have lost fat in the process!

Now…What Are 5 Tips To Help You Dial In Your Strength Training For Better Fat Loss Results?

#1: Focus on compound moves.

Compound moves or moves that work multiple joints and muscle groups at once allow you to move heavy loads and build lean muscle efficiently.

They are a perfect way to work more areas in less time, which is key if you are trying to create efficient workouts to match your busy schedule.

And while we don’t want our training to just be about burning calories, compound moves will help you burn more calories during your sessions than isolation exercises will.

You are working large muscle groups and more muscles at once, which means your body needs to utilize more energy to perform these lifts.

You may find you get more out of breath and see your heart rate increase more when focusing your workouts on compound movements, especially when you challenge yourself with heavy loads.

Working muscles require increased blood flow to deliver glucose, oxygen and other nutrients to muscles, which will increase your heart rate to match these demands aka you’ll burn more calories.

And not only will you burn more calories during your sessions but these muscles that have been worked during your session will require more energy to support the healing process so they can grow stronger.

Especially if you are in a slight calorie deficit, your body will need to utilize stored energy to fuel the repair and growth!

#2: Avoid body part splits.

You’ll see many bodybuilding splits working very focused areas of the body each session.

This often limits the large muscles you are actually targeting per session and decreases your training frequency for areas over the week.

Especially for stubborn areas, increasing training frequency may be helpful so you can more efficiently build that lean muscle.

This may mean full-body, anterior-posterior or even hemisphere splits may be more beneficial so you can target muscle groups more than once a week easily.

This will also allow you to hit more large muscle groups each and every session to more efficiently build strength and muscle.

Targeting more large muscle groups each and every session also allows you to ultimately create a more anabolic hormonal environment which can also assist you in burning more fat even at rest.

With these harder training sessions that focus on more large muscle groups each and every session you can elevate levels of growth hormone and testosterone and reap their fat burning benefits.

Besides initiating fat burning, growth hormone also facilitates protein synthesis for faster recovery and greater muscular development. 

Testosterone also is key to creating that anabolic environment which not only promotes fats burning but the development of lean mass.

Not to mention, again working those large muscle groups leads to more calories being burned not only during your sessions but even in the follow time as your body repairs and rebuilds!

#3: Use fewer single lift workout designs.

While you don’t want to turn every strength workout into a cardio session or that will fight against your muscle gains, you do want to use the cardio-strength spectrum to your advantage.

While single heavy lifts with longer rest periods can and should be included strategically, especially to build strength, they aren’t necessarily the most efficient for muscle hypertrophy.

Intense heavy lifting sessions with at times shorter rest periods, not no rest periods, can even better optimize those hormone levels.

By using more supersets, trisets and circuit type workout designs, you can allow areas to rest while still working other areas.

This often allows you to work more muscle groups in a shorter time frame and keep your body having to work harder to again, burn more calories to rebuild stronger.

The metabolic element to these sessions can also help you get cardiovascular benefits and stay in great conditioning shape, even improving your lifting.

Plus, by alternating areas worked, you can still get adequate rest to keep using those heavy loads to encourage muscle hypertrophy or growth!

#4: Mix up the tools you use.

Often when we think about building muscle, we think about lifting heavier and getting super sore.

While you may find at times during your fat loss phase, you do get more sore as you are in a slight calorie deficit, you also don’t want to try to make yourself sore after every session.

Soreness isn’t an indicator you worked hard enough. And it isn’t needed to build muscle.

While muscle tissue damage can lead to soreness, it isn’t the only driver of muscle growth either – there is also mechanical tension and metabolic stress.

That is why you want to consider not only adding heavier loads but different types of moves and resistances to your training routine!

Consider a barbell hip thruster but add in a mini band around your legs. Or even test out a double banded variation.

Don’t be afraid to use banded moves that change where and how tension is applied during a movement.

Don’t even avoid including some isolation work that does use bands to create that pump and burn to really target those stubborn areas!

These different tools and different moves help you use all three drivers of muscle growth to get the best results possible and even increase your training frequency over the week.

Not to mention they can make training fun, especially if you are finding your motivation at times fading. It can be fatiguing at times to keep trying to drive to lift more or do another rep.

And that is also why including progression through different tools and even the same but different can give you another way of progressing that mentally may be more fun and motivating!

#5: Do a proper warm up – Don’t skip the activation!

This tip is extremely unsexy but the one so many of us are guilty of doing…Especially when we think about designing workouts for weight loss and we’re short on time.

Our warm up is the first thing to go in our workouts so we can “get to the good stuff” and burn a ton of calories.

But if you want to get the most benefit from every training session and really make sure the correct muscles are working, you don’t want to skip your warm up, especially the activation.

Activation exercises not only create metabolic stress to drive muscle growth, but they can be used to establish that mind-body connection.

Through focused activation of one muscle they do also stretch the opposing muscle group as you go through the movement. A glute bridge, where you focus on those glutes will in turn stretch out those hip flexors!

And the more we are able to FEEL those correct muscles working in our training, the more those muscles are truly benefiting.

That ability to recruit muscles and feel them working, that activation, can improve our muscle hypertrophy.

For example, if you feel only your quads or hamstrings during a weighted glute bridge, your glutes aren’t getting the benefit they should. You want to feel them as the prime mover.

Doing glute activation in your warm up can help you establish that mind-body connection so you can better engage those glutes during your workout.

That way you’re not overloading muscles, which can lead to injury AND you’re also really truly using those muscles correctly so they get the full benefit of the workout lifts you’re including!

SUMMARY:

We want to be intentional with our training to get the best results possible.

The more we can use every tool in our toolbox to get results, the better and faster our results will be.

So if you’re really working to lose fat and have your diet dialed in, don’t ignore how beneficial strength training can be to building that lean, strong physique and even maintaining your results long-term!

Learn more about my 3-Step Recipe For Results

The Most Underrated Conditioning Tool (Add This To Your Workouts)

The Most Underrated Conditioning Tool (Add This To Your Workouts)

When you think about doing cardio, you think about endless rows of cardio equipment. Or you think about going outside for a run or ride.

But what if you find these workouts, well, boring?

Ok maybe you turn to some bodyweight interval sessions.

However, even many of these are very lower body focused.

Or they include a ton of jumping.

And it can be hard if you have a lower body injury to find options to work around!

So how can you get in a killer cardio workout that even targets your UPPER body more while allowing you to work on everything from building power to your aerobic capacity and conditioning?

The answer?

With BATTLE ROPES!

Battle ropes are the perfect way to work your entire body with lower impact moves or even take your cardio training up a notch.

You can use them for longer intervals of work to improve your aerobic base or you can use them to build explosive power.

They can be great to target literally every muscle of your body, whether you choose a basic wave to just work your upper body, a plank variation to target your core or even a full body movement including shuffling, lunging or squatting.

Learning To Use Battle Ropes:

So how do you do the basic battle ropes alternating arm wave?

A fundamental wave to learn on the battle ropes is the basic alternating arm wave. To do this movement, hold a handle in each hand and walk back so there is some slack in the rope but they are pulled out straight. You do not want them stretched tight.

Holding a handle in each hand, pull one hand down toward your hip as you raise the other hand up. Then quickly alternating, swinging the other arm back as you raise the other arm up.

You can play around with a straighter arm movement or slightly more of a bicep curl.

There are also multiple ways to create this basic wave based on how you want to isolate and work areas. You can make it super arm intensive, holding a very still body and doing more of that curl.

You can also use rotation a bit more swinging from your hip. This is more of the “gunslinger” wave allowing you to use rotation to power the movement more.

You can also do more of a Frankenstein movement, slightly marching in place as you create the wave with straighter arms.

All of these can be used based on how you want to target areas so even play around with them!

But make sure you aren’t just shrugging as you create the waves, feeling your upper traps really becoming overworked.

Think quick fluid movements allowing the waves to push each other down over trying to lift the entire rope up and down each and every time. It’s why you want a bit of slack in the rope.

Make sure too you’re standing tall with your chest pressed out and focused on moving as quickly as possible.

Once you’ start using the basic alternating arm wave…How can you spice things up a bit?

Battle Ropes Modifications And Progressions:

Not only are there different waves you can create, from the double wave to sidewinders to rainbows, but you can even vary up that basic alternating arm wave exercise by the posture you perform the movement in and the involvement of your lower body.

You could add in a side shuffle as you perform the alternating arm wave, side to side lunges or even a reverse lunge.

If you need to modify around a lower body injury, you could even do the movement seated on a bench or on the ground.

With any of the waves you can really implement different postures and movements to work your entire body and work around lower body aches and pains.

You can do a single arm wave from a plank position if you wanted to work your core more and get in an anti-rotational movement during your conditioning workout.

Or even the rainbows balanced on your butt to work your obliques more.

If you want to add in impact and work on explosive power, you could combine a double arm wave even with a squat jump.

Battle ropes are simply a great way to target not only your upper body but adjust to meet your conditioning needs for that day and work a variety of muscle groups!

But now that you have all of these options, how can you create a workout?

Battle ropes are a great tool to use whatever energy system you want to target.

You can include them in an interval workout, whether you want a quick high intensity interval session for something quick, like 30 seconds on, 10 seconds off or you want to work on your aerobic conditioning and perform longer intervals of work on the ropes, even up to 10 minutes straight.

You can honestly even include them in a lifting session if you wanted the workout to be more metabolically focused. You could include even something to work on your strength and power by doing reps of the Snake wave or outward circles during your chest, shoulders and tricep session.

Just remember, you want to include tools in a way that matches your needs and goals. We don’t just want to put things in to feel more worked and train harder!

But if you’re looking for a way to improve your conditioning and create a new progression, give battle ropes a try!

Love my workouts, exercises and tips? Subscribe to my YouTube!

–> Follow Redefining Strength On YouTube

10 Upper Body Bodyweight Exercises (+2 WORKOUTS!)

10 Upper Body Bodyweight Exercises (+2 WORKOUTS!)

There is always a way to keep moving forward consistently toward our goals working around the challenges life throws our way.

And while it may not be our ideal workout or schedule, doing SOMETHING is always better than nothing and can keep us moving forward toward our goals.

That’s why I wanted to share 10 upper body bodyweight moves to help you build strength even when you don’t have access to a gym or you’re short on time.

These moves will target your arms, shoulders, chest, back and core and can easily be done at home, with a few bonus moves using a towel.

I share quick tips on how to do these moves then 2 amazing workouts you can implement them in! 


10 Upper Body Bodyweight Moves:

1: Doorway Row

It can be challenging to target your back and perform pulling movements when we don’t have equipment. But by using a simple doorway or even stair banister, we can really challenge our back using our own bodyweight.

And this move is amazing because you can make it unilateral or bilateral to not only challenge one side at a time but even make it harder by using only one side to pull your weight.

Just make sure to stay in that squat and focus on your shoulder blade moving so you’re really initiating the pull with your back!

To modify, start with both hands instead of a unilateral pull.

2: Downward Dog Pike Push Ups

Push ups are not only a great chest, shoulders and tricep exercise, but also a great core move. And you can adjust how much you activate each of those muscle groups based on the exact variation you use.

If you want to get your shoulders and get in movement to mimic that vertical press or overhead press, the downward dog pike push up is the perfect move to include.

When you do this move, make sure you don’t turn it into a horizontal press but actually lower your head straight down between your hands to mimic that vertical pressing movement.

To advance this move, place your feet up on a bench or stair. The higher the platform, the harder it will be!

3: Scapular Wall Row

When we think about back exercises, we think about pulling movements. But this amazing back move is actually a press.

If you struggle with engaging your back and that scapular movement, and often feel your biceps taking over, this is a key back exercise to include. And all you need is a wall!

When you do this move, focus on driving off your elbows to push away from the wall and feel your shoulder blades move toward your spine to drive your chest out. Focus less on walking further away from the wall and more on that mind-body connection to engage your back.

To vary this move up, you can also do the press lying on the ground as well.

4: Tricep Push Ups

This amazing unilateral push up is a great way to target each arm independently to correct imbalances and really work those triceps.

It is also easier on the shoulders than the bench dip, which can make it a great option especially if you’ve had shoulder aches and pains in the past.

When you do this move, make sure to press through your entire hand. Move your hand up higher to modify or lower down your side to advance. And make sure not to let your legs flop around.

You can further modify this move to start by pressing off a bench or wall over doing the push up off the ground.

5: Lying W Pull Down

Even when we don’t have equipment, we don’t want to ignore the importance of vertical pulling exercises. Moves like the Lying W Pull Down can help us improve our back strength, working our lats while helping us improve our scapular control and stability.

Really focus on your shoulder blades drawing together and down toward your butt as you pull your arms down from extended overhead as you lie on the ground. Even slightly extend your spine to lift your chest and hold as you perform the movement.

If you do feel your neck during moves like this, rest your head on a towel or even modify this move standing.

6: Chest Fly Push Up

The chest fly is a great move to really work your pecs, which is exactly what muscle you’ll work more with the Chest Fly Push Up.

All you need are two small towels to use on a hardwood floor or even paper plates on carpet.

And bonus, you’ll also really work your core.

When you do this move, really focus on sliding out with control then your pecs working to pull your hands back in as you come up out of the push up.

To modify, try sliding one side out at a time or even move to your knees. You can also modify this move off an incline, sliding one hand out at a time while using your stairs to create that incline.

7: Plank Row

This bodyweight exercise is a great way to target your core, especially your obliques, improve your shoulder stability and even work on your scapular control and strengthen your back.

Really focus on avoiding rotation as you row your hand up toward your chest and make sure to initiate the row with your back.

This move is an anti-rotational core exercise so do not rush it but really flex even your quads and glutes to fight opening up as you lift your hand.

To modify, try the plank off an incline, placing your hands up on a bench, couch, table or stair.

8: Climber Plank

Target those arms and shoulders as you work your entire core with this plank variation.

When you do the Climber Plank, really make sure to place your hands under your shoulders over letting your hands sneak out in front of you as you climb up. And as you lower down, place your elbows under your shoulders.

This not only really makes your arms and shoulders work, but it will protect your neck and help you avoid shrugging.

To modify this move, try the plank off an incline.

9: Self Resisted Bicep Curl

You can apply your own resistance when bands or weights aren’t available. And one great way to do this and get in some bonus isolation work for those biceps is using a towel!

To do this curl, loop a towel and hold the ends in one hand to resist your other hand as you curl. You can then make it as easy, or as challenging as you want by pulling against your curl.

Focus on making yourself really fight to curl against the tension. Don’t make it too easy on yourself!

You can even include holds at different points in the move to spend more time under tension.

10: Body Saw

If you want a challenging plank variation that is going to work your triceps and lats, you’ll want to include the Body Saw.

While you can do this move by just walking your feet back, a great way to really make it challenge not only your core to protect your lower back during the extension but also your lats and arms, is to add a towel under your feet.

Instead of walking back, slide back. Do not let your hips sag but focus on lengthening through your arms and shoulders before you pull back in.

Think about pulling back into that plank by feeling the sides of your back working to bring your elbows back under your shoulders.

How Can You Use These Moves In 2 Amazing Workouts?

Workout number 1 is the 1 Minute Max Out. Set a timer for 1 minute and perform as many reps of a move as you can in that time. Move through the 5 exercises, working for 1 minute on each (30 seconds per side) before resting for a minute to repeat for 3-5 rounds through.

1 Minute Max Out

CIRCUIT:
1 minute Doorway Row
1 minute Downward Dog Pike Push Up
1 minute Plank Row
1 minute Tricep Push Up
1 minute Lying W Pull Down
1 minute Rest

The second workout option is the 20-16-12-8 Ladder. You will start with 20 reps per move in the Triset (or per side) then go down to 16 reps the next round, 12 the third round and finally 8 on the last round through the moves. Once all 4 rounds are complete on a Triset, move onto the second set of exercises. Time how long it takes you to beat that time next time through!

20-16-12-8 Ladder

TRISET #1:
20-16-12-8 Doorway Row
20-16-12-8 Chest Fly Push Ups
20-16-12-8 Body Saw

TRISET #2:
20-16-12-8 Scapular Wall Row
20-16-12-8 per side Self Resisted Bicep Curls
20-16-12-8 Climber Plank (perform HALF the reps per side)

Looking for more exercises, workouts, tips and motivation?

Follow me on Instagram!


The 3 Best LOWER AB Focused Planks

The 3 Best LOWER AB Focused Planks

Looking to mix up your core training and find something you really feel working those abs, especially the lower abs, while also helping you avoid an achy lower back?

Then you’re going to love these 3 amazing plank variations.

Planks can be both great isometric exercises, but also more dynamic movements to target and strength our abs.

And with some specific variations, we can target that lower portion of the rectus abdominis even more!

That’s why I want to show you 3 ways to use planks to target those lower abs…including one move that is a great untraditional and challenging plank option even if you can’t do traditional planks due to shoulder issues!

And at the end I’ll share a great quick burner layout so you can use these 3 moves at the end of your workout!


3 Lower Ab Focused Planks

1: Dolphin Planks

If you really want to target your lower abs, you need to include exercises that utilize the posterior pelvic tilt.

This tilting of the pelvis, tucking the hips toward the ribs, really engages that lower portion of the rectus abdominis while also working your glutes. And it is a great way to learn how to brace to protect your lower back from aches and pains as well.

While you can use the posterior pelvic tilt in a plank as an isometric hold, doing a plange plank, you can also include this tilting as a dynamic movement during the plank.

This dynamic plank variation using the posterior pelvic tilt is the Dolphin Plank and a great way to challenge your abs.

You will use that tuck up to engage those lower abs, but also challenge your abs to protect your spine as you test out your spinal extension, slightly dropping your hips toward the ground.

This forces your abs to brace as you extend, but be mindful you don’t end up simply engaging your lower back!

To do this move, set up in a plank from your forearms and toes with your feet together. Make sure your shoulders are stacked over your elbows and your upper back is engaged so your shoulders aren’t shrugged.

Drive back through your heels as you flex your quads to hold in a nice straight line. To improve your base, you can widen your feet out to shoulder width.

Then tuck your pelvis under toward your ribs, rounding through your entire spine even to tuck. Do not push your butt up in the air and end up shifting your shoulders back behind your elbows.

You really just want to round through your spine as you tuck your hips toward your ribs, engaging your abs and glutes.

Even think about drawing your belly button in as you exhale to pull your abs in hard.

Then begin to lower back down into that plank position. As you lower though, try to go a little past that straight line as if extending to slightly drop your hips.

You want to feel your abs almost FIGHTING against you lowering to prevent your back from really arching.

You’re testing out your ab brace as you extend.

Then tuck right back up, tilting your pelvis again.

Do not push backward as you do this movement. Keep your shoulders stacked over your elbows.

Pause in each position to really feel your core working. Really move slowly through the movement to focus on feeling your abs.

If you feel your lower back, either modify to the static plange plank hold or use an incline.

To modify this move an incline works best. The higher the incline the less pressure or strain there will be on your shoulders and even core so you can really focus in on those abs working.

You can also do this starting on your hands and knees but be conscious that, while it may look like the cat cow stretch, you are truly engaging your abs to round up. I like to call this variation the vomiting cat because I want my clients drawing in their abs as if trying to really hollow out their belly!

2: Lower Ab Plank

This move is not a traditional hands and feet or forearms and feet plank. But it is an amazing core isometric hold and a move that is great to target those lower abs.

I personally call it a Lower Ab Plank so wanted to include it as an option because often when people have shoulder injuries and can’t do planks they feel a bit lost about what options are out there.

So if you need to take your upper body and shoulders out of the equation, this is a great option to target those lower abs…although don’t forget about using the incline as well to regress moves and build up!

This exercise is advanced though and you need to have mastered that basic pelvic tilt hold to brace so you don’t feel your lower back or hip flexors only working.

To do the move, you will lie on your back with your arms down by your sides or hands behind your head.

To start you can raise your legs straight up toward the ceiling and tilt your hips towards your ribs to press your lower back into the ground. Or you can start with your knees bent to really set up the posterior pelvic tilt before extending your legs.

Maintaining that pelvic tilt, lower your legs down so they are only an inch or two off the ground and hold. Better to even hold up a few inches higher to keep that ab brace and even squeeze your glutes.

Focus on really bracing those abs as you hold.

If you feel your lower back taking over, raise your legs up higher or even bend your knees. You can even start with just one leg extended.

Lifting your head to perform an upper body crunch can both make the move harder, but also help by flexing your spine.

Make sure to breathe and focus on engaging those abs, keeping that tilt. You do not want your lower back taking over. If it does, your lower back and not your lower abs are getting worked by this move.

Better to modify and focus on those abs than do a harder variation where you compensate!

3: Body Saw

Extended planks or long lever planks have actually been shown to increase ab activation over the traditional plank, especially of the lower portion of the rectus abdominis.

That’s why it’s key to include some extended plank positions in your routine.

You just want to be very conscious you don’t overload your neck and shoulder OR let your butt start to hike up in the air as you do these moves.

One great dynamic way to include the extended plank position in your routine over simply holding is with the Body Saw.

The great part about this plank variation, like with all plank variations, is you can also modify this move off an incline.

And if you have wrist issues you can do it from your forearms or you can also give yourself more space and change things up by doing this movement from your hands to work your arms more!

To do the basic Body Saw plank from your forearms, set up in a plank position from your forearms and toes with your feet close together and elbows under your shoulders.

You want a nice straight line from your head to your heels. Make sure to engage your back to support your shoulders and make sure they aren’t shrugged.

Then begin to walk your feet backward, taking small steps. Keep your body in a nice straight line and don’t let your hips sag toward the ground.

Lengthen through your triceps and shoulders as you walk back.

Walk back as far as you can while keeping your core engaged.

Then walk your feet back forward until you are back in the standard plank position. You do not need to walk more forward than simply back so your shoulders are over your elbows.

Make sure you feel your abs bracing as you extend back. Do not push your butt up in the air or let your hips sag toward the ground.

Repeat walking back out.

Remember you can modify the move off an incline to reduce the strain on your upper body and core.

To advance this move as well, you can also add in sliders, sliding back instead of walking. That reduces traction and even makes that pull back in so much harder! Just make sure you can control the move before progressing!

SUMMARY:

Using these 3 plank variations you can really work your abs while targeting that lower portion of your rectus abdominis even more!

To use these as a workout….

Lower Ab Burner:

Set a timer for 20 seconds per move starting with the Body Saw then the Dolphin Plank and ending with the Lower Ab Plank.

Rest 20 seconds between rounds to make sure you can really focus on bracing hard each round and complete 2-3 rounds through.

You want to focus on short intervals so you can engage everything hard over just focusing on holding for longer and letting your lower back or hips become overworked!

The BEST results happen when our diet and our workouts WORK TOGETHER!

Check out my RS Formula for FABULOUS results:

–> 3-Step RS Formula


Target Your LOWER ABS – The Best Lower Ab Exercise You Aren’t Doing

Target Your LOWER ABS – The Best Lower Ab Exercise You Aren’t Doing

Now my favorite comment I get any time I post anything to work the lower abs is…

“You don’t have lower ab muscles.”

And that’s true. There is no specific lower ab muscle.

But you CAN target that lower portion of your rectus abdominis to a greater extent with specific moves, especially bottom up exercises.

Just like you can target the upper portion more as well with more top down focused moves.

So if you’re looking to target that lower portion of your rectus abdominis while even strengthening your pelvic floor and TVA more, I want to share a movement variation I think is often under utilized.

But before I do I do just want to mention a few bonus tips to help you really achieve that lean, flat stomach.

That lower abdominal region is an especially stubborn one to lose fat from.

And 100% diet is key. And consistency in dialing in our macros past the point we often want to quit as losing that last little bit of stubborn belly fat is hard.

But if you truly are struggling with losing that last little bit, this tip may be the missing piece from your training routine.

And it does involve something we’ve been told is impossible….

Spot lipolysis aka SPOT REDUCTION! GASP!

Yup. You can spot reduce an area…not in the way we’ve always tried to, but it may be that key little tweak when you’ve got everything dialed in.

How do you do this?

Try including this underrated ab exercise, or an exercise for the stubborn area you want to target in your strength workout. Include it even as part of a finisher.

When we work a muscle, we mobilize more fatty acids from the surrounding tissues.

So if we do this focused ab work to mobilize the fatty acids in the surrounding tissues and then include low intensity steady state cardio after, we can utilize the mobilize fatty acids.

Aka we can help ourselves lose more fat from our lower abdominal region!

(For more on Spot Lipolysis, clic HERE!)

If you’ve been struggling with that last little bit of stubborn fat and want to strengthen your lower abs, try this Hanging Posterior Pelvic Tilt with Squeeze as part of your workout finisher even adding in a nice walk after to cool down!

How do you do the Hanging Posterior Pelvic Tilt with Squeeze?

Hanging leg raises and knees to elbows are both great lower ab exercises. Yet too often we use them in a way that only ends up overworking our hip flexors.

It’s because we ignore the essential component that makes any leg raise movement really target our lower abs – the posterior pelvic tilt.

That’s why I love this hanging ab exercise – because it focuses on that essential pelvic tilt component.

And by adding in the leg squeeze, which in turn engages your adductors, you can even help yourself better activate your pelvic floor and lower portion of the rectus abdominis.

To do this move, start hanging from the bar from a ball or block between your upper thighs right above your knees. Grip the bar hard with all of your fingers evenly and engage your back to help you stabilize, slightly depressing your shoulder blades.

Then, squeezing the ball or block, tuck your pelvis toward your ribs. You’re basically rounding your lower back.

Your legs will come forward but you do not want to really bend at the hips.

You’re using your abs, and even your glute max to perform that slight spinal flexion to tuck your pelvis under.

Squeeze the ball hard as you tuck.

Think about pulling your core in as you tuck. You’re not just drawing your belly button toward your spine but even thinking about pulling your pelvis in toward each other as you tuck toward your ribs.

To help you really brace, focus on that exhale as you tuck.

As you do this move, focus on that exhale to expel all the air you have and contract that core as you perform the pelvic tilt to feel your TVA even engaging as a corset around your middle to brace.

Really pause with each tilt to focus on engaging your abs as hard as you can before slowly relaxing.

To help you really avoid too much swing, grip the bar hard and engage your lats.

This is a very challenging move as simple as it may seem.

To modify the fully hanging variation, keep your toes down as you hang, even losing the block or ball squeeze to be able to better focus first on the tilt.

If you have any upper body issues or simply can’t yet fully hang and control the exercise, you can also modify by doing this off the ground, holding onto a pole overhead or on a bench holding onto the end.

To progress the move when you’re fully in control of the posterior pelvic tilt, you can keep the squeeze and start to do even the full knees to elbows. But only progress as you can fully control the move and feel that mind-body connection being used to create that ab shakeage!

SUMMARY:

Remember you need to focus on feeling your lower abs working to get the full benefit of this move. If you instead only feel your lower back or hips, you need to modify.

Sometimes we need to regress to progress!

The 3-Step Fat Loss Formula if you’re ready to reveal those abs…

–> 3-Step RS Formula

3 Cardio Mistakes For Fat Loss (And What To Do Instead)

3 Cardio Mistakes For Fat Loss (And What To Do Instead)

Honestly for fat loss, cardio is overrated.

If you enjoy it, do it.

But…

A. You can’t out exercise your diet if you want optimal body recomposition results

…and…

B. Cardio can make it harder to build and retain lean muscle, which can already be a slight challenge when in a deficit to achieve fat loss.

However, if you are going to include cardio in your training routine for overall optimal health and because you enjoy it, I want to share some key mistakes most people make when it comes to cardio and fat loss and how to avoid them!

But before I dive into those common mistakes, I do just want to point out a common problem I see when it comes to our view of our training in general and fat loss…

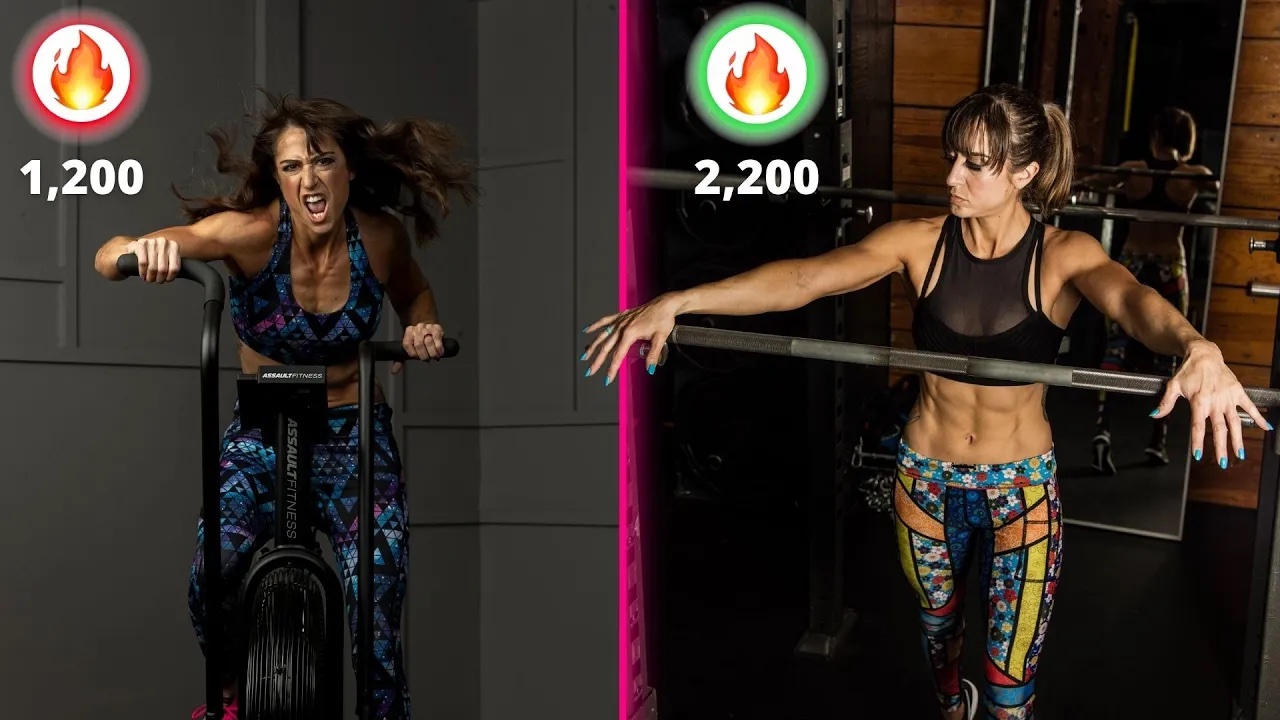
Too often we view our workouts simply as a way to burn more calories!

It’s why we think doing more cardio is better.

We see those calories adding up faster during our training sessions.

And while yes, training can help us burn more calories to create that deficit to lose fat, focusing solely on our training as a way to create that deficit is short term thinking that often backfires.

It’s why we actually often STRUGGLE to get the results we want.

Because if you are constantly trying to only create the deficit through your training, you’re ultimately going to burn out because you’ll have to keep trying to do more.

Our body adjusts and adapts and becomes more efficient. So unless you’re constantly finding ways to train longer or do more in your cardio, you’ll end up burning fewer calories over time.

Not to mention, you’re most likely not going to see optimal body recomposition results between metabolic adaptations and a lack of attention to building muscle in your training.

You’ll especially struggle to see results if you’re focused on doing more in your training sessions while eating less.

While we may be burning a ton of calories in our training, if we’re undereating, our body will try to “protect” itself by actually finding ways to use less energy during the rest of our day.

So you’ll actually create metabolic adaptations that will backfire long term and be why you quickly regain any weight lost if you don’t keep up your insane training schedule or continually lower your calorie intake.

This is why our workouts need to have a focus beyond purely being a way to burn more calories!

Now what are 3 Cardio Mistakes And How Can You Avoid Them?

Mistake #1: Putting cardio BEFORE strength.

If we want to see the best body recomposition results, we need to stop valuing cardio over strength work.

The best way to not only achieve our desired lean aesthetic, but actually maintain it long term, is to do all we can to build and retain our lean muscle.

More lean muscle helps us burn more calories at rest and, well, look leaner and more toned as we lose the fat.

It helps keep our metabolism humming so we can more easily maintain our results long term as well.

That’s why we need to stop prioritizing cardio or doing it first in our day before our strength work.

While I’m not a huge fan of two-a-day sessions, we have to remember that what we do first, we are freshest for.

So the best way to truly lift weights and perform exercise variations that truly challenge us in our strength sessions is to do those FIRST.

If we instead do cardio first, our strength sessions will suffer. Sure we may “feel” like we’re giving them our all, but our 100% intensity won’t be a true 100%.

So if you are doing both strength and cardio sessions together in a day, put that strength work first.

And if you can, instead of even doing a harder cardio on strength days, try just going for a walk after.

Especially the closer you are to the lean look you want, the more this may actually IMPROVE your fat loss efforts, utilizing the mobilized fatty acids from the tissues surrounding the areas you worked!

If you do plan in harder cardio sessions, try to save your cardio for a separate day, even a day you have a rest day after before your next lift!

Mistake #2: Focusing on the LENGTH of our sessions over the purpose.

Interval training and “HIIT” sessions are all the rage.

And they can be a great way to get in a killer training session when you’re short on time.

But too often now we take what should be a quick INTENSE workout and drag it out for an hour.

More is better, right?

NOPE!

Generally the longer your training session, the more your intensity dips. Unless your training sessions is long due to proper rest periods.

But usually our interval workouts aren’t longer due to changes in our work to rest intervals. Usually they’re longer because we took what should be just 20 minutes of work and doubled it.

We take that 5 round 30 seconds on, 10 seconds off circuit, and instead do 2 of those in a session.

But all that does is take us past the point of diminishing returns. Our intensity drops dramatically and we don’t get the same benefit. If you were trying to work on speed even, you can ultimately end up training slowness.

By doing more, we may, sure, burn more calories, but it is often not quality volume or work. It is often where we ultimately end up compensating out of fatigue which can lead to injury and hold us back from consistently training to see those aesthetic changes we want.

Not to mention the wasted volume can be why we are so tired for subsequent training sessions and then don’t get the full benefit.

And often these sessions lead to increased levels of hunger that can derail our diet and leave us feeling depleted energy-wise.

So stop focusing on simply doing longer sessions. Design workouts based on your goals. Even if you have an hour, not every workout needs to fill it!

Mistake #3: Thinking more is better.

Our training should be fun, but our workouts need to have a clear focus and be designed with a specific goal in mind if we want the best results.

We need to stop focusing on just doing more to burn more calories.

We have to recognize that the QUALITY of our work really matters.

So while you may increase the length of your runs or rides to train for a race, simply doing more for the sake of doing more may make you “feel” more in control, but it won’t lead to better results faster.

And often it can backfire. That steady state cardio can be catabolic to muscle tissue and fight against your fat loss goals.

It can especially hold you back if you’re pushing that deficit while also trying to do more in your training.

Not only can this negatively impact energy levels but it can create metabolic adaptations that actually hinder us from continuing to lose fat.

This overtraining while under fueling can also lead to hormonal imbalances that ultimately lead to us regaining the fat and more.

SUMMARY:

Everything we include in our training needs to have a purpose and be focused on our ultimate goal.

More is not better, as much as doing more can make us “feel” more in control.

As hard as it can be, ultimately results come from trusting the process.

Dial in your workouts AND your nutrition to see the best results as fast as possible…

–> The RS Formula To Fabulous Results