One of the best things you can do for your health is to move more often, even if it is just for a few minutes at your desk.
Sitting for 9 hours a day hunched over a computer causes us to develop muscle imbalances that can lead to injury. Plus, inactivity is just plain old bad for us.
Below are 10 Desk Exercises that will correct imbalances and get your body moving without you even having to leave your desk. These stretches and isometric exercises will open you up and get the correct muscles activated to help you remain pain and injury free!
10 Desk Exercises
These stretches and exercises will help improve your posture and prevent shoulder, neck, back, hip and even knee pain. They basically force you to do the opposite of what you do for 9 hours a day at your computer – they work on extension while you generally sit in flexion.
And these moves not only stretch but also activate the correct muscles so that the muscles that should be working, are working. Not only will this help you remain injury-free, but it will also help you get the most out of your workouts!

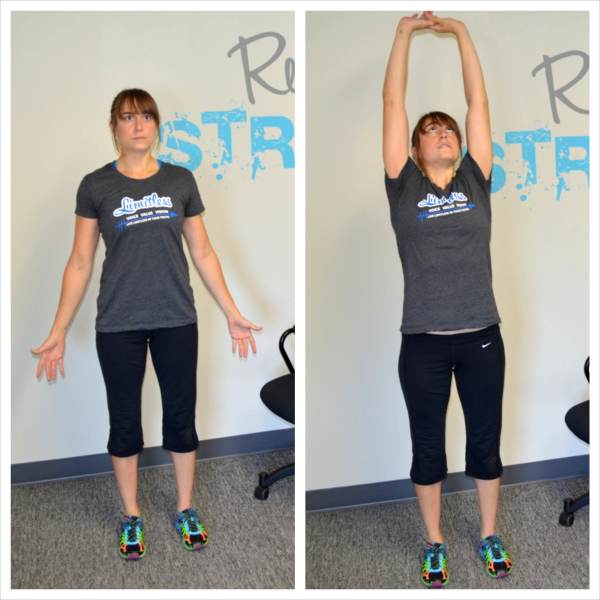
1. Mountain Pose – Simply forcing yourself to stand with proper posture can help you prevent injury because it can realign your body, loosening tight muscles and activating under-active ones
And this proper posture to realign your body is called Mountain Pose.
To do Mountain Pose, stand with your feet about hip-width apart and your arms down by your sides. Stand nice and tall and press your chest out, drawing your shoulder blades down and back.
As you open up your chest, try to elongate your body as if a string is attached to your head and pulling you up. As you feel yourself elongating, feel your feet firmly planted in the ground.
Pretend you are standing on a piece of paper and that you are trying to tear it apart by pressing your feet down into the ground and apart.
Feel your glutes tighten and squeeze as you open up your hips.
Stand tall and remember to breathe.
You can also do a variation of the Mountain Pose and reach up overhead and back as you stand tall. This will stretch our your arms and lats as well as your hips a bit more than the basic Mountain Pose.
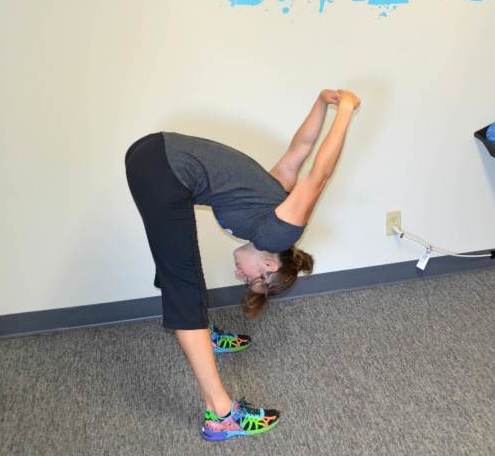
2. Standing Forward Bend – This move is a great full body stretch that really loosens up your hamstrings, low back, chest and shoulders.
To do the Standing Forward Bend, stand with your feet shoulder-width apart or wider. Clasp your hands behind your back with your arms straight and palms together.
Then lean forward, keeping your legs straight as you bend over.
As you bend over, let your hands fall away from your back toward your head. Try to keep your palms together as you let your arms fall forward toward the ground.
Breathe as you relax over, trying to get your hands as far from your back as possible and your legs straight.
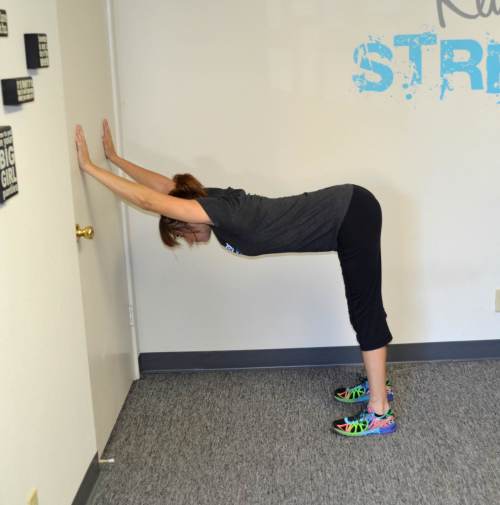
3. Half Wall Hang – Often because we sit all day hunched over a computer, we have poor thoracic extension and our chest and lats are tight. This can lead to neck, shoulder and back injuries.
The Half Wall Hang stretches out our upper body so the big muscles of our back can then be activated. It helps us prevent injuries when we do overhead pressing or snatching in our workouts!
To do the Half Wall Hang, place your hands on the wall and walk them down until your chest is parallel to the ground. Walk your feet back so that you are hinging over with your hips bent to about 90 degrees and your legs straight.
Your back and arms should be straight with your arms running along side your head. You want a nice straight line from your hands on the wall to your tailbone.
Press your chest out through your arms and feel a nice stretch through your chest and down the sides of your back. You may even feel a stretch down your hamstrings as you lean over against the wall.
Hold and breathe. Try to press your chest through toward the ground as you hold and work on your thoracic extension.
Beginners may need to start with their hands higher up on the wall and their feet closer in so that they aren’t leaning over as much.
Make sure your back is flat and not at all rounded as you hold.
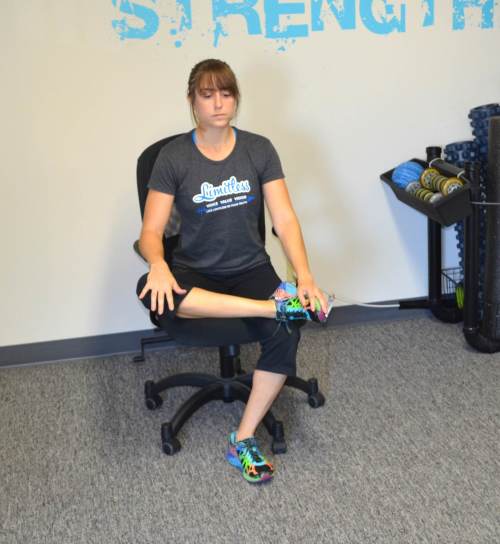
4. Seated Pigeon Pose – This stretch is a great way to stretch the outside of your hip as well as your glute and low back.
This is an especially important stretch for anyone that suffers from Piriformis Syndrome.
To do the Seated Pigeon Pose stretch, sit up nice and tall in your chair and bend one knee to place the ankle on top of your other leg just above the knee.
Sitting tall, press down on your knee to open up your hip.
Flex the foot of the leg crossed over if you feel too much pressure on the outside of your knee.
Breathe and relax as you press down on the leg to feel a nice stretch in the outside of your hip and glute. Pay attention to how the stretch feels on each side.
Make note of any imbalance. Is one knee higher up than the other? Can you press one down more? If you notice one side is tighter, make note. Imbalances can lead to injury more so than even if both sides are just super tight.
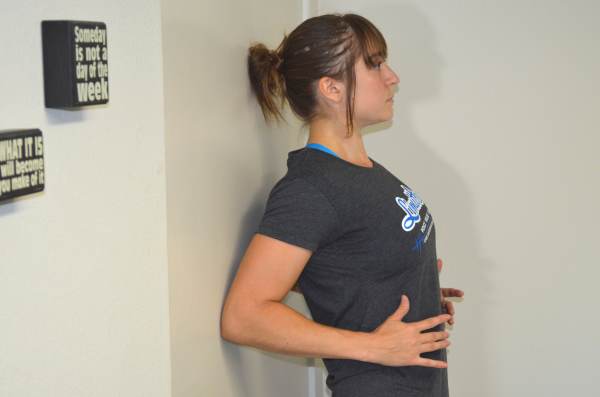
5. Scapular Wall Hold – If you want better posture and to alleviate neck, shoulder and upper back pain, you need to do Scapular Wall Holds almost every day, numerous times a day.
This move will help stretch out your chest while activating the big muscles of your back so that your upper traps and shoulders don’t try to do work they can’t handle and end up in pain and injured.
To do the Scapular Wall Hold, stand with your back to the wall just a few inches away. Bend your arms to 90 degrees and drive your elbows back and your chest out.
Lean back and place your elbows on the wall with your chest pressed out and your shoulder blades drawn down and back.
Do not shrug your shoulders as you drive your elbows back and pinch your shoulder blades down and together.
You want to open your chest up toward the ceiling as you lean on your elbows against the wall. Do not let your upper arms or back touch the wall.
Relax your head back instead of tucking your chin. Pinch your shoulder blades down and back while keeping your core tight as you lean into the wall. Squeeze your glutes and don’t arch your low back. Really press your chest out so that you feel this move low between your shoulder blades.
You don’t have to be at a huge incline or have your feet very far from the wall to feel this move. You may want to work your feet away from the wall as you get stronger, but even very advanced lifters should feel this between their shoulder blades while standing almost upright if they are consciously contracting.
If you want to use this move at the gym, check out these Scapular Wall Hold Variations.
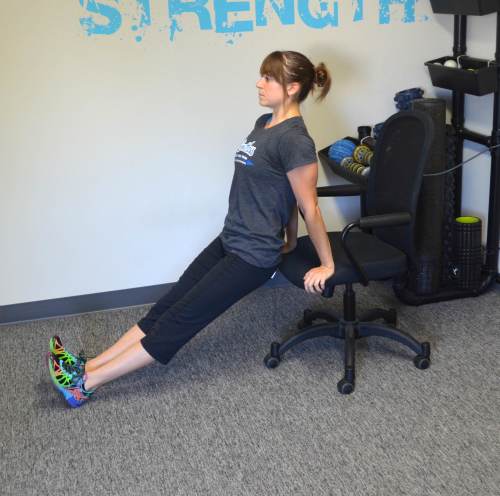
6. Dip Hold – This is a great move to improve your posture, activate your lower traps and even work your core and triceps. And the best part is, you don’t even really need to move from your desk chair!
To do the Dip Hold, sit on the edge of your chair with your hands down on the chair on each side of your body just outside of your butt. Your fingertips should hang over the edge of the chair.
Slide your butt forward and off the chair, keeping your legs out straight in front of you. As you move your butt off the chair, press up to the top of the dip with arms straight down and shoulder blades drawn down and back.
Press your chest out and do not tuck your chin or shrug your shoulders. Maintain a nice tall posture.
Make sure you don’t press your hips up toward the ceiling as you hold the dip. You should remain in a seated position with your back and butt close to the chair. Hold at the top of the dip. If you start to shrug, relax out of the hold.
Beginners may want to walk their feet back in toward the chair and bend their knees to take some strain off their upper body. Advanced exercisers will want to keep their legs out straight in front of them.
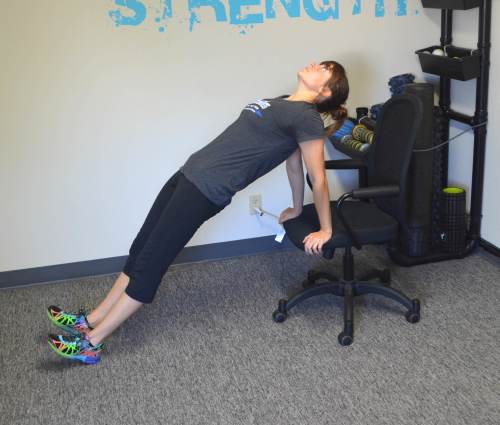
7. Desk Chair Posterior Plank – If you want to stretch your chest and hips while activating your glutes and back to improve our posture and prevent pain and injury, then you need to do the Posterior Plank. However, crawling around on the ground at work isn’t really an option.
That is why the Desk Chair Posterior Plank is a great option if you want to move and prevent injury at work.
To do the Desk Chair Posterior Plank, sit on the edge of your chair with your hands down on the chair on each side of your body just outside of your butt. Your legs should be out straight in front of you and you should be sitting nice and tall.
Then bridge up, driving up through your hands and heels. Lift your hips up as high as you can while pressing your chest out. Squeeze your glutes and draw your shoulder blades down and together.
Relax your head back and don’t shrug your shoulders. Make sure you aren’t hyperextending your low back to try to get your hips higher.
Keep your legs straight as you bridge up and hold. Raise one leg off the ground if you want to advance the movement.
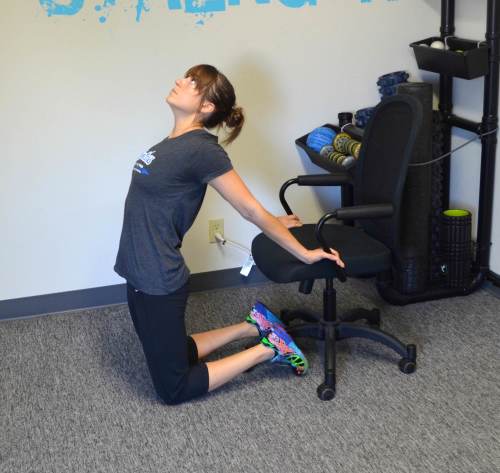
Beginners may need to start with the Desk Chair Camel instead. This move is more of a stretch than the Posterior Plank; however, it will open up your chest and hips just like the plank.
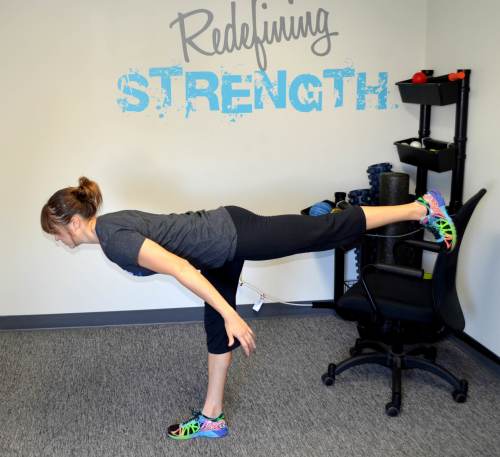
8. Warrior III – The Warrior III pose is a great way to improve your balance and core stability. However, you may find it isn’t an easy move to do in dress shoes or even heels.
If you can, do this move barefoot. (It could be a great chance to quickly roll out your foot with a tennis ball and stretch your calves as well to help prevent injury!)
To do the Warrior III pose, balance on one foot with your knee slightly bent.
Hinge over at your hips, lifting your back leg toward the wall behind you as you lean your chest over. Pretend you are driving your foot straight back into the wall behind you.
As you hold the pose, keep your back flat and your core tight. Reach your hands overhead or back behind you.
Hold in this position.
Do not let your back round or your other foot touch down. You want a nice straight line from the bottom of your lifted heel to the top of your head. Make sure you do not lock the standing leg out as you hold.
Also make sure your hips don’t rotate open up as you hold. Squeeze your glutes to keep your hips level.
Beginners may need need to use the wall behind them to help them balance. Stand with a wall behind you and when you hinge over have the lifted foot lightly touch the wall behind you to help you balance.
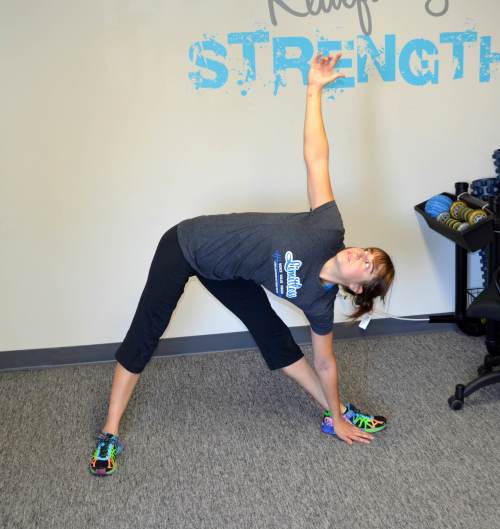
9. Extended Triangle Pose – If you want to improve the mobility of your hips and back, you need to try the Extended Triangle Pose.
This move will stretch out your legs and open up your chest and back.
To do the Extended Triangle Pose, step one foot forward so you are in a nice wide lunge stance. Then place your back heel down on the ground and turn the toe out. If your right leg is forward, your left foot will be perpendicular to your right foot.
Keeping your legs straight, reach forward and down with the right hand. Place your hand on the ground inside your foot or on a block or your shin if you can’t reach the ground while keeping your front leg straight.
Reach the left hand up toward the ceiling, opening your chest up toward your left hand. Hold that pose and relax and breathe.
Make sure to keep both legs straight. If you feel too much strain on your knees, bring your feet closer together.
If you can’t rotate your chest open toward the ceiling, don’t reach as low with your hand. You can place your hand on your shin or even your desk chair if needed.
If you want to stretch the outside of your hip and butt, you may want to try the Twisting Extended Triangle Pose. For more isometric moves, including the Twisting Extended Triangle Pose, check out these 20 Isometrics.
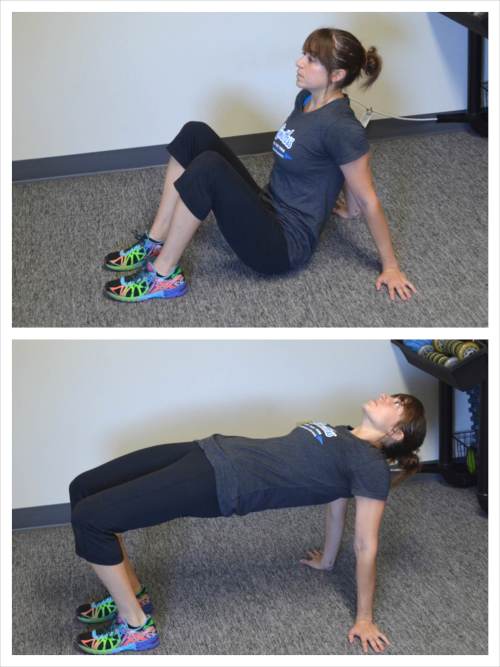
10. Table Top Bridge – If you don’t mind getting down on the ground at work, the Table Top Bridge is another great way to activate your glutes while opening up your chest and hips.
It is also a bit easier than the Posterior Plank, especially if you have knee pain or problems.
To do the Table Top Bridge, start seated on the ground with your feet flat on the ground in front of you and your hands on the ground behind you.
Squeeze your glutes and lift your hips up as high as you can, driving through your hands and heels.
At the top of your bridge, lean your head back and press your chest out. Squeeze your glutes.
Keep your core tight as you bridge up. Try to create a “table” with your body.
Don’t hyperextend your low back just to get your hips higher. You want to feel your glutes working and your chest stretching.
Hold at the top of the bridge or complete repetitions.
These 10 Desk Exercises are a great way to stay active and prevent injury all while staying at your desk. If you take just five minutes a couple of times a day and do a few of these moves, you will see your aches and pains lessen while improving your overall health.
For more injury prevention tips, check out my RStoration!


OMG! Def going to be using these! I can’t thank you enough for your hints, tips and tricks. Sharing what you know- which is A LOT. I wish you all the best! Much love from STL ✌️
Yes! They are great! Always glad to help. If you need anything let me know. I have a soft spot for STL as it is my hometown!
This post is great, although, I wonder how much time do you recommend to hold or stretch in all these exercises.
So I would create a workout out of them and use them for 15-30 seconds depending on the move.