The Best Bodyweight Exercise (Everyone Hates)

The Best Bodyweight Exercise (Everyone Hates)

Unpopular opinion…

I think Burpees are underrated.

You may be like, “WHAAAAT!? I see burpees in everything. They’re overdone!”

And while I agree they can be overused, misused and simply put in a workout just to make it harder…

I also think they aren’t given their due credit for being more than just a hard move, but an amazing full-body cardio move to improve your mind-body connection and functional fitness.

Burpees are an exercise that too often don’t get enough respect for being a move that has to be EARNED, but that can, and should, also be done in some form at EVERY age.

Yup…EVERY age…

That’s why in this video I want to explain WHY burpees can be so valuable to do even as we get older, but also why this move can be such a challenge and how we can break it down and modify it to fit our needs and goals!

And if you’re right now shaking your head saying, “NOPE! Burpees aren’t for me!”

I’d urge you to hear me out on WHY they can be so beneficial and then check out the modifications I share!

So…how and why are burpees so beneficial to include?

I’ll be the first to admit…I don’t like burpees.

They stink.

They’re hard.

They’re uncomfortable. 

They never seem to get easier…especially if we do them correctly with intention and focus.

And because they are a very advanced move, I’m very careful with how I program them into progressions for clients.

They are a complicated, full-body, explosive movement.

They challenge your mind-body connection, requiring you to perform multiple joint actions and engage muscle groups down your entire body efficiently in sequence to move quickly and powerfully.

Lose tension in one area and your burpee looks like the worm. Your push up becomes a belly flop. 

And not only do they require a strong mind-body connection and great full body strength and stability, they also require more MOBILITY than we realize.

To be able to jump your feet fully in close enough to your hands to jump up at the top, requires more hip and even ankle mobility than we recognize! 

But what makes them a hard and complicated movement we need to often regress to progress and truly EARN, is also what makes them a valuable exercise that I want every client to build up to as much as possible.

Breaking down the burpee to build up this movement will help you improve your ability to recruit muscles correctly quickly.

It will help you be able to engage muscles throughout your body in sequence to perform functional everyday activities that have us squatting and reaching and bracing all at once.

It will teach you to brace and stabilize while still reacting quickly.

And it will help you maintain the mobility to get down and up easily off the ground. 

While you may never do the exact burpee movement in every day life, it can really help us build functional strength through the fact we ask our body to do so many things as once and quickly.

That ability to engage things to stabilize and power movement FAST is what helps us react in everyday life to stay injury free and functionally fit.

It helps us react quickly to catch that glass when it gets knocked off the table.

To avoid slipping and falling when we trip on the curb.

It’s all about that mind-body connection.

And burpees are exceptional at helping us build that.

They are also a great move to improve our conditioning, especially when we are short on time. Working so many areas at once with this fast paced movement is going to get your blood pumping. And even just intervals of 20 seconds of work can be killer!

And while this may sound weird…

They even help us become more comfortable being uncomfortable which is truly invaluable to growth in life and success.

This ability to be comfortable being uncomfortable helps us conquer new challenges, which builds confidence. And the more confident we become, the more we will embrace learning and growth and rock those results as we get older!

Now if you’re starting to be sold on burpees and considering adding them in, you need to make sure you’ve truly EARNED the full variation.

And just because you can “do” a burpee, doesn’t mean that full variation is right for you…YET.

If your burpees look sloppy, like you’re a fish kind of flopping out of the water on dry land, it’s time to check your ego and regress. 

Build that core stability. Build that strength.

Build that mobility.

Regress to progress!

Get everything truly working together efficiently so you aren’t just working harder with this move, but actually seeing amazing full-body strength and conditioning gains from it!

So…How Can We Break Down And Modify The Burpee?

I want to break down some key modifications for this move based on some reasons why the burpee is so challenging….

Starting with the fact that it requires more mobility than we recognize.

Challenge #1: I don’t have the mobility to easily get down into the plank and stand back up.

I love using a bench or low box for clients starting out who may not yet have the mobility to easily step or jump back into a high plank and stand back up.

If you notice when you do burpees that you don’t put your hands flat on the ground or you can’t jump your feet in close enough to your hands to easily shift your weight back and stand up, using a bench or box will help. 

The incline helps create more “space” so you can more easily jump or step your feet into your hands.

This modification can also be key if you struggle with challenge #2…

Challenge #2: You don’t have the core stability or upper body strength.

The incline can also help reduce the resistance or load on your upper body and core as you move into that plank position and perform the push up.

Because the burpee shouldn’t be a belly flop onto the ground.

There should be a jump or step back into plank then a lower into a push up before you press back up and stand up.

By using an incline you modify the push up and plank, which can help you slow build that core and upper body strength.

As you build up, you can lower the incline slowly toward the ground, increasing the resistance and load on your upper body and core! 

And even starting out, if you don’t have a proper incline to use, try taking out the push up even and just focus on that nice plank position to start. Or even consider a knee push up variation. 

But focus not only on moving quickly but also proper form with each component of the move.

I mention this because SPEED and moving quickly with exercises has to be earned!

Which brings me to Challenge #3: Not having the neuromuscular efficiency aka the speed or power.

We can move faster while performing a movement correctly because we’ve built up that mind-body connection.

And that takes time.

To start, you may need to step with the burpee over jumping. 

Or you may need to slow things down.

I know often we don’t want to do that with the burpee because we are using it as a cardio move.

This is why modifying it to allow ourselves to move quickly and get our blood pumping is key.

BUT always modifying may also be why you feel “stuck,” unable to progress to a harder variation.

Sometimes we also need to progress and slow things down.

Then as we master that new movement pattern, we can slowly speed things up!

So consider including both burpees slightly broken down into components as you build up, removing the push up or only doing a half burpee without the jump up while also taking time to do longer intervals of conditioning work where you can slow things down to focus on the full movement! 

Now the final challenge I want to address and help you work around is…

Challenge #4: Modifying around aches and pains.

I’m going to tell you right now, the burpee may not be right for you in the starting phases of rehab.

But your goal should ALWAYS be to build back and retrain whatever movement patterns and exercises you can.

The key is to find ways to reduce mobility or strength demands whenever possible in that rebuilding phase.

If you have a wrist injury, that may mean using a bench to reduce the load on your upper body.

It may mean slowing down to place your hands on dumbbells instead to keep a neutral wrist position. 

It may even mean using an incline to modify into a forearm plank as you step back. 

But you want to find ways to embrace the components of an exercise you can train while avoiding overload.

Same can be said for knee or hip injuries. 

Maybe you remove all jumping and instead step back. Or you even use sliders to reduce impact more. 

Maybe you use the incline to give yourself space so you don’t need as much hip or ankle mobility to step back up and stand up.

Or maybe you even do a bulldog variation to target those quads more while putting less stress on your core. 

Again it is about considering what you need to eliminate, but what you can still do in a move to use as much as possible!

While the burpee may not be right for you at your current fitness level or phase of rehab…

While it may not be right for you YET…

I think too often we just demonize moves or write them off over thinking…

“How can I regress to progress?”

“How can I build back?”

We don’t break moves down, slow down the speed and RETRAIN movement and recruitment patterns to function optimally…

We just AVOID.

And this doesn’t help us stay functionally fit till our final day on this planet.

It honestly puts us at greater risk for injury in everyday life!

The more we can retrain and the less we have to FEAR movements, the stronger and more independent we will be till our final day on this earth!

So if you’ve been just hating on burpees, avoiding them thinking they’re hard and pointless…

Think again!

Find ways to include this amazing move in your workout routine using my tips to modify around your challenges and see your strength and conditioning improve dramatically when you’ve earned this killer exercise!

Ready for some fun workouts that will challenge you no matter your fitness level?

Take your training to the next level with my Dynamic Strength Program.

–> LEARN MORE

18 Underrated Core Exercises

18 Underrated Core Exercises

Often we fall back into using the same old moves, forgetting all of the options and variations out there. But having different variations of exercises to target the same area can help us create progression through the same but different.

It can help us even activate different muscles to different extents!

That’s why I want to throw back to the origins of my YouTube channel and share a Core Exercise Variations video with all of you.

These exercises work your entire core, frontside and backside.

Because sometimes we just need that library of move options to help remind us of all of the tools out there we have to meet our needs and goals and design the workouts that help us rock those results!

18 Underrated Core Moves

Balance Toe Touches 00:37
Cross Body Knees 00:54
Twist And Pivot 01:13
Wall Push 01:26
Side Balance Oblique Twists 01:35
Side Plank Clams 01:56
Plank with Reach Back and Out 02:12
Bulldog Reaches 02:34
Plank Snow Angels 02:55
Sit Thrus 03:39
3-Way Sit Up And Reach 03:59
Seated Hinges 04:24
C-Sit With Knees 04:42
Bridge to Boat 04:57
Banana Rolls 05:17
Butterfly Crunches 05:41
Frog Kickouts 05:57
Leg Wipers 06:12

BONUS!

15-Minute Core Burner

Complete 2-3 rounds through each circuit without resting. Rest no more than 30 seconds between circuits if possible. 

CIRCUIT #1:
30 seconds Twist And Pivot
30 seconds per side Plank With Reach Back And Out
30 seconds C-Sit With Knees
30 seconds Frog Kickouts

CIRCUIT #2:
30 seconds per side Cross Body Knees
30 seconds Plank Snow Angels
30 seconds 3-Way Sit Up And Reach
30 seconds Bridge To Boat

For more amazing workouts to match your needs, goals and schedule, check out Dynamic Strength!

–> LEARN MORE

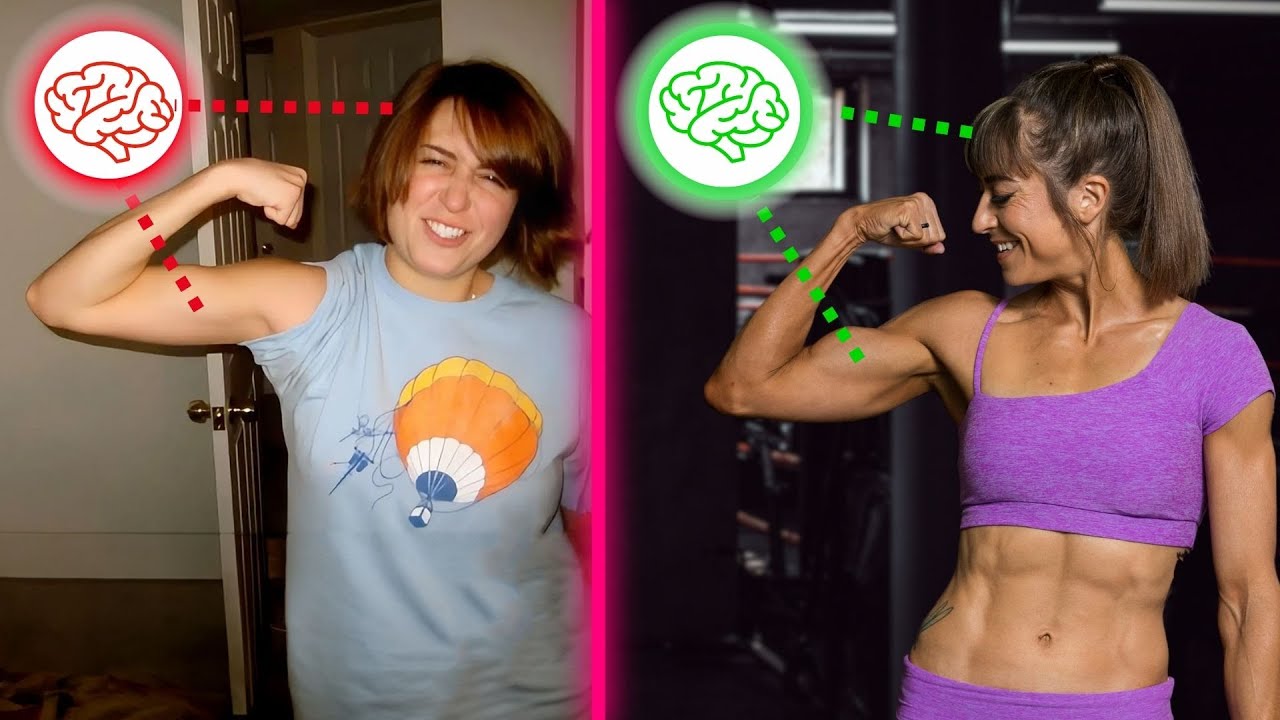
How Strong Is Your Mind Muscle Connection? (Take This Test)

How Strong Is Your Mind Muscle Connection? (Take This Test)

How aware of your body are you?

Do you think you have an amazing mind-body connection?

Well…here’s a test to find out!

I mention this because too often we’re doing the right moves yet not seeing the results we want.

And it’s because we’re going through the motions with our training, mimicking proper form.

But proper form doesn’t guarantee proper recruitment patterns.

Aka just because a move looks pretty doesn’t mean we’re using the right muscles or seeking out mobility from the correct joints.

And the more advanced an exerciser you are, the more you can easily cheat and compensate.

But this can lead to overload and injury and you not seeing the results of your training you want.

That’s why in this video, I want to take you through a quick test to assess your mind-body connection.

And I want to do this test for an area many of us actually struggle to activate correctly…

OUR GLUTES!

To do this test, you’ll just be performing what seems like an oh so simple move and is an essential basic…

The Bodyweight Glute Bridge.

To do this glute bridge assessment…

I recommend setting up your phone camera to film yourself from the side and even from the knees up on a second round through. 

This external feedback can then help you adjust form if you need to tweak things to get the correct muscles working.

As you perform this move, you are going to ask yourself 4 key questions at different points of the move to assess different muscles and even imbalances between both sides. 

If you have the camera running, you can verbally answer.

Otherwise you may want a piece of paper next to you to make notes on! 

Then set up as you normally would for the glute bridge.

I like to have clients place their feet flat on the ground at a comfortable distance from their glutes and bend their elbows to drive their upper arms down into the ground. 

Then you want to bridge up.

Pausing at the top of the bridge, ask yourself…What do I feel working the most? 

Lower Back – Yes or No?

Glutes – Yes or No?

Hamstrings – Yes or No?

Quads – Yes or No?

Relax back down.

Repeat the move a couple more times pausing to assess. Then record what you felt.

Then next, AS you bridge up, ask yourself…

What do I feel working FIRST?

Is it your hamstrings, glutes, quads or lower back? 

Write down which muscle you feel engage FIRST.

Next, as you repeat the bridge, assess both on the way up AND as you pause for a second or two at the top, to ask yourself…

Do I feel one side working more?

Yes or No?

And if yes, which side?

Even make note of whether or not you just feel one side MORE or if you ONLY feel one side truly engaging.

The final assessment you want to do, is focusing on WHERE you truly feel your lower back, glutes or hamstrings working especially.

Do you feel the top of your butt under your SI joint working?

Yes or No?

Do you feel in the meat of your glute working?

Yes or No?

Do you feel right under your butt working?

Yes or No?

Or do you feel the middle of your hamstring working?

Yes or No?

Make a note, yes or no for each.

Now let’s break down what this information helps you understand about your glute engagement…

This may come as no surprise, but what you should have felt driving this movement is your GLUTES.

However, many of us do feel our lower back or hamstrings working and even taking over for our glutes during this move. 

We even sometimes feel our quads trying to engage although we can also feel them stretching as the glute bridge IS a hip flexor stretch. 

But often we don’t fully realize what is driving the movement when we get caught up only trying to focus on form.

We even simply think, “Oh my lower back is just weak and needs to get stronger.”

But really this shows that other moves are taking over when our glutes should be engaging.

This means we need to address our mind-body connection.

So if you found your lower back, quads or hamstrings compensating, I want to share some tweaks to your glute bridge form you may want to consider. 

Especially if you felt under your butt or your hamstrings working, this can mean your hamstrings are synergistically dominant.

Yes…under your butt is often that hamstring origin area becoming overworked.

And sometimes it is us not realizing that it is NOT our glutes but actually our hamstrings working right there that can lead to hamstring tendinopathy or tendinitis. 

Not to mention our hamstrings constantly being overworked is why they perpetually feeling tight no matter how much we stretch.

And when they are constantly overworked this can lead to knee pain, hamstrings strains and pulls and even perpetuate your lower back issues. 

So making sure the correct muscles are working during a fundamental more focused movement is key so we can lift more and run faster and avoid injuries with more complex movement patterns.

I will also share some tips as well if you found that you had an imbalance between both sides. Sometimes this can mean we feel only one side working or that we feel our glute on one side but actually our hamstring on the other!

But first, how can you adjust your form if you don’t feel your glutes working like they should?

Here are 5 quick tips…

#1: Focus on maintaining that posterior pelvic tilt from the start and don’t get caught up in bridging higher.

This can help you make sure you’re using your abs to protect your lower back AND the posterior pelvic tilt engages the glute max.

Also, often in an attempt to bridge up higher, we arch our back at the top over extending our hips further, which overloads our lower back and can engage our hamstrings.

#2: Drive your knees toward your toes.

Focus on pressing through your entire foot and as you bridge up driving your upper arms into the ground, don’t push yourself backward.

Focus on driving those knees forward to help you avoid overusing your hamstrings.

This can even help if you tend to feel your quads working too.

#3: Focus on STOPPING the lift with your glutes.

So often in trying to work through a full range of motion, we stop engaging muscles to power the move.

Instead of trying to get a bigger movement, try and really squeeze your glutes hard to prevent yourself from being able to lift any higher. This focus on that activation of the glutes will make sure you’re driving true hip extension while avoiding anything else compensating!

#4: Pause and adjust.

At the top of the bridge, pause and then try little adjustments. If you move your feet in closer to your butt does that help? Or does moving them further away help you engage your glutes better? 

While technically moving our heels further away toward a straight leg glute bridge engages more hamstrings, you may find, due to hip tightness that having your heels in too close to your butt engages the hamstrings more or makes you arch your back or even feel your quads.

So as you hold at the top, assess what you feel working and play around with even your posterior pelvic tilt or trying to engage each side. 

Even put a hand on your glutes to try and give that tactile cue to feel them working to make that mind-body connection! 

That can allow us to get the positioning we need!

#5: Try other bridge variations.

Sometimes we need to first adjust the variation we use to recruit the correct muscles. Slight changes to our posture and positioning can really impact things and even tools can provide an extra stimulus to improve our mind-body connection.

Even doing a move we feel working our glutes correctly prior to the one we struggle with can help us established the mind-body connection in that second move.

Two great variations to try if you’re struggling to engage your glutes can be the frog bridge as the external hip rotation can often help. 

Or the mini band glute bridge. Pushing out on the band can help engage our glute medius which can help us better engage our glute max. 

The band can also sometimes help if you struggle to get both sides working together!

Now To Address An Imbalance Between Sides… 

I do want to note we will NEVER be perfectly evenly BUT we do want to note when one side isn’t pulling it’s weight.

When we have an imbalance this can lead to our stronger side taking over during other moves. This can lead to injury on that dominant side.

It can also mean that we risk injury on our weaker side if it is fighting to keep up. 

So we want to address imbalances as much as possible and be conscious of them.

This is where unilateral glute activation may be key. 

You may consider extra work for that weaker side, even swapping in something like the single leg reverse hyper to get that glute working. 

Or you may use something like the 80/20 glute bridge to help you focus on each side more independently. 

We have to recognize how challenging the full unilateral or single leg glute bridge is, which is why I recommend the 80/20 version instead.

If you can’t control the two-leg bodyweight bridge, there is a good chance your weaker side will continue to struggle with a full single leg variation.

But modify the move or even add in unilateral work to make sure you aren’t feeling other muscles take over for that weaker glute!

Bonus Tip:

And a final bonus tip, which can be helpful whether you’re addressing an imbalance or even just your hamstrings, lower back or quads engaging when they shouldn’t…

Foam Roll those overactive muscles PRIOR! 

The impact of foam rolling is short-lived, but by rolling that muscle that wants to compensate before you then do the exercise, you can help interrupt that mind-body connection so you can better engage the proper muscles.

Especially if you feel only the hamstring on one side, trying rolling that muscle prior to the glute bridge to relax it to make it easier to establish that mind-body connection to your glutes!

Just remember, changes to our mind-body connection and recruitment patterns won’t happen overnight.

Our mind and body will want to default back into patterns we’ve created over time that now feel natural.

But if we don’t work to address them in fundamental moves like this, we put ourselves at greater risk for injury when we lift heavy, run or cycle.

Not to mention we may not be seeing the improvements in our other training that we want because we aren’t using muscles as efficiently to power our training!

–> Download The Workbook Sheet

Exercises For Longevity

Exercises For Longevity

If you’re looking for exercises to not only help you live a longer life but a healthier one, then this video is exactly what you need.

In this video I am going to share with you why explosive exercises are key to include, 5 moves to improve your functional strength and mobility and tell you how you can strengthen this key predictor of longevity!

If we want to live longer, we need to be strong, mobile and able to react quickly.

That means including not only the 5 strength moves I’ll share but also explosive exercises.

They help improve your functional full body strength and coordination.

And the 5th move in this video will help you strengthen these key muscles to improve this commonly ignored “secret” to living longer!

So let’s talk about being a freaking lean and strong rockstar till your final day on this planet.

Part of how we need to train and the moves we need to include come back to one basic principle…

Use it or lose it.

We need to train the movement patterns we want to maintain until the end.

But not every move has to be an exact replica of an everyday activity.

Being functionally strong means being able to control our joints through a full range of motion and react quickly, recruiting the correct muscles at the correct times.

That’s why we need to include a diversity of moves, tempos and even types of resistances while focusing on strengthening through the fullest range of motion we can.

It’s why it is key we not only slow down the tempo of some movements but actually even SPEED UP the tempo at times!

So…Why Explosive Moves Are Key:

As we get older, our risk for falls and factures increases.

And part of this is due to our inability to react quickly when we trip or stumble.

We need to maintain our mind-body connection so we can recruit the correct muscles quickly to respond and help us avoid injury.

This is why including some explosive and even jumping movements is so key.

By performing these moves that require speed, power and coordination, we can keep that mind-body connection strong so we can react quickly in everyday life!

These moves that are fast-paced and require more muscles to work together at once quickly, are a great way to improve our coordination in a controlled environment.

While I know explosive, jumping and coordination intensive moves can feel awkward and frustrating even at times, they are essential to include.

If you can’t do super high impact exercises due to injury, consider things like the agility ladder, med ball slams and throws, kettlebell swings or even other movements where you move quickly as if you were going to leave the ground like bodyweight squats coming up onto your toes!

But don’t avoid the moves that challenge your MIND and not just your body to respond.

This ability to recruit muscles quickly builds strength as well!

We have to remember that the more we use muscles, go through that full range of motion and really challenge ourselves, the more strength, mobility and power we will maintain!

Now what are 5 strength moves you should include along with that explosive power and coordination work?

Move #1: Step Ups

Step ups are not only a movement pattern many of us use every day, stepping up onto a curb or going up stairs, but they are a key compound move to include for functional leg strength and to keep our hips and knees healthy.

They are also a unilateral or one sided exercise, which makes them extra valuable as they can make sure we don’t perpetuate imbalances or overuse one side due to weakness or previous injury.

Now if you’re thinking, “Great….Step ups hurt my knees.”

Don’t stress.

While they can be blamed for knee pain, learning to control this movement pattern can actually help us AVOID knee pain as we get older…

Because if we can’t control knee flexion, we’re going to struggle sitting down to the toilet or going up stairs!

We need to learn how to correctly load our glutes and prevent our knees from caving in as we step up.

When you do the step up, think about your foot as a tripod, two points in the ball of the foot, one in the heel. Firmly press through all three points to move to standing on the box.

Focus on feeling that glute as you drive up to keep the knee in line and avoid it collapsing in.

If you find you struggle due to even previous injury, not only can you start with a lower box, but I’m going to share a video in the description that teaches you to do a top down version of this movement called the step down.

This variation is a bit more of a hip hinge to make it glute dominant, which may help you to start!

Move #2: Single Arm Anti-Rotational Row

The Single Arm Anti-Rotational Row is another great compound unilateral movement to include to target your back.

And it’s key we include lots of back exercises in our routines as we get older to not only avoid neck, shoulder and upper back aches and pains but also avoid that “old age” posture we can see developing.

Most of us spend far too much time hunched over our technology. And the longer we’ve spent at a desk job, the more this posture adds up with age.

So we want to include back exercises to help reverse this posture.

This row not only addresses that back strength but, because it works one side at a time, will help you correct any imbalances between sides to avoid injury.

And the anti-rotational aspect of this movement, you fighting the urge to let your body rotate open as you row, is also a great way to improve your core strength and stability.

Anti-rotational moves are essential for us as we get older as they help us avoid lower back and hip pain by improving our core stability!

So as you do this move, really make sure to keep your shoulders un-shrugged to engage your back, focusing on your shoulder blade moving toward your spine and then pretend as if you’re rowing up with both arms to get that core to work to avoid rotation!

You’ll feel your core working to avoid your hip on the side not rowing from dropping open toward the ground.

While I love doing this move from a suspension trainer, you can do it off a bar as well!

Move #3: Single Leg Deadlift

Lower back aches and pains can seemingly add up more and more as we get older. Picking something up off the ground can feel like a risky activity.

But that’s because we stop training this essential movement pattern – the hip hinge.

Deadlifts are so often demonized as we get older, but it is key we learn how to hinge correctly to use our glutes and hamstrings so we don’t overload our back when picking up boxes or lifting things off the ground!

Just like it is key we train that knee flexion during moves like step ups to keep our knees healthy.

That’s why I love the single leg deadlift.

This variation of the hip hinge not only helps you strengthen those glutes and hamstrings to protect your lower back, but also works to improve your balance and core stability.

And better balanced has been linked with longevity!

When you do this move, make sure to truly sit back as you hinge over. You aren’t just leaning forward. You’re thinking about pushing your butt back to touch the wall behind you as you then bow over.

Do not just round and reach forward or try to squat and bend your knee to sink lower!

If you struggle though with the full single leg variation and balance as it is a tough unilateral move, start with a slider or even an 80/20 variation.

And in the video description I’ll share a video with an in depth tutorial on form and modifications.

Move #4: Rotational Chest Press

You want to include pulling, pushing, squatting and hinging over the course of your workout routines.

And you want to include anti-rotational moves, like the row variation I mentioned, as well as rotational exercises to strengthen your core.

While anti-rotational moves help you avoid unwanted rotation of your spine to protect it, rotational moves help you learn to power rotation properly so you don’t overload your lower back.

And with this press variation, you’ll not only strengthen your core but also your chest, shoulders and triceps.

It’s also a unilateral move to help you stay mobile and strong while avoiding and correcting imbalances.

To do this move, you will want to use a staggered stance, with the foot back on the side that is pressing.

And while you are rotating open and then away, do not make this a bigger move than you need, letting your hand drift back and away from your chest as you rotate toward the anchor point of the band or cable.

You also don’t want to end up just rotating through your lower back.

Make sure you feel your obliques really working as you twist.

And don’t shrug your shoulder.

While you can reach out a bit at the end to work that serratus anterior, which is key to keeping your shoulders healthy, you don’t want to round forward.

Focus on that press coming off of the rotation!

This can even be a great accessory move if you are working to improve your push ups!

Move #5: Unilateral Farmer’s Carry

Now this move is one of the most essential and functional movements everyone should be doing at every age to live a long, healthy life.

Carries are such a key move to include as they work our grip strength and even our entire body.

And being able to carry heavy things is truly key if we want to be fully independent as we age!

With carries, you can include so many different variations to target a variety of muscles based on your needs and goals.

You can do bilateral carries, carrying weights on both sides to use heavier loads and challenge your legs even more.

Or you can do an overhead carry for more shoulder work.

You can even do a unilateral variation of any carry to work on that anti-rotational core strength.

When you do the unilateral carry, walk as if you are carrying a weight on both sides and avoid leaning! This is what gets you that anti-rotational or anti-flexion benefit and works those obliques to stabilize.

No matter which carry you include though, a carry variation is key to include not only because of the full body benefits and because we carry things in every day life but because of how important GRIP STRENGTH is to longevity.

Cori Hack: Grip Strength

Grip strength is a key indicator of life span and is believed to be an indispensable biomarker for older adults.

A stronger grip has been linked with better health!

Studies have shown that “grip strength is largely consistent as an explanation of concurrent overall strength, upper limb function, bone mineral density, fractures, falls, malnutrition, cognitive impairment, depression, sleep problems, diabetes, multimorbidity, and quality of life.

There is also evidence linking grip strength and all-cause and disease-specific mortality, future function, bone mineral density, fractures, cognition and depression, and problems associated with hospitalization.”

So do not ignore the importance of strengthening your grip if you want to live a long and healthy life!

Now that doesn’t mean you have to go out and buy a ton of fancy specialized tools to strengthen your grip.

Moves like carries are essential to include, but even the other moves listed here will all promote muscle growth and even grip strength.

The rows will challenge your grip as will the deadlifts and step ups, especially as you add loads.

So don’t stress grip isolation moves but exercises that force you to carry loads while also helping you build functional full body strength!

Use these 5 moves to build lean muscle and improve your grip strength so you can live a long, healthy and independent life!

And don’t be afraid to challenge yourself with moves that test your coordination and work not only your body but brain as well! Being able to react quickly is key.

For more tips to use these moves, don’t forget to check the video description.

And remember, mobility work is also key as we get older. Check out my Flexibility Secrets To Make You Feel Younger next!

STUDIES:

https://www.ncbi.nlm.nih.gov/pmc/articles/PMC6778477/

https://agsjournals.onlinelibrary.wiley.com/doi/10.1111/jgs.17626

OTHER LINKS:

More on Step Downs: https://redefiningstrength.com/hate-step-ups-try-this-move-instead/

Deadlift tips: https://redefiningstrength.com/the-best-deadlift-exercise-you-arent-doing/ 

The Most UNDERRATED Bodyweight Core Exercise

The Most UNDERRATED Bodyweight Core Exercise

If you are looking for an amazing core exercise to work your abs, obliques, glutes, hamstrings, shoulders, adductors, serratus anterior and back, that requires no equipment so you can do it anywhere, then you’re going to love this video!

In this video I’ll show you one of my favorite bodyweight rotational core exercises and how to modify it based on your fitness level. And at the end of the video, I’ll even share a great quick bodyweight core burner to do using it!

Hey guys it’s Cori from redefining strength where we help you feel, look and move your best at any and every age. 

And building a strong core is essential to not only help us look amazing but also avoid common aches and pains especially as we get older.

Of course diet is also key if you are trying to lose that stubborn fat around your middle, which I’ll touch on later. 

But when we talk about building a strong core, we’re talking about strengthening everything between your shoulders and your knees, down your front side and your back side.

Which is why I love this amazing bodyweight plank variation which will help improve your shoulder and hip stability while strengthening your abs and obliques to control rotation!

And at the end I’ll share a great 5 minute burner using this move you can add on to the end of your lifting or cardio session!

It’s the perfect finisher to your lifting session or cardio workout.

So what is this fabulous move you can do anywhere?

It’s the Mountain Climber Turkish Bridge!

This move is deceptively hard, and can help you improve your shoulder, scapular, spinal and hip mobility. It truly works your entire core through rotation.

It’s a great move to improve your stability as you transition from both hands to a single arm.

Just remember every move is earned.

If you find that, even with these cues, you’re struggling to maintain proper form and feel the correct muscles working,

You don’t want to feel or you start to feel your lower back, neck or shoulder aching in a bad way, you check out the modifications I’ll discuss next.

To do this move you’ll want to set up in that high plank position with your feet about hip-width apart and your hands under your shoulders.

As you even set up, you want to be conscious of the muscles you’re engaging. Feel the sides of your back engage to support your shoulder.

Feel your quads flex as you drive back through your heels slightly in that plank position.

Focus on engaging your abs to brace.

Draw one knee up and across toward the opposite elbow. When you pull that knee across, focus on your abs even flexing to tuck. Don’t just tuck your knee in repeating the movement.

Even focus on engaging your back so you don’t shift forward.

Then kick the leg slightly back out, so your knee is about back in line with your planted leg, although you’ll keep that knee bent.

From here, twist that leg back and over toward the ground behind you as you lift the arm on the same side as that leg up toward the ceiling.

You’ll feel your obliques working as you twist.

And you want to feel the muscles around your rib cage working and the side of your back engaged to stabilize that standing shoulder.

Pivot onto the heel of that planted leg, feeling the hamstring and glute work. You’ll also really feel the glute of the bent leg.

Do not let your hips drop as you move into this single arm posterior plank, which also looks similar to a step in the Turkish Get Up.

Reach your top hand up toward the ceiling and pause to assess what you feel working.

Then lift that bent leg and lower that raised hand down, rotating back to face the ground. Make sure your standing hand is still under your shoulder and that your shoulders aren’t shrugged.

Do not put that raised leg down if you can avoid it.

Keeping it lifted as your rotate closed and move straight to pulling the knee in across your body will engage your adductor or inner thigh on your planted leg even more.

Repeat the move, moving at a controlled pace while assessing what you feel working!

This move, while it will improve your core stability, is challenging, partly because you are supporting your weight on one arm.

That’s why it is key we know how to modify to build up and recruit the correct muscles.

My favorite way to modify this move is off a bench because it allows you to do the exact same complete movement without variation to more easily build up.

The incline reduces the resistance on your upper body, which can allow you to engage everything correctly while maintaining proper form.

As you progress with the movement, you can slowly lower the incline working from a bench down to maybe a step or block before the ground. Just make sure each progression is earned.

If you have wrist issues, you may also find using an incline helpful as you can then perform this move off of your forearm.

Another option off the ground is to keep your wrist in a neutral position by gripping a dumbbell.

Just make sure that dumbbell will not move.

And because it’s key we’re creative to make sure we’re always meeting ourselves where we are at, if you don’t have an incline, you can also modify this move and reduce the strain on both your upper body, abs and hamstrings by performing the move from a bent knee position.

With this modification, you’ll start in a bulldog position with your knees under your hips. You’ll perform the same knee tuck and rotation open, BUT your knees will stay bent and you’ll be in more of a tabletop position.

Make sure that, while your hips may slightly drop in the rotation, you pause to really engage those glutes and extend your hips in the bridge for a second before rotating back closed!

Remember that at times we need to regress to progress to get the most benefit from a move.

Now how can you include this in a quick burner workout?

I love doing intervals over reps for moves like this because it allows us to focus on what we feel working and not rush to complete the reps.

A quick interval circuit with 30 seconds of work per move or side and 2 rounds through can be a great way to end a workout.

Use an anti-rotational move, a more glute-focused move and even an ab intensive move to complement this amazing rotational exercise.

WORKOUT:
30 seconds Bird Dog Plank
30 seconds per side Mountain Climber Turkish Bridge
30 seconds Reverse Crunch
30 seconds Frog Bridge

BONUS: Stubborn Belly Fat Tips

Adding in this amazing burner once or twice a week for a progression may be a great way to improve your core strength and stability. But you can’t ignore the importance of your diet if you want to reveal those lean, defined abs.

Next check out my Meal Plan To Lose Stubborn Belly Fat video with a full day of eating!

–> Check Out The Video Here