by Cori Lefkowith | Dec 21, 2017 | Blog, Bodyweight, Core, Exercises
Focused core work is important if we want to build a strong, lean core that not only looks amazing but also helps us run faster, lift more and prevent aches, pains and injuries!
We need moves that really activate and work our abs and glutes while strengthening everything between our shoulders and our knees, down our frontsides AND our backsides.
The more muscles we can work at once, and the more planes of motions we can move in, the stronger our core will be and the faster we will achieve results.
That is why I love these 10 Bodyweight Core Moves. They work your core from every angle and even get your blood pumping so you can burn fat as you strengthen your core.
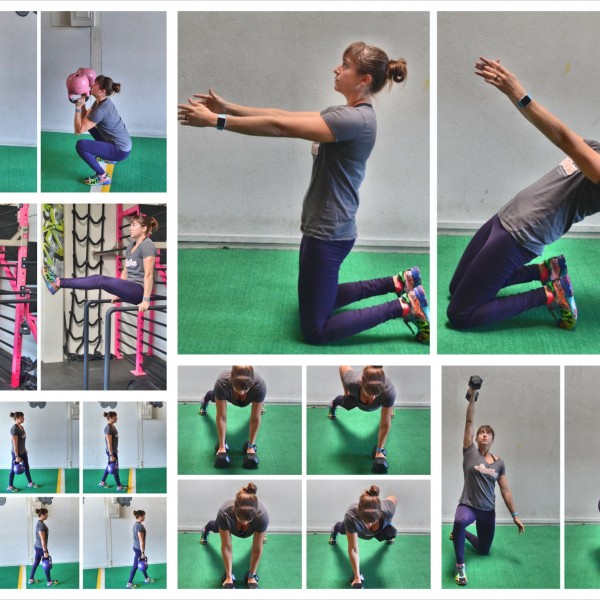
10 Bodyweight Moves To Redefine Your Core
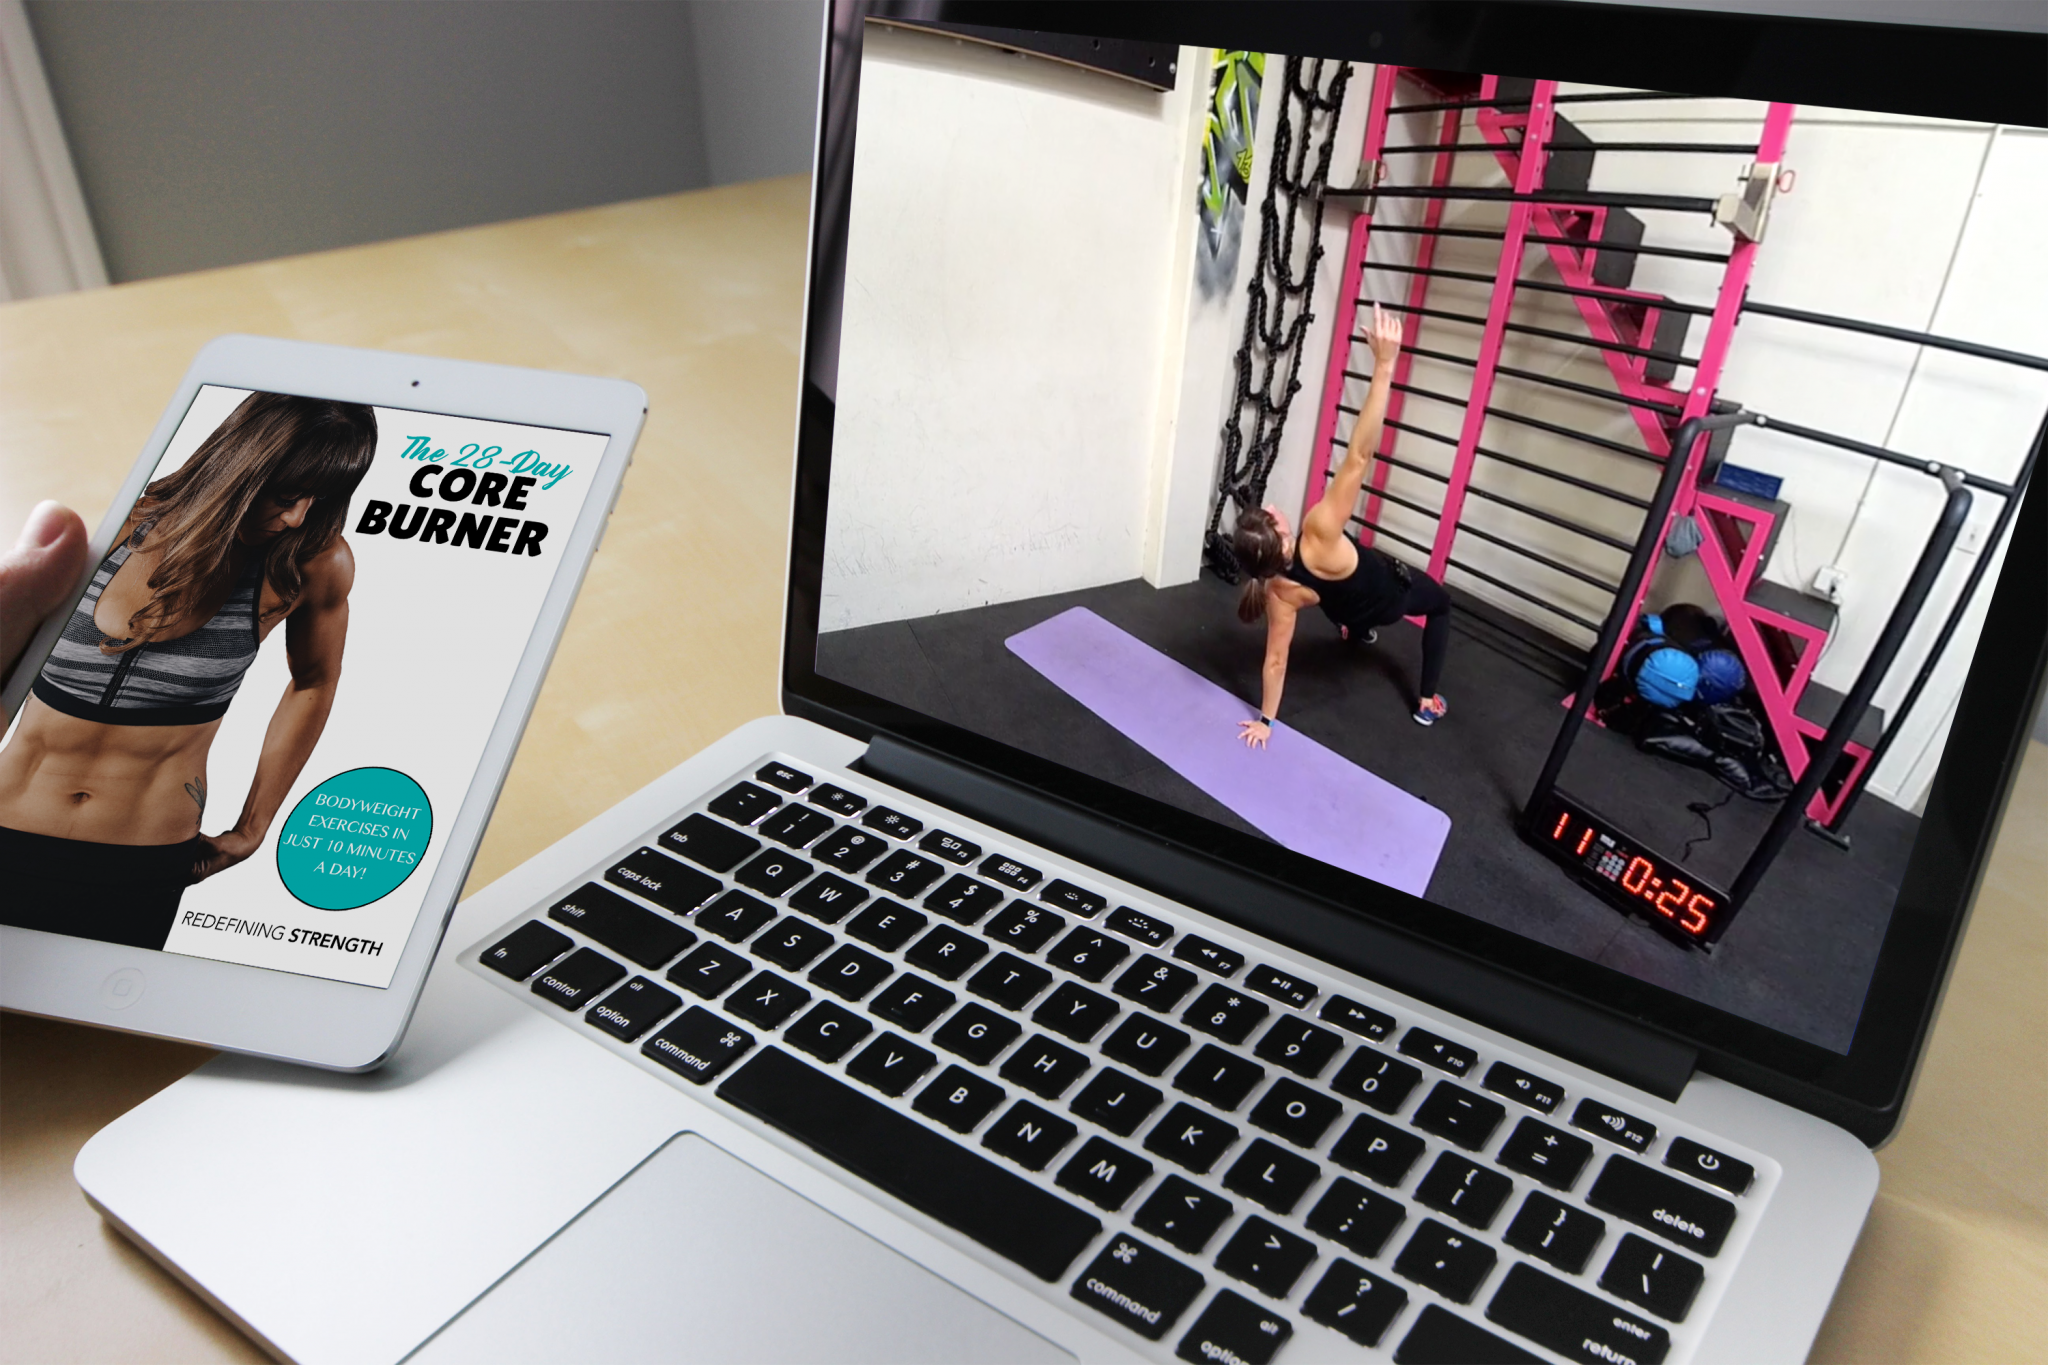
I use these 10 Bodyweight Moves in my 28-Day Core Burner to help clients get faster results. These core intensive exercises work both your anterior and posterior chain. They include rotational and anti-rotational moves and really work your core from every direction.
They work your balance and not only work your abs, but also your oh so important glutes. These moves will give you more bang for your buck in less time!
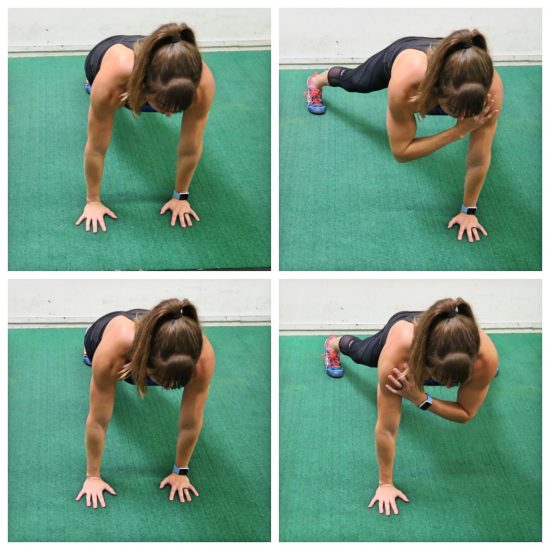
1. Single Arm Plank Jacks:
This is a great cardio-core move that will also build shoulder stability and work on anti-rotational core strength. You’ll feel this working everything between your shoulders and your knees as you start to sweat!
This is an advanced move though. Beginners may need to start with the Basic Plank Jack or even a Plank Step Jack. It can even be done with your hands up on an incline to modify!
To do Single Arm Plank Jacks, set up in a high plank position with your hands a bit closer together under your shoulders and your feet together. Brace your abs and make sure your body is in a nice straight line.
Then jump your feet out wide, and as you do, lift one hand to touch your opposite shoulder. Resist the urge to really rotate as you lift the hand or let your butt go up in the air. Try to keep your hips down and your core as square to the ground as possible.
Jump your feet back together and place the hand back down. When you quickly jump your feet out again, this time lift the other hand to touch your opposite shoulder. Jump quickly back in and lower the hand back down. Keep repeating the jack with your feet, alternating which hand you lift to tap your shoulder.
Beginners can do a basic Plank Jack without the shoulder tap. For the Basic Plank Jack, click here.
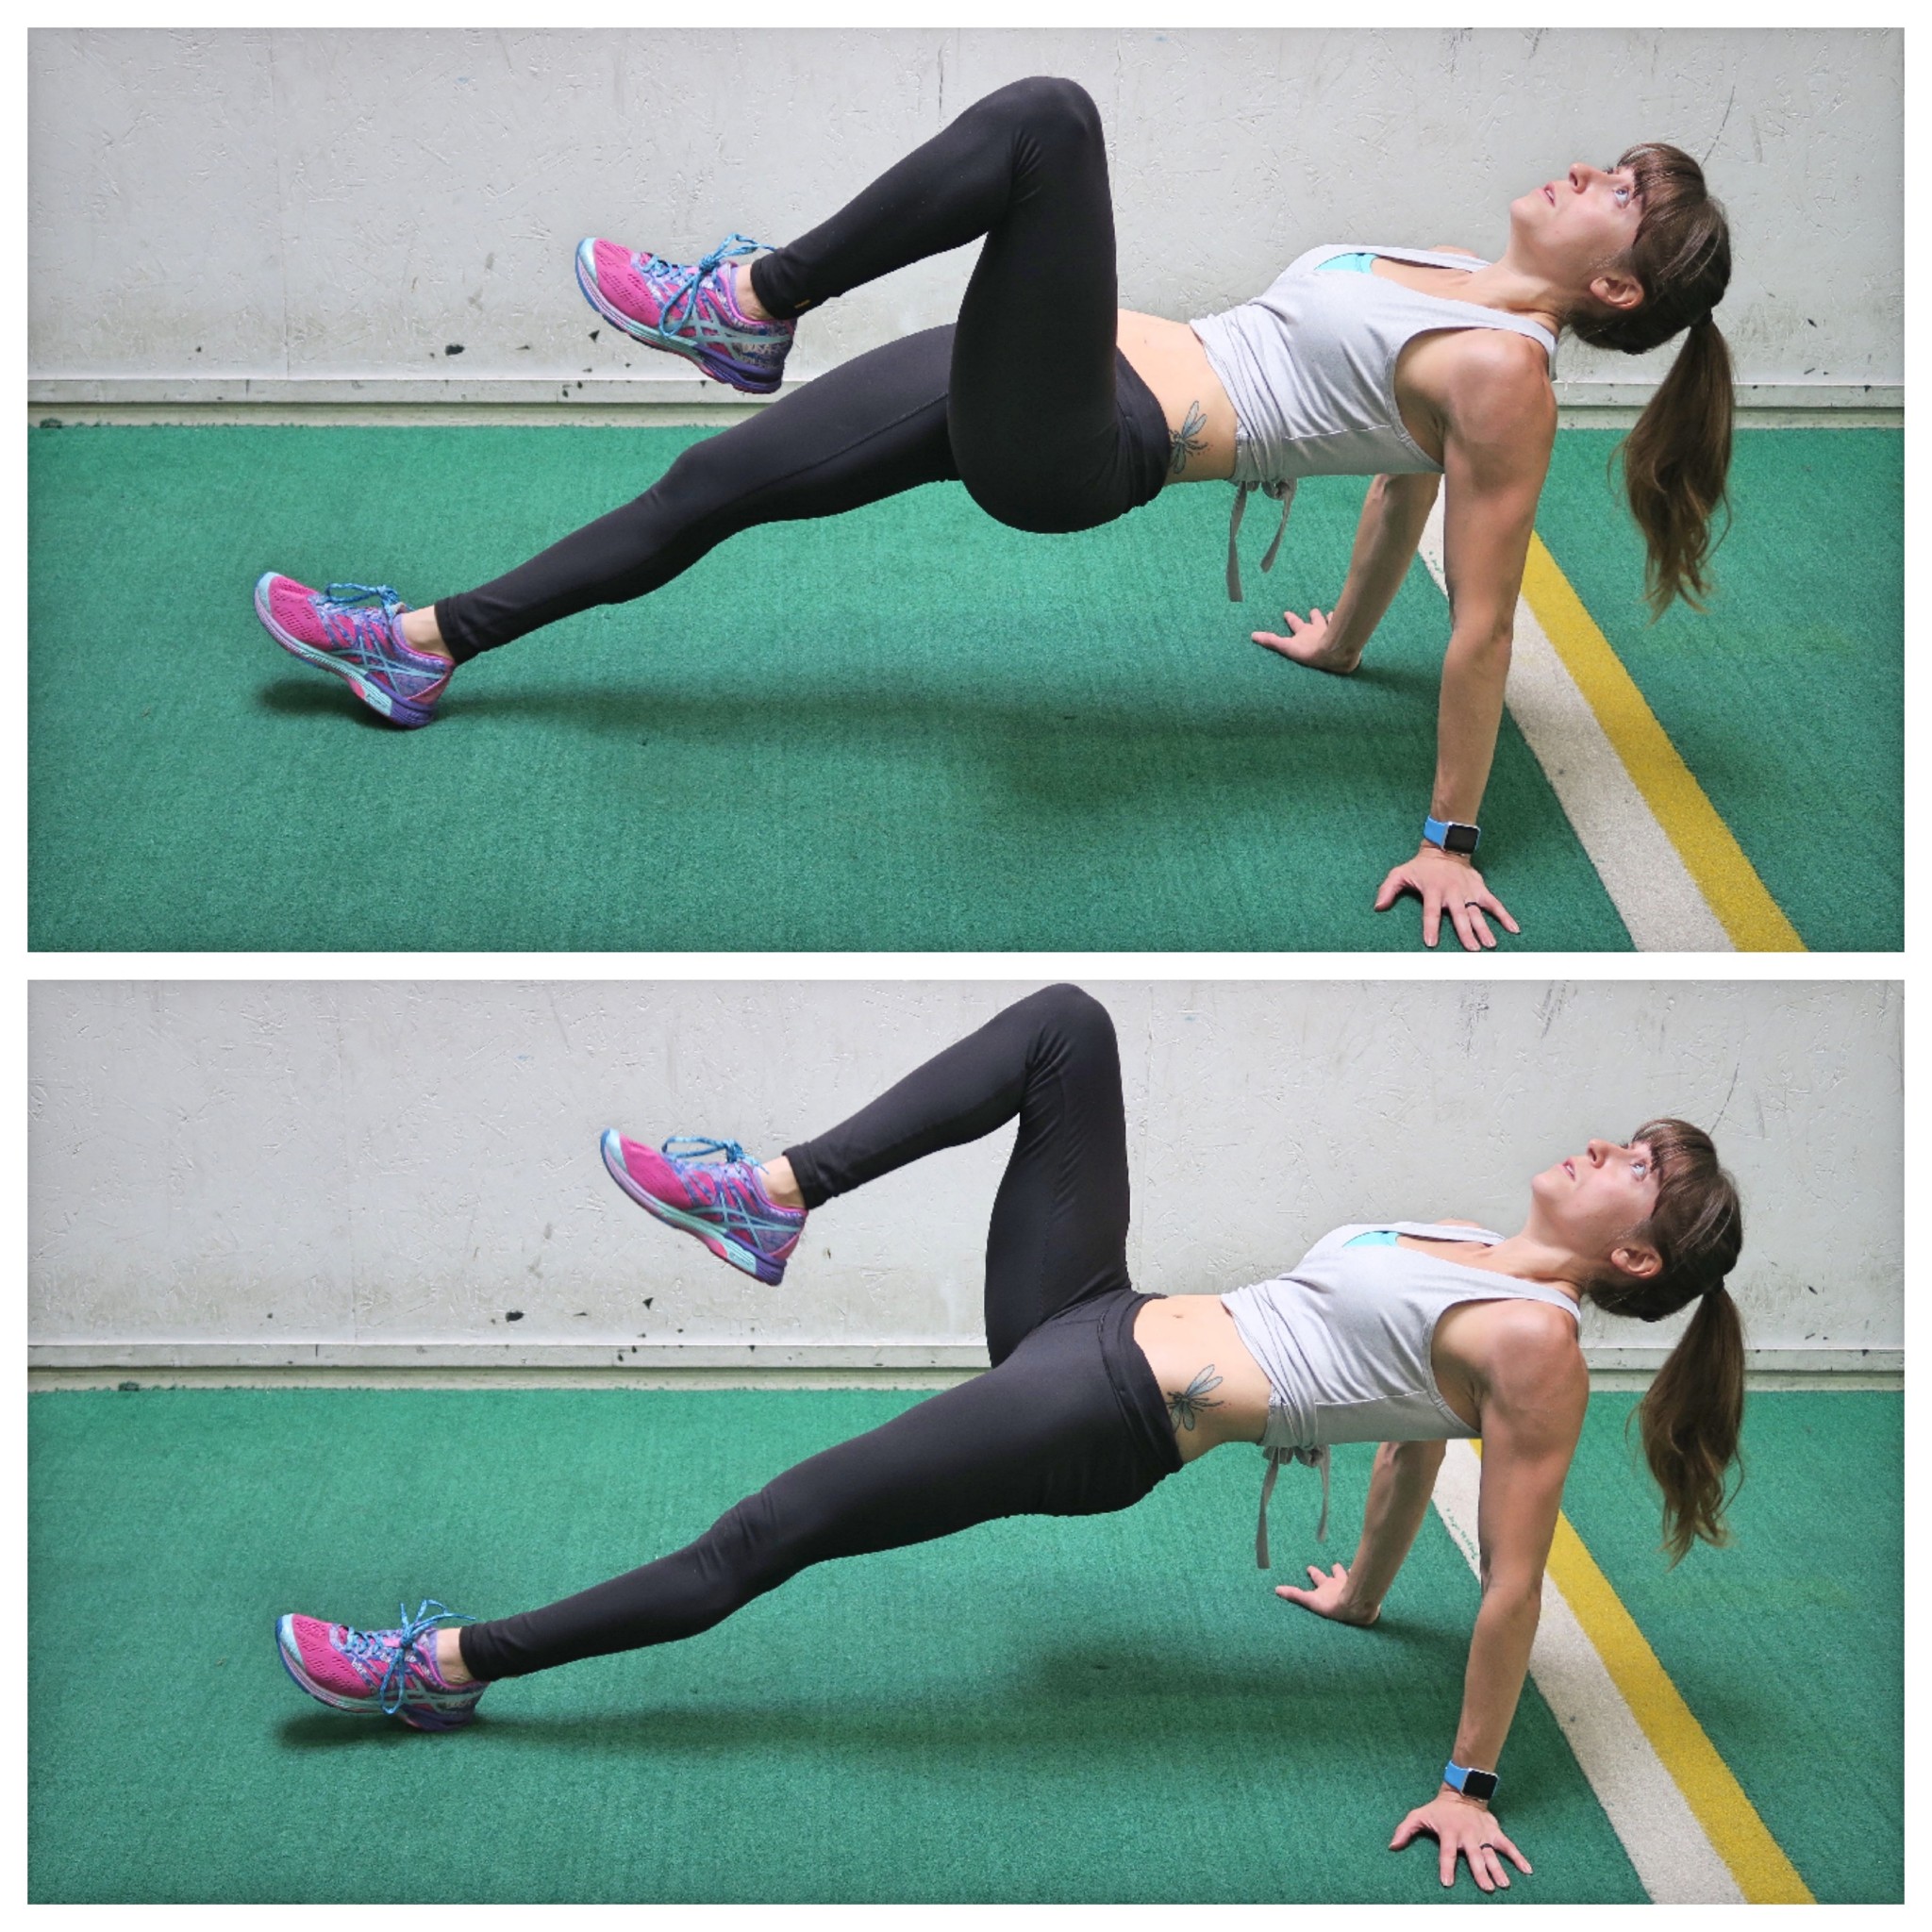
2. Mountain Climber Turkish Bridge:
This rotational exercise will work…well…basically everything! It works your abs, the muscles around your rib cage, your glutes, you shoulders and your quads. Heck even your back!
To do the Mountain Climber Turkish Bridge, set up in a high plank position with your feet about shoulder-width apart and your hands under your shoulders. Then drive one knee in and across your body to the opposite elbow, like a cross-body mountain climber. Move to straighten that leg back out and, as you do, kick it back over your body to rotate open into the Turkish Bridge.
So if you tucked your right knee in, you will then rotate your right leg back over your body to the left as you lift your right hand up off the ground so you can fully rotate open.
You’ll lift your hand up toward the ceiling as you place the foot of the leg you kicked over flat on the ground. That knee will be bent as your other leg stays straight. Keep your hand on the ground under your shoulder and bridge your hips up by squeezing your glute. Make sure the foot of the leg you kicked over is flat on the ground to help you engage and load that glute. Pause here briefly and really focus on bridging up as your hand stays under your shoulder.
Then bring the leg back over and in for the cross body mountain climber. Feel around your rib cage work as you rotate as well as your abs in the mountain climber and glutes in the bridge portion. Move at a controlled pace so you can feel everything working.
Beginners may need to do the move with their hands up on an incline or even break it down and do a set of Cross Body Mountain Climbers followed by a set of the Turkish Bridge.
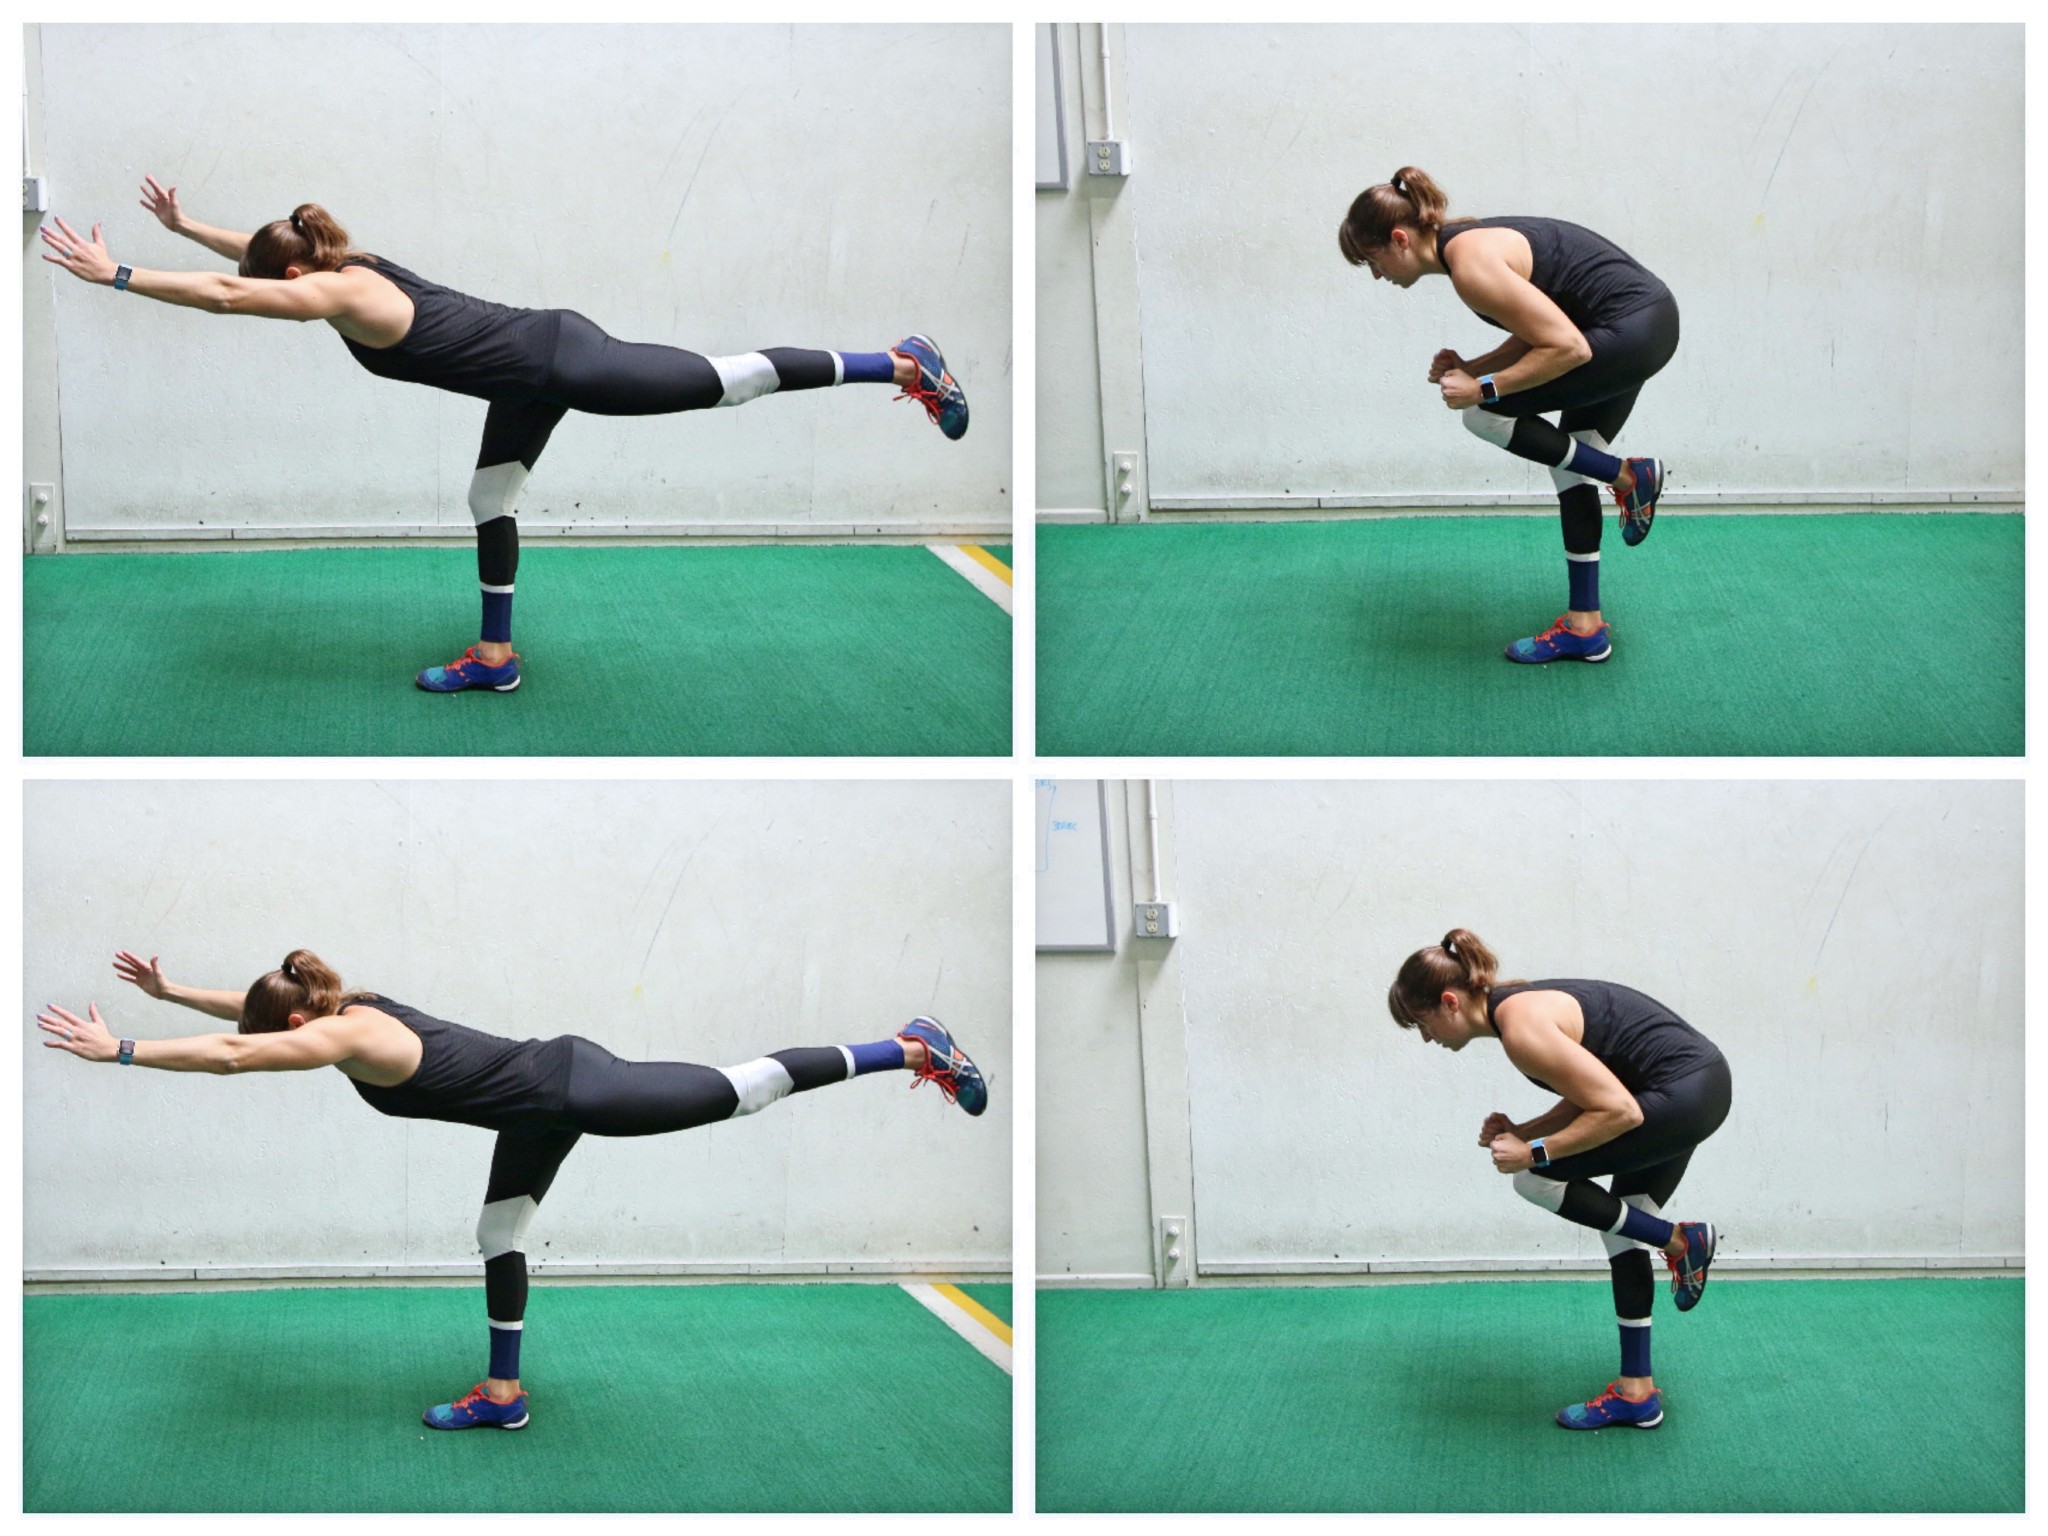
3. Warrior III Abs:
Balance moves, such as the Warrior III Abs, not only strengthen your feet and legs, but also help you build core stability. On top of that, the Warrior III Abs will also work your glutes and improve your hip mobility!
To do Warrior III Abs, set up in the Warrior III position, balanced on one leg with your raised leg driving back toward the wall behind you and your hips square to the ground. Reach your hands out overhead, reaching toward the wall in front of you.
Staying hinged over, crunch the knee of your raised leg in toward your chest as you pull your elbows in toward your knee. Really use your abs to crunch your elbows toward your knee. Do not stand up though as you crunch.
Then extend back out. Stay balanced on your standing leg and try to stay hinged over as you tuck and extend. Do not touch your toe down unless needed to stay balanced. Beginners may tap it down between reps to rebalance or even reach their hands out in front to lightly touch the wall.
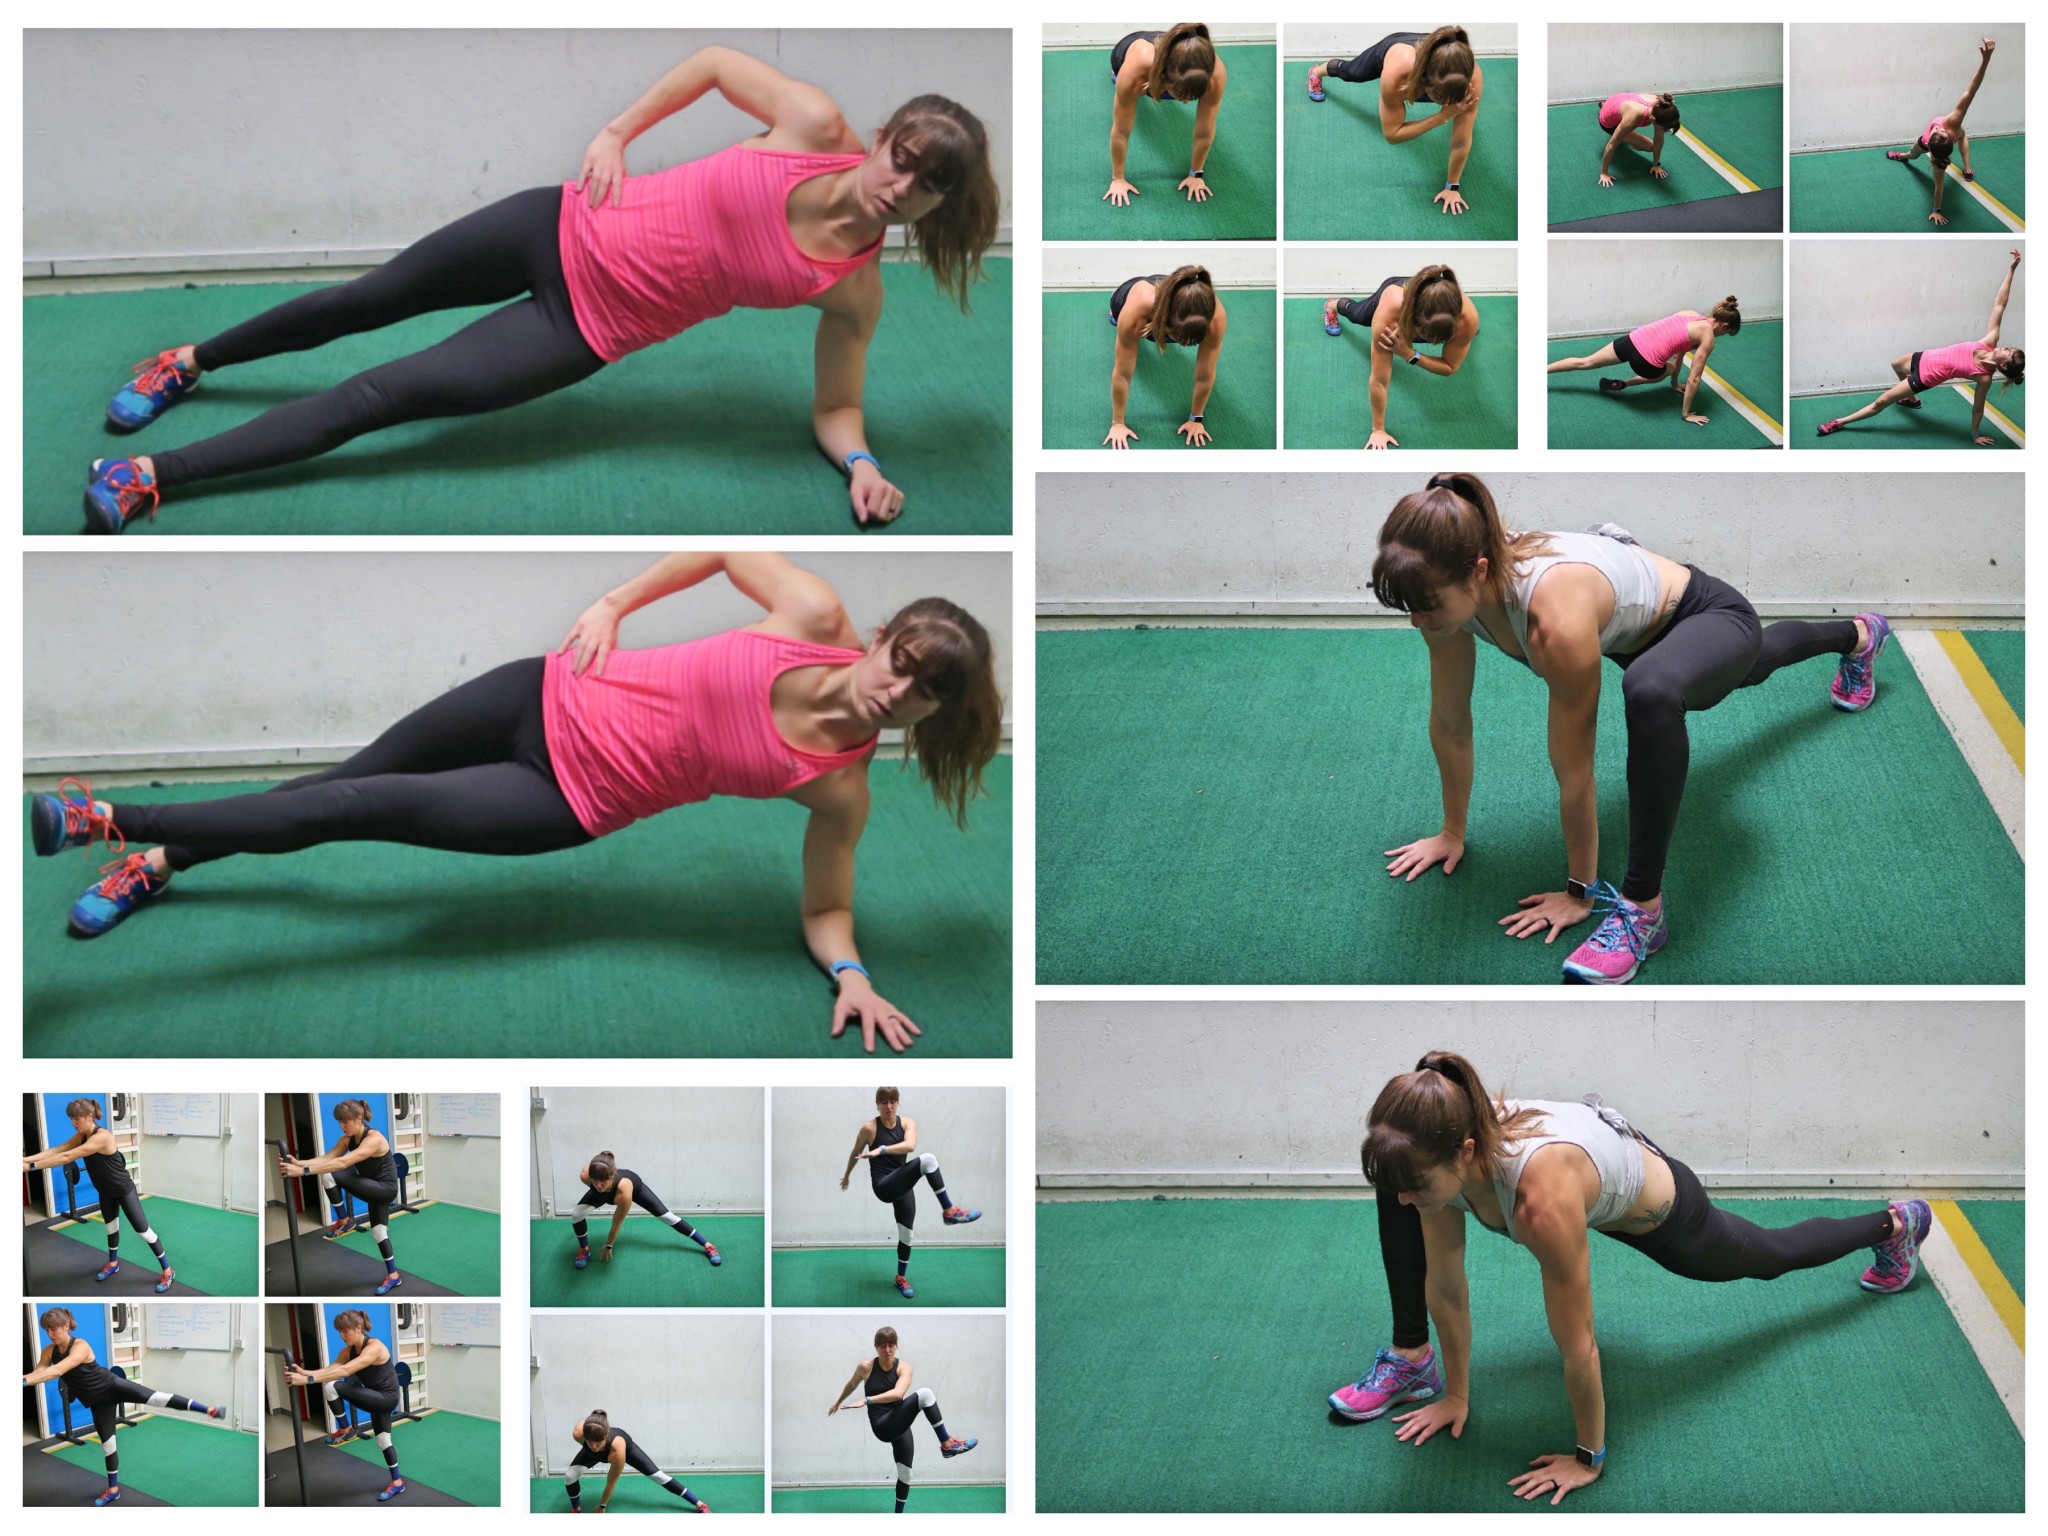
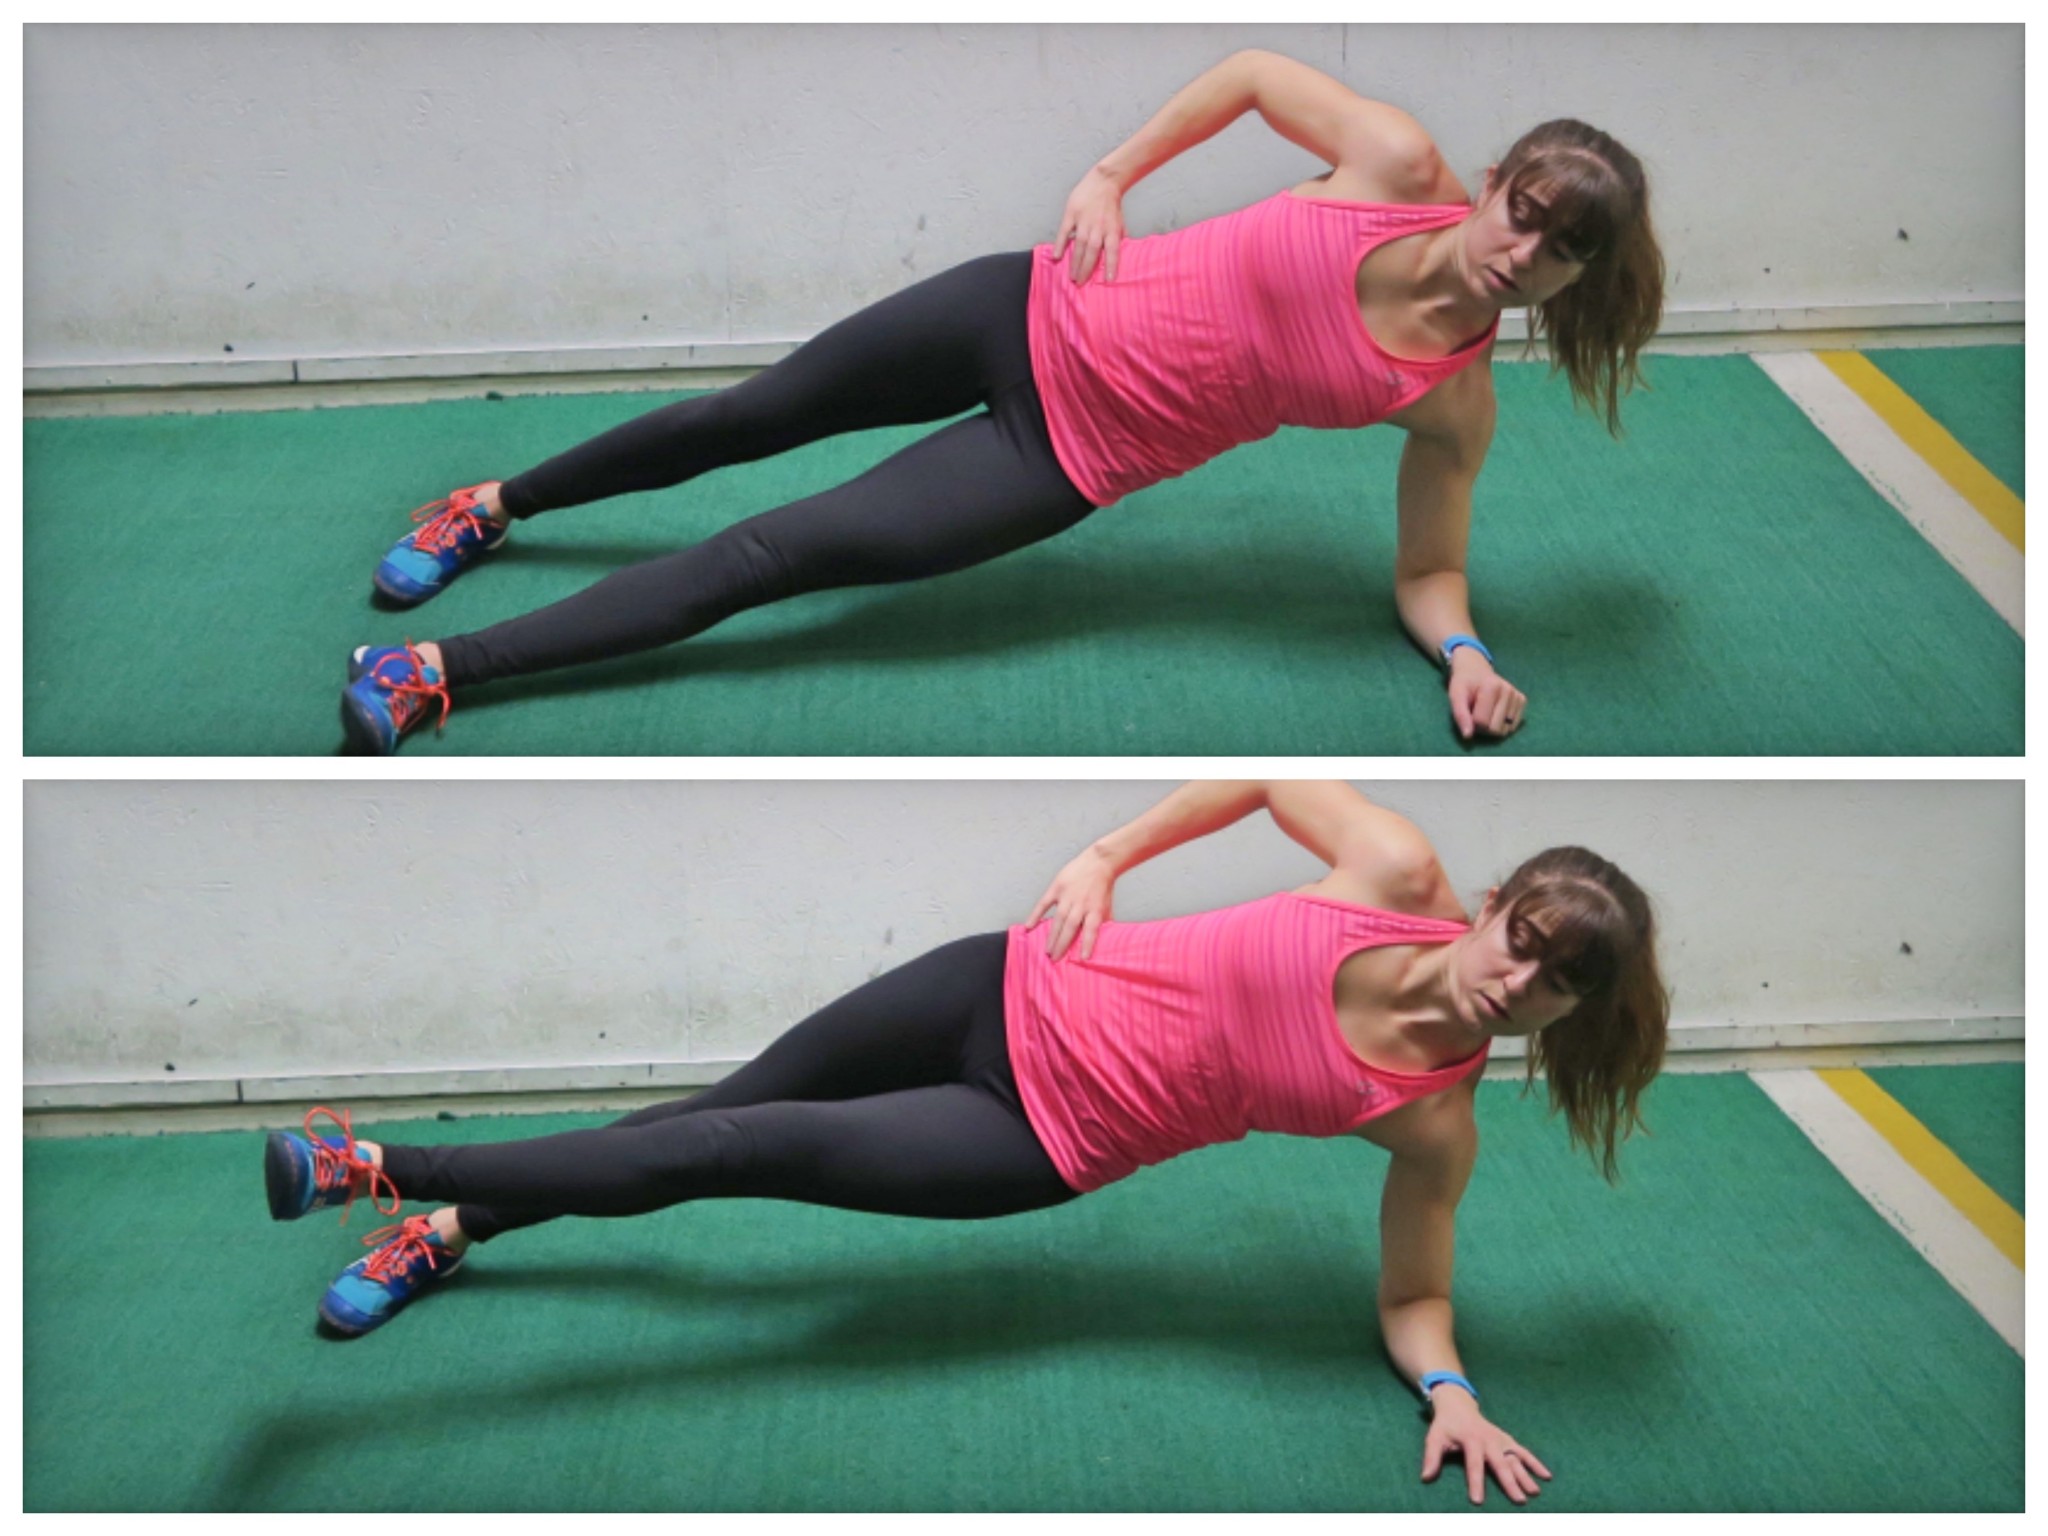
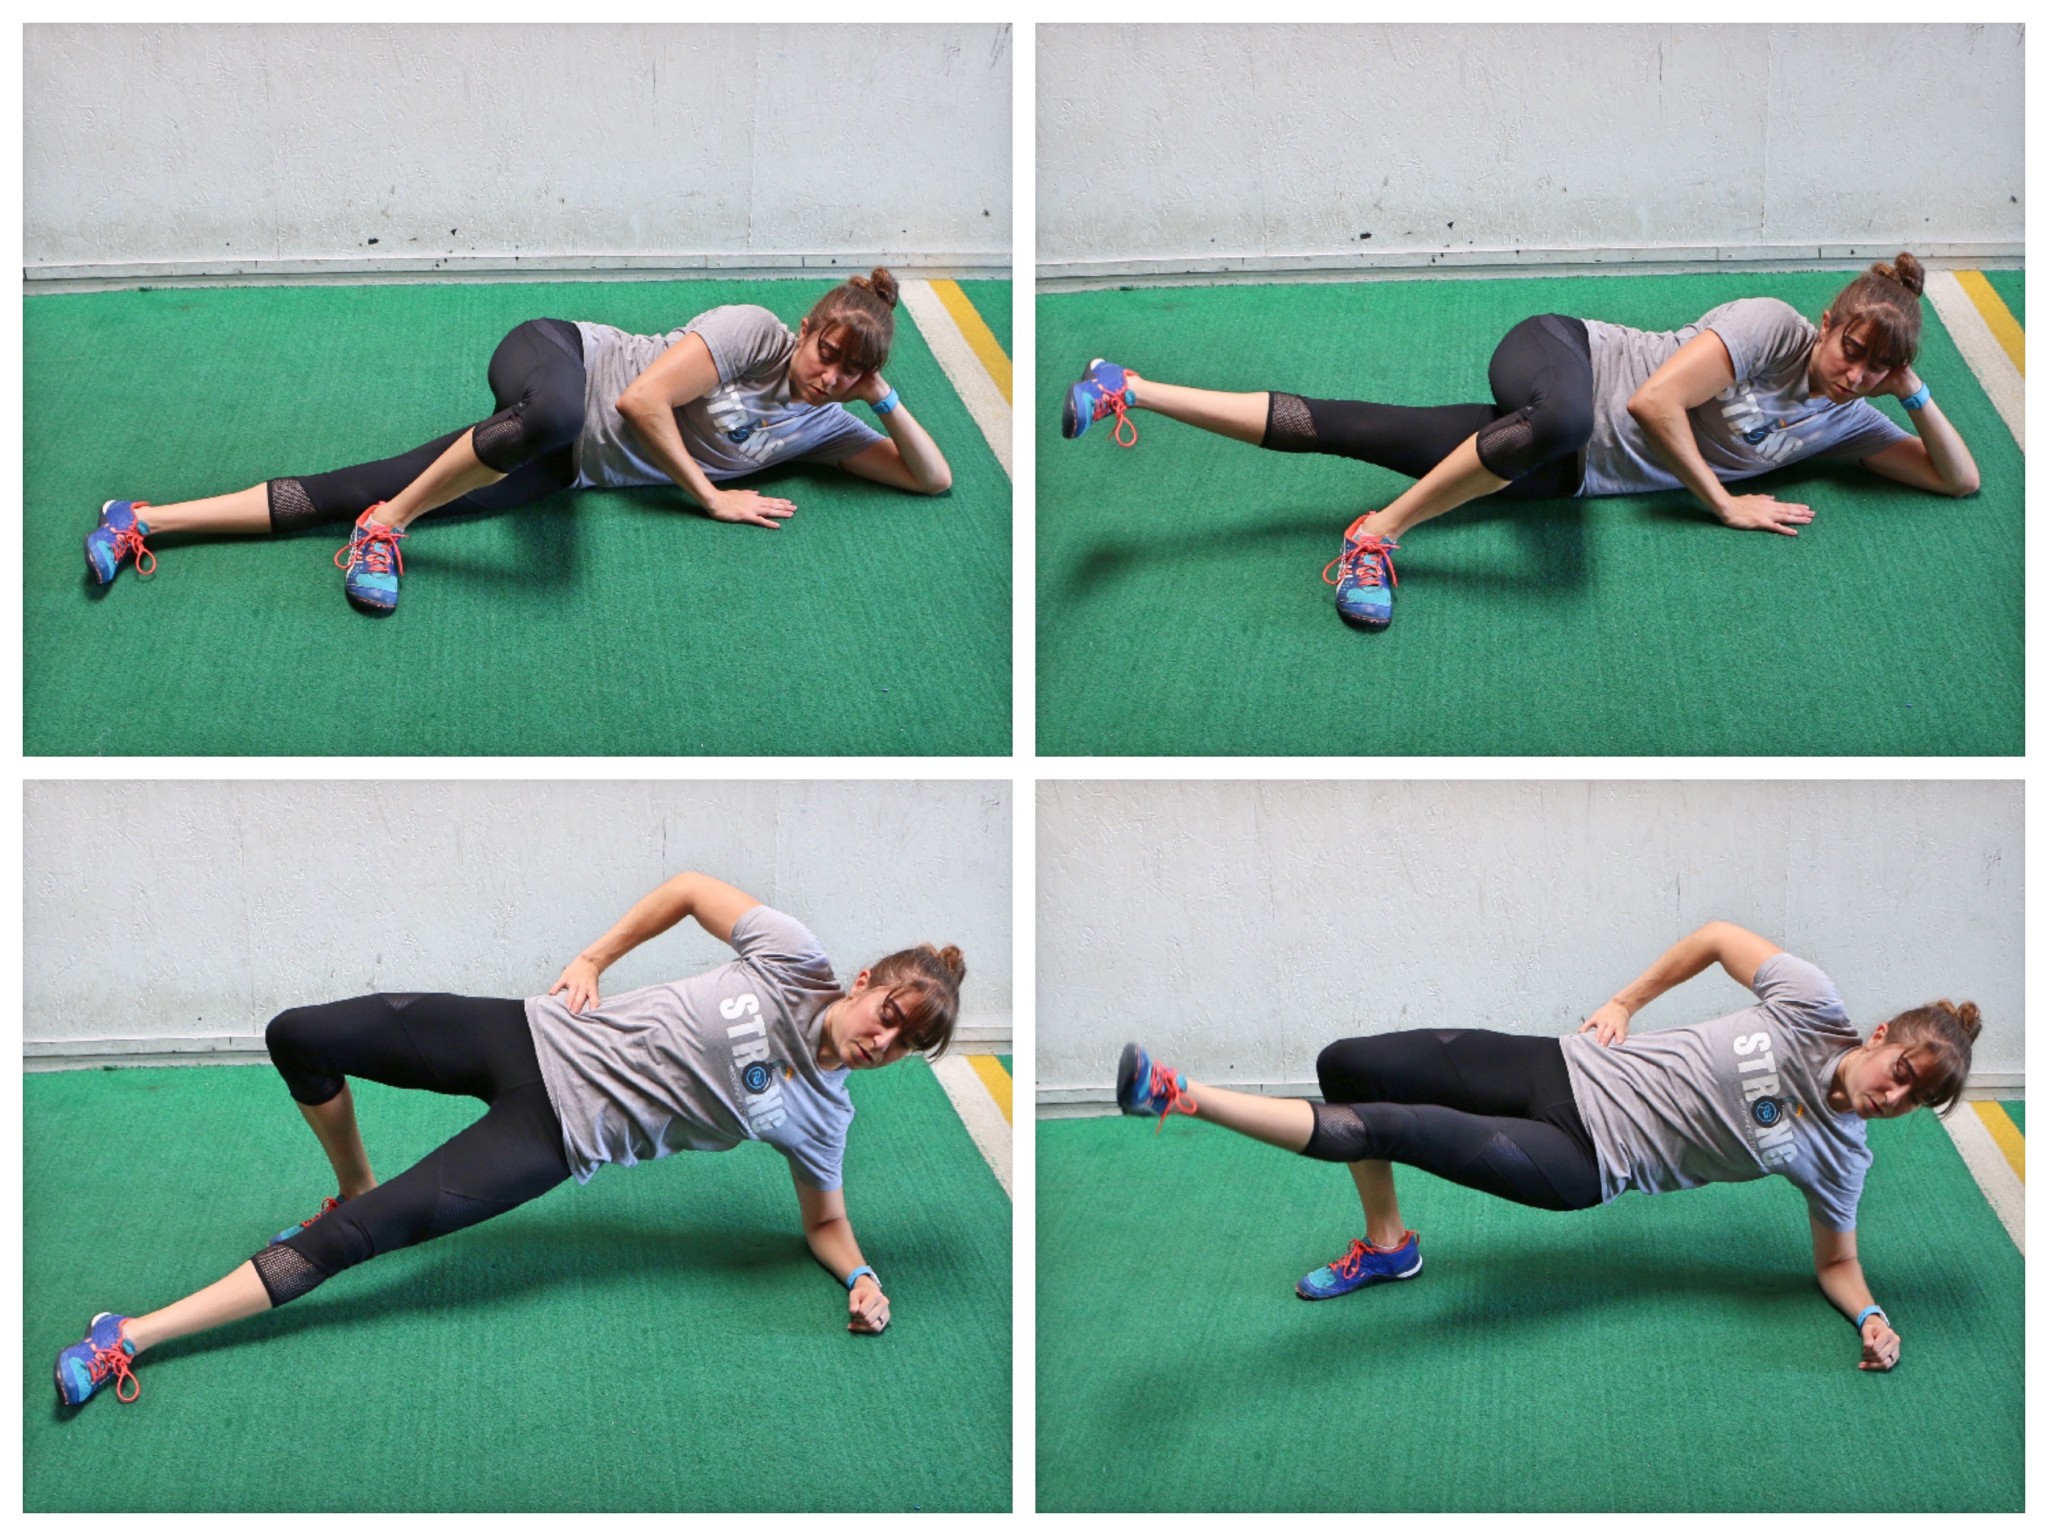
4. Side Plank Adductor Raise:
Your inner thighs, or adductors, are important core muscles that contribute to hip and knee stability. One great way to work them to build stability, as you strengthen your glutes and obliques, is with the Side Plank Adductor Raise.
To do the Side Plank Adductor Raise, set up in a side plank from your forearm and feet. You will want you elbow to be under your shoulder and your feet unstacked with your bottom foot in front and even slightly angled forward. Lift up into the side plank position with your top hand on your hip and your chest not rotated toward the ground. Drive through the sides of your feet and flex your feet to engage even your lower leg.
Holding this position, lift and lower that bottom leg, raising it up a few inches then putting it back down at a controlled pace. Stay up in the side plank the entire time and don’t let your hips sag. Do not place your top hand down to assisted.
If you need to modify, bend that top leg and place the foot flat on the ground behind you OR even regress fully to a side lying adductor lift. Both are shown below.
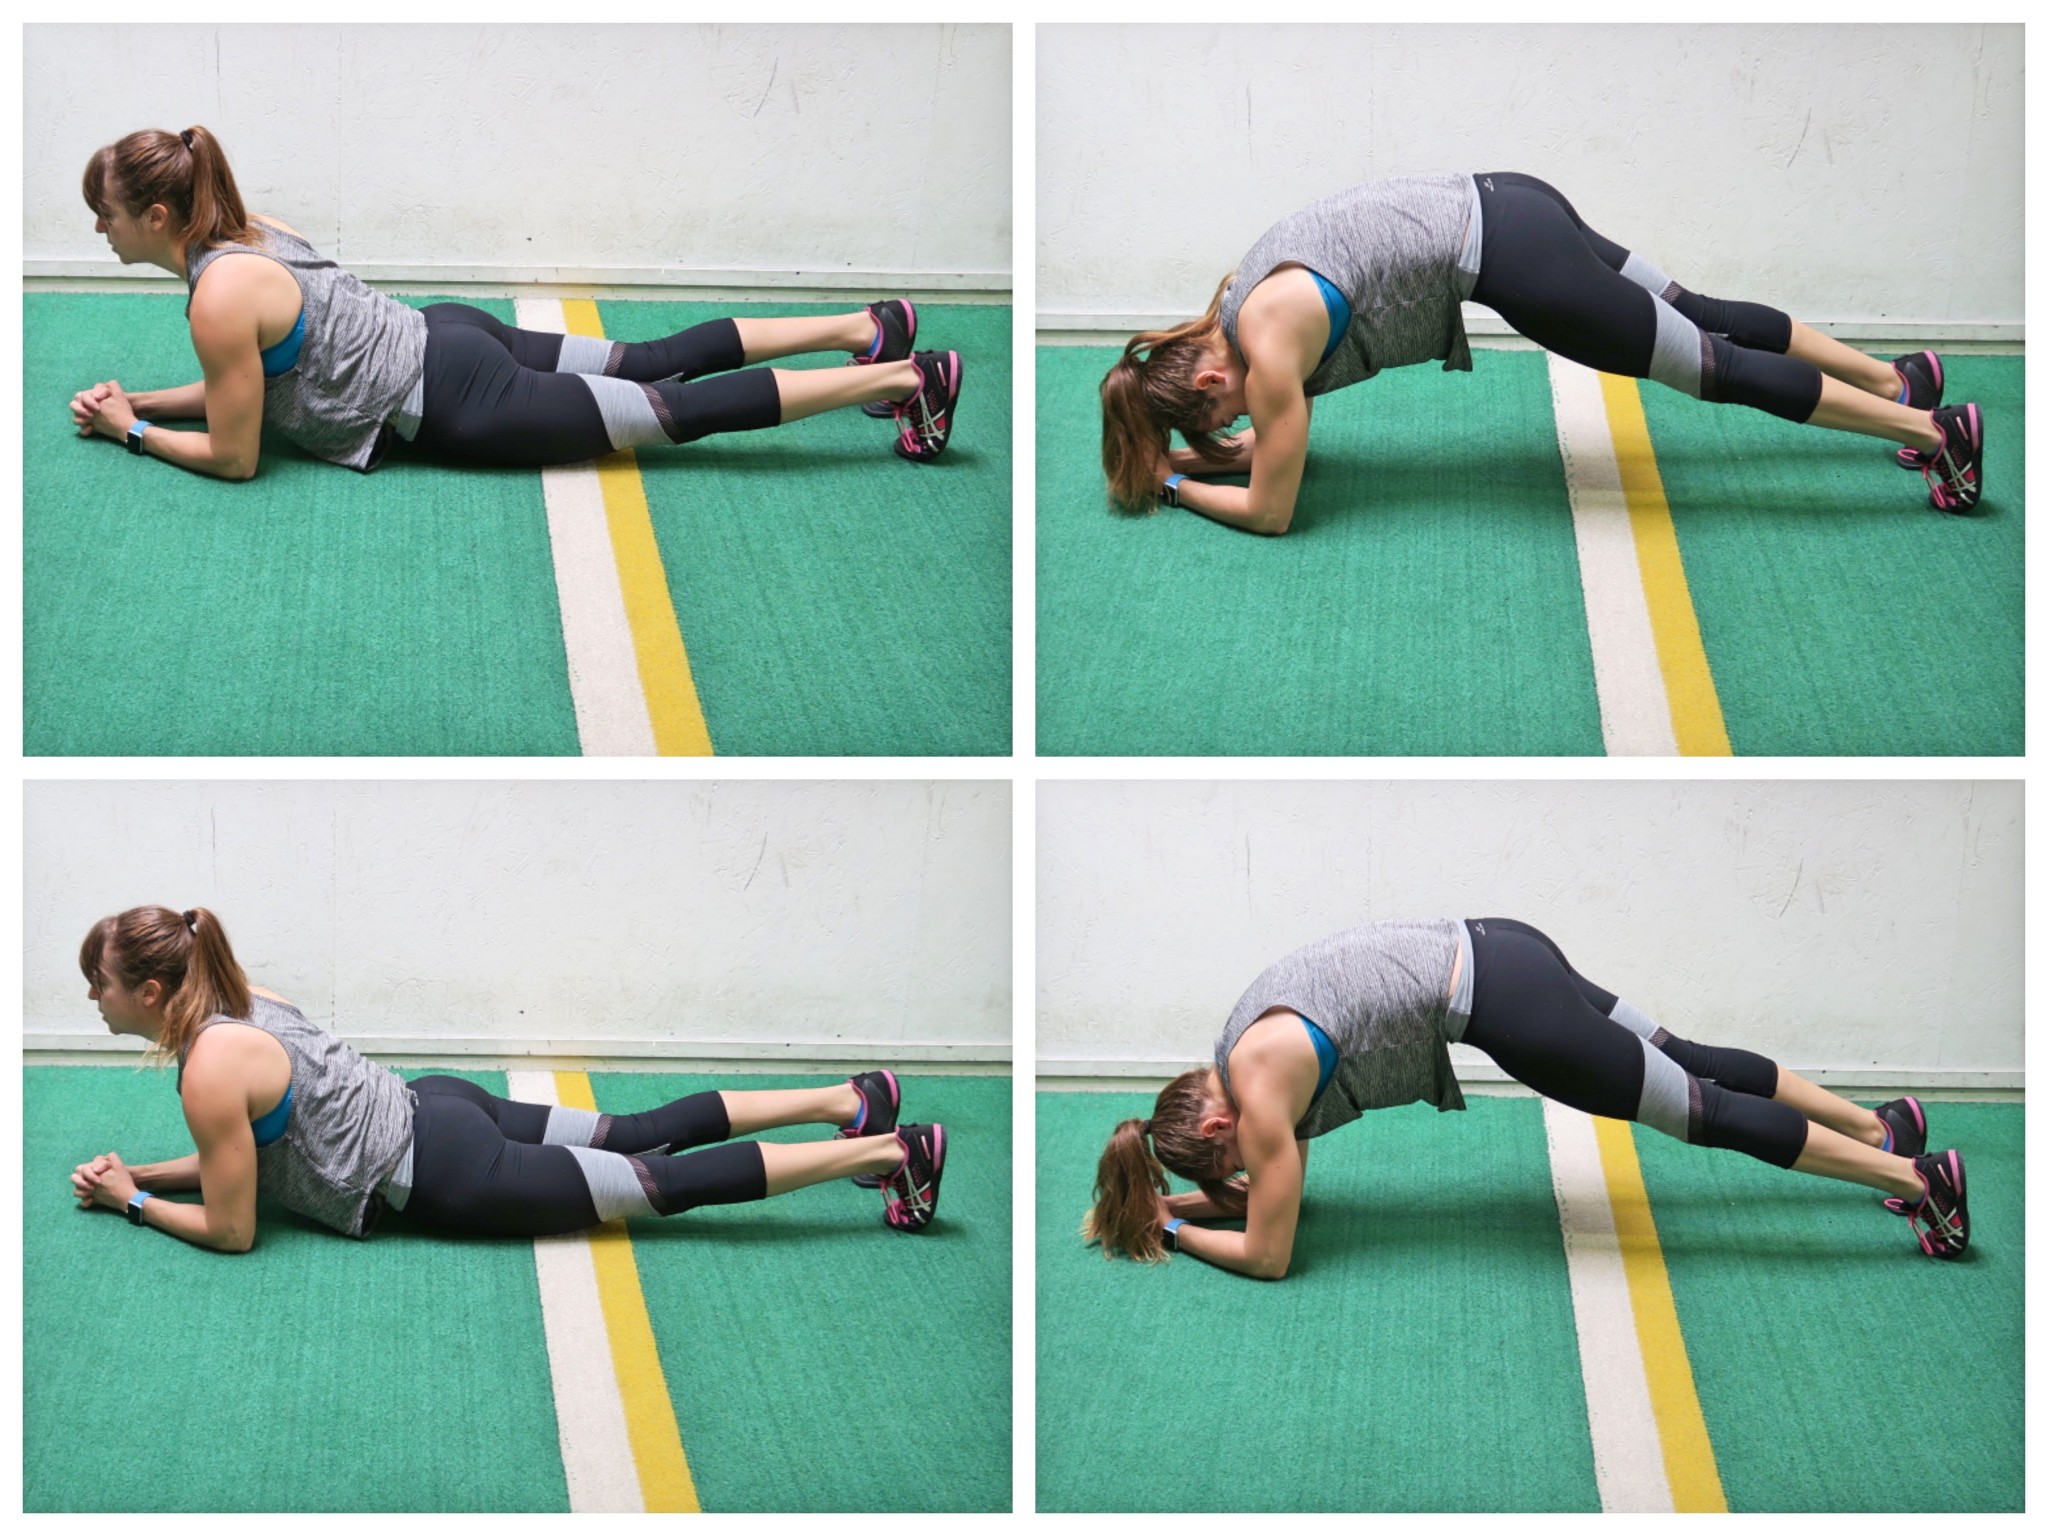
5. Dolphin Planks:
This plank almost makes you look like you’re doing everything wrong. You are going to sag your hips AND round your back at the top. But talk about a way to kill your abs!
The plange plank position, or rounded position at the top where you draw your belly button in, is going to get your abs shaking. And then when you dip your hips, you are just lowering down and stopping just before your abs disengage. AKA you are making your abs work to brace and stabilize as you move up and down in the plank position and getting your core intrinsic stabilizers to really work!
To do Dolphin Planks, set up in a plank from your forearms and toes (advanced) or knees (beginner). Make sure your shoulders are stacked over your elbows. Brace your core and engage your back as you hold your body in a nice straight line from your head to your heels or knees.
Then sag your hips toward the ground without completing relaxing onto the ground before rounding your back up toward the ceiling. You want to sag your hips only as low as you can without your low back taking over. You should feel your abs still engaging.
When you round up at the top, you aren’t simply sticking your butt up in the air. You want to round your entire back and perform the pelvic tilt. It is almost like you are doing the “cat” in the cat/cow stretch. Do not push backward too much as you do it. Keep your shoulders stacked over your elbows.
Then lower back down and sag your hips before rounding back up. Pause in each position to really feel your core working. Beginners can do this from their knees, off an incline or even modify and do the Vomiting Cat on their hands and knees.
6. Posterior Plank Mountain Climbers:
Often when we think about working our core, we think about working our abs and the front of our body. But our posterior chain is also important to work because one of the most important muscle groups of our core is the GLUTES!
Posterior Plank Mountain Climbers not only work your abs but also your posterior chain, including your glutes, back and hamstrings. The move also works on hip extension and will open up your chest. It is a great move to reverse all of the forward flexion we do sitting hunched over our computers and phones!
To do the Posterior Plank Mountain Climbers, sit on the ground with your legs out straight in front of you and your hands down behind your butt on the ground.
Then, driving up through your heels and your hands, press your hips up toward the ceiling and press your chest out. As you bridge up, squeeze your butt and lift your hips up as high as you can while keeping your legs straight and your chest pressed out. Do not shrug your shoulders at the top as you press your chest out.
Hold at the top with your body in a nice straight line. Do not hyperextend your back. Then slowly tuck one knee in toward your chest. Tuck it in as far as you can.
Then straighten the leg back out. Place the foot back down then tuck your other knee in. Feel your glutes and hamstrings working to hold you up as your abs work to tuck your knee in. Beginners can start with a tabletop variation as they tuck instead of the full Posterior Plank.
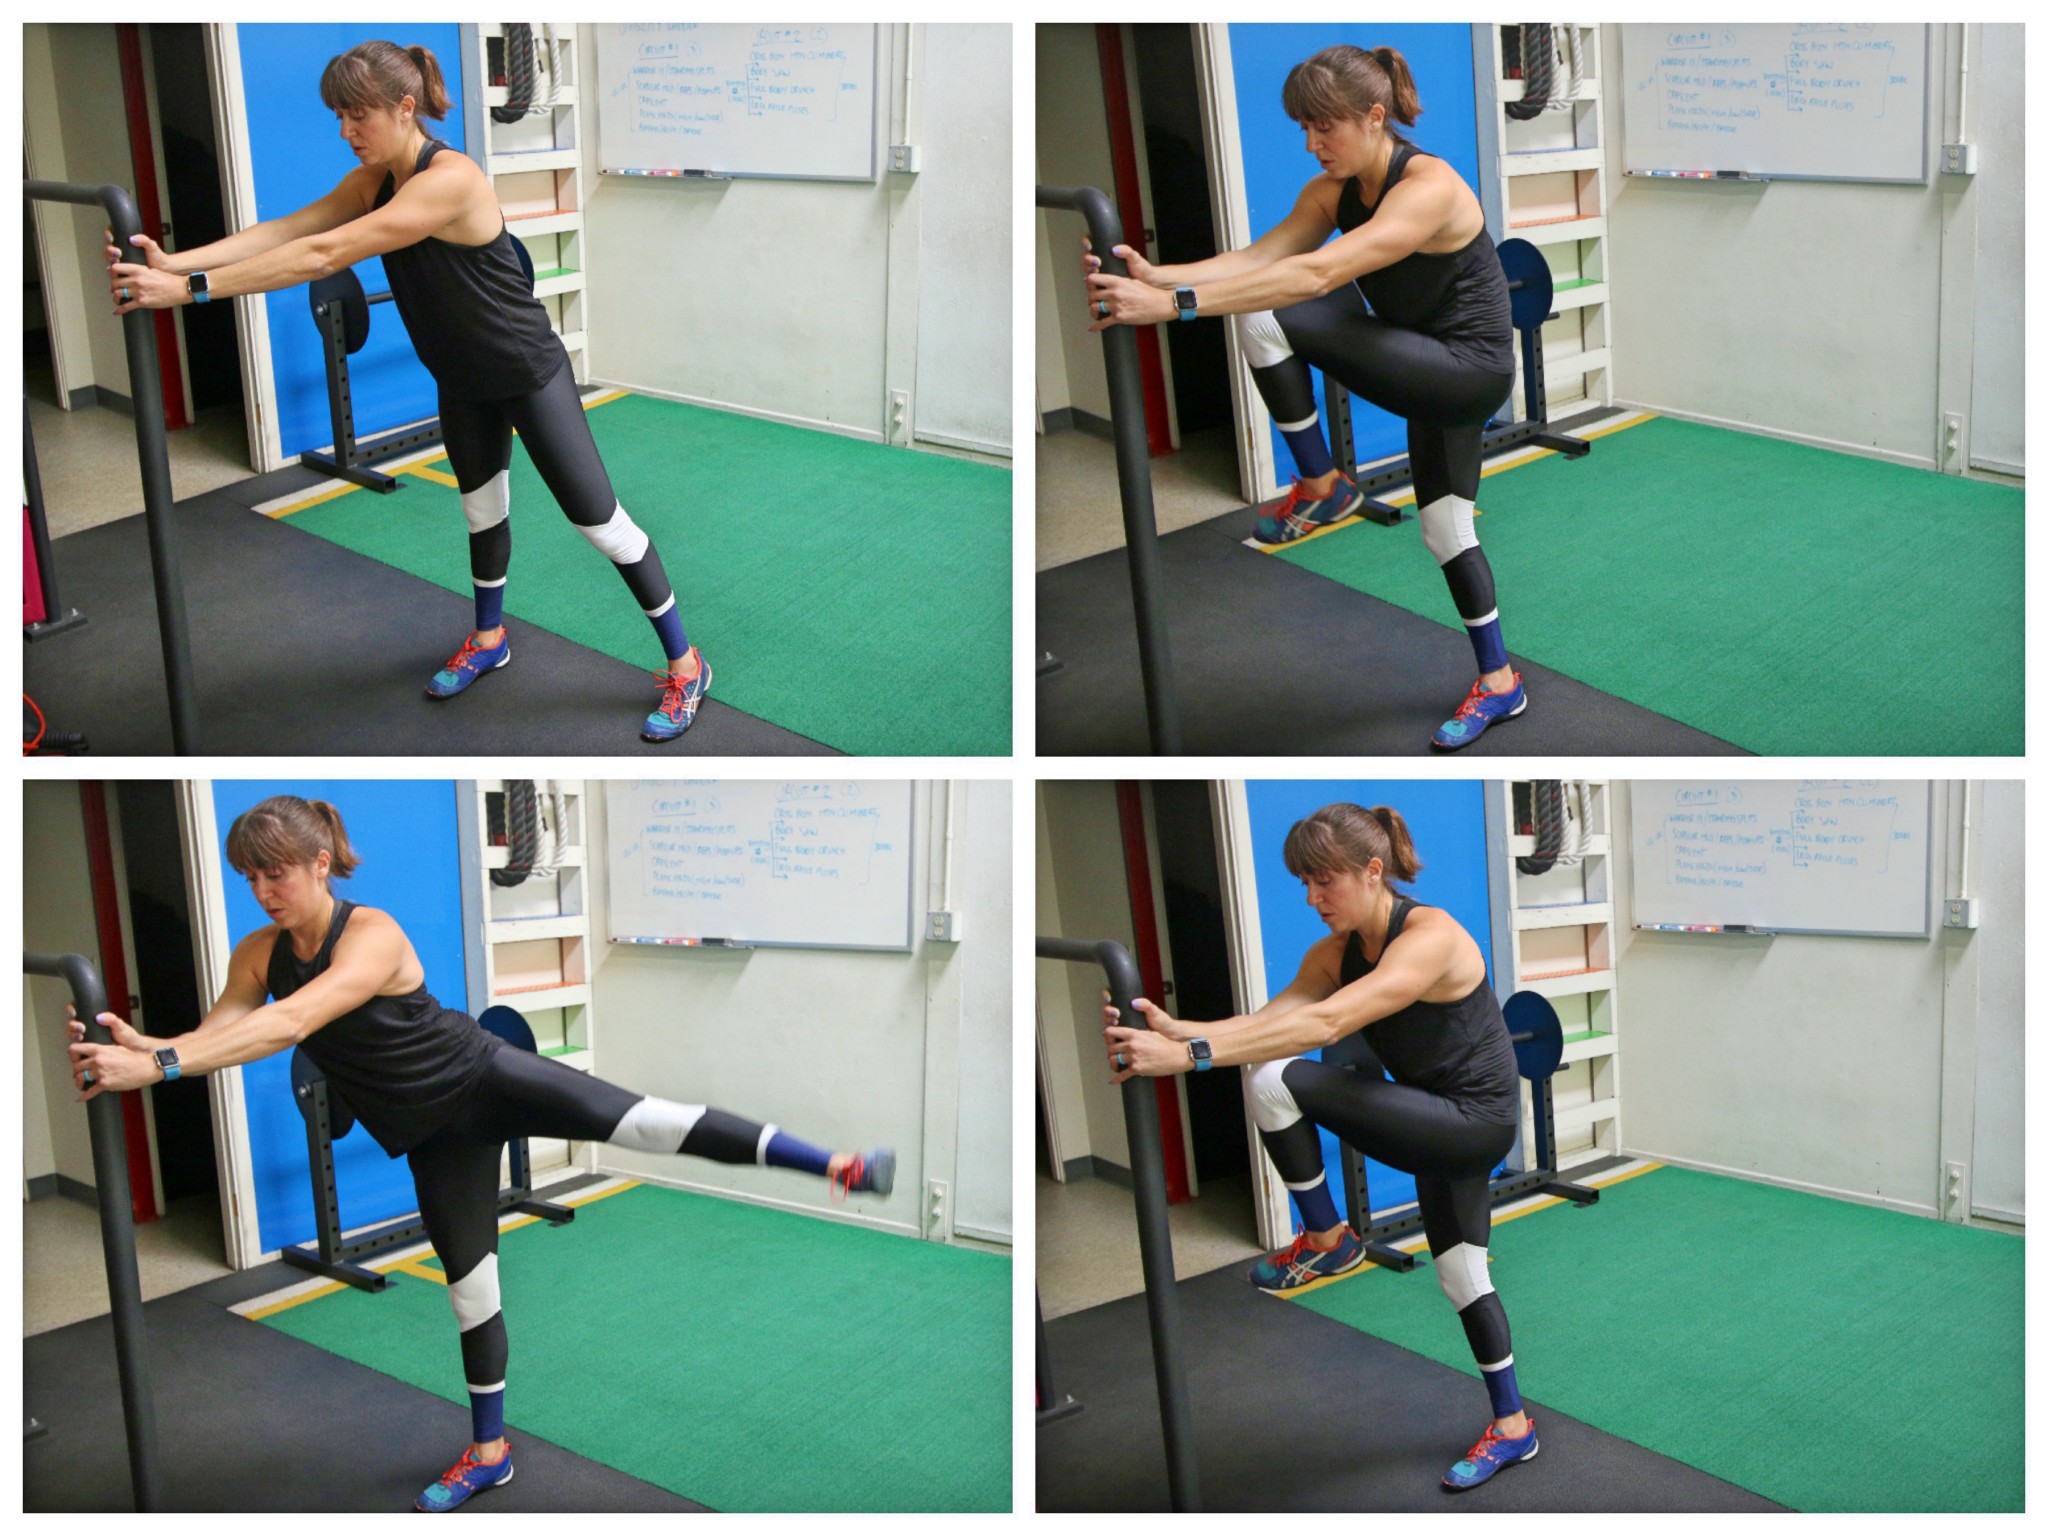
7. Cross Body Knee with Lateral Raise:
This standing core move is great if you can’t get down on the ground. Plus it is a unilateral move that will work your abs and glutes, especially your glute medius. Unilateral moves are great to help correct imbalances and make sure that each side of your body pulls its own weight!
To do Cross Body Knee with Lateral Raise, you’ll want a chair or wall right in front of you that you can lean forward and place your hands or forearms on.
Leaning forward bring one knee up and across under your body toward your opposite elbow, drawing your abs in as you tuck. Then kick the leg up and out to the side as high as you can but do not rotate as you kick laterally. Feel your glute working to lift. Do not really lean away but instead keep yourself balanced by leaning onto something.
After kicking out, lower your leg down and tuck your knee back in toward your opposite elbow, feeling your abs and not just your leg work to draw the knee in and across your body. Move at a controlled pace. Tucking and then performing a lateral raise or lateral kick.
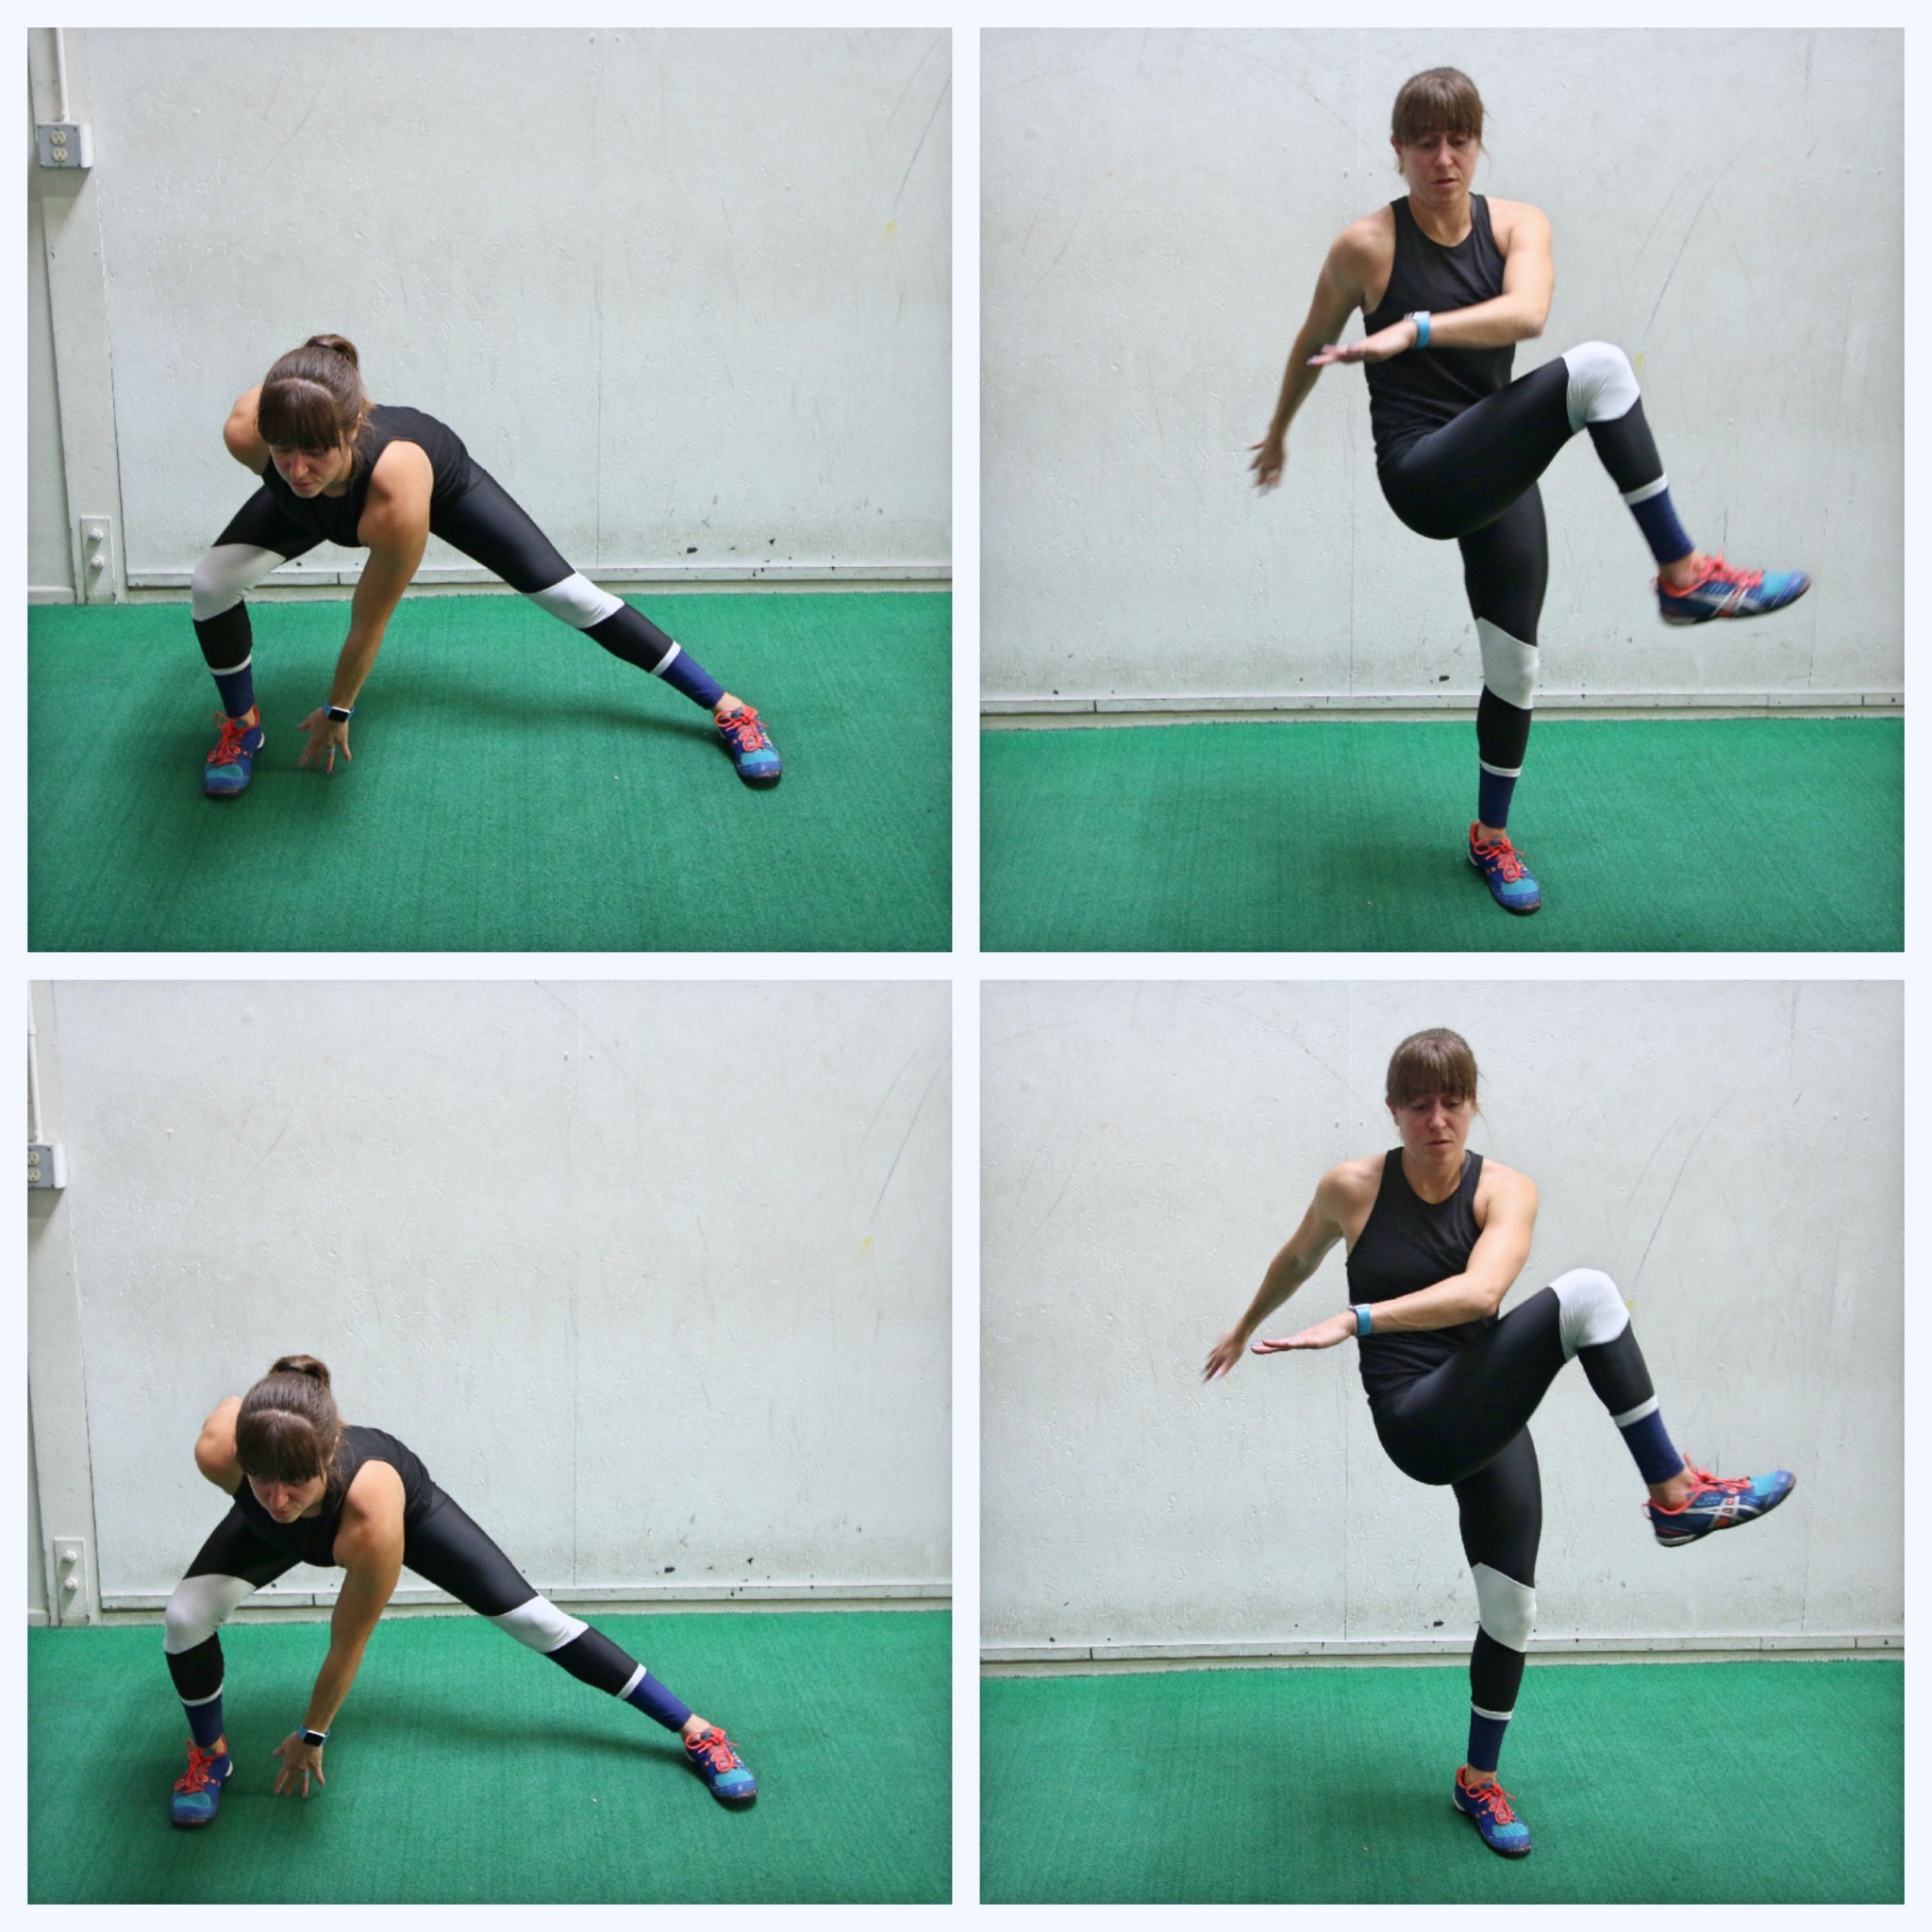
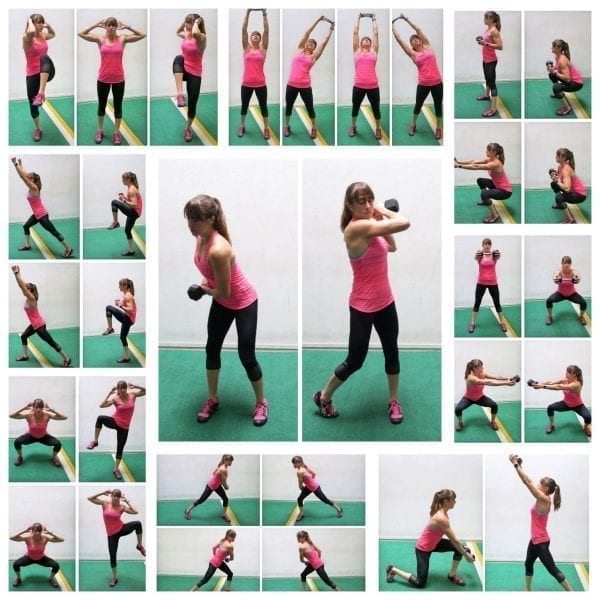
8. Side Lunge with Knee:
Working your legs and abs at the same times is the perfect way to build a strong core AND burn more calories in less time. Anytime you can get more muscles working at once, especially BIG muscle groups, you up your calorie burn as you build strength.
The Side Lunge with Knee will get your blood pumping as you strengthen your legs, glutes and abs, especially your obliques.
To do the Side Lunge with Knee, start standing tall then lunge out to the side, sitting your butt back as you hinge forward slightly and load your glute. Push your butt back and sink down, bending your outside knee as your other leg stays straight. You can reach to the ground or keep your hands at your chest. It can even be helpful to reach the opposite arm toward the heel you lunged out with to help you sit back.
Then quickly drive back to standing and, without touching your foot down if possible, drive that knee up and in across your body. You can rotate your upper body toward that knee almost as if pulling someone’s head down and across your body into your knee. Touch the toe down if needed then repeat the lunge back out followed by the quick knee drive.
Feel your legs working with the lunge and your abs working with the knee drive and rotation.
Beginners may not sink as low in the lunge or step out as far. They may also touch their toe down to balance between the lunge and knee drive.
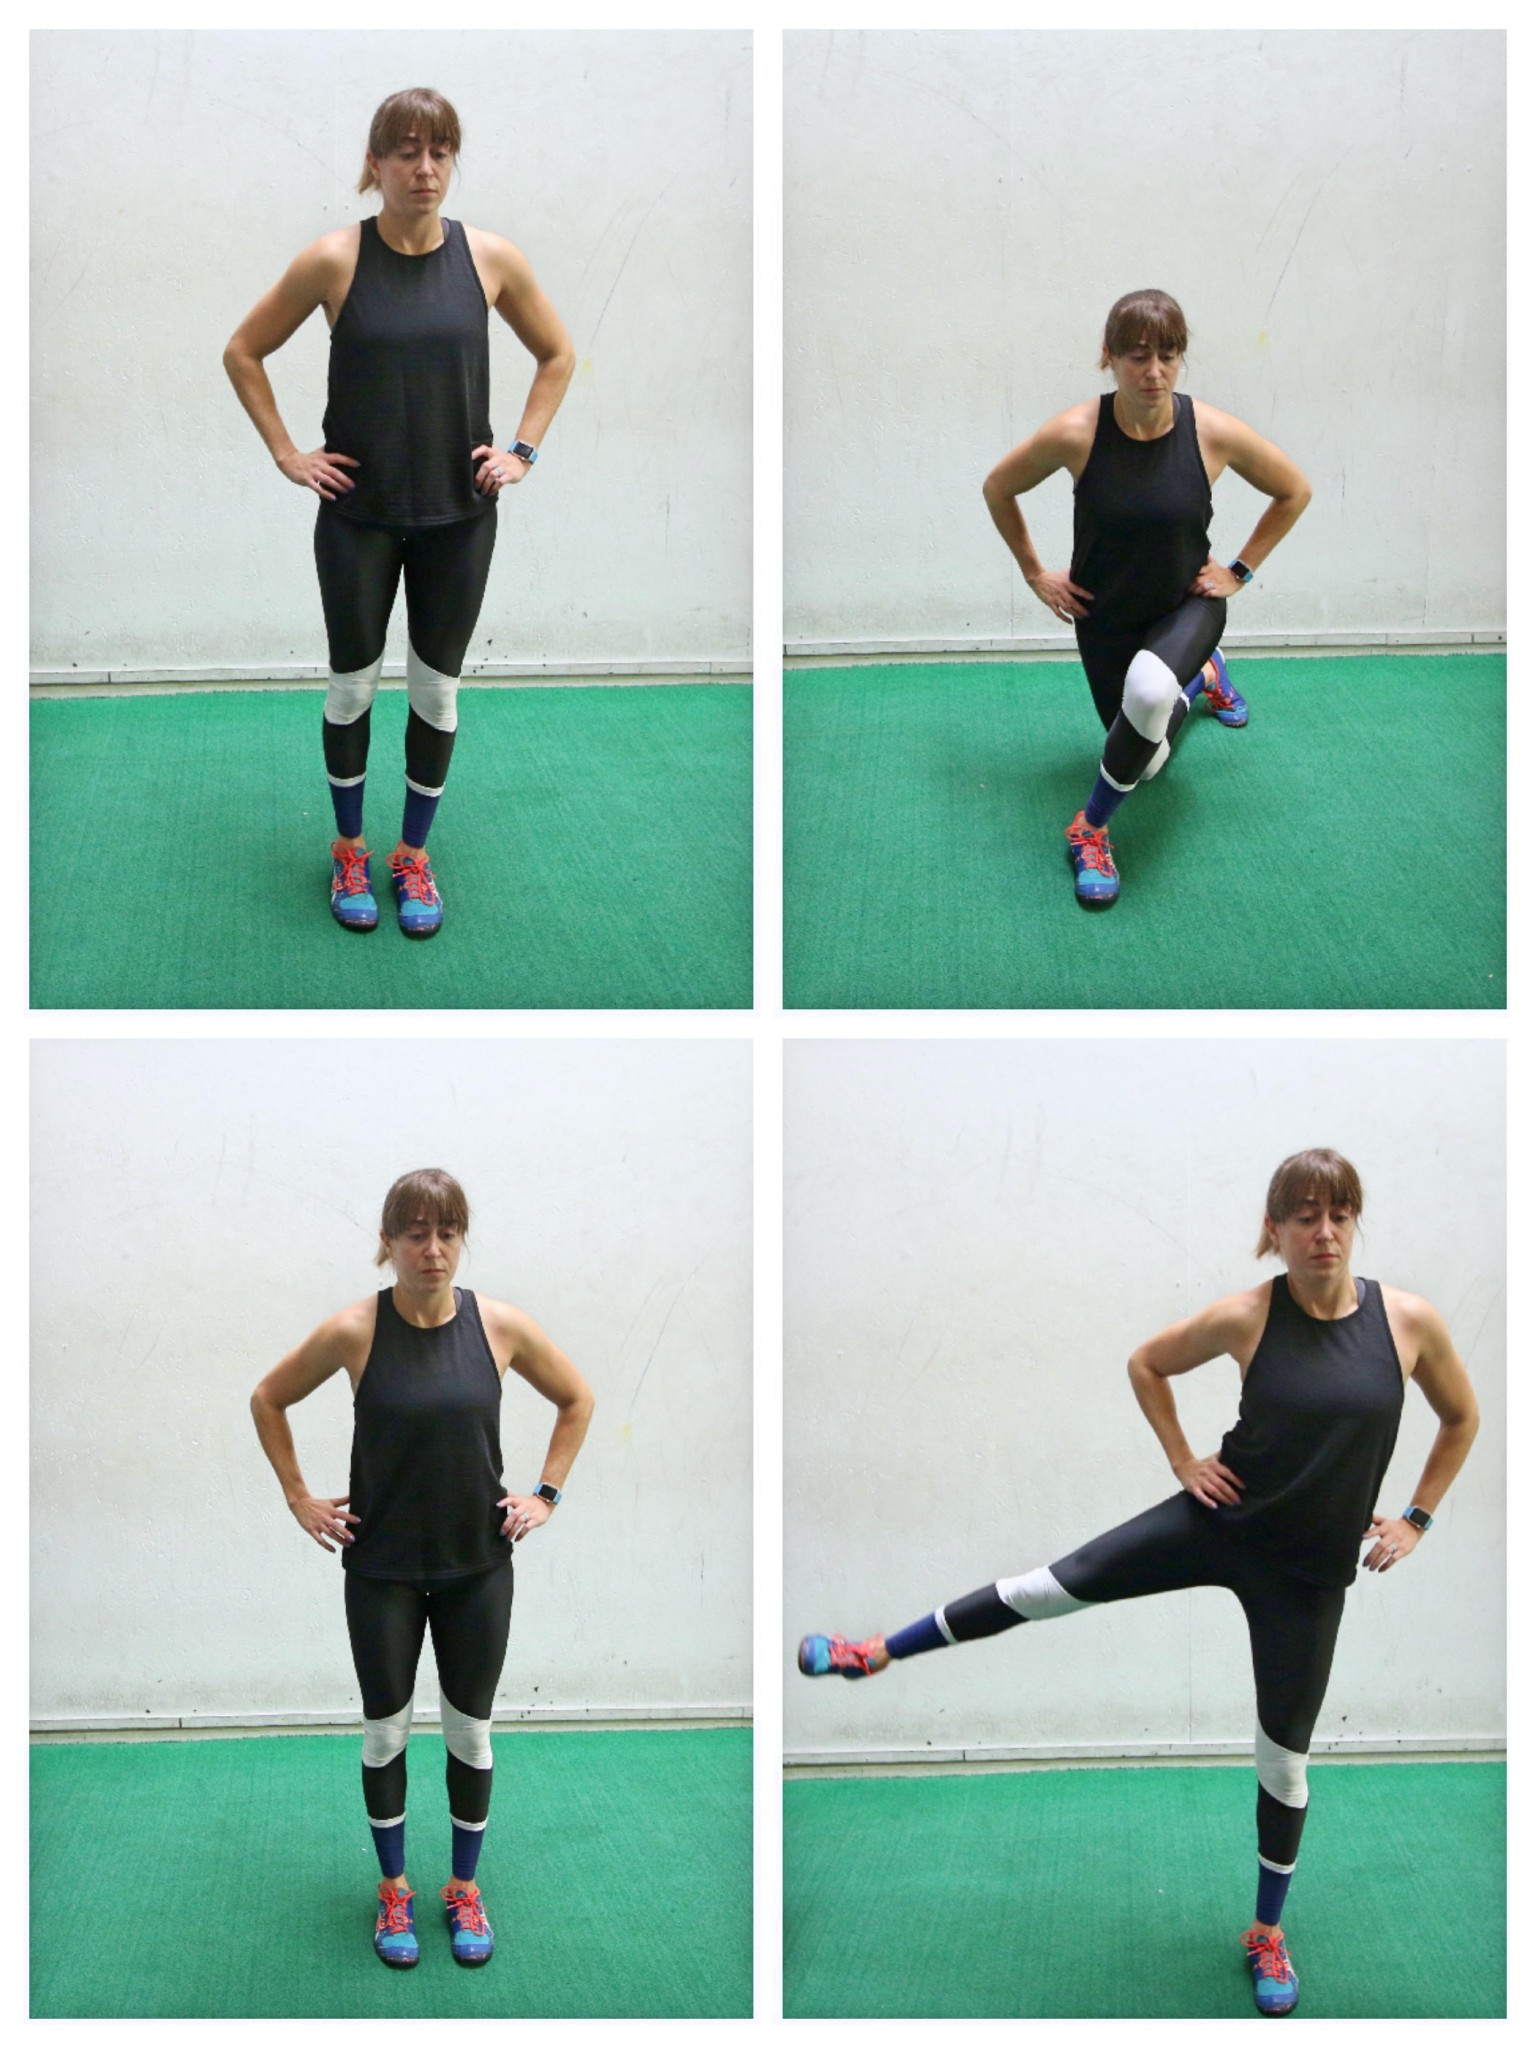
9. Curtsy Lunge to Leg Lift:
Moving in every plane of motion is key to building a strong core that prevents injury. And this Curtsy Lunge to Leg Lift not only gets you moving in different directions, but it also combines a compound leg move with a more glute-focused movement to really make sure your glutes are working. It really targets the glute medius with the Leg Lift, which is an important muscles to strengthen for hip stability!
To do the Curtsy Lunge to Leg Lift, start standing tall with your feet together. Then lunge back, stepping your foot across and behind your front leg so you sit back into your front glute. You aren’t lunging straight back, but are instead crossing behind as you keep your chest facing forward. Keep your front foot pointing straight ahead too. If you rotate open as you cross behind, you won’t get the benefit of the curtsy lunge.
Sink down into the lunge, sitting back in your front heel as you feel your front glute load. Then drive through your front heel to come back up to standing. Lightly tap the toe down to balance if needed and then raise your leg out to the side for a lateral raise.
Feel your glute on the side lifting your leg laterally then touch the toe down and repeat the lunge. You will shift your weight toward your standing leg, but don’t lean way to the side just to lift your leg up higher. Beginners may not sink as deep in the lunge.
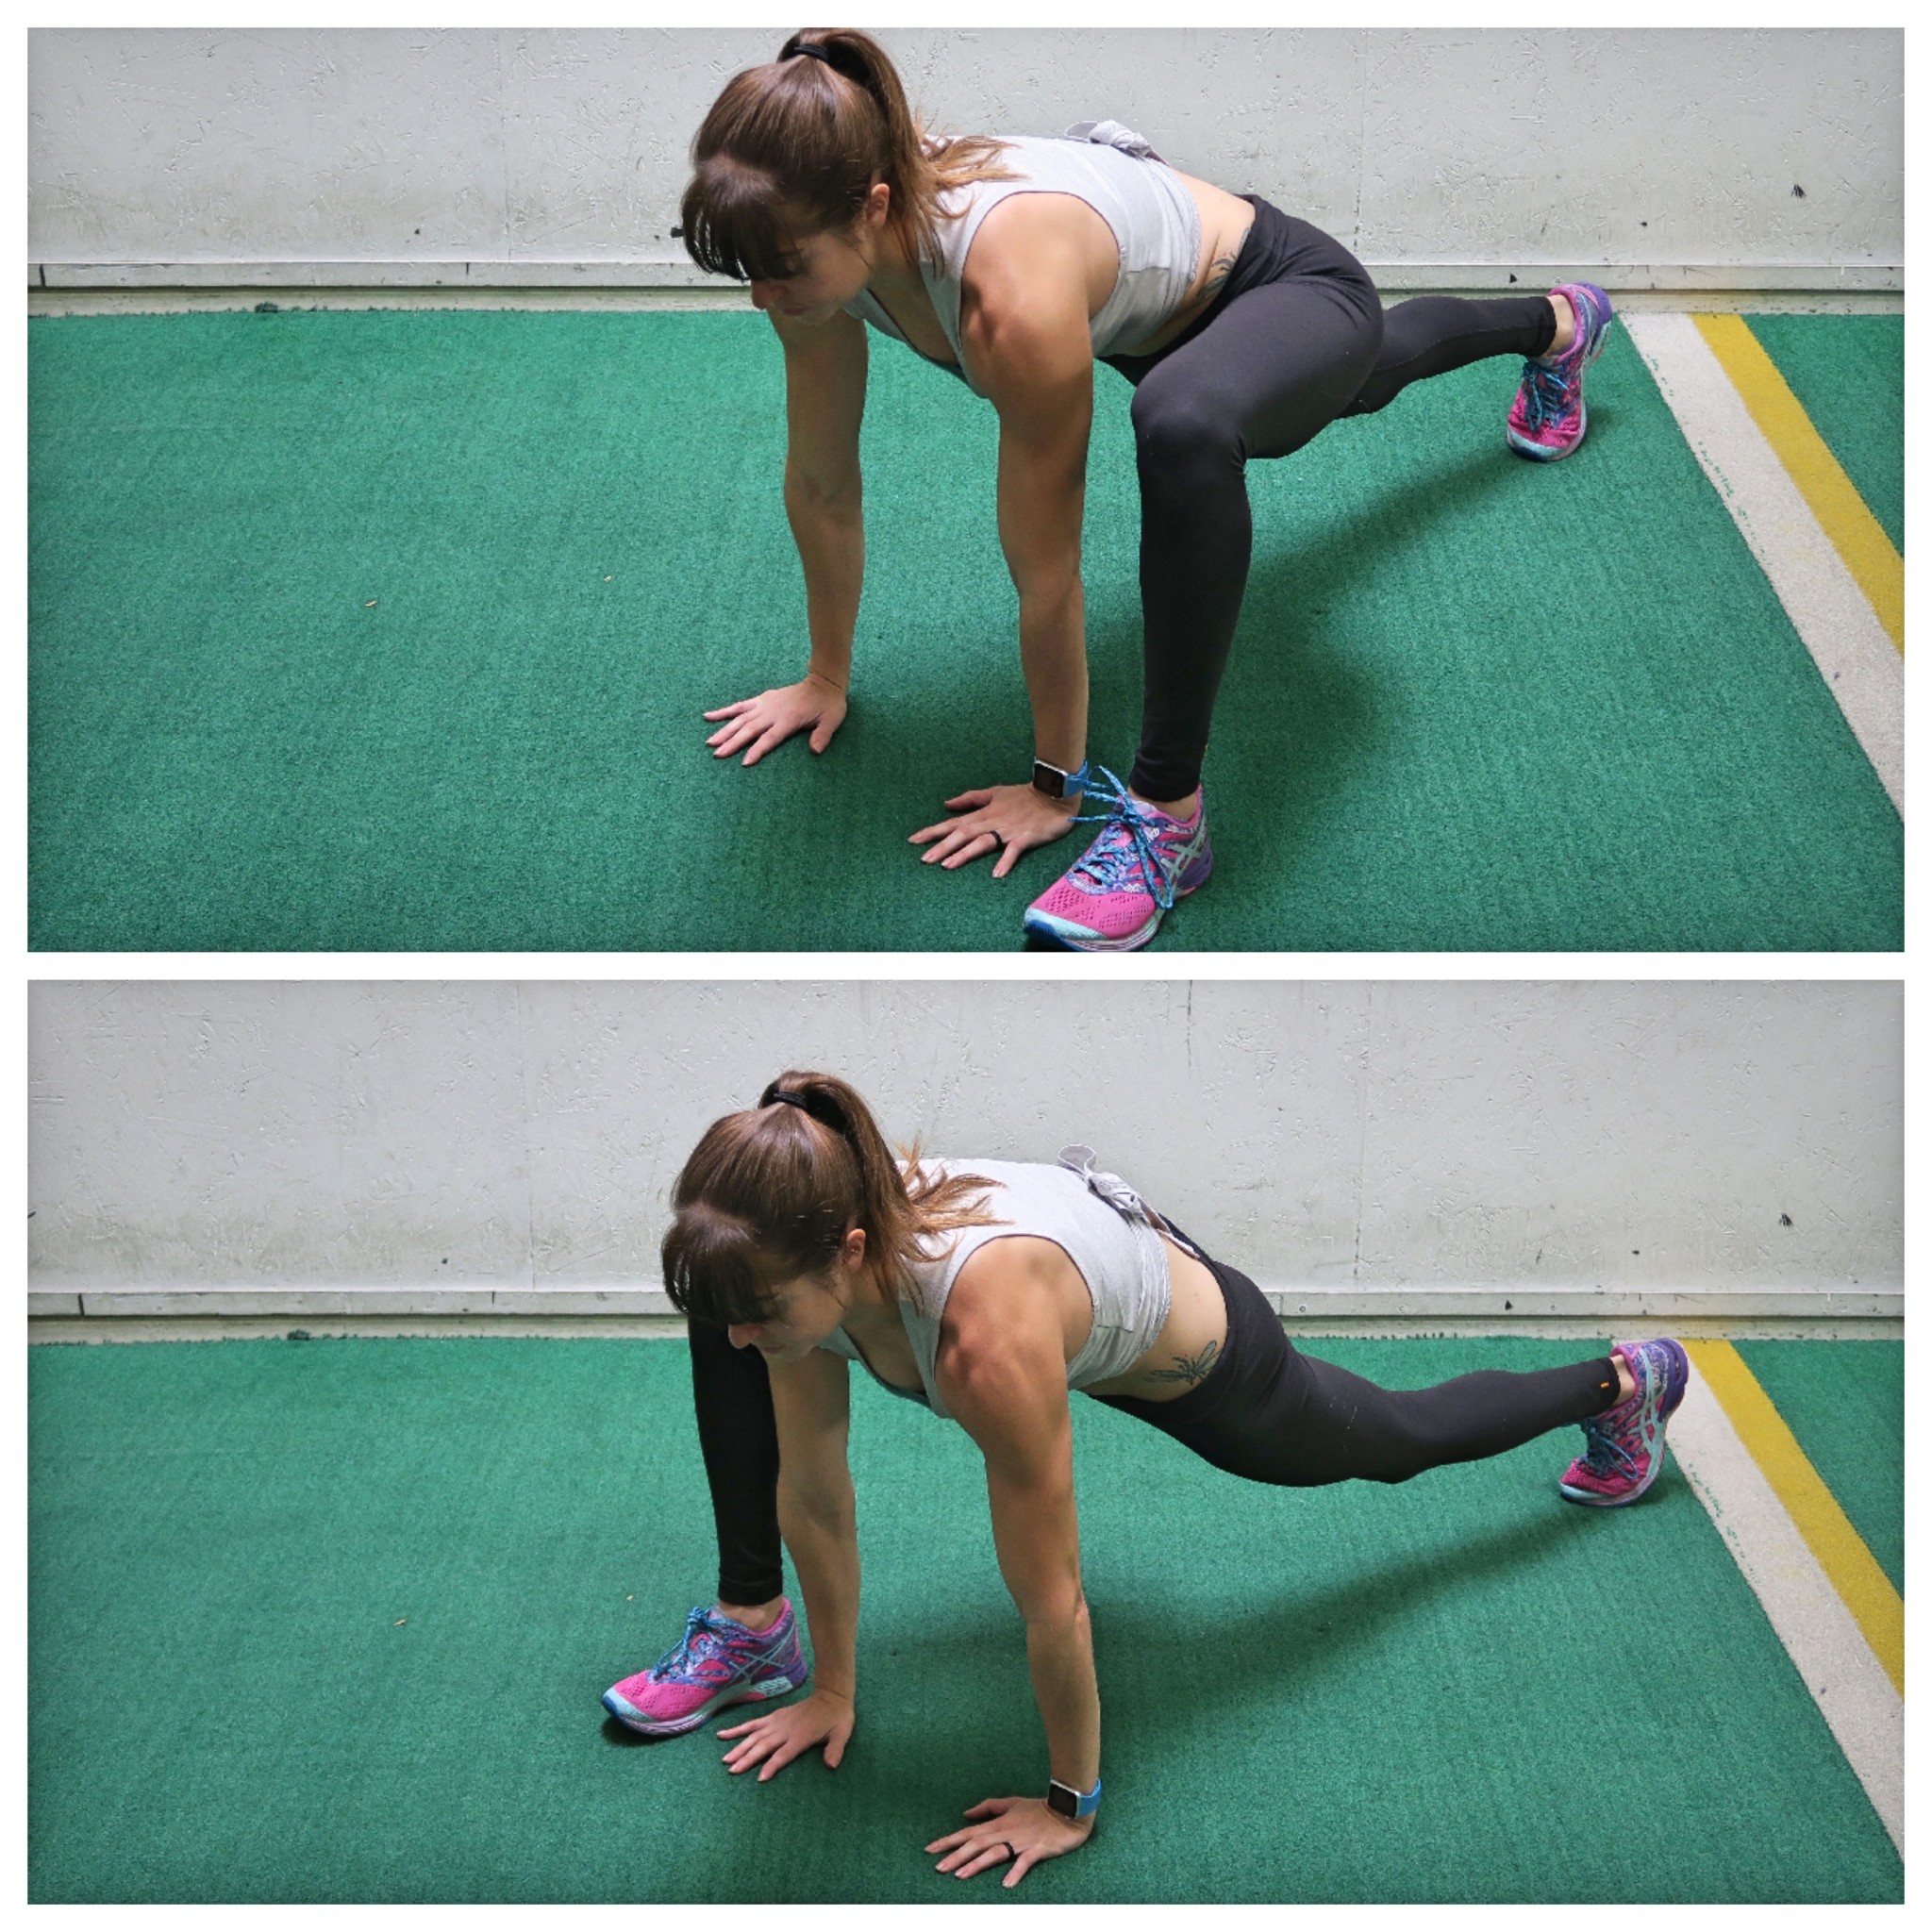
10 .Spiderman Mountain Climbers:
I love cardio-core moves that also work on your mobility. That is why Spiderman Mountain Climbers are a must-do move. They will work on your hip mobility as they strengthen your legs, shoulders and abs (plus they’ll really get your blood pumping!).
To do Spiderman Mountain Climbers, start in the high plank position from your hands and feet. Then, keeping your core engaged, step one foot up and outside your hand into a nice low spiderman or runner’s lunge. Try not to let your butt go way up in the air as you step your foot outside.
Beginners will then quickly step back into plank and then step the other foot forward into a lunge on the other side. They will move as quickly as possible, stepping their foot all the way outside their hand.
More advanced exercisers will jump from lunge to lunge. The faster you jump between lunges and the less you pause on each side, the harder the move will be. Still try to keep your butt down and make sure to land in a lunge with your foot outside your hand each time.
Want quick 10-Minute Bodyweight Core Burners using these moves?