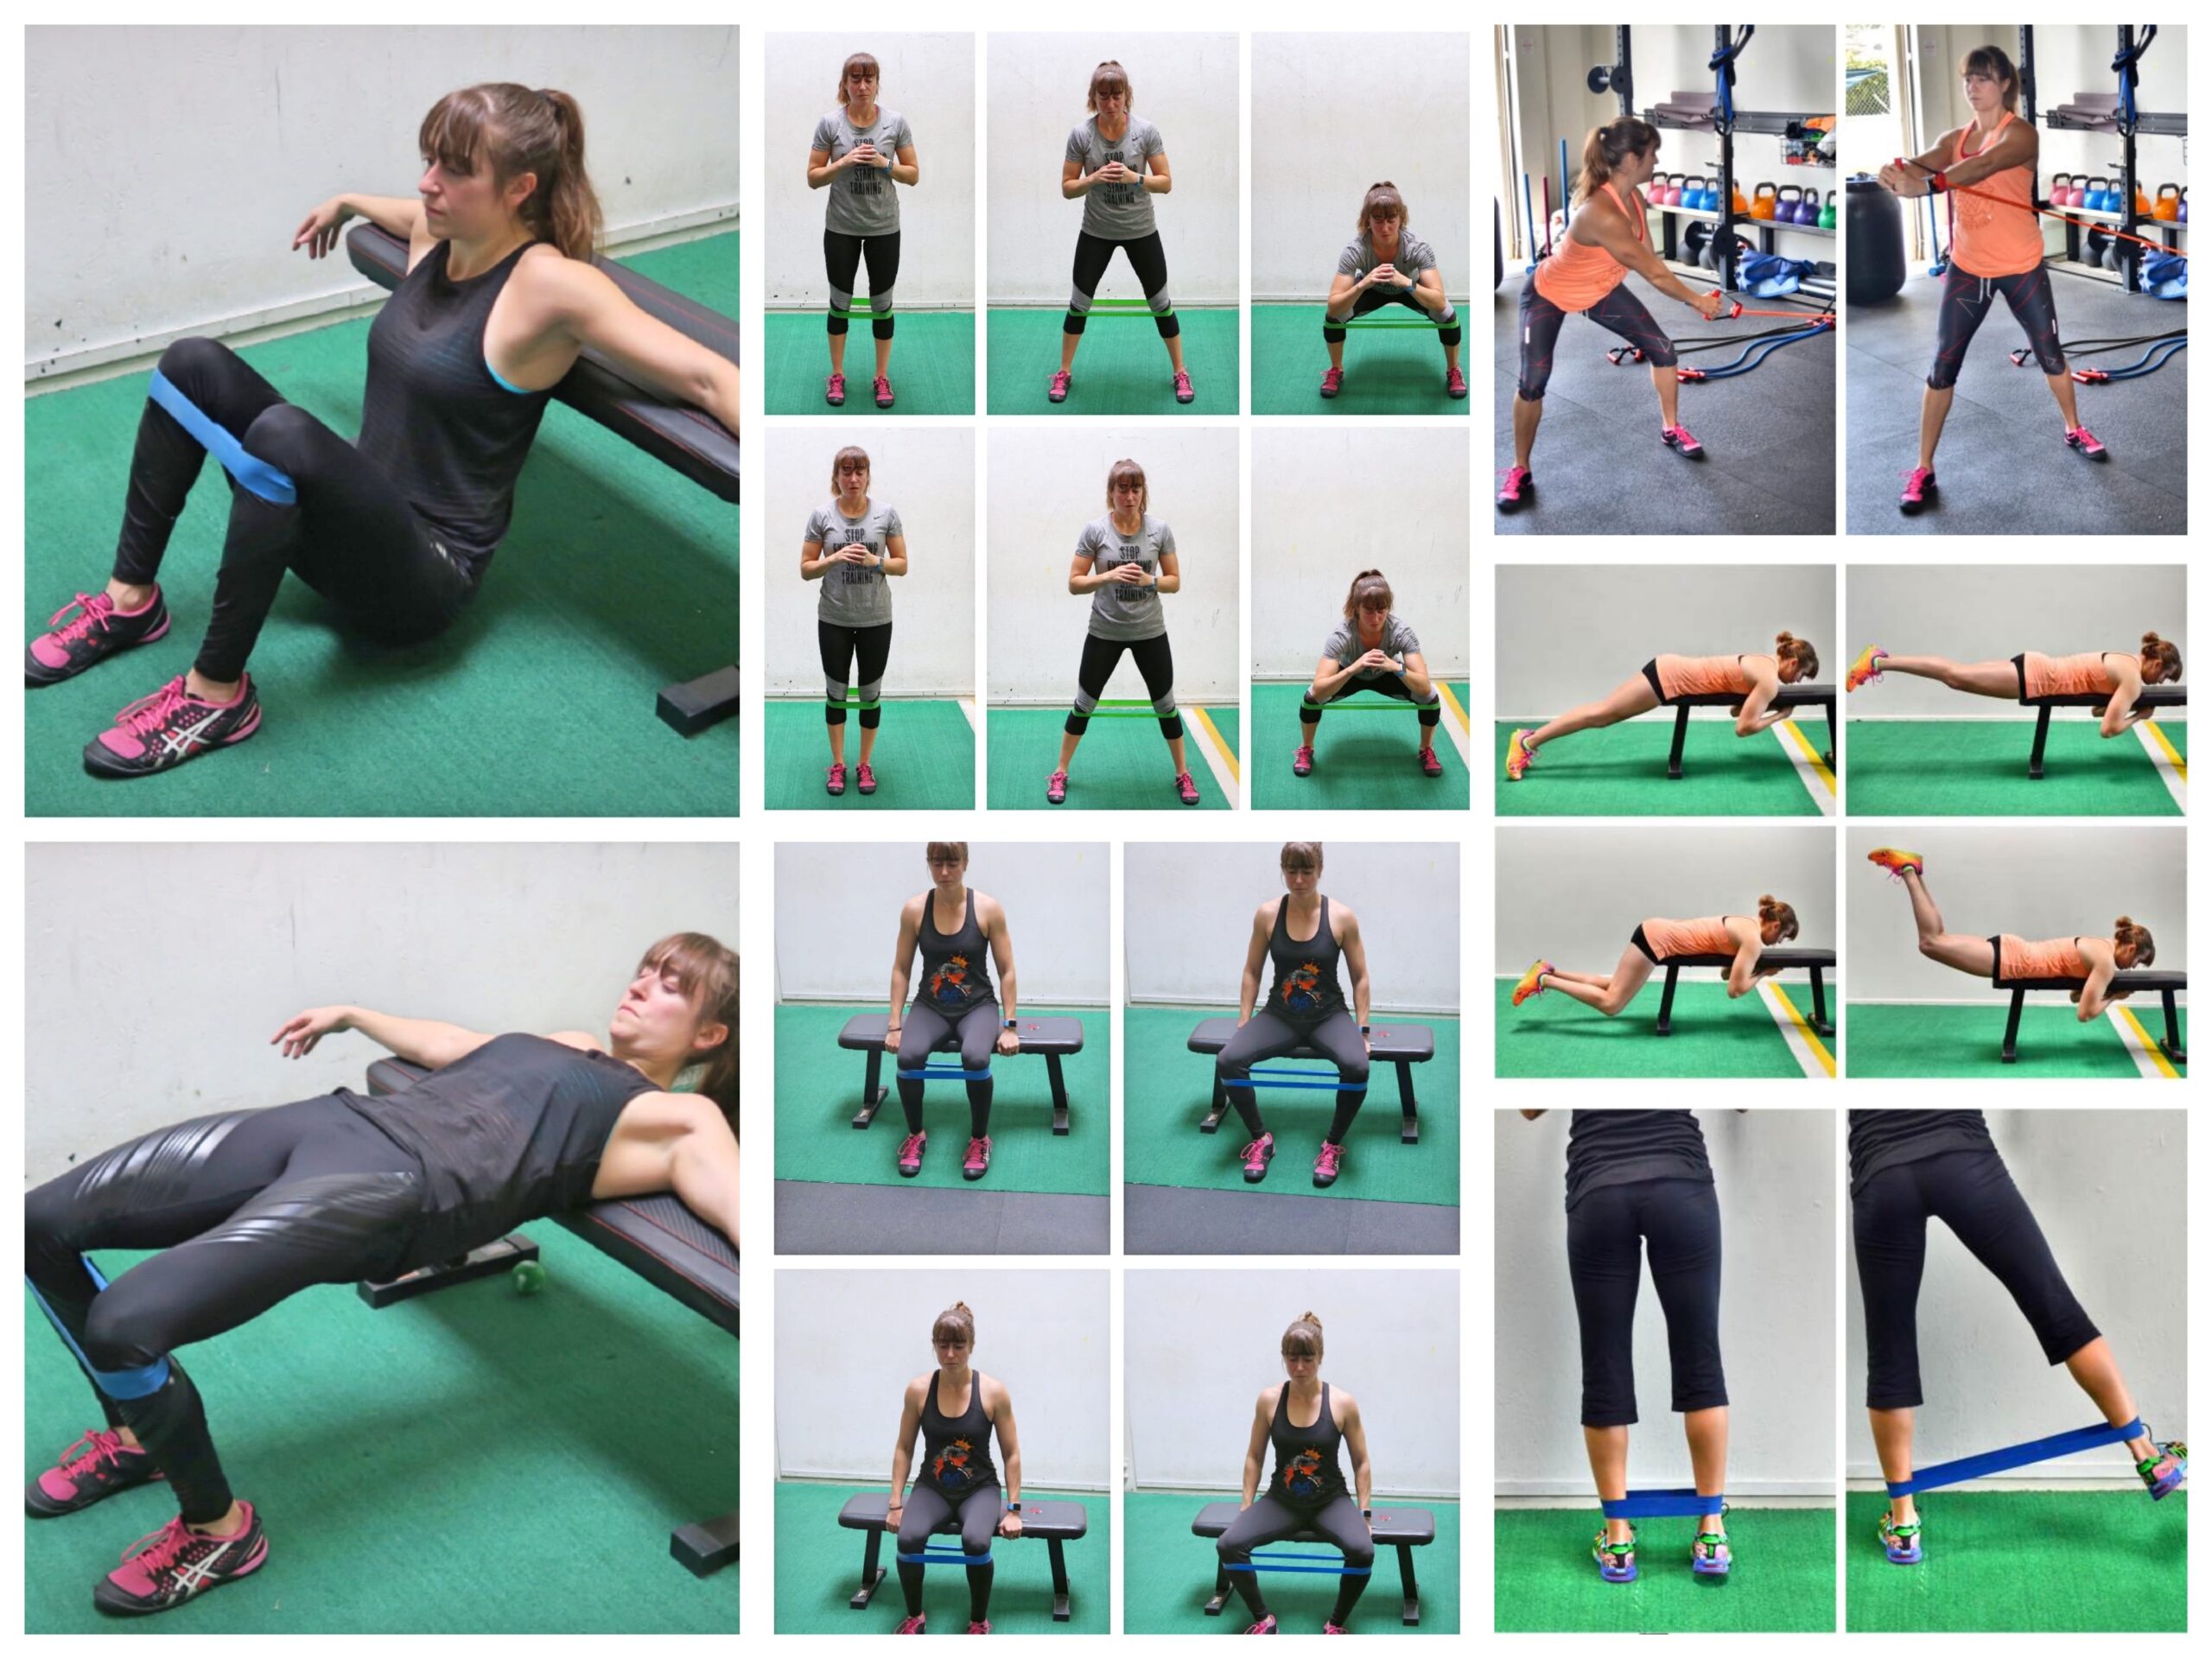
8 Glute Activation Exercises (Improve Hip Stability)
If you want to help prevent lower back, hip or knee pain and improve your lifting, running and riding, you need to include glute activation in your workout routine.
Glute activation exercises are movement generally done with little to no weight and for higher reps (15-25). They are isolation exercises meant to really target the glutes so you can feel them working before you even go into your compound exercises.
And you want to use these moves to strengthen all of actions the glute muscles perform – from abduction to extension to external rotation and even hip hyperextension.
That’s why I wanted to share 8 glute activation moves you can do with minimal equipment in a wide range of postures and positions. These moves will help you truly build functional strong glutes to improve your hip stability!
(Video demoing all moves below this 👇)
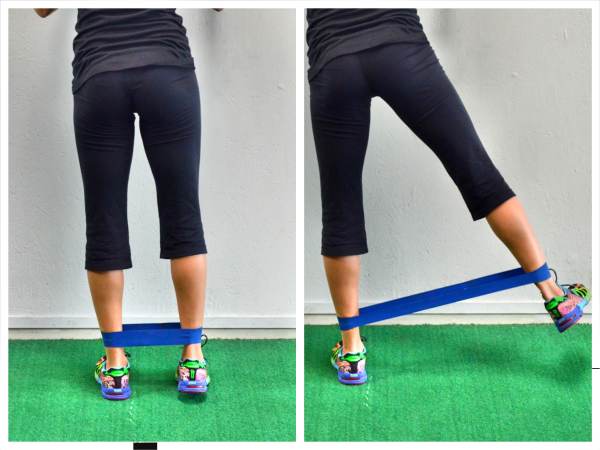
1: 3-Way Standing Hip Circles
Everything is connected. If you want better glute engagement, you can’t ignore your feet and ankles. And if you want better balance and foot and ankle stability, you can’t ignore your glutes!
That’s why standing moves like the 3-Way Standing Hip Circles are so key to include. They work on improving your balance while activating your glutes.
And with this move, you’ll activate your glute max with the hip extension kicking back, your glute medius with the abduction or knee raised out to the side and even your abs with the knee tuck in and forward.
Make sure to move slowly as you cycle through those moves while focusing on your other foot’s connection to the ground.
And do not lean or rock away to increase the range of motion. Focus on those glutes really working to lift the leg and your abs working to pull the knee in!
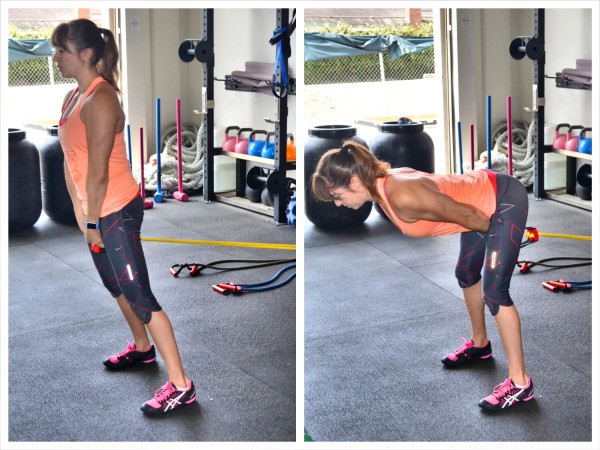
2: Hip Airplanes
When working on glute activation, we want to address all joint actions this muscle group contributes to, which is why I love to use Hip Airplanes.
This standing glute move will improve that balance and hip stability while helping you learn to engage the glutes to stabilize as you work through internal and external rotation – targeting all three gluteal muscles (the maximus, medius and minimus)
While you can do this move without your hands on a chair or box, I like to add in that little stabilizing element to start so you can work through a full range of motion.
Really focus on rotating from the hip, feeling your glute work over just allowing your spine to twist. You will not get the full benefit if you don’t focus on that rotation going from your head to your raise foot.
You want to rotate open from your standing leg fully, then rotate back closed toward that standing leg, even dropping the hip of the raised leg toward the ground.
Make sure as you do rotate, your standing foot is firmly pressed fully into the ground and you do not rock out on your foot.
If you have Piriformis issues, be careful with this movement, especially the external rotation.
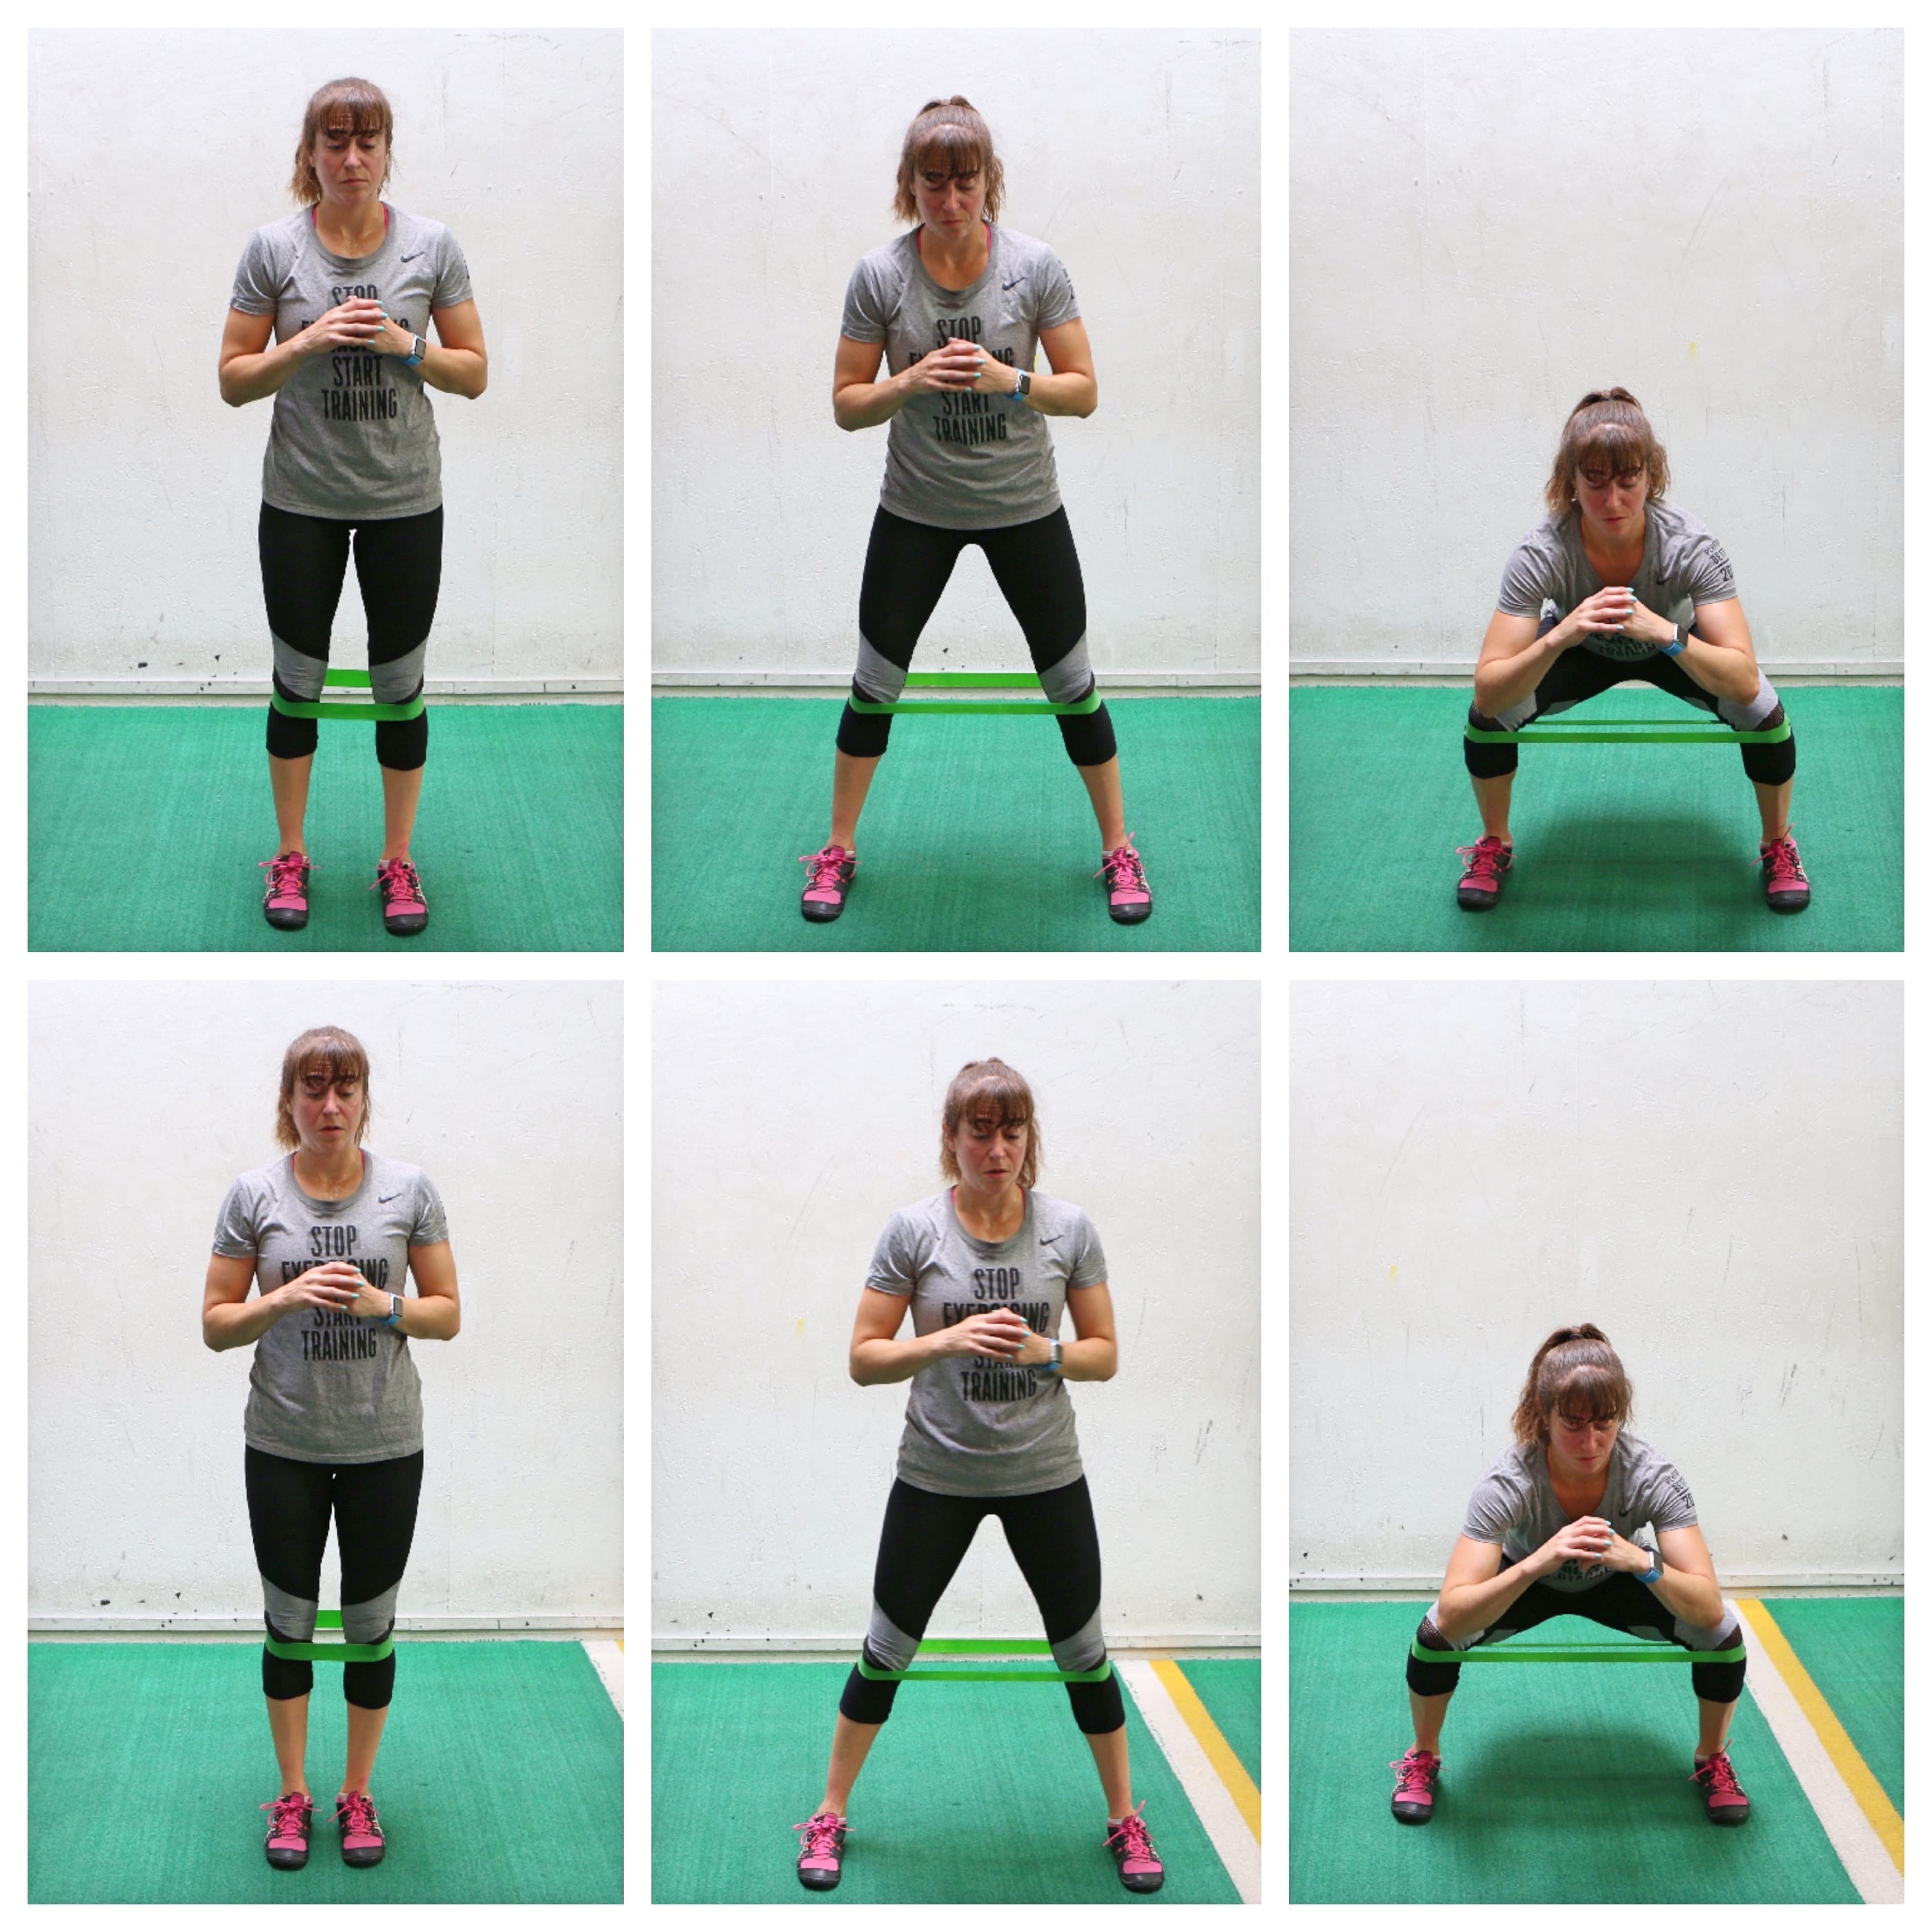
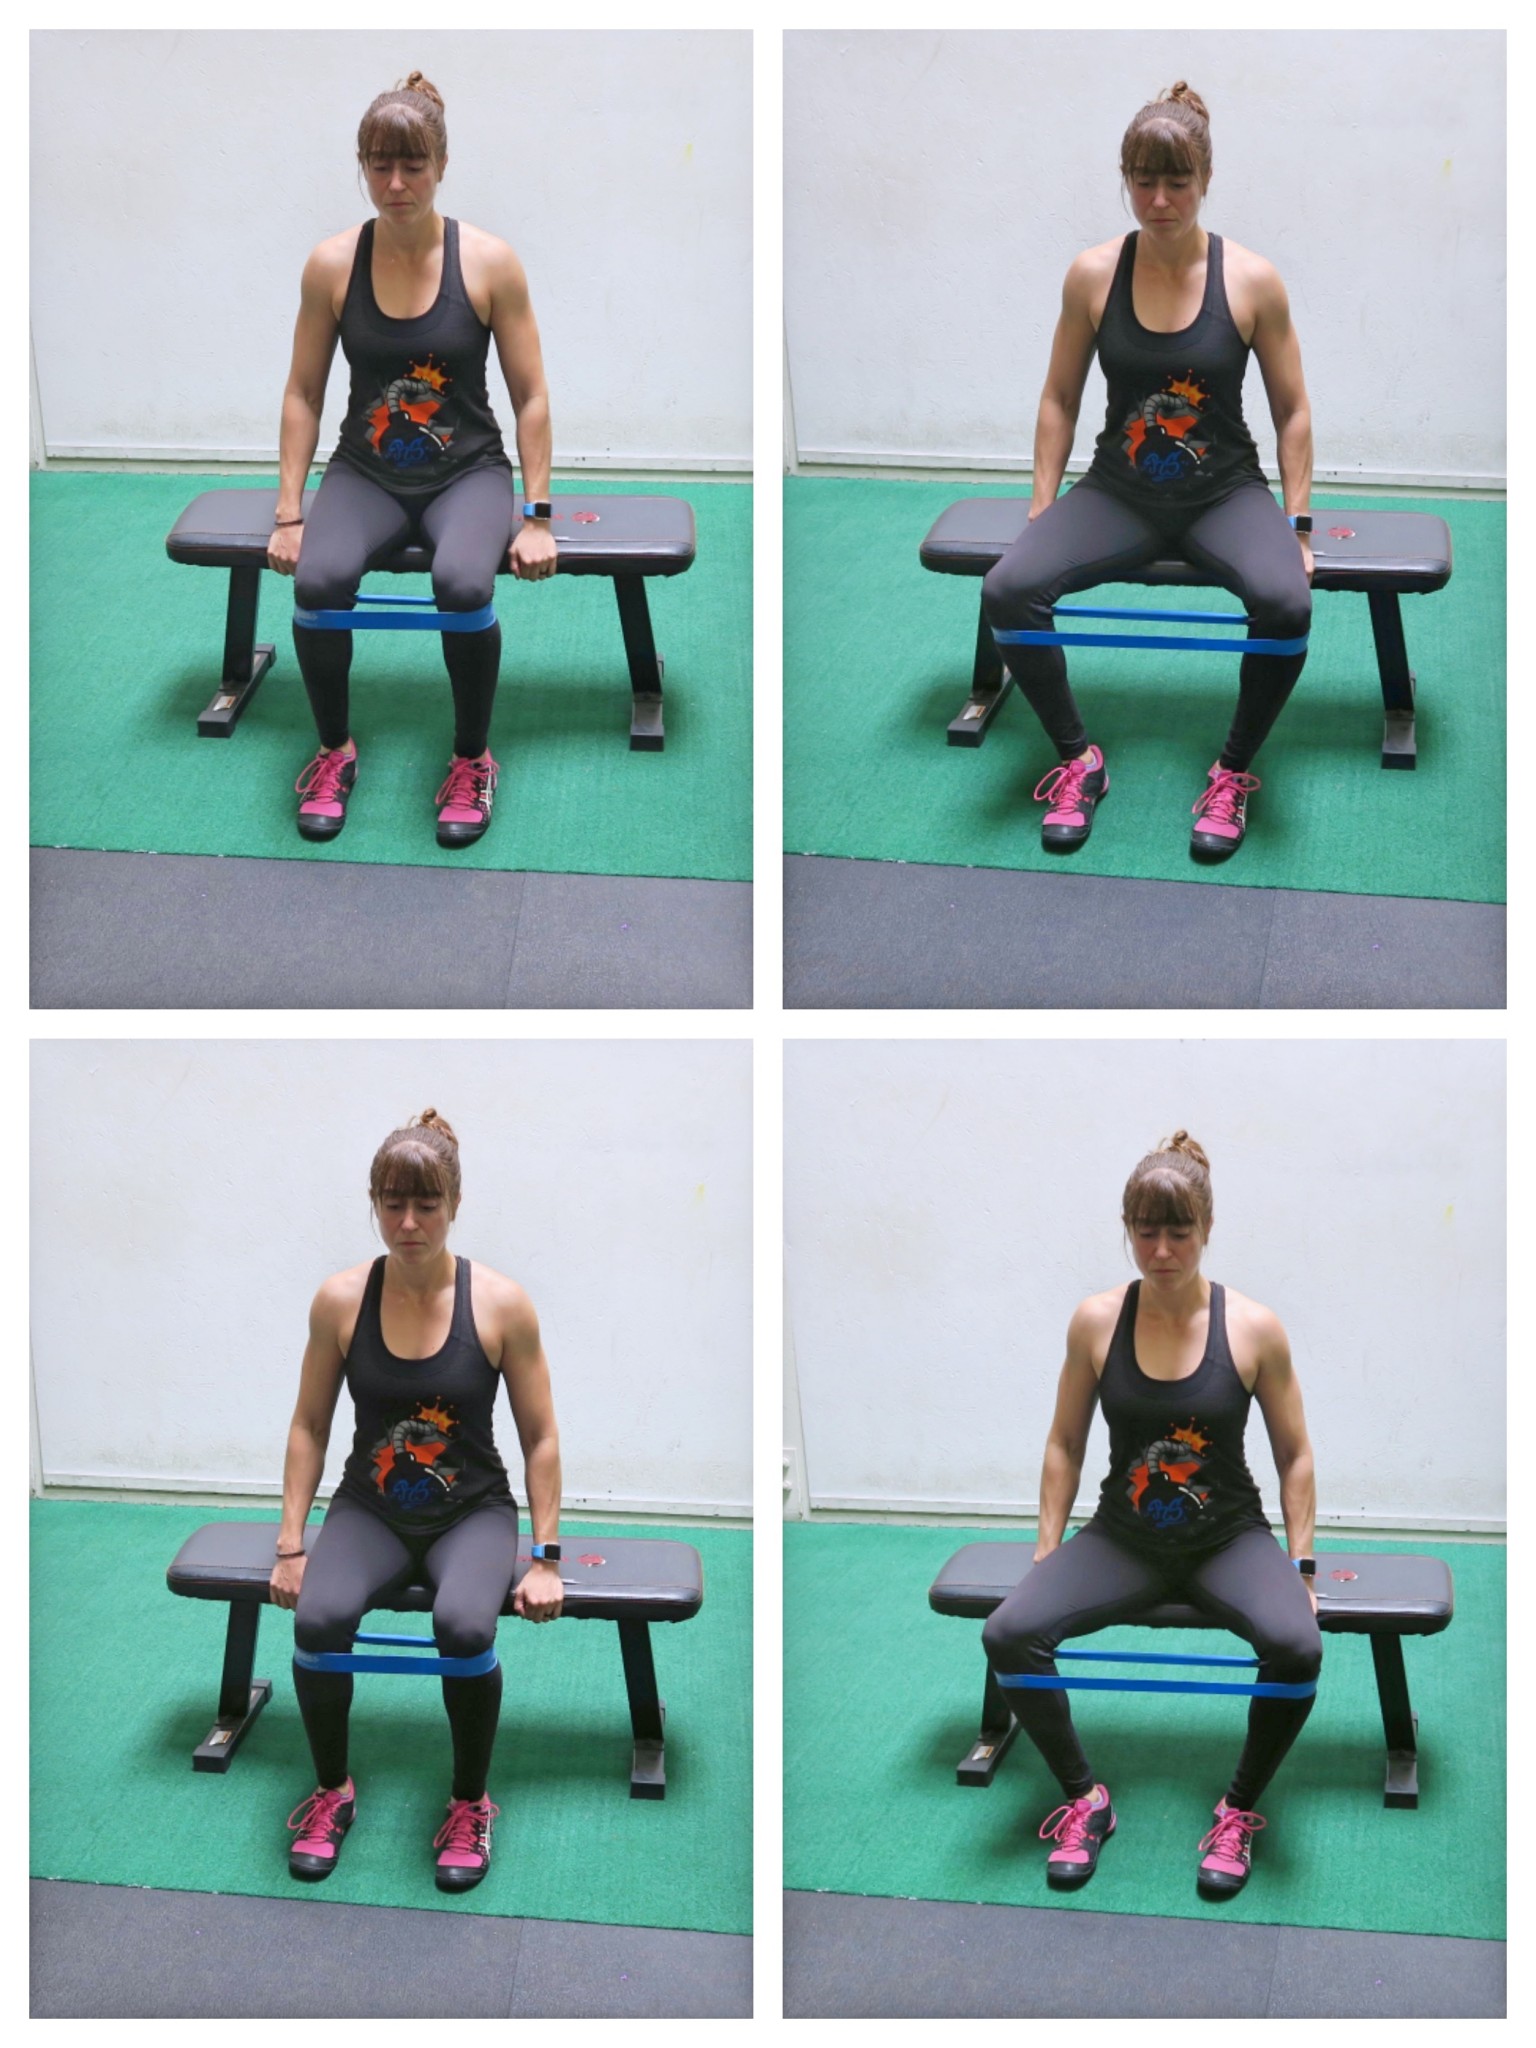
3: Mini Band Pulse Squats
Many of us have heard the phrase “Squat for a better butt.”
But squats, especially weighted squats, partly because they are a compound movement, really aren’t that great for glute activation. You’re definitely going to feel those quads and adductors even as well.
However, how much we target and activate a muscle is also based on the range of motion and equipment we use with that movement.
By changing the full squat to a pulse squat while adding a band, we can make the squat an amazing glute focused movement that creates metabolic stress so you really feel that pump in those glutes to establish that mind-body connection.
When you do this move, you can add loads, but start with the mini band right below or above your knees. You want the band just above or below your knees to use it to help you really focus on pressing out to activate your glute medius. This will improve your hip stability and actually better activate your glute max as well.
You then want to make sure you’re sitting back as you pulse right around parallel while sitting in that squat. Stay controlled and make sure you’re heels are firmly pressed down into the ground without rocking back.
To modify you can do this move holding on to a suspension trainer or even hovering over a bench!
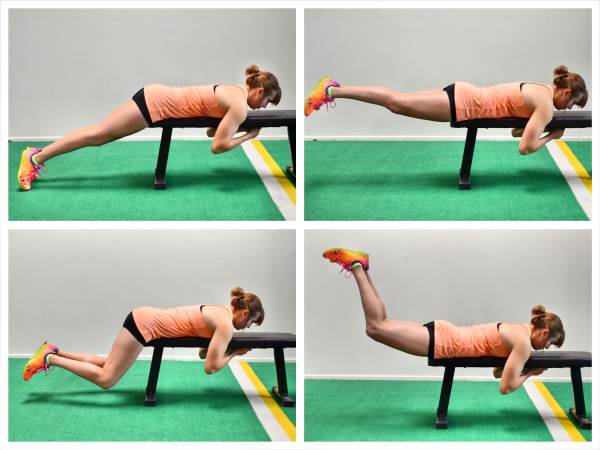
4: Bench 2-Way Leg Raises
Often with glute activation, we think we have to get down on the ground to do it. And while quadruped moves are an amazing way to target and activate those glutes, you can easily modify all of those movements off a bench if you need extra padding on your knees or simple don’t want to get down on the ground.
And the added bonus of using a bench is that you can even increase the range of motion you work through on many moves because your knee is raised off the ground.
That’s why I love Bench 2-Way Leg Raises. You can work your glutes through both hip extension and abduction and a larger range of motion.
When you do this move, make sure not to bend your arms or lean away. You want to even feel the glute medius or side butt on that leg that is down stabilizing your body as you lift the other leg to work.
Focus on even almost trying to stop the movement with your glute instead of just swinging the leg up higher. Focus on feeling that glute on that kickback stop the leg at about parallel to the ground. Do not arch your lower back to kick up higher. And really feel the side of your butt on that lateral raise. Do not rotate your toe open toward the ceiling as you raise.
To add a bit of progression to this movement, you can even wear ankle weights. But focus more on that mind-body connection over adding loads!
5: Lying Jacks
Often when we include abduction movements or lateral raise movements to work our glute medius, we are standing or seated. But by doing this abduction movement lying down, we can work our glutes while in hip hyperextension even.
We have to remember that by changing the degree of hip flexion involved in the abduction movement we can target different portions of the glute medius, addressing more anterior or posterior fibers!
We will also work our glute max to maintain the reverse hyper position.
When you do this move, you want to focus on pressing out against the band while not just rotating your toes out and open.
You also want to think about your glutes holding your legs up as you press your hips down. Be very conscious you aren’t feeling your lower back compensate to raise your legs up higher!
If you feel your lower back taking over, try a Y Reverse Hyper instead of holding the position as you perform the abduction.
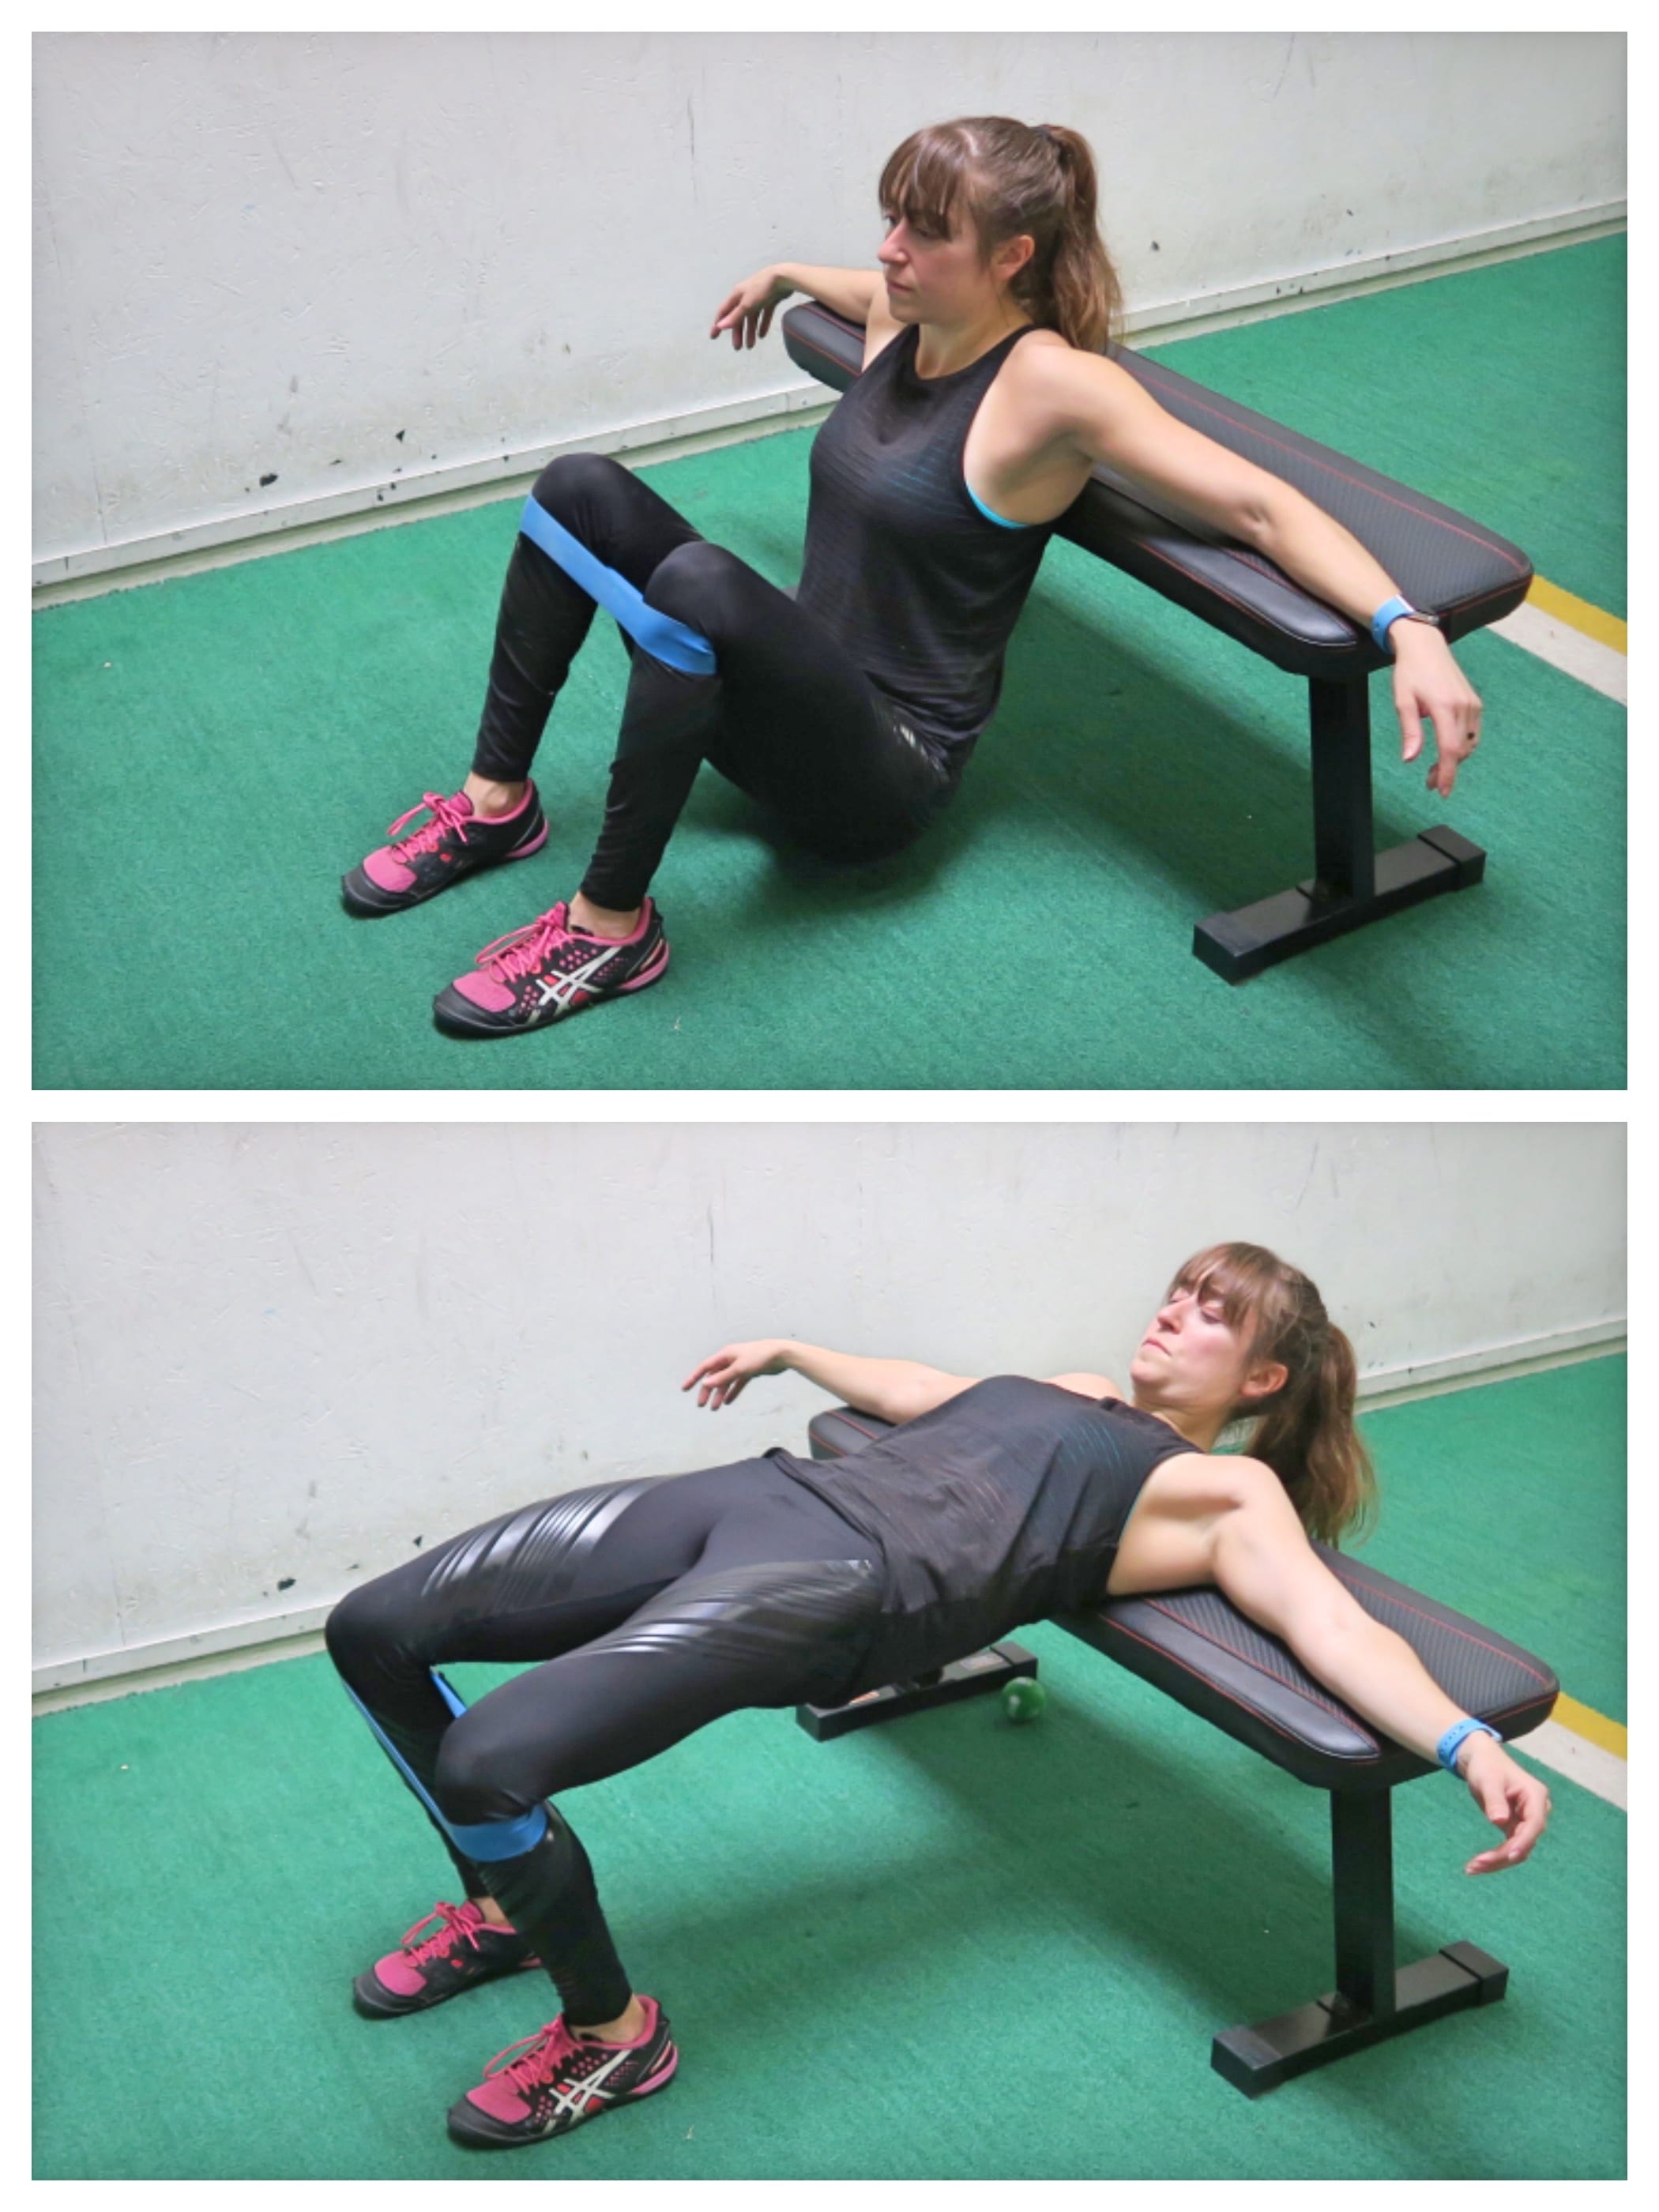
6: Side Plank Clams
Planks are a great core move that you can use to also target your glutes, side planks especially. And often the side plank with leg raise is the one you see being used.
But that move is not only far more advanced than we give it credit for, it also often will lead to fatigue of the muscle over simply helping us prep the muscle for more work.
That’s why I like the side plank clam variation. It can also include more external rotation or be a straight abduction move based on your foot positioning.
However, like the basic clam it is also often misused. Make sure you don’t let your TFL compensate by turning your top toe down toward the ground. And make sure as you lift you drive your hips forward.
If you did want to remove the external rotation, say if you have Piriformis issues, you could actually lift the top leg straight up during the movement, keeping the knee bent, over keeping the foot down which will force external rotation.
Both can be great variations to include and you may alternate which you used based on what you’re trying to target!
Just make sure that, while you’re focusing on the side of your butt, you keep your elbow stacked under your shoulder and your back engaged to support it. You want this move to benefit your entire core, including those obliques as well!
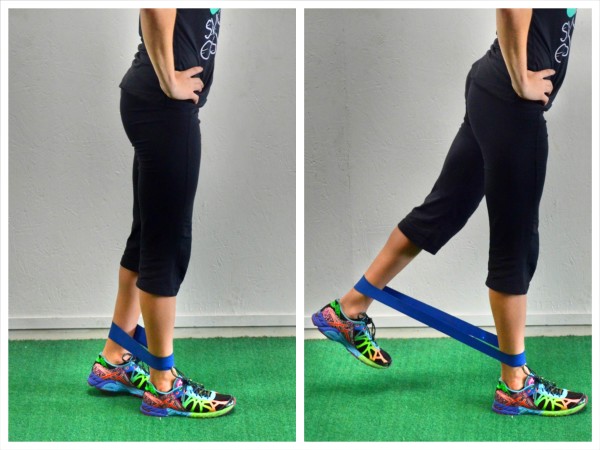
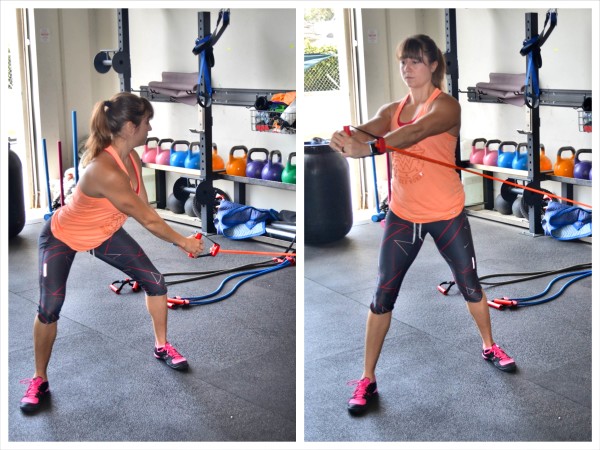
7: Figure 4 Glides
It can be easy to cheat with moves when we struggle to activate a muscle correctly. We call on other muscles to not only assist but we will seek out mobility from other joints. Often with lateral raise movements we will even try to swing the leg up higher as we lean away.
That’s why I love the Figure 4 move, especially with these glides.
This is a very small movement and can allow you to easily focus on that glute working. It can be easy also to feel yourself trying to cheat because you are holding in this raised position as you allow that leg to glide forward and backward.
It also engages the glute medius through hip flexion and extension.
Focus on sitting up nice and tall as you raise that leg on the side up. Think about keeping it level as you allow it to glide forward and backward slowly. You can even watch it to stay conscious of what is working.
And if you really struggle with wanting to lean away, you can put your shoulder against a wall as you set up.
But because you’re holding this position, do that easy assessment every once in awhile to make sure you aren’t leaning away!
8: 80/20 Glute Bridges
Often injuries and aches and pains aren’t just due to weakness but also an imbalance between sides and muscles. That means that often we need to do imbalance prehab, working only one side and even doing more reps on that side.
That’s why unilateral or single sided movements are key.
It’s why most of the moves included here are unilateral. However, unilateral moves can also be super challenging and serve as advancements for bilateral exercises as they add more instability and require to move the load or your own bodyweight with only one side.
That’s why I love these 80/20 Glute Bridges though. They force each side to work more but add in the assistance of your other leg to help you focus on the glutes working.
If you’ve struggled with the single leg glute bridge and feel your hamstrings compensating or lower back engaging in that movement, you can try this 80/20 variation to get that same benefit but with a move you can truly control.
Sometimes we need to regress to progress.
Make sure with this move that you stagger one foot out further so the foot that is closer in does 80% of the work. And then focus on that posterior pelvic tilt as you bridge, driving your knee toward your toe as you press up so you get your glute to power the movement over your hamstrings compensating.
SUMMARY:
Now how do you include these moves in your routine? The great part is there are a ton of different ways! But you want to probably only pick 1-3 to include as your activation in your warm ups for just 1-2 rounds. 15-25 reps or even about 30 seconds per move is often good.
The goal isn’t to fatigue your glutes but simply feel them start to work and establish that mind-body connection before your full workout.
If you are using them simply as a prehab routine, you may add another move or two on and do 3 rounds instead!
Need more glute activation series? Check out my Booty Burners…