FHP 343 – Embrace Your Negative Emotions

FHP 343 – Embrace Your Negative Emotions

I’d love to tell you there was a way to be happy 24/7.

But that’s just not the reality of being human.

Negative emotions are a part of life and a VALUABLE part at that.

I think too often we just try to avoid or ignore them, but they are going to be there regardless.

And actually often the more we “fight them” over owning up to them, the more they hold us back and drag us down.

I saw a great equation that was suffering = pain x resistance

And the point of it was the more we resist the negative emotion over embracing it and recognizing it, the more we actually suffer.

So how can you start to recognize negative emotions as a good thing?

#1: Recognize they’re normal. That you’re GOING to have them no matter how freaking amazing your life is.

Life is going to be full of ups and downs.

And honestly, you can only truly know the good by having experienced the bad.

I love the mindset even of setbacks can only happen BECAUSE there has been progress.

Negative feeling and emotions are part of life and they can even be a key component to helping us move forward and be happier long-term.

They can help us see when situations in our life and circumstances are off. They can help us realize a change is needed for us to truly move forward and be happier.

#2: Don’t just bury the seed. (Ignoring it doesn’t make it go away)

I think often we try to just ignore negative emotions and feelings. We even try to stamp them down to not have to deal with them.

The thing is that doesn’t truly get rid of them.

Often the more we ignore those emotions, the more they come back to bite us later.

It’s like burying a seed…it’s not gone…it’s actually going to GROW INTO SOMETHING MORE.

The question is, what is it going to grow into?

You want to control what comes of those negative emotions.

So just burying them hoping they grow into something good, or maybe don’t grow at all, is a recipe for disaster.

Instead you want to tend to those seeds and groom them to grow into something positive.

Face what is going on. It gives you control to shape how it impacts you in the future.

#3: See them as a learning experience – Assess and learn!

Negative emotions are showing us things we aren’t happy with. Things we are uncomfortable with. Situations we’d like to avoid in the future.

Experiencing those negative emotions can be a powerful learning tool so we don’t repeat the things that lead to those negative feelings.

Of course we don’t want to fear those negative emotions so much we don’t take risks, BUT we do always want to assess what we can learn from those situations to help yourselves avoid those negative feelings in the future…and even make them POSITIVE experience.

And not only can these negative emotions help us learn to create better outcomes for ourselves in the future, but they can also teach us to better embrace situations and CHOOSE how we perceive and use them.

Stuff is going to happen outside of our control. We just need to recognize we have a choice in how we perceive things.

So if you’ve always taken a negative perspective, maybe it’s time to even see if you can see the situation as an opportunity over an obstacle.

But don’t let negative emotions lead to simply avoidance. Assess the situation. Learn from and even recognize if it is simply the downside to another upside.

Because sometimes the negatives are part of getting something new and good!

The Most Underrated Shoulder Press

The Most Underrated Shoulder Press

The overhead press is a tough compound shoulder, tricep and chest exercise. It is also a great move to work your core, serratus anterior and even upper traps.

And while vertical pressing movements are key to include, they require more mobility and stability than we often realize.

They require not just shoulder mobility and stability, but also scapular and spinal mobility and stability as well.

The problem is, all too often our mobility and stability in these areas is lacking, and partly because of our common daily postures.

We spend far too much time hunched over our technology or commuting to and from work.

And this constant forward flexion, can lead to shoulder, scapular and thoracic mobility restrictions that may cause us to suffer from neck, shoulder and upper back aches and pains when we try to go heavy with overhead pressing.

These mobility restrictions can even be why your lower back is sore and achy after performing this upper body move!

So while it’s key we work to address these mobility and stability issues with our prehab work and including foam rolling, stretching and activation as part of our warm up, it may also mean that the basic overhead press is not the best option for us to start.

Because of these common mobility restrictions and the fact that so many of us compensate to try to replicate proper from, I actually love to sub in this often underrated overhead press variation, the landmine press.

It can help us get the full benefits of the overhead press with less strain on our rotator cuff as well as less risk of us arching and overloading our lower backs to compensate.

If you are currently working to improve your thoracic extension and shoulder mobility as well as your scapular control, you may find the Landmine Press allows you to include overhead pressing without feeling like you’re going to get injured.

Because of the slightly angled press, this move can more easily allow you to engage your back to support your shoulder and feel that scapular movement. It also requires less thoracic extension to perform correctly.

And my favorite variation of it, the single arm press, can even help you correct imbalances as you strengthen your shoulders, triceps and chest!

Before I dive into 3 tips to get the most out of this amazing move, I wanted to go over basic Single Arm Landmine Pressing Form.

How To Do The Single Arm Landmine Press:

To do the Single Arm Landmine Press, set a bar up in a landmine and grab the bar in one hand with a neutral grip, bringing the bar up to your shoulder. Stand with your feet about hip-width to shoulder-width apart and parallel. The bar should be just a few inches in front of your shoulder so you can hold it comfortably with your chest pressed out.

Think wide shoulders as you brace your abs as if about to be punched in the gut. Squeeze your glutes as well to help better engage your lats to support your shoulders.

Then press the bar out, extending your arm fully. Do not really lean into the press or round or reach out. Just press to fully extend your arm, then lower the bar back down to your shoulder.

Do not rotate or lean as you press. Keep your core engaged. Repeat all reps on one side before switching.

Now what are 3 tips to help you adjust this move to fit your needs and goals and get even more out of the basic variation?

#1: Vary Your Stance.

While this is an upper body move, how you stand to press can impact the additional benefits you get from the move.

In the basic form I mentioned, you will get a great anti-rotational core benefit. And the narrower your foot stance, the more you’ll have to fight your body’s desire to rotate.

You can also stagger your stance for a bit stronger base of support and to potentially even be able to focus on heavier loads.

But standing isn’t your only option for this move.

You can move to half kneeling, full kneeling or even seated!

While seated, you won’t be able to handle as heavy a load, it prevents you from compensating or seeking out mobility from other places. This move can be very core intensive and challenging.

Full kneeling will also be another challenging core option, requiring you to really fight the urge to rotate or lean. This variation can be great if you struggle with lower back pain during pressing and need to practice that ab and glute engagement.

Half kneeling is also a great way to really focus on ab and glute activation, but while being able to go slightly heavier than full kneeling. It is a great way to focus on using that glute activation on the knee that is down to better engage your lat on the pressing side to improve your shoulder stability and scapular control.

No one stance is better or worse. And you may find you even progress the move simply by adjusting the stance to adjust the different benefits you get from the move. We have to remember that the same, but different can be a form of progression as we use a move over different workout programming.

#2: Use Your BACK – Focus On Your Shoulder Blade Moving.

Often we ignore the importance of our back to improving our pushing movements. And not only the muscles of our back but the control of our shoulder blades in general.

When you set up to press and think about any of the cues from “press your chest out” to “wide shoulders” what you also want to be thinking about is engaging the sides of your back to support your shoulders and make sure you are unshrugged to start.

If you start the press with your shoulders shrugged and shoulder blades elevated, you are pressing from a weakened position – a position that is going to put more strain on those smaller muscles, like your rotator cuff.

By engaging the sides of your back to start with those shoulders down, you can press from a strong position.

And then don’t just think about pressing the weight out with your shoulder. Think about feeling that shoulder blade move. Your shoulder blade will upwardly rotate and posteriorly tilt as you press.

This movement is key to pressing safely.

So don’t just go through the motions of pressing the weight up.

Think about that back engagement as you set up to press from a point of strength and then focus on feeling your shoulder blade move as your back is involved in that shoulder flexion or press overhead!

#3: Don’t Ignore Your Core.

Whichever stance you use, your core will be engaged. Part of what causes lower back overload during overhead pressing is a lack of thoracic extension so we seek out mobility from our lumbar spine, but also a lack of proper core engagement to protect our lower back.

As you press, you do want to think about not only engaging your abs, but also your glutes. By engaging your glutes, you can actually help yourself better engage your lats to stabilize your shoulders.

And you’ll also help prevent yourself from being able to easily arch your lower back because you’re focused on squeezing your glutes to drive that hip extension.

Also by bracing your abs, think about engaging as if you’re about to be punched in the gut, you’ll further stabilize your spine.

Do not hold your breath though as you brace. You can think about exhaling on exertion even to better activate and engage things as you power that press.

You want to focus on everything involved as you press before you start to increase loads. This will ensure you utilize muscles efficiently and effectively, which can even help you lift heavier more quickly!

SUMMARY:

If you’re working to improve your shoulder, thoracic and scapular mobility and stability but want to include an overhead pressing exercise in your routine, consider using the single arm landmine press.

It’s a great way to get the benefits without the mobility and stability required of the full overhead press. And, because it is a unilateral move, it can even help you address imbalances between both sides.

If you find you don’t have a bar that is the appropriate weight, or even a corner to set up the bar in if you don’t have a landmine, one easy modification is a band incline press as well. The resistance band itself can even create a unique challenge of its own!

Love all of my amazing exercises, workouts and tips? Join my FREE Daily Newsletter below:

–> Join The RS Newsletter


FHP 342 – It’s YOUR Choice

FHP 342 – It’s YOUR Choice

Things in our life are going to happen. Things outside of our control.

There’s no denying that.

But we also have to stop blaming these events for our successes or our failures and realize that ultimately we are in control.

And this is actually a good thing.

Yes, it stinks accepting full control because it also means you’re responsible for your failures, BUT it also gives you the power to make a change at any time.

While we can’t control everything that happens in our life, we can control our perspective and how we respond ultimately to events.

We have to realize that we always have a CHOICE in what path we take.

And this responsibility and power can be scary.

It means we ultimately get the blame whether things work out or they don’t.

But that acknowledgement of our own control of the ultimate outcome is key if we truly want amazing results.

If we don’t believe we are in control of things, if we don’t believe we have a choice in the matter, we are constantly relying on outside things.

It means we can never really move forward on our own. It also means we never have to accept responsibility, to some extent, for our failures.

But the more we CHOOSE to accept control, the more we can ultimately steer our own car and head in the right direction even more quickly.

Recognizing that you have a CHOICE in how you perceive things can help you see even failures and setbacks as a learning experience.

Life is going to happen, but we can ultimately let those situations derail us because we couldn’t stop them from happening, OR we could choose to control our perspective and learn from the events and find opportunity in the new situation.

Whether something happens or not isn’t really what matters. What matters again is the choice we make in how we use those events to make or break us.

We have the CHOICE each and every day to believe we will be conquered by an event or that we will conquer any situation that comes our way.

I know it’s cliche but there is that oh so true line of “Whether you believe you can or you can’t, you’re right.”

But we have the CHOICE to believe, or not believe, in ourselves.

No one can make that decision for us.

Just like we have to make the CHOICE to be motivated. To want to move forward. To take action.

Our mindset is of our own making.

No amount of outside belief in us, or pushing, can force us to move forward. We have to make the decision to believe in ourselves and take action.

We have to make the CHOICE to go against what is instinctual and natural to make a change. We have to CHOOSE to step outside our own comfort zone.

Basically we have to recognize that so much of our success or failure is based on the mindset and actions we choose to take.

As scary as it is to take responsibility, the simple fact is, ultimately we are in control. And that, through our choices, we can improve our life, our results, at any time.

Embrace the power that mindset brings with it.

Today make one small decision to move you forward. Realize you can CHOOSE to succeed.

So make that your CHOICE and move forward!

The Side Plank – How To Do It The Right Way

The Side Plank – How To Do It The Right Way

Isometrics are key exercises to include in your routine to improve your stability and mind-body connection. They are a great way for you to target underactive muscles and really get them firing correctly.

They are a great way to make sure that you’re using muscles efficiently and effectively to work together to perform a movement.

Because we have to remember that part of getting stronger is learning how to quickly and efficiently recruit muscles to work together in the right order, each carrying the load they were meant to carry!

But so often these seemingly simple moves are taken for granted.

We simply try to get through the hold, or hold longer, instead of really focusing in on engaging muscles correctly as hard as possible.

That’s why I wanted to discuss one amazing core isometric, the Side Plank, and not only why this move is so key but also how we can get more out of it to not only strengthen our entire core but also avoid knee and shoulder aches and pains.

What The Side Plank Works:

The side plank is an amazing unilateral core move that can help you improve your shoulder, spinal, pelvis, hip, knee and even ankle stability when done correctly.

Because it’s a unilateral move and works each side independently, it an help you even correct imbalances. If you do have an imbalance, you may find you do an extra round or even only rounds of side planks on one side.

It is a great anti-lateral flexion, or anti-side bending, exercise to include to help you learn to brace to protect your spine.

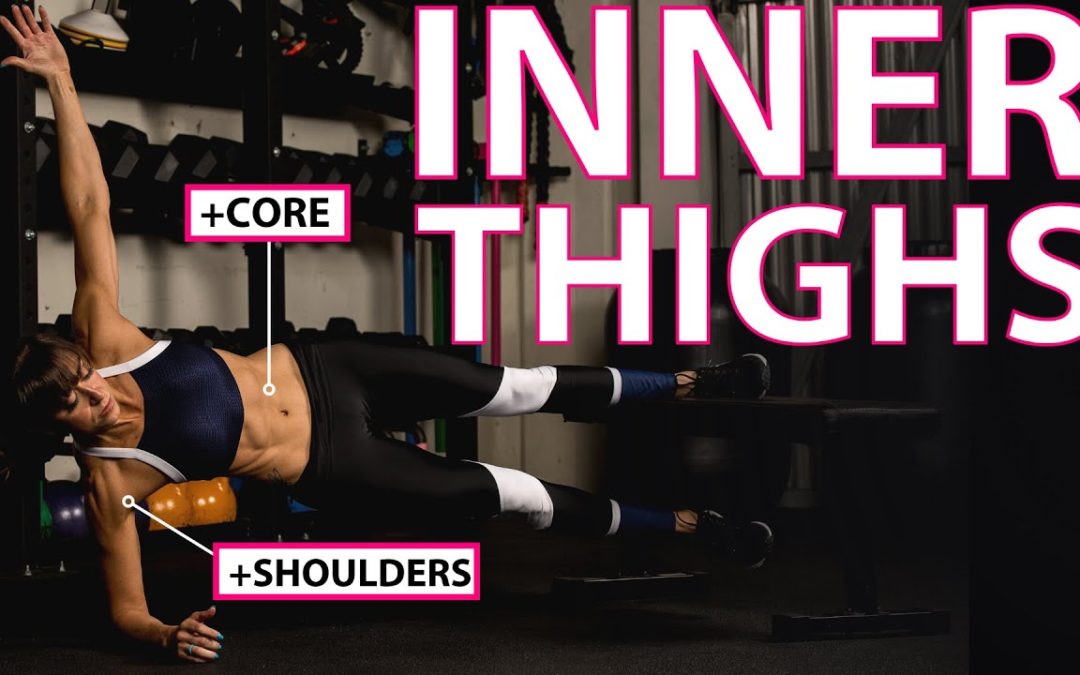
While the primary focus of the side plank is to strengthen your obliques, it will also work your glute medius, glute max, lats, shoulders, and QL (quadratus lumborum) to name a few of muscles involved.

It really is a full core move and can help you build stability from your shoulders to your feet.

But to get all of these benefits, you need to focus on what you actually feel working as you perform the hold and, at times, even concentrate on engaging each of the muscles involved a bit harder.

3 Form Cues To Improve Your Side Planks:

That’s why I wanted to share these 3 Key Form Cues to help you really proper engage the correct muscles as you hold.

#1: Flex your foot to create tension through your lower leg.

If you want to get the full benefit of the side plank and even help protect your knees and ankles, you can’t ignore the importance of creating tension through your lower leg as you hold.

This will not only improve your efficiency with the movement, but it will help engage the muscles from your ankles to your hips, including your glutes.

To flex or dorsiflex your foot, pull your toe up toward your shin to engage your lower leg before you even lift up into the side plank. Then really focus on pushing the side of your foot down into the ground as you hold to keep that tension.

You don’t just want to lift. You want to create that tension.

You can then either stack, or stagger your feet. Neither is technically bad and both can have their benefits.

Some argue that stacked is harder as there is a smaller base of support while others will argue the staggered is better to create tension and be able to better transition from front to side plank variations.

The key is truly creating the tension through your lower leg to improve your knee and ankle stability and even better engage those glutes!

#2: Squeeze your glutes.

Often we get so focused on this move as an oblique exercise we only lift through our torso, letting our hips ultimately sag and we miss out on the amazing benefit the side plank can have for improving our hip stability!

As you lift up into that side plank, squeeze your glutes to extend your hips and lock yourself into that nice straight line. Think about almost slightly squeezing your butt to push your hips forward.

This will help you avoid rotating toward the ground and even overloading your TFL and QL which can perpetuate SI Joint, IT Band issues and even lower back, hip and knee pain.

We want muscles to learn to engage to support each other, which often means focusing on that engagement in muscles that tend to be underactive.

By also engaging your glutes, you avoid rotating toward the ground and overloading your shoulder as you hold. Activating our glutes can actually help better engage our lats.

And not only do you want to focus on that glute max engagement, but you also want to think about the side of your butt lifting your hip up to maintain that hold. Focusing on the glute medius working will help you really use this move to improve your hip stability!

#3: Engage the side of your back to support your shoulder.

If you’ve ever found that side planks irritate your shoulder, you need to make sure you aren’t just relying on those smaller muscles to hold. You want to also engage your back and lats to support your shoulder properly and help stabilize it.

As you set up for the side plank, make sure that your elbow is underneath your shoulder and that you aren’t shrugging.

Even think about slightly pulling your shoulders down as you set up to hold.

Then as you hold at the top, to keep your back engaged, think about pushing your elbow down into the ground as you pulling your elbow slightly toward your feet. Your elbow will not move, but this focus as if you would adduct the shoulder if you could, engages your lat to help prevent shoulder issues.

Learning this engagement can not only help us avoid neck and shoulder aches and pains but also improve our scapular and shoulder stability, which in turn can improve our other pressing exercises, like our bench or push ups!

SUMMARY:

Using these 3 cues you can help yourself properly engage all of the muscles involved in the side plank to get more out of this amazing move and really improve your mind-body connection.

Focus on holding harder and run through what you feel working as you hold over just trying to hold longer or “get through” the time.

Try adding in some side plank holds for even 20-30 seconds to your activation series before your workout to activate everything from your shoulders to your knees!

FHP 341 – Am I Too Old?

FHP 341 – Am I Too Old?

Are there changes that happen as we get older?

100%!

But so often we blame our age for things within our power to change.

We also blame our age for issues we’ve ALLOWED to actually build up over time.

Improper dieting practices. A lack of a proper warm up….

Things we thought we could get away with when we were younger. That we thought “worked?”

Well…let’s put it this way….just because we could get results at the time, workout without warming up without any immediate consequences doesn’t mean we SHOULD HAVE.

And it’s also a big part of why we’re now “feeling our age.”

But because this is something we’ve…well…sort of done to ourselves…it also means we have the power to change it.

So how can you avoid feeling old? How can you control what you can control to stay lean and strong to your final day on this planet?

Here are 5 tips to help…that we need to try to teach people at younger and younger ages!

#1: Suck it up and learn about macros.

I know I sound like a broken record, but so often our desire to avoid learning about the fundamentals of nutrition catches up with us.

We may get away with slashing our calories super low when we’re younger or even out exercising our diet.

But as it becomes harder to build and retain lean muscle and metabolic adaptations can add up (both from menopause, muscle loss and previous improper dieting practices) we can’t just keep restricting further to see results.

By learning about macros we can actually help retrain our body to eat more, fuel for muscle growth AND achieve some stellar body recomposition.

Learning about macros gives us control to adjust as our needs and goals are constantly evolving. 

#2: Include PREHAB with each warm up.

I’ve heard so many people say they used to get away without warming up.

What I want to tell them often is that their “getting away with it” is actually what probably caused some of their current issues.

I used this analogy in another podcast, but it is like a leak in your ceiling. You may not notice it’s there. You may “get away” with keeping the same pipe…

But one day the leak will have added up enough your ceiling tile may collapse in.

So many injuries and issues are due to perpetual overload. And often when the injury fully shows and we can no longer push through…well that move is simply the final straw.

Start doing that mobility work daily to address common daily postural distortions and help prep your body to work correctly during your workouts.

Even just a 10 minute warm up with that full prehab process can go a long way.

#3: Stop saying you’re too old for things.

You want to know the clients that stay young forever? They’re the ones that never stop pushing themselves. 

That never shy away from challenges.

That constantly seek to progress moves.

Use it or lose it couldn’t be more true.

While yes, recovery times may change as well as even the types of training we are interested in…not to mention INJURIES may impact what we choose to do, age should never determine what we believe ourselves capable of.

At any age you can build strength, endurance and power.

It’s always about meeting yourself where you are at.

#4: Stop doing it because someone else did.

So often we don’t stop to assess our needs and goals.

We try to do something just because it worked for someone else even if it isn’t truly realistic for our lifestyle.

FOCUS ON YOU.

DO YOU!

What does your lifestyle look like and how can you create the healthiest version of that?

How can you help yourself build back in a sustainable way if you’ve been out with injury? 

How can you create a lifestyle balance that allows you to enjoy your glass of wine or dessert?

Don’t get caught up in someone else’s standards of what is healthy…focus on your needs and goals.

#5: Suck it up and go slow.

We need to get it out of our heads that results will happen overnight.

Slow results are REAL results…not just glycogen depletion and water weight being lost.

Slow results are also SUSTAINABLE results. 

We need to also realize that, the older we get, the longer we’ve potentially been doing the WRONG things. Also the longer we may have had the injury or the weight on.

And the longer we’ve been doing the wrong things? The longer it takes to correct.

As I like to tell clients, you didn’t get into your situation overnight and you’re not going to get out of it that quickly either.

The longer you’ve had the weight on, the more your body will rebel against the change.

We do not like change.

So get ready to be consistent and embrace that changes will take time!