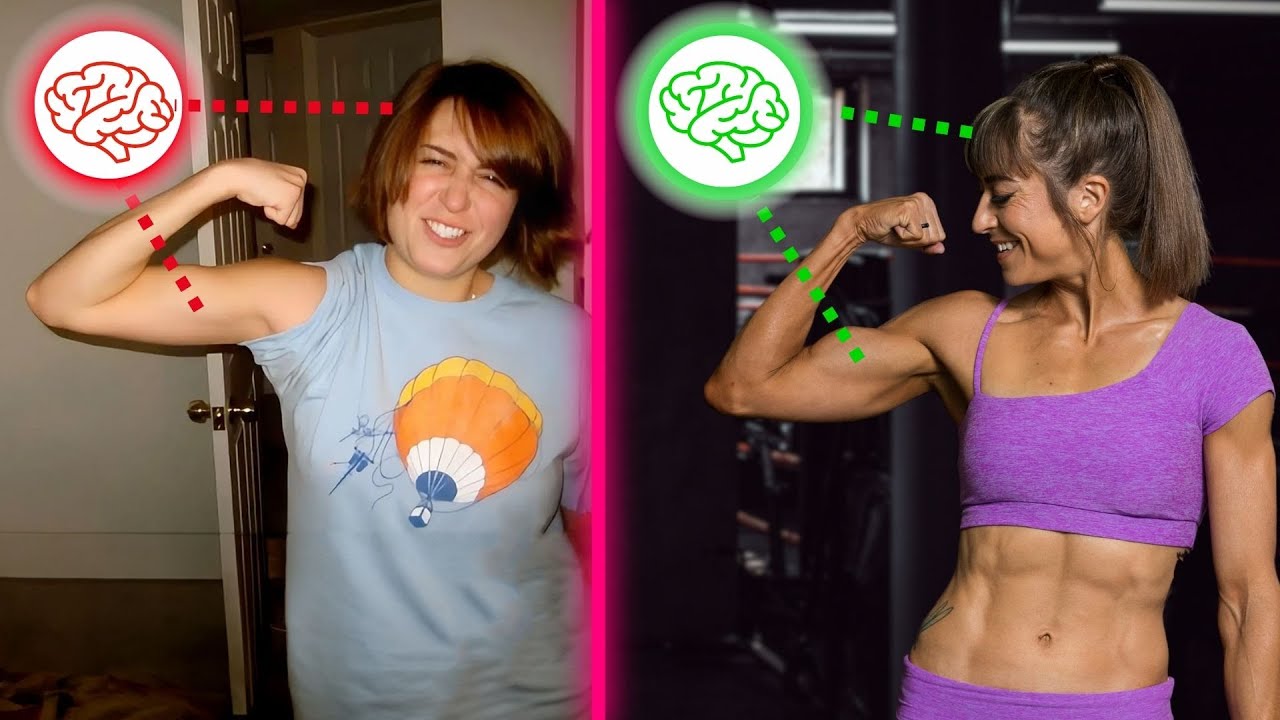
How Strong Is Your Mind Muscle Connection? (Take This Test)

How Strong Is Your Mind Muscle Connection? (Take This Test)

How aware of your body are you?

Do you think you have an amazing mind-body connection?

Well…here’s a test to find out!

I mention this because too often we’re doing the right moves yet not seeing the results we want.

And it’s because we’re going through the motions with our training, mimicking proper form.

But proper form doesn’t guarantee proper recruitment patterns.

Aka just because a move looks pretty doesn’t mean we’re using the right muscles or seeking out mobility from the correct joints.

And the more advanced an exerciser you are, the more you can easily cheat and compensate.

But this can lead to overload and injury and you not seeing the results of your training you want.

That’s why in this video, I want to take you through a quick test to assess your mind-body connection.

And I want to do this test for an area many of us actually struggle to activate correctly…

OUR GLUTES!

To do this test, you’ll just be performing what seems like an oh so simple move and is an essential basic…

The Bodyweight Glute Bridge.

To do this glute bridge assessment…

I recommend setting up your phone camera to film yourself from the side and even from the knees up on a second round through. 

This external feedback can then help you adjust form if you need to tweak things to get the correct muscles working.

As you perform this move, you are going to ask yourself 4 key questions at different points of the move to assess different muscles and even imbalances between both sides. 

If you have the camera running, you can verbally answer.

Otherwise you may want a piece of paper next to you to make notes on! 

Then set up as you normally would for the glute bridge.

I like to have clients place their feet flat on the ground at a comfortable distance from their glutes and bend their elbows to drive their upper arms down into the ground. 

Then you want to bridge up.

Pausing at the top of the bridge, ask yourself…What do I feel working the most? 

Lower Back – Yes or No?

Glutes – Yes or No?

Hamstrings – Yes or No?

Quads – Yes or No?

Relax back down.

Repeat the move a couple more times pausing to assess. Then record what you felt.

Then next, AS you bridge up, ask yourself…

What do I feel working FIRST?

Is it your hamstrings, glutes, quads or lower back? 

Write down which muscle you feel engage FIRST.

Next, as you repeat the bridge, assess both on the way up AND as you pause for a second or two at the top, to ask yourself…

Do I feel one side working more?

Yes or No?

And if yes, which side?

Even make note of whether or not you just feel one side MORE or if you ONLY feel one side truly engaging.

The final assessment you want to do, is focusing on WHERE you truly feel your lower back, glutes or hamstrings working especially.

Do you feel the top of your butt under your SI joint working?

Yes or No?

Do you feel in the meat of your glute working?

Yes or No?

Do you feel right under your butt working?

Yes or No?

Or do you feel the middle of your hamstring working?

Yes or No?

Make a note, yes or no for each.

Now let’s break down what this information helps you understand about your glute engagement…

This may come as no surprise, but what you should have felt driving this movement is your GLUTES.

However, many of us do feel our lower back or hamstrings working and even taking over for our glutes during this move. 

We even sometimes feel our quads trying to engage although we can also feel them stretching as the glute bridge IS a hip flexor stretch. 

But often we don’t fully realize what is driving the movement when we get caught up only trying to focus on form.

We even simply think, “Oh my lower back is just weak and needs to get stronger.”

But really this shows that other moves are taking over when our glutes should be engaging.

This means we need to address our mind-body connection.

So if you found your lower back, quads or hamstrings compensating, I want to share some tweaks to your glute bridge form you may want to consider. 

Especially if you felt under your butt or your hamstrings working, this can mean your hamstrings are synergistically dominant.

Yes…under your butt is often that hamstring origin area becoming overworked.

And sometimes it is us not realizing that it is NOT our glutes but actually our hamstrings working right there that can lead to hamstring tendinopathy or tendinitis. 

Not to mention our hamstrings constantly being overworked is why they perpetually feeling tight no matter how much we stretch.

And when they are constantly overworked this can lead to knee pain, hamstrings strains and pulls and even perpetuate your lower back issues. 

So making sure the correct muscles are working during a fundamental more focused movement is key so we can lift more and run faster and avoid injuries with more complex movement patterns.

I will also share some tips as well if you found that you had an imbalance between both sides. Sometimes this can mean we feel only one side working or that we feel our glute on one side but actually our hamstring on the other!

But first, how can you adjust your form if you don’t feel your glutes working like they should?

Here are 5 quick tips…

#1: Focus on maintaining that posterior pelvic tilt from the start and don’t get caught up in bridging higher.

This can help you make sure you’re using your abs to protect your lower back AND the posterior pelvic tilt engages the glute max.

Also, often in an attempt to bridge up higher, we arch our back at the top over extending our hips further, which overloads our lower back and can engage our hamstrings.

#2: Drive your knees toward your toes.

Focus on pressing through your entire foot and as you bridge up driving your upper arms into the ground, don’t push yourself backward.

Focus on driving those knees forward to help you avoid overusing your hamstrings.

This can even help if you tend to feel your quads working too.

#3: Focus on STOPPING the lift with your glutes.

So often in trying to work through a full range of motion, we stop engaging muscles to power the move.

Instead of trying to get a bigger movement, try and really squeeze your glutes hard to prevent yourself from being able to lift any higher. This focus on that activation of the glutes will make sure you’re driving true hip extension while avoiding anything else compensating!

#4: Pause and adjust.

At the top of the bridge, pause and then try little adjustments. If you move your feet in closer to your butt does that help? Or does moving them further away help you engage your glutes better? 

While technically moving our heels further away toward a straight leg glute bridge engages more hamstrings, you may find, due to hip tightness that having your heels in too close to your butt engages the hamstrings more or makes you arch your back or even feel your quads.

So as you hold at the top, assess what you feel working and play around with even your posterior pelvic tilt or trying to engage each side. 

Even put a hand on your glutes to try and give that tactile cue to feel them working to make that mind-body connection! 

That can allow us to get the positioning we need!

#5: Try other bridge variations.

Sometimes we need to first adjust the variation we use to recruit the correct muscles. Slight changes to our posture and positioning can really impact things and even tools can provide an extra stimulus to improve our mind-body connection.

Even doing a move we feel working our glutes correctly prior to the one we struggle with can help us established the mind-body connection in that second move.

Two great variations to try if you’re struggling to engage your glutes can be the frog bridge as the external hip rotation can often help. 

Or the mini band glute bridge. Pushing out on the band can help engage our glute medius which can help us better engage our glute max. 

The band can also sometimes help if you struggle to get both sides working together!

Now To Address An Imbalance Between Sides… 

I do want to note we will NEVER be perfectly evenly BUT we do want to note when one side isn’t pulling it’s weight.

When we have an imbalance this can lead to our stronger side taking over during other moves. This can lead to injury on that dominant side.

It can also mean that we risk injury on our weaker side if it is fighting to keep up. 

So we want to address imbalances as much as possible and be conscious of them.

This is where unilateral glute activation may be key. 

You may consider extra work for that weaker side, even swapping in something like the single leg reverse hyper to get that glute working. 

Or you may use something like the 80/20 glute bridge to help you focus on each side more independently. 

We have to recognize how challenging the full unilateral or single leg glute bridge is, which is why I recommend the 80/20 version instead.

If you can’t control the two-leg bodyweight bridge, there is a good chance your weaker side will continue to struggle with a full single leg variation.

But modify the move or even add in unilateral work to make sure you aren’t feeling other muscles take over for that weaker glute!

Bonus Tip:

And a final bonus tip, which can be helpful whether you’re addressing an imbalance or even just your hamstrings, lower back or quads engaging when they shouldn’t…

Foam Roll those overactive muscles PRIOR! 

The impact of foam rolling is short-lived, but by rolling that muscle that wants to compensate before you then do the exercise, you can help interrupt that mind-body connection so you can better engage the proper muscles.

Especially if you feel only the hamstring on one side, trying rolling that muscle prior to the glute bridge to relax it to make it easier to establish that mind-body connection to your glutes!

Just remember, changes to our mind-body connection and recruitment patterns won’t happen overnight.

Our mind and body will want to default back into patterns we’ve created over time that now feel natural.

But if we don’t work to address them in fundamental moves like this, we put ourselves at greater risk for injury when we lift heavy, run or cycle.

Not to mention we may not be seeing the improvements in our other training that we want because we aren’t using muscles as efficiently to power our training!

–> Download The Workbook Sheet

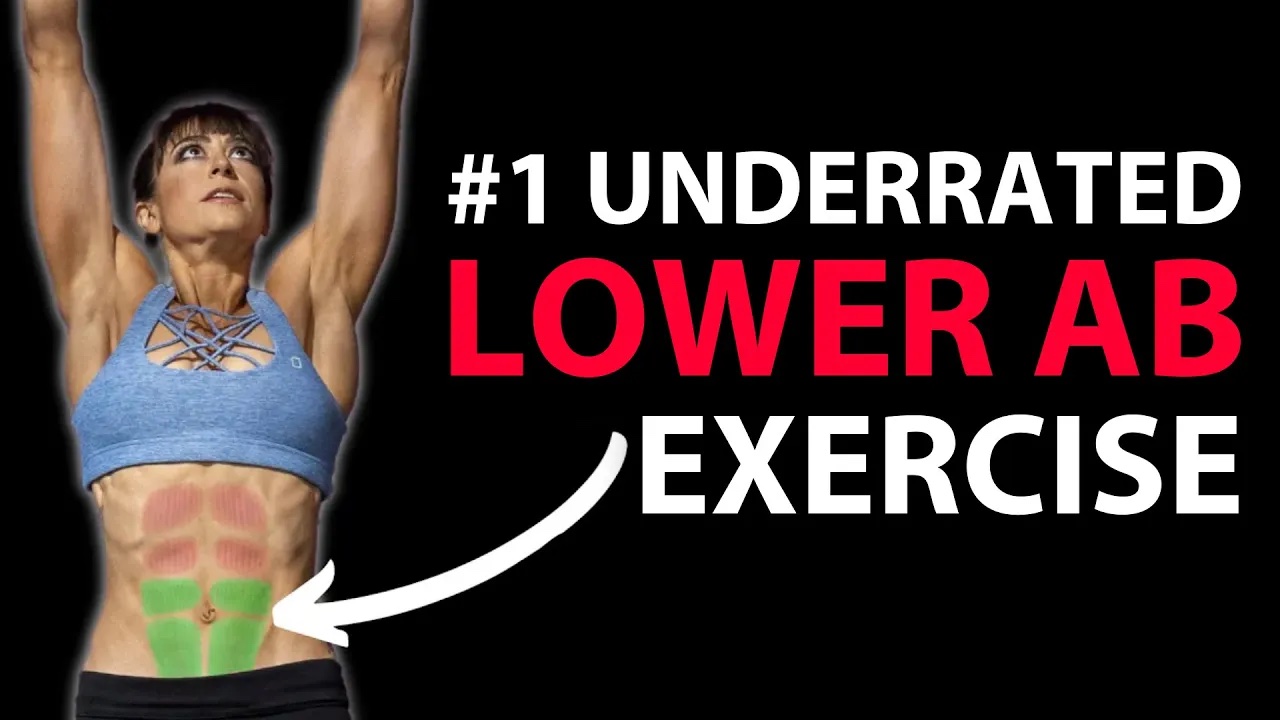
The Most UNDERRATED Lower Ab Exercise

The Most UNDERRATED Lower Ab Exercise

No you don’t have a lower ab muscle.

But you CAN target the lower portion of your rectus abdominis or your LOWER ABS to a greater extent based on the moves you include in your workout routine.

And one great way to target that area is with lower body crunches.

They’re simple and effective…if done correctly.

There are also a variety of ways you can regress and progress this move to match your needs and goals.

However, how you do this amazing move can really impact where you actually feel working and the benefits you get from it.

That’s why in this video I want to go over how to properly do this movement and some amazing ways to really feel those lower abs working.

But first I wanted to discuss two areas we often feel compensating during this exercise that can end up overworked and injured, leading to this fabulous move being hated on…

And they are our hip flexors and lower back!

Do you ever feel your lower back or hip flexors taking over when you do a lower body crunch? 

This is because you aren’t properly bracing your abs!

While yes, any exercise that involves hip flexion (that bending at the hip) WILL work your hip flexors… 

So often we rely on our hips over bracing our abs which ultimately ends up with us only feeling our hip flexors or lower back during this ab exercise! 

To prevent this from happening, there are a few things you want to focus on….

Focus On These Tips:

#1: Set up bracing your abs, tucking your hips slightly up toward your ribs. 

This posterior pelvic tilt will help you feel those abs engage and even engage your glute max a bit.

This glute max engagement inhibits your hip flexors from taking over as much.

#2: Initiate the crunch of your lower body through spinal flexion. 

Too often this move will be cued just as tucking your knees in which leads to us only bending and extending at the hip to raise our feet up off the floor and lower them back down.

But really we want to curl in from our SPINE. This spinal flexion is what engages our abs to power the knee tuck up.

#3: DO NOT SWING OR USE MOMENTUM. 

Slowly roll to tuck in and then, one vertebrae at a time, lower back down.

Do not release that ab brace at the bottom.

Keep your abs engaged as you touch your feet down! 

By focusing on this ab engagement and spinal flexion you not only protect your lower back, preventing it from arching up, but you disengage your hip flexors through that glute max engagement and use of the abs to curl in over just bending at the hip.

Building off of this focus on engaging your abs even before you start the movement…

I wanted to go over some tips to implement this basic lower body crunch properly before I then dive into some fun modifications and variations to match your needs and goals.

How To Do The Lower Body Crunch:

To do the lower body crunch, you want to set up lying on your back with your hands down on the ground beside you or behind your head.

To help you brace with the posterior pelvic tilt, pushing your palms and arms straight down beside you into the ground can help.

Bend your knees and curls your heels in toward your butt. This active curl in as you flex your feet should even help you feel your hamstrings engage to further prevent your hips from compensating.

Tilt your pelvis, drawing your hip bones up toward your ribs. Press your arms down into the ground.

Then think about curling your ribs up toward your hips as your knees curl in toward your chest.

Do not let yourself just flex at the hip. Really focus on curling your spine to lift your butt up.

Move at a controlled pace, then roll back down to tap your heels down.

Do not fully release engagement of the abs at the bottom.

Then curl back in.

Focus on that exhale as you curl in to help you engage your abs!

Then repeat the move, again focus on that curl starting from your spine over just your hips bending!

Keep that heel pulled in tension to help you avoid only bending at your hips!

Struggling? Try These Modifications!

If you’re focusing on these cues and struggling with getting your abs to engage there are two things I like to do with clients that can help…

#1: Hold on to something overhead. 

#2: Use a roller squeezed between your calves and hamstrings. 

I’ve even combined these two things as a variation to really isolate those abs. 

By holding on overhead as you perform the lower body crunch, you can help engage your lats, which can lead to better glute engagement as well.

This can help you create tension through your backside that protects your lower back during the move.

This pull down can also help you crunch your ribs slightly down toward your hips to better brace your abs.

It can also give you more control as you curl your knees in toward your chest.

And the roller can help you maintain that hamstring engagement to prevent your hip flexors from taking over.

By having to squeeze that roller into your legs, you prevent yourself from extra movement at the hips as well.

Combining both of these techniques may prove a killer combo even to really target those lower abs with a slow curl in and lower back down!

And the great part about this basic movement is there are so many ways you can change it up to match your needs and goals!

If you’re feeling really in control of this lower body crunch, you may still find the modifications provide progression through the same but different.

They can even help you isolate those lower abs in new ways.

Try These Progressions:

But you may also find you want to progress to a double leg lower with your legs straight or even a leg lower plus. 

That bonus spinal flexion at the top of the basic double leg lower is a great way to work those abs extra as they are worked by that flexion of the spine!

You can even just simply add weight to the basic lower body crunch. 

The benefit of adding weight is not only that the resistance makes it harder but also that, by holding a weight between your legs, you engage your adductors.

Because of the connection of your hip flexors to your pelvic floor, and your adductors are also a hip flexor, you may find that by squeezing a medicine ball between your legs you even feel your core working more with very light weight!

And if don’t have weight and want to work your upper body more, you can even take this lower body crunch up off the ground with hanging leg raise variations or even dip hold leg raises. 

But with all of these variations, you want to make sure you target your lower abs by bracing those abs with the posterior pelvic tilt and actually flexing at the spine as you lift.

It is tempting to just let the movement only occur at the hip when you fatigue without your abs engaged.

Remember this will just lead to your hip flexors working, not your abs getting the benefits you want!

So regress if you feel yourself starting to cheat!

Using these tips you can really target your lower abs with the amazing and oh so simple lower body crunch.

Perfecting basic moves like this can help us see better results faster and really target those stubborn areas we want to work!

Try This Ab Burner:

And for a quick and killer burner using this move, try this 100 Rep Ab Burner…

This is great to use once a week in your workout progression.

Completing 1 round through the circuit.

CIRCUIT:
20 Heel Raised upper Body Crunches
20 Lower Body Crunches
20 per side Oblique Crunches
20 Full Body Crunches

For more killer workouts, and even ab burners, join my Dynamic Strength App!

–> LEARN MORE

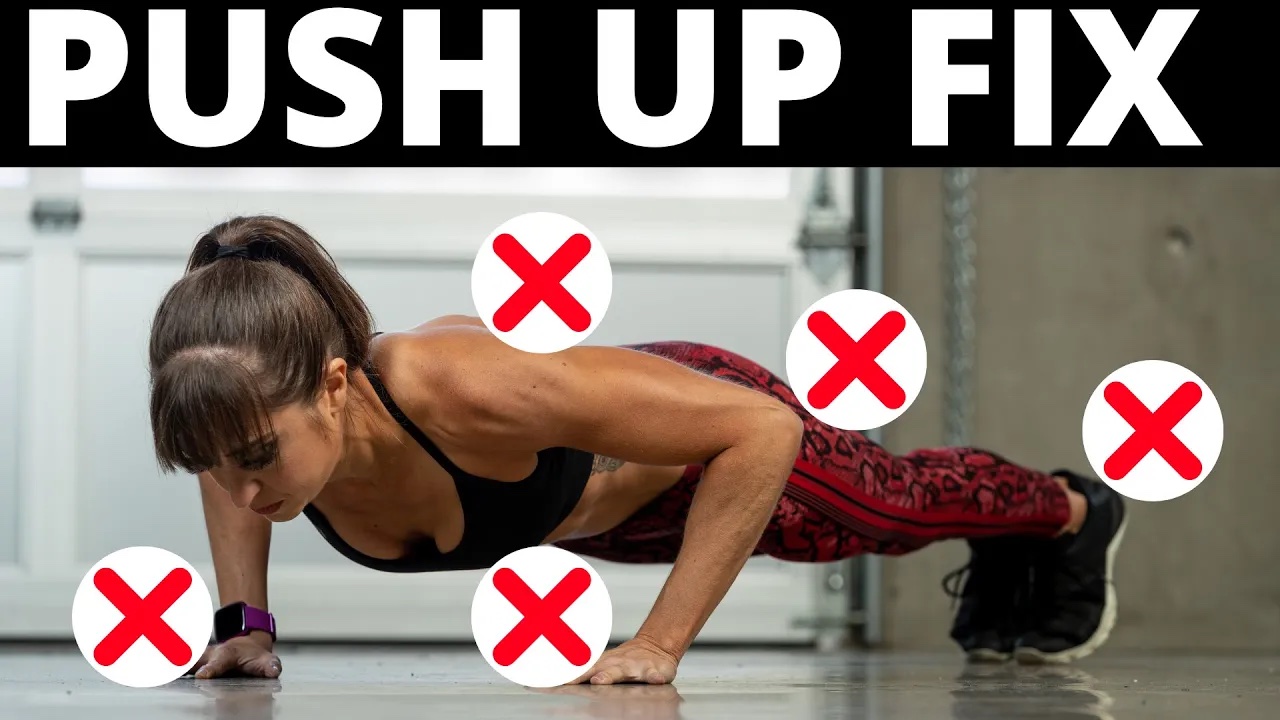
5 Tweaks To improve Your Push Up Form

5 Tweaks To improve Your Push Up Form

Want to improve your push ups?

Then start focusing on what muscles you actually feel working during the movement.

When we get the correct muscles truly powering an exercise efficiently, we can see improvements almost instantly.

It’s not that we all of the sudden POOF got stronger…

It’s often just that we are using the correct muscles to the correct extents at the right times.

That’s why I wanted to share 5 quick tweaks to your push up form that can help you improve your push ups immediately.

These are mental cues and areas to focus on as you not only set up in the push up, but even perform the movement.

These changes help you load more efficiently and better engage those bigger muscle groups to support each other.

Not to mention these tweaks will help you avoid those common aches and pains that happen with push ups from adding up!

At the end I’ll also share a bonus tip to help you learn to make these adjustments and truly focus on what you feel working.

So let’s first start with our connection to the ground. As we need to create tension through the ground to properly activate everything.

#1: Spread Your Fingers And Grip The Ground With Your Entire Hand.

If you want to engage your chest, shoulders and triceps properly, you need to focus on your hand placement.

Too often we just set up with no thought as to the pressure we are really applying through our hands.

This not only leads to a less powerful press as we don’t fully activate our chest, but it can also lead to overload of our wrist and elbows.

So spread your fingers wide and focus on gripping the ground with every finger tip as well as your thumbs.

You want your middle fingers pointing straight ahead as well. This helps keep your shoulders in a good position.

Often we may find our hands want to turn in as our elbows flare out, and not only does this overload our wrist and elbows but it internally rotates our shoulders and can lead to us shrugging and ending up with neck or rotator cuff issues.

It also prevents us from having as strong a press because our chest can’t engage correctly and neither can our back.

So don’t just rush the set up. Focus on your hands outside your chest and that tension into the ground through your entire hand.

This intentionality in your set up and tension down into the ground will not only help you better activate your pecs and protect your upper body, but it will also set you up for success with tweak number 5 to improve the push back up to the top of the push up.

But you don’t want to only focus on your hands connection to the ground. You also want to pay attention to your feet.

Because efficiency in the tension you create from your head to your heels can help you more easily bust out those push ups.

That’s why #2 is to Drive Back Into Your Heels. 

When you set up and place your hands outside your chest, you want to focus on pushing backward through your heels off the balls of your feet.

This helps you flex your quads and better creates that tension all the way up your body so you aren’t overloading your chest, shoulders and triceps.

Too often we end up pushing forward off our toes, which creates more strain and resistance on our upper body, making our press less efficient.

By driving back through your heels, you don’t add more load to your upper body and you even help yourself avoid the hip sag we often see with push ups because our core isn’t braced properly.

So push down into the ground as if pushing it away with the balls of your feet as you drive back through your heels.

And be conscious as you push back up to keep pushing back through those heels.

But it’s not just our lower body we want to be focused on with what we consider to often be a chest, shoulders and triceps move…

Which brings me to the 3rd area you want to focus on…

Your back!

#3: Focus On Your Back. 

Often when we do push ups, our hands start to drift out in front of us instead of staying by our chest.

We also tend to shrug.

Daily postures can lead to this feeling more natural and “easier” with our push ups.

But this puts more strain on our shoulders and triceps and doesn’t allow us to use the strength of our chest optimally.

While it can “feel” easier it actually makes push ups harder.

It’s why we can struggle to have that power in our push ups.

To avoid this happening and protect even our neck, shoulders and elbows, we want to focus on engaging our back and even the movement of our shoulder blades as we press.

As you set up for the push up, shrug your shoulders and then pull them down hard as you set up with your hands outside your chest.

Pulling those shoulders down and locking them into place should make you feel along the sides of your back under your armpits engage.

This back engagement is key.

Even think wide chest as you set up.

Then as you lower down, you want to feel your back pull your shoulder blades toward your spine.

This engages your back and stretches your pecs to load them.

As you then push back up in the push up, you will feel your shoulder blades move apart.

But also as you press back up, you want to feel your back stay engaged to keep your shoulders from shrugging up by your ears.

All of this allows you to better optimize how you’re using your upper body to push.

And while it can feel harder to start as it is breaking what feels natural, it ultimately will allow you to use the power and strength of those bigger muscles more!

It is all about using what is meant to power the movement and using those muscles efficiently.

That’s why you also want to focus on tension in different muscles as different points.

What you focus on in your setup may change as you lower down and then especially as you move to push back up!

Ever notice you can lower back down but if you lower just a bit too far, you can’t push back up?

Finding this is holding you back from that full range of motion in your push up?

This transition and push back up, means changing what you’re focusing on to keep that clear tension throughout your body.

It’s why adjustment #4 is to Exhale And Squeeze Your Butt As You Push Back Up.

We are stronger in the eccentric portion of the push up, which is the lower down.

That’s why we can find the push back up is where we lose tension and struggle.

Often we may find our chin tucks or our hips sag and then our elbows want to really flare out.

By exhaling on that exertion to push back up, we can help yourselves create better core tension and avoid the sag to push back up as one unit.

And by squeezing our glutes we can avoid our butt wanting to push up first as well.

So when you hit what may feel like a stick point, exhale hard and squeeze your butt to control your form as you push back up.

And while the exhale and butt squeeze can help with maintaining that nice plank position, tweak number 5 can help you keep that nice upper body position and even help you continue to drive back into your heels to further reinforce that plank position.

Tweak #5 is to Push The Ground Away As You Drive Up. 

Too often we just think about trying to get back up to the top of the push up which is why our butt can go back first or we find our shoulders lift as we arch our back.

We lift up in pieces.

By creating that good core tension with the exhale and butt squeeze we can then drive back up with our body moving together by focusing on pushing the ground away with our hands.

It’s why setting up with that tension to start is so key.
When you push the ground away, focus on gripping it with every part of your hand. And even think about almost trying to pull your hands together to keep those thumbs down.

The push up involves horizontal adduction of your shoulders, which engages your chest more.

So almost pretending you would fly your arms together if the ground wasn’t in the way, can help you get more chest involvement to press up.

And often as we go to push up, we come forward on our toes, losing tension.

But by focusing on pushing the ground away, we can help ourselves push back into our heels.

This reinforces that core tension and helps us keep our back engaged to further promote us using the muscles of our upper body efficiently for a powerful push back up!

Bonus Tip:

And while all of these form adjustments are amazing, it can be hard to focus on doing them when we are using a push up variation we can’t yet control.

Especially the longer we’ve been compensating and our form has been off, the harder it can be to change what has become “natural.”

So as much as we want to do a harder variation of the push up, sometimes we do have to regress to progress to start and train these changes first.

While they will help you quickly improve your push ups, do not hesitate to even modify off an incline, or higher incline, to start to build up with proper engagement.

That little step back can launch you forward faster!

Improving your movements and even feeling stronger, is partly about that efficiency of movement.

Use these cues and form tweaks to help yourself rock those push ups by getting the correct muscles working together more efficiently!

Want to improve your push ups? Here’s an amazing 30 day workout plan to help!

–> 30-Day Push Up Challenge

The Best Leg Exercise (You’re Not Doing)

The Best Leg Exercise (You’re Not Doing)

This squat is NOT for everyone.

Even modified it is a challenging movement.

But it is also an amazing unilaterally focused exercise and lateral movement that can improve your ankle and hip mobility and stability while helping you improve your leg strength.

It is a great accessory move to help you really improve your single leg squats!

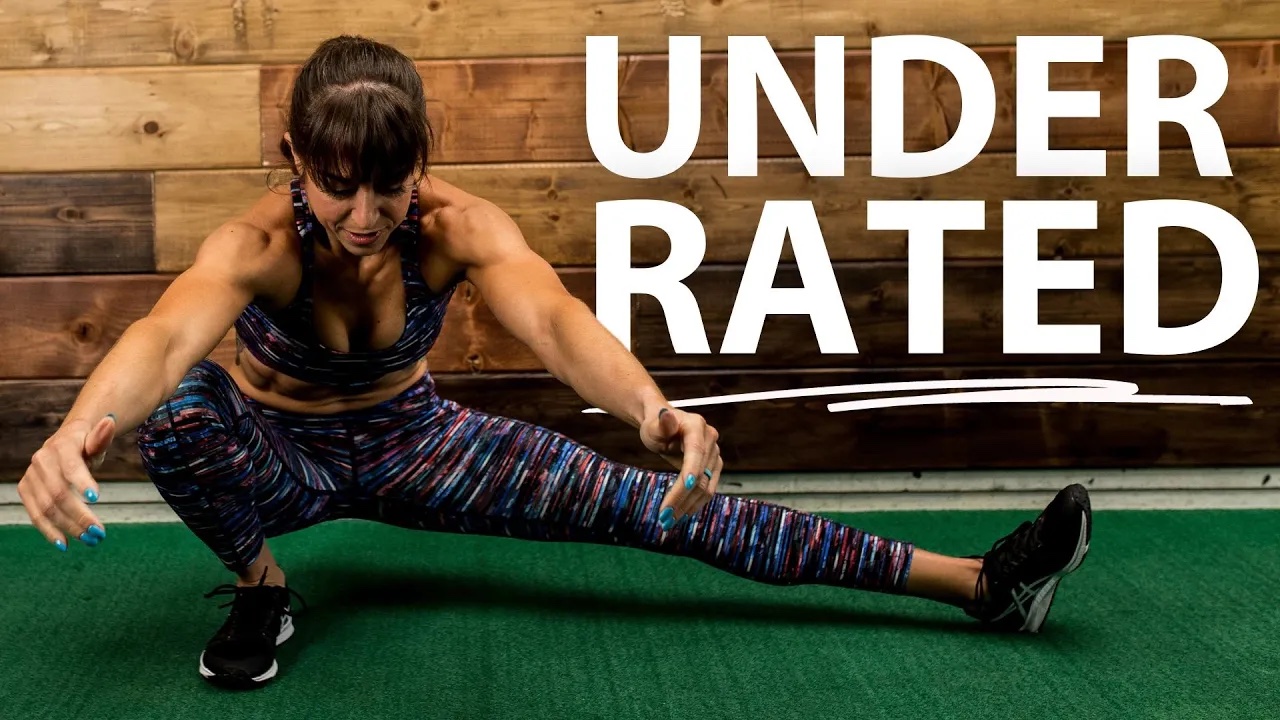
This amazing and often underutilized exercise is the Cossacks Squats!

In this video I’m going to break down how to do it as well as ways to modify it.

But just remember to regress to progress if you haven’t done this before.

And just because this is an amazing move, it doesn’t mean every version of it will be right for you!

How To Do The Cossack Squat:

To do the Cossack Squat, stand with your feet wider than shoulder-width.

Then shift your weight to one side, bending that knee as you keep the other leg straight and rotate that toe up toward the ceiling.

You’re pivoting on that one heel as you transfer your weight more to the side you’re squatting down on.

Sit your butt down toward your heel, still driving down into the ground through your other leg out straight.

Sink as low to that side as you can.

You aren’t sitting back like a hip hinge or traditional side lunge but sinking into a squat which means your knee will travel forward over your toe. Just make sure that heel doesn’t come up.

Then drive back up, pushing through that full foot down and the heel of your other leg. Come back center with both legs straight then repeat, sinking to the other side.

To progress the basic bodyweight, you can hold a weight up at your chest. This, while making the move more challenging, can also help you better brace your core!

This move is HARD.

It is an advanced move that requires a good deal of mobility and strength.

And if you’re just starting out with it, you want to be conscious of those mobility and stability demands.

So I wanted to share some different ways to modify this movement to match your needs!

The first way to modify is to – Limit The Range Of Motion 

We always only want to work through the range of motion we can control.

Be conscious though as you limit how deep you sink into a squat that you don’t end up turning this into a hip hinge.

To even help give you a target, consider sitting to a bench, chair or box!

The second way to modify is to – Hold On For Assistance. 

Sometimes part of what limits our ability to sink lower isn’t just the strength of our legs or the mobility of our hips and ankles.

It’s even our core stability.

Holding on to a suspension trainer, doorway or pole, can help us brace that core better and reduce the resistance on our legs just a bit.

This can help us work through a bigger range of motion at times than we would be able to otherwise.

As you progress, hold on with even just one hand or a lighter touch before progressing to the third modification option.

The third way I like to modify is to – Use A Weight To Counterbalance. 

Often we think that holding a weight just makes the move harder.

But there is a difference between pressing the weight out as we sink to help stabilize our core and counterbalance ourselves and holding the weight in at our chest to load the move down.

By pressing a weight out as you sink, you can help yourself stay more stable and engage your core better.

This is a great final progression if you are able to work through a full range of motion but can’t yet fully do it with just your own bodyweight.

Now I just wanted to share a few key reminders so you can get the most out of this movement.

First…The Cossack squat is a SQUAT not a side lunge. 

This means you want to focus on squatting down not hinging over like we often do to load our glutes with the traditional side lunge.

You also want to make sure you do drive off that heel of the foot that is turned up to push back center.

And you are pivoting that foot up unlike a traditional side lunge.

Second…If you can’t keep your heel down, include some ankle mobility work in your warm up and only go as low as you can control.

While our hip mobility may be a limiting factor at times, too often we ignore the importance of our ankle mobility to sink deep and even avoid our knees from becoming overloaded.

Doing a calf foam rolling move,stretch like the single leg foot and ankle stretch and even an activation move like the plate weight calf raise, could all be great exercises to include in your warm up to help!

The final note I wanted to make is for those with knee pain.

This move may NOT be right for you although we do always want to build back to as many movements as possible.

If you do have knee pain and struggle with controlling active knee flexion currently, consider a side lunge with a hip hinge instead to still work on lateral movements and still strengthen your body in different plans of motion! 

If you’re looking for an advanced bodyweight exercise to challenge yourself at home or simply want to improve your mobility and strengthen through a full range of motion to even build up your pistol squats, try including the Cossack Squat in your workout routine!

The #1 Way To Get Lean (And Strong) At Any Age

The #1 Way To Get Lean (And Strong) At Any Age

Muscle is the secret to longevity.

If you want to be lean and strong till your final day on this planet, you need to focus on building muscle.

But if you want to build muscle, you’ve got to work at it.

We lose muscle, and strength, as we get older, but part of that is OUR fault.

Because it is partly our fault, this also gives us the power to CHANGE and reverse this muscle loss.

So while it may get harder as we get older, that isn’t an excuse.

It just makes it all that more important we do everything we can to build it.

That’s why I want to share not only 5 essential tips to build and retain lean muscle as you get older but also just give you this warning…

Even if you want to lose fat, or achieve body recomp, you can’t keep doing what you’ve always done!

What used to work in your 20s and 30s, won’t work in your 40s, 50s and 60s…

Especially as you go through menopause.

That’s why it’s key you focus on building that lean muscle NOW, not tomorrow or the day after and embrace the changes needed!

Before I dive into these tips, I do want to highlight why it is so key we do what we can in terms of lifestyle changes to avoid not only muscle loss, but promote optimal muscle hypertrophy….

Because as we get older, there are numerous factors working against our muscle retention and gains.

Research has shown we can start to lose 3-5% per decade starting after 30, especially if we aren’t active.

When we were younger, our body was primed from a hormonal perspective to build muscle basically without us trying.

It’s why it’s also so dangerous for us to get stuck on protein intakes and training techniques from research done on 20 year olds.

Their bodies are primed to grow muscle…basically they can think about growing muscle and it grows.

Now this isn’t an excuse to just accept decline as we get older.

Accepting muscle loss or belly fat or injury because of your age, is the fastest way to get old quick and feel and look horrible.

But it is key we are aware of not only how our body changes, but that these recommendations don’t take into account the decades where our body isn’t working with us, but instead slightly against our strength and muscle gains!

Our body isn’t as efficient at utilizing protein for repair as we get older.

We are slower to recover. And injuries may have added up.

During menopause, inflammation and sleep and energy issues can also negatively impact not only our workouts but also our ability to gain muscle.

And while you may have bounced back after inconsistent workouts or injury in your 20s and 30s, all of these factors make it harder to rebuild lost muscle as you enter your 40s, 50s and 60s.

But even more essential you do what you can to be consistent with your training.

On top of all of this, our busy lifestyles and improper dieting practices to lose fat earlier on, may have also lead to muscle loss.

And this will only compound if we don’t now take action.

So stop waiting to address it…

Address it now!

And realize that, even if you want to lose fat and achieve amazing body recomp,you’ve got to stop the starvation and overtraining cycle!

Which brings me to tip #1…You may have to ditch the scale.

Stop freaking out at scale fluctuations.

The scale is going to increase.

Sure if you’re losing fat as you gain muscle, you may not see a change.

One pound lost of fat as you gain one pound of muscle leads to no change, although you’ll look a whole heck of a lot leaner.

BUT if you want to focus building lean muscle, you need to embrace GAINING weight on the scale.

I can tell you personally earlier on in my body recomp journey, this was a hard thing to accept.

Especially if you’re coming off a phase where you worked so hard to lose that stubborn fat.

The last thing you want to do is see it creep back on.

So you may find that using only measurements and progress photos for a while is key otherwise you may sabotage yourself.

Because you can see that scale increase and look leaner!

And if you get upset by every scale fluctuation up, you will never let that body recomp happen!

So often, when we want that body recomp, we get focused on fat loss, when to truly get the definition we want, we actually need to increase our lean muscle mass!

To increase your lean muscle, get ready to ditch the scale or accept daily fluctuations where often there will be big jumps up.

These jumps will happen for a number of reasons all of which are part of the process and even helpful to see gains as fast as possible.

You may see the scale increase as you work to build muscle because of water weight and glycogen storage as well as muscle tissue damage from hard training sessions.

So often water weight gain is demonized.

But this storage of water in your muscles is key to help your muscles repair and rebuild.

Not to mention, you may store more water if you up your carb intake.

This glycogen storage can help you stay energized, push through hard training sessions and create that anabolic environment to make it easier for you to build lean muscle!

Too often carbs are demonized, but especially if we are training hard, we need carbs to optimize hormone levels and create that environment for growth.

So we can’t fear the scale going up or water weight being gained.

And after a hard training session, especially if you feel sore, don’t be surprised if the scale jumps up because of inflammation from muscle tissue damage!

Not to mention, as you gain muscle, even if you lose fat, that scale may increase.

Freaking out at those increases is going to make you do the opposite of what you need to see results!

Tip #2: Truly PUSH and challenge yourself in your workouts.

Often we do a round that FEELS hard and hit that top number in the rep range or the single number on a lift we are supposed to complete and accept that we pushed hard enough.

Yet often, there is MORE we can give even though we were already uncomfortable.

This doesn’t mean cutting out rest though to feel more out of breath. Limiting rest can actually prevent you from lifting at your true 100% intensity.

And if we want to build muscle, we truly have to create that progressive overload and challenge so muscles have to rebuild stronger, especially the more advanced we are.

This is why you need to use forms of progression like tempo, range of motion, different types of tools over just adding loads.

You also need to focus on working DOWN in the rep range over just staying at the top of it.

If you can do 12 reps when 8-12 reps are assigned, next round go up to push yourself with a weight you think you can only do for 8-10.

If you can, still do the 12.

If you can’t, stay with that weight for another round, till you can do the 12.

Even push yourself to find something that you max out at 8 with to “grow into” that weight for 12 reps.

And depending on your training experience, you may even do those 8 reps, use rest pause techniques and pause for 15 seconds, then do a couple of more to try to get out 10-12 with a weight you could only technically do 8 with!

This makes your body think it did 12 reps with a load it can only complete 8 with which can help you ultimately lift more quality reps without doing wasted volume or trying to use a weight you can’t truly handle!

You may even find that if you are able to do a weight for 8 reps until that last round, you use rest pause technique to still complete 8 reps over going down in weight because you would only be able to do 6!

But don’t go through the motions just doing a weight for the reps listed, really work to use this double form of progression and don’t fear slightly lower reps and heavier weights!

Tip #3: Focus on eating more. 

Muscle is metabolically costly. It requires calories to be maintained.

If you don’t eat enough to build it, you won’t see your hard work in the gym paying off.

And the more muscle you build, the more calories you need to keep consuming to keep building.

More muscle equals more calories burned at rest.

Which means you need to consume more calories on a daily basis to maintain the muscle you have….

And even more if you want to KEEP building.

It’s part of why you need to ditch the scale at times when focusing on those muscle gains.

When building muscle, as your weight increases, you may also need to increase your calories.

This often goes against what we are conditioned to want to do, especially if we want to lose weight or have just lost weight.

Generally when we see the scale go up, we want to cut our calories.

But this can prevent us from building the lean muscle we are working hard to build.

This is why you need to focus on other forms of measurement to see body recomp.

But is is also why TRACKING your diet is so key.

I know personally when I can SEE I’m doing the right habits, it makes it so much easier to trust in the process.

It can help you see you’re fueling properly and implementing those daily habits.

It can also allow you to accurately adjust!

Too often we only see tracking as something we do when we cut out things to lose…when we restrict.

But it can also be a tool to help us add in the fuel we need in a way to perform our best!

While you don’t need an extreme surplus to gain, you do want to start with even just your maintenance calories and increase from there!

So if you’ve been in a deficit, focus on slow increases of 100-200 calories per week over time, staying focused too on the quality of your fuel and even your macros!

And if you do see more fat being gained as you build, you can then always do a mini cut after a set muscle building phase.

But you have the power to adjust those macros as needed because you are tracking!

Tip #4: Increase Protein Portions PER MEAL. 

Eating only 10 grams of protein at a meal isn’t going to cut it if you want to build muscle as you get older.

That small amount won’t optimally stimulate muscle protein synthesis.

And as we get older we can develop anabolic resistance, meaning we are less able to utilize protein as efficiently.

This means we need to increase our protein intake.

But it isn’t just increasing our daily protein intake that can help, it is actually increasing our intake per meal.

You’ll hear the myth you can only utilize 20-30 grams at a time, but this isn’t true.

But studies have shown you can actually utilize up to 70 grams easily in a meal, especially a meal of mixed macros.

Not to mention 20-30 grams is what is directly utilized for muscle repair and growth.

We have to remember that not all of the amino acids we consume will only go to that.

We are made up of protein and what we eat is utilized in so many different ways.

So it is key we get MORE for all of those functions as well as muscle repair, especially since as we get older we are less able to utilize protein as efficiently.

To best stimulate muscle growth and repair, focus on increasing your protein intake to 30-40 grams per meal.

Really shoot for 40 grams in a pre or post workout meal especially!

Just even increasing protein around your workout by 5-10 grams can be a great place to start if you’re struggling to increase your protein currently.

Tip #5: Lift heavier than ever.

Too often as we get older we STOP lifting heavy.

I’ve had clients start training with me telling me they even SHOULDN’T lift heavy or do certain compound moves because they are over (insert age here).

But you use it or lose it.

Part of why we lose strength and muscle is because we don’t push ourselves in the ways we did when we were younger.

We need to keep challenging our bodies.

Which is why we need to include some lower rep, heavier compound lift work in our workouts weekly.

This doesn’t mean you have to become a powerlifter if you don’t enjoy it.

But sometimes you do have to include things you don’t like to be able to do more of what you love…and feel and look the way you want.

So consider including a single heavy lift at the start of your workouts before you get into supersets or circuits, performing a compound exercises with weights that really max you out in that 4-6 rep range even!

If you want to feel and look your most fabulous till your final day on this planet, you need to focus on building and retaining lean muscle.

And while this can get harder as we get older, these 5 tips will help you fight against muscle loss and even build lean muscle no matter your age.

Don’t just accept that getting older has to mean decline. Because it doesn’t.

Join my fabulous free Facebook Community of women building their leanest, strongest bodies at any and EVERY age…

—> Join The Community


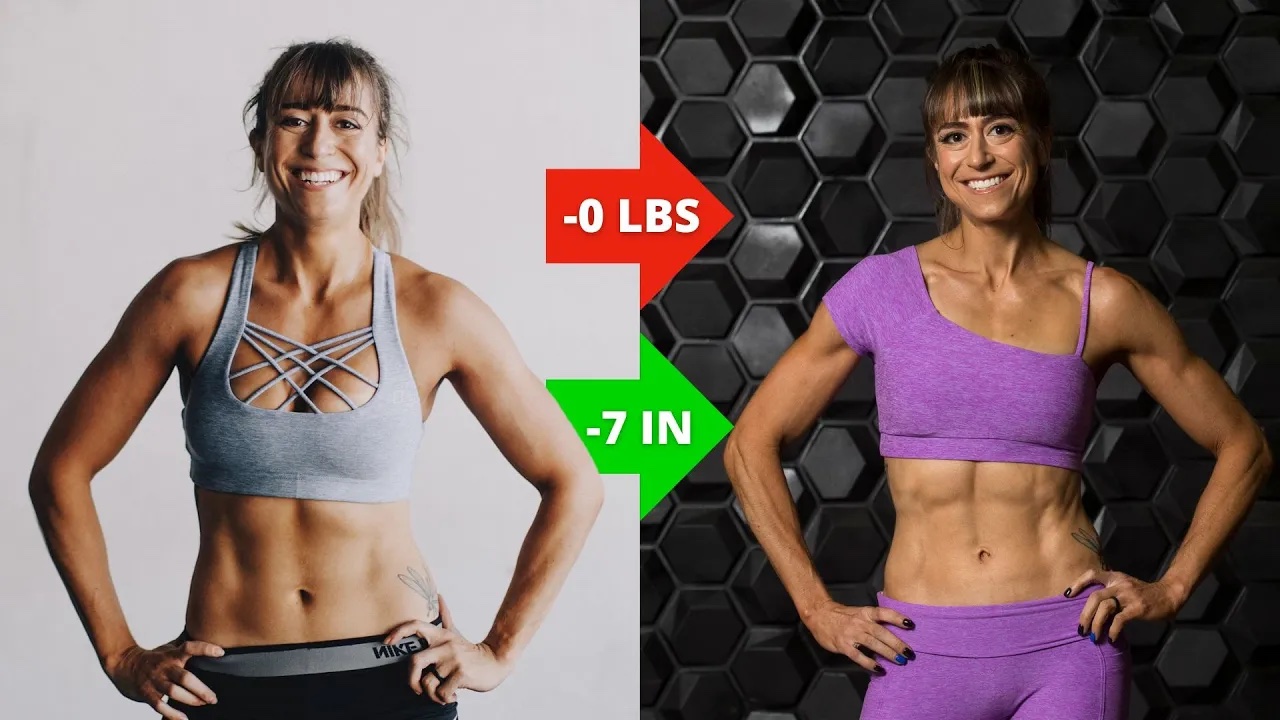
I’m Losing Inches But I’m NOT LOSING WEIGHT! (Body Recomposition?)

I’m Losing Inches But I’m NOT LOSING WEIGHT! (Body Recomposition?)

“I’m losing inches but not losing weight 😭”

I couldn’t believe the first time I had a client send me that with a crying face emoji.

I was like…

What in the actual F$#@!

I didn’t send that back, but I’m pretty sure my face went into spasm because of the numerous conflicting emotions that ran across it.

When I finally responded…and I’m pretty sure she saw text bubbles pop up and disappear for at least 5 minutes…

I said, “Out of curiosity, why do you say that as if it’s a bad thing?”

“Because I need to lose 50lbs and the scale isn’t budging!”

Over the years, my replies to this conversation have evolved.

And yes…I’ve had this conversation often…so if, right now, you’ve basically sent yourself that mental text…

LISTEN UP….

Because I’m going to explain why you’re losing inches while the scale isn’t changing and how this is actually a GOOD thing!

Don’t sabotage yourself by getting discouraged!

I’ll then share 3 essential steps to achieve amazing body recomp and build your leanest strongest body no matter your age.

So why are you losing inches while the scale isn’t budging?

Because your previous dieting practices have sabotaged your body composition and metabolism. 

The reason so many of us struggle to achieve our ideal weight and body composition is because we’ve lost muscle over the years and never put an emphasis on building it. 

And all those weight loss fad diets only make our body composition worse.

They keep us stuck in that yo-yo dieting cycle…

We starve ourselves, slashing our calories lower to lose faster on the scale as we increase our cardio, turning even our strength workouts into destructive sessions of cardio death. 

And while this may have yielded weight loss at one point, and “worked” to see fast results that fade quickly…it killed our muscle and our metabolism.

It’s 100% why we feel like it gets harder as we get older and especially during perimenopause and menopause.

Our body is already changing and on top of that we have to fight our previous diet and exercise practices… 

Sorry don’t waste your breath defending them.

I say this after having been guilty of them too. But I’ve now sucked it up and owned it to move forward.

And this is why you’re now seeing inches being lost without the scale changing. 

So…Why is this a good thing?

Your body is screaming at you…

“FINALLY! I CAN BUILD MUSCLE!” 

And it is doing just that.

It is healing your metabolism. 

It is building the lean muscle you need to be fitter and stronger and healthier. 

And those inches you are losing is actually fat being lost. 

Not just water weight. Not just glycogen depletion.

Not as much muscle as fat disappearing.

But because you’ve put yourself on this horrible yo-yo dieting roller coaster in the past, your body first wants to build this metabolically amazing muscle…

And that is why the scale isn’t changing. 

You’re doing things the right way this time.

You’re setting yourself up to be lean and freaking fabulous at every age moving forward. 

So don’t sabotage yourself.

Realize your body is thanking you for giving it the ability to gain muscle. 

And weight loss will follow if you trust the process. 

But don’t let the scale not changing as you LOSE INCHES make you sad in the slightest. 

Now the 3 Essential Steps To Keep This Amazing Body Recomp Happening…

You want to do everything you can to promote muscle growth which will help you lose fat and ultimately achieve your weight loss goals….and keep the weight off. 

However, this process isn’t fast AND can be frustrating because we aren’t getting the satisfaction of the scale changing.

A huge part of the battle over even what macros to use or what workouts we should be doing is getting ourselves to stick with the habits we need when we aren’t fully seeing results in the way we want…. 

Often we don’t need more “tactics”…we need more TIME for results to build.

More time creating new systems that lead to results and break those bad habits that are keeping us stuck.

Which is why Step #1 is to Fight The Urge To Do What You’ve Always Done.

It’s going to be hard to change your mindset and approach to weight loss. 

You’re going to have to keep reminding yourself not to default back into old habits and patterns. 

To not want to cut your calories lower. 

To not want to train longer or add in more sessions. 

The hardest part often of making changes is often UNLEARNING or breaking those old habits. 

Especially when the old habits are comfortable and we “feel” like they used to work to some extent. 

This is why it can be helpful to write out the habits we often WANT to fall back into to make them conscious while listing out what we want to do instead.

This can remind us to stay focused on the new habits we want to build while catching us if we do track back toward what we used to do. 

We want those conscious reminders.

We also want to set out other ways to celebrate wins with the new habits and remind ourselves they are paying off even while the scale may not be changing. 

The more ways we measure progress, the more ways we can see our success.

Take those body measurements. Track those strength gains in the gym.

Heck set a performance goal for yourself to help you have other reasons to want to keep doing the habits you need. 

Show yourself how this is paying off in so many other ways so you can get yourself buying into the process to keep doing what you need! 

And even list out all of the reasons why what used to “work” didn’t really work! 

Too often we just want to do what we’ve always done because it is comfortable. 

But if it worked so well, we wouldn’t be trying to reach the same goal again.

Remind yourself of the pattern those old habits lead to.

Remind yourself of the negative outcomes.

Help yourself see why you deserve this change and why it is worth it!

Step #2: Focus On Nutrition By Addition. 

Part of what also sabotages our success in reaching our body recomp and weight loss goals is the mindset of restriction.

We always turn to cutting things out.

And cutting things out can not only backfire because we aren’t eating enough to support building lean muscle, but also from a long-term ADHERENCE standpoint. 

When we feel like we are deprived or restricted and working SUPER HARD toward a goal, we feel we DESERVE better results faster. 

We want the outcome to match the effort. 

So the more we feel like we are having to do so much to not see the results we want, the more likely we are to give up when things are working.

This is why you need to approach nutritional changes with the mindset of what you can ADD IN first over what you need to cut out. 

This can also help us focus on FUELING our body to feel more energized, train harder and support lean muscle growth. 

Instead of focusing on what you need to cut out to make changes, focus on what you can add in that will help things shift. 

Even consider how you can still work in things you love by ADDING other things around them that balance out. 

Love dessert, but need to increase protein?

Don’t cut out your dessert!

Put that in first then find other ways to add in protein to other meals to still find a balance. 

Focus on things you can add to make healthy changes and better fuel your body. 

By focusing even on how we can drink more water, add in more fruits, consume more vegetables, we often will make changes that pay off without getting ourselves into a restriction focused cycle! 

Step #3: Train To Build. 

Stop seeing your workouts as a chance to burn more calories.

This creates that cycle of doing more in our training that ultimately not only leads to injury, but a lot of wasted effort. 

Doing more reps, training for longer, can end up in a lot of wasted time and volume just for us to try to burn a few more calories in a day. 

The simple fact is, you can’t out exercise your diet. 

And the more you try to, the more you don’t truly get the benefits of your training you should.

If you want amazing body recomp, muscle is magic. 

While your diet matters to building muscle, your training matters most.

If you don’t train to build, creating progressive overload, you won’t create the stimulus for growth. 

And building muscle will not only help you look leaner and lose fat, but it ultimately will help you feel younger and move better. 

If you love long bike rides or running marathons, you can still do the training you love. 

But by focusing more on strength work as well, you’re ultimately going to be able to do more of what you enjoy AND even achieve new personal records. 

So as much as you may not “enjoy” the strength work, you need to remind yourself of the value for both your performance, aesthetic and even LIFE goals. 

When you design your workout routine, your goal should be on building muscle. 

Especially for amazing body recomp, focus on full body workouts or hemisphere over body part splits to be efficient in your training and work more large muscle groups per session.

This also allows you to hit areas more frequently. 

And design for the time you have so you can get consistent with that schedule! 

Then make sure to push yourself to maximize the reps you do while not just eliminating rest! 

Think quality not quantity when you train!

As much as your goal may be to ultimately lose weight on the scale, if you’re losing inches and not yet seeing the scale budge, do NOT give up. 

Remember this is a GOOD thing.

Stop the extreme deficits. 

Stop the fanatic cardio sessions done purely to burn more calories. 

Start focusing on muscle.

Use these 3 steps to help you dial in your lifestyle to achieve amazing body recomp! 

If you’re looking to have all 3 steps combined into a personalized plan, check out my 1:1 Online Coaching!