How To Do A Sit Up Properly – 3 Tips To Help

How To Do A Sit Up Properly – 3 Tips To Help

Sit ups get a bad rap because of the spinal flexion involved in the movement.

But guess what?

Our abs are worked by spinal flexion.

Yes they work to stabilize and prevent extension and brace to protect our spine, which is why planks are key too, but they do power spinal flexion.

And yes, we do work our core through all the amazing compound exercises out there like pull ups and squats and deadlifts, but that doesn’t mean we can’t also safely include spinal flexion moves to target our abs with a movement pattern they are MEANT to perform.

The key is learning to do sit ups properly so we aren’t compensating and overworking our lower back or relying simply on our hip flexors to sit up.

Here are 3 tips to help you get the most out of this basic move to work your abs through spinal flexion.

3 Tips To Improve Your Sit Ups

#1: Don’t sit up – roll up!

If you want to really focus on using your abs to sit up, don’t simply hinge and sit up at your hips. Focus on rolling up one vertebra at a time.

Think about truly curling your spine to come up.

You’ll realize this makes your abs work a lot harder and you feel your hip flexors working a lot less.

We have to remember that our abs power spinal flexion. And that curl to roll up is the spinal flexion we need to target our abs.

When we simply sit up and lie down, we often are performing the movement mainly as hip flexion. To get that ab engagement, we need that spinal flexion.

So focus on rolling up one vertebra at a time before sitting up nice and tall at the top. Then roll back down.

Even slow down the movement to focus on your abs over rushing through!

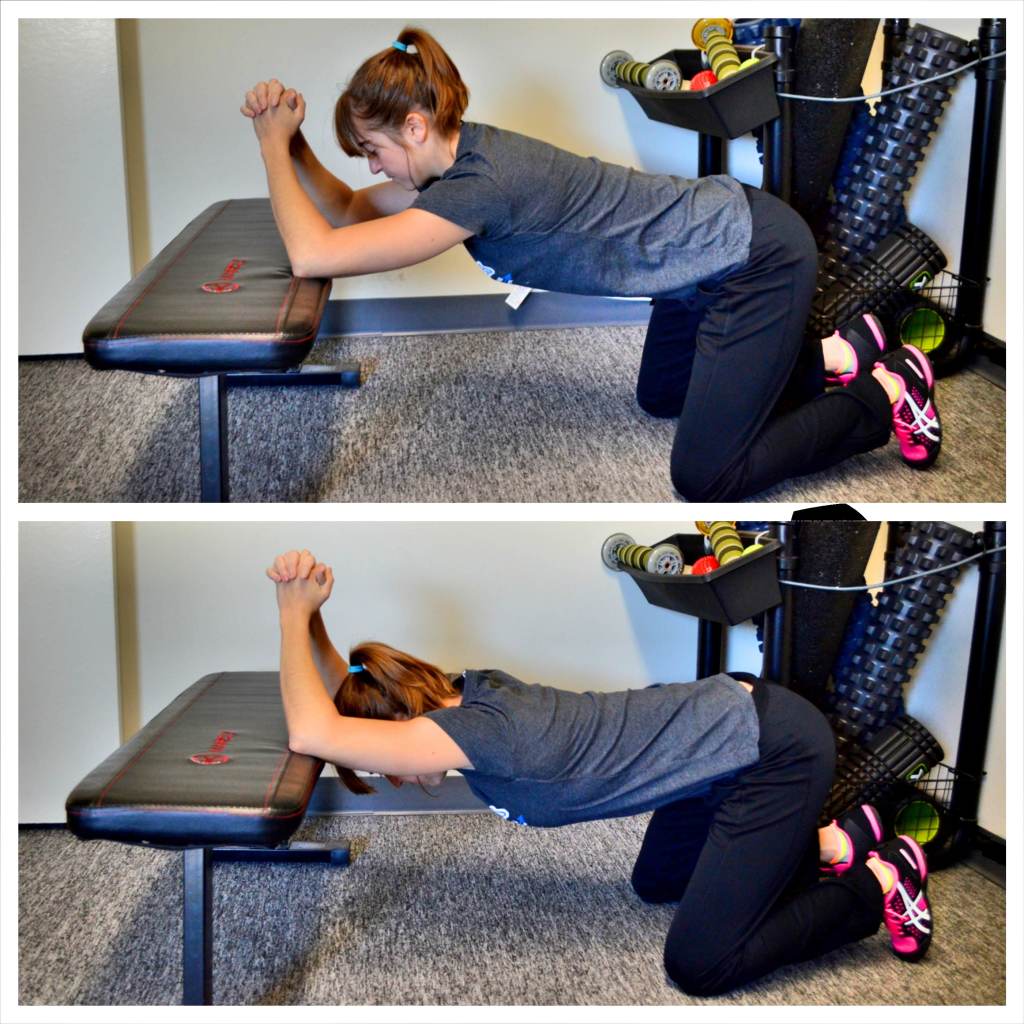
#2: Drive your heels down into the ground.

One of the best ways to relax an overactive muscle is to engage the opposing muscle group.

Often with sit ups, you see people’s legs flopping all over the place. Their legs lift and their hip flexors engage.

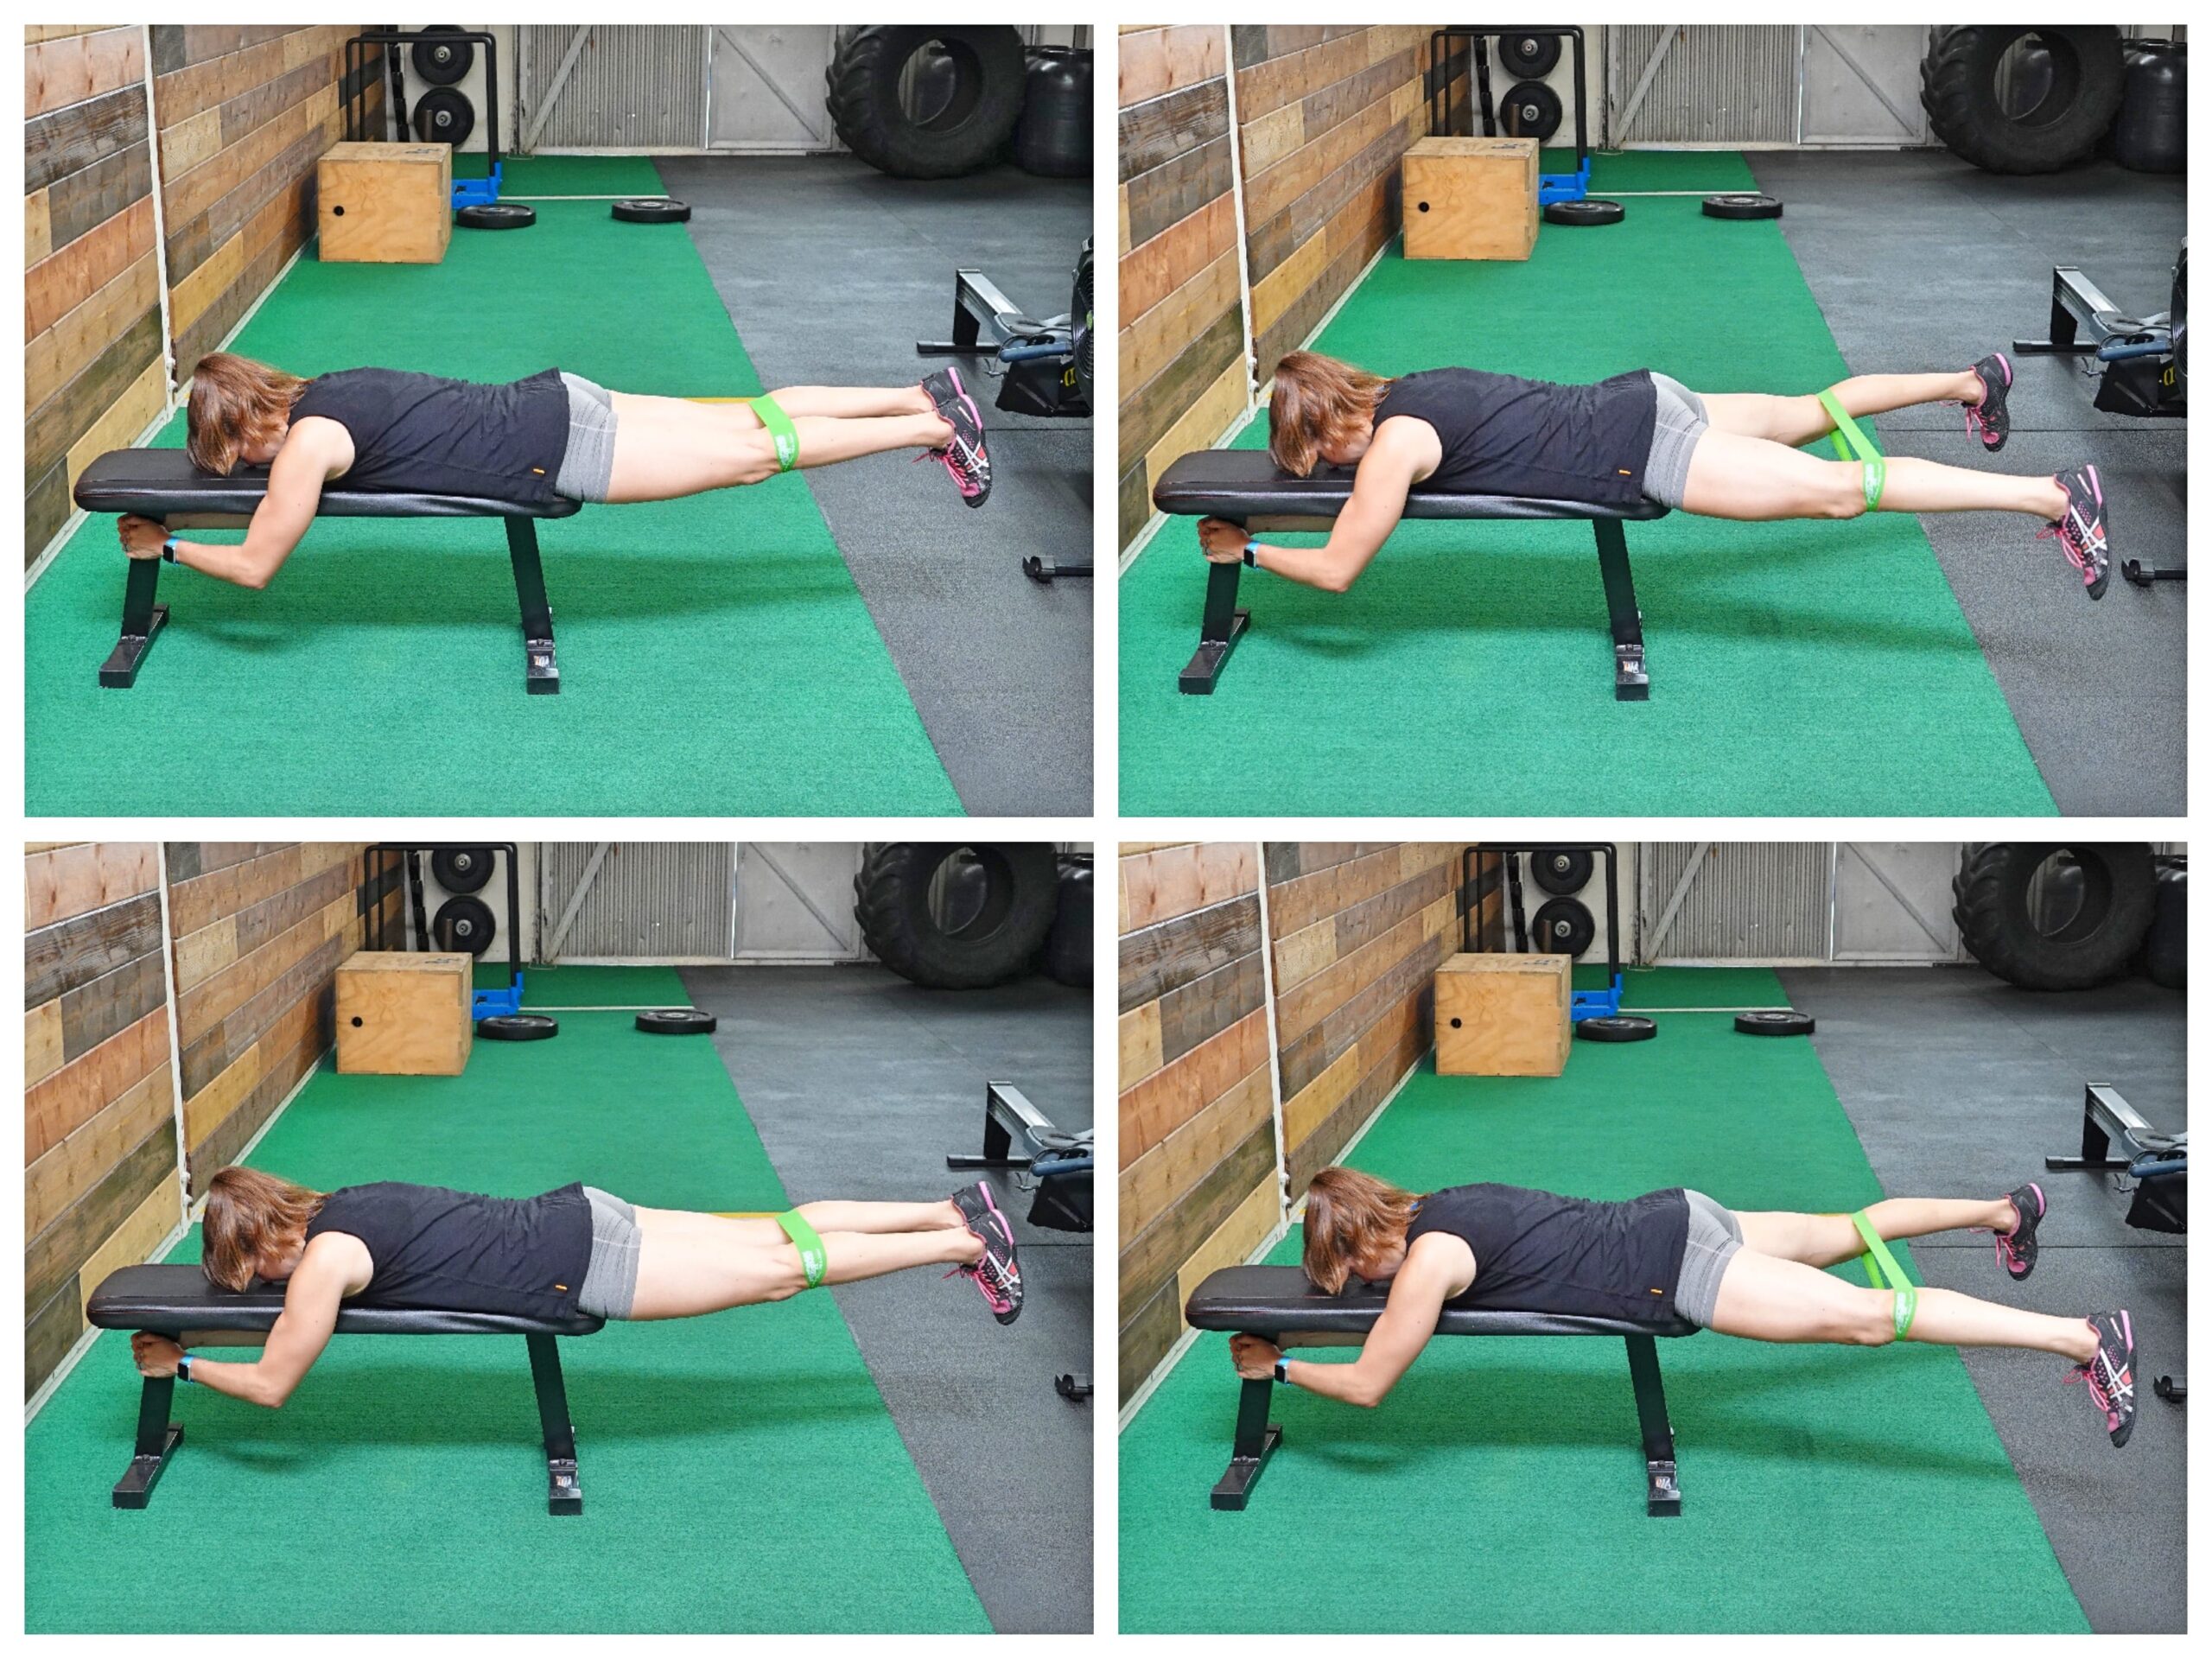
Next time you do sit ups, set up at the top and drive your heels down hard into the ground. Even think about slightly curling them back toward your butt. This will engage your hamstrings ever so slightly and help shut off your hip flexors.

Then slowly roll down.

Keep that tension, pushing your heels down into the ground as you roll down and come to rest at the bottom.

Keep that same pressure, pushing your heels down, as you sit back up.

You not only won’t feel your hips as much, but you may feel your abs more.

If you really struggle with your hips becoming over worked, you can even do a little hamstring hack, looping a band behind your heels to help you better engage those hamstrings if you struggle with applying pressure down into the ground.

#3: Don’t swing your arms overhead.

I know it can feel like we need the momentum to help us get back up, but swinging your arms is not only a way to cheat and not use your abs, but it can also cause you to arch your lower back at the bottom of the move and result in your lower back becoming overworked.

When you lie back down, you can bring your hands under your chin and then extend them toward your legs as you sit up if you do need a very slight assist in rolling up or you can keep them extended toward your legs.

The key is slowing down this move over trying to power through more reps.

If you really can’t get up without using the momentum, try a Seated Hinge variation, doing a top down variation of the sit up. Start at the top seated and only round to hinge back as far as you can control instead of starting lying on the ground.

This can help you learn to roll back to start.

SUMMARY:

Too often we take for granted this very basic ab move. And we demonize it for causing lower back pain when we simply aren’t performing it correctly and using the spinal flexion to work our abs.

Try these 3 tweaks and make your abs work during this basic move and stop relying on your hip flexors while overworking your lower back!

Leg Lowers – You’re Doing it WRONG (3 tips to help)

Leg Lowers – You’re Doing it WRONG (3 tips to help)

Constantly feel your lower back or hip flexors during ab moves like leg lowers?

Do you just push through figuring your lower back is weak?

STOP!

Not only is this NOT helping you get the desired ab strengthening results you’re trying to work toward but it may also result in lower back and even hip aches and pains.

Here are 3 common mistakes I see people making with leg lower ab exercises and how to avoid them!

Mistake #1: Putting Your Hands Behind Your Lower Back

Stop cheating yourself out of really earning this move.

Putting your hands behind your lower back is a bandaid, a quick fix.

While yes, it can help you avoid lower back pain in the moment, it isn’t teaching you to actually use your abs correctly to protect your back and stabilize.

It allows you to do a move you haven’t truly earned.

Instead you need to regress to progress and modify the exercise to learn how to build up and engage your abs correctly.

Because you aren’t feeling your lower back because it is weak. You’re feeling your lower back because your abs aren’t yet strong enough, or you don’t have the mind-body connection yet, to keep them braced throughout.

Instead of pushing through this variation, if you want to get the full ab strengthening benefits, modify the move doing a single leg lower or even bent knee tuck.

It is always better to modify and get the correct muscles working than to push through a harder variation and compensate.

Modifying doesn’t mean you’re making it easier. It means you’re making it the level you need to work the muscles you want to target best!

You may even find you have to go back to that basic pelvic tilt movement and learn how to engage those abs and glutes correctly to stabilize and brace before adding movement!

Mistake #2: Swinging Your Legs

Leg lowers do work your hip flexors as they are a hip flexion movement.

And your abs are working to stabilize and protect your back.

But if to rush through this movement you start to swing your legs, you’re not going to get any of the benefit this move can have for your abs.

And you’re probably going to start to feel your lower back engaging as your hip flexors fatigue especially.

So stop swinging your legs and rushing through just to get the workout done.

Instead slow down the movement.

Focus on engaging your GLUTES even as you lower your legs a few inches from the ground. And even think about pulling your legs back up using your abs so you get that brace going as you lift.

Slow the movement down and focus on that control and what muscles you actually feel working.

Get more out of every second of work by being intentional!

Mistake #3: Not Focusing On Bracing Your Abs

Too often we just replicate a movement pattern without really being conscious of the muscles we feel working until we are in pain.

We let our lower back take over during this move and just keep pushing through.

We want to get the workout over with or we figure our lower back is weak.

But what we feel working during a move is what is going to “benefit” so to speak from the exercise.

So if you want to work your abs but you only feel your lower back?

Your abs aren’t getting the benefit of this move you’d like.

That’s why it is key you regress to progress and learn how to use that posterior pelvic tilt to your advantage.

While yes our spine has a natural curve, we want to know how to engage our glutes and abs using that posterior pelvic tilt.

Before you even start any level of the leg lowers move, lie on your back on the ground and think about engaging those lower abs to tuck your hips slightly toward your ribs. Even feel your glutes engage with the tuck.

From here you can do a bent knee march, double knee tuck, single leg lift or those killer double leg lowers.

But you should only advance as long as you can keep those abs braced.

If you lose that brace, you need to regress or shorten the interval of work, cutting back on time or reps.

Trying to do more without the correct muscles working is only going to backfire.

SUMMARY:

As much as we all want to do those fun and challenging exercise variations, at times we need to regress to progress and take our ego out of things.

Learn how to engage those abs correctly and build up to earn that harder move so you can get more out of every rep of that amazing leg lower ab exercise!

For an amazing Lower Ab Workout, give this burner a try! It’s a great way to finish off your workouts!

–> Lower Ab Burner


How to FIX Low Back Pain –  Do These 4 Moves

How to FIX Low Back Pain – Do These 4 Moves

If you’ve ever suffered from lower back aches and pains?

You aren’t alone.

Lower back pain is one of the most common injuries, with at least 80% of Americans suffering from lower back pain at some point in their life.

And the worst part? All too often it becomes a continual annoyance.

However, too often in our attempt to prevent future issues, we do exactly the WRONG thing,

So what do you need to STOP doing if you want to truly keep your lower back from continually aching?

And what should you be doing instead?

First let me go over what is often actually occurring leading to nagging lower back aches and pains.

While there can be many different causes, and you always want to get checked out whenever possible to determine what is causing your pain, often our issues stem from our lower back becoming overworked and overloaded.

This occurs because of postural distortions from our modern lifestyles and even compensations and imbalances caused by previous injuries.

That ankle or knee injury you had years ago?

That can create a sequence of events that finally led to overload and your lower back suffering the effects of the build up.

But instead of addressing these others areas of immobility or weakness?

We instead only focus on the point of pain – our lower back.

And often we assume our lower back hurts because it is weak.

We believe that weakness is why it fatigues during moves and why we often feel it during core work.

So what do we do?

We find moves to strengthen it – like Supermans.

But this is often exactly what we should NOT be doing!

While supermans have their place in a proper core strengthening routine, too often we turn to moves like this when we have lower back aches and pains.

And all these moves do is further overload and overwork our already tired back.

They perpetuate the overuse instead of addressing what is actually weak and the areas that actually lack immobility.

So what moves should you be doing instead?

4 Key Moves To Fix Lower Back Pain:

When you’re suffering from lower back pain there are 4 key things you need to address, thoracic mobility, hip mobility, ab activation and glute activation.

You need to make sure you aren’t seeking out extra mobility from your lumbar spine that should be coming from your thoracic spine or hips.

You also want to make sure that your abs and glutes are strong to protect your lower back and prevent it from becoming overworked.

Here are 4 great moves to help you address these 4 keys and avoid lower back aches and pains in the future!

#1: Kneeling Thoracic Extension Stretch

 kneeling-lat-and-thoracic-stretch

Ever realize you’re constantly hunching over? Whether it’s over your computer, in a car or even just while sitting watching TV?

This constant flexion can lead to limited thoracic extension and thoracic mobility in general. And when our thoracic spine doesn’t extend properly, we may then seek out mobility from other areas to help us mimic proper movement during an exercise.

So if you’ve ever noticed you arch your lower back to keep your chest up as you squat or you arch your lower back to press better overhead, you may need to work on that thoracic extension!

A perfect move to do just that is the Kneeling Thoracic Extension and lat stretch.

To do the Kneeling Thoracic Extension Stretch, kneel on the ground and place your elbows up on a box or bench in front of you. Set up far enough back that you can drop your chest toward the ground, extending your shoulders, as you sit your butt back toward your heels.

Pull a towel tight between your hands to help you avoid your shoulders rotating open as you lower your chest toward the ground.

Then drop your chest toward the ground, focusing on extending your upper back. Brace your abs and make sure you aren’t just arching your lower back as you press your chest down.

You may feel a stretch down the backs of your arms and the sides of your back. Pause for a second then relax out and repeat.

If you can’t get down on the ground, you can also do this as a half wall hang, placing your hands up on a wall in front of you.

#2: Lying Bench Hip Stretch

Stretch out your hip flexors as you activate your glutes to improve your hip extension with the Lying Bench Hip Stretch.

The psoas, a hip flexor muscle, plays a key role in our posture and pelvic positioning. When this muscle becomes tight it can limit hip mobility, which can lead to underactive glutes and your lower back becoming overworked.

Often to compensate for the lack of proper hip mobility, you’ll arch your back during moves. And because your glutes are weak? You’ll try to compensate by using your lower back to lift.

That’s why this a great hip stretch to include. It can really help you relax the psoas as you activate your glutes to control that hip extension.

To do the Lying Bench Hip Stretch, lie back on a bench with your butt right at the edge of the bench. Let one leg hang down toward the ground with your knee bent around 90 degrees as you hug the other knee in toward your chest. Wrap your hands around your shin, right below your knee to hug it in.

As you hug that knee in, squeeze the glute of the leg hanging down to really drive your hip into extension almost as if you’re pressing the heel of that foot through the ground.

Pause then tuck that knee up toward your chest before extending the foot back down toward the ground.

As you extend your hip, squeeze your glute and pause before repeating.

#3: Lying Jacks

If your glutes are underactive and weak, your lower back and hamstrings will try to pick up the slack and work when they shouldn’t.

And either of those muscle groups becoming overworked can perpetuate your lower back aches and pains.

That’s why it is key you activate your glutes so they engage correctly during compound lifts and when you run.

With the Lying, you’ll target not only your glute max, but also your glute medius. This will be key to improving your hip stability.

And you learn how to engage those glutes to even control hip hyperextension. Too often we allow our lower back to become the prime mover in this movement, when really our glutes should be in control.

To do this move, place a mini band around your legs above your knees. Lie on the bench and press your hips down into the bench.

Engage your glutes to lift your legs to about parallel to the ground. Make sure you’re pressing down into the bench and using your glutes over arching your back.

Holding at the top press your legs out and open against the band. Control the press open then bring your legs back together and repeat.

To modify you can do this off the ground. Just make sure you are truly lifting using those glutes and not arching your lower back just to get up higher!

#4: Anti-Rotational Dead Bugs

Being able to avoid unwanted rotation and correctly brace your abs is also key to protecting your lower back. If our abs are weak, our lower back may engage to help us perform the movement.

Anti-Rotational Dead Bugs is a key move to include to help you activate not only your abs but also your obliques to fight rotation and protect your lower back.

To do Anti-Rotational Dead Bugs, anchor a band down low and hold one handle in both hands so your side is to the anchor point. Lie flat on your back with your hands gripping the handle extended straight up toward the ceiling.

Make sure not to shrug.

Engage your abs with a posterior pelvic tilt, tucking your hips slightly up toward your ribs as you lift your feet up off the ground.

Fighting the urge to rotate toward the anchor point, keep your hands pressed out directly above the center of your chest. As you hold, extend one leg out as you keep the other knee tucked in. Slowly bicycle your legs, extending the other out as you tuck your other knee in.

Move slowly. This move is best done for time on each side!

SUMMARY:

If you’re sick of lower back aches and pains, STOP allowing it to become overworked. Improve your thoracic and hip mobility while learning how to correctly engage and recruit your abs and glutes to protect your lower back!

Ready to eliminate aches and pains?! Check out my Injury Prevention Pack.

Foam Roll + Stretch + Activate!