The One Small Change That Will Transform Your Lower Ab Workout

The One Small Change That Will Transform Your Lower Ab Workout

One small tweak to a move can be exactly what we need to create progression and take our results to the next level.

That’s why I want to show you how just this small change in your bench positioning can progress the basic lower body crunch to challenge those lower abs even more.

If you haven’t yet tried Incline Abs, you’re going to want to.

In this video I want to break down how to do this move to get the most benefit as well as why it is so amazing.

Because this exercise is deceptively challenging and must be earned, I’ll also share ways to modify it and build up!

But first, why should you use this move?

Incline Abs are a move I’ve fallen in love with because they are a great way to create progression through the same but different from hanging abs, but also take the basic lower body crunch up a notch without adding weight.

And lower body crunch movements are a great way to target that lower portion of our rectus abdominis, or our lower abs, to a great extent.

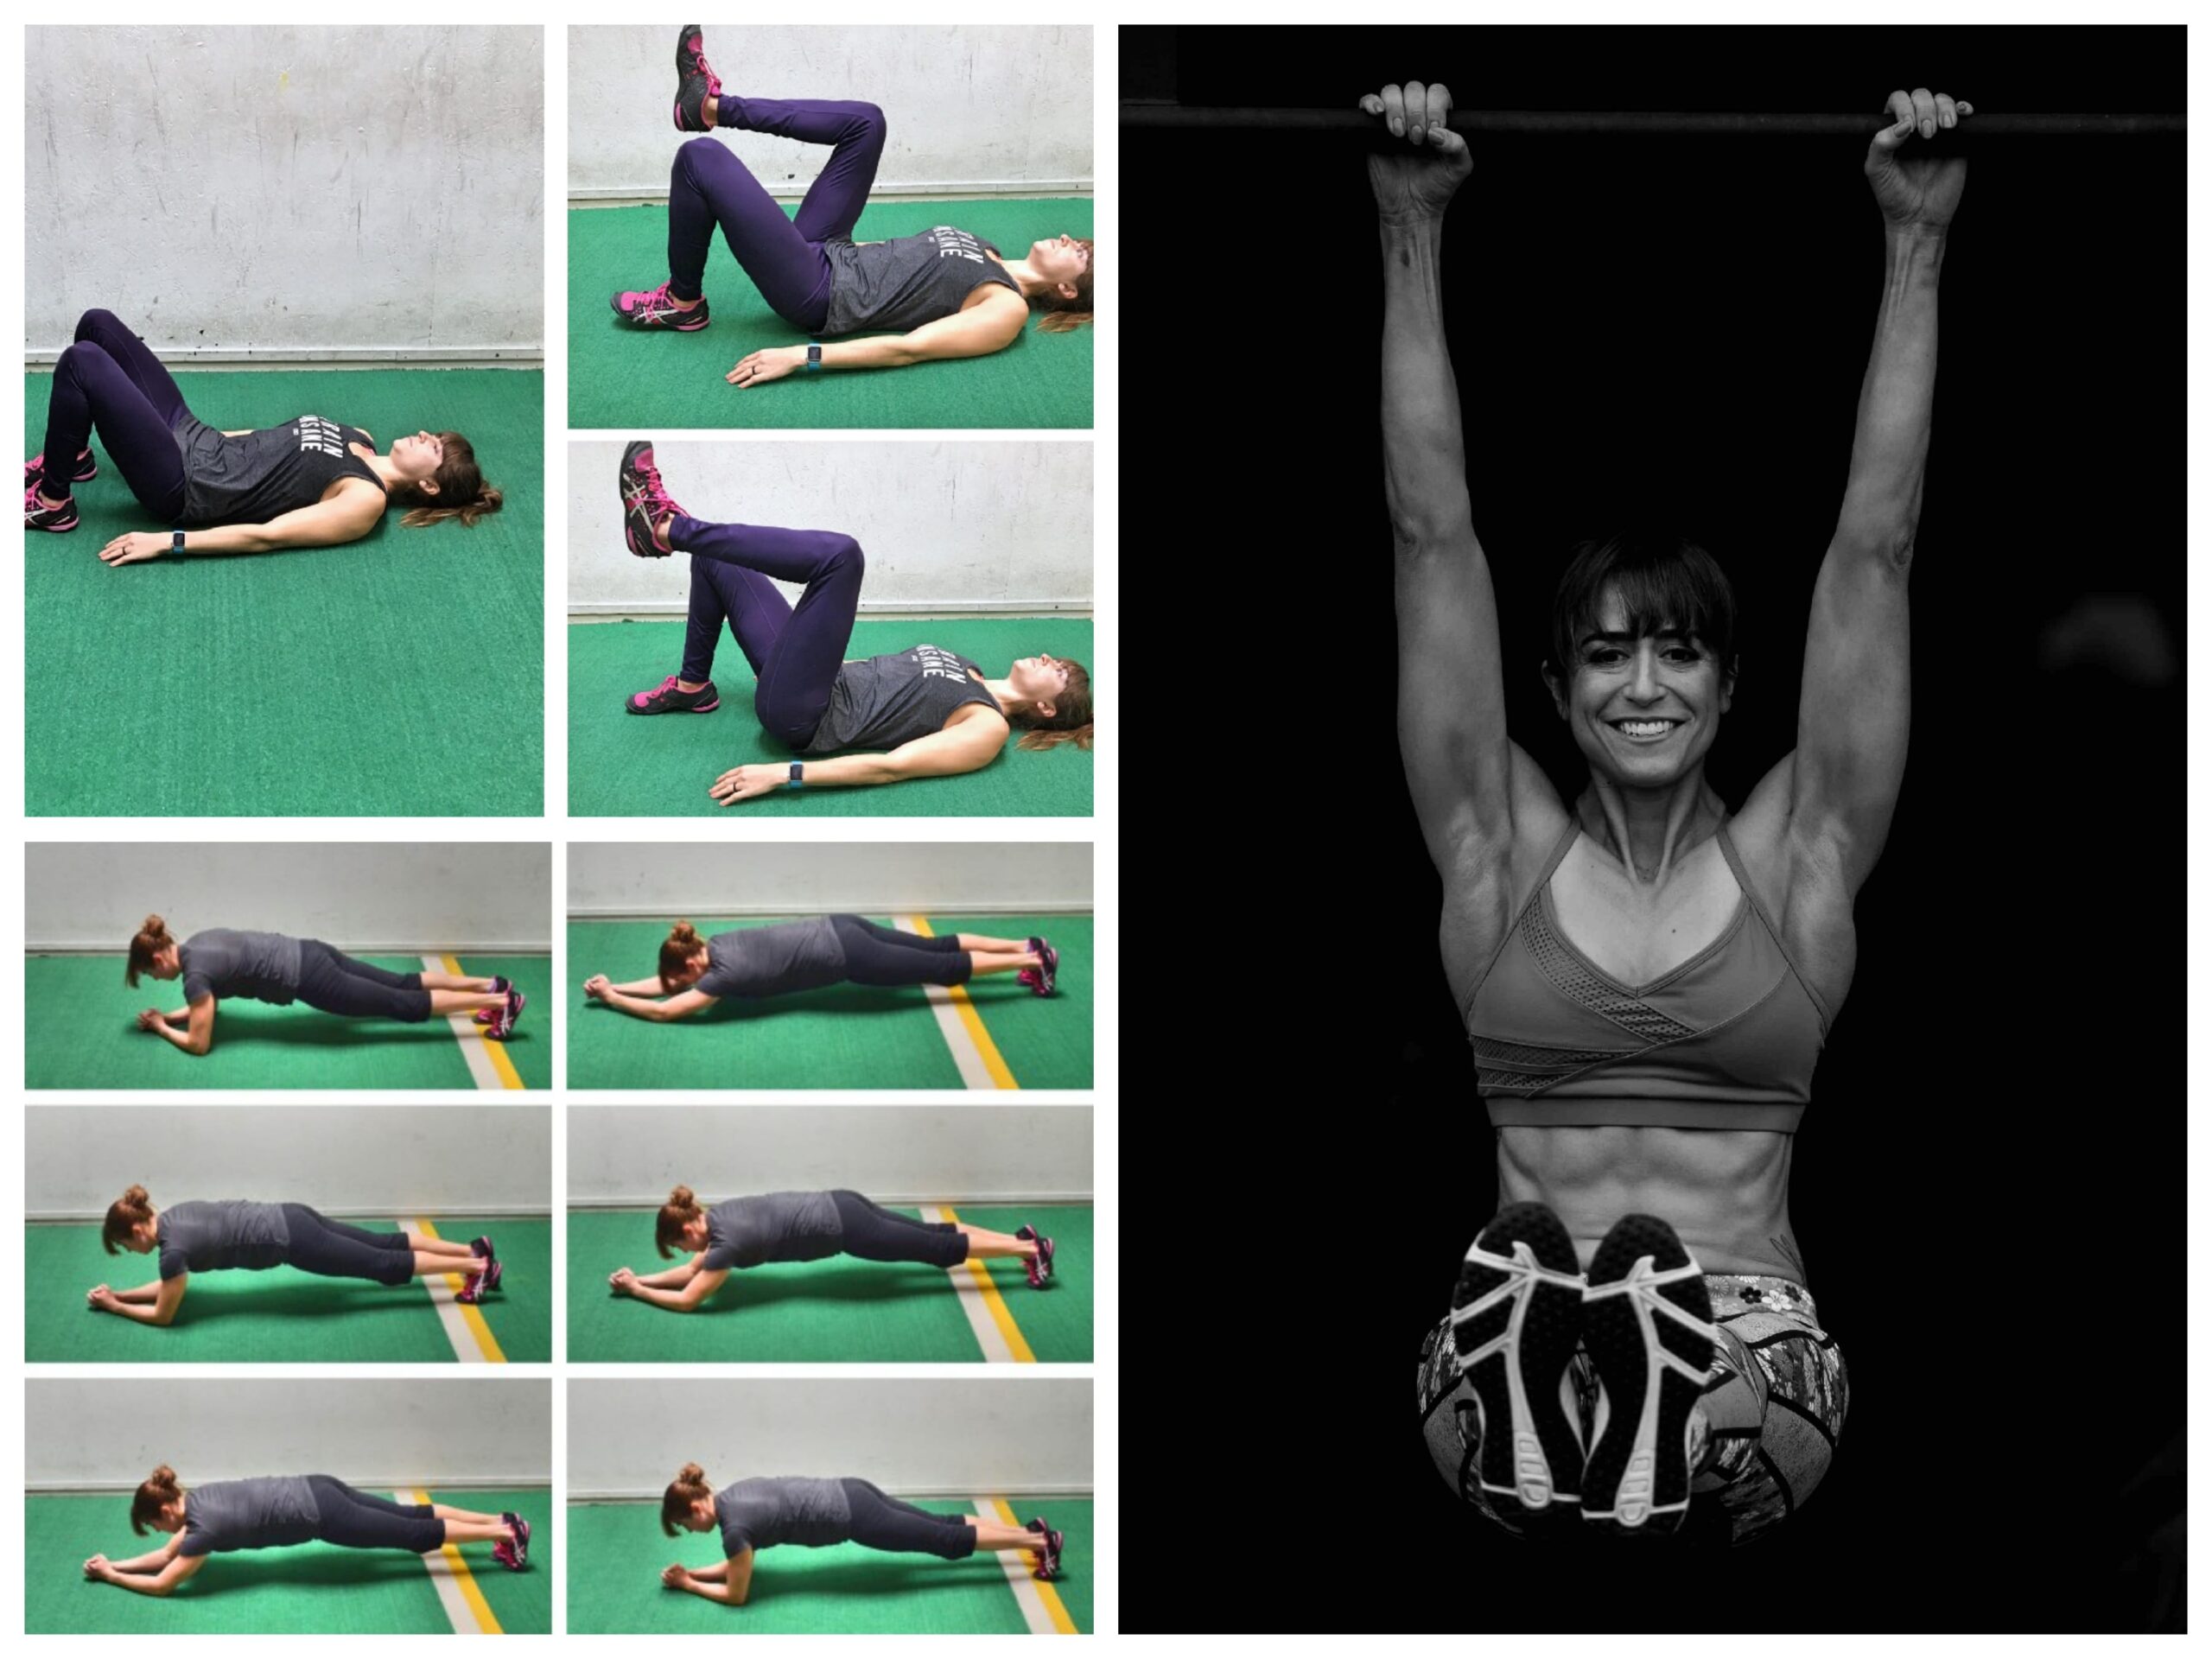
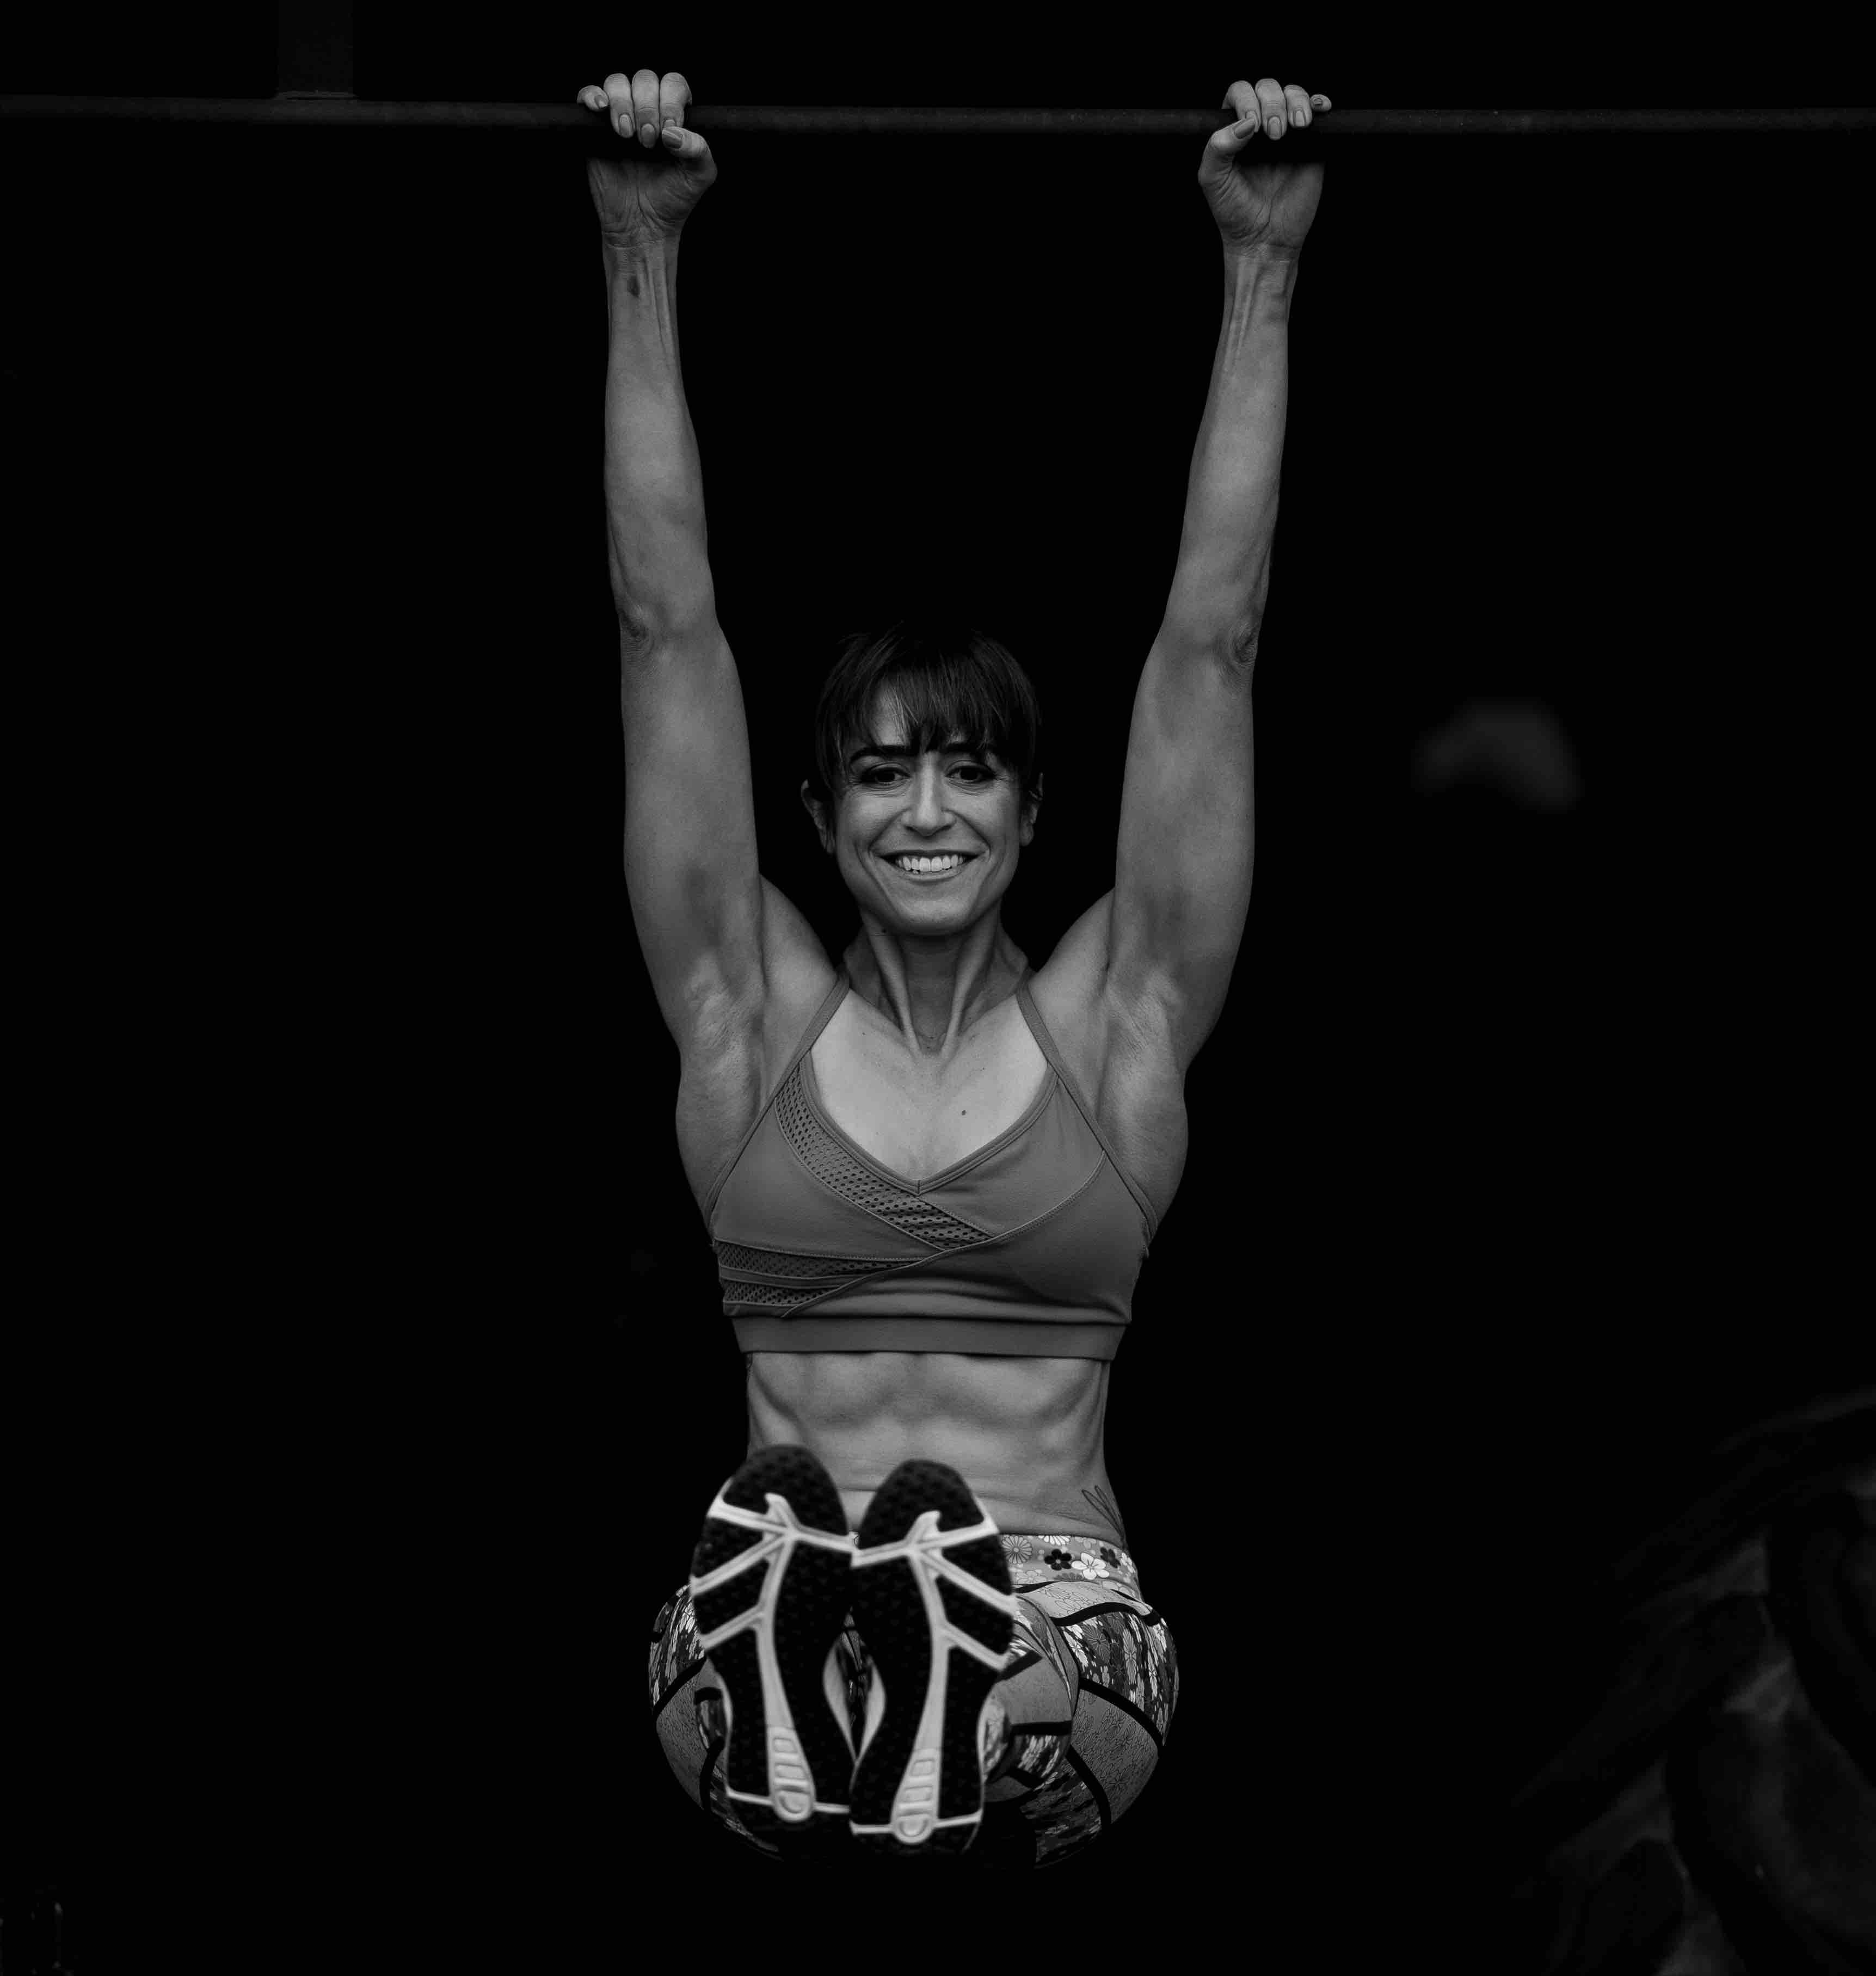
This move reduces some of the strain on the upper body that comes with doing the hanging knees to elbows, while still giving you the benefit of engaging your upper body to pull down on the bench as you curl your knees up.

So you get the upper body bonus but with less upper body strain.

That upper body hold can be helpful to engage the lats and even your serratus to better help you active your abs and protect your lower back.

And because of the bench behind your back, you won’t be able to swing or use momentum as easily as you can with hanging knees to elbows.

The bench variation can help you really practice that spinal flexion to learn to control that knee tuck, even making it a great option if you’re working to build up to hanging core moves.

But don’t think that this move is easy just because it may be a way to build up.

It isn’t. And the harder you pull down on the bench and more you focus on that controlled roll up and down being powered by your abs over just flexing at the hips, the harder this move gets!

Now, breaking down how to do this move to maximize it before I share some modifications and variations…

When you set up for this move, you’ll want your bench on about the second notch for a 45 degree angle.

Sit back against the bench and grab the top of the bench in both hands so you can really pull down hard on it and feel the sides of your back engage.

With your knees bent and toes touching the ground, push your back into the bench and slowly curl up one vertebrae at a time.

Feel yourself rolling your knees up toward your elbows pulling with your abs.

It will be tempting to just sort of bend your knees to tuck but this not only won’t get you far, it will just lead to you overusing your hip flexors.

You want that curl to be powered by your abs which means rounding through your spine.

Once you curl your knees up to your elbows, focus on that slow lower down one vertebrae at a time.

At the bottom, do not release tension on the top of the bench or bounce off pushing off with your feet.

You may feel your hips just slightly working at this initial point so can keep your knees tucked up and not fully touch down if you’re struggling with that initial ab engagement to start.

The key here is that hard pull down on the bench and curl!

This is deceptively hard when done intentionally and with control. And starting with a flat bench may be key.

However, if you feel really stuck building up to this move, even try a slow eccentric “only” variation.

To do this, you can slightly use that push off or momentum to set up at the top then control the lower down for a 5 count.

Because we are often strongest in the eccentric portion, this may help you take on your weight to work through the movement with control but while using momentum strategically.

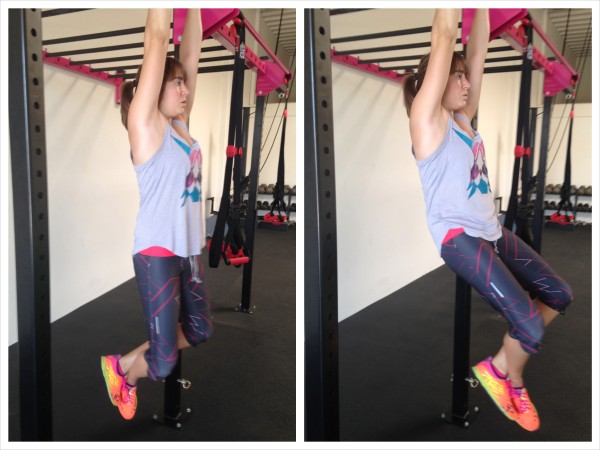
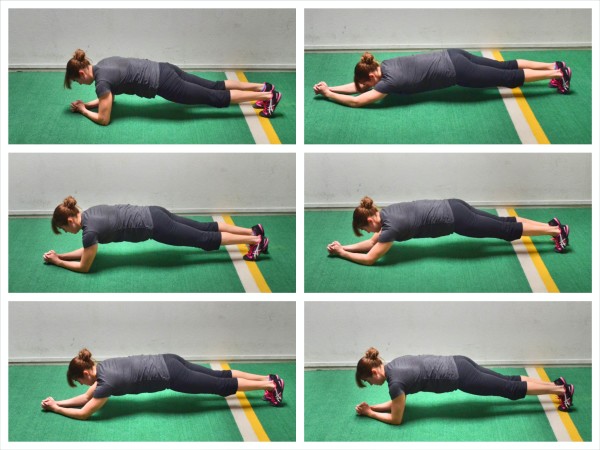
But if you can’t control that lower down, the flat bench or even the ground with an overhead hold can be key to start.

You’ll still get that upper body engagement and you can learn to control that spinal flexion.

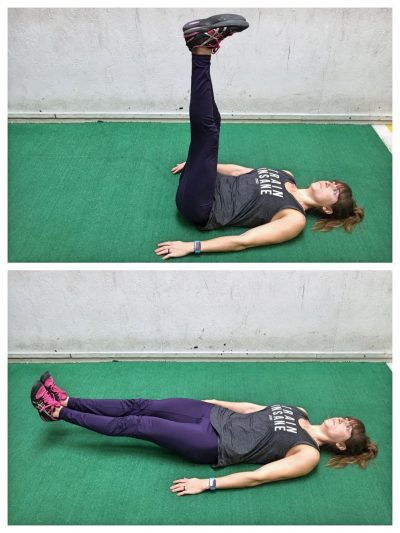
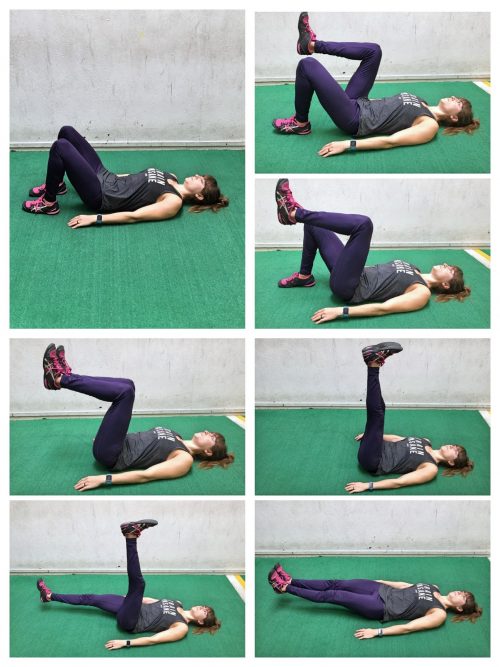
If you kick out straight with the moves it will take things up a notch from keeping the knees bent to touch the toes down as you lower back down from the curl.

Make sure to keep your abs engaged as you extend your legs out straight if you do, tilting your pelvis toward your ribs for that posterior pelvic tilt. That will engage your abs with your legs out straight and even engage your glutes.

You can kick your legs out a bit higher if needed as well to modify just slightly.

With this flat variation still stay focused on that curl of the spine to bring the knees in and pull down hard on the bench or pole you’re holding on to overhead.

But this flat variation is a great way to get started on that curl without the added resistance that gravity applies with the incline.

Regress to progress but focus on that curl and use that overhead hold to help you really work those abs.

And then use that change in posture on that bench to progress the lower body crunch to challenge your lower abs.

From there, don’t be afraid to change up tempo or even add loads as you use that Incline Ab variation. But don’t just jump to adding loads. Focus on that control and slow roll powered by your abs!

For more moves to challenge your entire core, check out these 7 Intense Ab Moves.

7 INTENSE Ab Exercises (Most People Skip)

7 INTENSE Ab Exercises (Most People Skip)

You clicked on this video for 7 intense ab moves.

I know, I know…Just tell you the moves. Well I’m going to.

Here’s move #1 of 7 in total that will focus on not just your abs, but especially that lower portion of your rectus abdominis….

Move #1: Weighted Crunches

The Pull Over Crunch is one of my go-tos as a weighted crunch variation, but I wanted to mention weighted crunches in general because so often we forget how key it is to progress those basic bodyweight moves to keep challenging ourselves so we see results.

Even adding a weight to the basic crunch can take it up a notch.

While we aren’t trying to do a 5 rep max out on loads, we do want those higher rep ranges of 15-20 reps to really challenge us and adding a weight is a great way to do this!

And if you want to add not only weight but create an extra challenge for yourself, try the Pull Over Crunch.

The reach overhead with the weight challenges your abs to resist extension and brace to protect your lower back.

This is HARD, especially with your legs extended out off the ground.

You’ll then pull the weight from overhead down in front of your knees as you crunch your knees and upper body together.

This pull over is going to work your entire core and even your serratus anterior.

Then extend back out but don’t relax back onto the ground.

That brace to keep your hips tilted toward your pelvis and not let your lower back take over is really what works those abs with the flexion to crunch everything together.

If you’re finding that your lower back or hips are taking over, try lighter or now weight and even try a bent knee variation with touching your toes down between.

You can even modify further with just the upper body crunch or single knee tucks.

But note, what you feel working during this and every move I share!

Because if all you feel is your lower back or hips, your abs won’t get the full benefit and you won’t see results build.

And remember, this move, and all 7 actually, are ADVANCED moves.

I will share modifications like the single knee tucks to make sure you’re using the level that makes YOUR abs truly work!

Now…Move #2: Leg Lowers +

Leg lowers are an amazing move to target that lower portion of our rectus abdominis, aka those lower abs.

And by adding on this little raise and spinal flexion at the top of that leg raise movement, we make our abs work even more not only to brace as we lower and resist extension but to actually power flexion.

To do this move, I love adding in a hold overhead to help brace those abs more, but you don’t need to.

If you don’t hold on overhead, placing your hands besides you on the ground will provide a bit more support than if you place them behind your head.

With your legs squeezed together and feet up toward the ceiling, feel yourself tuck your hip bones toward your ribs to feel like your abs flex and engage.

Lower your legs as close to the ground as you can, then feel yourself pull your legs back up toward the ceiling using your abs.

As you lift them straight back up, feel as if a string is lifting them higher and pulling your butt and back off the ground.

You want to feel your abs flex and lift your pelvis up.

Lower back down before you again do the leg lower toward the ground.

This truly is a killer move especially if you avoid using momentum.

If you feel your lower back engaging, try a bent knee version instead or even test out holding on overhead to help you create that core tension to start if you aren’t!

Move #3: Slider Body Saw

This stability and anti-extension plank variation is deceptively hard.

That lengthening or extended plank position as you avoid letting your butt go up in the air or lower back arch and hips sink to the ground really makes your abs work.

And by doing this off sliders over walking in and out, you reduce any traction that may help you control the movement or push off.

You’ll even feel into your arms and around your rib cage working as you lengthen sliding back then pull yourself back into the plank position.

Make sure you don’t shrug but feel down the sides of your back to move back forward.

And make sure you’re actually extending back. It is easy to try to cheat and just rock forward over our forearms over truly lengthening back through our shoulders and core.

To modify, you can do this walking back over using the sliders and even add in an incline to reduce resistance.

A plank rock is also a more static option to start whether off the ground or an incline!

Always ways to adjust a move, reducing the strength demands through different postures, positions and even ranges of motion!

Move #4: Dip Hold Curl Up

I love moves that work not only our abs but even have bonus areas they target.

And that’s why I love hanging abs and even dip hold ab variations.

But when we think about abs off the parallel or dip bars, we often think leg raises or knee tucks.

While amazing options, this small, simple looking and deceptively killer move for our abs, especially our lower abs is too often overlooked…

Because it doesn’t look like much!

The tuck to pull UP and push the bars away, rounding through the spine is what really targets those abs using spinal flexion.

That pull up and in will make your abs shake if you focus on doing it intensely to almost pretend you’re sucking your body up.

Don’t just bend at your hips.

Pull your body up by rounding your back to hollow out your abs. Think about even curling up.

To modify this, do a foot assisted version to reduce the resistance on your upper body and core.

If you don’t have parallel bars, you can also do a slider variation off the ground, pushing the ground away with your hands as you lift your butt to slide your legs on the sliders back to tuck up.

For those of you without monkey arms, you may need stands or kbs or dumbbells.

Move #5: Incline Bench Abs

This is an amazing way to progress those reverse crunches and add in diversity if you also love hanging abs!

This is a killer lower ab move that also works your serratus or the muscles around your ribs.

That slight incline that challenges you to curl against gravity is what kicks this up a notch.

Just don’t rush through as you tuck and lower down. Really focus on the curl.

You will want to pull down hard on the top of the bench as you start with your knees bent and toes resting on the ground.

Use your abs to slowly curl your knees up toward your elbows, rounding your spine off the bench.

Touch your elbows then lower down with control.

The more you focus on even your upper body pulling on the bench, the more you can feel your abs over your hip flexors, especially if you struggle with your hips wanting to engage with leg raise movements.

And to modify this, lower the incline back to a flat bench variation or even off the ground.

Move #6: Ab Extensions

Ab extensions are another way to do extended planks, and a great way to mix things up.

That extended plank position is so key to include if you do really want to target those lower abs.

The most common version of ab extensions are done with the ab wheel as roll outs.

But you can also use sliders, a stability ball or even suspension trainer.
The provide changes to postures and even instability to help you create progression with this move.

Whichever tool you use, make sure that as you set up on your knees, you’ve engaged your glutes and slightly tuck your hips up toward your ribs.

Keep this ab engagement through the full movement.

Extend your arms out overhead on the ground keeping the brace and even a very slight tuck your chin down over looking out in front of you.

Then to move back up, really focus on pulling your hands back under you with the sides of your back while feeling the muscles around your ribs.

Your abs are working hard here to stabilize and avoid movement of your spine!

To modify, you can do a single arm extension, so reaching one arm out at a time or even limit the range of motion you work in.

Using a wall to guide you and stop the movement can help you work in a range of motion you can control.

But you do want to strengthen through the biggest range of motion you can!

And last but not least…Move #7: Bench V-Ups

This full body crunch allows you to work in a bigger range of motion than off the ground because you’re seated on a bench.

And you will feel your quads even often with this killer ab move. Just make sure you don’t rely soley on your arms to support you in the crunch but pull yourself up with your abs.

Seated on the bench, put your hands on the back of the bench behind you with your legs squeezed together and out straight in front of you.

With your feet hovering off the ground, lean back. Then crunch your torso toward your legs.

You will round through your spine as you crunch up.

Then as you lean back and extend out, your abs will work to avoid your lower back arching or engaging.

Really focus on your abs pulling your legs and upper body together each time you v up.

To modify, you can do a bent knee or even single leg version.

Off the ground is also always an option, especially if you don’t have a bench.

And to bring this full circle, you can even advance this move further by making it a weighted bench v-up, holding that weight even between your feet.

Just go light! This can really start to target your quads and hip flexors more to maintain that leg position.

You may find a slight knee bend, but not actively bending at your knees as you do the move is key!

Now go enjoy these moves and make sure you focus on what you feel working! Even consider adding in 3-4 for 30 second intervals and 2 rounds through as a finisher to your workout this week!

Want more amazing workouts always at your fingertips? Join my Dynamic Strength program!

–> Learn more about Dynamic Strength

The 3 Best LOWER AB Focused Planks

The 3 Best LOWER AB Focused Planks

Looking to mix up your core training and find something you really feel working those abs, especially the lower abs, while also helping you avoid an achy lower back?

Then you’re going to love these 3 amazing plank variations.

Planks can be both great isometric exercises, but also more dynamic movements to target and strength our abs.

And with some specific variations, we can target that lower portion of the rectus abdominis even more!

That’s why I want to show you 3 ways to use planks to target those lower abs…including one move that is a great untraditional and challenging plank option even if you can’t do traditional planks due to shoulder issues!

And at the end I’ll share a great quick burner layout so you can use these 3 moves at the end of your workout!


3 Lower Ab Focused Planks

1: Dolphin Planks

If you really want to target your lower abs, you need to include exercises that utilize the posterior pelvic tilt.

This tilting of the pelvis, tucking the hips toward the ribs, really engages that lower portion of the rectus abdominis while also working your glutes. And it is a great way to learn how to brace to protect your lower back from aches and pains as well.

While you can use the posterior pelvic tilt in a plank as an isometric hold, doing a plange plank, you can also include this tilting as a dynamic movement during the plank.

This dynamic plank variation using the posterior pelvic tilt is the Dolphin Plank and a great way to challenge your abs.

You will use that tuck up to engage those lower abs, but also challenge your abs to protect your spine as you test out your spinal extension, slightly dropping your hips toward the ground.

This forces your abs to brace as you extend, but be mindful you don’t end up simply engaging your lower back!

To do this move, set up in a plank from your forearms and toes with your feet together. Make sure your shoulders are stacked over your elbows and your upper back is engaged so your shoulders aren’t shrugged.

Drive back through your heels as you flex your quads to hold in a nice straight line. To improve your base, you can widen your feet out to shoulder width.

Then tuck your pelvis under toward your ribs, rounding through your entire spine even to tuck. Do not push your butt up in the air and end up shifting your shoulders back behind your elbows.

You really just want to round through your spine as you tuck your hips toward your ribs, engaging your abs and glutes.

Even think about drawing your belly button in as you exhale to pull your abs in hard.

Then begin to lower back down into that plank position. As you lower though, try to go a little past that straight line as if extending to slightly drop your hips.

You want to feel your abs almost FIGHTING against you lowering to prevent your back from really arching.

You’re testing out your ab brace as you extend.

Then tuck right back up, tilting your pelvis again.

Do not push backward as you do this movement. Keep your shoulders stacked over your elbows.

Pause in each position to really feel your core working. Really move slowly through the movement to focus on feeling your abs.

If you feel your lower back, either modify to the static plange plank hold or use an incline.

To modify this move an incline works best. The higher the incline the less pressure or strain there will be on your shoulders and even core so you can really focus in on those abs working.

You can also do this starting on your hands and knees but be conscious that, while it may look like the cat cow stretch, you are truly engaging your abs to round up. I like to call this variation the vomiting cat because I want my clients drawing in their abs as if trying to really hollow out their belly!

2: Lower Ab Plank

This move is not a traditional hands and feet or forearms and feet plank. But it is an amazing core isometric hold and a move that is great to target those lower abs.

I personally call it a Lower Ab Plank so wanted to include it as an option because often when people have shoulder injuries and can’t do planks they feel a bit lost about what options are out there.

So if you need to take your upper body and shoulders out of the equation, this is a great option to target those lower abs…although don’t forget about using the incline as well to regress moves and build up!

This exercise is advanced though and you need to have mastered that basic pelvic tilt hold to brace so you don’t feel your lower back or hip flexors only working.

To do the move, you will lie on your back with your arms down by your sides or hands behind your head.

To start you can raise your legs straight up toward the ceiling and tilt your hips towards your ribs to press your lower back into the ground. Or you can start with your knees bent to really set up the posterior pelvic tilt before extending your legs.

Maintaining that pelvic tilt, lower your legs down so they are only an inch or two off the ground and hold. Better to even hold up a few inches higher to keep that ab brace and even squeeze your glutes.

Focus on really bracing those abs as you hold.

If you feel your lower back taking over, raise your legs up higher or even bend your knees. You can even start with just one leg extended.

Lifting your head to perform an upper body crunch can both make the move harder, but also help by flexing your spine.

Make sure to breathe and focus on engaging those abs, keeping that tilt. You do not want your lower back taking over. If it does, your lower back and not your lower abs are getting worked by this move.

Better to modify and focus on those abs than do a harder variation where you compensate!

3: Body Saw

Extended planks or long lever planks have actually been shown to increase ab activation over the traditional plank, especially of the lower portion of the rectus abdominis.

That’s why it’s key to include some extended plank positions in your routine.

You just want to be very conscious you don’t overload your neck and shoulder OR let your butt start to hike up in the air as you do these moves.

One great dynamic way to include the extended plank position in your routine over simply holding is with the Body Saw.

The great part about this plank variation, like with all plank variations, is you can also modify this move off an incline.

And if you have wrist issues you can do it from your forearms or you can also give yourself more space and change things up by doing this movement from your hands to work your arms more!

To do the basic Body Saw plank from your forearms, set up in a plank position from your forearms and toes with your feet close together and elbows under your shoulders.

You want a nice straight line from your head to your heels. Make sure to engage your back to support your shoulders and make sure they aren’t shrugged.

Then begin to walk your feet backward, taking small steps. Keep your body in a nice straight line and don’t let your hips sag toward the ground.

Lengthen through your triceps and shoulders as you walk back.

Walk back as far as you can while keeping your core engaged.

Then walk your feet back forward until you are back in the standard plank position. You do not need to walk more forward than simply back so your shoulders are over your elbows.

Make sure you feel your abs bracing as you extend back. Do not push your butt up in the air or let your hips sag toward the ground.

Repeat walking back out.

Remember you can modify the move off an incline to reduce the strain on your upper body and core.

To advance this move as well, you can also add in sliders, sliding back instead of walking. That reduces traction and even makes that pull back in so much harder! Just make sure you can control the move before progressing!

SUMMARY:

Using these 3 plank variations you can really work your abs while targeting that lower portion of your rectus abdominis even more!

To use these as a workout….

Lower Ab Burner:

Set a timer for 20 seconds per move starting with the Body Saw then the Dolphin Plank and ending with the Lower Ab Plank.

Rest 20 seconds between rounds to make sure you can really focus on bracing hard each round and complete 2-3 rounds through.

You want to focus on short intervals so you can engage everything hard over just focusing on holding for longer and letting your lower back or hips become overworked!

The BEST results happen when our diet and our workouts WORK TOGETHER!

Check out my RS Formula for FABULOUS results:

–> 3-Step RS Formula


Leg Lowers – You’re Doing it WRONG (3 tips to help)

Leg Lowers – You’re Doing it WRONG (3 tips to help)

Constantly feel your lower back or hip flexors during ab moves like leg lowers?

Do you just push through figuring your lower back is weak?

STOP!

Not only is this NOT helping you get the desired ab strengthening results you’re trying to work toward but it may also result in lower back and even hip aches and pains.

Here are 3 common mistakes I see people making with leg lower ab exercises and how to avoid them!

Mistake #1: Putting Your Hands Behind Your Lower Back

Stop cheating yourself out of really earning this move.

Putting your hands behind your lower back is a bandaid, a quick fix.

While yes, it can help you avoid lower back pain in the moment, it isn’t teaching you to actually use your abs correctly to protect your back and stabilize.

It allows you to do a move you haven’t truly earned.

Instead you need to regress to progress and modify the exercise to learn how to build up and engage your abs correctly.

Because you aren’t feeling your lower back because it is weak. You’re feeling your lower back because your abs aren’t yet strong enough, or you don’t have the mind-body connection yet, to keep them braced throughout.

Instead of pushing through this variation, if you want to get the full ab strengthening benefits, modify the move doing a single leg lower or even bent knee tuck.

It is always better to modify and get the correct muscles working than to push through a harder variation and compensate.

Modifying doesn’t mean you’re making it easier. It means you’re making it the level you need to work the muscles you want to target best!

You may even find you have to go back to that basic pelvic tilt movement and learn how to engage those abs and glutes correctly to stabilize and brace before adding movement!

Mistake #2: Swinging Your Legs

Leg lowers do work your hip flexors as they are a hip flexion movement.

And your abs are working to stabilize and protect your back.

But if to rush through this movement you start to swing your legs, you’re not going to get any of the benefit this move can have for your abs.

And you’re probably going to start to feel your lower back engaging as your hip flexors fatigue especially.

So stop swinging your legs and rushing through just to get the workout done.

Instead slow down the movement.

Focus on engaging your GLUTES even as you lower your legs a few inches from the ground. And even think about pulling your legs back up using your abs so you get that brace going as you lift.

Slow the movement down and focus on that control and what muscles you actually feel working.

Get more out of every second of work by being intentional!

Mistake #3: Not Focusing On Bracing Your Abs

Too often we just replicate a movement pattern without really being conscious of the muscles we feel working until we are in pain.

We let our lower back take over during this move and just keep pushing through.

We want to get the workout over with or we figure our lower back is weak.

But what we feel working during a move is what is going to “benefit” so to speak from the exercise.

So if you want to work your abs but you only feel your lower back?

Your abs aren’t getting the benefit of this move you’d like.

That’s why it is key you regress to progress and learn how to use that posterior pelvic tilt to your advantage.

While yes our spine has a natural curve, we want to know how to engage our glutes and abs using that posterior pelvic tilt.

Before you even start any level of the leg lowers move, lie on your back on the ground and think about engaging those lower abs to tuck your hips slightly toward your ribs. Even feel your glutes engage with the tuck.

From here you can do a bent knee march, double knee tuck, single leg lift or those killer double leg lowers.

But you should only advance as long as you can keep those abs braced.

If you lose that brace, you need to regress or shorten the interval of work, cutting back on time or reps.

Trying to do more without the correct muscles working is only going to backfire.

SUMMARY:

As much as we all want to do those fun and challenging exercise variations, at times we need to regress to progress and take our ego out of things.

Learn how to engage those abs correctly and build up to earn that harder move so you can get more out of every rep of that amazing leg lower ab exercise!

For an amazing Lower Ab Workout, give this burner a try! It’s a great way to finish off your workouts!

–> Lower Ab Burner


Do You Really Have Lower Abs?

Do You Really Have Lower Abs?

GASP! Maybe there is something to this LOWER AB thing!

Fitness elitists will get really mad if you utter the term “lower abs.”

Because technically there is no lower ab muscle.

Technically it is all the same muscle the rectus abdominis that we are usually targeting with our core work, especially if we want six pack abs.

(I’ve had to turn away when another trainer tries to lecture me on using the term lower abs to secretly roll my eyes. I guess I could lecture them back…but why?)

Anyway…

All those “lower ab moves” we used to use started to get written off as simply hip flexor exercises since most of those moves done for lower abs include leg lower type movements.

And yes…your hip flexors DO work during those leg lowers.

But I just couldn’t fully accept that they had no impact on the “lower abs.”

My “lower ab” definition was best when doing more leg lower movements after learning the pelvic tilt and after doing hanging abs.

I felt the lower ab region really WORKING during those moves and I’m always extra conscious when testing movements to feel WHERE is activating.

Because guess what? Doing the right moves even without feeling the correct muscles working is going to do NOTHING except put you at risk for injury!

So feeling my “lower abs” working led me to include hanging abs and the posterior pelvic tilt in my Killer Core program.

If you feel the muscles activating, and have clients agree with those finding and feel their “lower abs” like never before, SOMETHING is going on.

So that led me to hours of pouring over studies trying to see if I could figure out what I, and my clients, were feeling.

Were we simply mistaking this feeling in our “lower abs” for our psoas working?

That’s when I found studies showing that different ab exercises DID, in fact, activate portions of the URA and LRA (upper and lower rectus abdominis) to different extents. (Study 1)

Which frankly makes sense considering we’ve shown, and even more widely accept, that exercises activate upper or lower pec fibers differently and even upper and lower glute max fibers differently.

Another interesting results I found in a study was that POSTERIOR PELVIC TILT actually had HIGHER LRA for groups that learned to perform it correctly and were even more active AKA all of us who’ve trained a lot and are looking for that true engagement! (Study 2)

This also made me realize how important it was to correctly teach the posterior pelvic tilt progression – a progression we often skip to jump right to the hardest leg lower move.

Ever feel your lower back taking over during leg lowers? Ever put your hands behind your lower back to correct this?

Well this is just putting a bandaid on the problem. This is why we end up only working our hips and quads, and maybe even lower backs, with these moves.

It’s why we DON’T work our lower abs to the extent these moves can work them.

When you want to work your lower abs, you need to focus on what is working. REGRESS the posterior pelvic tilt progression to maybe a single leg lower or bent knee march or even just a simple HOLD.

But regress until you can properly feel your abs working and then slowly progress!

Ok so maybe you’re now thinking “I buy the whole activating different aspects of the muscles, BUT leg raise movements are STILL hip flexor moves….”

Well guess what!?!

Hanging Leg Raises actually have the highest mean AND peak activation of the rectus abdominis! (Oh and this article not only confirms that but also the existence of differences in activation between the Upper and Lower RA!)

I would say it looks like my abs are working pretty hard here…as well as some other important muscles of my core!

So for you that are non-believers adamantly against any leg raise type movement who annoyingly try to correct anyone who even utters the words Lower Abs, just be open to the differences in activation!

And also realize that part of what makes a difference is what you force your body to feel working and how you even cue and coach the moves. Just like the double leg lowers…You sometimes need to regress to progress.

It may mean starting with a Hanging Pelvic Tilt to learn how to engage the abs to then help assist in the Hanging Leg Raises. Or it may be doing a bent knee raise to start. But the key is being conscious of what is working as you utilize these moves!

Hanging Pelvic Tilt

I almost feel like this adamant “there are no lower abs” makes us cut off our noses to spite our faces.

Why miss out on moves that can only HELP!?!

Don’t miss out on using these moves because the term we use is referring to a region of a muscle not a separate muscle.

Hanging Leg Raises, Pelvic Tilt…oh and even the Body Saw (a study also showed a longer lever plank like the Body Saw was great for the core!) are KILLER ab moves you NEED to be including!

body-saw

Let’s not miss chances to get the results we want when we can FEEL something working!

It’s also another reason to THINK about what you actually feel working and constantly assess your recruitment patterns!

So take some time today and test out those moves!

Ready to work not only your LOWER ABS but your entire core?

Ready to implement some Hanging Abs, Pelvic Tilt and even long lever planks into your routine?

Start the 30-Day Killer Core Challenge! All you need is your own bodyweight and a bar!