Add This To Your Shoulder Workout (AT HOME!)
When training at home or when we travel without access to equipment, it can feel like there are some body parts that are hard to hit and exercises that are hard to replicate.
But we can get in a killer workout no matter what.
That’s why I wanted to share a great replacement exercise for the overhead press if you want to target your shoulders without any weights.
That move is the Pike Push Up.
However, this push up variation is much harder than we realize and you don’t want to…well…drop yourself on your head while doing it.
Please regress to progress and make sure you build up to this deceptively hard yet simple move.
To help you build up I’m going to share some form tips to implement this move correctly but also an amazing modification.

Because with the pike push up you can mimic that vertical press to work not only your shoulders but also your triceps and core!
The key is actually performing this push up variation though as the vertical press!
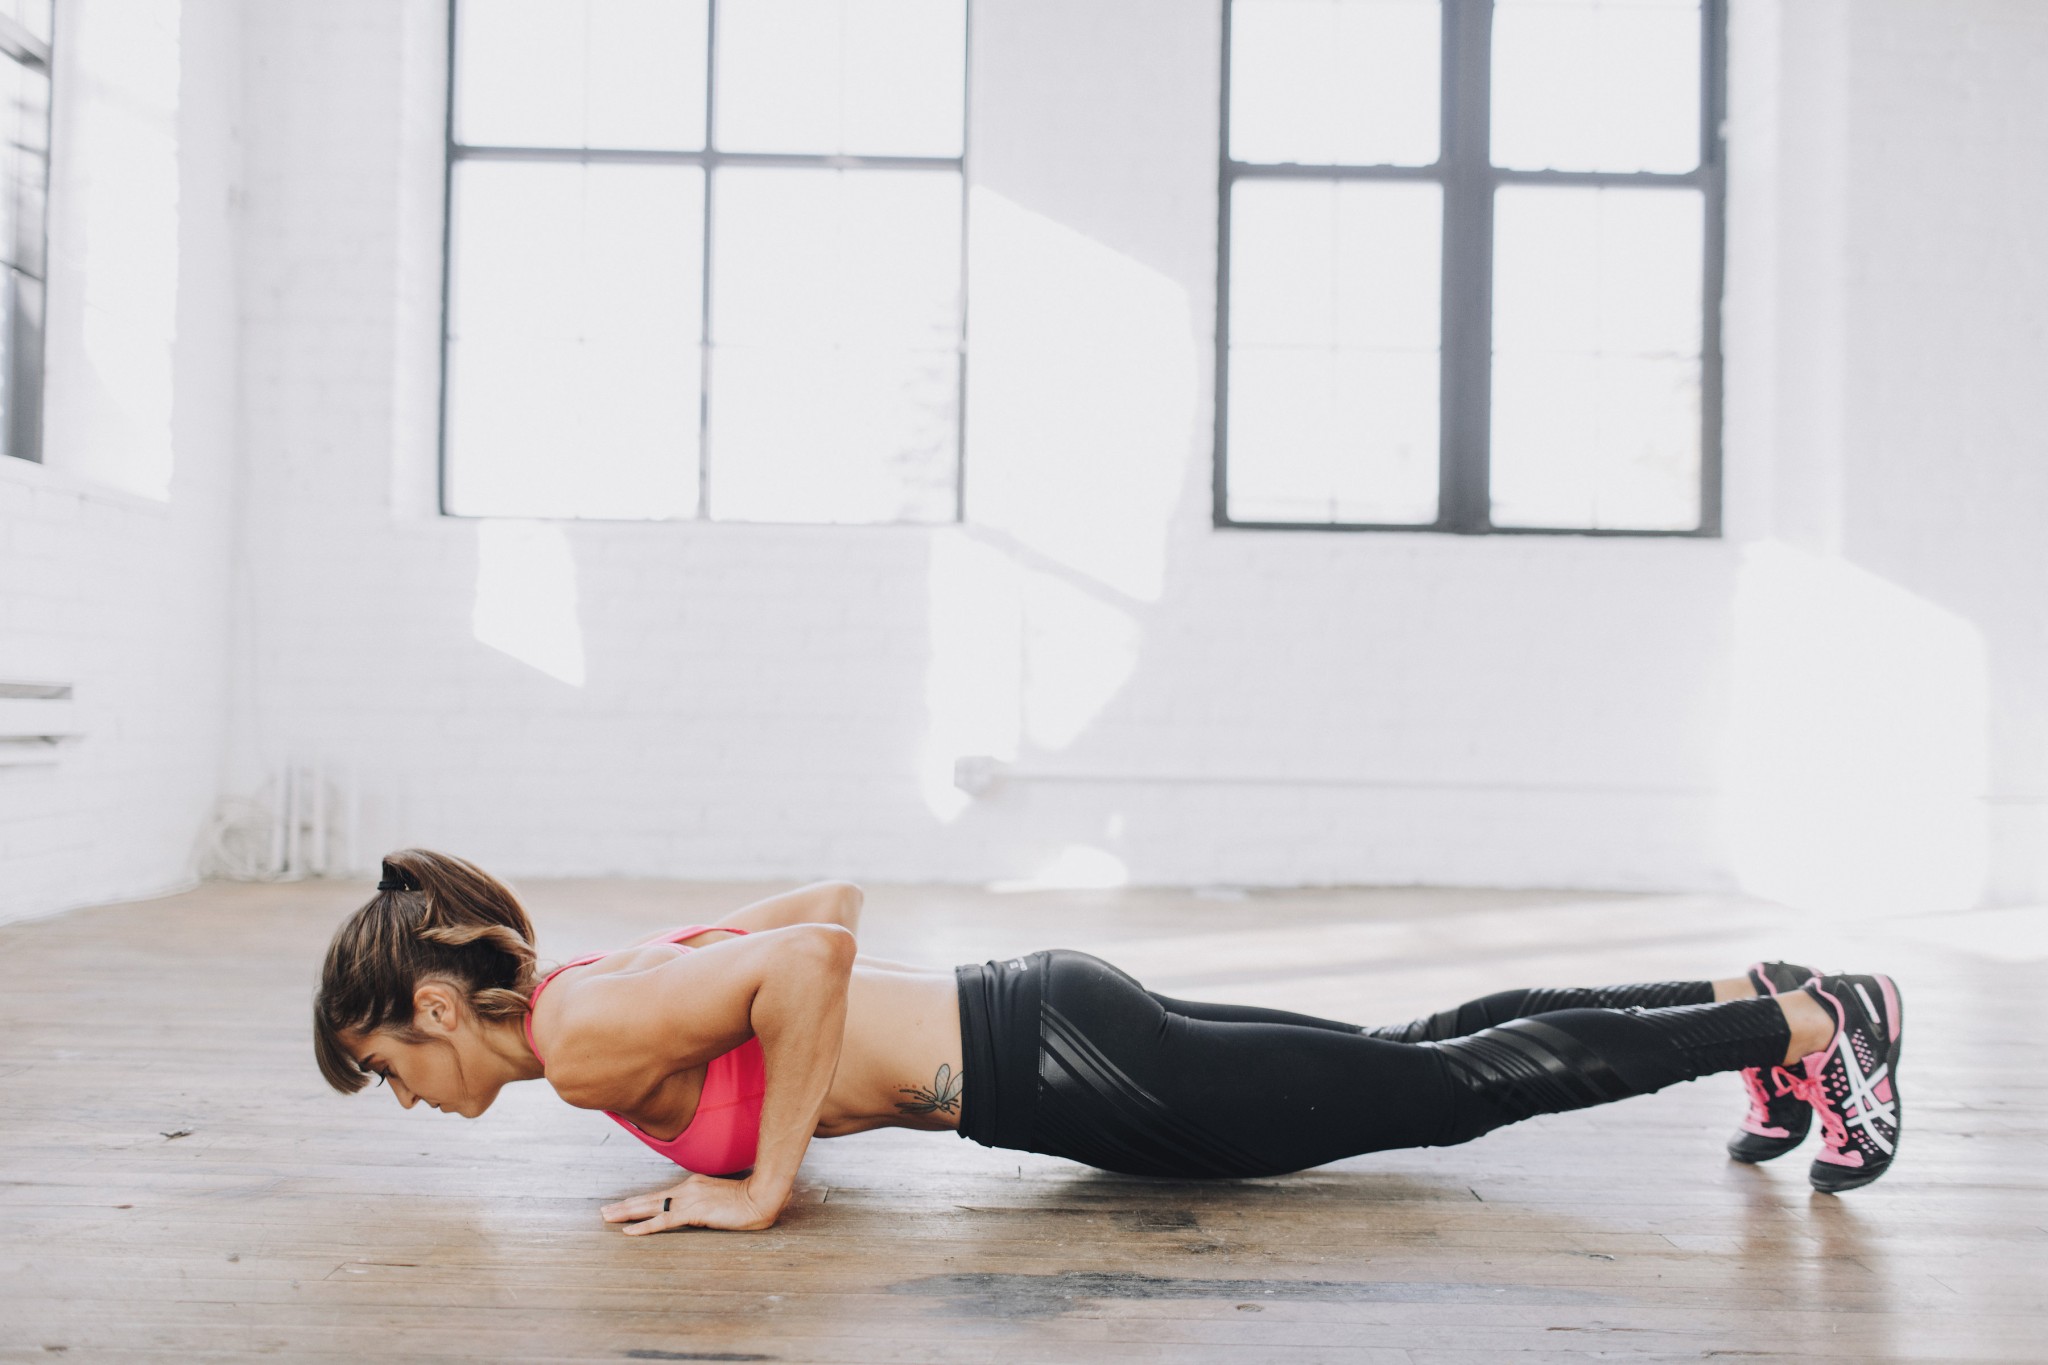
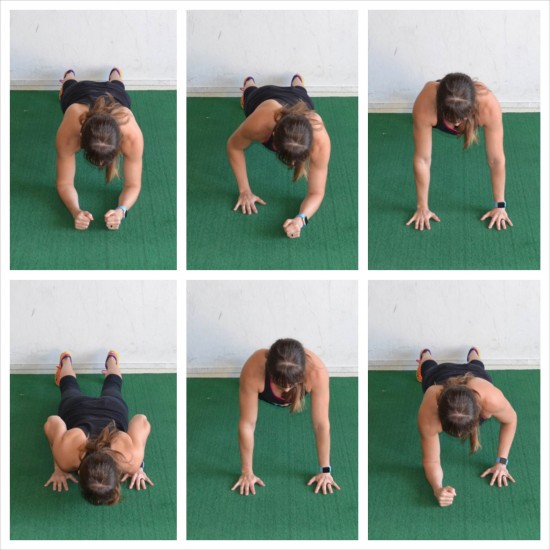
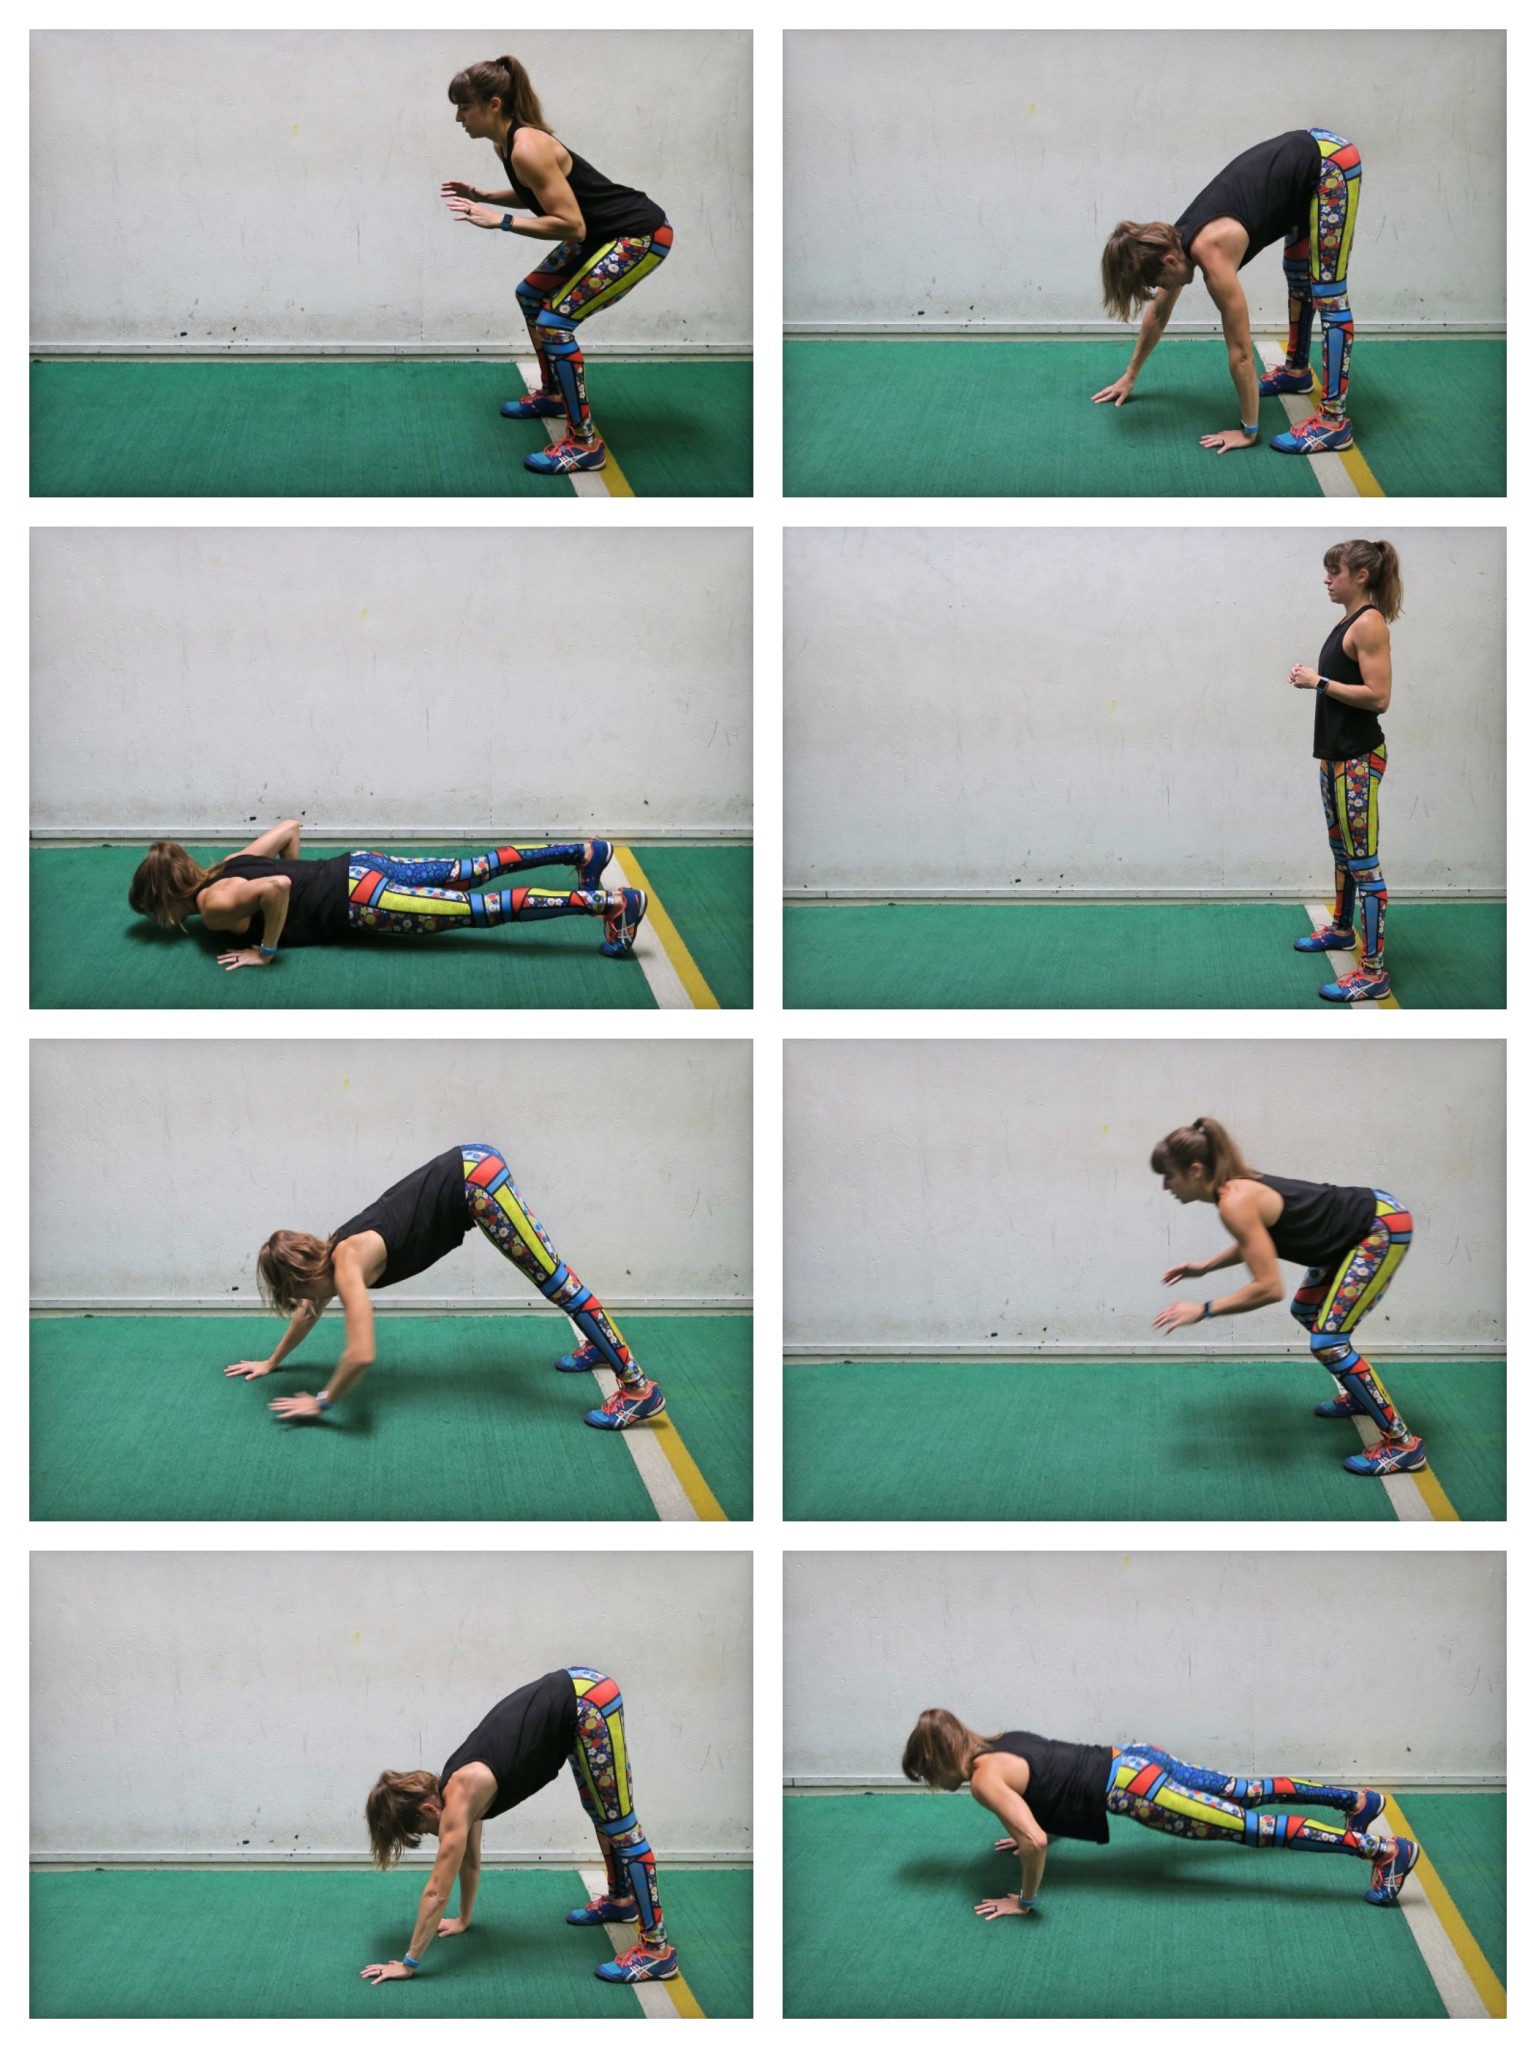
First, let’s break down the form on the full pike push up.
If you want to get the vertical pressing benefits of this push up variation, you’ve got to make sure you’re actually performing a vertical press.
It is easy to let this move become more of a horizontal push as you fatigue. But the more you start to let yourself drift into more of a traditional push up position, the less you’re going to emphasize your shoulders and triceps and the more your chest is going to begin to work.
You may find your pike push up turns more into a decline variation, which isn’t bad, it’s just not working the same muscles to the same extents!
To do the pike push up, you want to place your feet up on a bench or couch or stair. The higher the platform, the more challenging this move will be.
The platform allows you to shift more weight onto your arms for added resistance.
Walk your hands back so your butt is up in the air and your chest is facing back toward the wall behind you with your arms extended.
You want to try to create as straight a line as possible from your hands up to your butt.
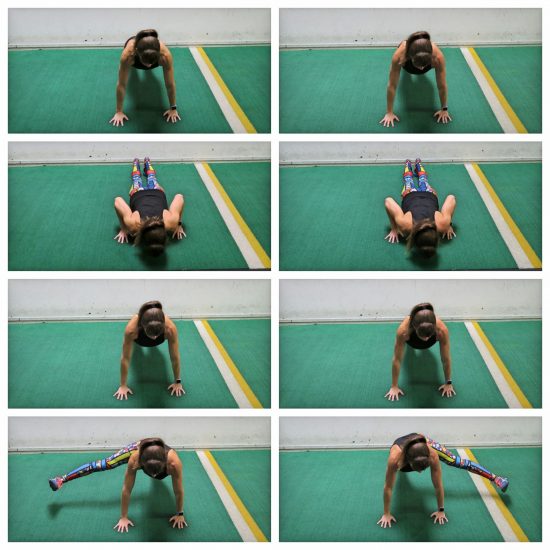
As you begin to lower, you will shift forward just slightly as you lower your head toward the ground at about your fingertips.
Think about the similar movement of the overhead press but in reverse.
When your head is near the ground, that’s like the bar at about your chest.
Then as you extend your arms out to push back up in the pike, that’s like you pressing the bar overhead.
You want to think “vertical press” and push your butt up toward the ceiling.
You just don’t want to end up rocking so forward your hands are at your shoulders or chest. This isn’t that incline bench or decline push up.
You can even lower your head down to lightly touch the ground before pressing back up. Really focus on pushing that ground away with your entire hand.
As you get tired it is easy to not notice you start to push forward off your feet and move into less of that vertical position.
While you ARE pushing off your toes on the bench to load your weight vertically, you want to push your butt up toward the ceiling not rock back and forth.
If you notice as you fatigue your hands creeping out from the platform or your butt sinking, pause and reset or even modify.
This seems simple, but is much harder than it looks.
That’s why you may want to start first off the ground from a more downward dog position, doing the Downward Dog Pike Push Up.
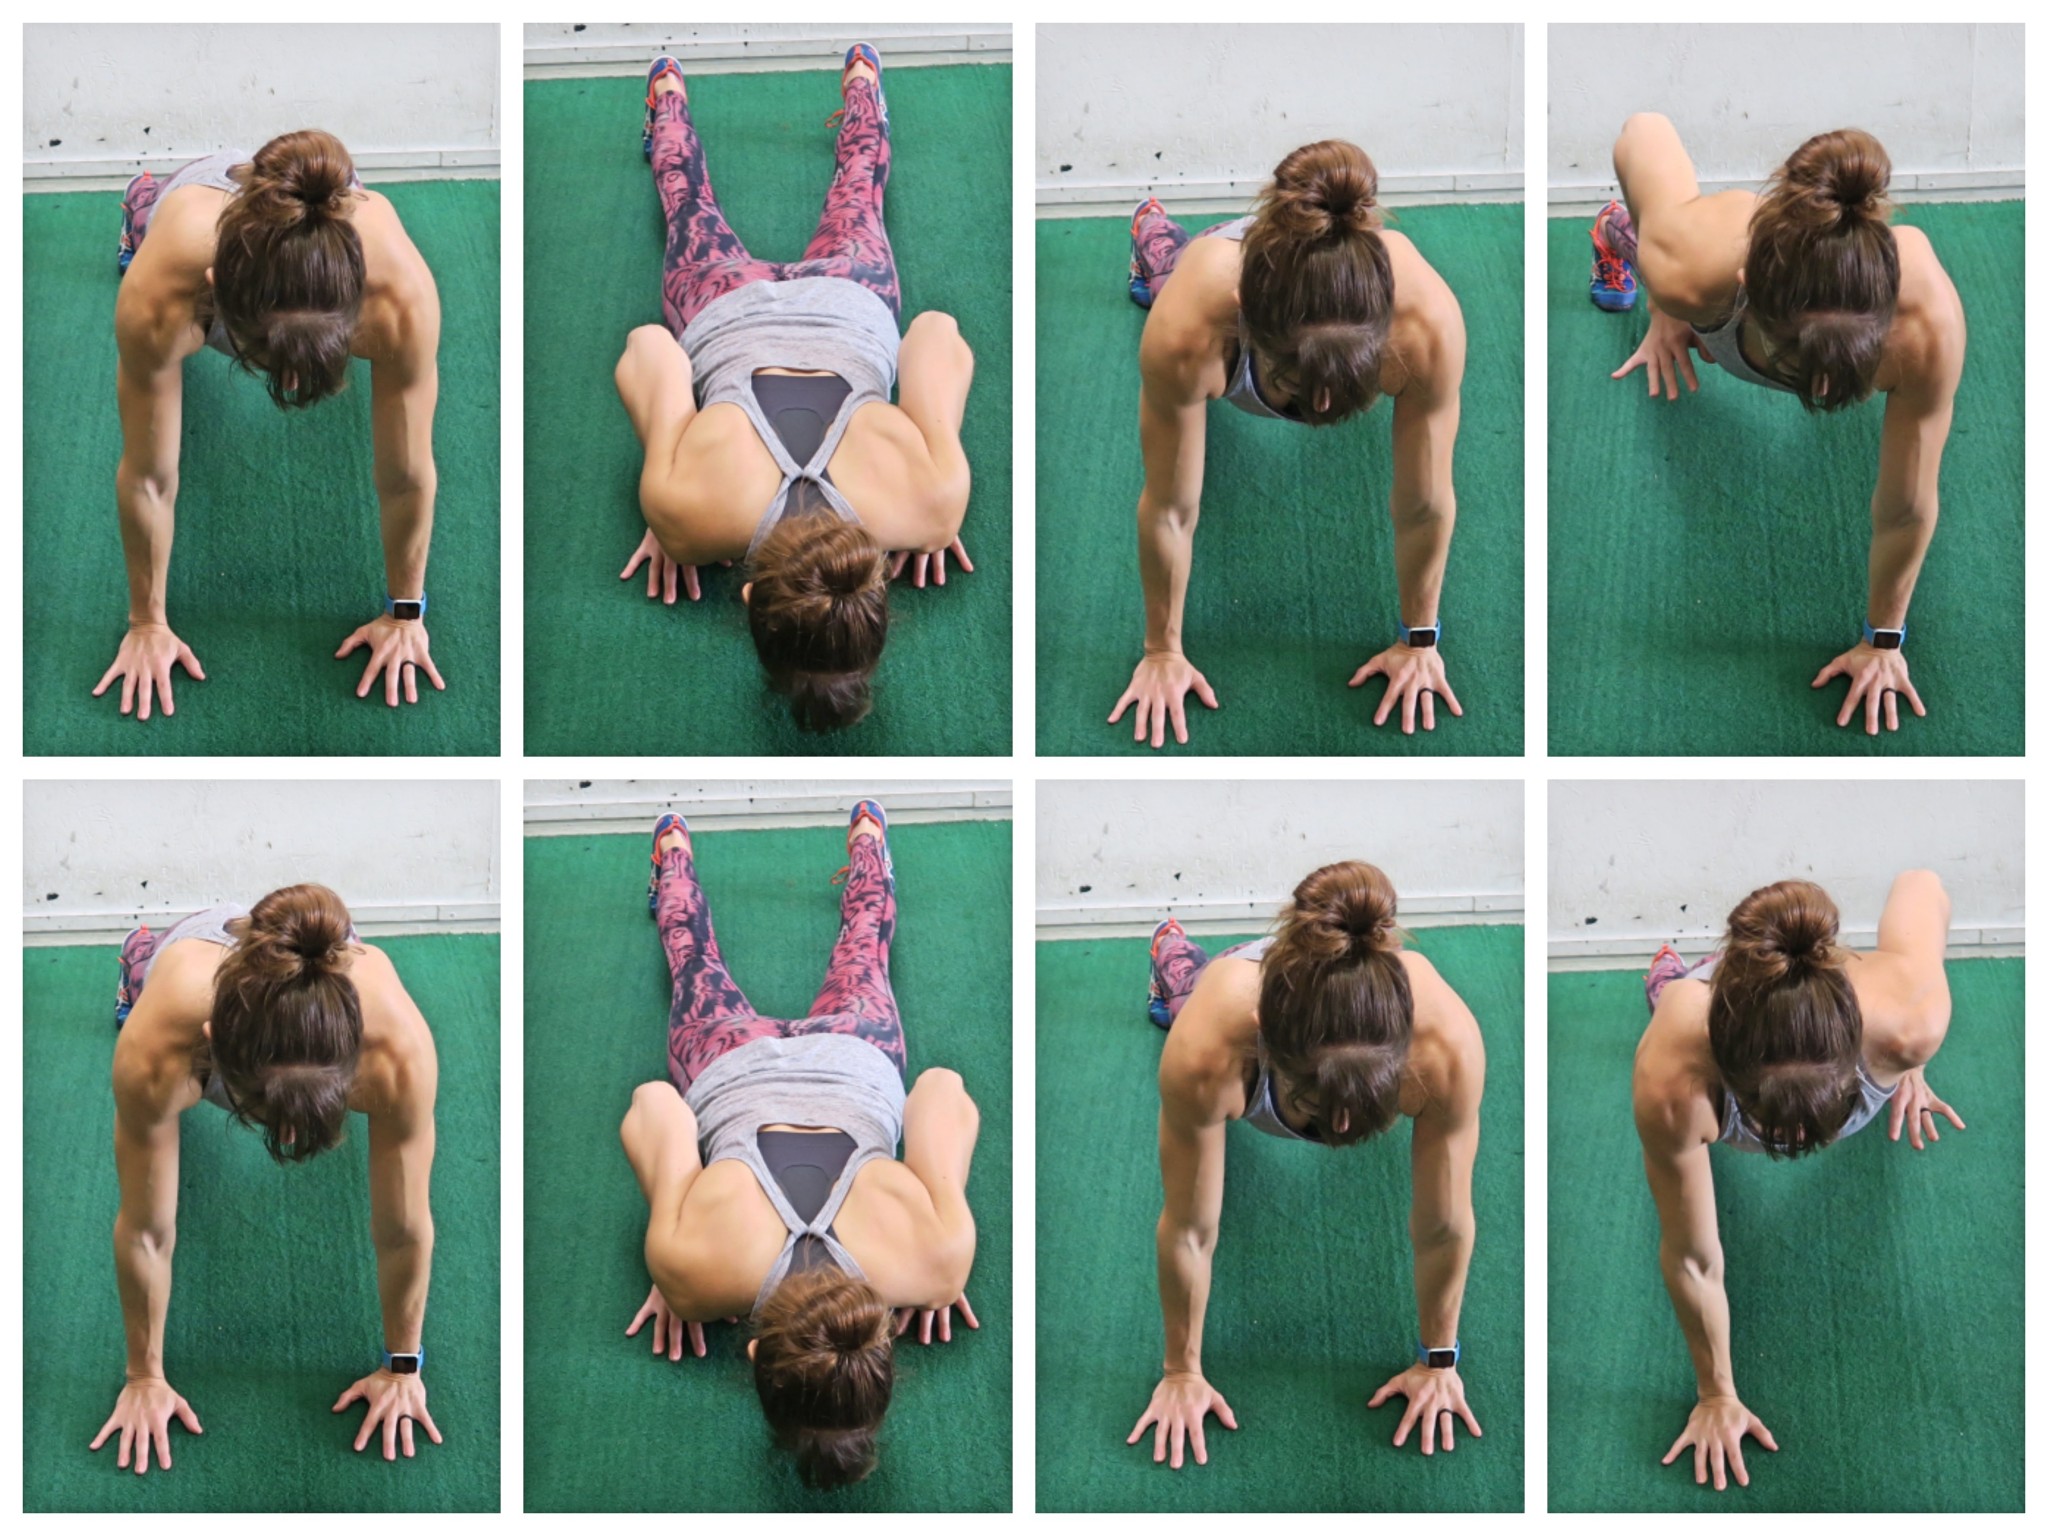
With this variation your feet will be on the ground and you’ll set up almost as if you’re doing the downward dog.
But even off the ground you have room to modify more or less.
The more forward you walk your feet, the more challenging the move will get.
You want to even shift your weight a bit forward onto your hands if possible to make it harder.
You then want to maintain that nice straight line from your hands on the ground up your spine to your butt as you lower your head between your fingertips then press the ground away to extend your arms straight back out.
Just be conscious you don’t rock forward and drop your butt or you’ll end up turning this into more of a regular push up.
You want to focus on those triceps and shoulders and feel like you’re pushing your butt up into the air.
If you film yourself doing this, you want to still see an angled press with your arms in line with your body and spine as you extend out.
Visualizing that barbell or dumbbell press can help!
You can walk your feet closer to your hands and really push up onto your toes before then moving your feet to a low incline to progress.
If you’re struggling to control the more downward dog position though, do not walk your feet in toward your hands yet
Instead even consider putting your hands on an incline like a stair.
By raising your hands up, you reduce the resistance on your upper body, helping you practice that vertical press with a lighter weight.
Regress to progress and focus on the proper movement and feeling your shoulders and triceps working.
There is always a way to match our fitness level and even the equipment we have on hand to get in a great workout based on our needs and goals!
But try one of these pike push up variations, using what you need based on your abilities now.
Just like we change up tools and weights and reps to create progression with the overhead press, you can vary resistance through inclines and foot positions with the pike push up.
You can even change up the tempo you use to perform the pike push up, slowing down just parts of the exercise.
And then you can use it for interval work or different rep and set designs as needed.
When we don’t have access to equipment we can still challenge ourselves and build muscle and strength with fabulous workouts!
Want amazing workouts you can do anywhere?