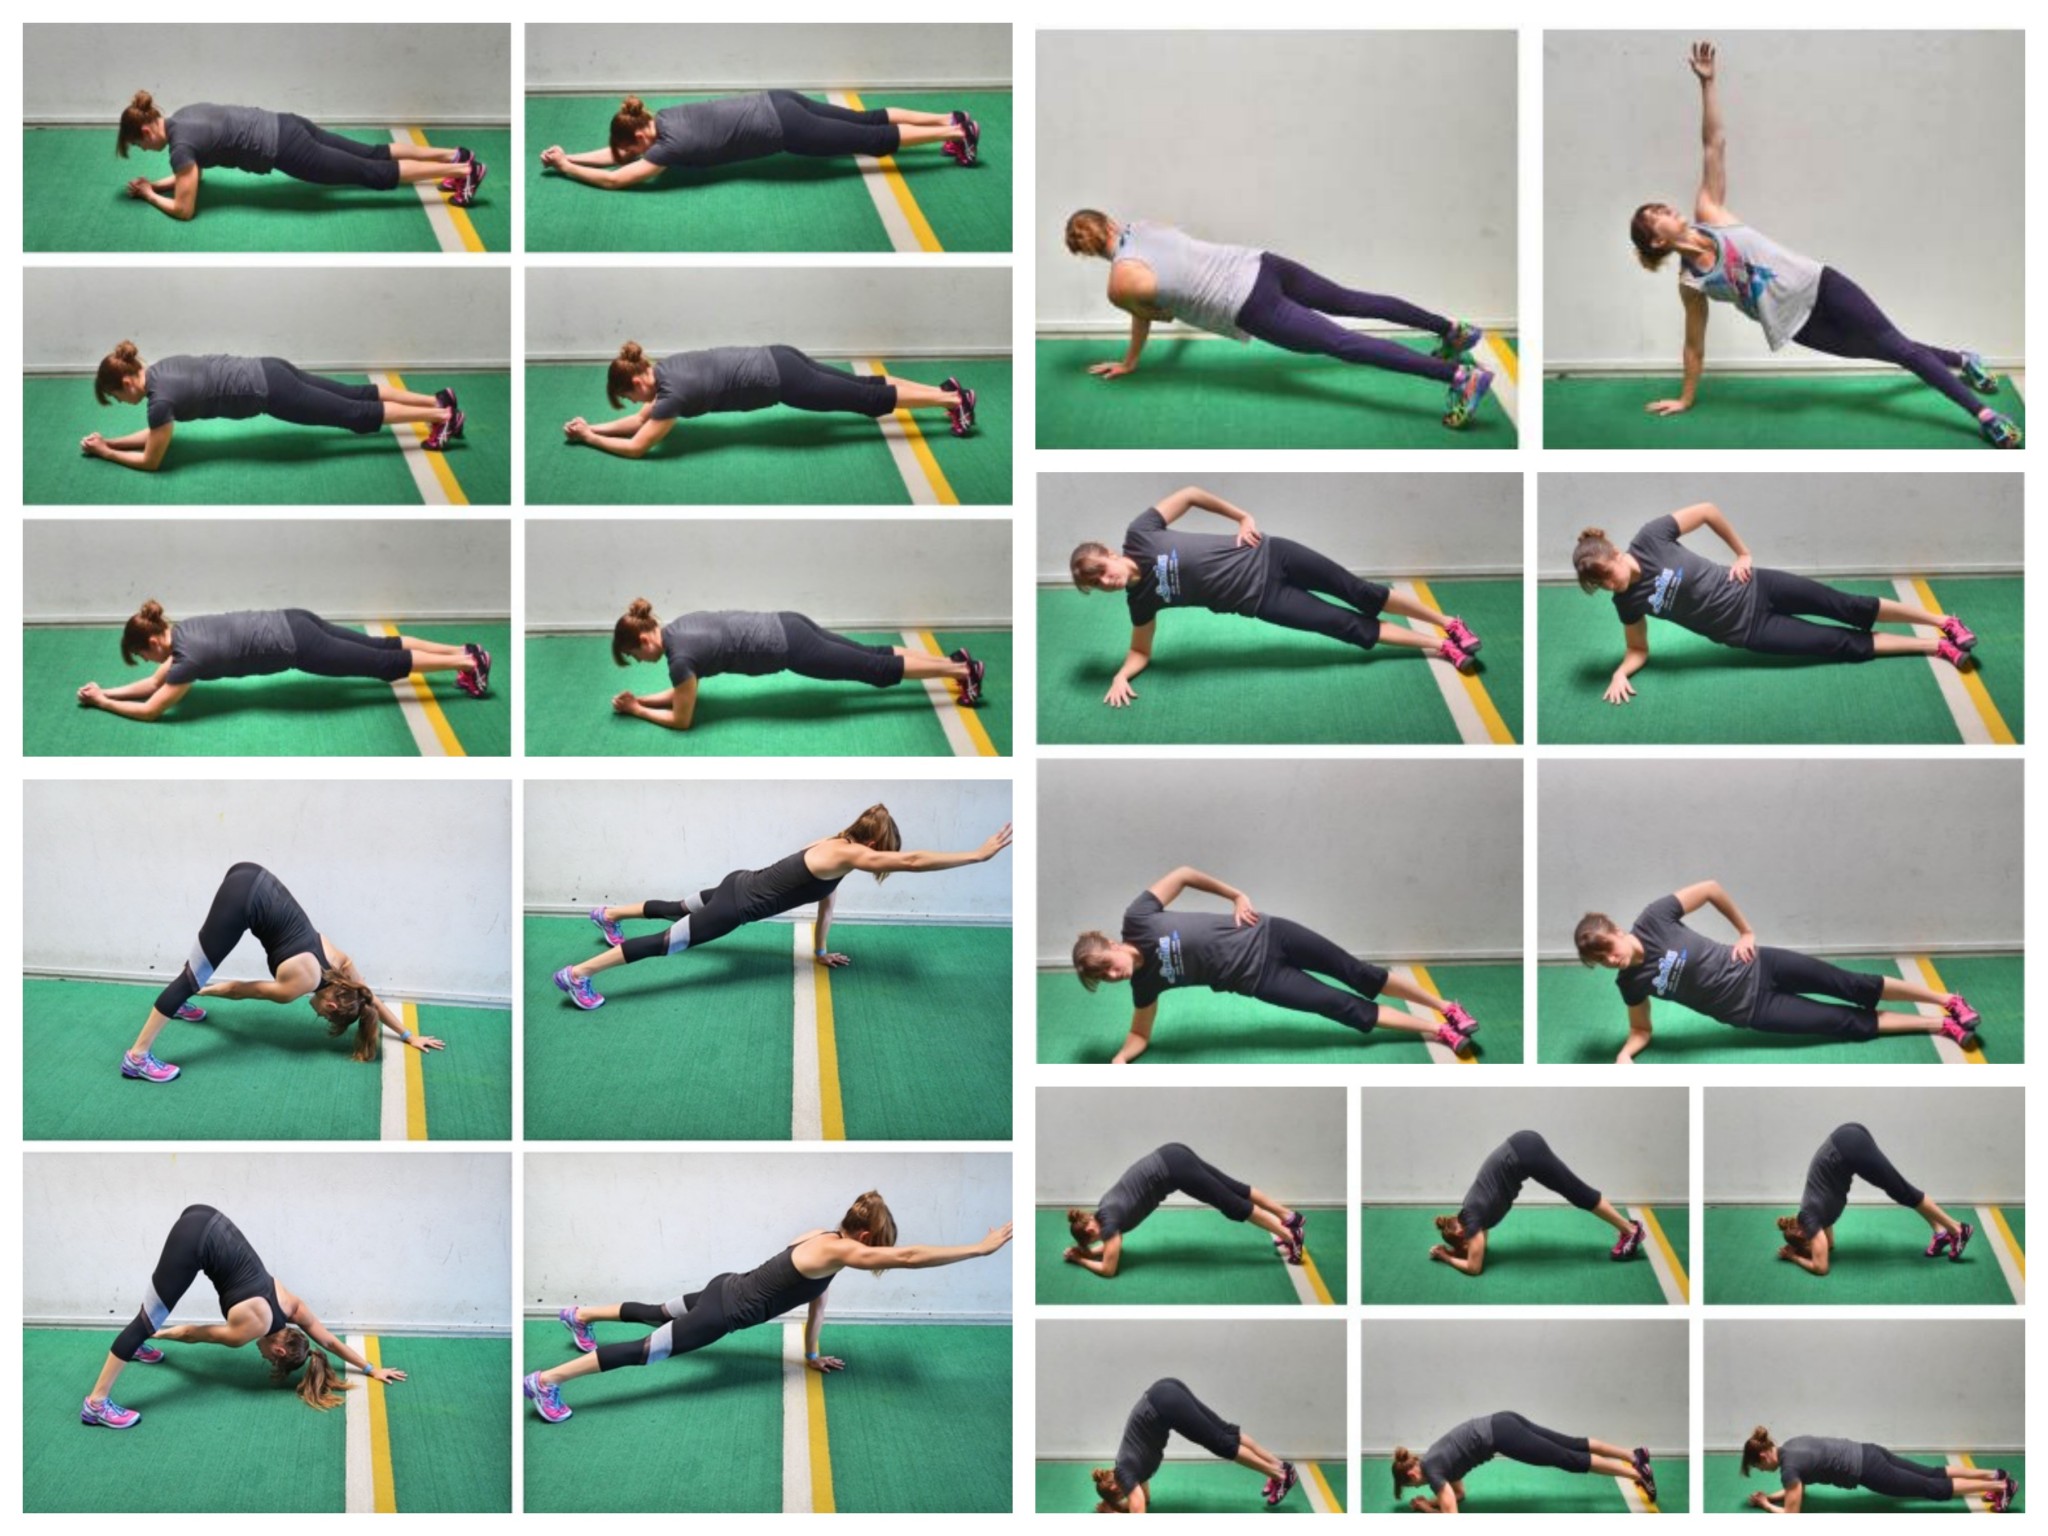
5 Plank Variations I ALWAYS Use
There are so many great plank variations out there. And of course I like mixing things up and using a variety to challenge my body, and my mind, in different ways.
BUT I also have my go-to options. Plank moves I like to include way more often not only in my own workouts, but in my clients.
These moves are my favorites because they are functional moves that cover everything I think a core training program needs to get results.
- They work the core from every angle.
- They work the core in every plane of motion (sagittal, frontal and transverse).
- They work everything between your shoulders and your knees aka all of the muscles of your core.
- They work not only your abs but also your glutes.
- They build shoulder stability.
- They are compound moves that even get your blood pumping a bit to help you burn more calories.
- They can be easily modified or advanced for any level.
- They are a combination of unilateral and bilateral moves.
- They force you to learn to engage your core as you balance, twist, turn, bend and even extend!
- They even work on improving your mobility and strengthening through that full range of motion!
So what are these 5 Plank Variations I always use!?
- Plank with Reach Back and Out
- Side Plank Hip Dips
- Body Saw
- Plank with Rotational Reach
- Inchworm Plank
Learn more about each move below!
(If you’re ready to skip to the good stuff and get some workouts using these plank variations, you’ll want to check out my 28-Day Core Burner Program!)
Plank with Reach Back and Out:

This plank in particular is one of my favorites.
Why?
Because it works on shoulder stability, glute activation, hip extension and core anti-rotational strength.
To do the Plank with Reach Back and Out, set up in a Front Plank from your hands and toes with your hands under your shoulders and your feet about hip-width to shoulder-width apart. For this move, you will want your feet wider to create a more stable base. Beginners can do this move from their knees.
Then from the Plank position, reach one hand back and across toward the opposite ankle, pushing your butt back and up toward the ceiling as you reach. Then reach back forward and out toward the wall in front of you, dropping your hips back into a nice plank position.
Do not drop your hips too low and feel your low back engage. Keep your core tight to protect your low back as you come back into that nice plank position. Reach back and across with the same hand until all reps are complete on that side.
Side Plank Hip Dips:
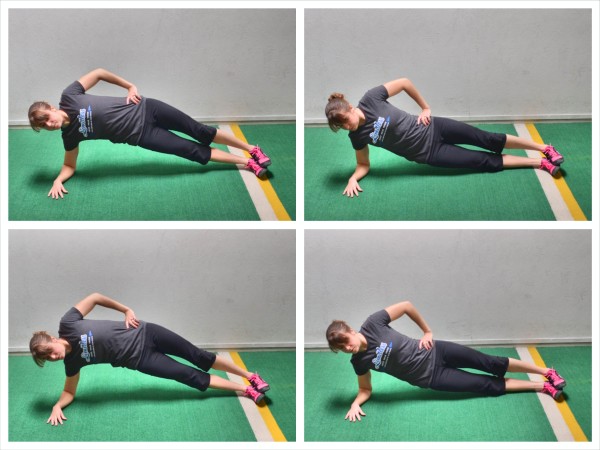
So why is the Side Plank with Hip Dips one of my favorites? A. It’s a frontal plane movement. B. It’s a great move to work obliques AND your glute medius (aka a butt muscle) which is an important hip stabilizer.
To do the Side Plank Hip Dips, set up in a side plank from your forearm with your elbow right under your shoulder. Do not let your elbow get way out beyond your shoulder or you will place more strain on your shoulder. By keeping the elbow “stacked” under the shoulder, you allow your back and lat to help support your weight.
You can then either stack your feet and lift up onto the side of your bottom foot or you can place the top foot in front on the ground and lift up onto the sides of both feet. Unstacking your feet will make it a bit easier to balance. Beginners may need to place their bottom knee down on the ground.
Keeping your body in a straight line and your chest open and not rotated toward the ground, drop your hips down toward the ground and then lift them back up into the Side Plank.
Repeat making sure your body doesn’t collapse forward and your chest doesn’t rotate toward the ground. Your top hand can be raised toward the ceiling or on your hip.
Body Saw:
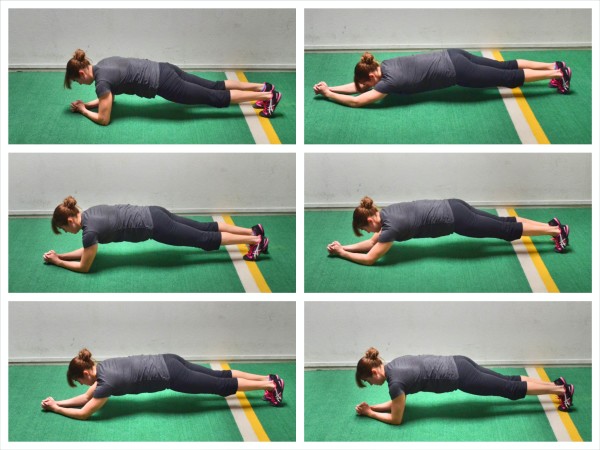
I love this more advanced plank. It shows that to advance the plank you don’t always have to hold for longer or add in weights.
And for a functionally strong core, you want to have core strength and stability even when stretched out. This plank variation will help you learn to brace your abs even as you extend to help you protect your low back. Plus the movement really gets the blood pumping a bit!
To do the Body Saw, set up in a Plank position from your forearms and toes with your feet close together. Your forearms should be right under your shoulders and your body should be in a nice straight line from your head to your heels.
Then begin to walk your feet backward, taking small steps. Keep your body in a nice straight line and don’t let your hips sag toward the ground. Lengthen through your triceps and lats as you walk back. Walk back as far as you can while keeping your core engaged.
Then walk your feet back forward until you are back in the Forearm Front Plank. Do not let your butt go up in the air as you walk your feet back in.
Repeat, walking your feet back out. Only walk out as far as you can without your low back engaging. If your low back feels this move, don’t walk out as far. Start with only a few steps.
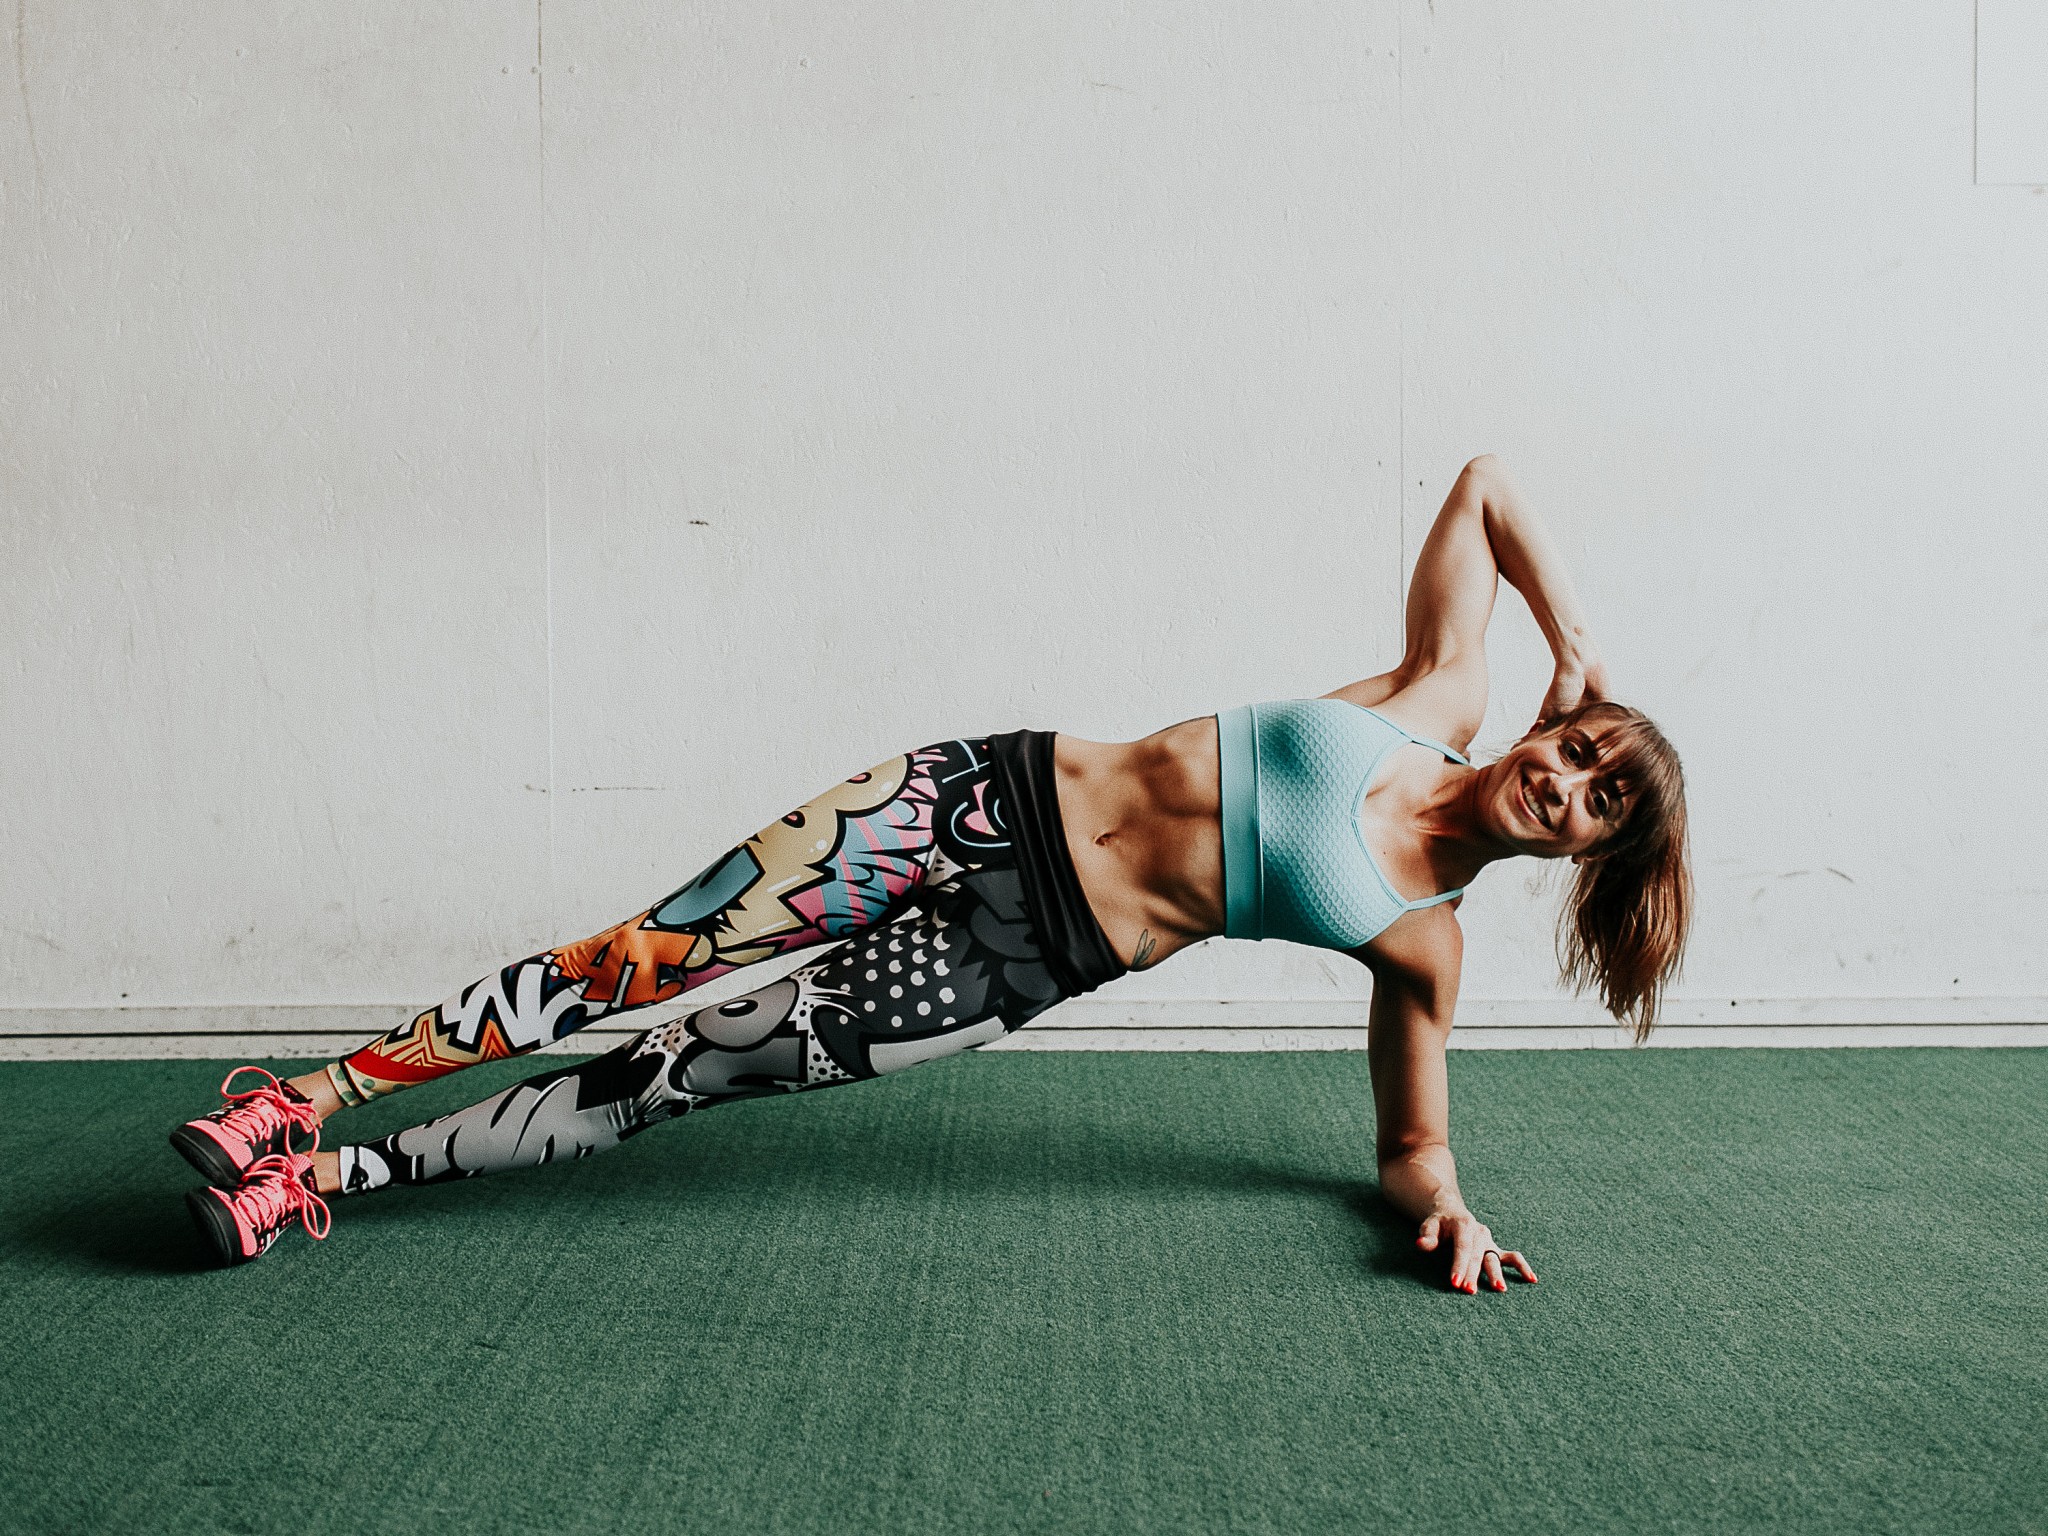
Plank with Rotational Reach:
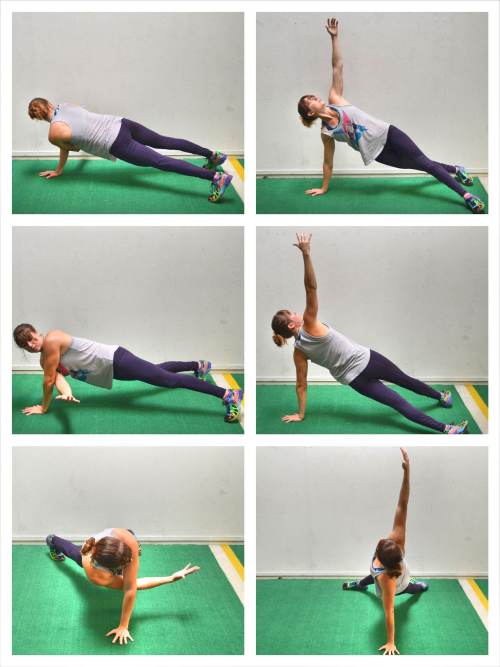
This is another great plank to build shoulder stability, but this one instead works on rotational strength. I love this plank variation because it works the entire core and you’ll even really feel it working the muscles around your rib cage!
To do the Plank with Rotational Reach, set up in the high plank position on your hands and knees (beginner) or toes (advanced). Set your feet wider apart to create a more stable base. Then reach one hand under your armpit and toward the far wall beyond your side. You aren’t just reaching under your armpit to pat yourself on the back. You want to really reach toward the wall.
As you reach, make sure your hips stay down. Then pivot open, rotating into a Side Plank as you reach your hand up toward the ceiling. You will reach the hand that reached under your armpit up toward the ceiling, keeping your hips up as you move into a Side Plank. Pivot onto the sides of your feet as you reach or try to open up as much as you can on your knees. Beginners can even move to their feet if they can to do a more intermediate variation.
Then reach the hand back down and under your armpit, rotating your hips back down toward the ground and into the Front Plank position. Repeat. Complete all reps on one side before switching and reaching the other way. Do not let your butt go up in the air or your hips sag toward the ground as you reach.
Inchworm Plank:
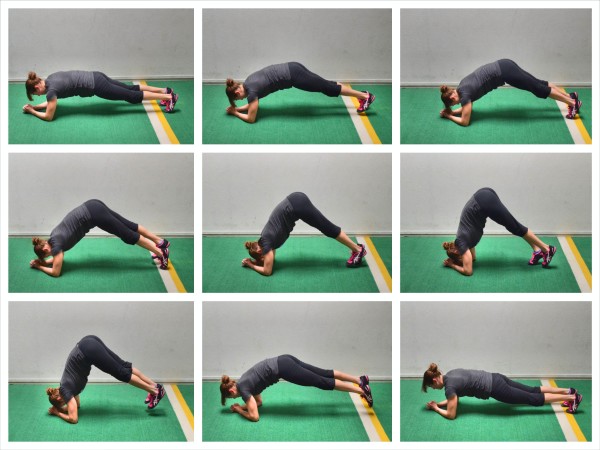
I love this plank because it is the opposite of the Body Saw and requires a lot of core strength to get your feet in closer to your head so that you can get your butt up higher. It also really works on your mobility to be able to walk in further. Plus, the walking in and jumping out will get your blood pumping and heart beating!
To do the Inchworm Plank, set up in a forearm plank from your toes with your elbows under your shoulders and your body in a nice straight line down to your heels.
Begin to walk your feet in toward your head, keeping your legs straight as you take very small steps forward. Your butt should go up in the air as you walk your feet in to pike up. Walk in as far as you mobility allows. Then jump both feet back out (beginners may walk back out instead).
Do not let your hips sag toward the ground as you return to the forearm plank. Then repeat walking back in before jumping back out.
Ready to build core strength using these Planks and even other fun core moves?
Ready to learn why just holding a plank for LONGER isn’t the answer?
Ready to get rid of that low back pain and get a stronger, killer-looking core?
–> Then learn more about my 28-Day Core Burner Program HERE! <–
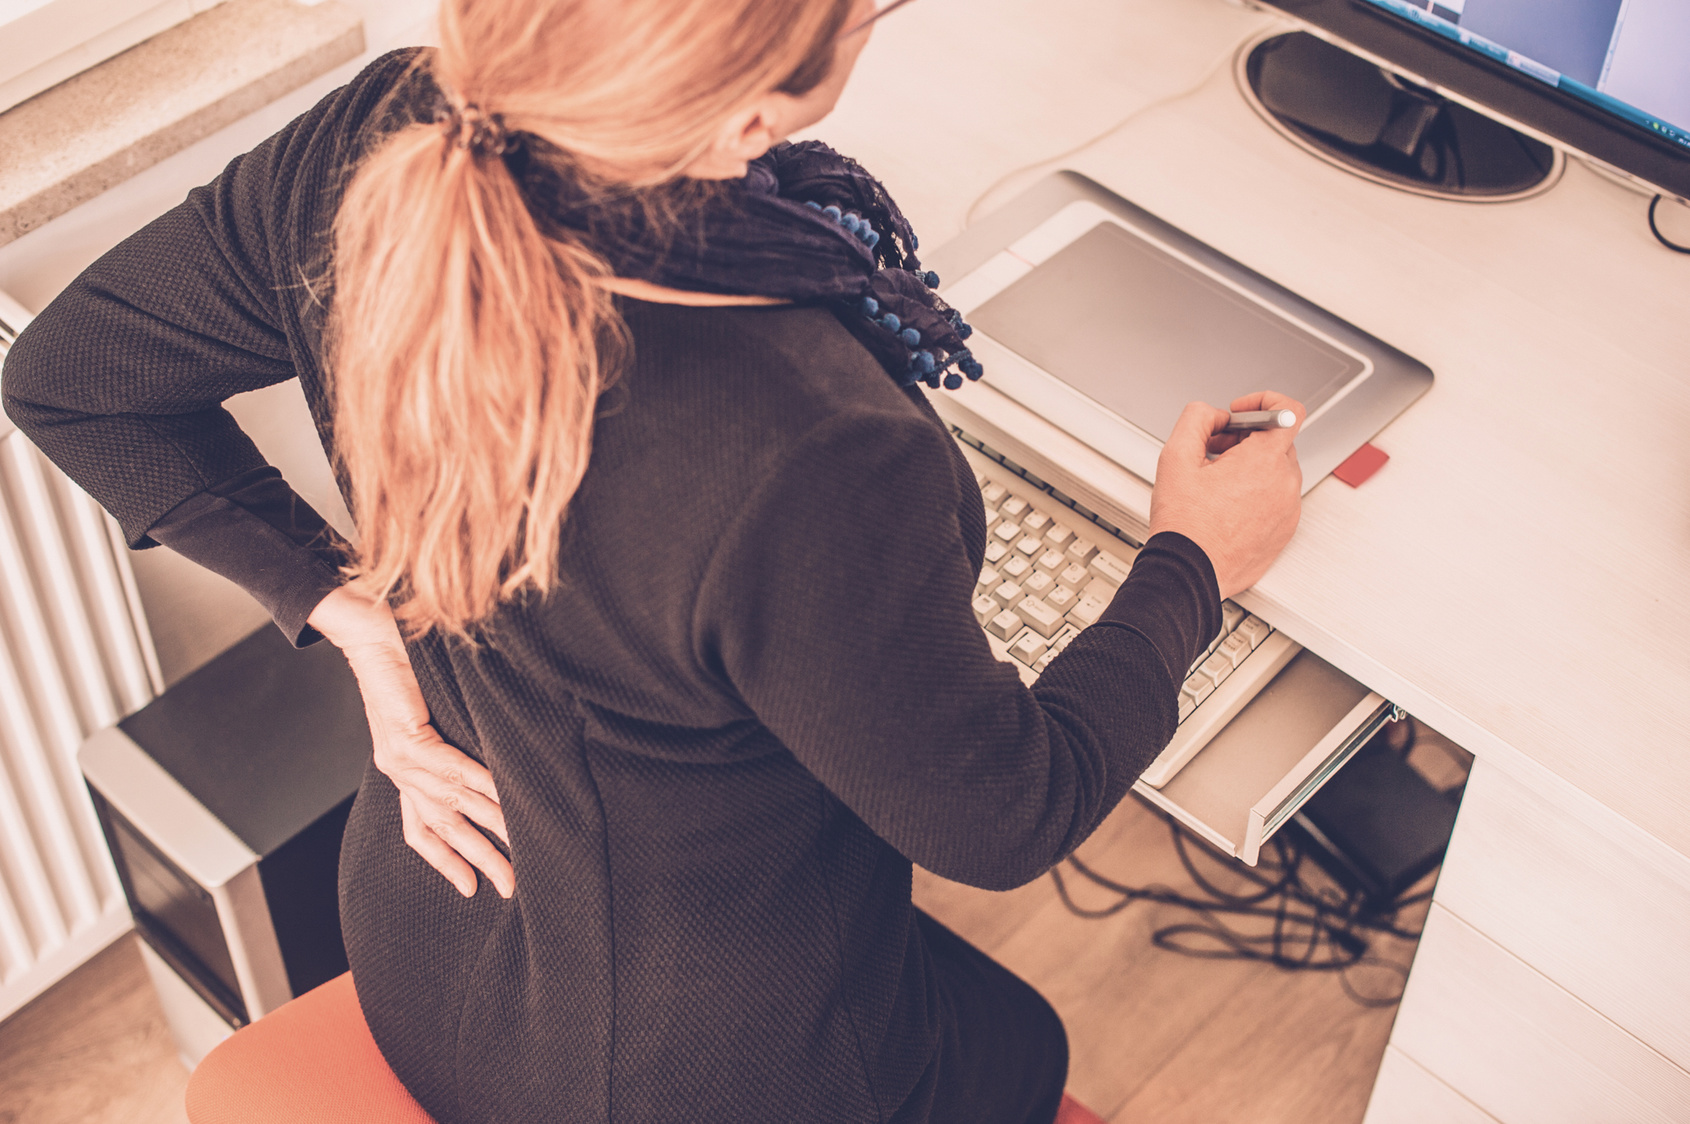 But what we don’t realize is that all of that sitting at a computer, sitting watching TV, hunching over our phones texting or even driving in the car not only leads to poor posture, but also imbalances that kill our proprioception.
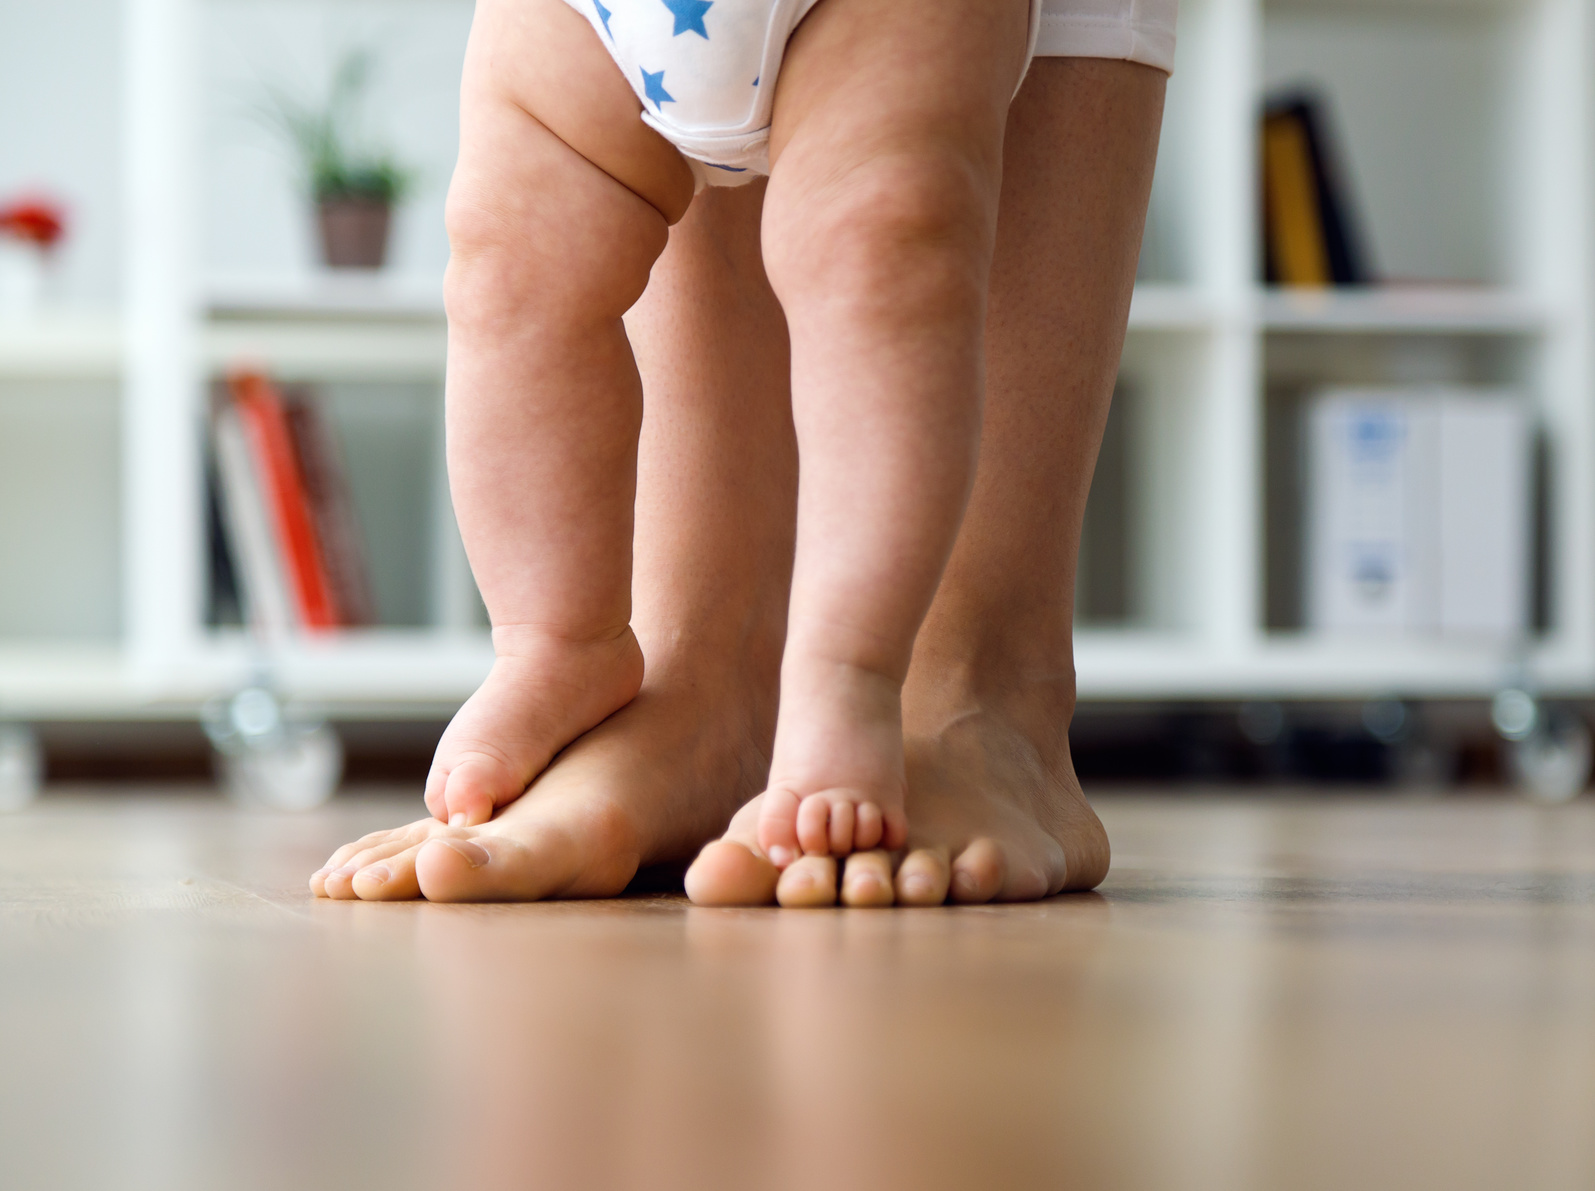 First they crawl. Then they stand while holding on. Then they stand on their own. Then they stand, but hold on to start walking. Then finally walking a few steps on their own…Until they are able to not only walk, but run.
 You do bodyweight glute bridges, focusing on extending your hips and squeezing your glutes. You engage your abs and make sure your low back and hamstrings don’t take over. You start to FEEL the contraction of your glutes and they start to burn.
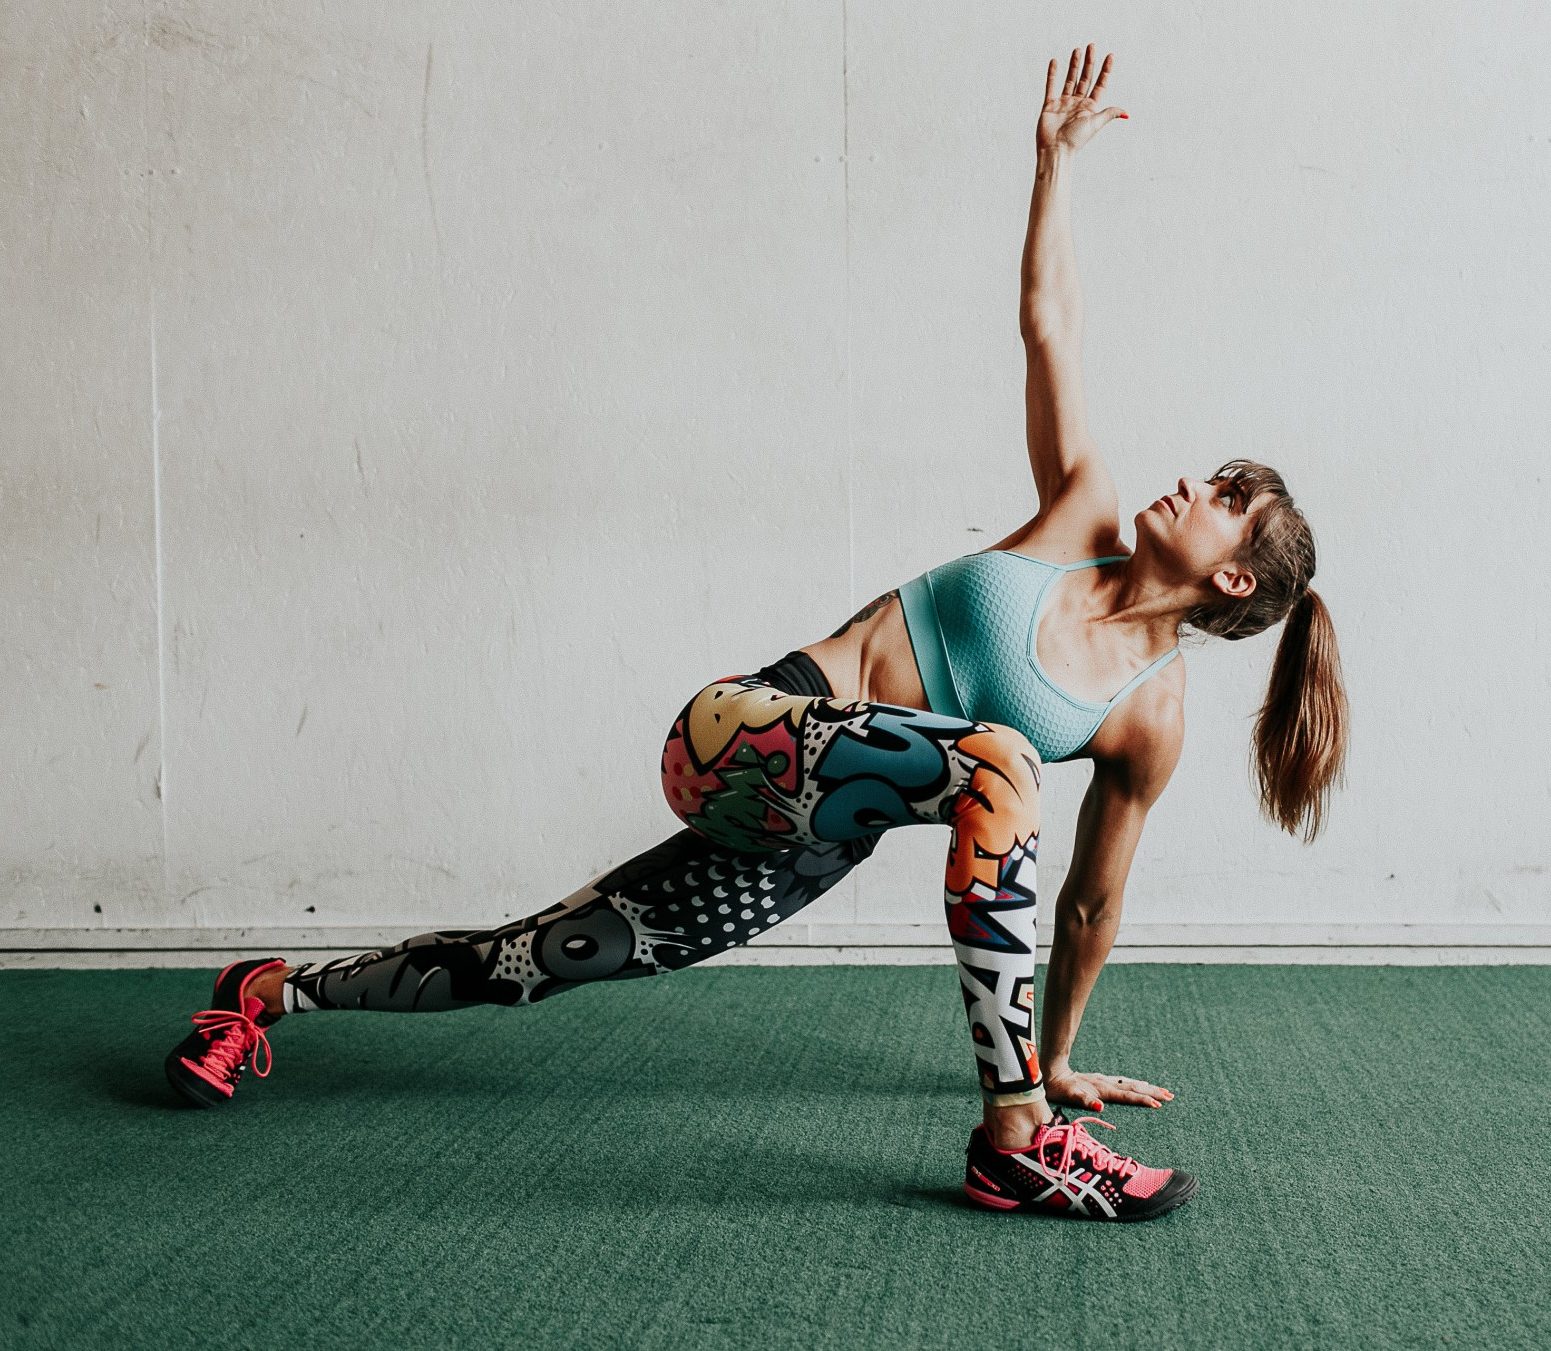 You are relaxing those muscles that want to try to engage and carry a load they can’t. So you are relaxing them so your brain doesn’t want to recruit them. And then you are getting the right muscles for the job engaged and working.
