WARM UP
Stretch and Roll Out:
Calves
Quads
Groin
Hamstring
Hips/Glutes
Back/Chest
Shoulders/Forearms
WORKOUT
Complete 3-5 rounds of each circuit, resting as needed between rounds. Rest 1-2 minutes between circuits. Focus on adding weight or trying more challenging variations; however, make sure that you use a full range of motion. Don’t add weight at the expense of not completing a full range of motion!
CIRCUIT #1:
20 reps Glute Bridge with Squeeze
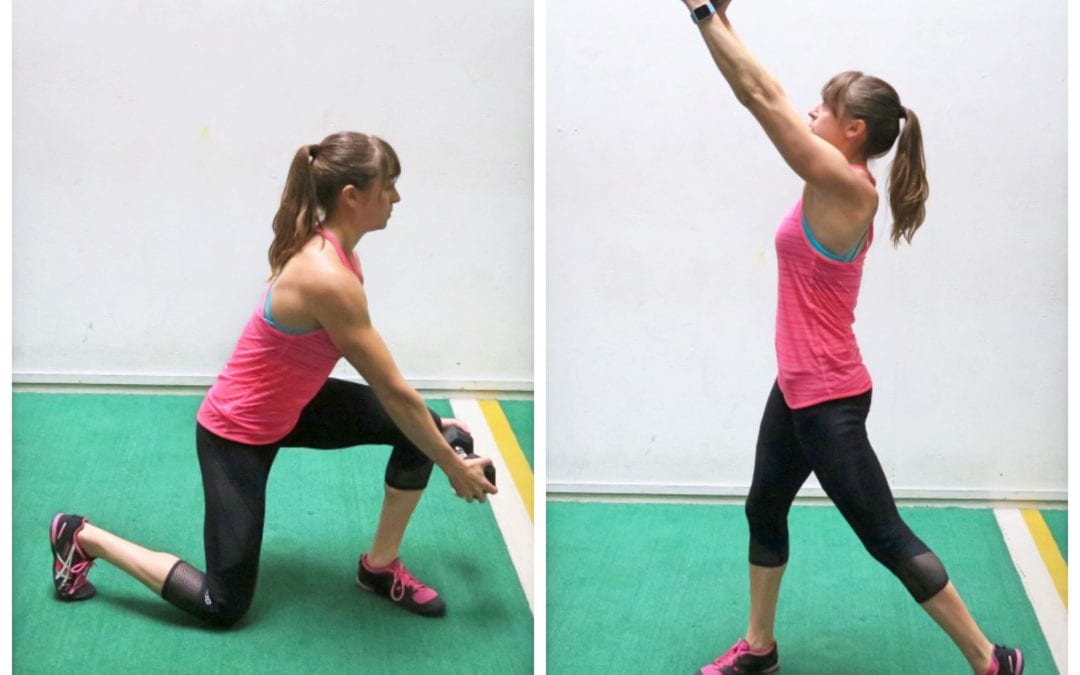
6-8 reps per side Cossack Squat
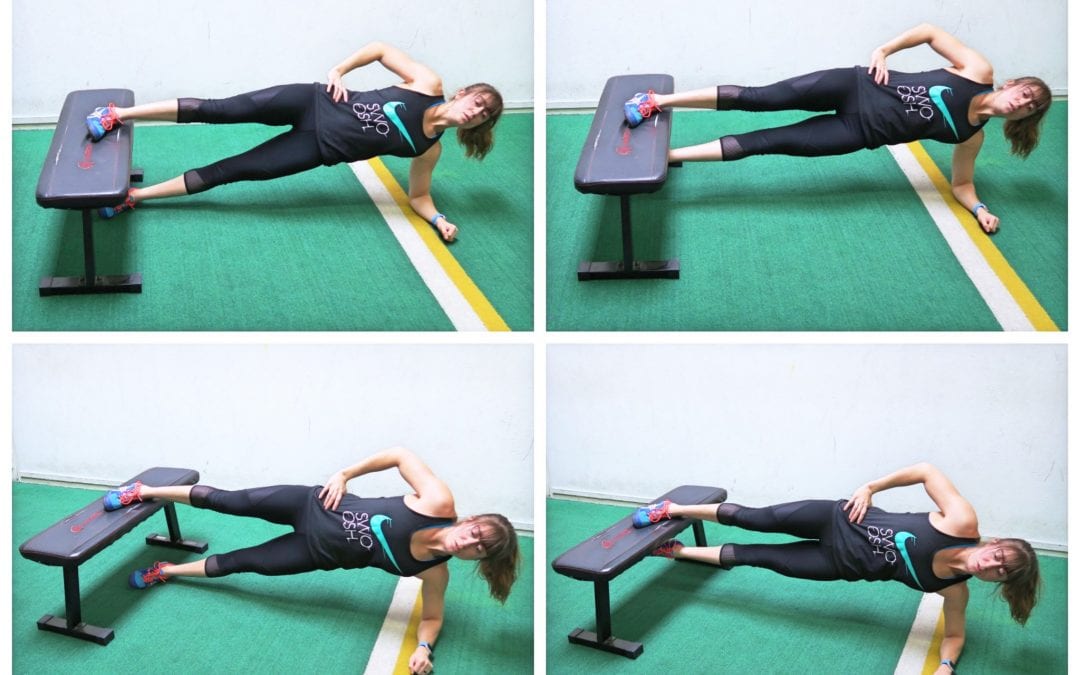
8-12 reps per side Side Plank Bench Lift
CIRCUIT #2:
10 reps per side Side Plank Clams
10-15 reps Sumo Squat
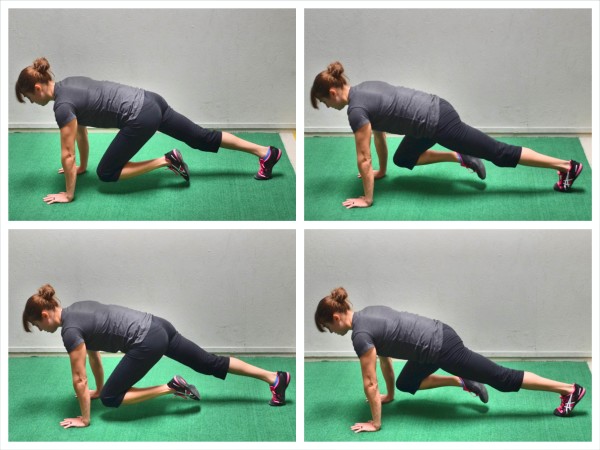
10-15 reps Peek-a-boo
COOL DOWN
Stretch and Roll Out:
Calves
Quads
Groin
Hamstring
Hips/Glutes
Back/Chest
Shoulders/Forearms
NOTES: Modify moves as needed, and add weight to make moves more challenging if you can still work through a full range of motion. This workout should help activate your glutes, strengthen your adductors while also improving your mobility!
For descriptions of each move, Elite Library Members can click the links below. Not a member, click here to learn more about our Exercise Library or see this post 21 Inner Thigh Moves for a video of the moves.
WARM UP
Stretch and Roll Out:
Calves
Quads
Groin
Hamstring
Hips/Glutes
Back/Chest
Shoulders/Forearms
WORKOUT
Complete 4 rounds of each circuit. Rest 1 minute between circuits. Do not rest during the 30 seconds of work. Really challenge yourself to move quickly while using a challenging weight. These weights though don’t need to be super heavy to be effective! Move right from one exercise to the next without resting!
Complete 5 rounds of the first exercise, resting about 60-90 seconds between rounds. Then rest 1-2 minutes and move on to the circuit. Complete 3-5 rounds of the circuit, resting as needed. Then rest 1-2 minutes and complete the burnout.
BURNOUT:
Complete 8 rounds, working 20 seconds, resting 10 seconds in between.
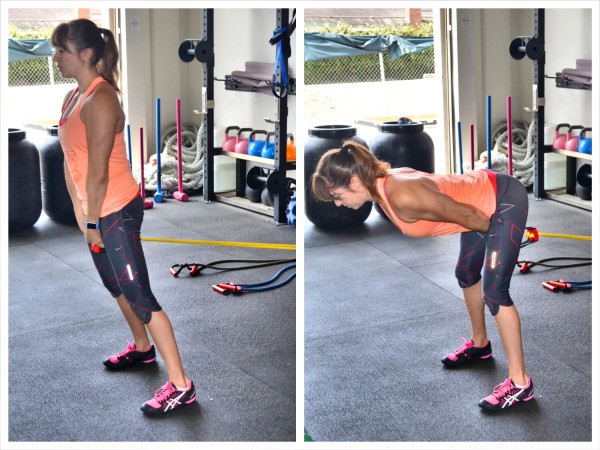
20 seconds Band Pull Thrus
10 seconds Rest
COOL DOWN
Stretch and Roll Out:
Calves
Quads
Groin
Hamstring
Hips/Glutes
Back/Chest
NOTES:
Focus on really challenging yourself with weight on the Hip Thrusters, even if that means slightly lower reps or even longer rest between rounds. On the circuit, you will still want to challenge yourself with weight; however, you should rest less between rounds and move from one exercise to the next.
On the burnout, move quickly and focus on your glutes engaging. Don’t rest during the 20 seconds of work. Instead have a lighter band ready in case you need to regress so that you can keep moving.
**If you don’t feel your glutes working during the Woodchopper, try the Band Hip Rotations.
WARM UP
Stretch and Roll Out:
Calves
Quads
Groin
Hamstring
Hips/Glutes
Back
Shoulders
Wrists
WORKOUT
Set a timer for 30 second intervals with 5 seconds of transition time. Complete 30 seconds on an exercise then take the 5 seconds to move to the next exercise. You will only have the “active rest” break between the 2 rounds of the circuit. Then rest about 30 seconds before moving on to 2 rounds of the next circuit.
COOL DOWN
Stretch and Roll Out:
Calves
Quads
Groin
Hamstring
Hips/Glutes
Back
Shoulders
NOTES:
Regress movements as needed so that you can keep moving the entire 30 seconds. It is better to regress than rest. Also, during the active rest, bring things down as much as needed. The point is to move but to bring your heart rate down a bit while still getting everything to work.
WARM UP Stretch and Roll Out:
Wrists/Forearms
Chest
Shoulders/Traps/Upper Back
Lats/Thoracic Extension
ACTIVATION
Complete 2 rounds of the circuit below.
CIRCUIT: 30 seconds Downward Dog Hold
15 reps Scapular Push Ups
15 reps Band Pull Downs
WORKOUT
Complete 3-5 rounds of the first exercise, resting up to 90 seconds between rounds so that you can work to increase weight. Then rest 1-2 minutes and move on to the circuit. Rest as needed between rounds of the circuit.
EXERCISE:
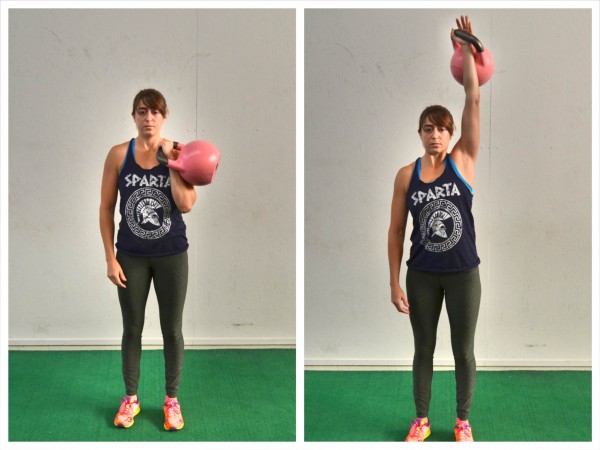
5-12 reps* Single Arm Overhead Press
CIRCUIT:
10-15 reps Lat Pull Down
5-8 reps per side Windmill
10-15 reps Inverted Rows
3-5 reps per way Halos
10-15 reps per side Stability Press
NOTES:
This workout will help increase your Overhead Press AND even help improve your core strength, posture and PULL UPS!
This is not a cardio workout or one to be rushed. Focus on the muscles working and take your time to engage your back and build shoulder stability!
For the Overhead Press, the rep range is so wide because beginners, with the proper mobility, will need to start lighter and do more reps, while advanced exercisers can use this time to increase weight and even decrease reps to really work heavier.
EXERCISE DESCRIPTIONS: For some recommended warm up exercises for this workout, check out these moves. Downward Dog Hold – To do Downward Dog Abs, set up in Downward Dog. Start in the high plank position. Then push your butt back and up toward the ceiling as you press your chest back toward your legs between your straight arms. Focus on getting your back flat and a nice straight line from the heels of your hands up to your tailbone. You want your arms to be in line with your torso (aka your biceps by the ears). Push your butt back and up as you hold the downward dog position and try to drive your heels down toward the ground. Do not walk your hands in too close to your feet as you hold just to try to get your heels down. Then raise your right leg up in the air, kicking your heel up toward the ceiling. Drive your right knee in toward your chest. As you drive your knee forward, shift your weight forward into a front plank. Try to get your body in a nice straight line and your shoulders over your arms. Then kick your right heel back up toward the ceiling and move back into Downward Dog. You can then switch sides or you can perform another knee drive with the right, bringing your knee in toward your opposite elbow or the outside of the same elbow. Once you’ve done a few knee drives on one side, switch sides. Changing the angle of the knee drive, hits your core from different angles!
Scapular Push Ups – To do the Scapular Push Up, set up in a high plank position with your hands under your shoulders and your feet together. Your body should be in a nice straight line from head to your heels. Without bending your elbows or dropping your hips, pinch your shoulder blades together and press your chest out. Do not tuck your chin or jut your head forward. Also do not let your core wiggle or your elbows bend to try to increase your range of motion. You are not doing a push up. This is a very small range of motion where you are simply focused on pinching your shoulder blades together. Just pinch your shoulder blades together and then relax or even round your back up out of it (rounding your back at the top is another variation but can be very useful for correcting certain push up problems). Keep your core tight as you pinch your shoulder blades together. As you get stronger and build the mind-body connection you will find your range of motion increases. If you struggle to pinch your shoulder blades together without wiggling your core or bending your elbows, go down to your knees as if doing a push up from your knees. If you still struggle, bring your knees under your hips. Do not get caught up on doing this from your toes. Just focus on pinching the shoulder blades together.
Band Pull Downs – To do Band Pull Downs, you can do them with a Mini Band, a Resistance Band or a Theraband. You don’t need a very heavy resistance to make this move work. You can even use a towel. Just use something to help remind you to activate and pull with your back. If you use a band, hold the band in both hands with your hands about hip-width apart. Slightly pull out on the band so that there is tension on the band. Press your chest out and reach the band overhead, keeping the band tight between your hands. You may need to adjust your hands in closer if the band is light. You want to pull out on it so your hands are not much wider than shoulder-width apart at most. Then pull the band down toward your chest, as if pulling your chest up to the bar during a Pull Up. Pinch your shoulder blades down and back and feel your back working to pull the band down. Drive your elbows down to the ground and slightly back as you pull the band down keeping it tight between your hands. You can either hold at the bottom of the pull or slowly reach the band back overhead to complete repetitions. If you do repetitions, move slowly and make sure to maintain tension on the band the entire time. Focus on really pulling the band down with your back while “leading” with your chest. Do not arch your low back as you perform the pulls even though you want to press your chest out. Make sure you also don’t simply feel the outsides of your shoulders working, but instead feel your back. If you only feel your shoulders, you may be using too heavy a band or you may be too focused on pulling out on the band instead of down.
Single Arm Overhead Press – To do the Single Arm Overhead Press, take one kettlebell and place your hand through the handle so that you can rest the kettlebell on the back of your forearm. The kettlebell handle should be across your hand from the base of your thumb, across your palm to come and rest toward the heel of the outside of your hand. If the kettelbell bothers you or if you don’t have one, you can use a dumbbell instead. Bring the weight up toward your chest in the racked position. Your hand will be in by your sternum and your elbow will go out toward your side but shouldn’t flare way up by your shoulder. Stand tall with your legs straight and brace your abs and engage your glutes. Feel your back engage and press the weight straight up overhead. Extend your arm fully, making sure that you don’t arch your back extra as you press. Keep your abs engaged. If you are doing a strict press, do not bend your legs. If you want to work more on a push press, you may use your legs. Press the weight straight up toward the ceiling, straightening your arm up so that your bicep is by your ear then lower the weight back down to the racked position. Complete all reps on one side before switching. Pause at the top of each rep and make sure to full extend. If you can’t press straight overhead or lack proper mobility, work first to develop that before really working to add weight on your presses.
Lat Pull Down – To do the Lat Pull Down, anchor a resistance band up high. Then grab the band in both hands with your palms facing away. (Just like with the Pull Up, you can use a variety of grips and even hold it with your palms facing each other or toward you.) Step back and sink into a deep lunge with the back leg straight. Lean forward over the front leg with your back flat and reach your hands up overhead holding the band. Make sure there is tension in the band as you extend your arms up toward the anchor point. You want to create a nice straight line from your hands to your tailbone so that you can mimic the vertical pull. Then pull the band down to your shoulders, driving your elbows down toward your hips. Feel your shoulder blades retracting and the sides of your back working to pull the band down. Keep your chest pressed out and your core tight as you pull the band down. Do not let your back round just to pull the band lower. Hold for a second then extend your arms back overhead and repeat. Make sure to keep your back flat and draw your shoulder blades down and back as you pull the band down to you. Step further away from the anchor point to increase the tension and make the move harder. Make sure to pull the band down to your shoulders in a controlled fashion, hold for a count then extend your arms back out in a controlled fashion.
Windmill – To do the Windmill weight a kettlebell, place your hand through the handle and let the weight rest on the back of your forearm. Your feet should be about shoulder-width. Turn out the toe of the side that doesn’t have the weight to about 45 degrees. Straighten the arm with the weight up toward the ceiling. Then hinge over, driving your butt back as you reach your hand toward the ground while keeping the arm with the weight straight up toward the ceiling. Slow hinge over as far as you can and feel your core rotate slightly as you drop the hand down and hinge over. The stand back up, keeping the arm with the weight straight up toward the ceiling the entire time. As you hinge over, you can use your leg as a guide as long as you aren’t simply then going forward. Slide your hand down toward the ground and rotate your torso as you lower down. Keep the arm with the weight straight up toward the ceiling. Then come back up and stand nice and tall. You will feel this in your obliques and shoulders. You will also feel a nice stretch down your hamstring while you feel your glutes working. You can slightly bend your front knee as you do this but do not turn the move into a squat.
Inverted Rows – To do the Basic Inverted Row, you can either use a Suspension Trainer or a Bar. Using a Suspension Trainer, hold a handle in each hand with your palms facing in. Walk your feet forward so that your body is at an incline. The closer to parallel to the ground you get, the harder the move will be. Hang from the straps with your body in a nice straight line and your chest pressed out. Engage your core and glutes and keep your legs straight. You want a nice straight line from your head to your heels. Do not let your low back arch or your hips sag toward the ground. Then drive your elbows down and back to row your chest up to the handles. Keep your body in a nice straight line as you row up and do not bounce off the bottom. Keep your wrists straight as you row up. Also, do not shrug your shoulders. Then lower back down. Do not lose tension at the bottom. Make sure to keep the chest pressed out and your body in a nice straight line. Do not swing to row back up. Make sure to feel your back and arms working to row and not just your arms. Focus on feeling your back pull.
Halos – To do Halos, stand with your feet no wider than hip-width apart. Stand with your feet closer together to make the move harder on your core. Hold a kettelbell upside down with one hand on each side close to where the handle attaches to the bell (you can also use a plate weight or dumbbell if you don’t have a kettlebell). Then raise the weight up so that it is in front of your face with your elbows down toward the ground. Stand tall with your shoulders down and back. Squeeze your glutes and brace your core as you begin to circle the bell around your head. Bring the bell back and around your head to the right, pointing the bottom of the kettlebell back behind you as you circle it around the side of your head. Then drop it down behind your head, reach the bottom of the kettlebell down between your shoulder blades as your elbows rotate to point up toward the ceiling. As you circle the kettlebell back and reach down between your shoulder blades, keep your core tight and don’t let your hips wiggle. Also, do not tuck your chin or move your head. You want to circle the kettlebell around as your head stays still. Continue the circle and bring it around the other side, handles leading, and back in front of your face. Then switch the direction of your circle and go back the way you just came. Keep alternating directions until all reps are complete. Do not tuck your chin or bob your head as you circle. Brace your abs and glutes so that you don’t rotate your hips as you circle and instead get all of the mobility from your shoulders and not your hips. Bracing your core will also protect your low back. Only the kettlebell is moving.
Stability Press – To do the Stability Press, you can use a resistance band or cable. If you are using a band, anchor the band and then hold one handle in both hands. Turn to the side so you are sideways to the anchor point and step away from the anchor point so that there is tension in the band. You want to make sure there is tension or the move won’t be challenging. Stand with your feet no more than shoulder-width apart. The closer your feet are together, the harder the move will be. Choose a stance though that challenges you while allowing you to maintain good form and not lean away. As you become stronger, bring your feet closer together and then even try a heavier band or walk further from the anchor point. Bring your hands into the center of your chest and squeeze your glutes while you brace your abs. Standing up nice and tall with your chest pressed out, slowly push the band straight out from the center of your chest until your arms are straight out. It should be a struggle to press the arms straight out because the band is trying to rotate you back toward the anchor point. Your core should have to work to stabilize and press straight out from your chest. Do not let your arms rotate open and go back toward the anchor. You want to press straight out from the center of your chest without shrugging your shoulders. Maintain a nice tall posture with your shoulder blades drawn down and back and your core engaged. Make sure you also don’t lean away. Then slowly bring your arms back in and repeat. Move slowly to really have to fight the band. If you move too quickly, you won’t get as much out of the move and you’ll probably get sloppy and let yourself rotate toward the anchor point or even shift open and push away. Also, if you allow your stance to rotate open or if you lean away, it will make the movement easier and won’t force that inside side (the side closest to the anchor point) to really work to stabilize. Complete all reps on one side before turning and facing the other way to work the other side. Really consciously engage your glutes before starting to press.