The Surprising Cause Of IT Band Issues, Back, Hip And Knee Pain!

The Surprising Cause Of IT Band Issues, Back, Hip And Knee Pain!

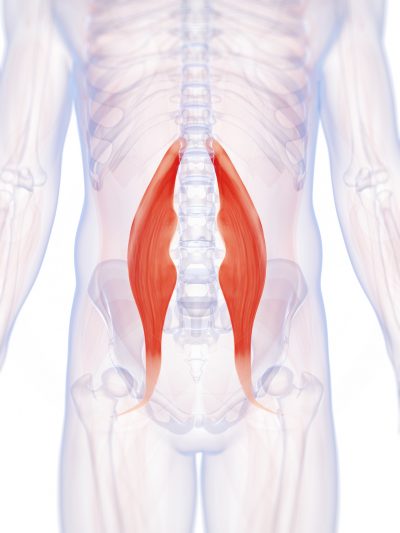
The psoas has become the sexy hip flexor muscle to talk about and work on.

But what if I told you that all too often the TRUE culprit of our back, hip, IT BAND, knee pain and even ANKLE pain had to do with ANOTHER hip flexor muscle?!

What if I told you that you should actually be paying attention to your TFL or your Tensor Fasciae Latae.

TFL muscle

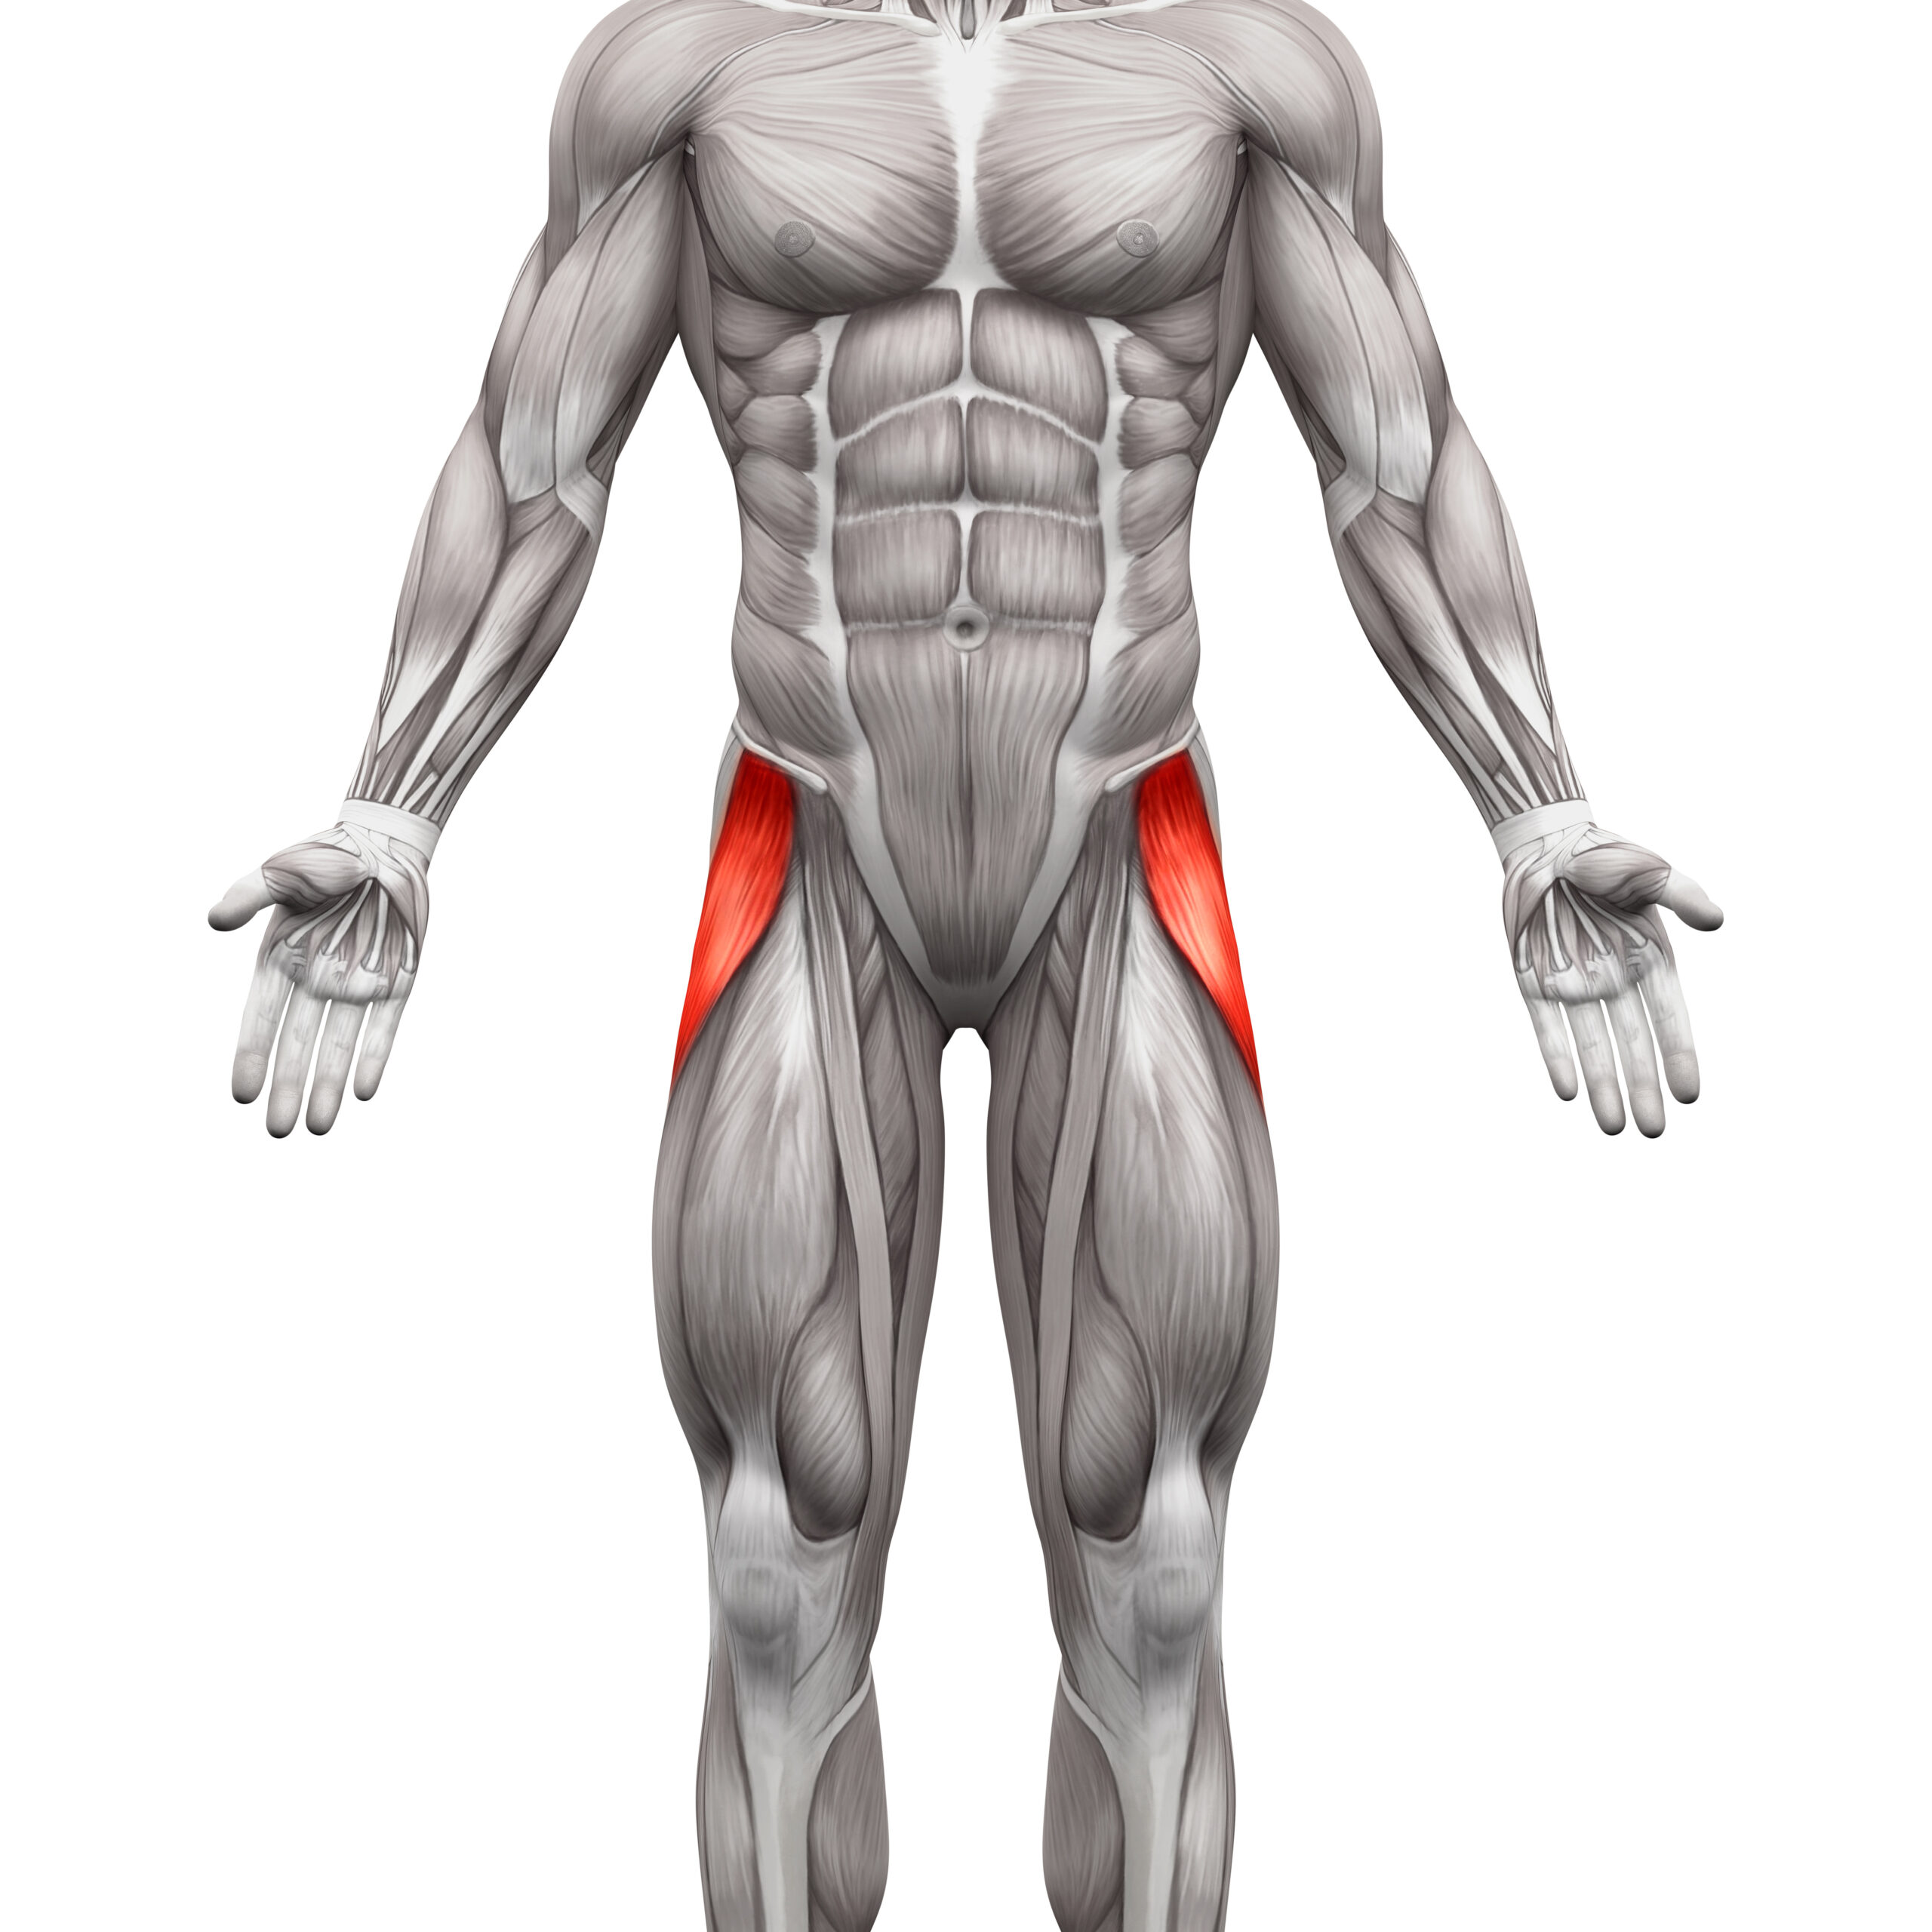
The TFL can be a nasty little sucker, compensating for a week glute medius, perpetuating IT Band tightness and impacting everything down to our feet and ankles.

It contributes to internal hip rotation AND external tibial rotation.

Because of its far reaching impact it is a muscle we can’t ignore.

However, the hard part about addressing TFL tightness and overactivity is that many of the moves we need to do to CORRECT the issue, can often PERPETUATE IT!

For instance, to help prevent the TFL from continuing to compensate, we need to include glute medius strengthening.

But ever notice how you’ll do Monster Walks and feel the front side of your hip working?

Ever push through thinking “Oh yea! Feel that burn!?”

Or maybe you don’t even think about what is working. You’re doing the “right moves” so you just believe you SHOULD get results, right?

WRONG!

If you’re doing the right moves but still allowing muscles to compensate, not only are you NOT correcting the problem, but you may be making it worse.

So when you feel that front outside of your hip working during those mini band walks? Guess what is not working as it should and what is also COMPENSATING for that underactive muscle!?

Well your glute medius is not getting the benefit of the exercise it should be getting and instead you’re perpetuating the overuse of your TFL!

So all of that rehab? It isn’t going to pay off.

While you need to strengthen your glute medius, you need to realize that all too often our TFL can compensate for a weak glute medius.

Because this muscle then becomes even further overworked and even shortened, it can lead to lower back hip and knee pain, not to mention even IT Band issues and foot and ankle problems!

Yup! Through our IT Band the TFL can create movement compensations down our entire leg!

And when we then see changes to our ANKLE mobility guess what happens? Those changes only further perpetuate those compensations back UP our kinetic chain.

It’s why you can’t just IGNORE aches and pains. The longer you ignore them and keep pushing through, the more you then just allow compensations and imbalances to build up so there is more to have to sort through later.

If you don’t address TFL issues, you’ll end up having to address issues from your feet up!

So how can we prevent our TFL from leading to all of these aches and pains when it wants to work during the exercises we NEED to be doing to correct it?

Here are three tips to help you quiet down that TFL and get your glutes activated! And to then implement these tips, check out the quick series I’ve included at the end of this post!

As you go through implementing these tips, be CONSCIOUS of what you feel working. Don’t just rush through the moves! Be intentional with your prehab moves!

3 Tips To Strengthen Your Glutes And Prevent Your TFL From Compensating!

#1: Treat the TFL like a toddler. Keep it distracted so you can get work done!

Basically, you want to adjust movements to help make it EASIER to establish that mind-body connection.

One way to do that is to “keep the TFL busy” by internally rotate your foot during lateral raise, or abduction, movements.

Because the TFL performs hip internal rotation, you can almost “distract” it with that movement AS you use the glute medius to perform the lateral raise.

So if during lateral raises you notice you often feel the front of your hip, turn your toe down toward the ground.

You may even notice often that your toe is turned out toward the ceiling.

The TFL contributes to tibial external rotation.

So internally rotate your foot is the OPPOSITE action, which can help “shut off” the TFL. Not to mention when you internally rotate your tibia, you often then even internally rotate our hip by extension.

Maintaining this internal rotation, you can then perform your lateral raise movement.

If you still are struggling to feel your glute medius, you can even kick slightly back as you raise up OR put your hip into extension, driving back into a slider or wall AS you perform that lateral raise movement.

This hip extension and slight kick back will engage your glute max, which will also hinder the TFL from taking over and allow you to potentially better activate your glute medius. This works because the TFL is a hip flexor so by putting your hip into extension, you can inhibit it from working!

lying lateral raise

#2: Change the hip flexion during those abduction moves.

When you’re first starting to “rehab” an issue, you need to use the moves you feel the most and build off of those.

Basically you want to take the path of least resistance to establish that mind-body connection.

If you feel a move working those glutes, use that first THEN even dive into other moves because you’ve already established that mind-body connection.

To find that move that helps you establish that mind-body connection, you may need to adjust the exact POSTURE you use during basic abduction moves.

By adjusting the amount of hip flexion or extension you perform the move in, you can find a way to maximize your glute medius engagement and minimize your TFL compensation.

It isn’t a clear cut and dry rule of what posture is best so you may want to play around to see what matches your personal recruitment patterns.

For some more flexion may “distract” the TFL because it is a hip flexor.

However, for some, more hip flexion may perpetuate it being overactive during those abduction moves.

In this case, putting the hip into more extension may be key to inhibit the muscle.

While you of course want the glute medius to be strong in both a slightly more hip-flexed or hip-extended state, you do want to start with the move you feel working correctly to make sure you establish that mind-body connection.

The fact that hip flexion can play a role in how much you’re able to engage the TFL is why that oh so “basic” clam exercise can so often backfire too!

The clam is a traditional glute activation movement. But this seemingly simple move is so often butchered. First off, you may find you need to use that internal rotation of the tibia I mentioned in the first tip to help.

Secondly, you may adjust how much you pull your knees forward or straighten your legs out.

The key is being conscious of what you feel working to then ADJUST your exact amount of hip flexion.

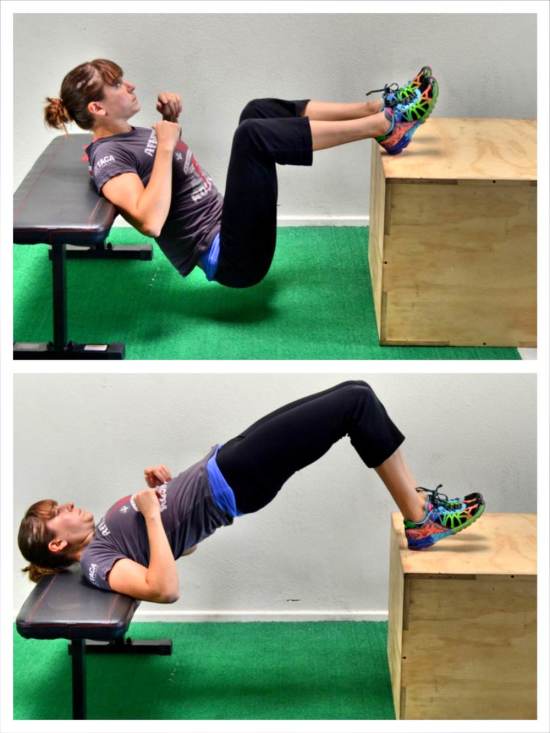
A great way to play around with different amount of hip flexion during even a bilateral abduction move is even seated on a bench.

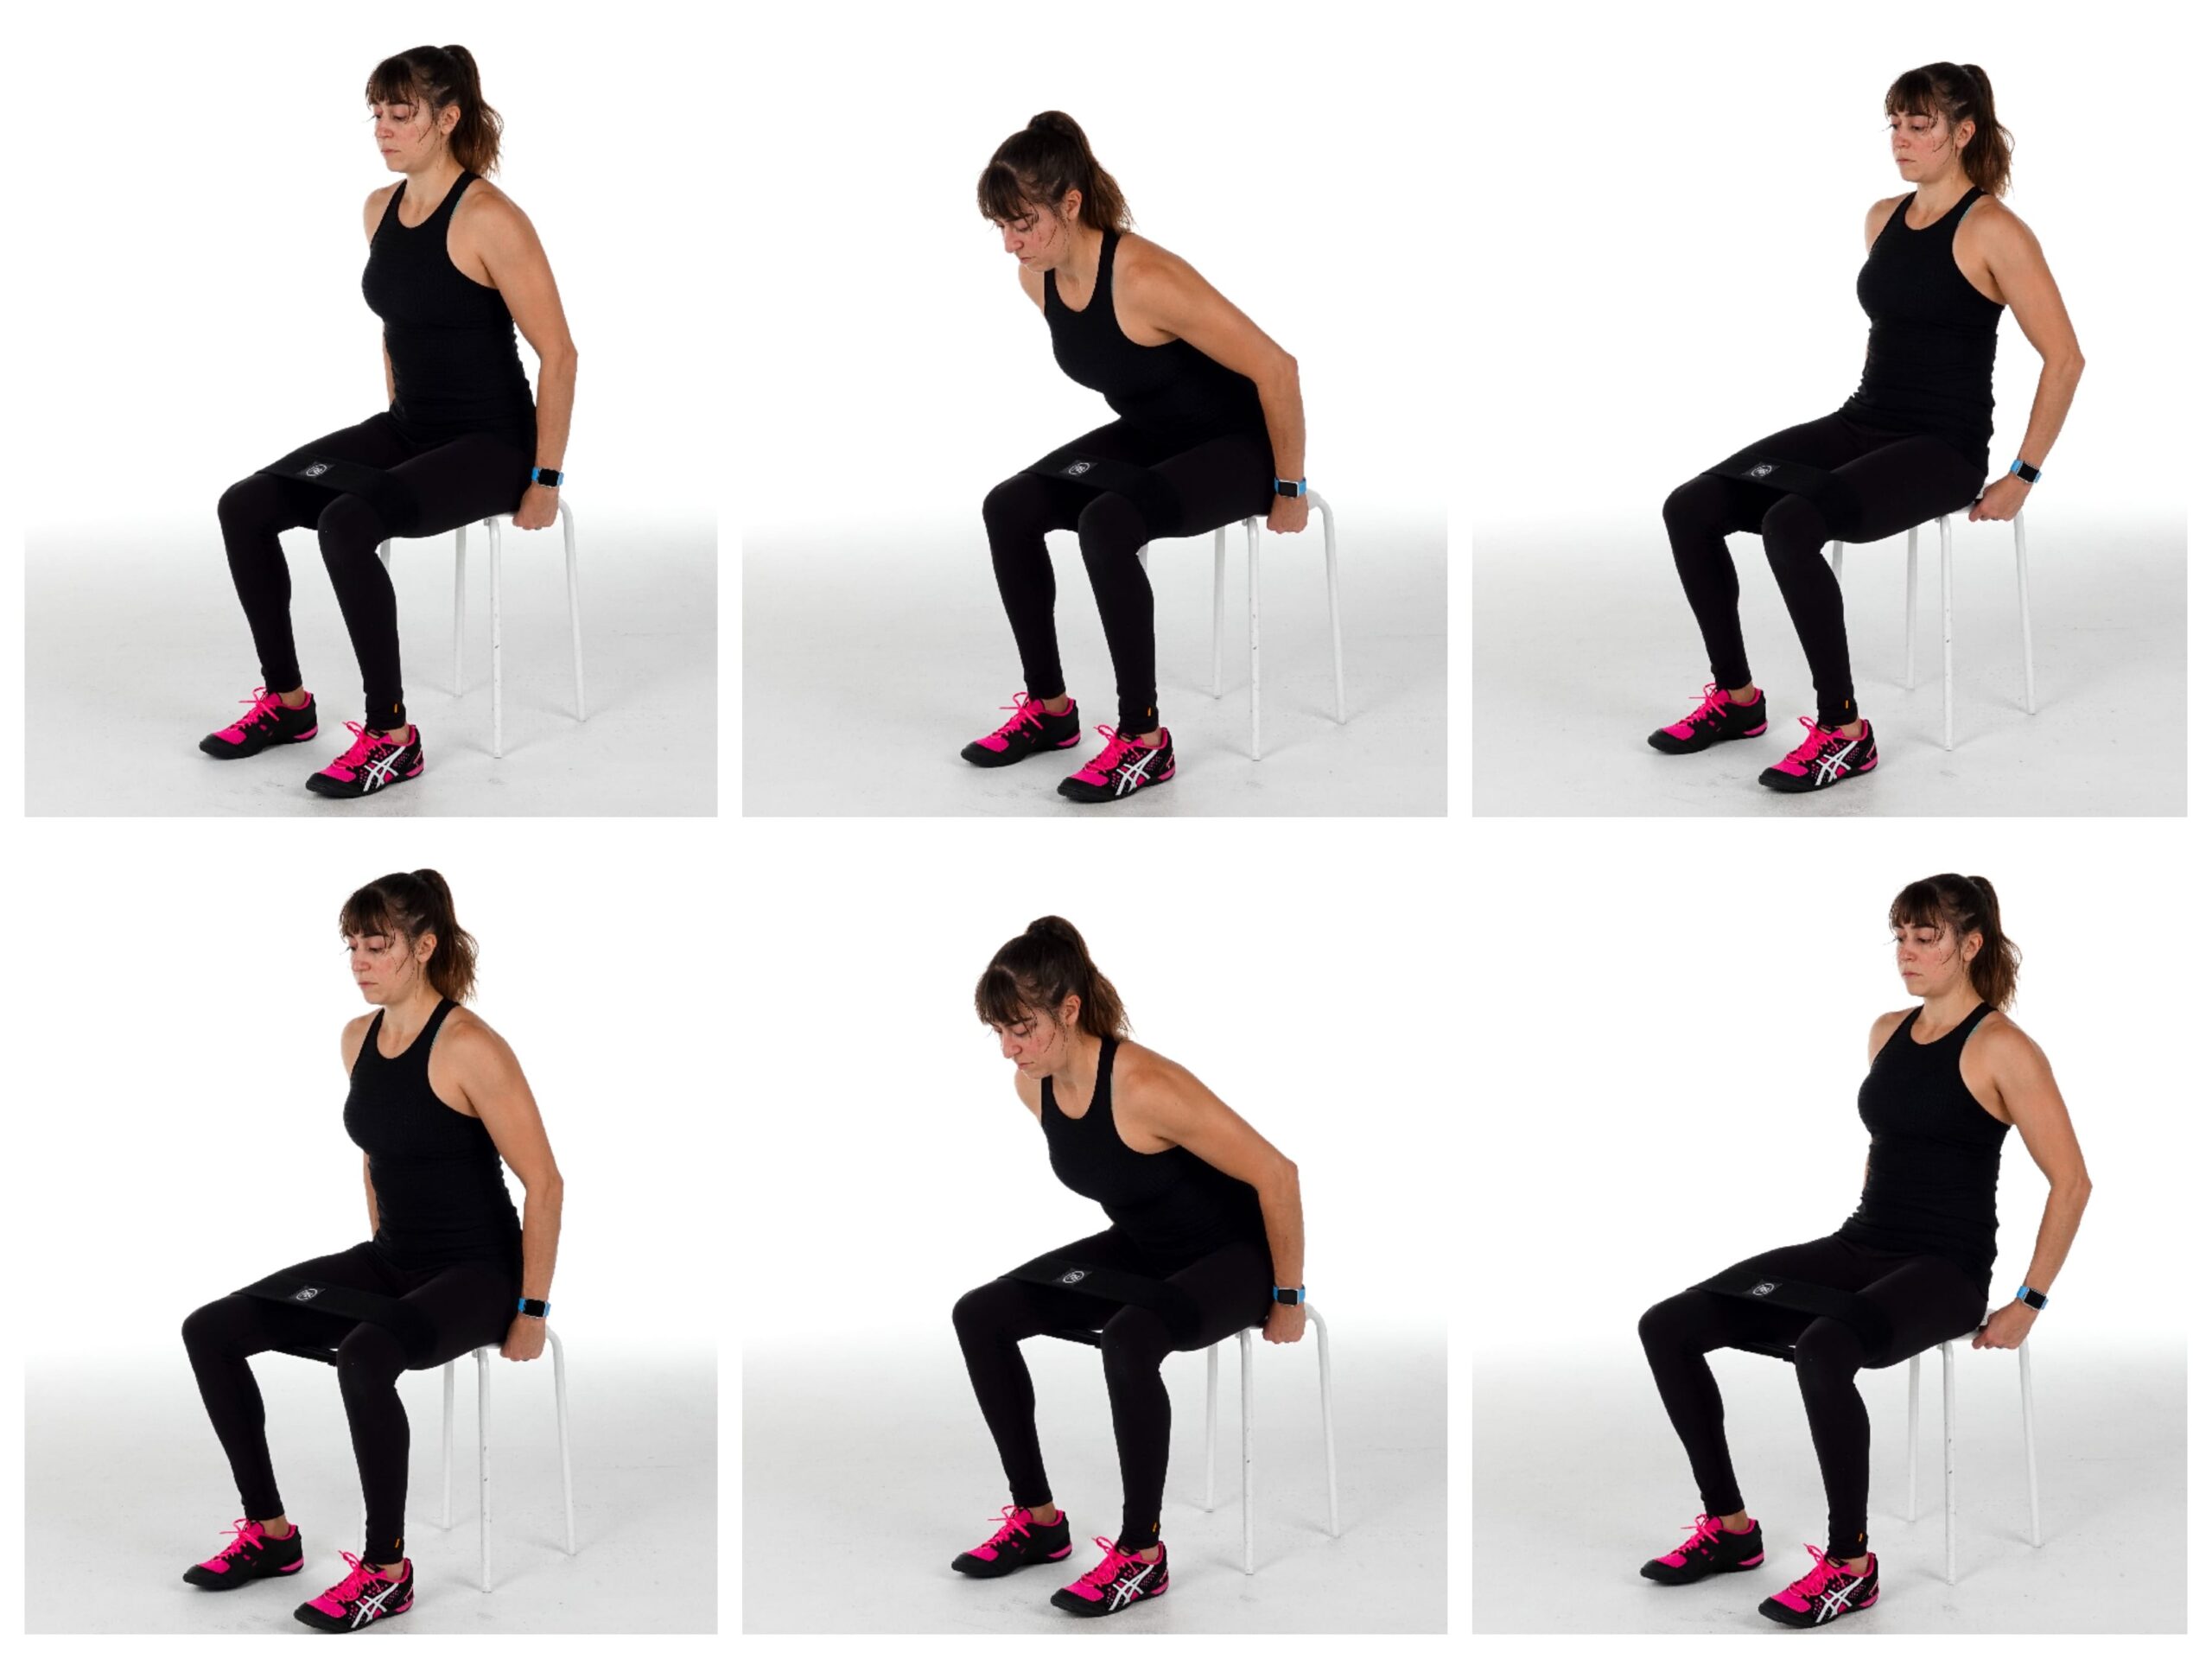
You can lean back, sit up tall or even lean forward to different degrees to not only strengthen your glute medius in a variety of postures BUT also find the exact position that works best for you.

We have to remember to focus on what we feel working so we can work around our own biomechanics.

#3: Foam roll and stretch BEFORE you activate.

If you struggle to activate a muscle, you may find that foam rolling and stretching the muscle prior to doing activation moves is oh so key!

While people debate the benefit of both techniques, with one of the main arguments against them being that the benefits are short-lived, that doesn’t mean you can’t use these “short-lived” benefits to your advantage.

By rolling your TFL and then stretching to improve your hip mobility, you can inhibit this overactive muscle, even if just temporarily.

tfl-foam-rolling

If you interrupt that mind-body connection between your TFL and brain, and restore muscles to their proper length-tension relationships, you can then help yourself better establish the mind-body connection to the muscle you DO want to work – your glute medius!

So if you find your TFL is being a pesky little sucker and compensating for your glute medius no matter what posture or tweaks you do, try relaxing and inhibiting it IMMEDIATELY PRIOR to doing the glute activation moves.

Interrupt that communication so you can establish a new connection to those glutes!

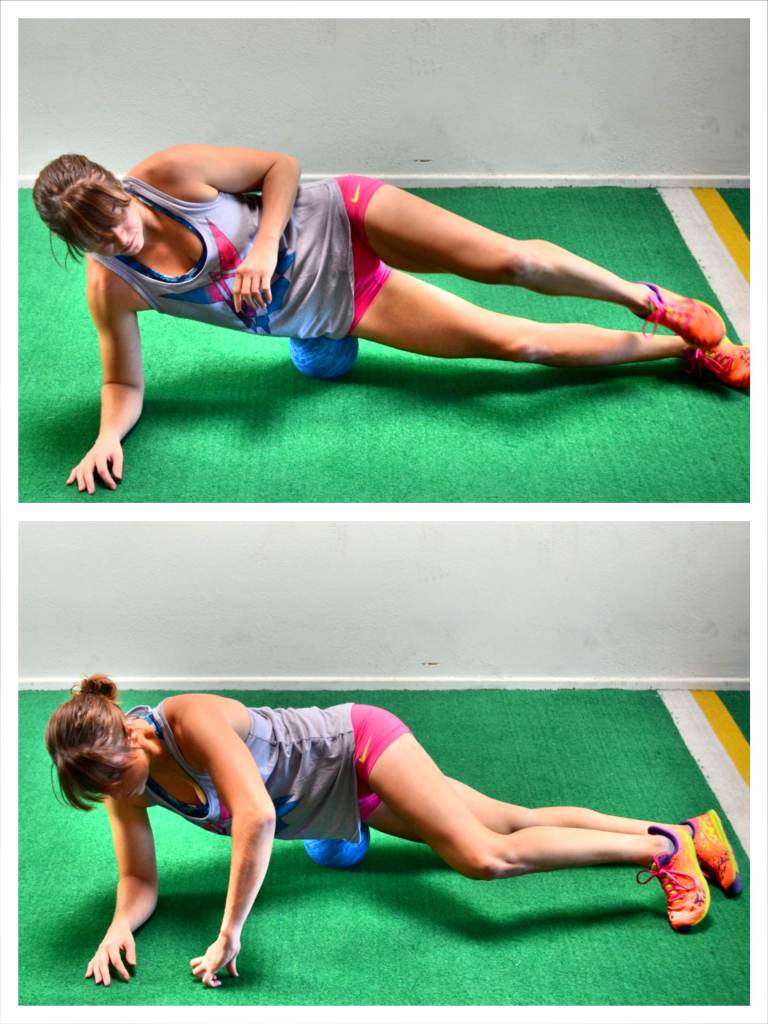
A lacrosse ball is a great way to relax that TFL and even a simple half kneeling hip stretch with reach can improve your hip extension.

BONUS: If you have an imbalance do imbalanced prehab!

The one other key thing to note is if you have an imbalance, you need to do imbalanced rehab.

So if one side is constantly tight, you need to address that one side specifically.

You also want to assess if it is glute weakness on that SAME side or if there is even weakness on the OTHER side perpetuating the issues and leading to the TFL becomign overworked!

Of course seeing someone to asses you is key but KNOWLEDGE IS POWER. So now you can be aware of what you’re doing in your workouts and therefore why you are, or aren’t, seeing the results you want to seek out the help you need.

Using these tweaks you can help yourself strengthen your glutes and prevent your TFL from constantly compensating!

Now try implementing them in this amazing series below!

Quick Hip Mobility Series To Prevent IT Band Issues, Back, Hip And Knee Pain!

This Avoid IT Band Issues Series uses foam rolling and stretching to address your TFL tightness and overactivity. It even works to relax your peroneal (the outside of your lower leg) to make sure you’re working on any issues from the ground up.

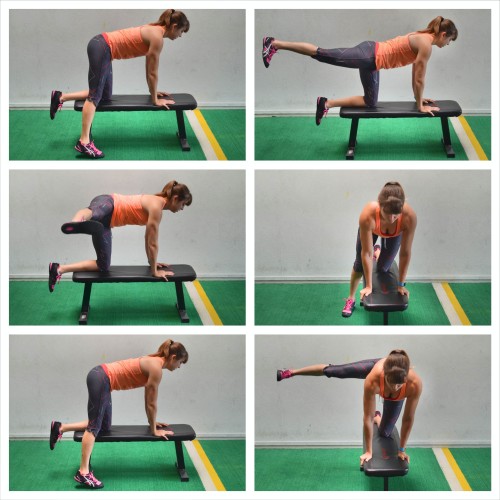
It then uses two great abduction moves to activate your glute medius!

The Avoid IT Band Issues Series

Complete 1 round through the circuit below, spending a minute per move on each side.

CIRCUIT:
1 minute per side Peroneal Foam Rolling
1 minute per side TFL Foam Rolling
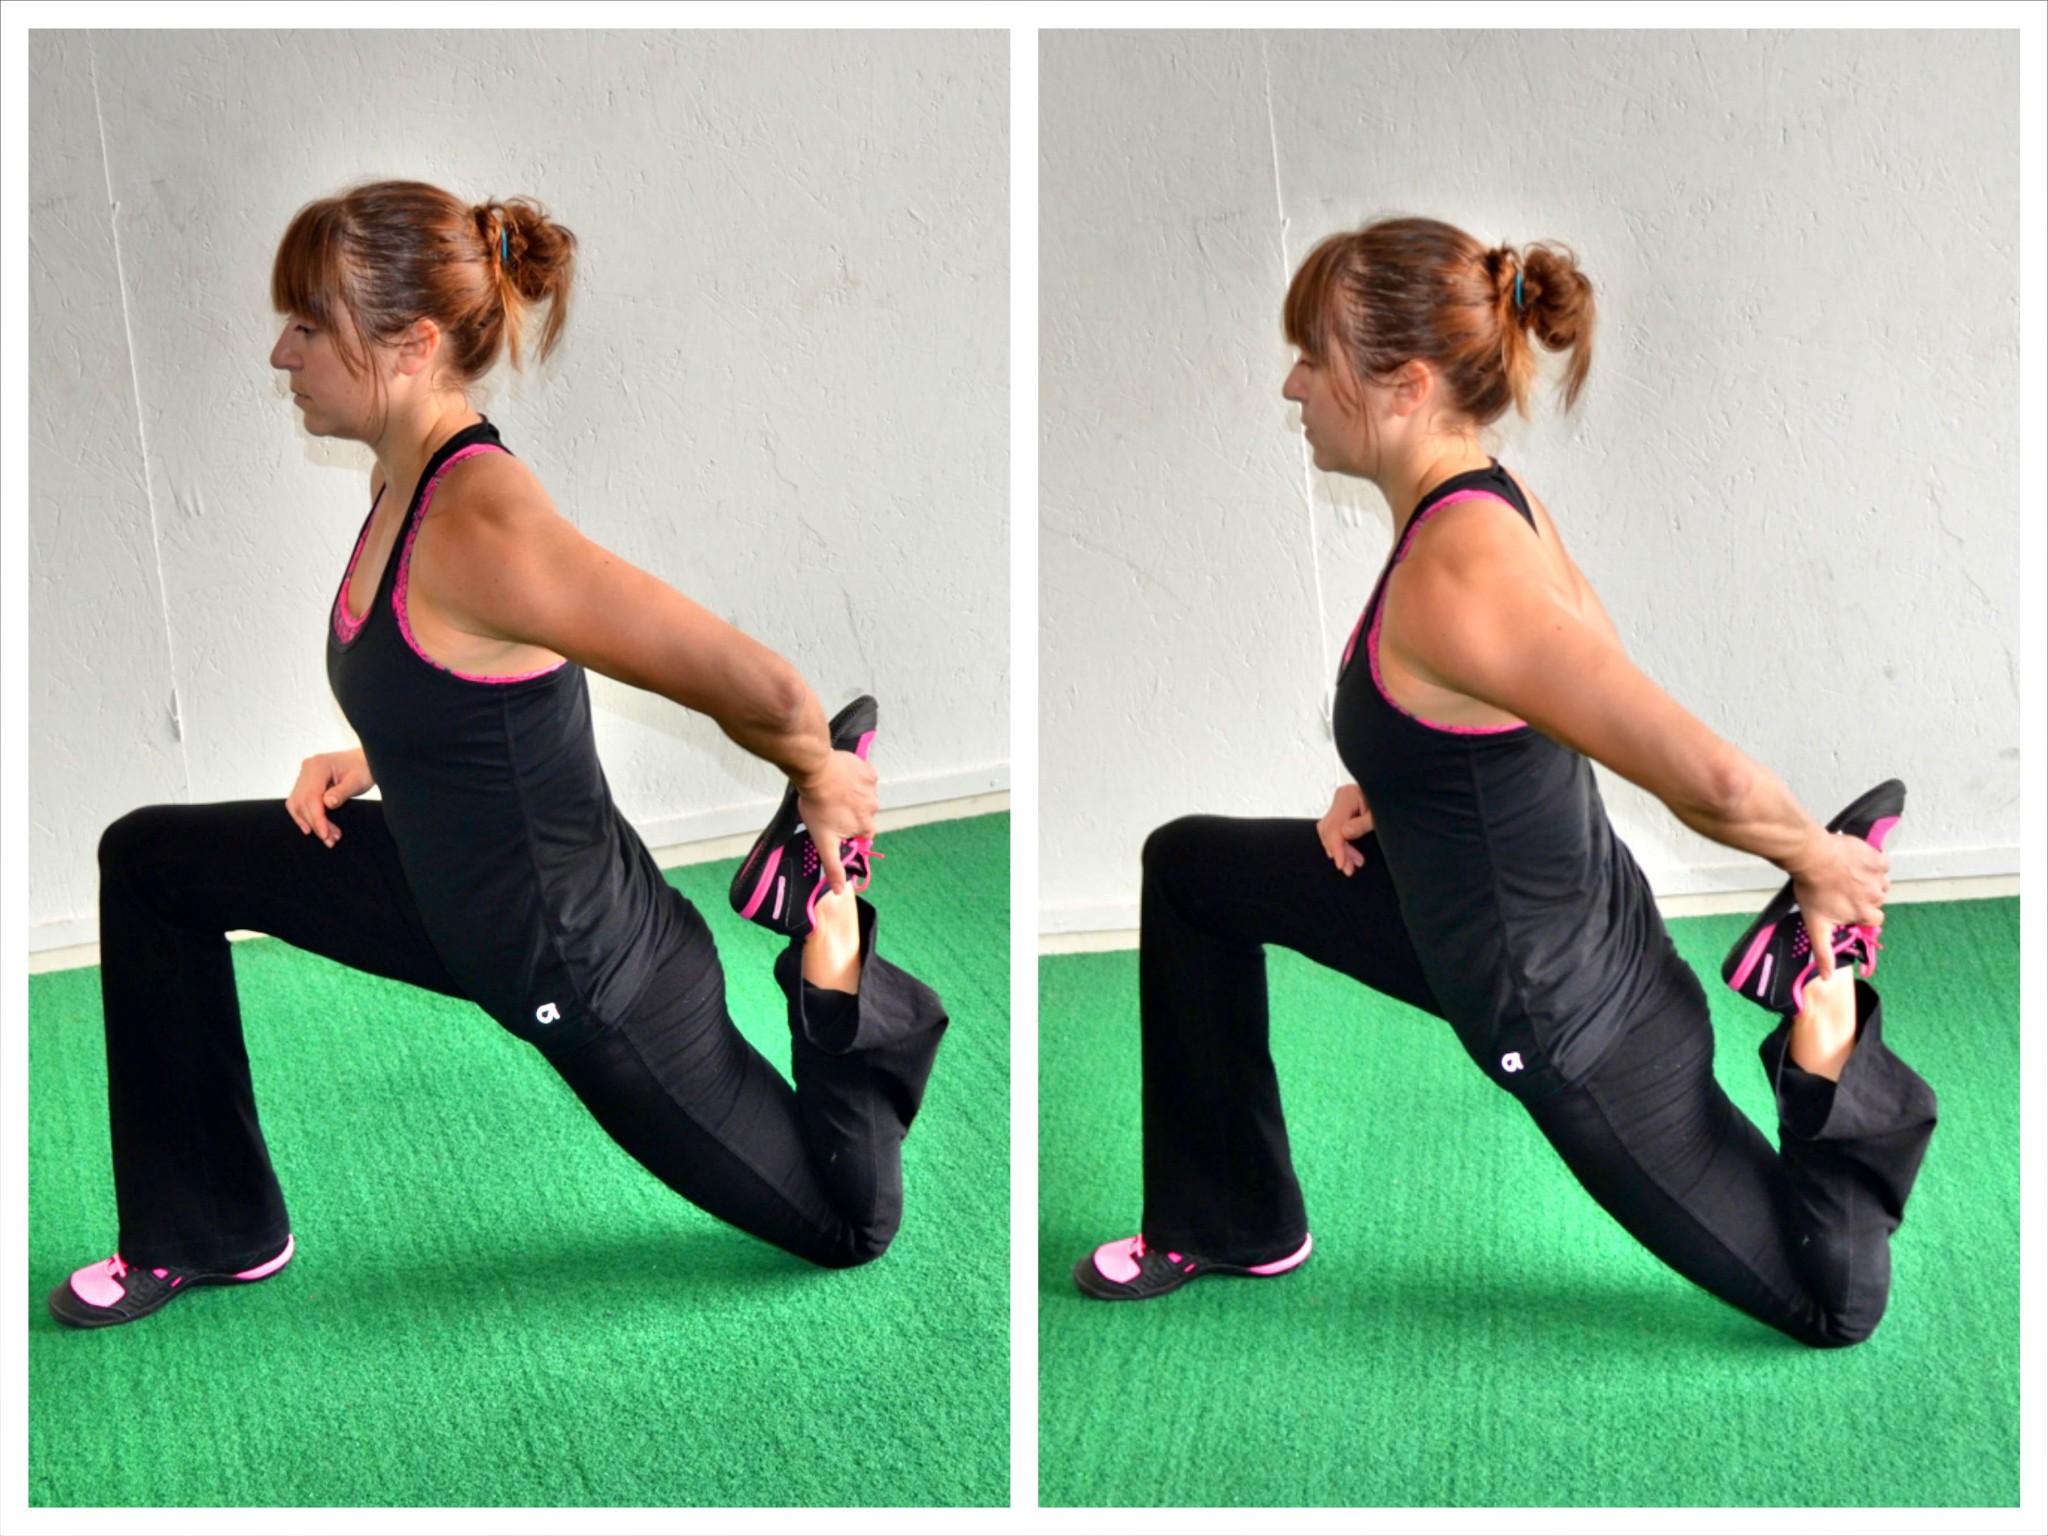
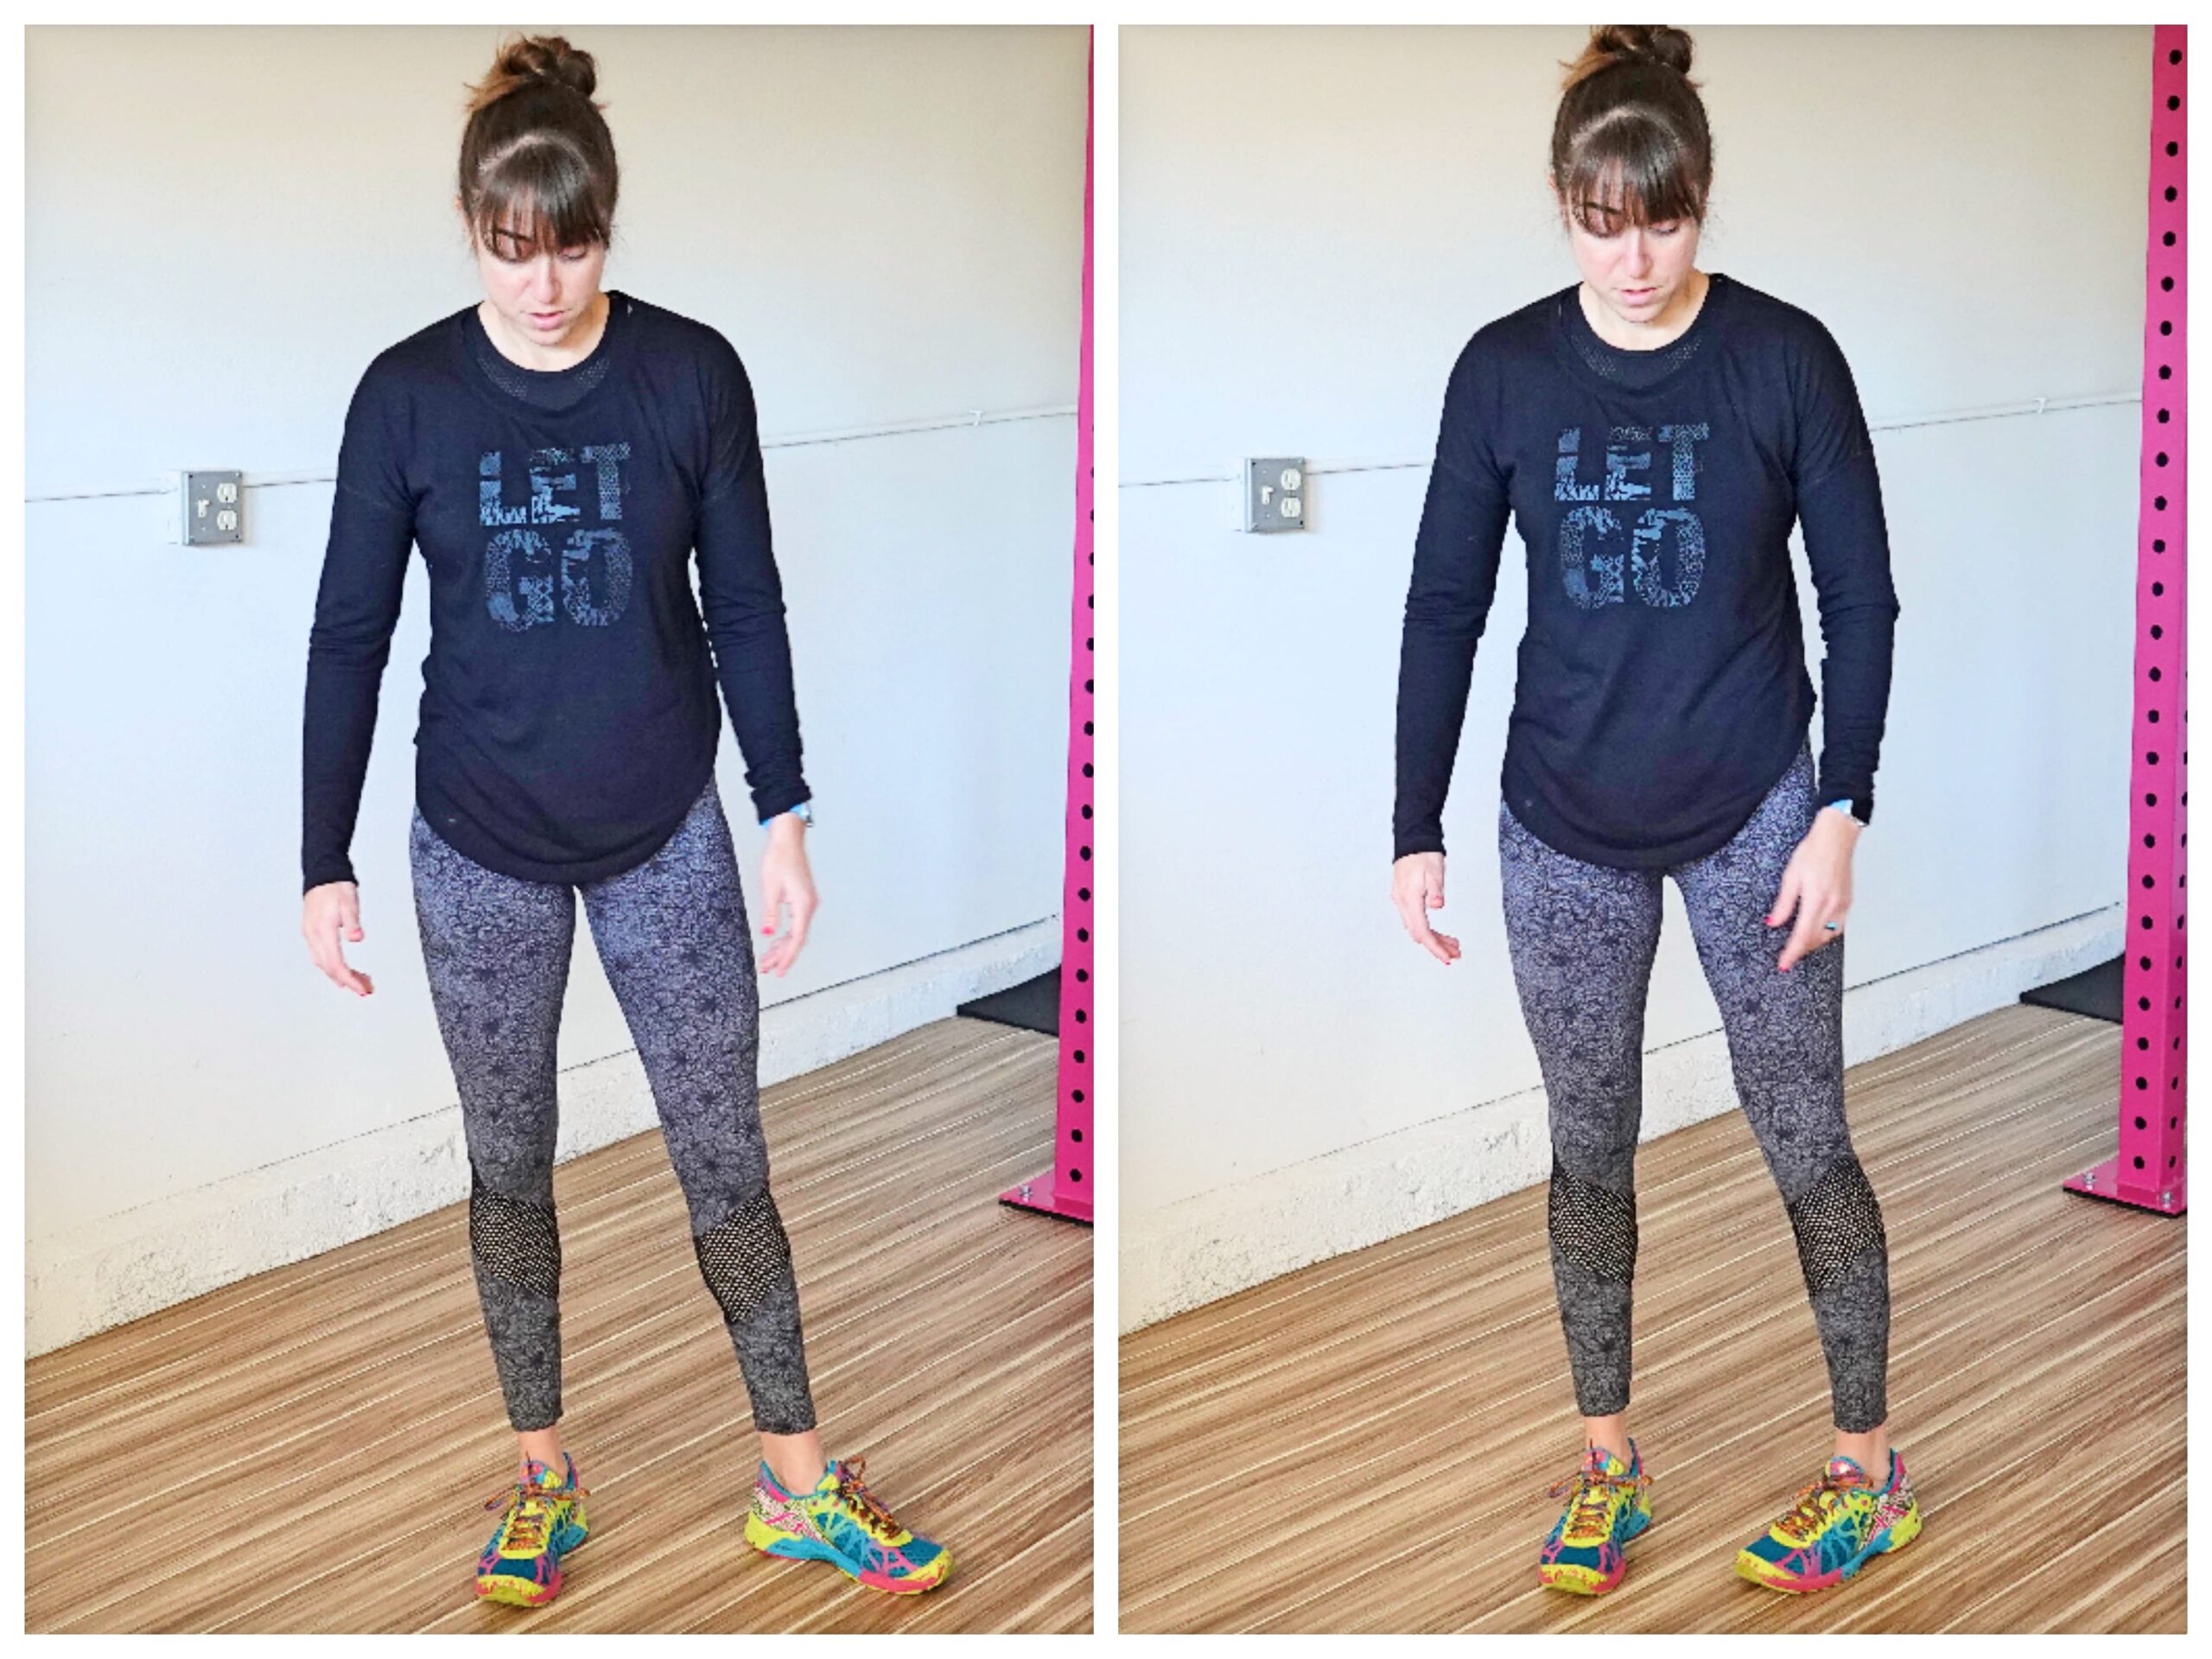
1 minute Standing TFL Stretch
1 minute per side Lying QL Stretch
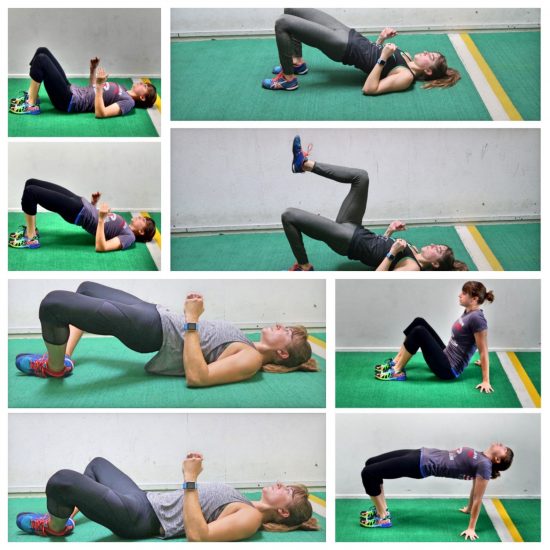
1 minute Bridge Abductions
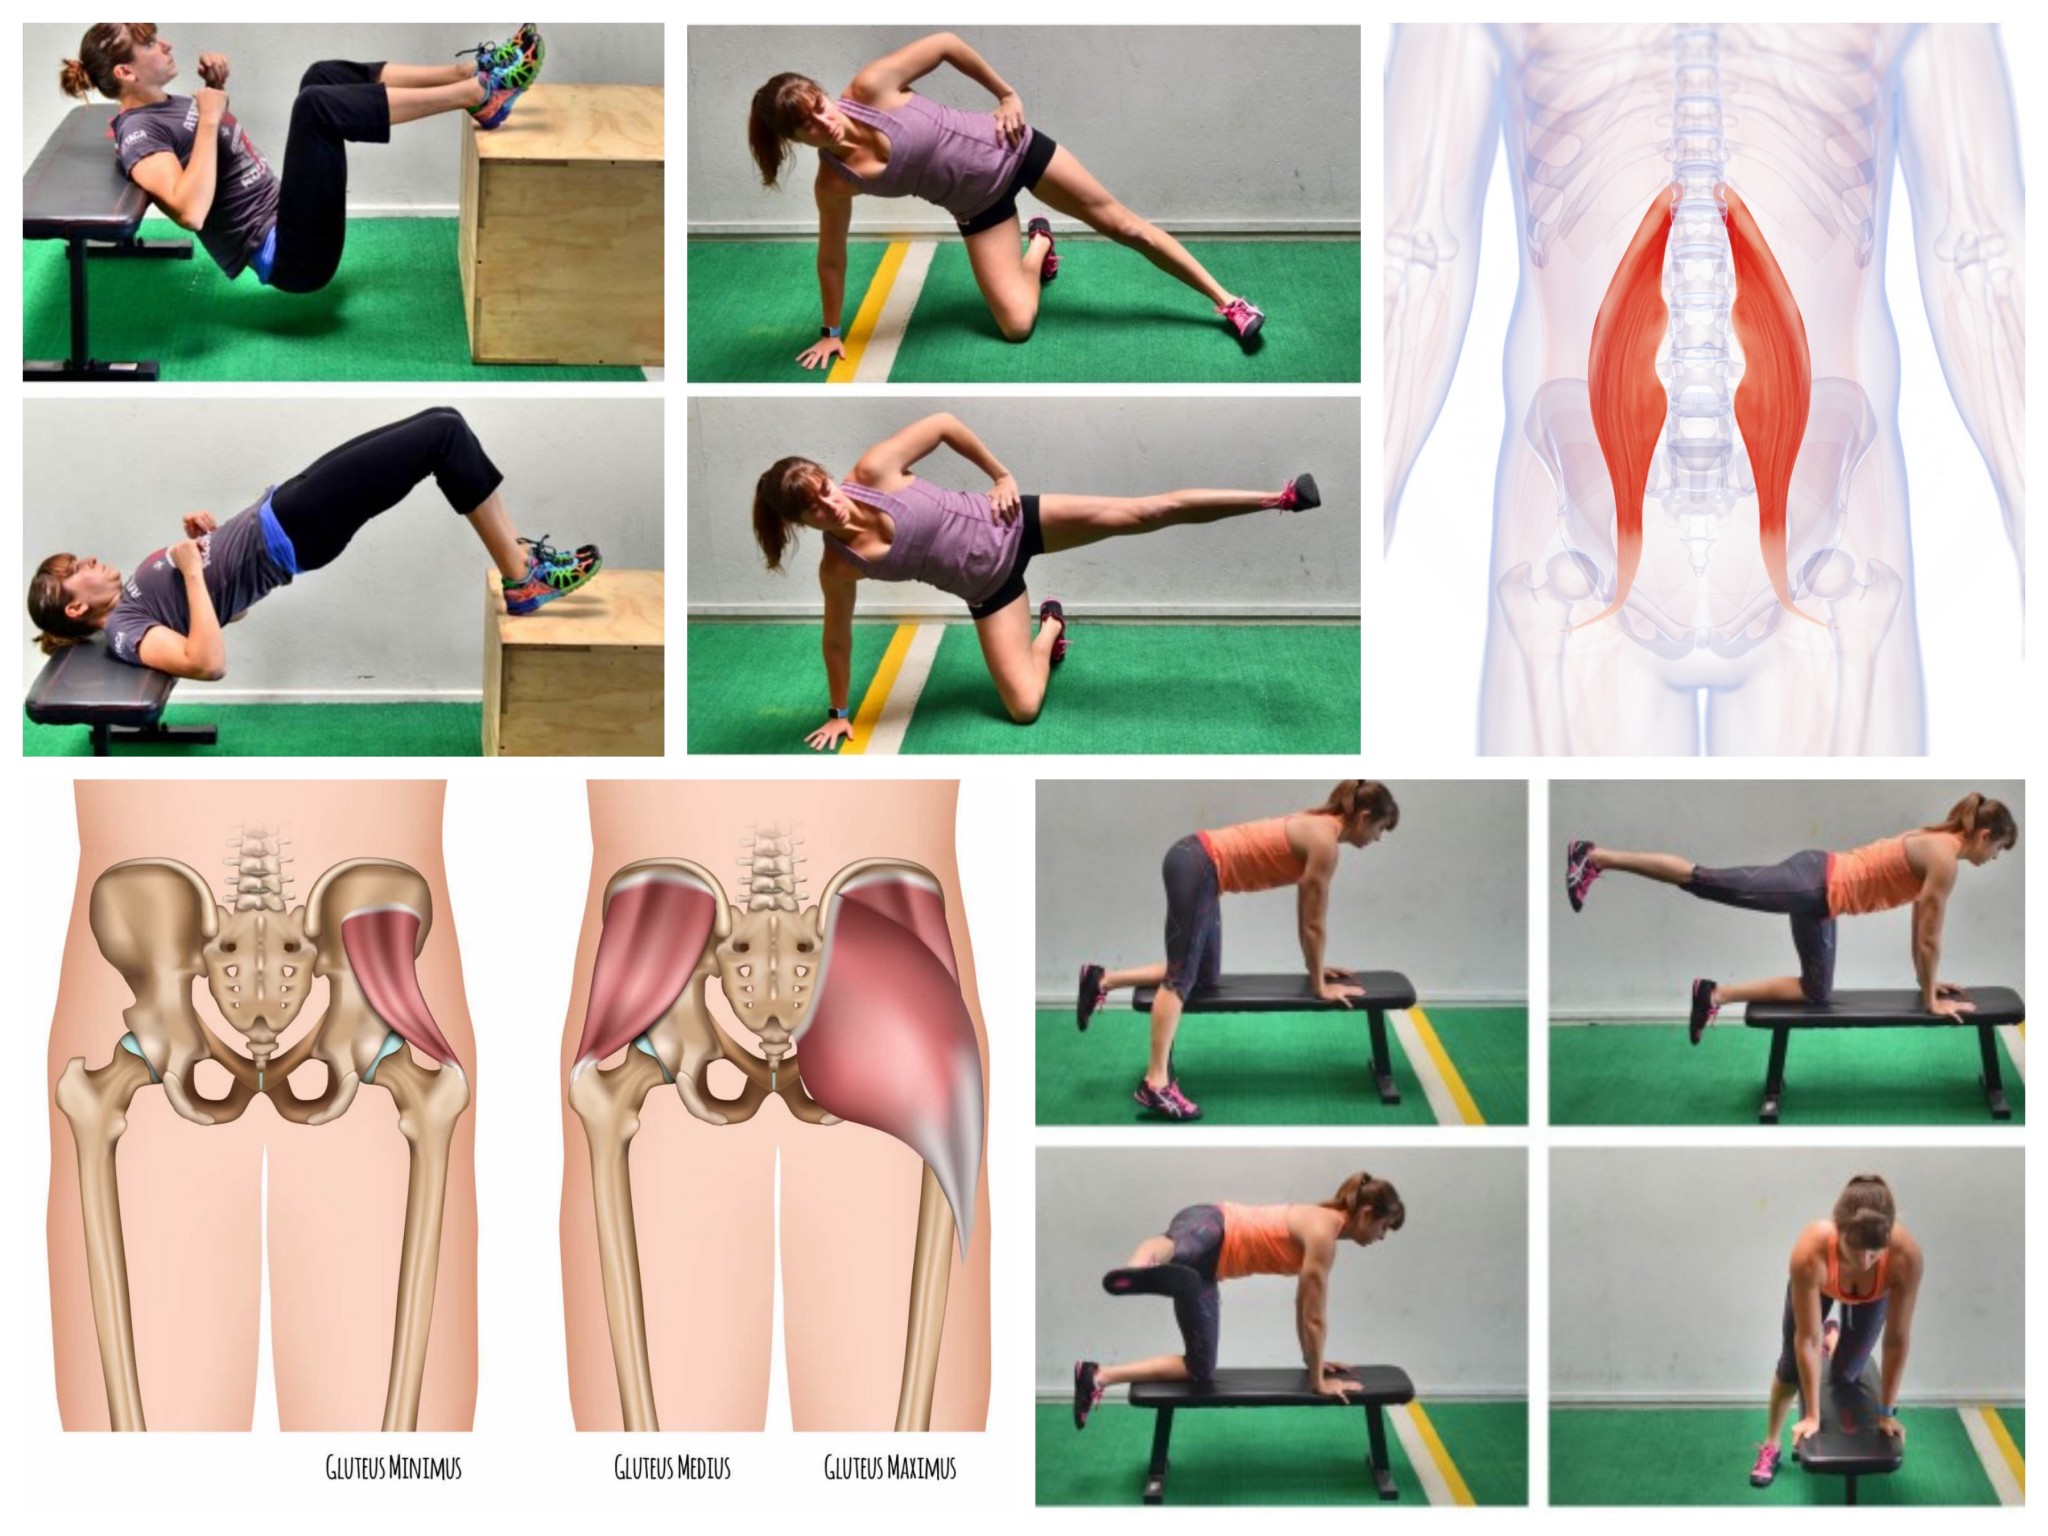
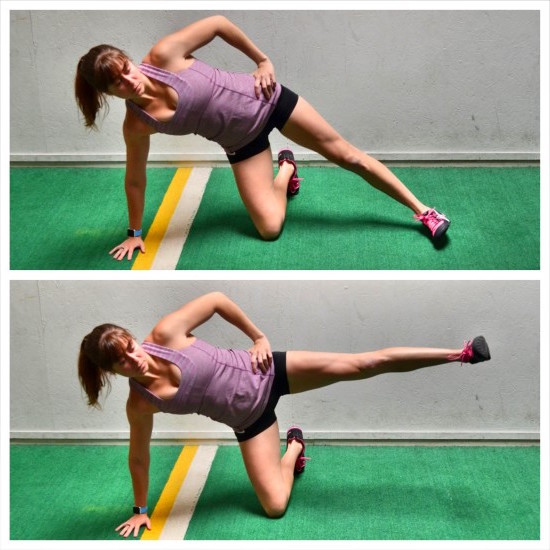
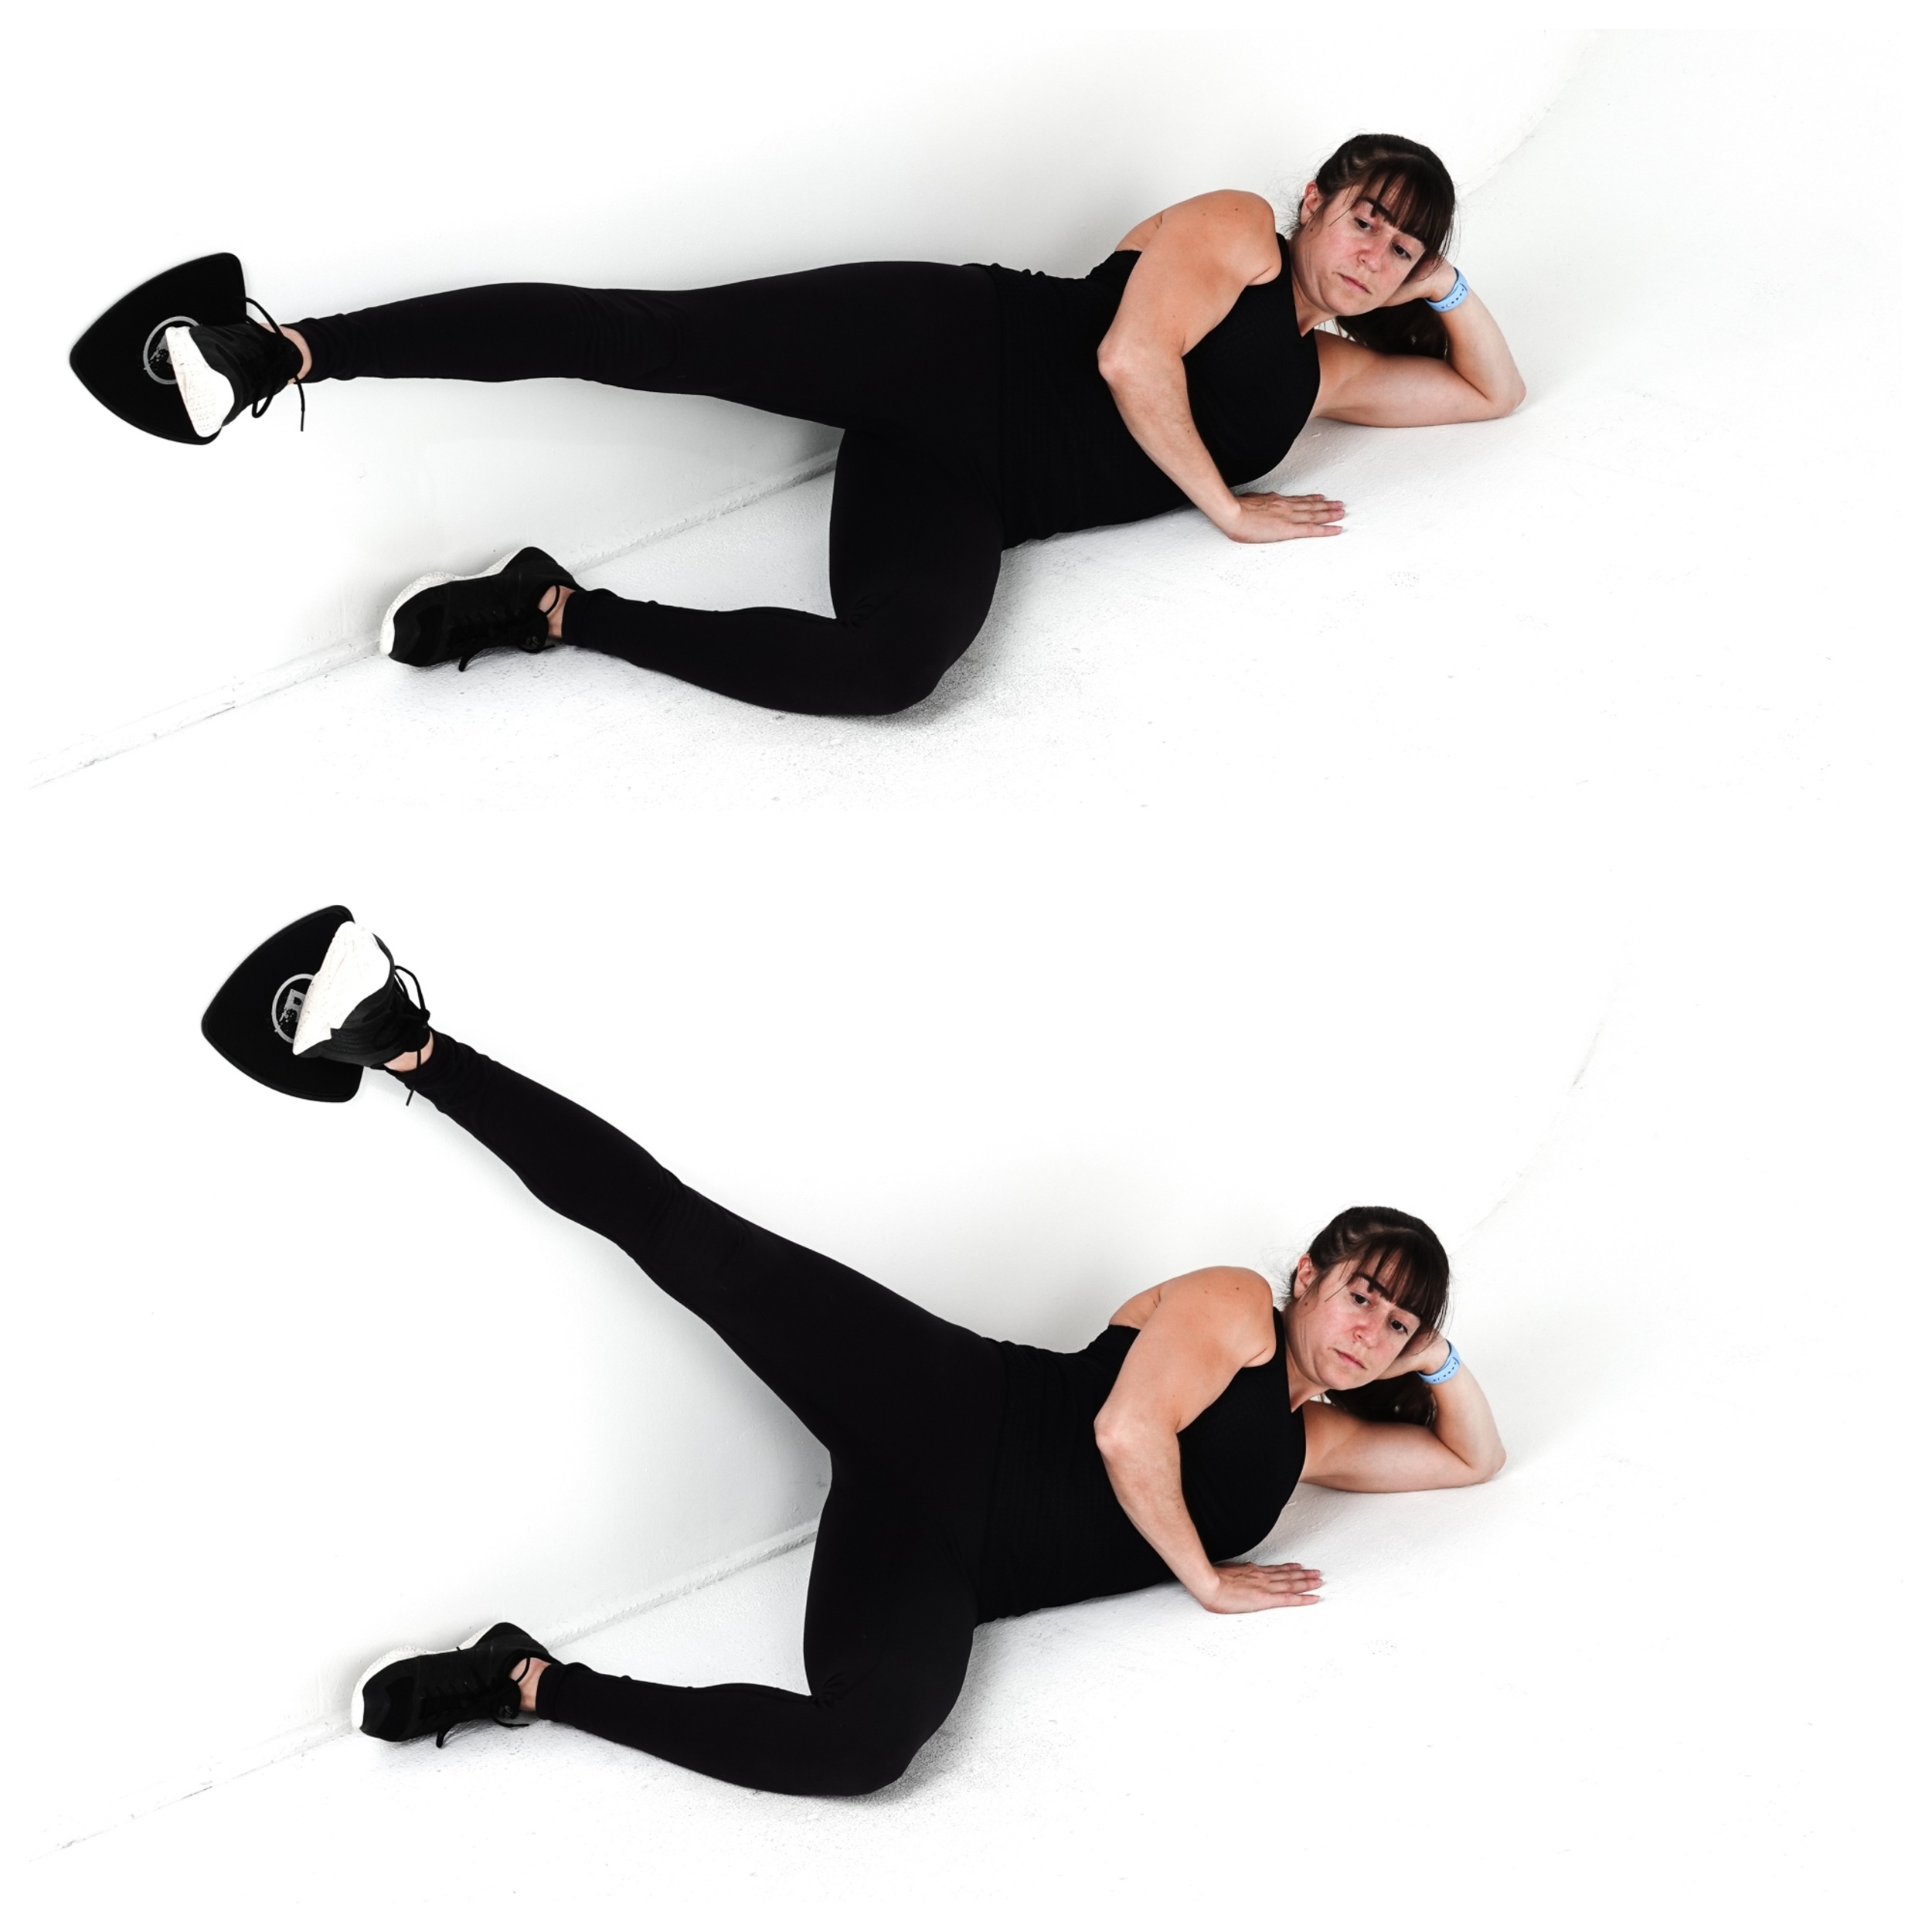
1 minute per side Lying Side Raises

Need more amazing series to improve your hip mobility and prevent lower back, hip and knee pain?

Join my 28-Day Booty Burner program!

It’s Not Your Lower Back’s Fault

It’s Not Your Lower Back’s Fault

“My low back hurts…How do I strengthen it?”

But what if strengthening it isn’t really the issue?

What if working it more won’t fix your problem and may actually make it WORSE!?

Low back aches and pains are one of the most common issues out there. About 80% of the population will at some time or another complain that their low back is “bugging” them.

I mean who hasn’t gotten low back soreness from sitting too long? Or we’ve known someone who’s “thrown their back out” picking up something as freaking light as a pencil. Heck, it’s may have even happened to us!

So what do we often do when this happens?

We go “rest up” on the couch or sit and don’t workout. We avoid moves we think may have caused it.

But rest and avoidance don’t really solve the problem.

Because we then go back to repeating the same poor movement patterns and compensations that caused it in the first place.

So maybe in an attempt to prevent yourself from getting injured again you think, “I’ll add in more moves to strengthen my low back.”

I mean it got injured cause it was weak, right?

WRONG!

Yes, sometimes weakness does lead to injury.

But guess what!?!

It may not be low back weakness that is the issue…

Actually working your low back more may only PERPETUATE the pain!

Often with low back injuries, we are ticking time bombs.

We spend way too much time seated with our hips in flexion hunched over a computer, driving in a car, watching TV…

This hip tightness and constant flexion can make our glutes, and even abs, under active and cause our low back to want to work during exercises and movements when other muscles should actually be doing the work.

It leads to compensations, imbalances and overuse injuries.

It causes our low back to become OVERWORKED!

Which is why simply working your low back more, thinking it is weak, isn’t the answer.

Too often when we get injured, we only focus on the point of pain. When the actual problem causing the imbalances and compensations that lead to our pain, aren’t exactly where we hurt.

That’s why you may want to give your low back a break and start addressing these other issues:

If you can get your glutes and abs working as they should, they will help prevent your low back from becoming overworked. They will PROTECT YOUR LOW BACK.

But often to get your glutes and abs working correctly, you also need to address hip flexor tightness and any imbalances you have between, not only your right and left sides, but even between different muscle groups.

Ever feel one side more than the other during exercises?

Or maybe you only feel your hamstrings or low back during glute bridges?

Or maybe you only ever feel your quads (the fronts of your legs) during leg exercises and never your butt?

These are all imbalances that need to be corrected! And often we ignore these things when we workout and continue to push through because these things seem like they have nothing to do with our low back pain.

I know I know…It’s not where it hurts.

BUT THEY ARE THE REAL PROBLEM!

And they all relate back to getting the RIGHT MUSCLES working. AKA your abs and glutes!

Using isolation exercises that require little to no resistance for higher repetitions, you can activate your abs and glutes and improve your hip mobility to prevent further low back aches and pains.

 The key is to use these moves to rebuild that mind-body connection and get the right muscles working BEFORE you do other compound moves.

That way when you run and lift, your abs and glutes will work as they should!

If you’re ready to stop suffering from low back aches and pains and wasting time overworking your low back, it’s time to start my 28-Day Booty Burner Challenge.

These quick workouts will help unlock your hips, correct imbalances and get your abs and glutes working correctly!

Join my 28-Day Booty Burner Challenge to activate those glutes —> https://goo.gl/FWYnzd

How To Activate Your Glutes Before You Workout

How To Activate Your Glutes Before You Workout

So you want a sexy, strong butt…because let’s face it…who doesn’t!?!

Whether you just want your butt to look firm and toned or you want to lift more, run faster or even PREVENT INJURY, glute activation is a MUST.

And it can be done quickly BEFORE you workout so you get even more out of all of those squats, lunges and deadlifts.

Because while squats, lunges and deadlifts are AMAZING compound exercises, if your glutes aren’t ALREADY activated, they won’t work properly during those moves.

Which can not only lead to injury, but also cause your quads and legs to change while your glutes stay the same.

So if you want to get the most out of your workouts, you’ve got to activate your glutes BEFORE.

(And P.S. Guys – this applies to you too. If you want to prevent low back, hip and knee pain, run faster, and lift more, you have to activate those glutes…Plus I won’t lie…Women like a nice backside. 😉 haha)

Below are 3 moves you can do before your lower body workouts to make sure your glutes are activating and firing.

These moves are all BODYWEIGHT because with bodyweight we have the ability to contract our glutes harder and establish the mind-body connection.

Too often we add weight to try to get the glutes to work, but then they stop firing. Bodyweight and light resistance for higher reps is KEY to getting them activated and pumped.

Using these 3 moves you can also unlock your hips to improve hip extension and work all 3 gluteal muscles.

It is important that your glute activation ALSO works on hip extension because tight hips can not only lead to pain and injury, but they can keep your glutes from working proper and cause that LOWER BELLY POOCH!

Use these 3 moves and get your glutes working properly before your workout for a strong and sexy butt!

3 Moves To Activate Your Glutes Before You Workout

Bench 2-Way Leg Swings:

This move works all three gluteal muscles, opens up your hips AND even helps you build core stability.

It is the perfect move if you can literally only do one thing that day to activate your glutes and core. This move alone will get you ready to feel your glutes during your workout!

bench-two-leg-swings

To do the Bench 2-Way Leg Swings, place one knee and both hands on a bench with your knee under your hips and your hands under your shoulders. Your other leg will be off to the side of the bench hanging straight down to the ground.

Keeping your arms straight, brace your core and then lift the leg off the bench straight up to the side. Keep the leg straight as you lift and don’t bend your elbows or lean away to try to lift higher. Squeeze your glute to lift the leg up and out to the side. Try to get it as straight out to the side as possible. Feel the outside of your hip working.

Lower back down and then lift the same leg straight back toward the wall behind your. Again, squeeze your glute to lift your leg straight out behind you and extend your hip. Keep your core engaged and do not hyperextend your low back or rotate your hips open just to kick the leg up higher as you lift it back behind you.

Lower back down and repeat the lifts on the same side. Do not bend your arms or really rock away to get the leg up higher. You want to move from the hip and use your glute.

Do not just swing the leg, but focus on FEELING your glute working. Complete all reps on one side before switching. Move quickly between the two lifts.

Side Balance Leg Raise:

This is the perfect way to activate your hip stabilizers aka your gluteus medius and minimus to prevent pain and injury AND even make sure your gluteus maximus engages during your workout! PLUS, this move will work your core and even your shoulders!

To do the Side Balance Leg Raise, start on one knee with your other leg out straight to the side. Then place your hand down on the outside of your knee so you are in a side balance position. Your hand should be under your shoulder while your knee will be just slightly below your hip. You want to keep your chest open and not rotate toward the ground.

Then lift your top straight leg up toward the ceiling. Lift the leg as close to parallel to the ground as you can and then lower back down. Do not swing your entire body to lift the leg. Keep your core tight and do not let your body rotate toward the ground or open toward the ceiling as you lift. Make sure your toe doesn’t rotate open as you lift.

Feel the outside of your glute and hip working to lift the leg. Complete all reps on one side before switching.

Feet-Raised Hip Thruster:

Take the basic glute bridge and amplify the pump with the Feet-Raised Hip Thruster. This move will work on hip extension and get those glutes burning and engaged! It is the perfect way to unlock your hips as you activate your glutes.

bilateral-off-box-hip-thruster

To Feet-Raised Hip Thruster, place a box and a bench close enough together that your back can be on the bench and your feet up on the box. You just don’t want your legs to be out too far. If your legs are out too straight, you will use more hamstrings than glutes.

Then with your feet and back both up on boxes or benches, bridge up, driving up through your heels and your upper back. Make sure to engage your abs and even do a pelvic tilt if you struggle to keep your low back from taking over.

Drive your hips up and squeeze your glutes. Lift your hips to full extension and hold for a second and then lower back down. Make sure you don’t drive yourself backward over the bench. You want to bridge straight up and feel like you are driving your knees forward over your toes.

Lower back down, making sure to drop your butt below the height of the box and repeat. You do not have to touch the ground each time, but you do want to do a bigger range of motion than you could if performing a bridge from the ground.

–> 5 Signs Your Hips Are Locked Up And Glutes Are Inactive <–

LEARN MORE –>