How to Unlock TIGHT HIPS (With 6 Exercises)

How to Unlock TIGHT HIPS (With 6 Exercises)

Are you one of the many people out there struggling with tight hips or hip pain? 

Whether it’s caused by a previous injury, sitting for long periods, or a sedentary lifestyle, hip pain and tight hips can be a major roadblock to your daily routine. 

Rehab work can help improve our movements, BUT we have to KEEP doing it to see those results maintained.

Rehab must become prehab. 

That’s why I want to share 6 moves to help you keep those hips, and even your lower back and knees, healthy and happy. 

And at the end I’ll share a quick series you can do combining these moves to use daily!

Exercise #1: Rectus Femoris Foam Rolling

Especially if you spend a ton of time seated, you want to spend some time relaxing tight and overactive hip flexors.

One key hip flexor muscle to focus on is the rectus femoris. This quad muscle is the only one to impact both the knee and the hip so tightness can not only perpetuate your hip pain, but also your knee and even lower back aches and pains.   

To roll out this muscle, a ball works best but will apply more pressure so if needed modify with a roller. 

Lie face down with the ball in the middle front of your thigh. Relax over the ball, propping yourself up on your forearms.

Extend your leg out flexing that quad then relax. Repeat as you hold on the ball, breathing to help the muscle relax and release.

If you find you’re only tensing against the pressure, start with a softer trigger point tool.

Repeat for a few extensions then move the ball slightly up or down your thigh.

Exercise #2: Adductor Foam Rolling

Tightness of our adductors or inner thighs can perpetuate hip pain as well, causing hip alignment issues and even knee tracking issues. 

 If you find your knees tend to cave in and you struggle to feel your glute medius or side butt working, you may want to address any adductor tightness. 

The adductors are also a hip flexor, so tightness there may be limiting your hip extension as well. 

To roll out your adductors, a roller works best.

Place the roller to the side fo you and bend your knee to about 90 degrees placing the inside of your thigh by your knee on the roller. You can roll up toward your groin and work all along your inner thigh. 

When you find a spot that is tight, lift your lower leg and then relax it back down and even push down into the roller then slightly release.

Don’t just roll up and down quickly but instead focus on holding on any tight spots to help the muscle relax and release.

Then you want to include stretching. If you are doing this as part of your warm up series, stretches that get your joints moving through a full range of motion is key. 

Exercise #3: Bench Hip And Quad Stretch 

This stretch will help improve your hip extension and stretch out any short and tight hip flexors. The key with this move is to focus on that back glute engaging to drive that back hip forward.

This stretch will isolate each side independently and really start to warm up your legs as well as it is basically a balance lunge!

To do this stretch, set up with a bench behind you. As long as your knee allows, set up at the bottom of the stretch kneeling on the ground. If you need to reduce the range of motion, put a block or even a pillow or cushion down on the ground to kneel on.

Place your back foot up on the bench and make sure your front foot is firmly pressed into the ground. Engage that back glute to help you kneel up nice and tall and drive your hip into extension from the bottom.

Then pressing off your front and back foot, lift up.

Squeeze that back glute the entire time and lower back down. Pause at the bottom on the ground for a breath and repeat.

If you find balancing a challenge, you can use a suspension trainer, chair or foam roller to hold on to just make sure you aren’t leaning forward but instead staying upright.

Leaning forward would put your hip back into flexion! 

Exercise #4: Alternating Pigeon Pose

The pigeon pose stretch is an amazing stretch to improve your hip mobility, especially if you’ve ever had sciatic pain, lower back pain or even IT band and knee issues.

However, the static version isn’t a great way to warm up your body for work. 

With this variation, moving through that range of motion, you can implement this stretch while really mobilizing those hips.

To do this stretch, start on your hands and knees. Then begin to walk your hands to one sides on the ground as you swing the leg on the side you’re walking toward back behind you and across your other leg.

Your body will rotate as you move into that pigeon pose, sitting into the glute of that front leg with your shin perpendicular to your body. Flex your foot if you do feel any pressure in that front knee.

Focus on squaring your hips up toward the ground as much as possible as you reach that one leg straight back. Engage that back glute to drive that back hip into extension as you feel the outside of your front glute stretching.

Pause for a breath then move back onto your hands and knees before rotating into pigeon on the other side.

If this feels like too much, or you can’t put pressure on your knees, try a seated bench variation, alternating pigeon pose on each side, pressing the knee gentle open as you hinge forward and sit back up before switching sides.

Next you want to include focused activation exercises.

While with the stretching you want to focus on what you feel even working to drive the stretch and begin that activation process, these moves are really key to get those underactive muscles working and improve your hip and even pelvic stability.

This first activation exercise focuses on activating those glutes. 

Exercise #5: The Wall Side Lying Lateral Raise 

Too often, especially if we’ve had previous lower back, hip or knee injuries, our glutes aren’t working as effectively as they should be and we need to work to improve that mind-body connection.

Isolation moves like this to create a slight pump and burn, but not fatigue the muscle, prior to our training are key.

The Wall Side Lying Lateral Raise is an amazing glute activation move to include because it targets both the glute medius and glute max to improve your hip stability.

The one thing we have to remember is the “right” moves only benefit us if the correct muscles are working.

And often we will allow our TFL or piriformis to compensate during lateral raise movements. 

That’s why this variation of the lateral raise is so helpful.

Turning your toe down toward the ground even just slightly vs letting it rotate open can really help you avoid that hip flexor or piriformis from taking over and the slight kick back helps also engage your glute max and avoid any hip flexor engagement to better activate that glute medius.

To do this exercise, set up lying on your side with the bottom leg bent and your butt a few inches from the wall.

You can fully lie on your side with your bottom arm straight out on the ground or you can prop yourself up to rest your head in your hand.

Lift your top leg up a few inches off your bottom leg and even slightly turn that top toe down toward the ground.

Drive your heel back into the wall behind you and feel your glute engage pushing into the wall.

Slide your heel up the wall lifting your leg and focus on the side of your butt lifting as you drive hard back into the wall. 

Do not let your body rotate or your toe turn open just to try to lift higher. 

Perform this lateral raise but do not rotate your hip open to raise up higher.

To advance this move, add a mini band around your legs above your knee.

The final exercise in this series will work on pelvic stability, engaging your core, glutes and even your hamstrings.

Exercise #6: Is Alternating Pelvic Tilt Leg Glides 

Often our hamstrings feel tight and we turn to stretching. 

But in many cases they are weak.

And even being weak they may want to take over for underactive glutes. 

That’s why exercises like this that work on core bracing as you strengthen your hamstrings can help improve your hip stability while also helping you avoid hamstring strains and injuries!

To do this move, lie on your back with a slider or towel under each heel and your heels a few inches from your butt. Feel the space between your lower back and the ground.

Engage your abs to get rid of the space as you press your lower back into the ground. Taking a deep breath and then exhaling as you draw your hip bones up toward your ribs can help you engage those abs.

Keeping your abs engaged, slowly slide one heel out, straightening your leg out.

Then curl that heel back in, pulling the heel in with your hamstring almost as if you are trying to drive the slider into the ground as you curl it back in.

Feel your hamstring work to pull it back in and avoid your pelvis shifting.

Move slowly and alternate sides, extending the other leg out. 

If you feel your hips shifting, stay on one side versus alternating.

Really focus on feeling your hamstring with that pull back in. Drive your heel down hard into that sliders to engage it and even your glute. 

If you don’t create that tension you won’t get the benefit of this move.

To combine these 6 moves, try this series below.

I like using intervals as it really allows us to focus on maximizing the movement over counting reps. While you can do each move up to 1 minute per move or side, even 30 seconds is a great place to start!

CIRCUIT:
30-60 seconds per side Rectus Femoris Foam Rolling
30-60 seconds per side Adductor Foam Rolling
30-60 seconds per side Bench Hip And Quad Stretch
30-60 seconds Alternating Pigeon Pose
30-60 seconds per side The Wall Side Lying Lateral Raise
30-60 seconds Alternating Pelvic Tilt Leg Glides

Ready to improve your mobility EVERYWHERE?!

Check out my RStoration!

FHP 514 – 5 Tips To Boost Your Metabolism and Optimizing Your Sleep With Dr. Amy Bender

FHP 514 – 5 Tips To Boost Your Metabolism and Optimizing Your Sleep With Dr. Amy Bender

Slow Metabolism? Struggling with your sleep?

In this episode, we’ll dive into your metabolism and discuss how we can keep it healthy as we age. Many of us believe that our metabolism slows down as we get older and that we’re doomed to gain weight, but there’s a lot we can do to control it. We can even reverse metabolic adaptations through our previous dieting practices and increase our metabolic rate at any age.

In this episode, we’ll cover five tips to boost your metabolism and optimize your sleep. First, we’ll explore how your metabolism works and why changes occur, especially as we age. Then, we’ll discuss why your dieting mindset may be holding you back and how to overcome it.

We’re also excited to have a special guest, Dr. Amy Bender, who is the Director of Clinical Sleep Science at Cerebra, a sleep health technology startup, and an Adjunct Assistant Professor of Kinesiology at the University of Calgary. She received her PhD and Master of Science degrees in Experimental Psychology from Washington State University, specializing in sleep EEG. Dr. Bender has helped develop the only validated sleep screening tool for athletes and has implemented sleep optimization strategies for numerous Canadian Olympic and professional teams. Her current interests focus on how to help people sleep better by improving sleep disorder treatments with more precise digital sleep metrics.

Dr. Bender will share essential tips to improve the quality of your sleep and what your sleep tracking device is really telling you. We’ll also reveal six metabolism-boosting foods, including one that’s often overlooked, and share a quick recipe to combine them. Lastly, we’ll discuss how to design your workouts to boost muscle and metabolism.

By the end of this episode, you’ll have a better understanding of how to boost your metabolism and optimize your sleep for a healthier lifestyle. Tune in to learn how to take control of your health and wellbeing today.

00:00 – Intro
01:30 – How Metabolism Works
11:32 – The Crash Diet Mindset
16:23 – Optimizing Your Sleep
37:36 – 6 Metabolism Boosting Foods
42:38 – Recipe – Tuna, Avo Cucumber Bites
43:50 – Workouts and Metabolic Rate

Connect With Dr. Amy Bender
IG and Twitter @sleep4sport
www.sleepintowin.com
www.cerebra.health

Spicy Tuna and Avocado Cucumber Bites

Ingredients:
1 Cucumber, sliced into rounds
1 can of tuna, drained
30 grams of avocado, mashed
1/4 tsp cayenne pepper
1/4 tsp iodized salt
1 tsp grated ginger/1/2 tsp ground
1-2 tsp of Sriracha (to taste)

Slice the cucumber into circles.

Mash the tuna and avocado together then add the pepper, salt, ginger and sriracha, although you can also drizzle the sriracha on if you prefer.

Then top the cucumber with the tuna and avocado mixtures.

If you want a little crunch, you can cut up roasted seaweed snacks into quarters and add on top of the mixture!

BONUS:
By adding seaweed to the recipe, you’re adding a source of iodine, iron, and other minerals to the dish. The seaweed also adds a slightly salty flavor and a nice crunch.

CALORIES AND MACROS (seaweed not included)
Calories 296
Protein 42 grams
Carbs 14 grams
Fat 8 grams

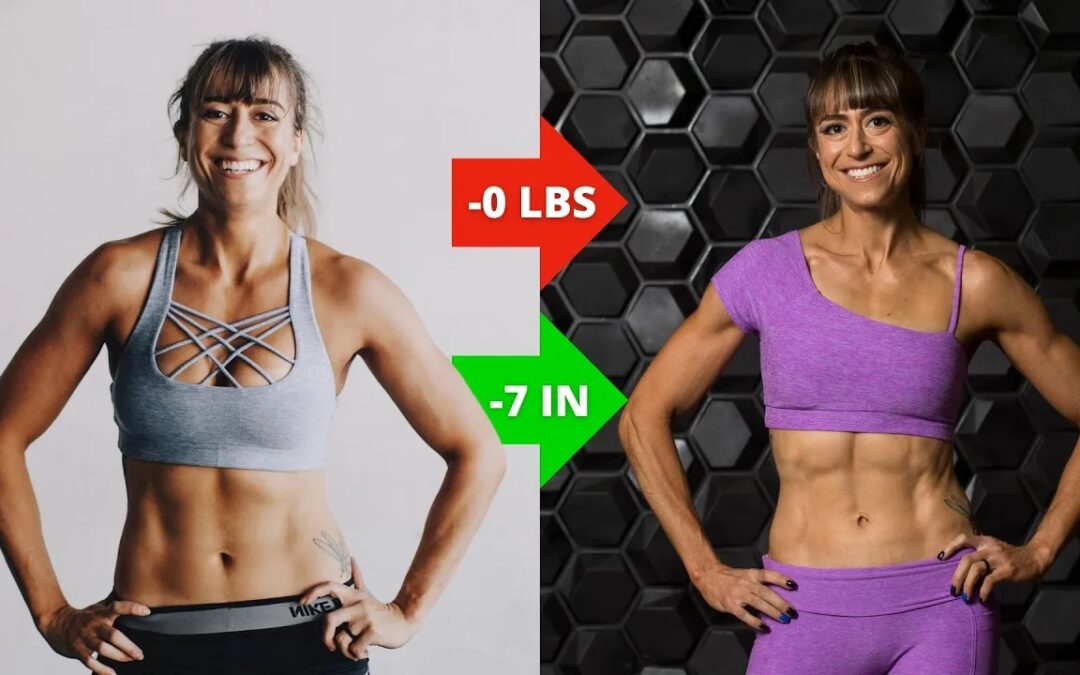
Why You’re Not LOSING FAT (5 Things No One Tells You About Losing Weight)

Why You’re Not LOSING FAT (5 Things No One Tells You About Losing Weight)

You tried on those pants that wouldn’t button…

You stepped on the scale that showed you a number that made you want to hurl it at the wall…

So now…you’ve decided you want to lose weight.

In this video I want to share 5 things no one tells you about losing weight, but I also want to ask you one very important question first…

Is weight loss what you really want?

I ask this question because it’s key we realize that losing weight as fast as possible on the scale may actually be holding us back from seeing the fat loss results we want.

Losing weight faster doesn’t mean losing fat faster.

It actually often means the opposite.

In our desire to see quicker changes on the scale, we go to extremes which are unsustainable and only truly deplete our glycogen stores, causing us to also lose water weight. 

It’s why we may see immediate big drops in our weight.

It’s not fat being lost though.

If we do manage to maintain the extreme measures, we often then also start to lose as much muscle as we do fat.

And while some muscle loss will occur at points in your weight loss journey, you want to do everything possible to maintain as much lean muscle mass as you can!

Which actually brings me to the first thing no one tells you about losing weight…

Macros matter most.

I can feel the angry mob of calorie counters approaching who won’t listen a step further in this video…but hear me out….

Often people say it’s only about calories in vs calories out while saying you can’t build muscle and lose weight at the same time…

Which actually you can do.

But it is this calorie only focus that creates this issue and belief.

Adjusting your macros is key if you want to lose fat and not only retain lean muscle mass but BUILD it. 

Focusing solely on a calorie deficit won’t do this and could lead to more muscle being lost in the weight loss process.

Macros are so key because higher protein diets are the only ones shown to help you not only retain but even GAIN muscle while in a deficit. 

By keeping on more lean muscle as you slim down, you’ll promote more optimal hormone levels and even help keep your metabolic rate higher. 

Muscle requires more energy to be maintained.

And this higher energy expenditure daily will make it easier to ultimately lose more fat!

This focus on retaining lean muscle while trying to lose fat is even more key as we get older because it becomes harder to build and retain lean muscle, which leads to more metabolic adaptations with age. 

And creating an extreme deficit to lose weight quicker as we get older only puts us at greater risk to lose even more muscle!

So if you want to see the best results, you want to focus on those macros to fuel your training and even help yourself gain muscle as you lose fat.

Focusing on hitting that high protein tipping point, consuming 30% of your calories from protein, can help you see better fat loss results while even building muscle through a strategically created deficit based on your macro breakdown. 

The second thing no one tells you about losing weight is something none of us really want to admit…because it stinks.

I mean, who wants to be PATIENT!?

But we need to realize that results will take longer the longer we’ve been at our current weight. 

Think about how long it took for you to get into your current position.

Think about how long you haven’t been at your goal…

Often when we are considering how quickly results happen, we think about the diet we are using or the workouts we are doing.

But we never consider how much our body will fight us to maintain the balance of where it is at currently. 

Our body doesn’t like change.

It feels threatened with change. It’s part of how it protects us to survive.

So the longer you’ve had the weight on, the farther you are from your goal, the longer it will probably take for you to get there. 

Especially if it means hitting a new level of leanness you’ve never achieved before. 

So while you may look at your friend who gained 15 pounds just like you and want your results to happen just as fast, if you’ve had the weight on for a year and they just gained it during the holidays, it is probably going to come off much more quickly for them!

When mapping out your plan, realize that gaining the weight took 10 months so you’re probably not going to see it just all melt off in 10 weeks. 

Recognizing this helps give us perspective when we feel like changes aren’t happening fast enough!

The third thing no one tells you is that repeatable habits should be your focus over doing more. 

When we want to lose weight, we do turn to making habit changes…but often we make massive overhauls to our current lifestyle and habits.

Our focus is on what will get us results FASTEST. 

Not what habits can I actually REPEAT day in and day out. 

Now this doesn’t mean every habit change will feel easy. Most won’t actually feel sustainable to start.

And they won’t be fun.

Tracking your food is not fun. 

Doing the mobility work when you’re in a rush and just want to get to the meat of your workout isn’t fun. 

BUT it can be repeatable if you break things down to meet yourself where you are at.

When making changes to lose weight, start with easy to repeat habits.

Focus on those small daily changes over doing more.

This allows you to build instead of overwhelming yourself so that you give up when you just simply run out of willpower and self control.

These repeatable habits are what lead to DISCIPLINE.

So as much as these may feel small, they may feel even less than “ideal” they will allow you to get consistent. 

And what we do consistently we get good at.

If we consistently do habits that make us gain weight, we will.

If we consistently do habits that help us lose, we will.

So focus on repeatable habits that can help you build a lifestyle and see those results snowball. 

The fourth thing no one tells you, that it is key we recognize to avoid sabotaging ourselves and giving up when results are snowballing…

Is that you’ll often feel like the areas you want to change are the LAST to change. 

And even at points as you’ve made progress losing weight, they look WORSE! 

Stubborn areas are stubborn for a reason.

They often contain more of the stubborn type of fat cell and have less blood flow. 

They are often the places we gain first so will be the LAST we will lose from.

We may see all of these other areas trimming down, but not see any changes really to start from the places we care about. 

Not only is this frustrating but slimming down in some places and not others can make the areas we want to change stand out even more.

But don’t give up.

Giving up is what keeps you from finally losing from those stubborn body parts. 

Often it is pushing through and just sticking with those same old boring habits, not jumping ship in favor of some fad diet, that will finally add up.

And if you are struggling with those stubborn areas and want to learn more about what makes stubborn areas so stubborn, check out my How To Lose Stubborn Fat Video with 3 tips.

Now…The 5th and final thing no one tells you about losing weight is…

What you did to lose the weight will NOT be what you do to maintain it. 

Honestly because the dieting industry is built off of us regaining the weight we’ve lost…

A new fast fix is easier to sell you than maintenance

Maintenance isn’t sexy so it’s never discussed

But maintaining your weight loss is a learned process with its own unique challenges. 

And one of those challenges is actually being ok with a very small increase on the scale as you shift your body and habits from weight loss mode to maintaining mode.

You can’t just keep repeating what you did to lose and stay in a deficit forever, yet you also can’t go back to old habits. 

You’ve got to slowly make adjustments to your macros and calories to increase them to a maintenance level while potentially returning to a more even macro split. 

We have to remember our body, needs and goals are constantly evolving which means our diet and workout habits can’t just stay stagnant.

(At the end I’ve linked out to more free resources!)

If you’ve been only focused on losing weight fast, it’s time to change your approach. Losing weight quickly doesn’t always mean losing fat, and extreme approaches can be harmful.

By focusing on healthy habits, you can achieve lasting results that don’t have to feel overly restrictive.

More Free Resources:

–> 5 Tips To Maintain Your Results

–> 3 Step Fat loss Recipe

FHP 513 – 5 Reasons You’re Not Losing Weight

FHP 513 – 5 Reasons You’re Not Losing Weight

Are you feeling frustrated by your lack of weight loss results?

Don’t worry, you’re not alone. In this episode, we’ll be diving into the top five reasons why you may not be seeing the progress you want. We’ll cover why seeking rapid weight loss can actually hinder your success, how to break through a plateau with tips from the Lead Redefining Strength Registered Dietitian Michelle, an amazing workout design to build muscle and boost your metabolism, why eating clean may not be the solution you need for fat loss, and how to hit your macros for maximum results. Whether you’re new to tracking or a seasoned pro, these tips are sure to help you achieve your weight loss goals.

00:00 – Introduction
00:58- Is Fast Weight Loss Worth it?
06:19 – Weight Loss Plateaus
20:00 – Fat Loss Workouts
24:41 – Should You Eat Clean?
28:39 – How To Hit Your Macros

10 Tips To Increase Your Push Ups (In 7 MINUTES)

10 Tips To Increase Your Push Ups (In 7 MINUTES)

Are push ups your arch nemesis? 

Do you struggle to do even one?

Don’t worry, you’re not alone.

In this video I’ll share 10 tips to help you improve your push ups fast and be able to perform them flawlessly by addressing the common form issues and weak links we all tend to have!

Tip #1 is Regress to progress.

Sometimes you have to take that step back to truly improve. 

Often we just keep trying a variation we haven’t earned yet and wonder why things aren’t progressing.

And it’s because we keep cheating or compensating to do a harder variation than we can control. 

This can not only lead to injury but often keep us stuck.

Proper form, using the correct muscles to power the movement, is what makes us efficient with an exercise. And this efficiency is what strength truly is. 

You can’t be efficient with a move you aren’t doing properly!

So if you’ve stalled, try modifying the move even just one step backward, off an incline instead of the ground, to refocus on what you feel working and make sure everything is engaging correctly in the correct order. 

Get the correct muscles working. While it stinks to step back, this can help propel you forward!

Tip #2: Run through a set up checklist.

How often do you do a move and simply…well…do it?!

We don’t consider how we are positioning each part of our body or run through what we need to engage and how it needs to be engaged to do the move. 

While we want this process of engagement to become natural, when first starting out is key we run through a checklist to make sure we have everything ready to work as it should!

So as you set up for the push up, run through a checklist of what you often struggle to engage to make sure you’ve set yourself up to move well from the start. Don’t just rush through hoping to mimic the movement. 

A great set up checklist for overall form may be…

#1: Set your hands outside your chest and spread your fingers to drive down hard into the ground. 

#2: Engage your back to unshrug your shoulders. 

#3: Brace your abs, even squeezing your glutes to do a slight posterior pelvic tilt.

#4: Drive back through your heels as you flex your quads. 

This sequence helps you make sure you’ve put yourself in a position to have the correct muscles engaged from the start of the movement.

Tip #3 is Drive back through your heels.

Often we think about the push up as an upper body or even a core move. But our lower body needs to be engaged correctly if we want to be efficient with the movement. 

If we push ourselves forward over driving back, we can actually overload our upper body more. 

And we can make it harder on ourselves for our body to move as one unit.

Instead, as you set up for the push up, drive back through your heels and feel your quads flex. 

This will help you maintain proper plank alignment as you lower down. 

It can help you avoid your butt going up in the air or shifting backward or forward. 

It can even help you avoid those hips sagging because of the tension you’ve already set up through your legs! 

Tip #4 is Set up at the bottom.

If you struggle with that press back up in a push up, it’s key you target that engagement from a dead stop. 

A great way to do this is to actually set up at the bottom of your push up, whether you’re using an incline or doing these off the ground. 

Just realize this is HARDER than lowering down because everything has to be fully engaged to press correctly BEFORE you even move. So don’t hesitate to modify starting out with this. 

But set up at the bottom of the push up, run through your checklist to make sure everything is engaged, take a big breath in and then focus on that solid push up to the top as you exhale. 

Too often we just work on moves top down, but that bottom up work can be so key especially if we do struggle with that transition from lowering down to pressing back up in a push up.

Tip #5 is Practice stick point holds.

Often there is a part of the push up we struggle with the most. 

It could be maintaining a straight plank position at the bottom or in that push about half way up… 

By using some push up holds in even our warm up activation work or as a burner to end our workout, we can build our strength endurance by HOLDING in these positions we struggle with. 

You can not only cycle through these positions in a single interval, pausing in a spot for 5-10 seconds, but you can also do single longer holds just setting up directly at your stick point! 

As you hold, run through how you feel everything working and your set up to really ingrain that positioning and recruit those muscles efficiently!

Tip #6 is Use a band.

While I love incline push ups to help build up, the more variations of a move we can include, the more we can help ourselves really learn to engage everything correctly. 

Sometimes with incline or knee push ups, we can feel like we are getting stronger, yet still be slightly stuck.

The band is a great way to reduce tension on your upper body but work through that full range of motion off the ground. 

It can also be a great way to increase your strength endurance if you’re stuck only able to do a few reps off the ground currently.

To do this, set up a band at about elbow height in a rig and position yourself in the push up with the band under your chest. 

You can set the band up higher if you do need more assistance or have a higher stick point. 

Then lower down performing the push up. As you get deeper in the lower down, the band will take away some of the load on your upper body and even add assistance as you push back up! 

Tip #7 is Focus on pushing the ground away.

If you think about just lifting your body up, this often leads to our butt going up or some other version of the worm happening.

We lose tension on our foundation and a focus on the true movement pattern we are performing.

If you think about a bench press, your focus is on pressing the weights up. 

You want that same focus in a push up to best activate your chest, shoulders and triceps.

With the push up, focus on pushing the ground away with your hands.

This can help you avoid your elbows flaring way up into a T shape with your body. 

And it can help you remember to focus on powering that press with your upper body!

That tension down into the ground will truly better activate your pecs, shoulders and triceps!

Tip #8 is Include activation work in your warm up for your BACK.

Proper scapular control makes for a more powerful press. 

If you want to protect your shoulders, neck and elbows as you work to improve your push ups, you want to make sure you include scapular mobility and activation work in your warm up routine. 

If we are able to properly move our shoulder blades, we are better able to use our chest effectively in the push up as well.

In your warm up consider even a scapular wall hold as part of your activation series. This will open up your chest and engage your back, pulling your shoulder blades toward your spine. 

It is a great way to make sure your back is ready to work and support those shoulders throughout the push up movement! 

(It’s also a great move to improve your posture if you’re doing extra pressing).

Tip #9 is Use cluster sets.

If you want to be able to do more push ups in a row, you have to do more push ups in a row to build up that strength endurance. 

Instead of modifying over rounds, consider designing your push up work as cluster sets.

Set a total number of reps for the round, say even the goal is 6. 

And break it down into sets of what you can do well, even if that is just 2. Do 2 reps and rest 15-30 seconds then do 2 more. Do this pattern, even performing singles if needed to hit 6 then rest for longer between rounds. 

This way you are still hitting your desired number of reps BUT in a way you can do each rep with the most challenging variation and proper form.

By resting for so short, you don’t let your body fully recover which can so to speak trick it into believing you’re able to do 6 in a row. You will see your strength endurance and push up reps increase quickly implementing this technique! 

Tip #10 is Include anti-extension core work.

The push up is basically a moving plank. 

And while planks are a great move to include, they can also get a bit boring, especially if you’re just doing the basic front plank. 

So if you want to mix up your core work in a way that will really help your push ups, consider other anti-extension core exercises as part of a finisher to your workout.

It may be simply including a bird dog version of that front plank or even a dead bug variation that helps. 

Anti-extension exercises are ones that make your abs work to avoid arching of your lower back, which will help you avoid your hips sagging in push ups!

You may even include an anti-extension move in your warm up to get your core ready to work and establish that mind-body connection prior to your push ups. 

Just make sure you’re not doing too much to fatigue it prior.

Remember, the key to success is consistency and practice. So, make sure to incorporate these tips into your workout routine and track your progress over time. 

–> More Push Up Tips – Use Your Back