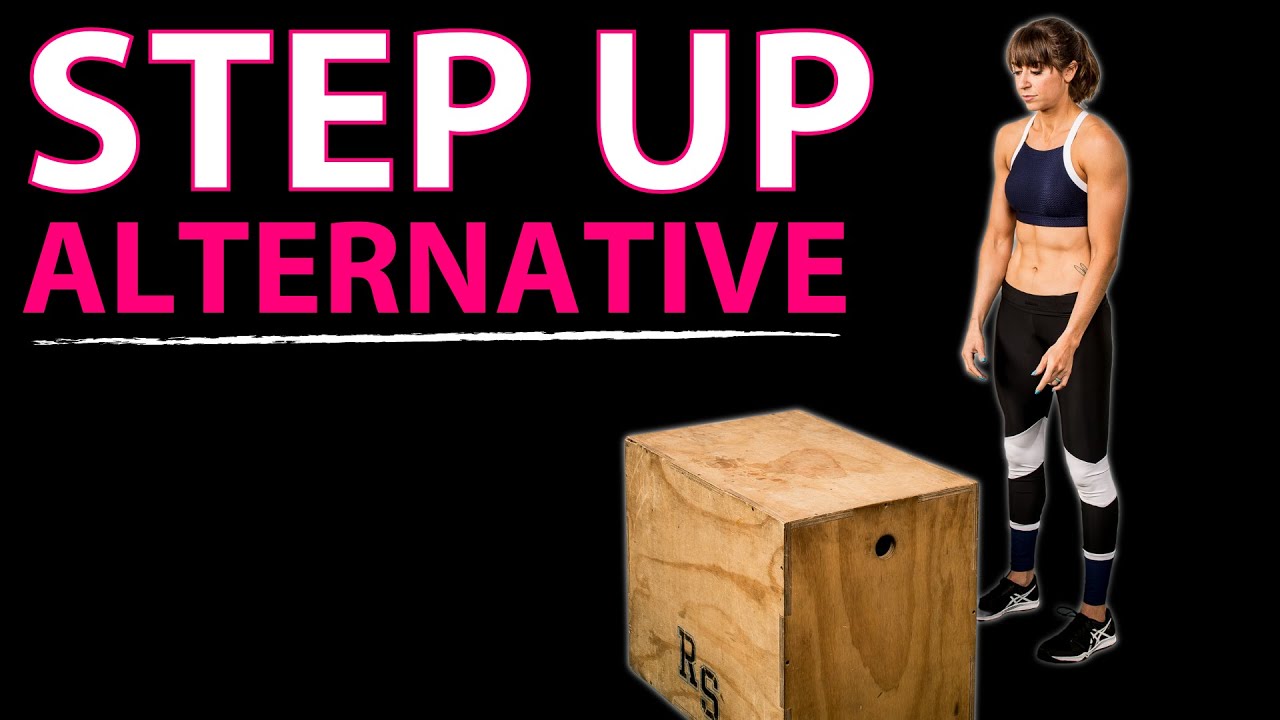
Hate Step Ups? Try this move instead!

Hate Step Ups? Try this move instead!

Not every variation of every move is going to be right for you.

Especially if you’ve had injuries in the past you’re rebuilding from.

If you’ve struggled with knee or hip pain, especially on one side, you may want to focus on unilateral moves.

Unilateral, or one sided moves, can help you correct imbalances while making sure that your stronger side isn’t taking over and compensating.

They can allow you to rebuild that weaker side while also avoiding overloading the weaker side by doing a move that your weaker side can’t keep up on.

But what if you’re including unilateral moves like the step up and they are still a struggle? What if you want to target your glutes more because you tend to be quad dominant?

Well then this variation is exactly what you need…

THE STEP DOWN!

Sometimes it is small tweaks to moves that really add up. These adjustments can help us target specific muscles more and work better with our builds and current mind-body connection.

With the Step Down, this top down approach, can help you better focus on the hip hinge and only work through the range of motion you can truly control.

It is a great way to focus more on your glutes than your quads.

And you can really limit the range of motion to exactly what you can control without being able to cheat and push off your other foot.

It can also work well if you don’t have a range of box heights because you are so in control of how far you lower down.

So how do you do this great step up variation to improve your balance and target your glutes more?

How To Do The Step Down:

To do this move, start standing on top of a box to one side of the box. You want to place the opposite foot from the side you’re standing closest to close to the edge so the foot on that same side can actually hang off the box.

Press that foot on the edge into the box. This can help you better balance as you lower down, especially if you struggle.

Make sure you push the foot on top of the box solidly down into the box. Too often we don’t focus on that foundation to help us better activate muscles up our leg and even improve our stability.

Think of your foot as a tripod and push the two points in the ball of your foot and one in your heel down into the box.

Then begin to push your butt back. You want to start by hinging at the hips as you then bend your knee to lower your foot off the box to the ground. Do not be afraid to slightly lean forward as you lower.

You do not want to round your spine as you hinge.

Lower down only as far as you can control.

If you can lightly graze your toe on the ground, great. BUT you don’t want any weight to shift to the foot lowering down if it does touch the ground.

You will then drive back up to standing off the foot on top of the box. Stand tall at the top and squeeze that standing glute before repeating the move.

You can increase the height of the box as needed or even lower only half way down on the box if needed to start.

But you want to lower down only as far as you can control.

Because of the hip hinge with this movement over the traditional step up, you will be able to target your glutes more while still working your quads and hamstrings.

Make sure as you do this move, your knee stays in line with your hip and ankle. You do not want your knee caving in or bowing out.

Part of keeping everything in line relates back to you also focusing on that foot. Push through the entire foot and be conscious if you do feel yourself starting to rock in or out.

Modifications:

To modify this move, you may start with a smaller range of motion and increase as you build up. You can even start standing on a plate weight or only lower a few inches down on a taller box if that is what you have.

You can also create a balance assist by holding on to a pole or suspension trainer in front of you.

If you really struggle with your knee caving in, to help you better activate that glute medius to stabilize the hip and knee, you can also anchor a very light band to the opposite side of your standing leg and put it around your leg.

This gives you tension to push out against to activate the glute medius or that side butt muscle that stabilizes your hip and will improve that knee alignment. Just go light so you have that reminder but it doesn’t pull you into an incorrect position.

To advance the step down, you can hold a weight in close at your chest or even increase the height of the box to increase the range of motion.

Using This Move:

This is a great unilateral accessory exercise to include and most often will be done for 10-20 reps, although if you are adding loads you may find you do try to create a challenge at 8 reps.

Use it for higher reps if you are just starting out and doing more bodyweight based training!

Ready to design workouts AND dial in your nutrition to match YOUR needs and goals?

Check out my SIMPLE recipe for results…

–> 3-Step RS Recipe

10 Upper Body Bodyweight Exercises (+2 WORKOUTS!)

10 Upper Body Bodyweight Exercises (+2 WORKOUTS!)

There is always a way to keep moving forward consistently toward our goals working around the challenges life throws our way.

And while it may not be our ideal workout or schedule, doing SOMETHING is always better than nothing and can keep us moving forward toward our goals.

That’s why I wanted to share 10 upper body bodyweight moves to help you build strength even when you don’t have access to a gym or you’re short on time.

These moves will target your arms, shoulders, chest, back and core and can easily be done at home, with a few bonus moves using a towel.

I share quick tips on how to do these moves then 2 amazing workouts you can implement them in! 


10 Upper Body Bodyweight Moves:

1: Doorway Row

It can be challenging to target your back and perform pulling movements when we don’t have equipment. But by using a simple doorway or even stair banister, we can really challenge our back using our own bodyweight.

And this move is amazing because you can make it unilateral or bilateral to not only challenge one side at a time but even make it harder by using only one side to pull your weight.

Just make sure to stay in that squat and focus on your shoulder blade moving so you’re really initiating the pull with your back!

To modify, start with both hands instead of a unilateral pull.

2: Downward Dog Pike Push Ups

Push ups are not only a great chest, shoulders and tricep exercise, but also a great core move. And you can adjust how much you activate each of those muscle groups based on the exact variation you use.

If you want to get your shoulders and get in movement to mimic that vertical press or overhead press, the downward dog pike push up is the perfect move to include.

When you do this move, make sure you don’t turn it into a horizontal press but actually lower your head straight down between your hands to mimic that vertical pressing movement.

To advance this move, place your feet up on a bench or stair. The higher the platform, the harder it will be!

3: Scapular Wall Row

When we think about back exercises, we think about pulling movements. But this amazing back move is actually a press.

If you struggle with engaging your back and that scapular movement, and often feel your biceps taking over, this is a key back exercise to include. And all you need is a wall!

When you do this move, focus on driving off your elbows to push away from the wall and feel your shoulder blades move toward your spine to drive your chest out. Focus less on walking further away from the wall and more on that mind-body connection to engage your back.

To vary this move up, you can also do the press lying on the ground as well.

4: Tricep Push Ups

This amazing unilateral push up is a great way to target each arm independently to correct imbalances and really work those triceps.

It is also easier on the shoulders than the bench dip, which can make it a great option especially if you’ve had shoulder aches and pains in the past.

When you do this move, make sure to press through your entire hand. Move your hand up higher to modify or lower down your side to advance. And make sure not to let your legs flop around.

You can further modify this move to start by pressing off a bench or wall over doing the push up off the ground.

5: Lying W Pull Down

Even when we don’t have equipment, we don’t want to ignore the importance of vertical pulling exercises. Moves like the Lying W Pull Down can help us improve our back strength, working our lats while helping us improve our scapular control and stability.

Really focus on your shoulder blades drawing together and down toward your butt as you pull your arms down from extended overhead as you lie on the ground. Even slightly extend your spine to lift your chest and hold as you perform the movement.

If you do feel your neck during moves like this, rest your head on a towel or even modify this move standing.

6: Chest Fly Push Up

The chest fly is a great move to really work your pecs, which is exactly what muscle you’ll work more with the Chest Fly Push Up.

All you need are two small towels to use on a hardwood floor or even paper plates on carpet.

And bonus, you’ll also really work your core.

When you do this move, really focus on sliding out with control then your pecs working to pull your hands back in as you come up out of the push up.

To modify, try sliding one side out at a time or even move to your knees. You can also modify this move off an incline, sliding one hand out at a time while using your stairs to create that incline.

7: Plank Row

This bodyweight exercise is a great way to target your core, especially your obliques, improve your shoulder stability and even work on your scapular control and strengthen your back.

Really focus on avoiding rotation as you row your hand up toward your chest and make sure to initiate the row with your back.

This move is an anti-rotational core exercise so do not rush it but really flex even your quads and glutes to fight opening up as you lift your hand.

To modify, try the plank off an incline, placing your hands up on a bench, couch, table or stair.

8: Climber Plank

Target those arms and shoulders as you work your entire core with this plank variation.

When you do the Climber Plank, really make sure to place your hands under your shoulders over letting your hands sneak out in front of you as you climb up. And as you lower down, place your elbows under your shoulders.

This not only really makes your arms and shoulders work, but it will protect your neck and help you avoid shrugging.

To modify this move, try the plank off an incline.

9: Self Resisted Bicep Curl

You can apply your own resistance when bands or weights aren’t available. And one great way to do this and get in some bonus isolation work for those biceps is using a towel!

To do this curl, loop a towel and hold the ends in one hand to resist your other hand as you curl. You can then make it as easy, or as challenging as you want by pulling against your curl.

Focus on making yourself really fight to curl against the tension. Don’t make it too easy on yourself!

You can even include holds at different points in the move to spend more time under tension.

10: Body Saw

If you want a challenging plank variation that is going to work your triceps and lats, you’ll want to include the Body Saw.

While you can do this move by just walking your feet back, a great way to really make it challenge not only your core to protect your lower back during the extension but also your lats and arms, is to add a towel under your feet.

Instead of walking back, slide back. Do not let your hips sag but focus on lengthening through your arms and shoulders before you pull back in.

Think about pulling back into that plank by feeling the sides of your back working to bring your elbows back under your shoulders.

How Can You Use These Moves In 2 Amazing Workouts?

Workout number 1 is the 1 Minute Max Out. Set a timer for 1 minute and perform as many reps of a move as you can in that time. Move through the 5 exercises, working for 1 minute on each (30 seconds per side) before resting for a minute to repeat for 3-5 rounds through.

1 Minute Max Out

CIRCUIT:
1 minute Doorway Row
1 minute Downward Dog Pike Push Up
1 minute Plank Row
1 minute Tricep Push Up
1 minute Lying W Pull Down
1 minute Rest

The second workout option is the 20-16-12-8 Ladder. You will start with 20 reps per move in the Triset (or per side) then go down to 16 reps the next round, 12 the third round and finally 8 on the last round through the moves. Once all 4 rounds are complete on a Triset, move onto the second set of exercises. Time how long it takes you to beat that time next time through!

20-16-12-8 Ladder

TRISET #1:
20-16-12-8 Doorway Row
20-16-12-8 Chest Fly Push Ups
20-16-12-8 Body Saw

TRISET #2:
20-16-12-8 Scapular Wall Row
20-16-12-8 per side Self Resisted Bicep Curls
20-16-12-8 Climber Plank (perform HALF the reps per side)

Looking for more exercises, workouts, tips and motivation?

Follow me on Instagram!


The Best Inner Thigh Exercise You’re Not Doing

The Best Inner Thigh Exercise You’re Not Doing

Do you want to tone and strengthen your inner thighs?

Then this move is exactly what you’re looking for!

While we want to make sure we include compound leg exercises in our workout routines that work our entire leg while targeting those adductor, or inner thigh muscles, we also want to make sure that we complement that training with some isolation moves to really hone in on this stubborn muscle group.

That’s why I want to share one of my favorite moves so you can target your inner thighs and really feel them working while improving your knee and hip stability as well.

And bonus!, you’ll work you’re entire core, especially those obliques and even that glute medius, to target two other stubborn areas the love handles and side butt!

So what is this amazing inner thigh and core move?

It’s the Bench Side Plank Adductor Lift or the Copenhagen Plank!

This move is deceptively hard though so be conscious of the cues as you set up and watch for the modifications so you can make sure you adjust the move to fit your current fitness level, needs and goals!

Better to regress and build up than to use a variation we haven’t yet earned!

Bench Side Plank Adductor Lift Form:

To do this move, set up on your side with your elbow under your shoulder and the inside of your top foot on the bench.

Dorsiflex that top foot hard, pulling your toe up toward your shin to create tension through that lower leg. This tension will protect your knee as you hold the side plank.

Lift up into a side plank from your forearm with your bottom foot on the ground and your top foot on the bench, pressing down hard into the bench. Make sure your shoulders aren’t shrugged and your elbow stays under your shoulder so you can properly engage your upper back.

If your elbow sneaks out beyond your shoulder, it will put more strain on your neck and shoulder.

Engage your upper back and feel your bottom oblique and glute medius working even to slightly allow that bottom leg to hover off the ground. Make sure you aren’t twisted to face toward the ground.

Feel the adductor of your top leg working already as you hold in this position. Again do not relax that top foot.

Then holding the side plank position, lift that bottom leg up to meet the bench. Feel the adductor or inner thigh of that bottom leg working to lift.

Move slowly lifting and lowering back down. You can touch the foot down, but do not disengage your core at the bottom. Feel your bottom glute medius and oblique working to keep you lifted in the side plank.

Perform all lifts on that side then switch sides.

Modifications:

The first way to modify this move is to hold the side plank with your knee on the bench or even upper thigh.

This reduces the strength and stability demands, especially if you’ve had knee issues in the past.

If you don’t have a bench, you can of course always use a stair, couch or table, but you can also completely modify this movement off the ground.

From the ground you will just stagger that bottom foot in front to then be able to lift.

One further modification if the side plank is a bit too much currently on your shoulder and core, is to switch to an incline variation using the bench with your elbow up on the bench. You will then stagger your bottom foot in front to perform the adductor lift.

Using the incline reduces the load on your upper body and can be good to help you build up.

If you’re fully starting at the basics, you can even perform this movement fully lying on your side; however, this does reduce remove the core bonus you get from that side plank position.

SUMMARY:

Remember that doing a harder variation is not better if you can’t focus on the correct muscles working.

Often people end up demonizing moves not because the moves are bad but because they didn’t use the proper recruitment patterns or did a harder variation they haven’t yet earned.

But pick the variation that matches your needs and goals to work those inner thighs while improving your hip and knee stability and core strength!

Love Redefining Strength and want more tips delivered to your inbox daily?

Join my free daily newsletter HERE!


The 3 Best LOWER AB Focused Planks

The 3 Best LOWER AB Focused Planks

Looking to mix up your core training and find something you really feel working those abs, especially the lower abs, while also helping you avoid an achy lower back?

Then you’re going to love these 3 amazing plank variations.

Planks can be both great isometric exercises, but also more dynamic movements to target and strength our abs.

And with some specific variations, we can target that lower portion of the rectus abdominis even more!

That’s why I want to show you 3 ways to use planks to target those lower abs…including one move that is a great untraditional and challenging plank option even if you can’t do traditional planks due to shoulder issues!

And at the end I’ll share a great quick burner layout so you can use these 3 moves at the end of your workout!


3 Lower Ab Focused Planks

1: Dolphin Planks

If you really want to target your lower abs, you need to include exercises that utilize the posterior pelvic tilt.

This tilting of the pelvis, tucking the hips toward the ribs, really engages that lower portion of the rectus abdominis while also working your glutes. And it is a great way to learn how to brace to protect your lower back from aches and pains as well.

While you can use the posterior pelvic tilt in a plank as an isometric hold, doing a plange plank, you can also include this tilting as a dynamic movement during the plank.

This dynamic plank variation using the posterior pelvic tilt is the Dolphin Plank and a great way to challenge your abs.

You will use that tuck up to engage those lower abs, but also challenge your abs to protect your spine as you test out your spinal extension, slightly dropping your hips toward the ground.

This forces your abs to brace as you extend, but be mindful you don’t end up simply engaging your lower back!

To do this move, set up in a plank from your forearms and toes with your feet together. Make sure your shoulders are stacked over your elbows and your upper back is engaged so your shoulders aren’t shrugged.

Drive back through your heels as you flex your quads to hold in a nice straight line. To improve your base, you can widen your feet out to shoulder width.

Then tuck your pelvis under toward your ribs, rounding through your entire spine even to tuck. Do not push your butt up in the air and end up shifting your shoulders back behind your elbows.

You really just want to round through your spine as you tuck your hips toward your ribs, engaging your abs and glutes.

Even think about drawing your belly button in as you exhale to pull your abs in hard.

Then begin to lower back down into that plank position. As you lower though, try to go a little past that straight line as if extending to slightly drop your hips.

You want to feel your abs almost FIGHTING against you lowering to prevent your back from really arching.

You’re testing out your ab brace as you extend.

Then tuck right back up, tilting your pelvis again.

Do not push backward as you do this movement. Keep your shoulders stacked over your elbows.

Pause in each position to really feel your core working. Really move slowly through the movement to focus on feeling your abs.

If you feel your lower back, either modify to the static plange plank hold or use an incline.

To modify this move an incline works best. The higher the incline the less pressure or strain there will be on your shoulders and even core so you can really focus in on those abs working.

You can also do this starting on your hands and knees but be conscious that, while it may look like the cat cow stretch, you are truly engaging your abs to round up. I like to call this variation the vomiting cat because I want my clients drawing in their abs as if trying to really hollow out their belly!

2: Lower Ab Plank

This move is not a traditional hands and feet or forearms and feet plank. But it is an amazing core isometric hold and a move that is great to target those lower abs.

I personally call it a Lower Ab Plank so wanted to include it as an option because often when people have shoulder injuries and can’t do planks they feel a bit lost about what options are out there.

So if you need to take your upper body and shoulders out of the equation, this is a great option to target those lower abs…although don’t forget about using the incline as well to regress moves and build up!

This exercise is advanced though and you need to have mastered that basic pelvic tilt hold to brace so you don’t feel your lower back or hip flexors only working.

To do the move, you will lie on your back with your arms down by your sides or hands behind your head.

To start you can raise your legs straight up toward the ceiling and tilt your hips towards your ribs to press your lower back into the ground. Or you can start with your knees bent to really set up the posterior pelvic tilt before extending your legs.

Maintaining that pelvic tilt, lower your legs down so they are only an inch or two off the ground and hold. Better to even hold up a few inches higher to keep that ab brace and even squeeze your glutes.

Focus on really bracing those abs as you hold.

If you feel your lower back taking over, raise your legs up higher or even bend your knees. You can even start with just one leg extended.

Lifting your head to perform an upper body crunch can both make the move harder, but also help by flexing your spine.

Make sure to breathe and focus on engaging those abs, keeping that tilt. You do not want your lower back taking over. If it does, your lower back and not your lower abs are getting worked by this move.

Better to modify and focus on those abs than do a harder variation where you compensate!

3: Body Saw

Extended planks or long lever planks have actually been shown to increase ab activation over the traditional plank, especially of the lower portion of the rectus abdominis.

That’s why it’s key to include some extended plank positions in your routine.

You just want to be very conscious you don’t overload your neck and shoulder OR let your butt start to hike up in the air as you do these moves.

One great dynamic way to include the extended plank position in your routine over simply holding is with the Body Saw.

The great part about this plank variation, like with all plank variations, is you can also modify this move off an incline.

And if you have wrist issues you can do it from your forearms or you can also give yourself more space and change things up by doing this movement from your hands to work your arms more!

To do the basic Body Saw plank from your forearms, set up in a plank position from your forearms and toes with your feet close together and elbows under your shoulders.

You want a nice straight line from your head to your heels. Make sure to engage your back to support your shoulders and make sure they aren’t shrugged.

Then begin to walk your feet backward, taking small steps. Keep your body in a nice straight line and don’t let your hips sag toward the ground.

Lengthen through your triceps and shoulders as you walk back.

Walk back as far as you can while keeping your core engaged.

Then walk your feet back forward until you are back in the standard plank position. You do not need to walk more forward than simply back so your shoulders are over your elbows.

Make sure you feel your abs bracing as you extend back. Do not push your butt up in the air or let your hips sag toward the ground.

Repeat walking back out.

Remember you can modify the move off an incline to reduce the strain on your upper body and core.

To advance this move as well, you can also add in sliders, sliding back instead of walking. That reduces traction and even makes that pull back in so much harder! Just make sure you can control the move before progressing!

SUMMARY:

Using these 3 plank variations you can really work your abs while targeting that lower portion of your rectus abdominis even more!

To use these as a workout….

Lower Ab Burner:

Set a timer for 20 seconds per move starting with the Body Saw then the Dolphin Plank and ending with the Lower Ab Plank.

Rest 20 seconds between rounds to make sure you can really focus on bracing hard each round and complete 2-3 rounds through.

You want to focus on short intervals so you can engage everything hard over just focusing on holding for longer and letting your lower back or hips become overworked!

The BEST results happen when our diet and our workouts WORK TOGETHER!

Check out my RS Formula for FABULOUS results:

–> 3-Step RS Formula


Target Your LOWER ABS – The Best Lower Ab Exercise You Aren’t Doing

Target Your LOWER ABS – The Best Lower Ab Exercise You Aren’t Doing

Now my favorite comment I get any time I post anything to work the lower abs is…

“You don’t have lower ab muscles.”

And that’s true. There is no specific lower ab muscle.

But you CAN target that lower portion of your rectus abdominis to a greater extent with specific moves, especially bottom up exercises.

Just like you can target the upper portion more as well with more top down focused moves.

So if you’re looking to target that lower portion of your rectus abdominis while even strengthening your pelvic floor and TVA more, I want to share a movement variation I think is often under utilized.

But before I do I do just want to mention a few bonus tips to help you really achieve that lean, flat stomach.

That lower abdominal region is an especially stubborn one to lose fat from.

And 100% diet is key. And consistency in dialing in our macros past the point we often want to quit as losing that last little bit of stubborn belly fat is hard.

But if you truly are struggling with losing that last little bit, this tip may be the missing piece from your training routine.

And it does involve something we’ve been told is impossible….

Spot lipolysis aka SPOT REDUCTION! GASP!

Yup. You can spot reduce an area…not in the way we’ve always tried to, but it may be that key little tweak when you’ve got everything dialed in.

How do you do this?

Try including this underrated ab exercise, or an exercise for the stubborn area you want to target in your strength workout. Include it even as part of a finisher.

When we work a muscle, we mobilize more fatty acids from the surrounding tissues.

So if we do this focused ab work to mobilize the fatty acids in the surrounding tissues and then include low intensity steady state cardio after, we can utilize the mobilize fatty acids.

Aka we can help ourselves lose more fat from our lower abdominal region!

(For more on Spot Lipolysis, clic HERE!)

If you’ve been struggling with that last little bit of stubborn fat and want to strengthen your lower abs, try this Hanging Posterior Pelvic Tilt with Squeeze as part of your workout finisher even adding in a nice walk after to cool down!

How do you do the Hanging Posterior Pelvic Tilt with Squeeze?

Hanging leg raises and knees to elbows are both great lower ab exercises. Yet too often we use them in a way that only ends up overworking our hip flexors.

It’s because we ignore the essential component that makes any leg raise movement really target our lower abs – the posterior pelvic tilt.

That’s why I love this hanging ab exercise – because it focuses on that essential pelvic tilt component.

And by adding in the leg squeeze, which in turn engages your adductors, you can even help yourself better activate your pelvic floor and lower portion of the rectus abdominis.

To do this move, start hanging from the bar from a ball or block between your upper thighs right above your knees. Grip the bar hard with all of your fingers evenly and engage your back to help you stabilize, slightly depressing your shoulder blades.

Then, squeezing the ball or block, tuck your pelvis toward your ribs. You’re basically rounding your lower back.

Your legs will come forward but you do not want to really bend at the hips.

You’re using your abs, and even your glute max to perform that slight spinal flexion to tuck your pelvis under.

Squeeze the ball hard as you tuck.

Think about pulling your core in as you tuck. You’re not just drawing your belly button toward your spine but even thinking about pulling your pelvis in toward each other as you tuck toward your ribs.

To help you really brace, focus on that exhale as you tuck.

As you do this move, focus on that exhale to expel all the air you have and contract that core as you perform the pelvic tilt to feel your TVA even engaging as a corset around your middle to brace.

Really pause with each tilt to focus on engaging your abs as hard as you can before slowly relaxing.

To help you really avoid too much swing, grip the bar hard and engage your lats.

This is a very challenging move as simple as it may seem.

To modify the fully hanging variation, keep your toes down as you hang, even losing the block or ball squeeze to be able to better focus first on the tilt.

If you have any upper body issues or simply can’t yet fully hang and control the exercise, you can also modify by doing this off the ground, holding onto a pole overhead or on a bench holding onto the end.

To progress the move when you’re fully in control of the posterior pelvic tilt, you can keep the squeeze and start to do even the full knees to elbows. But only progress as you can fully control the move and feel that mind-body connection being used to create that ab shakeage!

SUMMARY:

Remember you need to focus on feeling your lower abs working to get the full benefit of this move. If you instead only feel your lower back or hips, you need to modify.

Sometimes we need to regress to progress!

The 3-Step Fat Loss Formula if you’re ready to reveal those abs…

–> 3-Step RS Formula

The Most Underrated BODYWEIGHT Leg Exercise

The Most Underrated BODYWEIGHT Leg Exercise

Too often we only think about progressing movements to build muscle by adding loads.

However, you can build muscle by creating progression in other ways especially if you don’t have any tools at your disposal.

If it challenges you, it will change you.

So if you’re only training with bodyweight but want to strengthen your legs?

You’ll want to try this amazing move, and one of my favorite bodyweight leg exercises we often aren’t doing – The Airborne Lunge!

Before I go over how to do this move, I want to highlight other ways you can create progression without loads all of which can be done with this great lunge variation.

One, you can use unilateral movements over bilateral moves.

Two, you can create more instability, through changing the surface you’re performing the move on or even the base of support you have, such as doing a fully single leg movement.

Three, you can change up tempo. You can slow down the whole movement, parts of the movement or even speed the move up and make it more explosive. You can even slow down one part and speed up another. Or you can even add a pause or hold.

Four, you change up the range of motion you’re working through. Increasing the range of motion of a move can make it more challenging. It is also a great way to make sure you’re working to maintain the mobility you build through your other prehab work!

It’s key to remember we can find ways to progress movements and build strength and muscle even when we don’t have weights.

So if you’re training at home or when you travel and need to progress the basic bodyweight leg exercise, try this Airborne Lunge Variation.

It’s a great move if you even want to build up toward that pistol squat!

The Airborne Lunge:

The Airborne Lunge is a great bodyweight glute and leg exercise that can help you build up to that full pistol squat even with a more hip dominant movement pattern.

It is however a deceptively hard move.

To do the Airborne Lunge, stand tall and shift your weight to one foot, bending the other knee to bring your heel up toward your butt. You want to keep that foot pulled toward your butt so you only touch your knee down when you lower.

Then sit your butt back to hinge at the hips as you bend your standing knee to drop your back knee down toward the ground. You will lean forward as you hinge, but do not round over. You are leaning forward to counterbalance your weight and sit back.

Touch your knee to the ground gently without letting that raised foot touch down.

Do not reach that raised leg back too far or you will get too spread out. Your standing knee may travel over your toes. This is NOT a bad thing and this ankle mobility is required to build up toward the full pistol squat. Just make sure you’ve pushed your butt back to load your glutes while keeping that standing foot, and especially your heel, firmly pressed down into the ground.

Lightly touch your back knee down, then drive back up to standing. Do not push off that knee or the raised foot.

You want the entire movement to be powered by that standing leg.

Stand tall at the top and squeeze that standing glute. Try not to touch the other foot down.

Repeat the move again, sitting your butt back to hinge as you bend that standing knee to lower down.

The range of motion on this move and the instability of the unilateral movement make it a challenge. To progress it further, you can increase the ROM, by performing the lunge with your standing leg up on something so you have to sink deeper.

Or you can change up the tempo, slowing things down, even pausing at the bottom.

However, you can also modify this movement by reducing the range of motion and touching your knee down to a block or box. You can also reduce the instability by holding on to something to help you balance.

But this unilateral move is a great way to build strong legs and glutes, correct imbalance and progress your bodyweight training WITHOUT adding loads!

And it’s a great way to perform a more hip dominant exercise that can help you even build up toward that full pistol squat as well!

SUMMARY:

Just remember, if it challenges you it will change you. Muscle growth and strength increases come from forcing our muscles to adapt to a challenge!