by Cori Lefkowith | Sep 9, 2017 | Blog, Exercises, Pain Relief, Pull Ups
I want to ask you a couple of questions…And tell me if these sound familiar….
- Have you ever had neck, shoulder or upper back pain?
- Do you feel like your upper back and neck are constantly tight?
- Do you have poor posture and tend to round forward?
- Have you been struggling to improve your pull ups no matter how much you work at them?
- Heck have you ever tried to work on pull ups only to end up with neck or shoulder pain?!
Maybe all of the above even!?!
Do you feel like no amount of stretching helps permanently and that you just have to keep doing more and more for momentary relief?
Unfortunately that is because stretching alone isn’t the answer.
Stretching alone doesn’t solve the problem for a two main reasons…
- We aren’t stretching the RIGHT muscles.
- We don’t get the right muscles activated so we keep overusing the wrong muscles.
Often our back “feels” tight so we stretch it.
But that tight feeling often isn’t from muscles being shortened.
When muscles are shortened, stretching can really help. But in this case, stretching a muscle that is overly lengthened may feel good for a moment but doesn’t SOLVE the problem. Our back may “feel” tight and even gets trigger points because our chest is overly tight and causing our back muscles to be over-stretched.
Therefore stretching our back alone doesn’t really SOLVE the problem.
If we’ve suffered upper body pain or injury and sit hunched over a computer or walk texting on our phones, often the big muscles of our back aren’t working correctly and carrying the load they should be carrying. It can also cause our chest and lats to become tight and our shoulder blades to become less mobile.
This leads small muscles, like our rotator cuff muscles, to become overworked, which can injured to injury. It can cause neck pain and shoulder pain.
But only stretching won’t get the right muscles working.
Stretching the right muscles, aka the muscles that are SHORTENED and TIGHT, can help open everything up, but then we NEED to activate the right muscles.
If you don’t then ACTIVATE, you’ll keep overusing muscles that weren’t meant to be the prime movers!
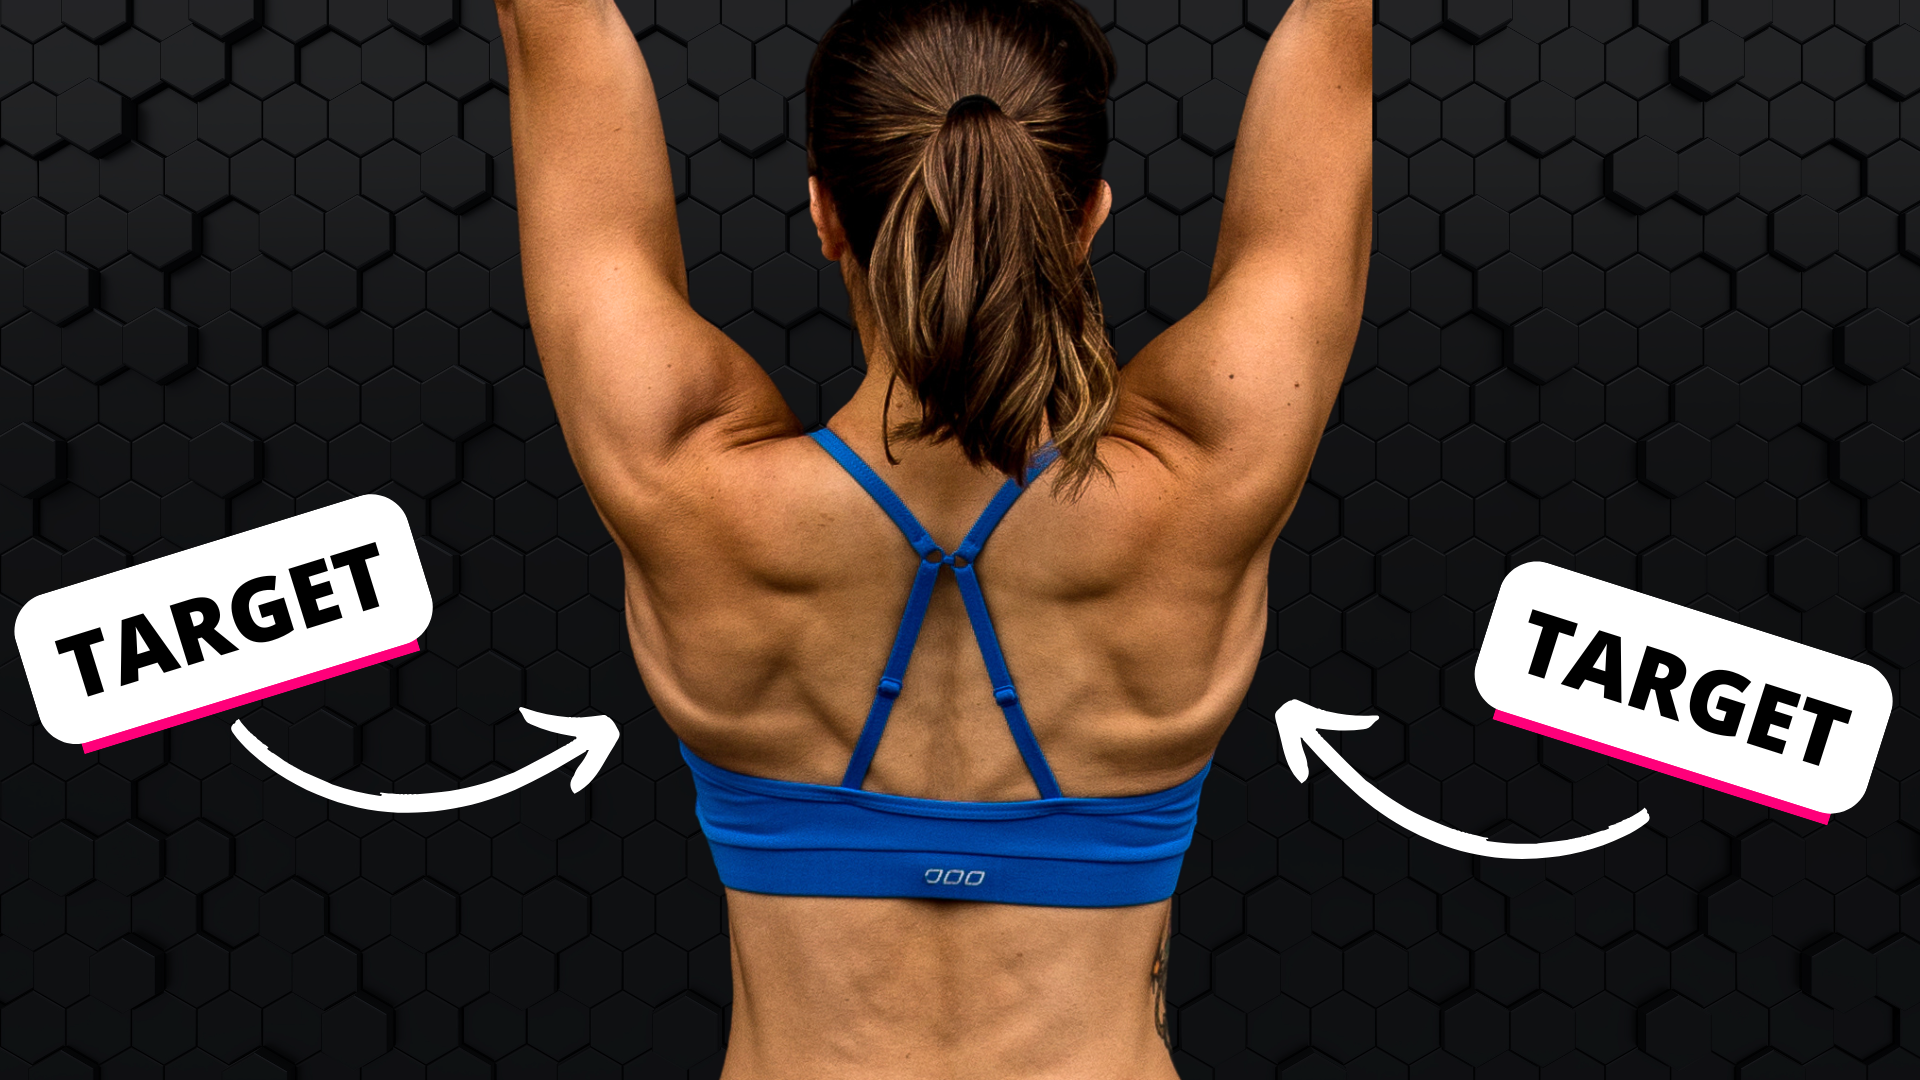
So if you’re ready to get the right muscles working to improve your posture AND even your pull ups, you’ll want to start including these 5 moves daily even!
Using these 5 moves, you can relax tight muscles and activate the big muscles of your back! They combine foam rolling, stretching and activation to help you restore mobility and build that mind-body connection.
Chest Foam Rolling:
Neck, shoulder, upper back pain? Always feel like you have “knots” in your back, but the relief from massage or stretching is only temporary?
Well guess what? Part of the problem is that your chest muscles are tight and actually perpetuating you rounding forward and even the rounding forward of your shoulders.
So to help relieve those aches and pains and help yourself get the muscles of your back working correctly, you need to start rolling out your chest.
To roll out your chest, you can either use a bigger foam ball against the ground or you can use a smaller, harder ball in a doorway.
To roll out your chest using a foam ball against the ground, place the ball on the ground and lie face down on top of it with the ball starting right at the side and top of your chest beside your shoulder joint and below your collarbone.
Holding the ball there, begin to sweep your arm overhead and then back down toward your legs. You can sweep your arm almost as if making snow angels. Or you can move your arm overhead and then tuck it under to reach down toward your feet and rotate your shoulder a bit. You can make full and partial sweeps to dig into a spot.
Then move the ball a little more toward your sternum and repeat. You can work all along underneath your collarbone, holding on any tight spots and moving your arm. You want to make sure to work all around the front of your shoulder joint and toward your sternum.
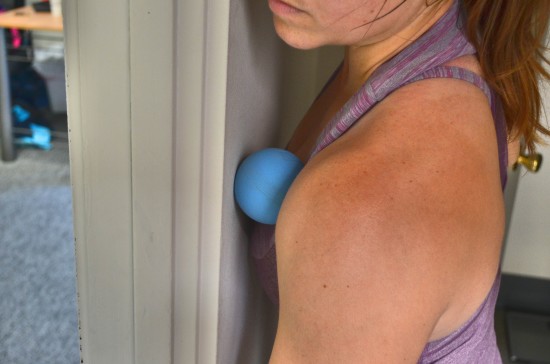
To roll out your chest in a doorway, it is best to use a smaller, harder ball instead of the foam ball.
Stand facing the wall besides the doorway and place the ball between your chest and the wall. You want to be right on the edge of the wall so that you can extend your arm forward through the doorway. Place the ball in your chest right by your shoulder joint. Hold on any tight spots as you work down toward your armpit then up under your collarbone. You will want to lift your arm out in front as you roll as well as out to the side like you did on the ground.
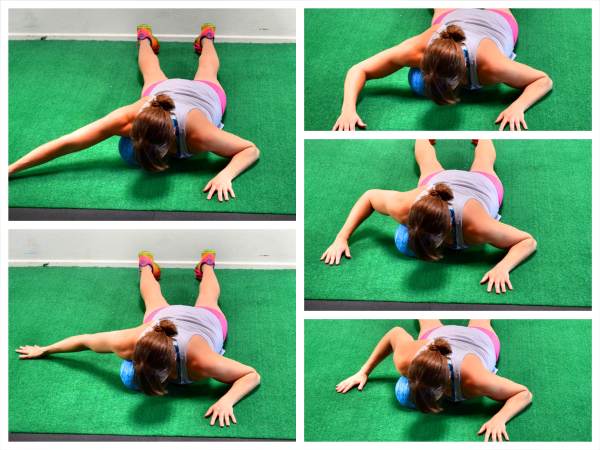
Lat Foam Rolling:
Because we sit way too much hunched forward over our computers, phones or even our bikes, our lats can become tight. It is important that you get everything loosened up if you want to improve your posture and your pull ups.
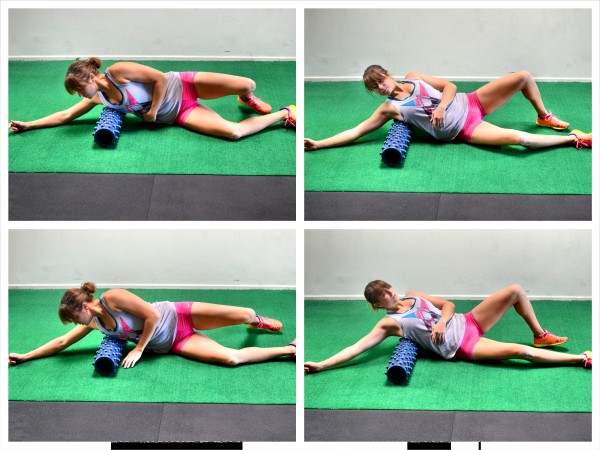
To roll out your lats, you can use a ball or a roller. Start by lying on your side with a roller under one armpit along the side of your back. Extend the arm on the side with the roller up above the roller. Then rock forward and backward on the roller, rotating your chest toward the ground and then up toward the ceiling as you roll on the roller so it hits toward your ribs and then toward your back.
Hold on any tight spots you find then move it lower down the side of your back. Hold on any tight spots as you go and make sure to rock forward and backward as you make your way down your side.
As you work down your side, you may want to rotate slightly more toward your back. Work all the way from your armpit to about the end of your rib cage.
Be careful as you work your way down your lat. Do not start to hyperextend your low back or tense to arch over the roller.
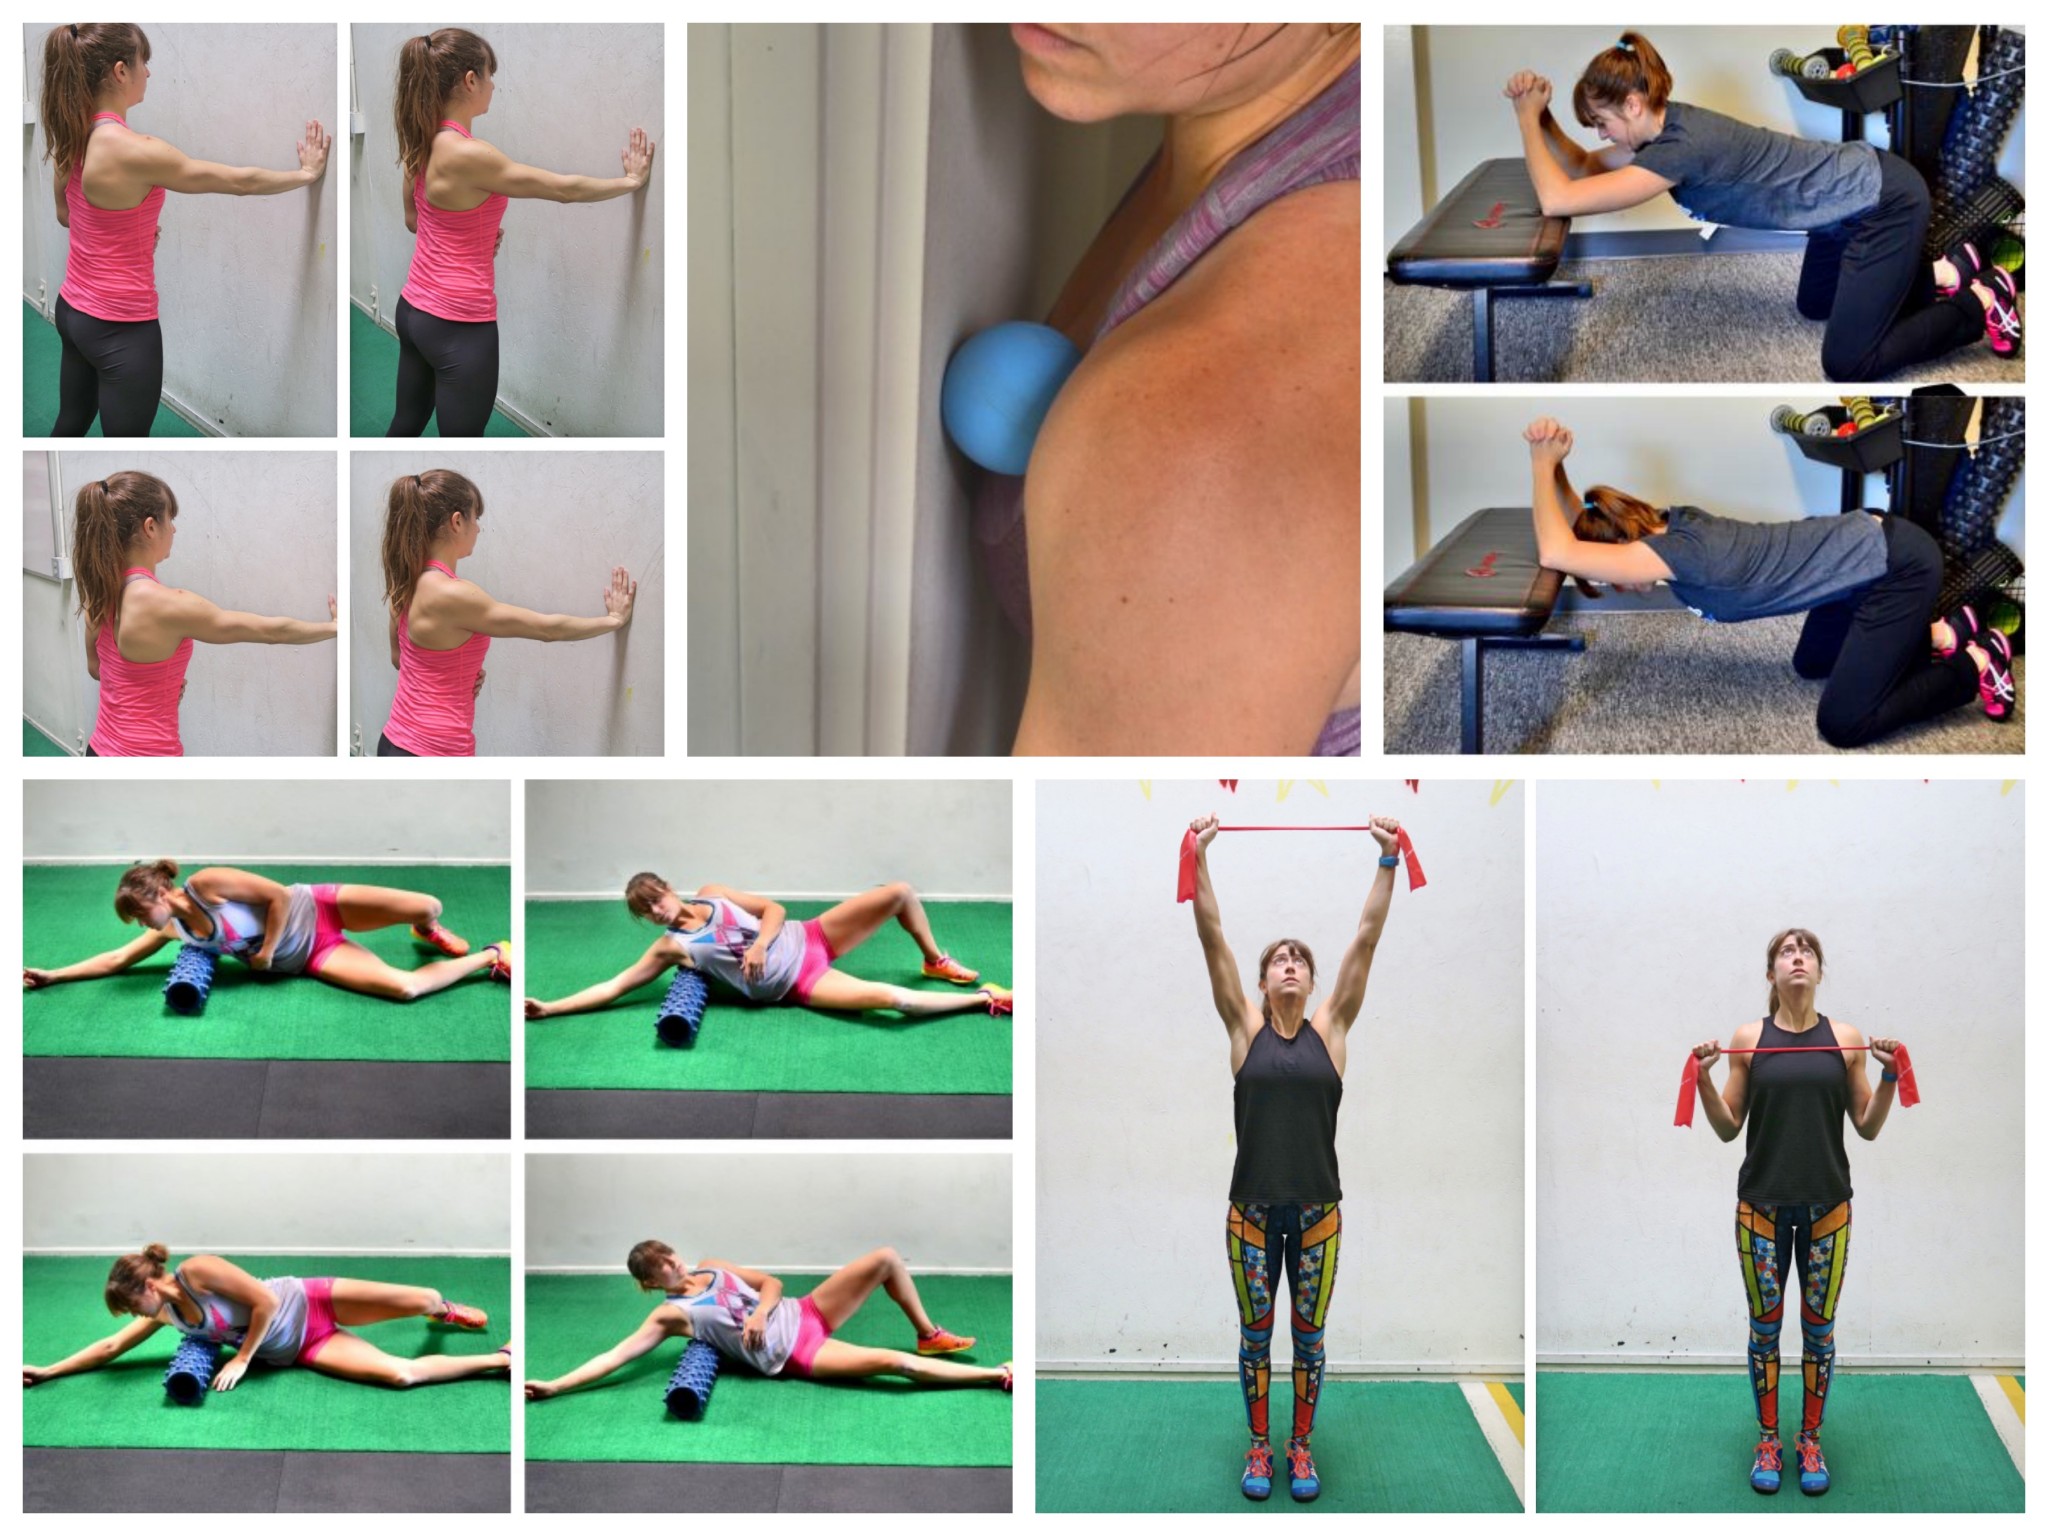
Kneeling Thoracic Extension and Lat Stretch:
When we sit all day in forward flexion, hunched over, our spine is in flexion. This stretch works on the exact opposite – extension. It will help you reverse the hunch (improve your spinal extension) as you stretch out your lats and even your triceps.
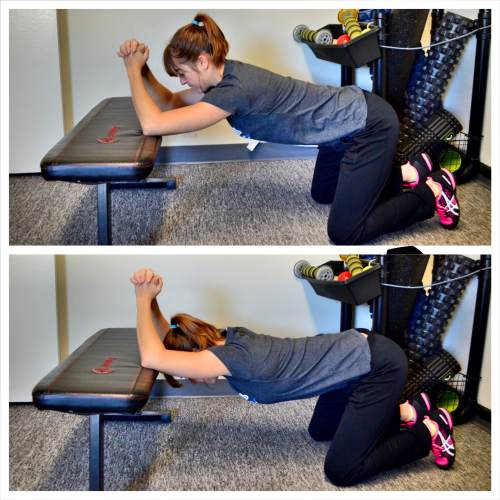
To do the Kneeling Thoracic Extension and Lat Stretch, place a box, bench or table on the ground in front of you. Kneel on the ground facing the bench and place your elbows up on it about shoulder-width apart. Make sure that you are kneeling far enough away from the bench that you can lean forward and drop your head between your elbows as you press your chest toward the ground.
From this kneeling position, relax your chest and head over, sitting your butt back. Press your chest toward the ground and feel your spine extend. You should feel a nice stretch down your triceps and lats as well as through your thoracic spine. Try to extend your back as much as possible as you press your chest toward the ground, but don’t simply arch your lower back. Keep your abs braced so that you force your mid and upper back to extend.
Breathe to stretch deeper and then relax back out and repeat, trying to get further with each rep.
If you really feel your elbows constantly sliding out on the bench, you can hold a dowel or even a towel between your hands to help keep everything in line. You can also increase the stretch by bringing your hands back toward your head as you maintain extension.
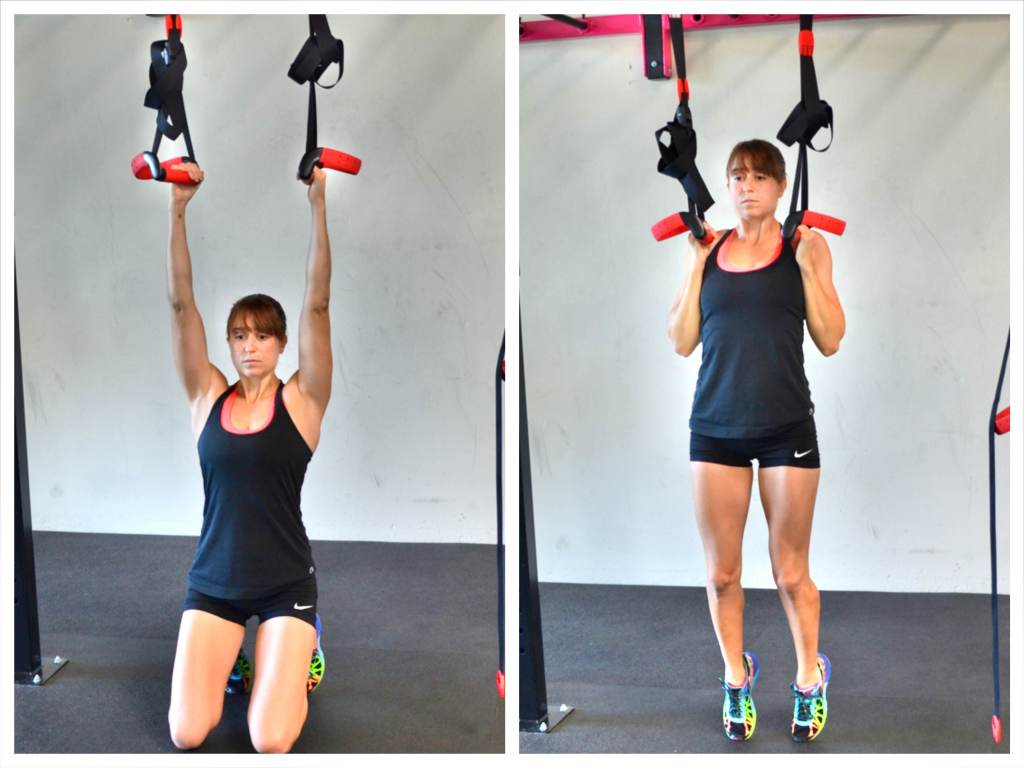
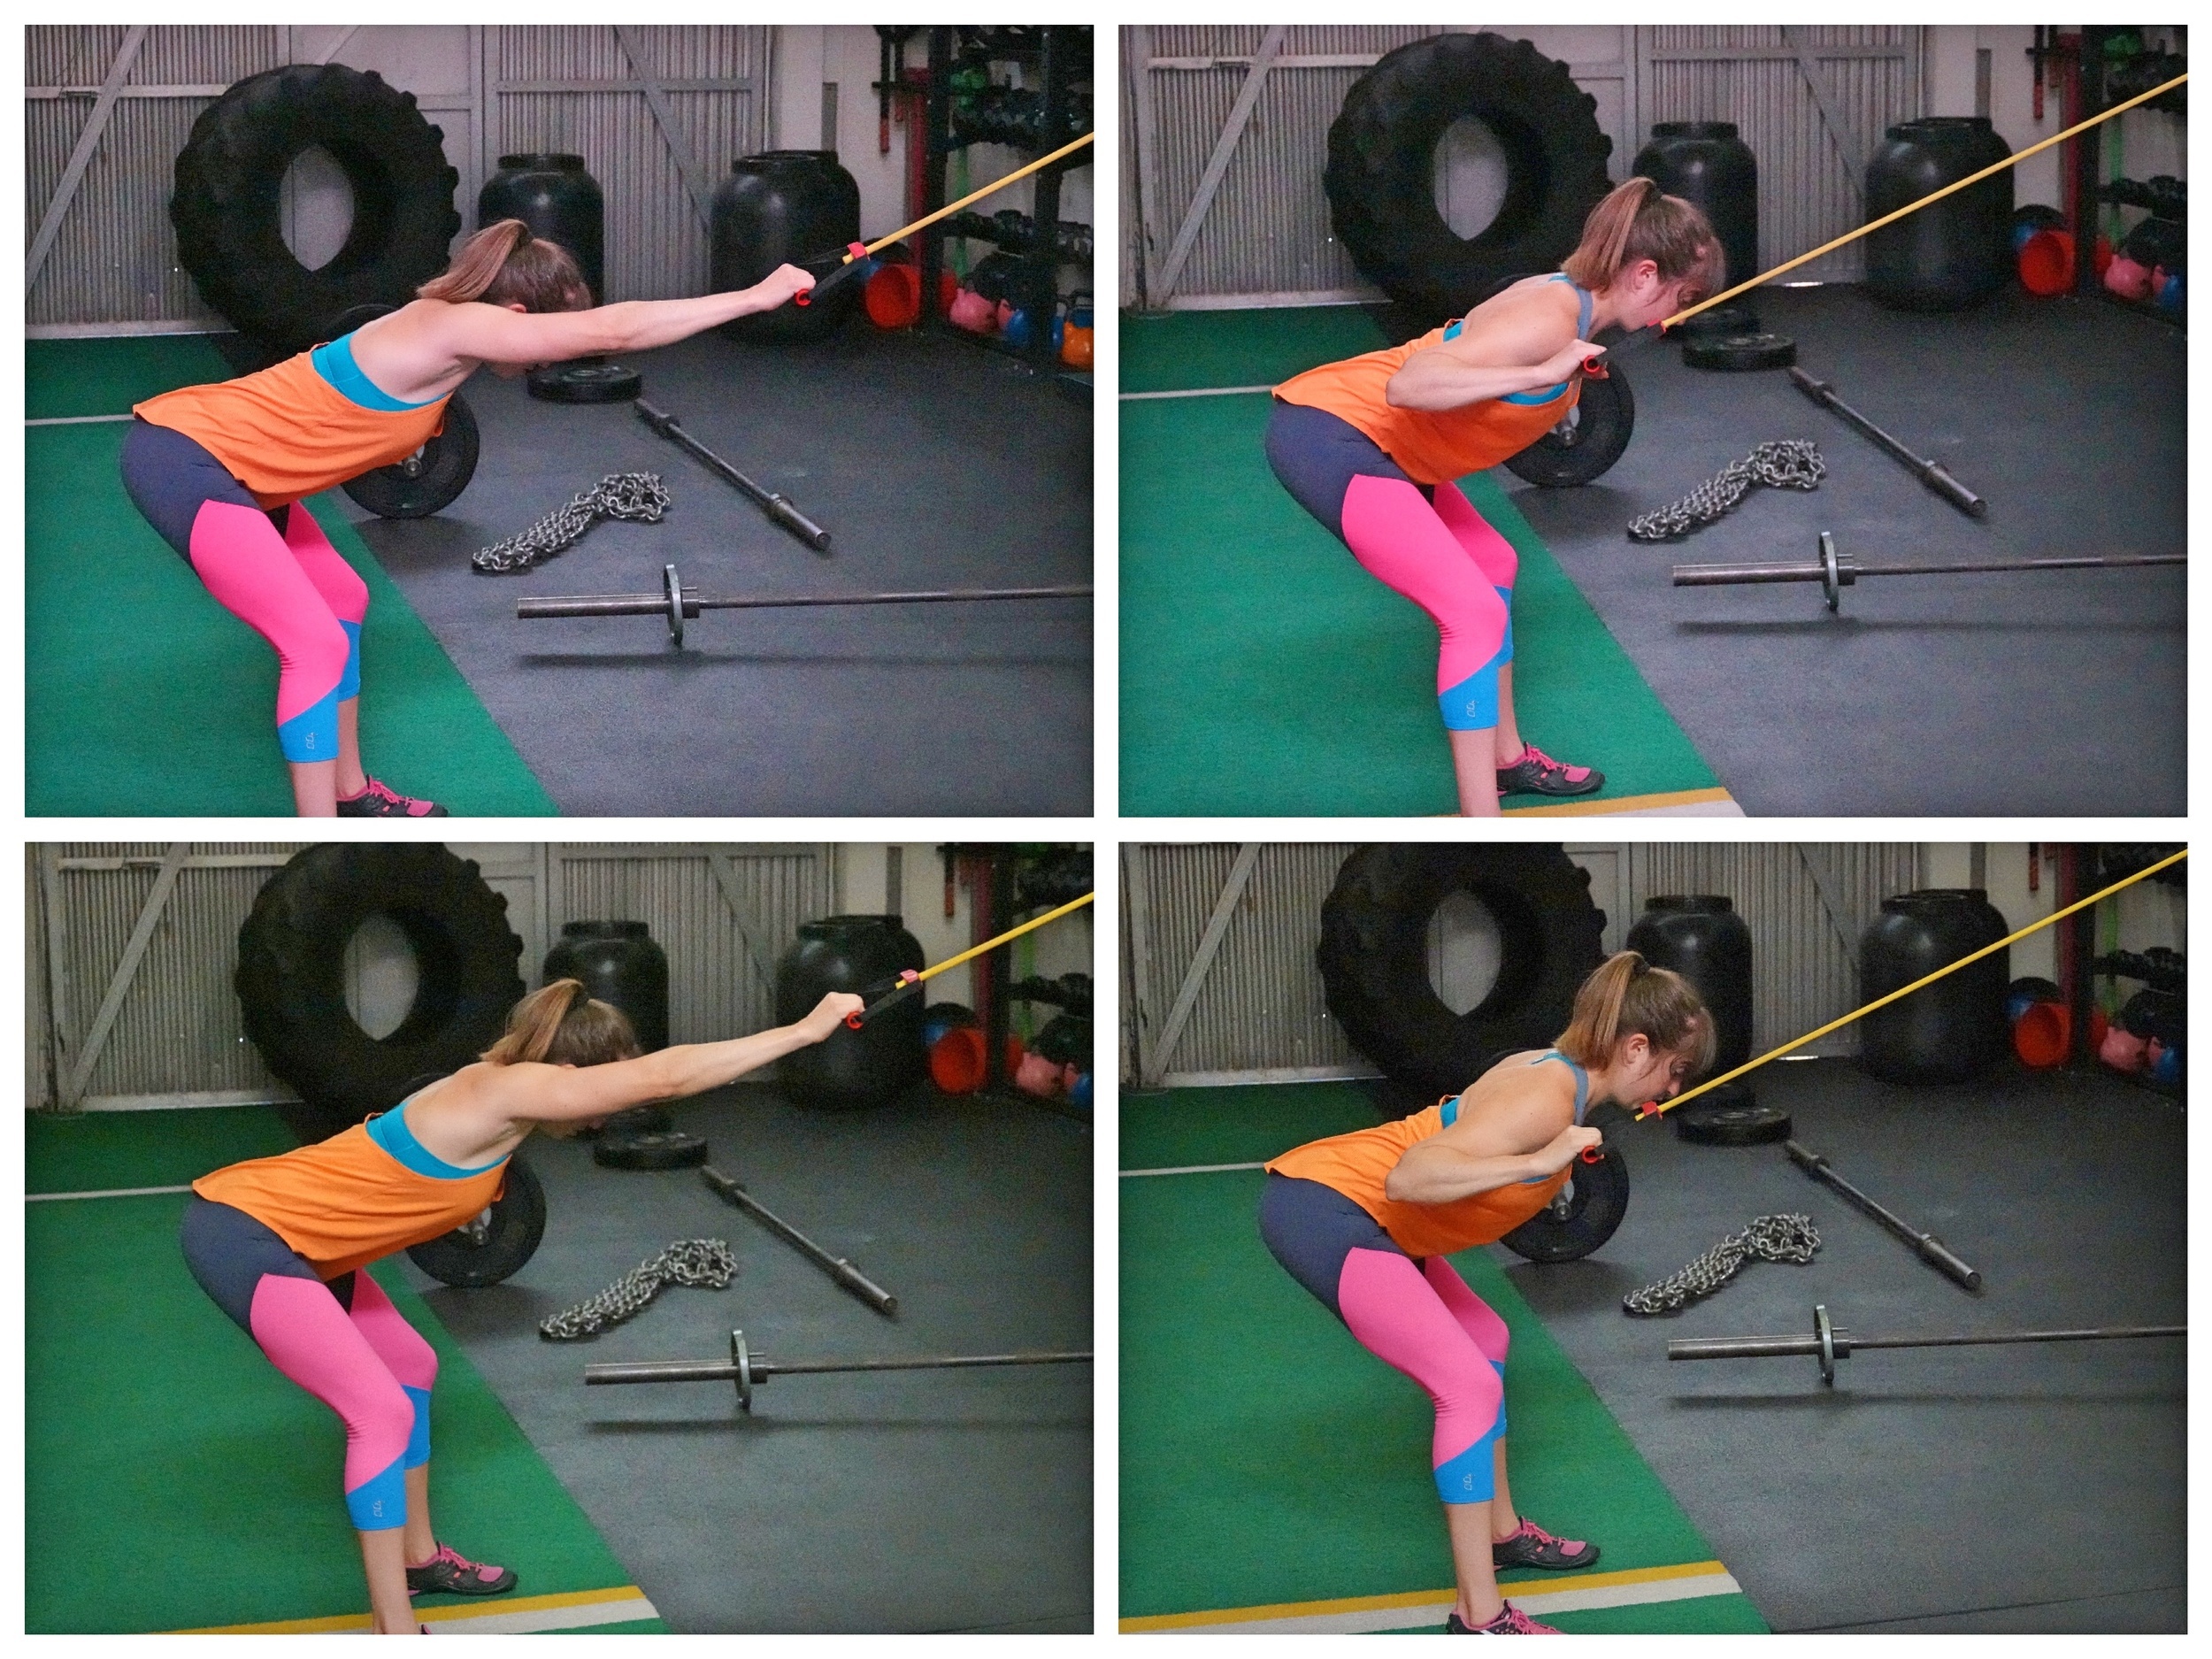
Pull Downs:
Once you’ve foam rolled and stretched to loosen tight muscles, you have to get the right muscles activated and working. Otherwise you’ll just end up constantly stretching everything only to tighten back up because you keep overusing muscles that aren’t meant to carry the load.
The Pull Downs are a great activation exercise to work your lats and lower traps and help mobilize your shoulder blades.
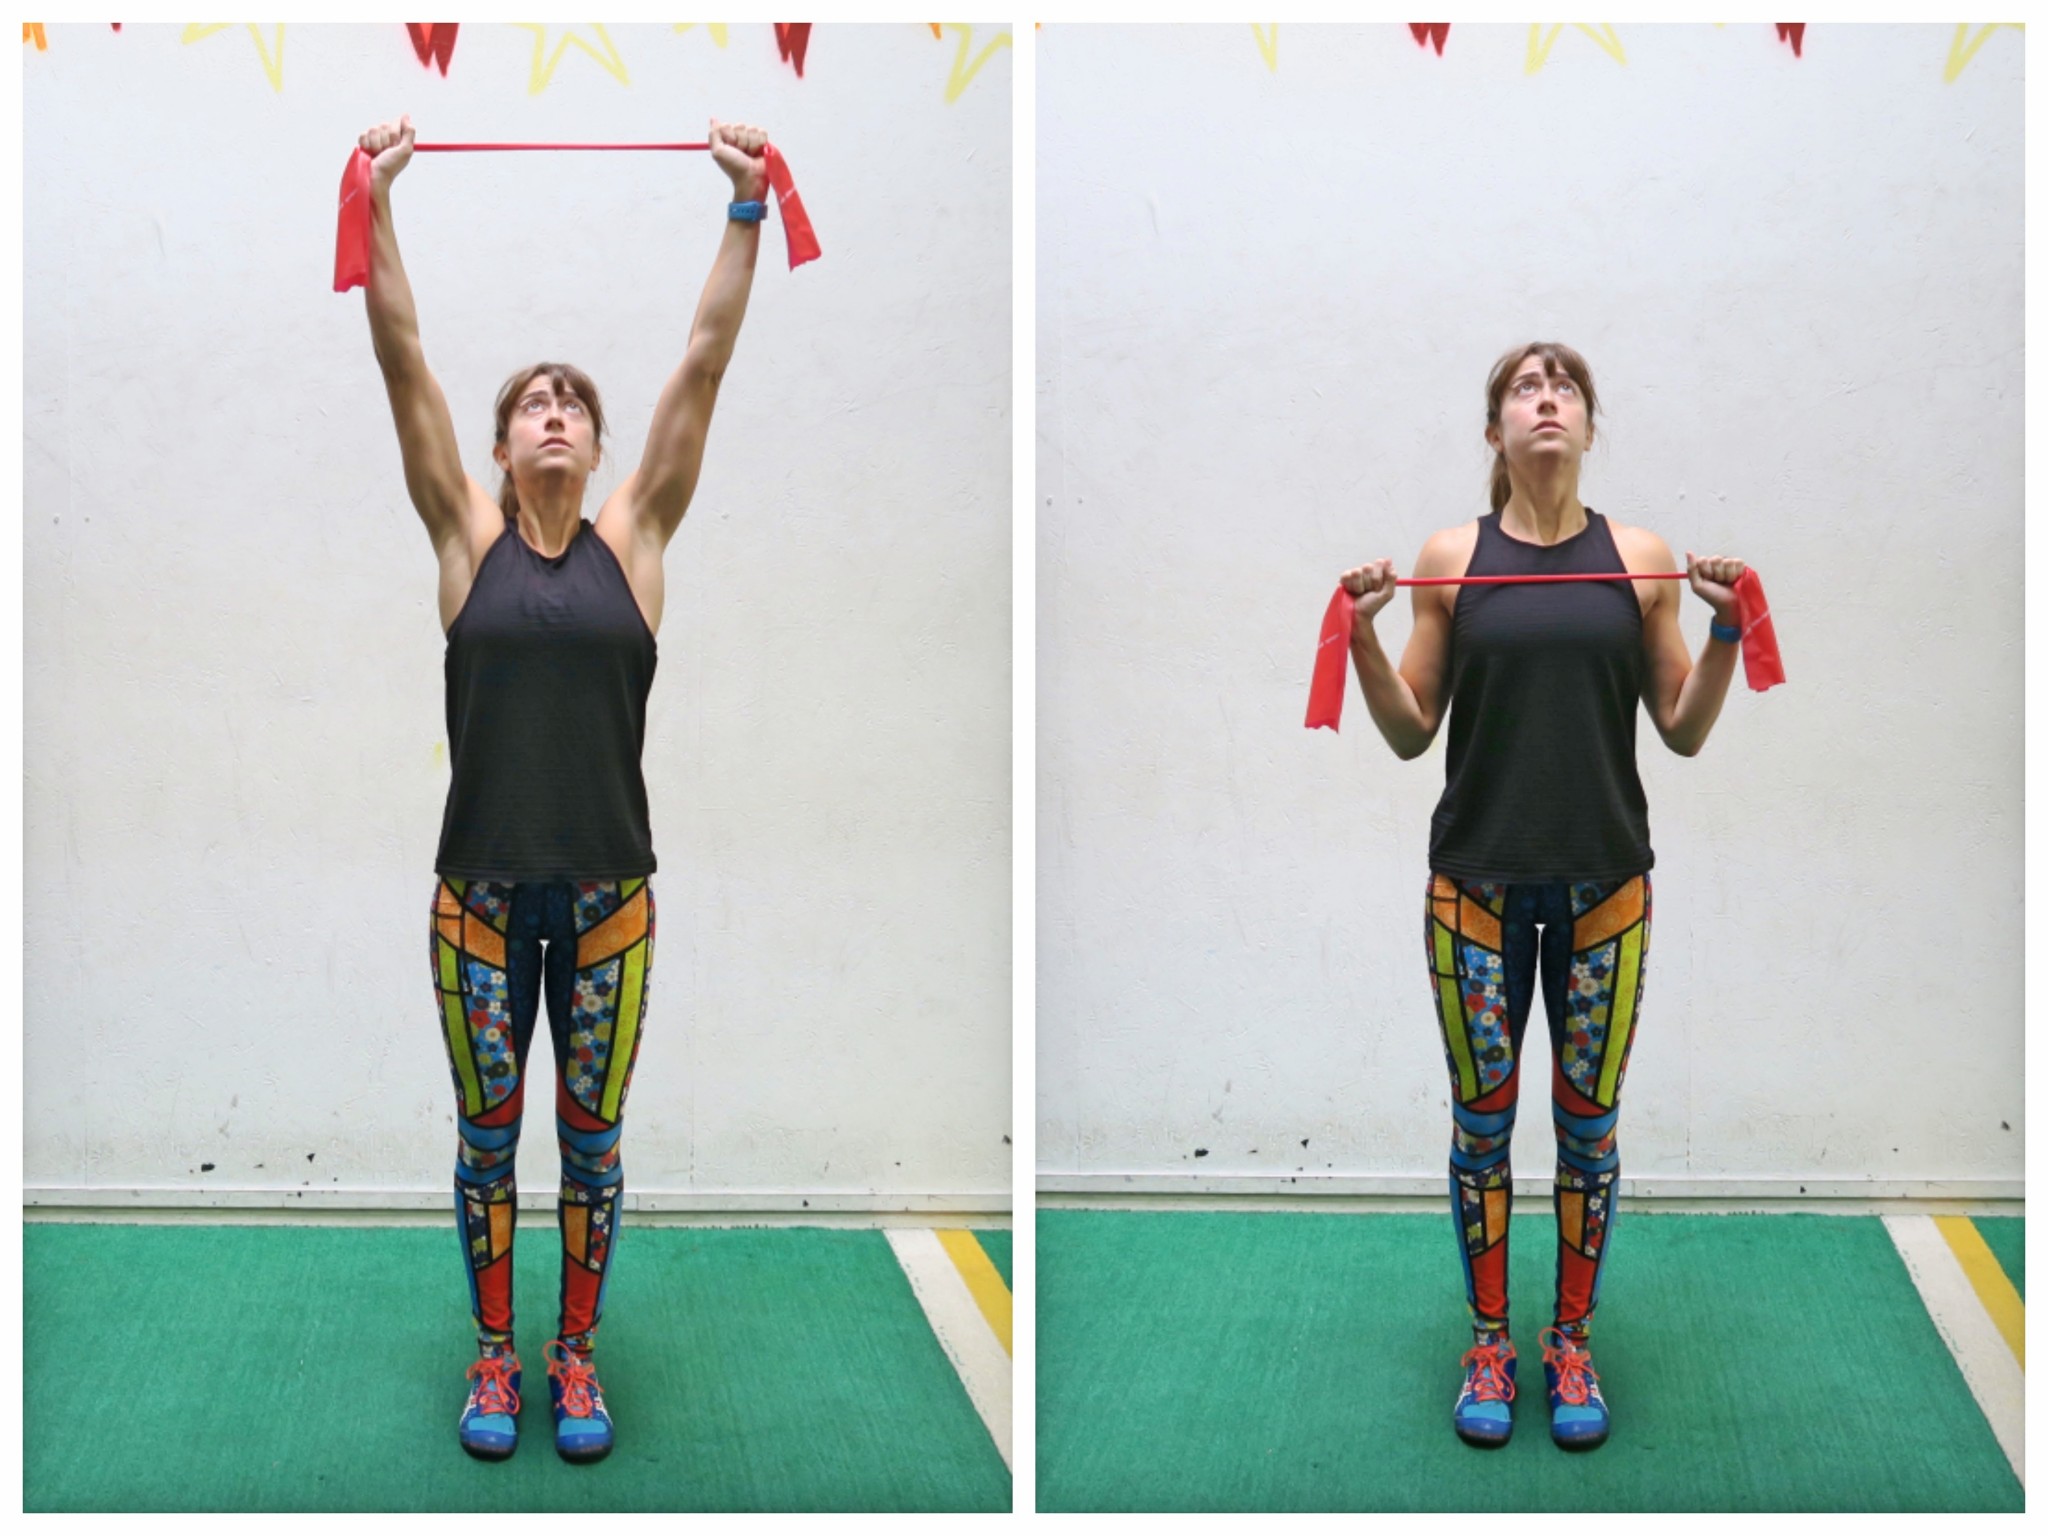
To do Pull Downs, hold a band, or even a towel, in both hands with your hands about hip-width apart. Slightly pull out on the band so that there is tension on the band or towel. Press your chest out and reach the band overhead, keeping the band/towel tight between your hands. You may need to adjust your hands in closer if the band is light. On a towel as long as you pull out with your hands a little wider than shoulder-width you should be fine since it won’t stretch like the band. You want to pull out on it so your hands are just slightly wider than shoulder-width apart.
Then pull the band down toward your chest, as if pulling your chest up to the bar during a Pull Up. Lead with your chest as you draw your shoulder blades down and back and feel your back working to pull the band down. As you pull the band down, keep it tight between your hands.
Hold at this bottom position. Really press your chest out and engage your upper back as you hold. You want to think that you were leading with your chest up toward the bar. Do not arch your low back even though you want to press your chest out. Make sure you also don’t simply feel the outsides of your shoulders working, but instead feel your back. If you only feel your shoulders, you may be using too heavy a band or you may be too focused on pulling out on the band instead of down.
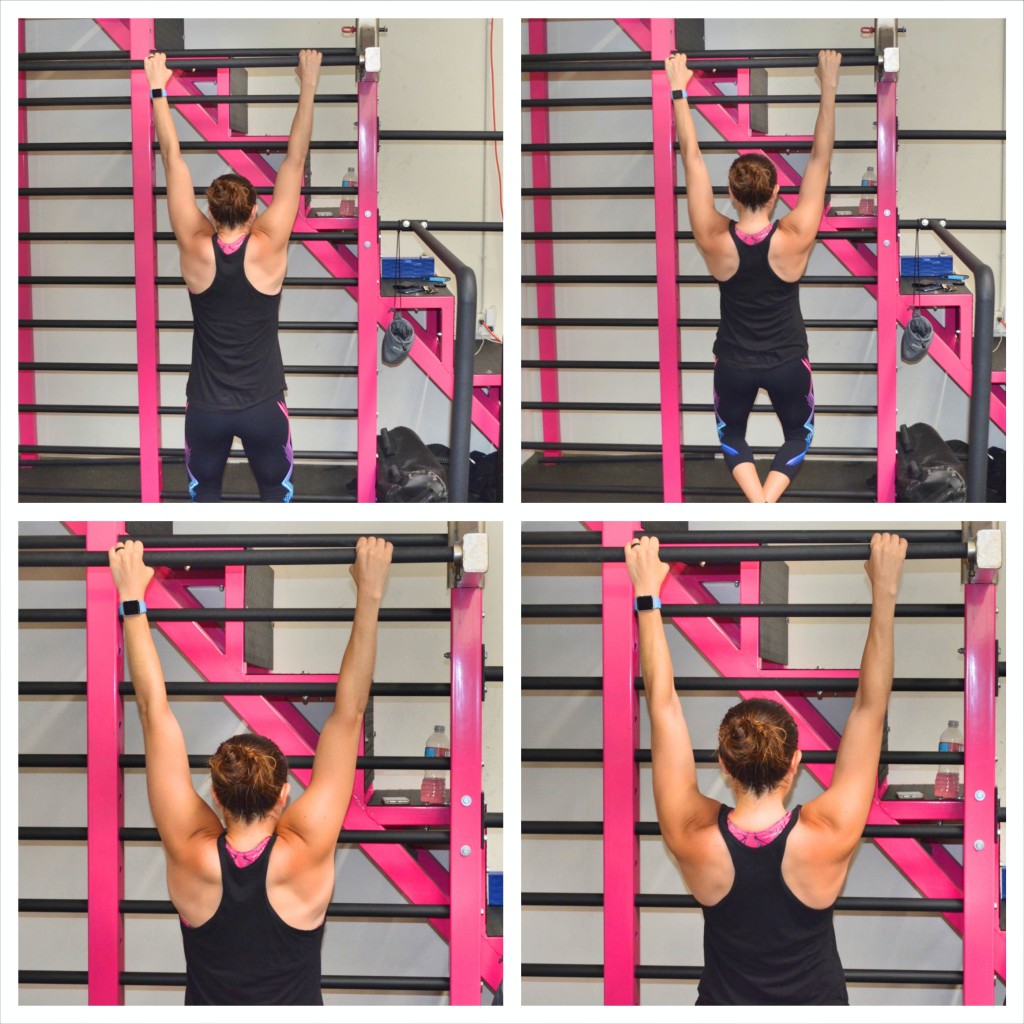
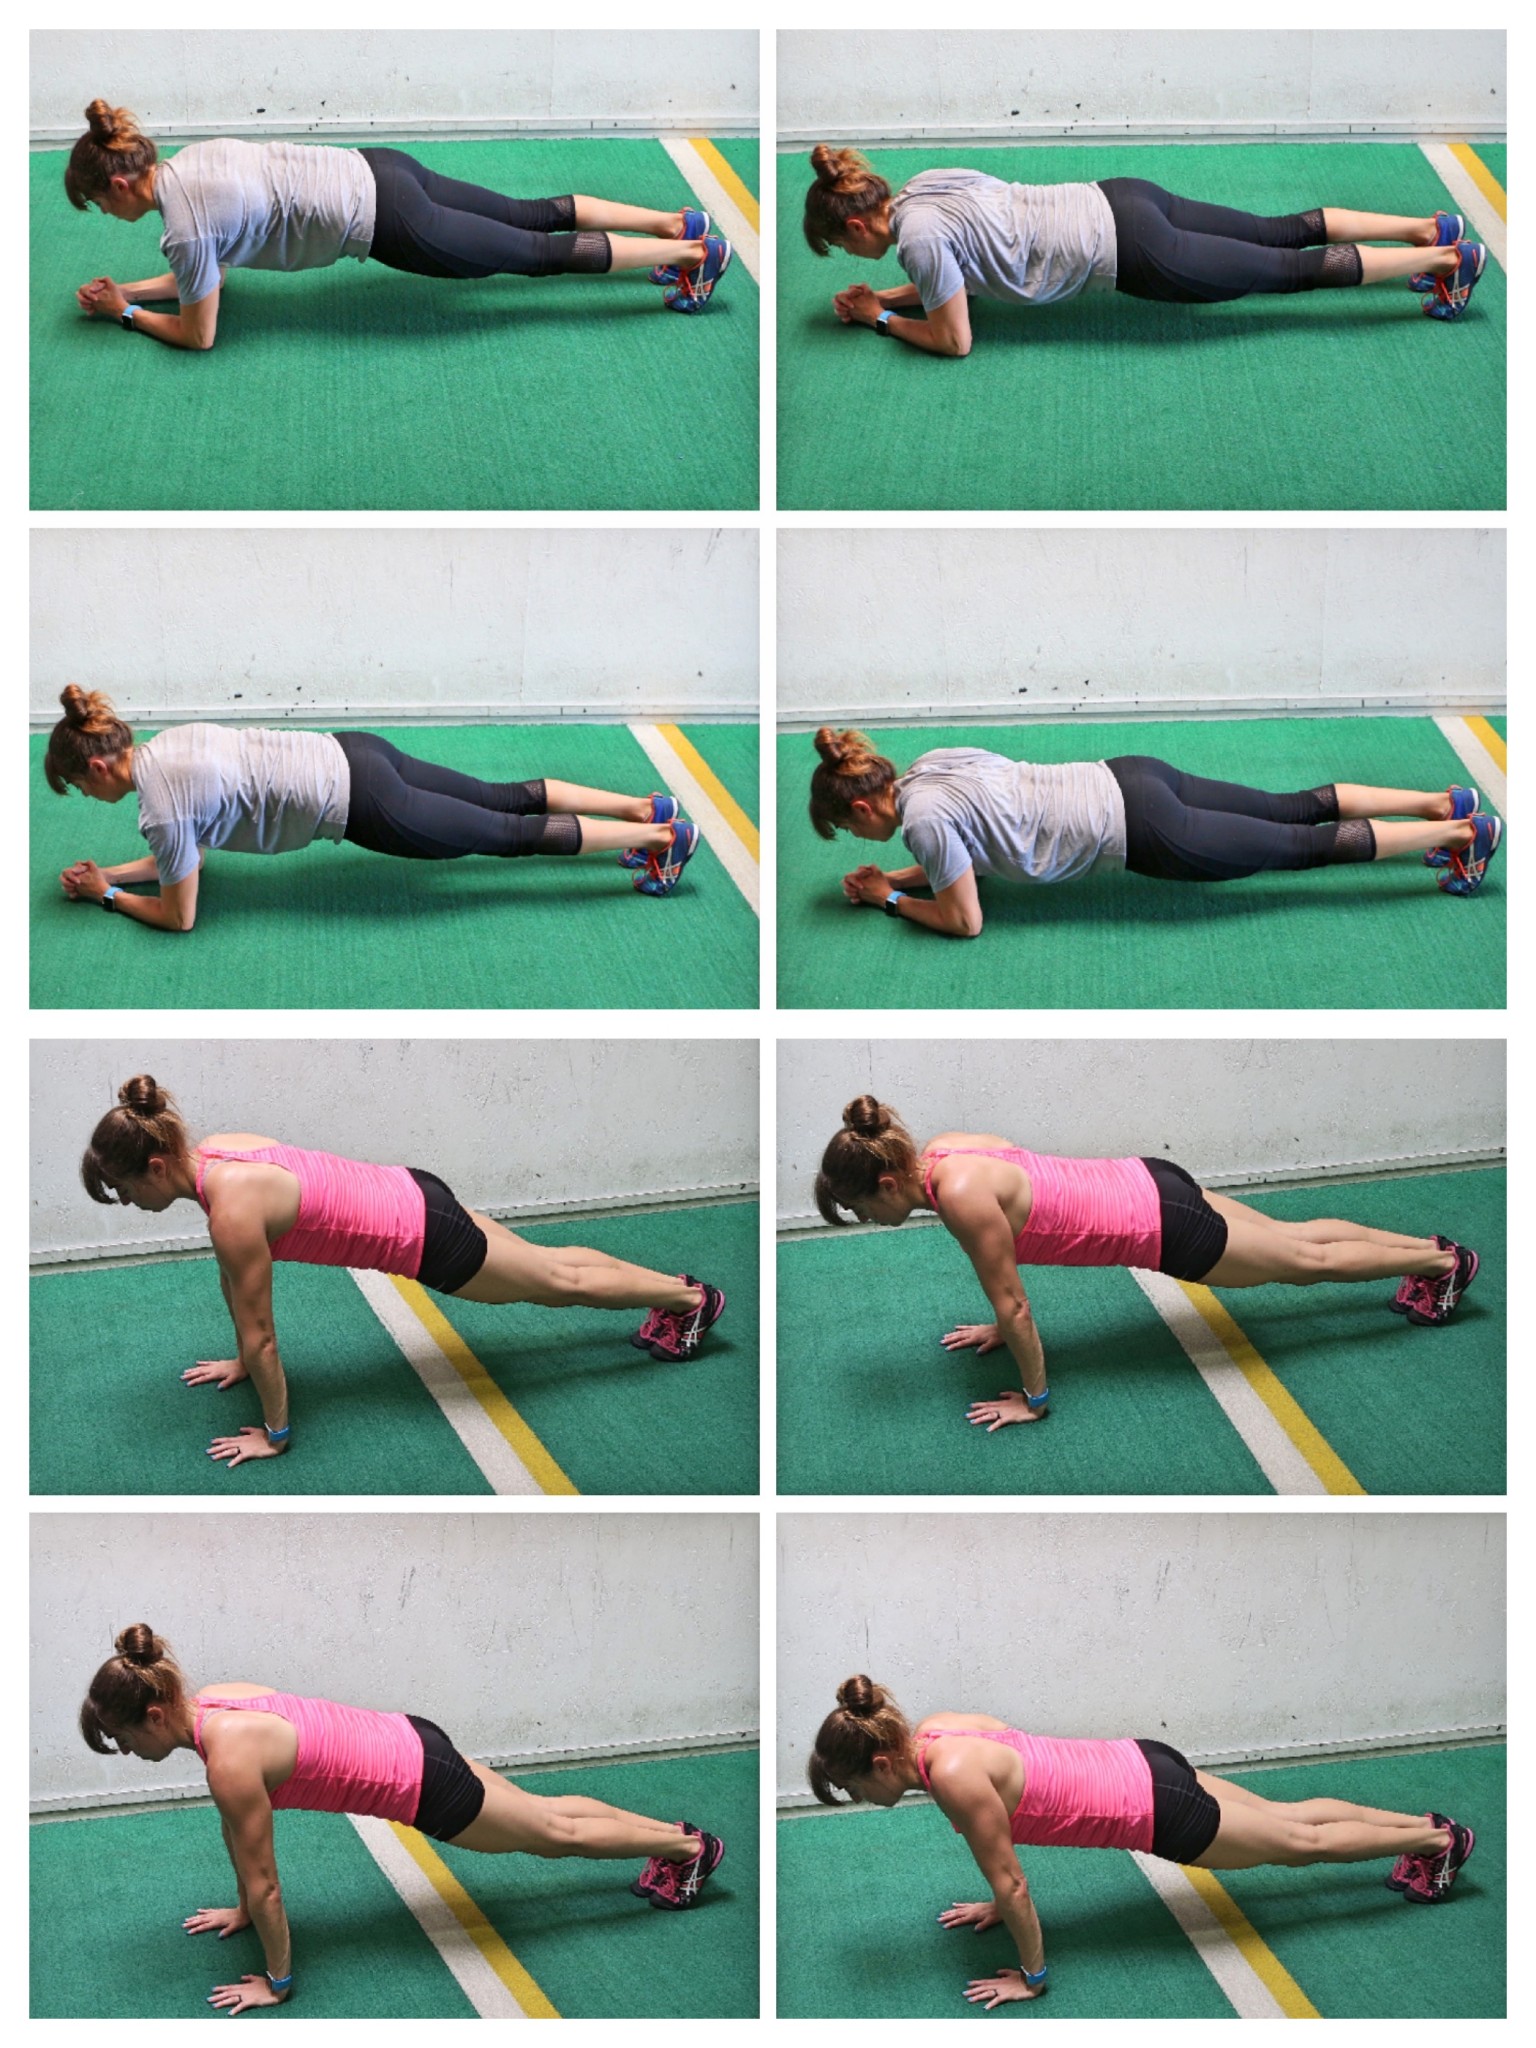
Scapular Push Ups:
The Scapular Push Up is a must-do move.
If you have a desk job, want to improve your posture, improve your pull ups…heck improve your deadlift or press or just about anything, this is a must-do move!
It works on mobilizing your shoulder blades to create shoulder stability. It will activate your back and the muscles around your rib cage. It can even work your core.
You can do this move from the quadruped position or modified push up position to start. Beginners may even need to do it off the wall if they aren’t able to isolate and move their shoulder blades.
As you can actively recruit the proper muscles, you can do the scapular push up from the high plank or forearm plank position.
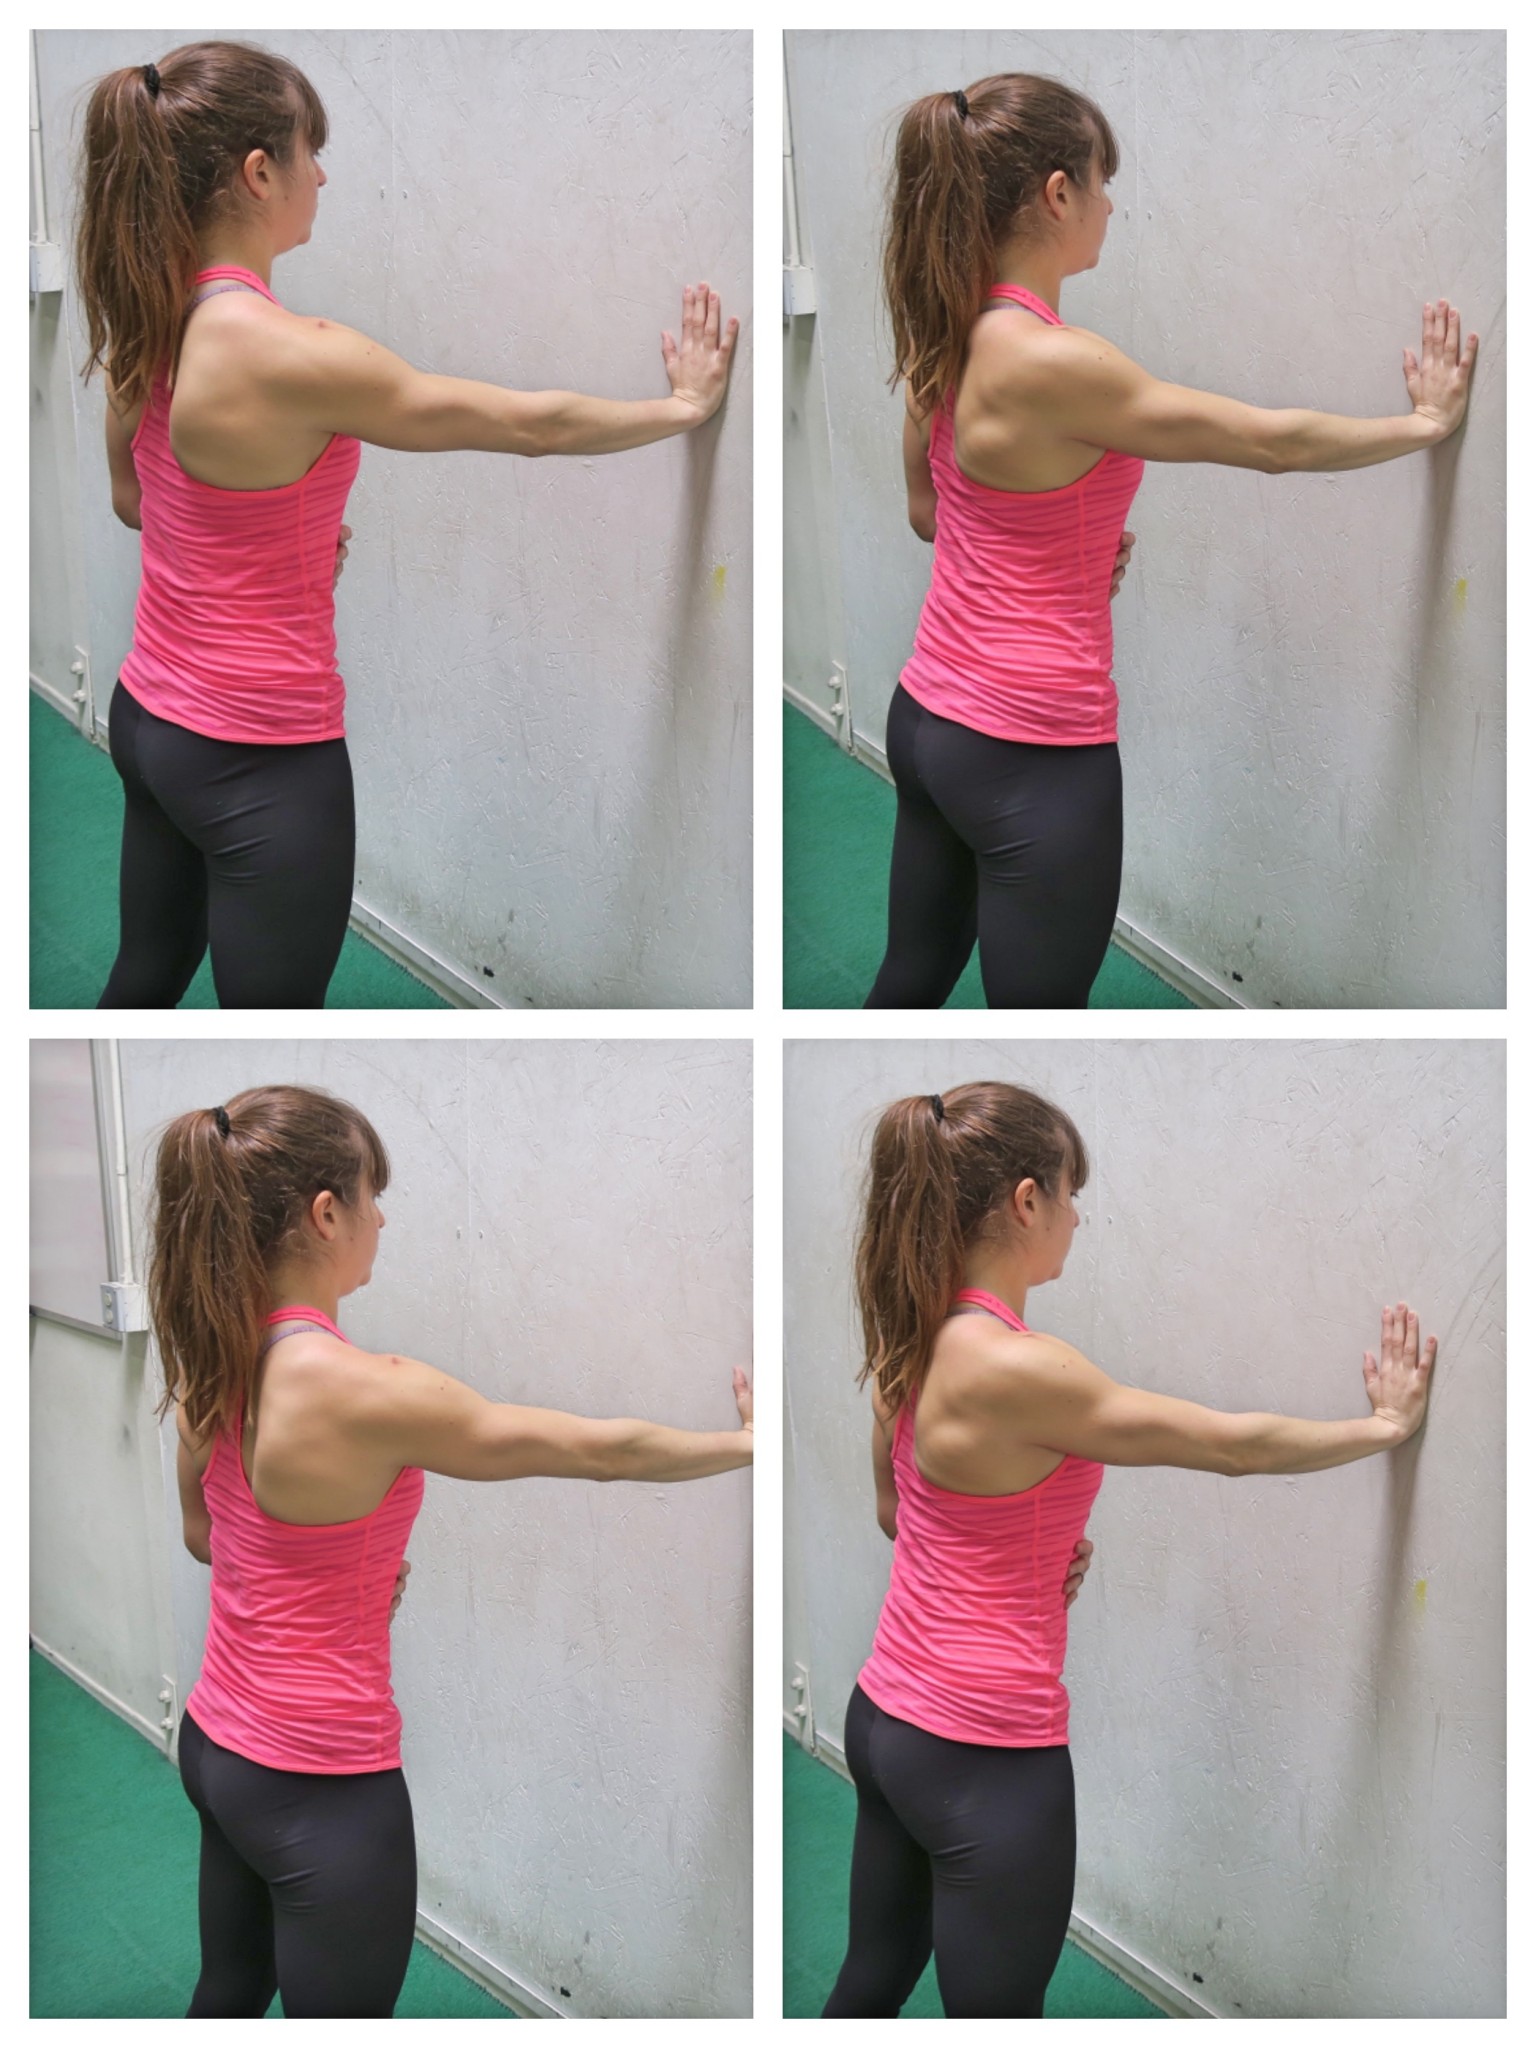
No matter your level, you can also do Single Arm Scapular Push Ups off the wall, which is my current favorite because it also allows you to address imbalances between your right and left sides.
To do Single Arm Scapular Push Ups, set up facing a wall. Place one hand up on the wall at about shoulder height. Your arm should be straight, but make sure you aren’t shrugging. You can be at a slight incline to make the move harder by walking your feet back, but start standing more vertical to the wall so you can really focus on proper movement of your shoulder blade.
Then, keeping your elbow straight, press your chest toward the wall as you feel your shoulder blade retract back. You should feel your shoulder blade move toward your spine. Do not shrug your shoulder as you focus on moving the shoulder blade. Pause then relax back out.
Make sure you don’t shrug or bend your elbows or rotate to try to make the movement bigger. Keep your core tight and isolate that one side working. You will feel the muscles along the side of your back and your ribs working. You can even put the opposite hand below your armpit on the working side to feel those muscles working.
Posture Or Pull Ups?
While these exercise will help with both, if you’d like to learn more about one or the other, click below! I’ve got programs to help with both
Learn more about improving your Posture –>
Learn more about improving your Pull Ups –>
by Cori Lefkowith | Feb 11, 2016 | Blog, Bodyweight, Exercises, Pull Ups
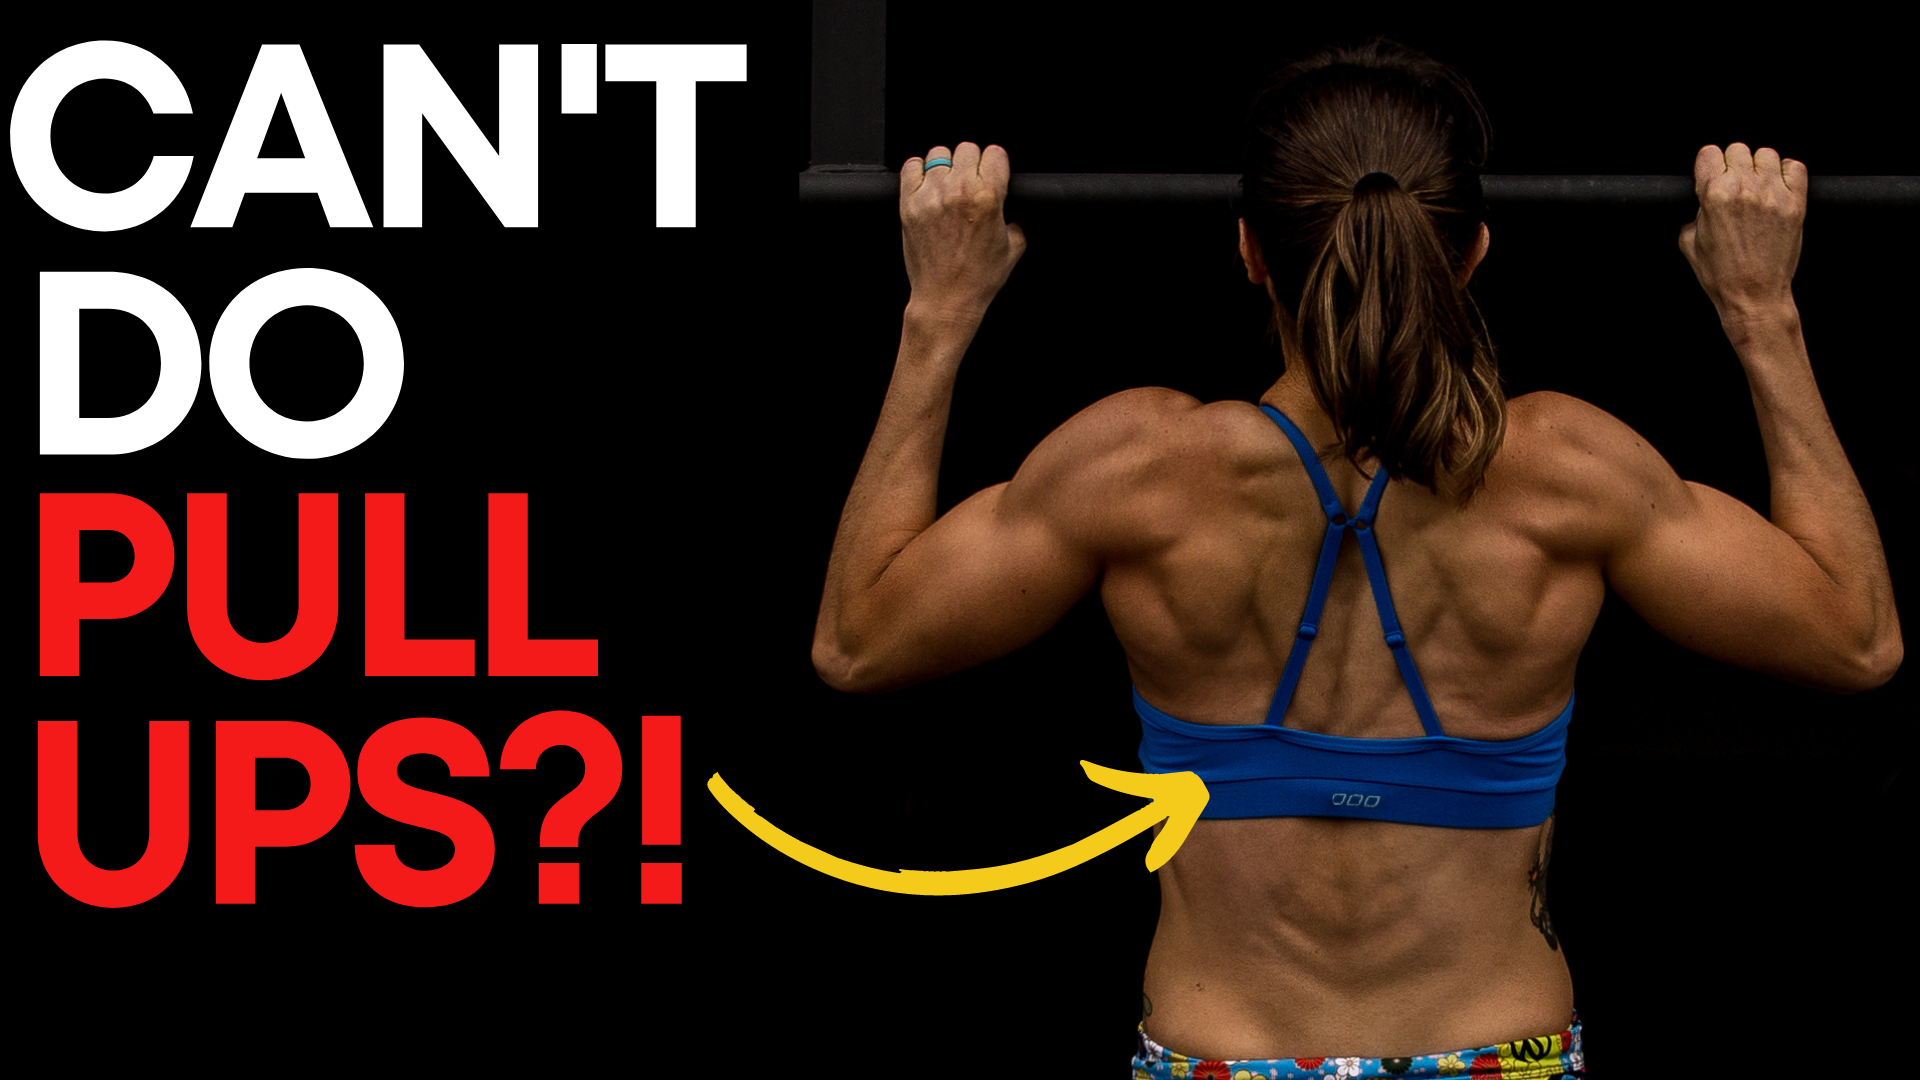
Many of the clients that I work with come into the gym unable to do a Pull Up. And most have it as a main goal they would like to accomplish.
Some clients may have never even really tried to achieve that first Pull Up, believing that there was no way they would be able to do one while others may have been working toward it for awhile with no real progress forward.
Because the Pull Up is a unique exercise that not only requires strength, but also a mind-body connection that many people with a desk job simply don’t have. So it isn’t as simple as doing some back exercise and BAM! first Pull Up!
It isn’t even as simple as slowly progressing variations from easiest to hardest and BAM! first Pull Up.
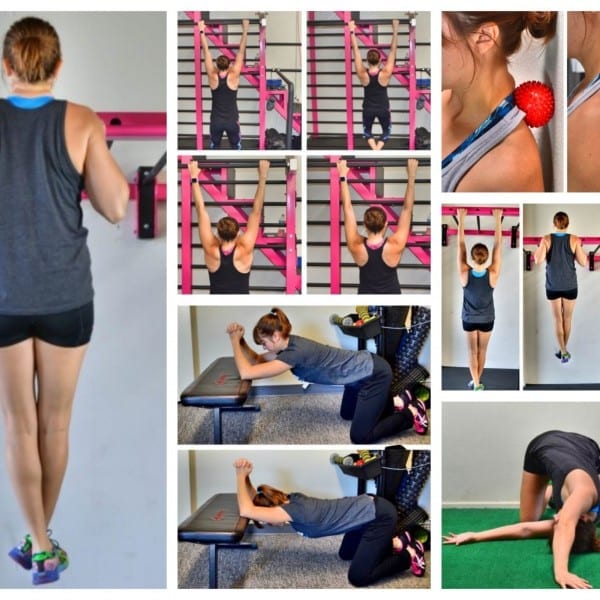
Helping clients, or even yourself, achieve that first Pull Up is about building the mind-body connection, reversing the effects of sitting, strengthening your back and forcing your body to take on more and more challenging Pull Up variations. It is about a complete program of foam rolling, stretching, activation and strengthening exercises.
It is about a program that boils down to 3 key things – Activation, not using Assistance and lower reps. End of story.
You can do all the Inverted Rows and Machine-Assisted Pull Ups assisted Pull Ups you want and never achieve that first Pull Up if you don’t think about these 3 things.
by Cori Lefkowith | Jul 2, 2015 | Blog, Bodyweight, Exercises, Pull Ups, Vs.
To work your back, you need to include Pulling Exercises in your workout routine.
However, not all Pulling Exercises are exactly the same because there are a lot of different muscles that make up your back that are worked to different degrees by different movements.
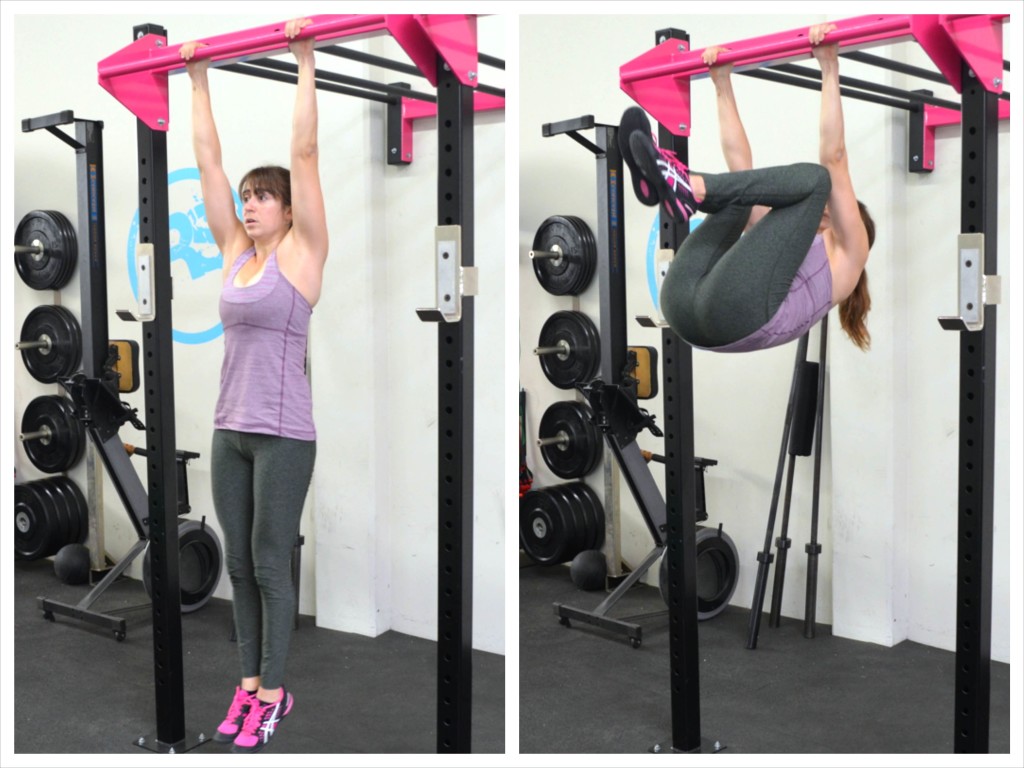
The two most basic types of Pulling Exercises you need to include in your workout routine though are the Vertical Pull and the Horizontal Pull.
Both work the muscles of your back differently and activate and target different muscles.
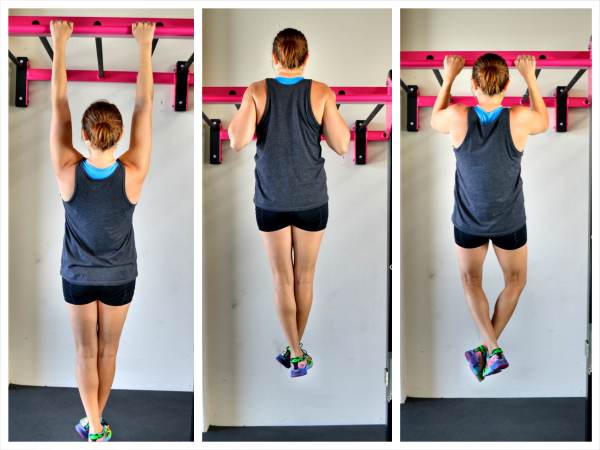
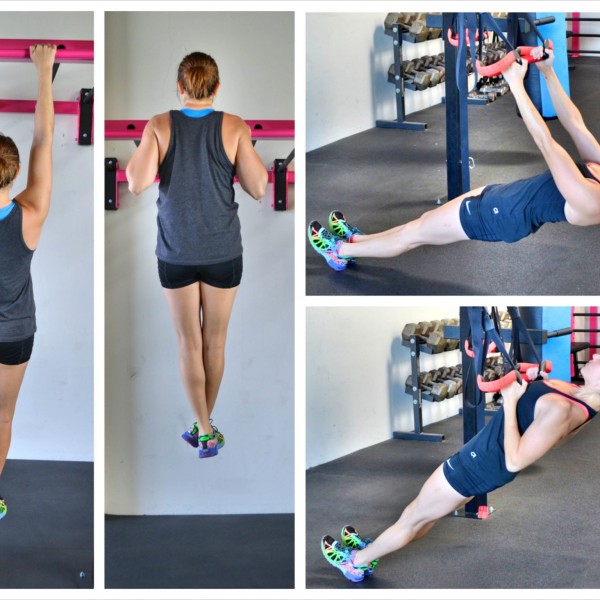
The most common bodyweight Vertical Pull is the Pull Up/Chin Up while the most common bodyweight Horizontal Pull is the Inverted Row.
Both moves need to be included in your workout routine and activate different muscles of your back to different degrees.
And while the Inverted Row is often used to help beginners work up to the Pull Up, you need to be aware that these two moves are very different and that the Inverted Row is still a very important movement for even the advanced lifter to include. (The Inverted Row alone also won’t get you to that first full Pull Up because it is a different movement.)
Below we will discuss the differences between the Pull Up and the Inverted Row and even some fun variations of each move you should be including in your workout routine.
(more…)