I love giving clients no excuse to skip their workouts. Even if you have very little space and just your own bodyweight, you can get in an amazing full body routine.
Below are 5 moves that can be combined for a killer full-body workout and I’ll share a few ways to modify each to meet your current fitness level.
So even if you’re working out in your living room, you can build strength and muscle!
The key to challenging yourself with just your own bodyweight is using unilateral moves, a combination of both rotational and ANTI-rotational exercise, increasing the range of motion of basic exercises, creating hybrid exercises and even moving in every plane of motion.
And with these 5 moves, I’ll show you how to use all of those forms of progression!
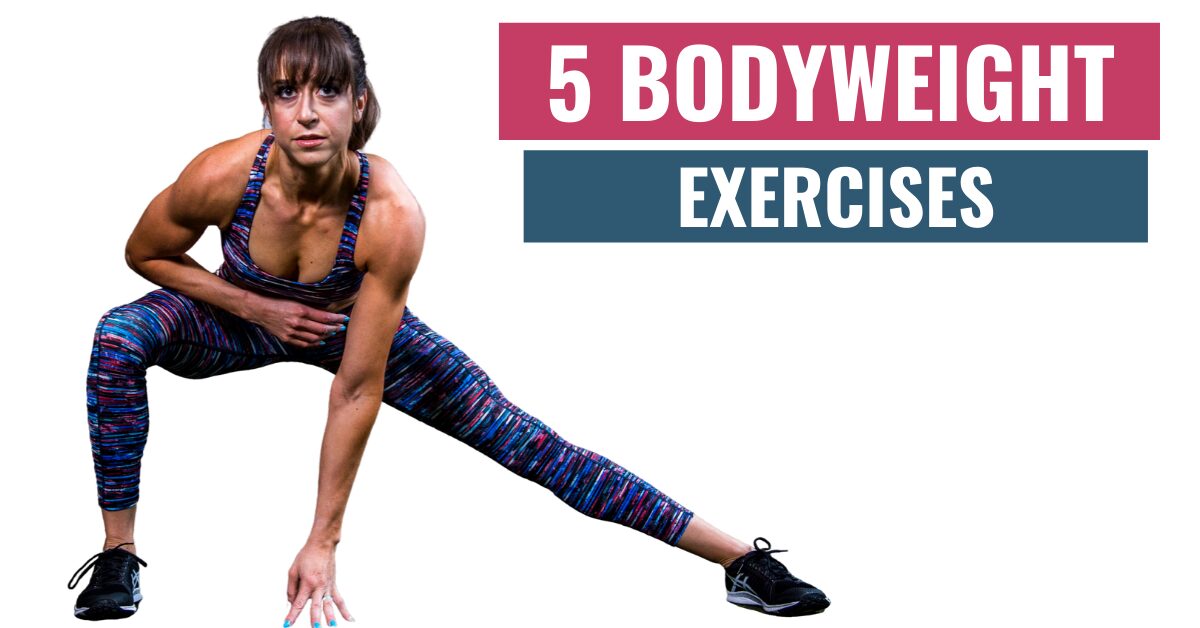
5 Bodyweight Exercises To Use At Home:
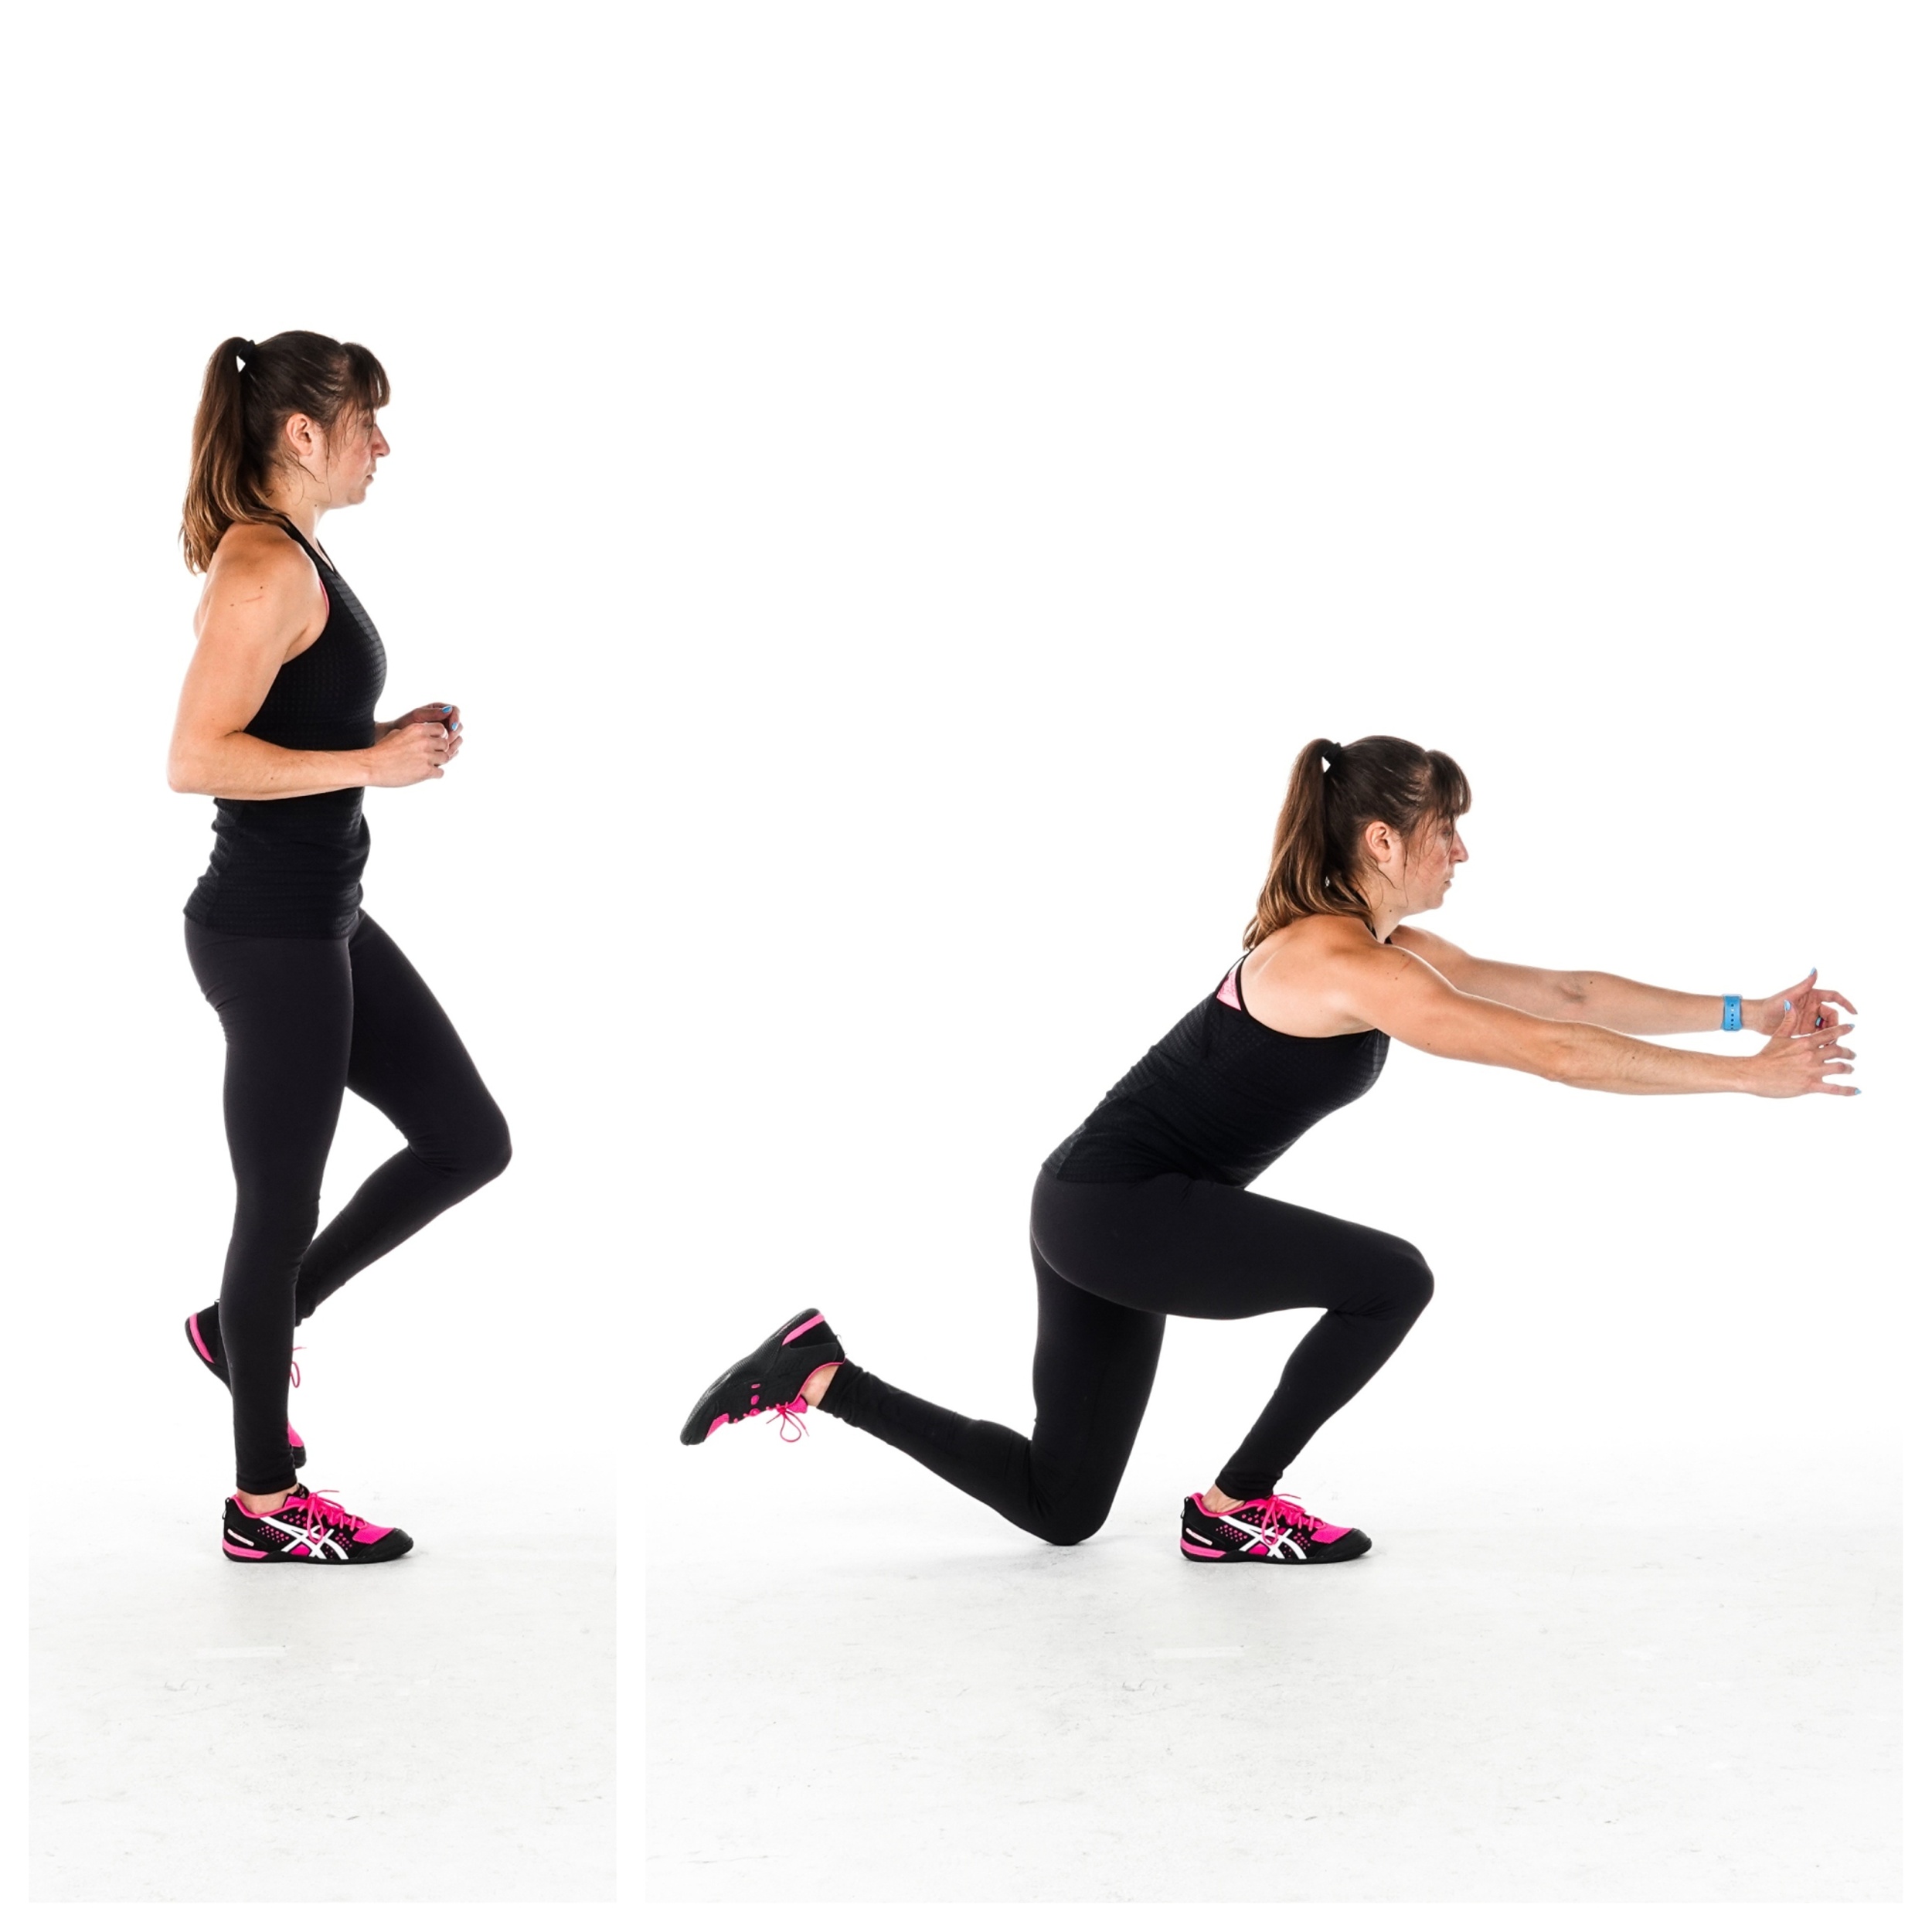
Exercise #1: Airborne Lunge

Want a more glute-focused variation of the pistol squat? Or maybe something just a bit more accessible to use in your routine?
Then you’ll love the Airborne Lunge.
If you find the single leg deadlift easy and want to work your quads and hamstrings while targeting your glutes a bit more, this unilateral move is an amazing way to do just that.
It’s also a great way to work through a full range of motion and, because it is a unilateral move, it adds in that balance challenge. Also, you now have to support all of your weight on one side, which increases the “load” you have to carry on both legs.
To do this move, you’ll stand on one leg with your other knee bent to pull your heel up toward your butt. Start by hinging at the hips. This isn’t a squat it is a hip hinge movement, so you will lean forward as you sit your butt back.
Then sink down dropping that other knee down toward the ground. Keep your heel pulled up toward your butt so you can’t push off that other foot as you touch your knee down.
Also, avoid reaching that other knee back too far. Focus on loading that standing glute and sinking to touch the knee down then driving back up through your standing heel. Squeeze your glute at the top and only touch the foot down if you need to balance.
To modify, you do not have to sink as low or you can hold on to a doorway or counter or stair rail.
You could also take a cushion or pillow to give yourself something to lower down to and even do an eccentric only variation. Lowering down using this move, then touching your foot down to stand back up and reset.
And the single leg deadlift is always an option, with a slower tempo, if you do have knee pain with flexion.
To advance the Airborne Lunge, you can also use a slower tempo and even a pause at the bottom.
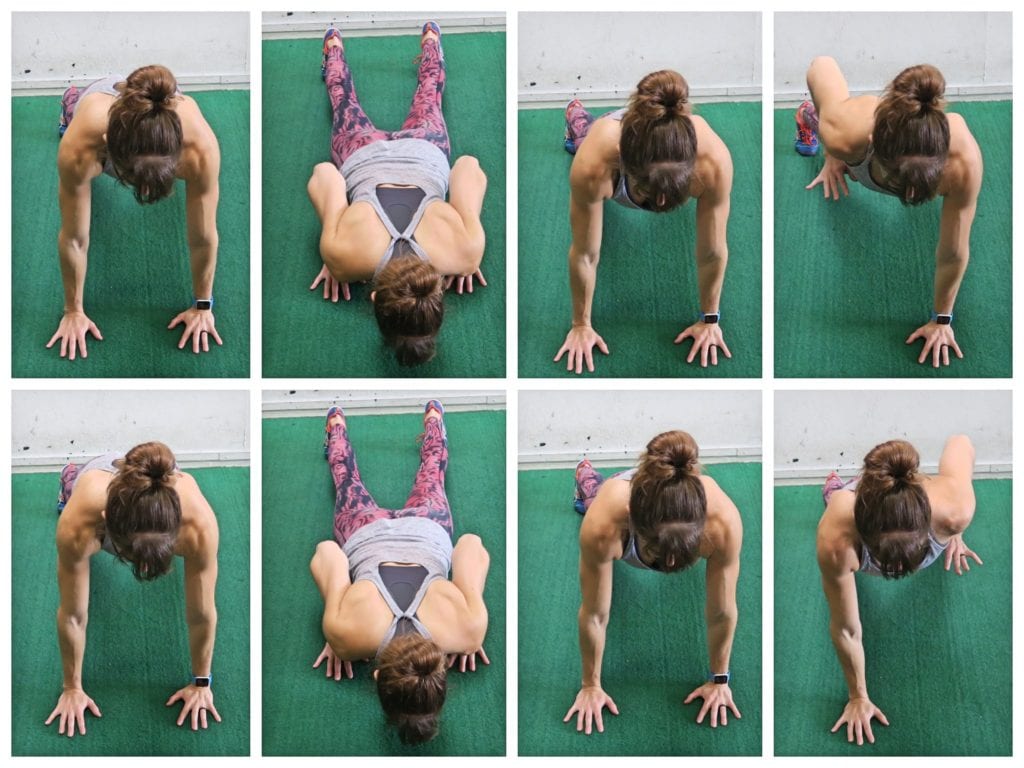
Exercise #2: Row Push Ups
If you want a push up variation that works not only your chest, shoulders and triceps but also your back, you need to try this hybrid push up variation – the Row Push Up.
This is also a great anti-rotational core move, which will target your obliques and improve your shoulder stability. You’ll even feel your GLUTES working to help you fight the urge to rotate as you row.
While tempting, it is key with this move that you don’t rush the row because you start to lose balance. And unlike the standard push up, where your feet will be together, you want to place your feet about hip-width to shoulder-width apart so you can really focus on fighting rotation.
When you do this push up, fight to keep your body from rotating as you row your hand up toward your chest. And don’t just simply lift your hand, focus on feeling your back pull your hand up. This is a great way to work on that scapular movement as you stabilize in that plank position.
It will improve your shoulder and scapular stability.
For the full, advanced, variation, you’ll perform a push up in between each row. A great way to modify the movement to start is to first do a row on each side then a push up instead of a push up after each row.
If you can’t yet do a full push up, I recommend modifying off an incline or, if you don’t have an incline, you can do the move completely from your knees.
It’s even possible to do a hybrid of knees and feet, performing the push up on your knees then moving to your toes for the plank row.
To advance the move, play around with tempos, full hand release at the bottom or even do the same but different as a decline variation.
But do not rush through the row thinking it is a simple hand lift.
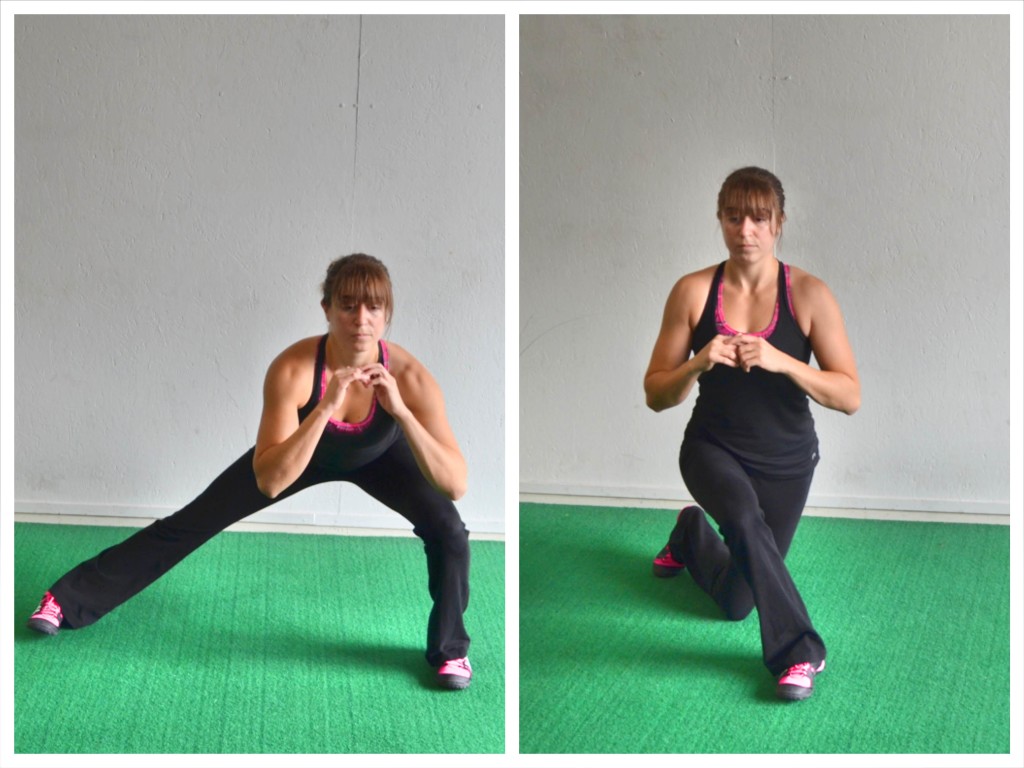
Exercise #3: Side Lunge to Curtsy Lunge
Improve your hip mobility and build leg strength through multiple planes of motion by combining the side lunge and curtsy lunge into a series.
A great way to progress moves, and create a new challenge for your body, is to slightly alter the plane of motion you are working in and even combine moves so that you are working the same muscle groups but in different ways.
This lunge series is a great way to target not only your entire leg but specifically your glutes and adductors.
If you’re just starting out with this move, you may tap your foot down between reps as you come center or not sink as deep in the lunge.
As you work to advance the lunge series, perform a bigger range of motion, lunging deeper, and avoid touching your foot down between lunges. This forces you to perform a more powerful push out of each lunge to work your legs while also forcing your core to work to keep you balanced.
If you find you have to do a stutter step to push back up and center, you’ve performed too big a range of motion for your current fitness level.
To advance the move, you could slow down the tempo or add in a pulse to each lunge. You can even combine other lunges into the series or find ways to increase the range of motion even using a stair!
If you struggle to properly load your glutes during these moves, touching your hand back toward your heel in the side lunge or using a slight hip hinge, leaning forward to sit your butt back, can help.
Also watch that you don’t rotate open with the curtsy lunge but instead really focus on crossing your leg behind.
If you have knee pain you can reduce the active knee flexion even doing taps from more of a skater squat position.
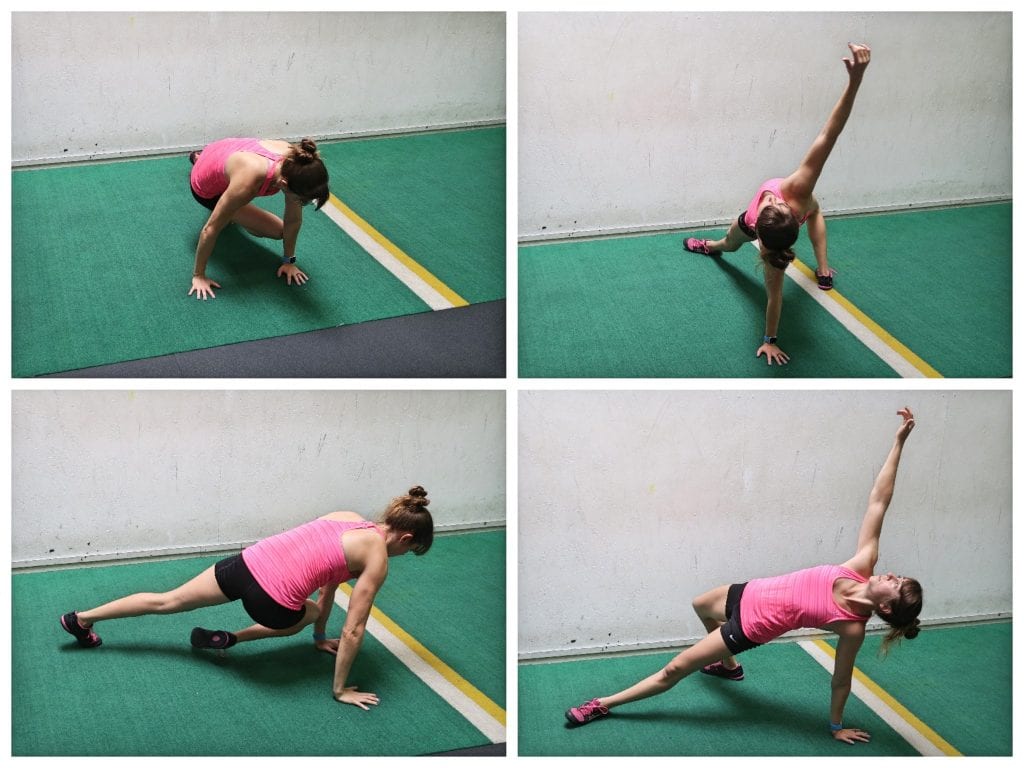
Exercise #4: Mountain Climber Turkish Bridge
This is a killer rotational core move that will work everything down your frontside AND your backside while improving your shoulder stability!
Glutes, abs, obliques, quads, arms, back…it’s all working! This move does require more shoulder stability though to start so please implement it slowly if you’ve had previous shoulder injuries!
To do this move, start in the plank position and pull one knee across toward the opposite elbow. Really think about pulling that knee in with your abs and not just flexing at your hips. Think about rotating your entire torso to engage your core.
Then, as you extend your leg back out, rotate open toward the ceiling to actually kick that leg behind you so you will place that foot flat on the ground. You will keep that knee bent, almost as if doing a donkey kick as you rotate open.
As you rotate, you’ll place the foot of the bent knee down on the ground and really engage your glutes to move into a Turkish Bridge position. Squeeze your glutes to drive your hips up. Make sure to engage your back to support your shoulder as you reach your other hand up toward the ceiling. Focus on keeping that shoulder over your hand.
If you let your hand sneak out beyond your shoulder, it can place more strain on your shoulder and neck.
Pause for a second, squeezing your glutes, then bring that leg back across as your rotate closed to drive your knee back in toward your elbow.
To modify, you can do this off an incline or you can perform it from more of a bulldog, tabletop bridge position.
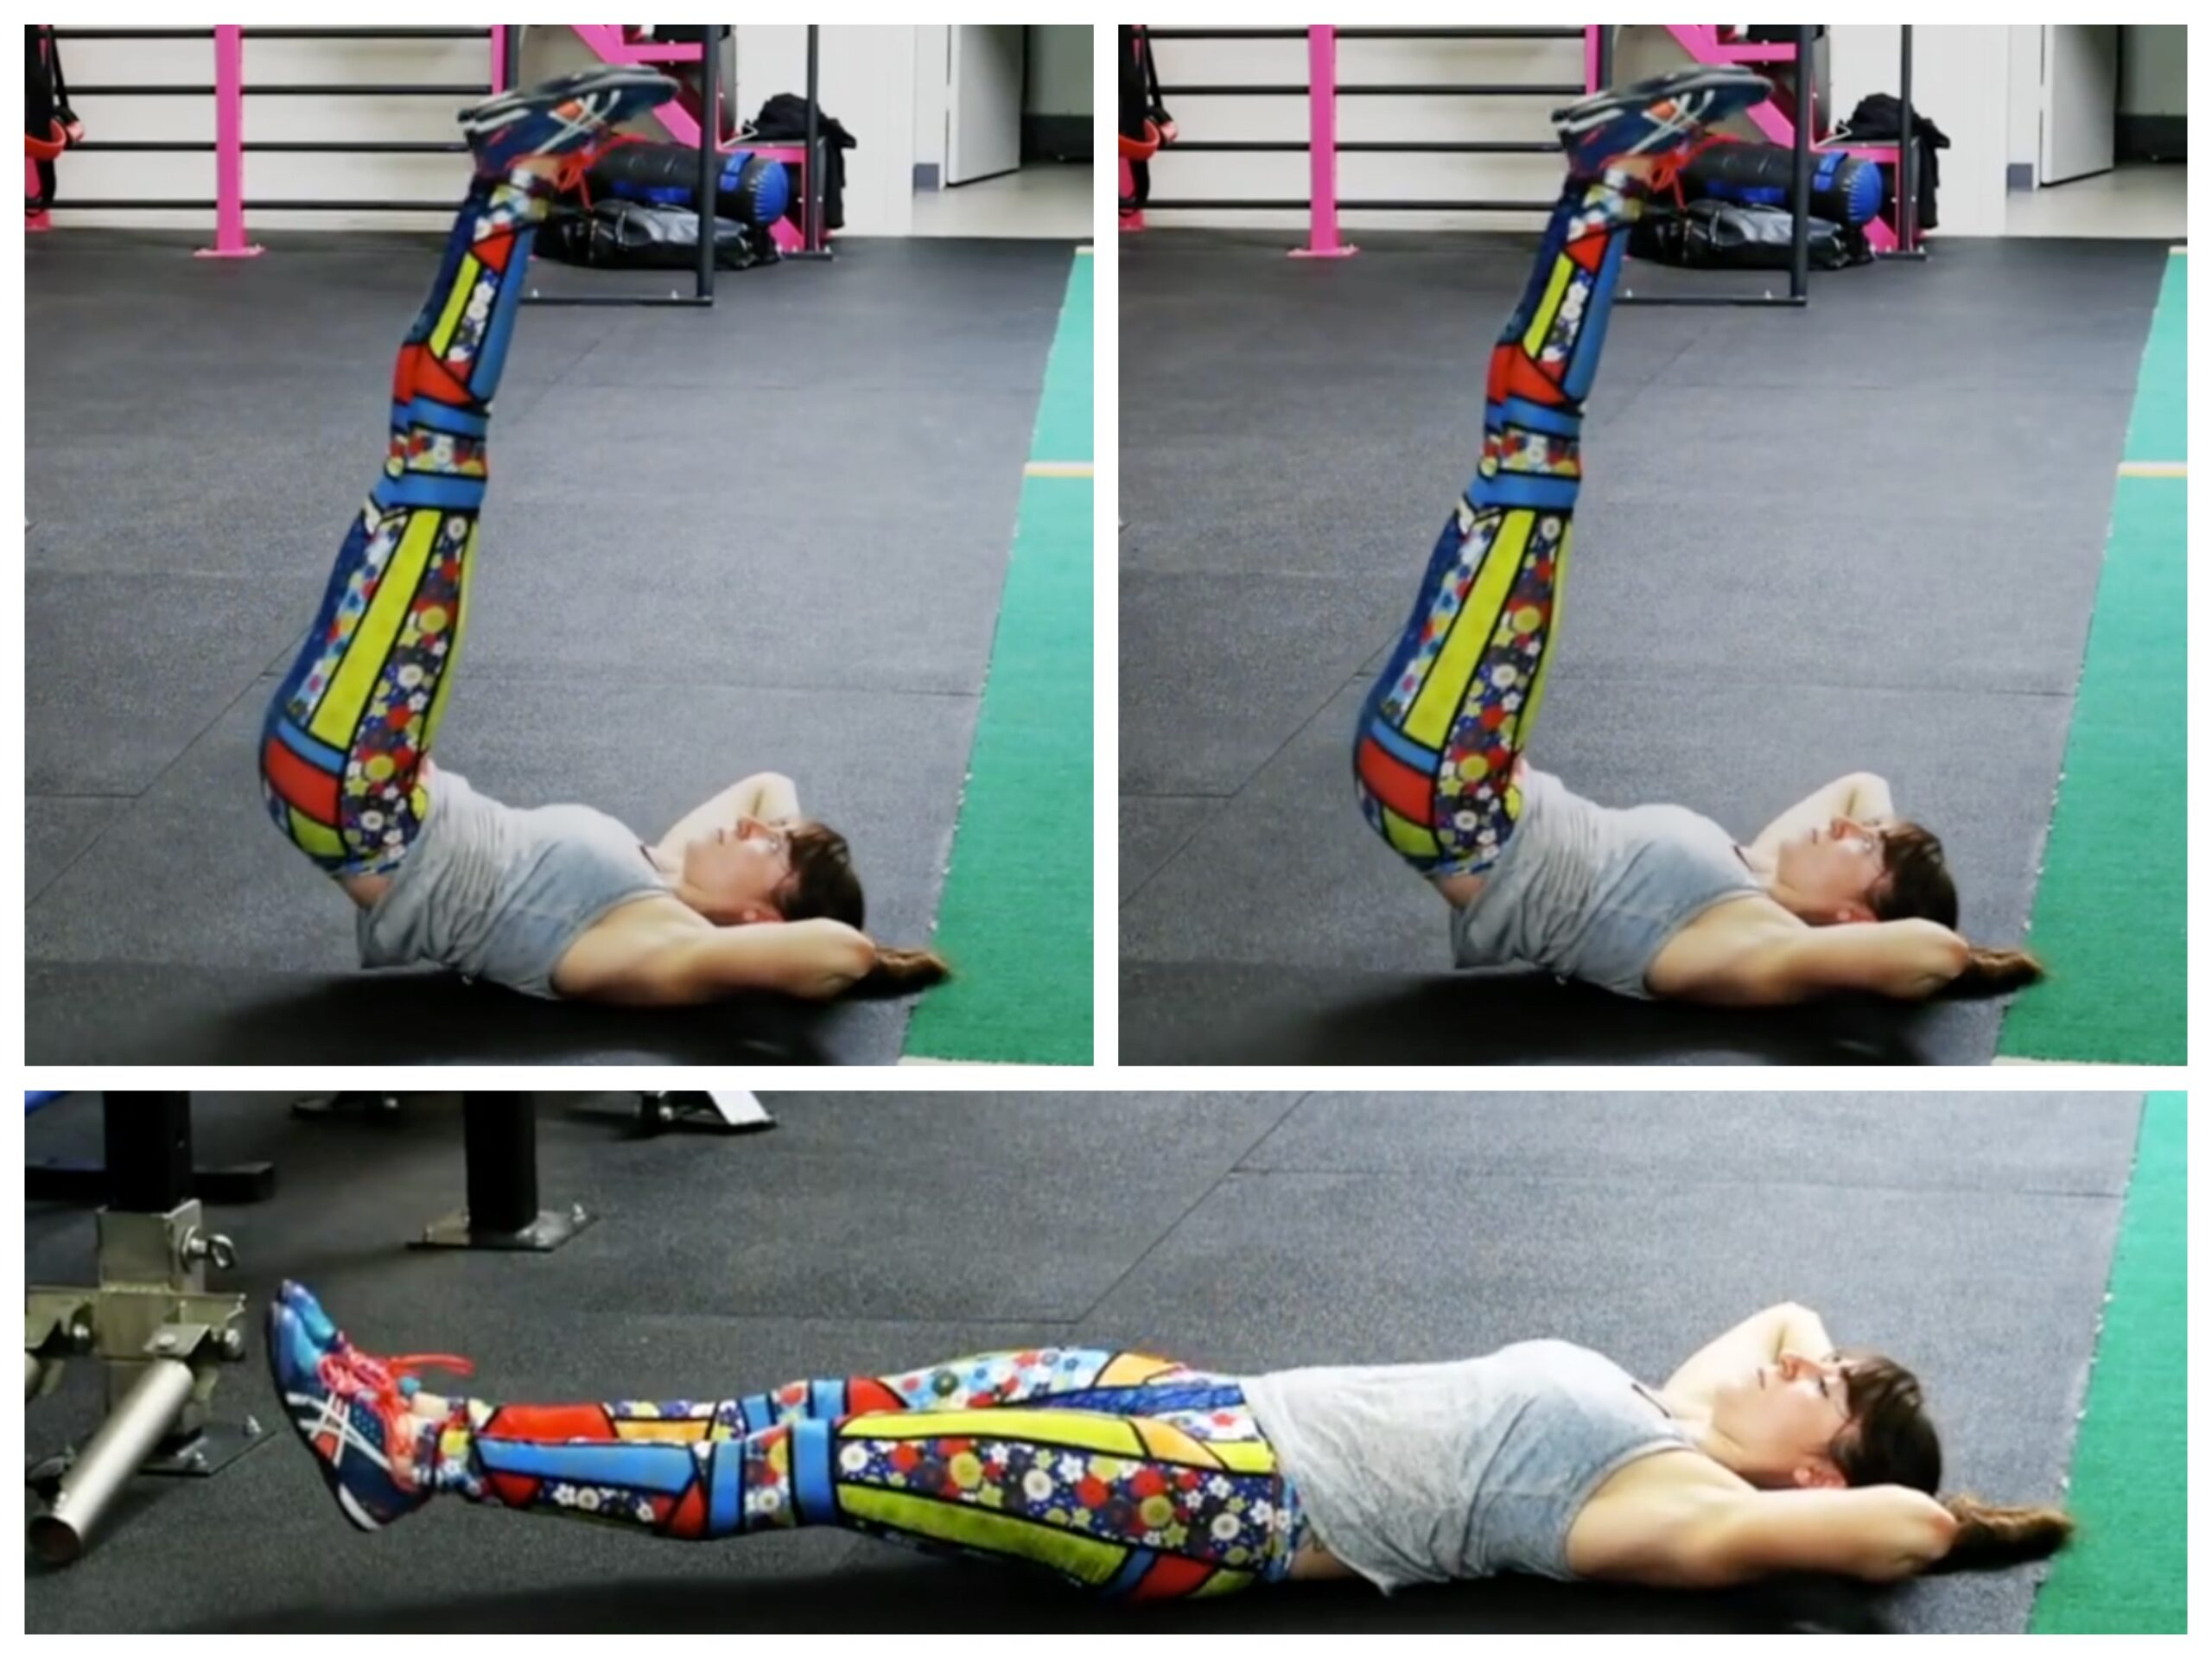
Exercise #5: Leg Lowers Plus
This is an advanced core move that works your abs in a stabilizing fashion (as you lift and lower your legs), but also through spinal flexion because of that bonus lift at the top.
It is a very advanced variation of the pelvic tilt progression so if you can’t perform the basic straight leg lowers without your hands behind your lower back, you haven’t YET earned this move.
You will want to start with bent knees and perform a bent knee curl at the top.
The key with this exercise is to engage your core to brace and protect your lower back as you lower your legs down. You will do this by posteriorly tilting your pelvic and pressing your lower back into the ground
When you lower your legs toward the ground, flex your glutes even at the bottom.
Lift your legs back up toward the ceiling and then, as if they are attached by a string, press them straight up toward the ceiling flexing your spine to lift your butt up.
Do not swing or use moment to lift as much as you can avoid it. I know it’s tempting to get a bigger range of motion since the lift can feel really small.
You can have your hands on the ground beside you and even push down into the ground to help you better engage your abs for that little plus lift at the top.
Or you can have your hands behind your head and even lift your head up to work your core more.
If you feel your lower back with basic leg lowers, keep your knees bent as you lower and curl in. And think about curling your knees in toward your head for the plus. Move slowly so that you aren’t using momentum!
2 Full-Body Bodyweight Home Workouts:
Not only can we slightly tweak moves to match our needs and goals, but we can also adjust our IMPLEMENTATION of the same basic moves.
Below are two different ways to use these moves to build full-body strength. One is interval based while the other is a rep ladder. Both will help you increase your training density to build strength using just your own bodyweight!
WORKOUT #1: The Bodyweight Strength Ladder
Start with 10 reps of each move (or per side) on the first round through the circuit. The next round through, perform 9 reps. Then 8,7,6…until you perform one rep on the final round. Rest only as needed. As the reps go down, progress movements as needed so they are still challenging. Time how long it takes you to beat that time next time through!
CIRCUIT:
10-1 rep per side Airborne Lunges
10-1 rep per side Row Push Ups
10-1 rep per side Side to Curtsy Lunge
10-1 rep per side Mountain Climber Turkish Bridge
10-1 rep Leg Lowers Plus
WORKOUT #2: The One-Minute Max Out
Set a timer for 1 minute intervals of work and complete each move back to back without resting. Perform as many reps of each move as you can in that time and record how many you do each round to try and beat it. Rest for 1 minute between rounds. Complete 3-5 rounds through. Beginners can start with just 30 seconds per move.
CIRCUIT:
1 minute Airborne Lunges
1 minute Row Push Ups
1 minute Side to Curtsy Lunge
1 minute Mountain Climber Turkish Bridge
1 minute Leg Lowers Plus
1 minute Rest
Want more amazing workouts you can do anywhere? Check out my Dynamic Strength Program!