The Right Way To Get A Strong Lower Back (4 exercises)

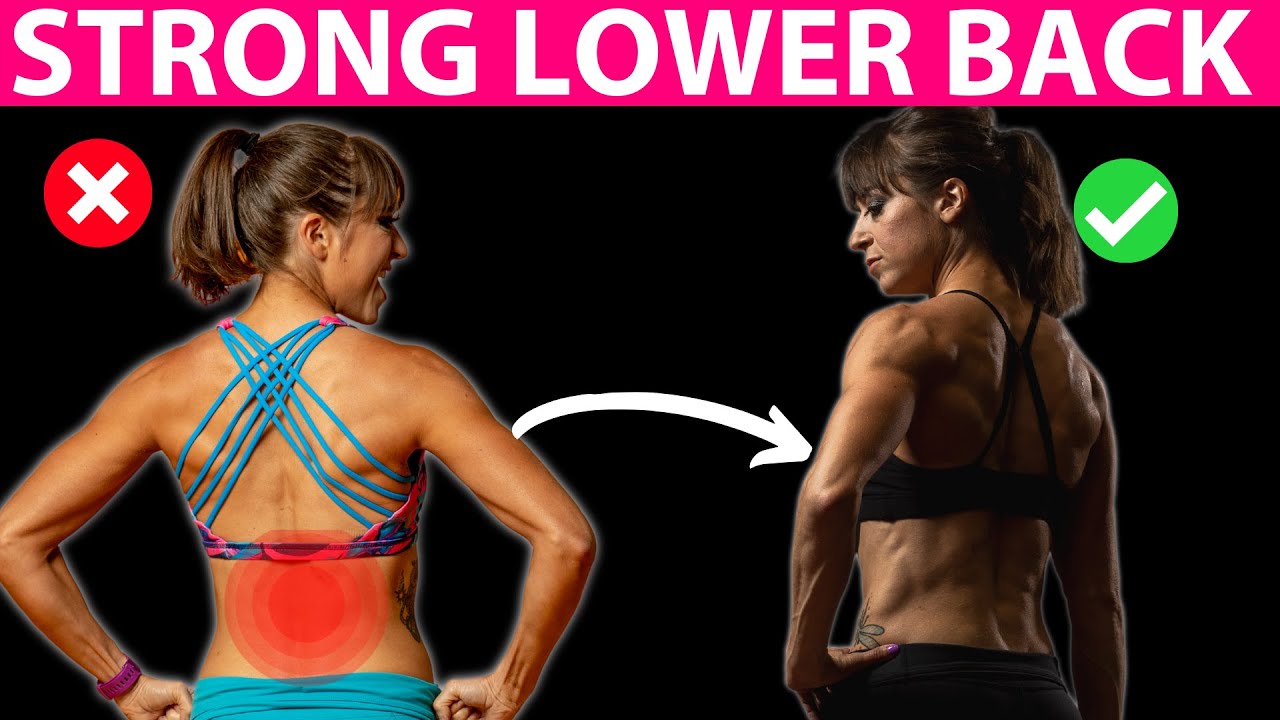
The Right Way To Get A Strong Lower Back (4 exercises)

Many of us have thought to ourselves, “My lower back is so weak” when we’ve been suffering from lower back aches and pains.

We feel it during ab movements or deadlifts and think that we feel it because we need to strengthen it.

But what if the problem isn’t that your lower back is weak?

What if the issue is that it’s actually OVERWORKED?

This is all too often the case when it comes to our lower back.

The muscles there become overworked due to our daily postures which have created mobility restrictions and underactive abs and glutes.

So all of that strengthening you’re trying to do, all of those superman you’re doing, may actually be perpetuating the issues making them worse instead of better.

Instead you may need to be working on your hip and thoracic mobility while activating your abs and glutes to protect your lower back from being overloaded.

Remember the point of pain isn’t always where the problem started. And feeling a muscle work during a move may not be because it is weak. Instead it may be working when it shouldn’t and become overloaded.

So if you’ve been feeling your lower back during moves and thought, “I need to strengthen it,” try including these 4 moves in your warm up routine instead! And stop overworking your already overloaded lower back more!

Exercise #1: Thoracic Foam Rolling

If one area is lacking in mobility, we will seek out mobility from another area to compensate.

Because we often lack proper thoracic extension due to hunching over our technology or driving in our cars, we tend to compensate for this lack of extension by arching our lower back during exercises.

If you’ve ever felt your lower back during overhead pressing movements or bent over rows or back flyes, you may be arching your lower back in an attempt to maintain a neutral spine because of your limited thoracic extension.

That’s why it’s key we work to improve our thoracic extension to avoid seeking out mobility from our lumbar spine to compensate.

That’s why I love peanut foam rolling. It’s a great way to relax those muscles that may become tight along our spine while improving our thoracic extension.

To do this move, you can use a peanut, which can easily be made by taping two balls together or tying them in a sock. Lie on your back placing the peanut in your mid-back with a ball on either side of your spine.

Place your hands behind your head, pulling your elbows open as you relax over the peanut.

Breathe and hold for a second, then crunch up and relax back down. Do a few of the crunches, extending back over, before moving the peanut up your spine.

You can also reach your arms up overhead and sweep them open and out to your sides before crunching up to stretch out your chest further.

But focus on breathing to relax as you hold and allow your spine to extend over the roller.

To progress this move, you can use something like the Simple Mobility tool which has a larger diameter and will require more spinal mobility to relax over.

Exercise #2: Bench Hip And Quad Stretch with Rotation

Tight hip flexors, and a lack of hip and spinal mobility in general can lead to you overusing your lower back as you then aren’t able to properly engage your glutes or even your upper back and abs.

That’s why stretches to improve your hip extension and spinal mobility are key.

Too often if our hip flexors are tight, we end up feeling moves that should be felt in our glutes in our lower backs and quads. Not to mention we can develop hamstring synergistic dominance where our hamstrings start to become overworked instead of our glutes working when they should!

To address both limited hip and spinal mobility, I love this Bench Hip and Quad Stretch With Rotation.

To do this move, place one foot up on a bench or chair behind you and half kneel on the ground with that back knee down and front foot flat on the ground. Move out far enough that you can squeeze that back glute to drive your hip into extension while keeping that front knee aligned over that front ankle.

In this half kneeling position, place both hands down on the ground even with your front instep.

In this position it is key you squeeze that back glute to drive that hip into extension or you lose out on the hip flexor stretch. Having your back foot up on the bench flexes your knees to stretch your quads at the same time.

Then lift your hand closet to your front foot to rotate toward that front leg. As you rotate your chest open, don’t just move at your shoulder. Focus on engaging your upper back to rotate your chest open.

Reach up toward the ceiling then place that hand back down on the ground. Then lift your other hand up to rotate away from that front leg. You may find it harder to rotate one direction, especially away from the front leg.

Make sure to keep that back glute engaged the entire time to stretch your hips and engage your upper back to help you twist and rotate.

Do not let yourself rock out on that front foot and cheat, seeking out mobility from other areas!

Move slowly and work for about 30 seconds per side even before switching legs.

To modify, you can place your back foot on a block instead of up on a bench. You can also place that back foot on a wall if you don’t have a bench.

If you can’t kneel due to knee issues, do this from a runner’s lunge position, even modifying with your hands up on an incline.

Exercise #3: 3-Way Hip Circles

The best way to protect your back is to strengthen your glutes and your abs so they brace to help protect your spine so your lower back isn’t doing all of the work!

That’s why this 3-Way Hip Circle activation move is so important to include. It not only helps mobilize your hips, but also works on your core engagement, activating your glutes, abs and even obliques.

Avoid leaning away or rotating your pelvis as you focus on moving just at the hip joint.

In this drill you want to pause in each position as the donkey kick will target your glute max while the fire hydrant will target your glute medius and the knee tuck will engage both your hip flexors, but especially your abs if you focus on drawing in your belly button as you pull in to tuck.

By also fighting the urge to lean away you’ll feel those obliques working to keep your hips level toward the ground.

To do the 3-Way Hip Circles, start on your hands and knees with your hands under your shoulders and your knees under your hips. Flex your feet.

Then, keeping your knee bent to about 90 degrees, kick one leg back like into a Donkey Kick. You may slightly abduct the leg to better engage the glute, but do not let the knee rotate open. Focus on stopping the move with your glute over arching your lower back to lift up higher.

Pause here even assessing if you feel your glute. If you feel your hamstrings, relax your foot or even kick slightly out. And make sure your hips stay level to the ground.

Then, without bringing your knee back down, circle it out to the side into a Fire Hydrant position. Do not bend your arms or lean away to try to get the leg up higher.

Pull your knee in line with your hip, keeping your knee bent to about 90 degrees. Focus on keeping your lower leg about parallel to the ground. Do not let your foot flare up higher. Feel the side of your butt working to hold the leg up.

Pause here then tuck your knee straight in toward the elbow on the same side.

Pull your abs in as you crunch and don’t be afraid to flex slightly through your spine. Focus on those abs working as you drive your knee into your arms.

Pause then repeat the move kicking back into that Donkey Kick position.

Move slowly focusing on avoiding rotation or arching of your lower back as you kick back.

Complete all reps on one side before switching.

You can not only modify this move but also simply add variety to it and a balance challenge, by doing this standing. You can also do a straight leg kickback if you really struggle with arching your lower back or your hamstring compensating.

The key is making sure you actually feel the glutes working. Because doing the right moves, without feeling the correct muscles working may only perpetuate the problem over correcting it!

Exercise #4: Pelvic Tilt Balance March

Improving your pelvic stability to properly be able to brace your abs during movement is key if you want to avoid lower back overload and injury.

It’s why the Pelvic Tilt Balance March.

It is far from an easy move but it is a great way to engage your TVA or transverse abdominis while working your rectus abdominis and obliques to stabilize.

Just make sure you advance it slowly over rushing it.

You don’t want your lower back to take over or your hip flexors to be doing all the work.

To do this move, place a larger foam ball or pilates ball right under the top of your butt.

You want to balance on this ball, pressing down into it with your arms down by your sides, palms pressing into the ground.

Then bend your knees to about 90 degrees, bringing them into that tabletop position. Better to have them slightly out than to tuck them more into your chest as that will make it easier.

Balancing here, slowly touch one toe to the ground, fighting the urge to rotate. Raise that leg back up then touch the other toe down.

Focus on bracing those abs and not letting your abs dome out or your lower back arch. If it feels like too much, bring the ball up slightly higher.

To advance from here, you may bend your elbows or even raise one or both arms off the ground. This will give you less of a base to assist with stabilizing.

But only progress as you’ve earned it. Better to modify and really feel those abs working!

Move slowly with this move and even consider starting without the ball to master that posterior pelvic tilt progression if you haven’t!

SUMMARY:

Too often our lower back becomes overworked due to hip and spinal mobility restrictions and weak or underactive abs and glutes.

But because we consistently feel our lower back during moves, we assume it is actually weak and instead try to do more to work it.

This only perpetuates the problem.

So make sure you’re also working to improve those mobility restrictions while strengthening supporting muscles so your back doesn’t become overloaded.

Remember where the point of pain is isn’t always where the problem started! And injury doesn’t only mean an area is weak!

Use these 4 moves in your warm up, even just spending 30 seconds per move to start to help you avoid those lower back aches and pains!

Want more workouts, exercises and tips? Join my daily newsletter:

–> Join The RS Newsletter!


4 Common Exercises You’re Doing Wrong

4 Common Exercises You’re Doing Wrong

Just because a move is “good,” or a key movement pattern to perform, or something really frequently included as a staple in many routines, doesn’t mean you deserve to do it.

Every movement variation has to be earned.

And doing a harder variation we can’t truly control or utilize to the fullest will actually hold us back. It won’t allow us to get as much out of the exercise and our workouts as doing an “easier” exercise actually could.

Often, if you do a move actually modified to your current needs and goals, you may feel the muscles being worked harder because everything is engaged correctly.

That’s why I wanted to talk about 4 exercises that are often in programming that people aren’t maximizing – 4 moves we don’t fully give them credit for being the challenging exercises they actually are.

And not only do I want to go over the reason to use these moves but the common mistakes I see people making and also the modifications we should be using instead to EARN these harder variations!

Exercise #1: Balance Lunges or Bulgarian Split Squats

The balance lunge or Bulgarian split squat is an amazing unilaterally-focused leg exercise.

Yet so often we aren’t really getting the true benefit of our back foot being raised up on a bench or in a suspension trainer.

While yes, the automatic instability of raising that back foot up does make it more challenging no matter what, the true point of putting your back foot up is to increase the range of motion you are working through.

Yet so often we place our foot up on something only to repeat the same range of motion we would when doing a split squat off the ground!

Sometimes the range of motion is even smaller actually because we aren’t stable and haven’t yet learned how to control the full split squat movement.

And on top of that, so often because we “can do” the move, we start to even add loads and completely miss out on the full benefit of this variation.

We have to remember that loads are not the only way to progress an exercise.

And that, if you’re going to include the Balance Lunge, you need to make sure you can utilize the increased range of motion. That is what creates the progression and benefit of this movement.

From there you can add loads, change tempos and even use different ways of creating that extended range of motion to adjust instability.

But you need to utilize the full range of motion first.

If you can’t work through the full extended range of motion, you may want to start with a lower bench or box to reduce the mobility and stability demands. Slowly increase the range of motion instead of just jumping to a bench.

You may even find right now you struggle to fully come to the ground during the basic split squat.

If that is the case, start with a basic split squat, even starting the movement from the ground to fully have to learn to control the complete range of motion!

Exercise #2: Double Leg Lowers

Double leg lowers have become an extremely popular ab exercise. But so often we end up feeling our lower backs or hip flexors over really targeting our abs.

In an attempt to correct this and do this harder variation we haven’t earned, we place our hands behind our lower backs and butts.

But this is a band aid. It doesn’t teach us to actually control the ab brace we need so we can build up.

It’s why we may need to regress to progress.

Because leg lower type movements, while they WILL work your hip flexors, are a great way to target that lower portion of the rectus abdominis more or what we often refer to as the “lower abs.”

And knowing how to brace correctly to protect your spine as you flex and extend your hips is also beneficial as you work to improve your heavier lifts!

So if you find your lower back engaging or only your hip flexors working, you can modify the double leg lowers in a few different ways.

But the key is learning to engage your abs using that posterior pelvic tilt.

This is a small movement that engages your abs and glutes.

Think about tilting your pelvis toward your ribs. Hold here as you do any movement in the progression whether it’s a single knee tuck, really taking things back to back to basics, double knee tuck or even single leg lower.

Only progress to the next level if you can maintain that ab brace and not feel your lower back taking over!

And if you do find you fatigue once you’ve built up to the double leg lowers, don’t push through. Instead modify with one of these variations so you can continue to target your abs.

Because we have to remember that the muscles we feel working are the ones getting the “benefit” of the movement. And if the correct muscles aren’t working we may be perpetuating recruitment patterns that lead to overload and injury…not to mention don’t actually work the muscles we want to target!

Exercise #3: Burpee

Love them or hate them, the burpee is often a staple in workout routines.

While many of us do recognize it is hard, it requires a lot more strength and mobility than we recognize.

And because the purpose of the burpee is almost always to be “cardio,” in an attempt to go as fast as possible, the quality of the movement often suffers.

We end up doing the worm during the push up portion. Or shrugging our shoulders in the plank. Or we land with our knees completely straight after performing a half-hearted jump at the top.

And sometimes, in an attempt to modify, we step back, but then to stand up, we end up having to do these stutter steps to bring our feet into our hands because we don’t have the mobility to truly step in far enough.

The burpee is a killer bodyweight move. And if you plan to include it, you need to earn it.

While yes, you can use the step back to reduce impact if you do have the range of motion to control the movement…and while yes, you can take out the push up to modify it as well so you don’t end up doing the worm, if you want to truly build up to that full burpee, try instead using an incline.

If you’ve been working to improve your push ups and build toward that full perfect push up from our toes, you may have been using an incline. And if you aren’t, start!

The incline can be a great way to reduce the load on our upper body and core so we can perform the push up correctly.

The incline also reduces the mobility demands during the burpee. It takes a lot more mobility than we realize to jump back in to efficiently stand up. Because your hands are raised, you need less hip and ankle mobility to jump back in and stand up.

As you feel comfortable with this move and can move quickly while performing quality reps, you can then lower the incline over time!

Exercise #4: Single Leg Glute Bridge

The bodyweight glute bridge may seem easy, but it’s a move that is so often done incorrectly. And then so often, before we’ve really earned it, we switch to the single leg glute bridge.

We may try to use the single leg glute bridge to get some unilateral benefits and work each side independently, but we have to recognize that it is a big jump in progression from the basic bodyweight glute bridge.

So before we even try the single leg variation, we need to make sure our glutes are actually powering the basic glute bridge. We don’t want our hamstrings or lower back compensating instead.

We don’t want to barely be able to lift up and trying the single leg variation or arching up super high because we’re hyperextended our lower backs.

A few key cues to help you better engage your glutes during even the basic bodyweight glute bridge are…

1. Before lifting perform the posterior pelvic tilt, tucking your hips toward your ribs. Maintain this throughout the bridge and don’t let your lower back arch to lift up higher.

2. Drive your knees toward your toes as you lift so you don’t push yourself backward and end up using more hamstring.

3. Engage your upper back, bending your elbows to drive your upper arms into the ground so you can focus on that pure hip extension.

Once you can control that basic glute bridge, you can then move into an 80/20 variation. This will allow you to focus more on one side or the other while still having a bit of assistance.

We have to remember that the full unilateral or single leg glute bridge isn’t just us having to lift all the weight on one side, but it is also us having to stabilize our pelvis and balance.

While still a simple move and bodyweight, it is more of an advancement than we give it credit for.

That’s why the 80/20 variation can be a good in-between so we can actually target each side while still working through a full range of motion targeting the glutes.

As you do feel ready to progress, just make sure your hamstrings and lower back aren’t engaging and taking over. This move is powered by your glutes!

SUMMARY:

Every move we include in our workouts should be done with a purpose. And we should only advance moves as we EARN those harder variations.

Sometimes, as much as it can hurt our ego, it is key we regress to progress and build up.

We are never above those basics and, at times, taking things back a step can help us improve any weak links!

Ready to take your training to the next level and dial in your workouts and your nutrition to match YOUR specific needs and goals?

Apply to my 1:1 Coaching. Book your strategy call below…

–> Apply Today


The Best Oblique Exercise (You’re Not Doing)

The Best Oblique Exercise (You’re Not Doing)

A few of the most common moves I see done for oblique work are the Pallof Press, side planks and teapots (love them or hate them…which is a topic for another day).

But my favorite is actually a unilateral balance challenge and bodyweight exercise.

This move requires no equipment and is deceptively hard.

But if you regress to progress, and take the time to master it, it will take not only your core strength, but also your scapular, shoulder, hip, knee and ankle stability to the next level.

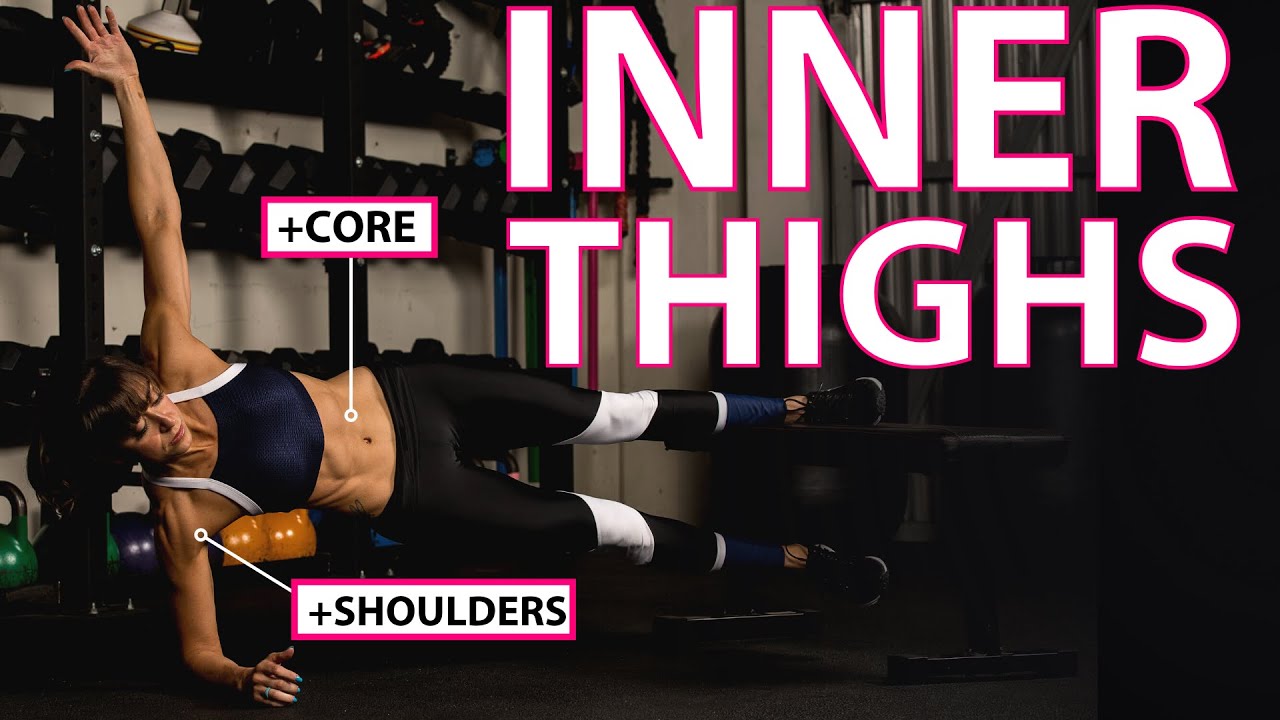
It’s seriously one of the most amazing compound oblique exercises out there and one of the most awkward feeling as you get your balance – The Single Arm Rotational Plank with Knee Drive.

This rotational core exercise is an amazing way to really target your obliques and abs while also working your adductors, quads, Serratus Anterior, shoulders, back…and so much more.

However it is more challenging a unilateral move than we give it credit for.

If you can’t control the advanced variation and perform it slowly, please make sure to use the modifications I mention. You don’t get better results by rushing a movement or by doing a harder variation you haven’t earned.

The best results happen when we are intentional with our exercises so we can get more out of every movement. And you want to make sure you get all of the benefits you can from this move!

So…What are the benefits of this amazing move?

With this unilateral move, if you take the time to learn to control it, you will…

  • Improve your hip and knee stability, especially strengthening those adductors and quads.
  • Work your obliques and abs with both the rotational movement and the crunch. Your abs have to work hard to actually prevent unwanted extension of your spine as you even rotate to face the ground.
  • Improve your shoulder and scapular stability strengthening both the muscles of your shoulder but also of your upper back as well as your Serratus Anterior. You’ll feel that muscle really having to work as the shoulder blade protracts during your torso rotation toward the ground.
  • Correct imbalances because of the unilateral focus so you can make sure both sides are strong and working efficiently.

You’ll also find this movement really helps you improve your mind-body connection to recruit many different muscles at once to stabilize everything. I know it can be a frustrating coordination and balance challenge to start, but that is so key for actually improving our strength gains ultimately.

The more efficient and able we are to recruit the correct muscles to stabilize, the stronger ultimately we will be so we can run faster and lift more.

And bonus, if you are a runner, this is for sure a must-do core move if you’ve ever had knee, hip or lower back aches and pains!

Now…how do you do the Single Arm Rotational Plank With Knee Drive?

To do the Single Arm Plank Rotation With Knee, set up in a side plank position from your hand with your bottom leg staggered on the ground behind your top leg. You won’t be on the inside of that front foot like a regular side plank but will actually want to place the sole of your foot on the ground.

Make sure your hand is under your shoulder as you set up and you’re engaging your back to support your shoulder so you aren’t shrugging or straining it. This is key to supporting you as you rotate.

Then lift that back leg as if kicking it back and up toward the wall behind you as you rotate your chest toward the ground to counterbalance yourself. You will reach that top hand out as if almost trying to create a line across your body from your heel to your finger tips.

You should almost feel like you’ve rotated into a front plank position as you lift and reach out.

Then pivot back into the side plank position and, as you do, tuck the knee of your extended leg and elbow of your extended arm together, slightly crunching. You’re performing a little cross body crunch as you twist. Make sure your hand is still under your shoulder so that you’re shoulder isn’t straining as you twist.

After slowly tucking the knee to the elbow and feeling yourself pivot around that shoulder, extend back out.

You will feel all the muscles around your rib cage as well as your obliques, abs, adductor and quads especially as you crunch together.

Move slowly so you can stabilize. Do not rush if you feel off balance.

How can you modify this move?

How can you adjust this move if you feel your shoulder straining or adductor or groin becoming overworked?

A first little tweak you can make to the move is touching your foot down behind you instead of lifting it up. This little touch to pause and balance in the movement may be all the modification you need to start.

If you struggle with hyper mobility, especially in your elbows, you may also choose to modify this off your forearm.

However, if you don’t feel in control of any aspect of this movement, your next modification should be off an incline. The higher the incline, the more you can reduce the resistance of the movement.

As you feel stable, you can slowly lower the incline to progress the move.

You may even find you combine the incline with the foot tap to start.

The key is making sure you’re able to properly stabilize that shoulder to really focus on those obliques working to rotate and help you stay balanced!

The Most Underrated HAMSTRING Exercise

The Most Underrated HAMSTRING Exercise

If you want to strengthen and build your hamstrings, you want to include both hip extension and knee flexion movements.

For hip extension, think Romanian Deadlift or Good Morning for example and for knee flexion think about those hamstring curl machines.

But how can you work and even isolate those hamstrings if you don’t have any equipment at home?

So many of those go to moves require gym access or at least more equipment…

That’s why I wanted to share one of my go-to knee flexion hamstring moves, whether you have no tools while training at home or access to a full gym – The Glute Bridge And Curl.

I love this move because it can help you really target those hamstrings through knee flexion or bending your knees to curl your heels toward your butt while also activating and working your glutes.

It is also easy to progress and regress in a variety of ways without adding loads to match your needs and goals. And if you do have a gym, you can even progress through the same but different by using a variety of tools to change the instability and even range of motion.

But before I go into some of the different variations, I want to chat about the basic form of the glute bridge and curl and how you can do this amazing move at home…

How To Do The Basic Glute Bridge And Curl:

To do the Glute Bridge And Curl without any fancy equipment, you can use towels on a hardwood or tiled floor or paper plates on carpet. If you even have a simple set of sliders or furniture movers those can work as well.

Place a towel under each foot, making sure your heel is on the towel, as you lie on your back with your knees bent and feet flat on the ground. Bend your elbows to drive your arms down into the ground. Perform a posterior pelvic tilt, slightly tilting your pelvis up toward your ribs. This will make sure you don’t arch your back as you perform the move.

Bridge up, squeezing your glutes.

Holding this bridge, slide your feet out to straighten your legs. You will lower your butt toward the ground as you lengthen but don’t lose that posterior pelvic tilt.

After fully extending your legs, curl your heels back in toward your butt to lift back up into the bridge. Almost think about trying to drag up the flooring as you curl back in so that you are creating tension to really work those hamstrings.

Return to the bridge and repeat the move.

Make sure you do not arch to lift up higher. You want to really use your glutes and abs to brace and support during this move so you can focus on those hamstrings powering the knee flexion.

Also, move slowly as you extend out to work your hamstrings through the eccentric portion of this move as well!

Modifications Of The Glute Bridge And Curl:

Now as simple as this move may seem, it is more challenging for our hamstrings than we actually give it credit for.

The great part is, this move is easy to modify to meet our needs. And, by modifying, we can even focus on each side independently to correct any strength imbalances we may have.

To modify this move, you can start by extending one leg at a time to focus on each side working. You can alternate curls or simply stay on one side.

Once you feel ready to progress from here, you can start with just using the two-leg bridge and curl for the eccentric portion.

You will extend both legs out slowly together, then curl one in at a time. Alternate which you curl in first and stay focused on that drag back in to really make your hamstring work.

If you do want to advance the move and get a unilateral focus, try a single leg bridge and curl with your other leg lifted up off the ground so it can’t assist.

Do not progress the move though if you feel your lower back compensating. You want to make sure to use those glutes in the bridge up and keep your abs engaged through that posterior pelvic tilt!

Equipment Variations Of The Glute Bridge And Curl:

If you do have access to different tool, you can even progress this move through doing the same but different.

You can create more instability from the version off of towels or sliders by using the suspension trainer. Or you can even increase the challenge by using a bigger stability ball which increases the height you have to bridge up!

If you have a rower you can even have some fun using that instead.

So many ways to vary a move and make it work for us.

What is your favorite way to perform the glute bridge and curl?

Want to stay up to date with all of the latest and greatest from Redefining Strength?

Join my FREE daily newsletter:

–> Join RS!


The Best Core Exercise You Aren’t Doing

The Best Core Exercise You Aren’t Doing

Your core is everything from your shoulders to your knees down your frontside and your backside.

And when you train your core you want to work in every plane of motion, including both anti-rotational and rotational core work.

You want to consider not only how to create a stronger core, but also a better mind-body connection to stabilize and support your shoulders, spine, pelvis, hips and knees.

And that is why I love this amazing core move the SIT THRU!

Now this move looks slightly odd and can feel awkward and complicated to start, it also requires more stability and mobility than we realize.

But it is an amazing move to work on your rotational core strength, targeting your abs and obliques while also improving your hip and shoulder mobility and stability. You’ll feel this move working the muscles around your ribs, your shoulders and arms as well as your quads.

It requires no equipment to do as well and can even be a great way to get your blood pumping, making it a fun move to even use as additional core work in an interval cardio workout.

Plus the basic Sit Thru can so easily be combined with other moves to match your needs and goals, whether it’s performing it as a Burpee Sit Thru, Crawl with Sit Thru or even Sit Thru to Thoracic Bridge!

So how do you do this amazing basic Sit Thru move and what if you aren’t yet ready for the full variation?

How To Do The Sit Thru:

To do the Sit Thru, start on your hands and knees with your hands under your shoulders and your knees under your hips. Tuck your toes under and press up onto your hands and toes or balls of your feet.

This is a bulldog position and your knees should be hovering a few inches off the ground.

Lift one foot to kick under your body as you rotate to face that way. As you bring your leg forward and through, extending it out, lift your hand on the side you’re kicking toward so you can rotate your chest open.

You will be supporting yourself with your other hand and foot. Make sure to keep that arm straight and do not shrug the shoulder.

You want to rotate all the way through with your leg out straight so that you are almost sitting, and even could touch your butt to the ground if you needed to pause and re-balance. This is the sit thru.

Then rotate back close, placing your hand back down as you bend your knee to move back into that bulldog position.

You want to avoid your legs straightening out more into the plank as you perform this move. That tight position is what not only works your quads but helps improve your mobility.

You also want to make sure your hands stay under your shoulders to help keep your shoulders stable while improving your shoulder mobility. Do not shrug as you do this move.

Then kick through to the other side.

The faster you move, the more challenging, and even cardio, the move will be!

But what if you don’t have the mobility or shoulder stability yet to do this move?

How To Modify The Sit Thru:

One of my favorite ways to modify the Sit Thru is off a bench or incline. By placing your hands up on a bench, you provide more space to perform the sit thru and you reduce the strain and load on your arms and shoulders, abs and quads.

It can allow you to still work on that same position and rotational move while improving your shoulder stability without the strain.

As you feel more comfortable and improve your mobility, you can lower the incline over time.

If you do not have an incline, you can also modify this move by kicking your leg under in that bulldog position without raising your hand. This can be great if you don’t yet have the shoulder stability too, however it does take out some of the benefits.

SUMMARY:

Just remember a move is only as good as our implementation. We need to regress to progress and make sure we are not just replicating a movement pattern but also feeling the correct muscles working.

Have some fun including the sit thru in your routine and feel that core working!

Ready to learn how to use moves to match your needs and goals?

Check out my 1:1 Online Coaching Program:

—> LEARN MORE

The Most Overrated Glute Exercise

The Most Overrated Glute Exercise

The clamshell exercise is a staple of any rehab program that calls for glute activation moves.

But honestly, it’s slightly overrated.

And so often done INCORRECTLY.

We end up rotating to get a bigger range of motion. We engage other muscles to try and rush to progress the move and add a band.

We aren’t intentional with the move while focusing on what we feel working.

But part of that is actually because it is so easy to cheat.

For such a seemingly simple move, it is so easy for us to cheat and compensate and ultimately perpetuate the existing issues by overusing the same muscles we are trying to avoid overusing.

All too often this basic move perpetuates the problem instead of activating the muscles we want it to.

We end up engaging our TFL or overworking our piriformis over actually getting our glute medius to pull it’s weight.

That’s why I wanted to share with you one of my favorite Glute Medius Activation Moves to do instead – The Wall Side Lying Lateral Raise.

But before I go into the glute medius move I prefer to use, I did just want to touch on 3 key cues if you decide to use that oh so basic clam exercise.

#1: Turn your top toe down toward the ground.

This cue can actually be useful in many glute medius moves to help inhibit the TFL if it tends to take over.

The internal tibial rotation, or rotation of your lower leg down toward the ground, can help you prevent the TFL from compensating for your glute medius.

When doing the clam, just turn that top foot toward the ground in front of your bottom foot instead of keeping your feet stacked or letting that top foot open up as you raise your top leg.

#2: Don’t focus on a bigger range of motion.

Yes we always want to strengthen through a full range of motion, but we want to make sure it is actually a range of motion we can control with the muscles we want to target.

Too often we end up rotating our entire body or start to overuse muscles like our piriformis to perform a bigger range of motion.

Instead of focusing on making the move bigger, focus on stopping the movement with the glute medius, really feeling it on the side of your butt.

It can even be helpful to put a wall or pole behind you and think about squeezing your butt slightly forward even as you open.

#3: Change your degree of hip flexion.

Struggling to establish that mind-body connection?

Try changing how much you flex or extend your hips.

While this can not only help us target the anterior or posterior fibers of the glute medius more, and make sure we are able to engage the muscle through a variety of postures, it can also help us find a position where we can most easily establish that mind-body connection, especially if we are struggling.

Once you are able to really feel the muscle working, you can even move to a more or less hip flexed position to use that engagement to help you create the mind-body connection while in a position you may not have felt it before!

But because each of us does have a different build and mind-body connection, whether even due to previous injuries, it can be useful to feel free to adjust our exact degree of hip flexion as we learn to master the move and use the correct muscles.

Now let’s talk about how to do the Wall Side Lying Lateral Raise and why I prefer this move over the basic clam.

The Wall Side Lying Lateral Raise:

If you’re struggle to engage your glute medius, it can be helpful to make sure you’re engaging your glute max as well. That’s why this move with the slight kick back can really help.

And because your TFL is a hip flexor and your piriformis assists with horizontal abduction when your hip is flexed to 90 degrees, it can be key to work on activating your glute medius while your hip is extended.

If you think about the clam, you aren’t kicking back and as easily able to use the glute max to help prevent your TFL from compensating.

You also are in that hip flexed position which lends itself to both your Piriformis and TFL engaging, two muscles that often compensate for our glute medius leading to lower back, hip and even knee aches and pains.

And that’s why this Wall Side Lying Lateral Raise is a great go-to glute medius activation move!

This move works on hip extension to engage your glute max while also working to improve your hips stability and glute medius activation.

To do this move, you may start with bodyweight and progress to a mini band variation with the band around your legs just above your knees.

Set up by bending that bottom leg to help you stabilize and set up lying on your side with your back to the wall. You want to set up a few inches out from the wall so you can kick back slightly into the wall. You can fully lie on your side with your bottom arm straight out on the ground or you can prop yourself up to rest your head in your hand.

Then lift your top leg up a few inches off your bottom leg and make sure you do NOT rotate that toe open. You can even turn that top toe slightly down toward the ground.

After lifting up a few inches, drive your heel back into the wall behind you.

From this position, slide your heel up the wall lifting your leg.

Perform this lateral raise but do not rotate your hip open to raise up higher.

Lift up and then slowly slide the leg down. Do not lower completely down and relax out. If you’re using a band, you want to make sure the band doesn’t pull you back down and that you keep tension on it even at the bottom.

You want your glute working the entire time.

Focus on feeling your glute 90
lifting your leg up, and if you have a band pushing against the band, as you feel your glute max working to drive your heel back into the wall extending your hip.

SUMMARY:

We have to remember that no one move is right for everyone. And even knowing when we DON’T feel a move working the correct muscles can be key so that we can prevent ourselves from perpetuating the problem and even select a move that does better help us establish that mind-body connection.

Use these cues to help yourself make sure you’re adjusting moves to fit your needs and goals and if you’ve been struggling to use the clam, try this lateral raise variation instead!

Working to activate your glutes? Check out my Booty Burner!

–> LEARN MORE ABOUT THE BOOTY BURNER