The Most Underrated HAMSTRING Exercise

The Most Underrated HAMSTRING Exercise

If you want to strengthen and build your hamstrings, you want to include both hip extension and knee flexion movements.

For hip extension, think Romanian Deadlift or Good Morning for example and for knee flexion think about those hamstring curl machines.

But how can you work and even isolate those hamstrings if you don’t have any equipment at home?

So many of those go to moves require gym access or at least more equipment…

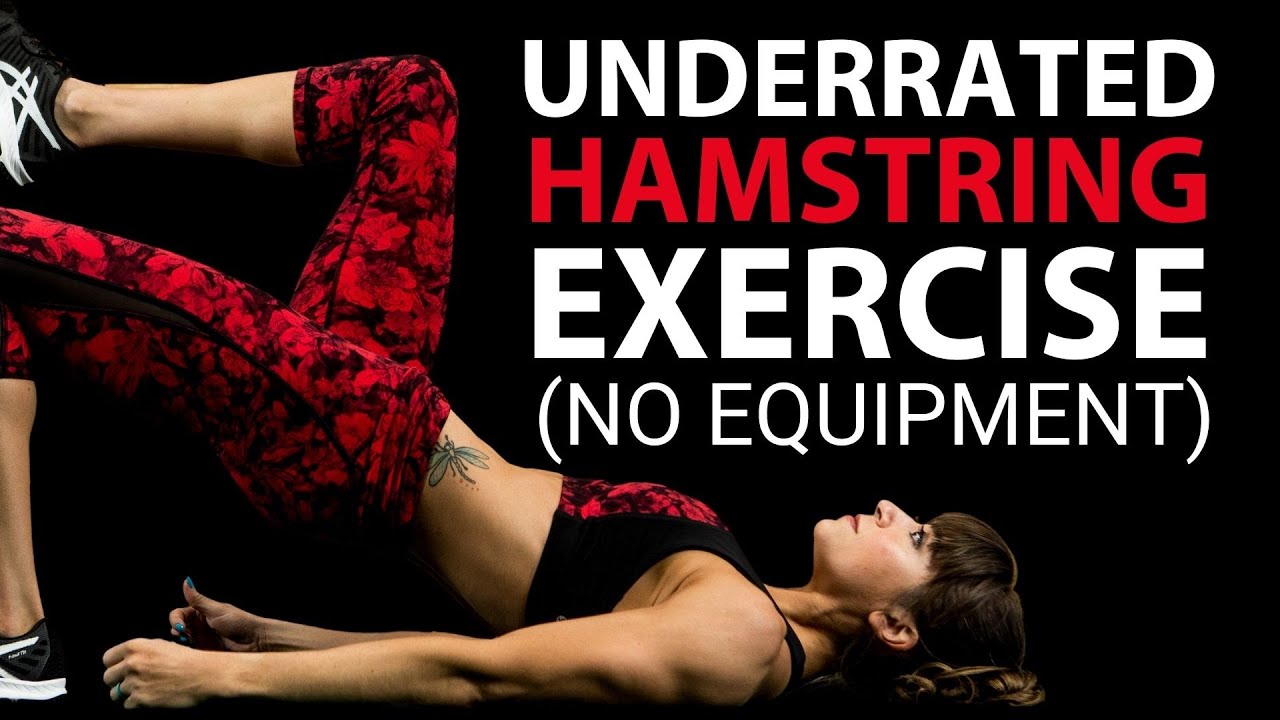
That’s why I wanted to share one of my go-to knee flexion hamstring moves, whether you have no tools while training at home or access to a full gym – The Glute Bridge And Curl.

I love this move because it can help you really target those hamstrings through knee flexion or bending your knees to curl your heels toward your butt while also activating and working your glutes.

It is also easy to progress and regress in a variety of ways without adding loads to match your needs and goals. And if you do have a gym, you can even progress through the same but different by using a variety of tools to change the instability and even range of motion.

But before I go into some of the different variations, I want to chat about the basic form of the glute bridge and curl and how you can do this amazing move at home…

How To Do The Basic Glute Bridge And Curl:

To do the Glute Bridge And Curl without any fancy equipment, you can use towels on a hardwood or tiled floor or paper plates on carpet. If you even have a simple set of sliders or furniture movers those can work as well.

Place a towel under each foot, making sure your heel is on the towel, as you lie on your back with your knees bent and feet flat on the ground. Bend your elbows to drive your arms down into the ground. Perform a posterior pelvic tilt, slightly tilting your pelvis up toward your ribs. This will make sure you don’t arch your back as you perform the move.

Bridge up, squeezing your glutes.

Holding this bridge, slide your feet out to straighten your legs. You will lower your butt toward the ground as you lengthen but don’t lose that posterior pelvic tilt.

After fully extending your legs, curl your heels back in toward your butt to lift back up into the bridge. Almost think about trying to drag up the flooring as you curl back in so that you are creating tension to really work those hamstrings.

Return to the bridge and repeat the move.

Make sure you do not arch to lift up higher. You want to really use your glutes and abs to brace and support during this move so you can focus on those hamstrings powering the knee flexion.

Also, move slowly as you extend out to work your hamstrings through the eccentric portion of this move as well!

Modifications Of The Glute Bridge And Curl:

Now as simple as this move may seem, it is more challenging for our hamstrings than we actually give it credit for.

The great part is, this move is easy to modify to meet our needs. And, by modifying, we can even focus on each side independently to correct any strength imbalances we may have.

To modify this move, you can start by extending one leg at a time to focus on each side working. You can alternate curls or simply stay on one side.

Once you feel ready to progress from here, you can start with just using the two-leg bridge and curl for the eccentric portion.

You will extend both legs out slowly together, then curl one in at a time. Alternate which you curl in first and stay focused on that drag back in to really make your hamstring work.

If you do want to advance the move and get a unilateral focus, try a single leg bridge and curl with your other leg lifted up off the ground so it can’t assist.

Do not progress the move though if you feel your lower back compensating. You want to make sure to use those glutes in the bridge up and keep your abs engaged through that posterior pelvic tilt!

Equipment Variations Of The Glute Bridge And Curl:

If you do have access to different tool, you can even progress this move through doing the same but different.

You can create more instability from the version off of towels or sliders by using the suspension trainer. Or you can even increase the challenge by using a bigger stability ball which increases the height you have to bridge up!

If you have a rower you can even have some fun using that instead.

So many ways to vary a move and make it work for us.

What is your favorite way to perform the glute bridge and curl?

Want to stay up to date with all of the latest and greatest from Redefining Strength?

Join my FREE daily newsletter:

–> Join RS!


The Most Overrated Glute Exercise

The Most Overrated Glute Exercise

The clamshell exercise is a staple of any rehab program that calls for glute activation moves.

But honestly, it’s slightly overrated.

And so often done INCORRECTLY.

We end up rotating to get a bigger range of motion. We engage other muscles to try and rush to progress the move and add a band.

We aren’t intentional with the move while focusing on what we feel working.

But part of that is actually because it is so easy to cheat.

For such a seemingly simple move, it is so easy for us to cheat and compensate and ultimately perpetuate the existing issues by overusing the same muscles we are trying to avoid overusing.

All too often this basic move perpetuates the problem instead of activating the muscles we want it to.

We end up engaging our TFL or overworking our piriformis over actually getting our glute medius to pull it’s weight.

That’s why I wanted to share with you one of my favorite Glute Medius Activation Moves to do instead – The Wall Side Lying Lateral Raise.

But before I go into the glute medius move I prefer to use, I did just want to touch on 3 key cues if you decide to use that oh so basic clam exercise.

#1: Turn your top toe down toward the ground.

This cue can actually be useful in many glute medius moves to help inhibit the TFL if it tends to take over.

The internal tibial rotation, or rotation of your lower leg down toward the ground, can help you prevent the TFL from compensating for your glute medius.

When doing the clam, just turn that top foot toward the ground in front of your bottom foot instead of keeping your feet stacked or letting that top foot open up as you raise your top leg.

#2: Don’t focus on a bigger range of motion.

Yes we always want to strengthen through a full range of motion, but we want to make sure it is actually a range of motion we can control with the muscles we want to target.

Too often we end up rotating our entire body or start to overuse muscles like our piriformis to perform a bigger range of motion.

Instead of focusing on making the move bigger, focus on stopping the movement with the glute medius, really feeling it on the side of your butt.

It can even be helpful to put a wall or pole behind you and think about squeezing your butt slightly forward even as you open.

#3: Change your degree of hip flexion.

Struggling to establish that mind-body connection?

Try changing how much you flex or extend your hips.

While this can not only help us target the anterior or posterior fibers of the glute medius more, and make sure we are able to engage the muscle through a variety of postures, it can also help us find a position where we can most easily establish that mind-body connection, especially if we are struggling.

Once you are able to really feel the muscle working, you can even move to a more or less hip flexed position to use that engagement to help you create the mind-body connection while in a position you may not have felt it before!

But because each of us does have a different build and mind-body connection, whether even due to previous injuries, it can be useful to feel free to adjust our exact degree of hip flexion as we learn to master the move and use the correct muscles.

Now let’s talk about how to do the Wall Side Lying Lateral Raise and why I prefer this move over the basic clam.

The Wall Side Lying Lateral Raise:

If you’re struggle to engage your glute medius, it can be helpful to make sure you’re engaging your glute max as well. That’s why this move with the slight kick back can really help.

And because your TFL is a hip flexor and your piriformis assists with horizontal abduction when your hip is flexed to 90 degrees, it can be key to work on activating your glute medius while your hip is extended.

If you think about the clam, you aren’t kicking back and as easily able to use the glute max to help prevent your TFL from compensating.

You also are in that hip flexed position which lends itself to both your Piriformis and TFL engaging, two muscles that often compensate for our glute medius leading to lower back, hip and even knee aches and pains.

And that’s why this Wall Side Lying Lateral Raise is a great go-to glute medius activation move!

This move works on hip extension to engage your glute max while also working to improve your hips stability and glute medius activation.

To do this move, you may start with bodyweight and progress to a mini band variation with the band around your legs just above your knees.

Set up by bending that bottom leg to help you stabilize and set up lying on your side with your back to the wall. You want to set up a few inches out from the wall so you can kick back slightly into the wall. You can fully lie on your side with your bottom arm straight out on the ground or you can prop yourself up to rest your head in your hand.

Then lift your top leg up a few inches off your bottom leg and make sure you do NOT rotate that toe open. You can even turn that top toe slightly down toward the ground.

After lifting up a few inches, drive your heel back into the wall behind you.

From this position, slide your heel up the wall lifting your leg.

Perform this lateral raise but do not rotate your hip open to raise up higher.

Lift up and then slowly slide the leg down. Do not lower completely down and relax out. If you’re using a band, you want to make sure the band doesn’t pull you back down and that you keep tension on it even at the bottom.

You want your glute working the entire time.

Focus on feeling your glute 90
lifting your leg up, and if you have a band pushing against the band, as you feel your glute max working to drive your heel back into the wall extending your hip.

SUMMARY:

We have to remember that no one move is right for everyone. And even knowing when we DON’T feel a move working the correct muscles can be key so that we can prevent ourselves from perpetuating the problem and even select a move that does better help us establish that mind-body connection.

Use these cues to help yourself make sure you’re adjusting moves to fit your needs and goals and if you’ve been struggling to use the clam, try this lateral raise variation instead!

Working to activate your glutes? Check out my Booty Burner!

–> LEARN MORE ABOUT THE BOOTY BURNER

The Best Deadlift Exercise You Aren’t Doing

The Best Deadlift Exercise You Aren’t Doing

It’s awkward. Uncomfortable. You can’t lift as heavy. And it takes coordination and balance…

I’m talking about one of the most underutilized but oh so important deadlift variations out there…

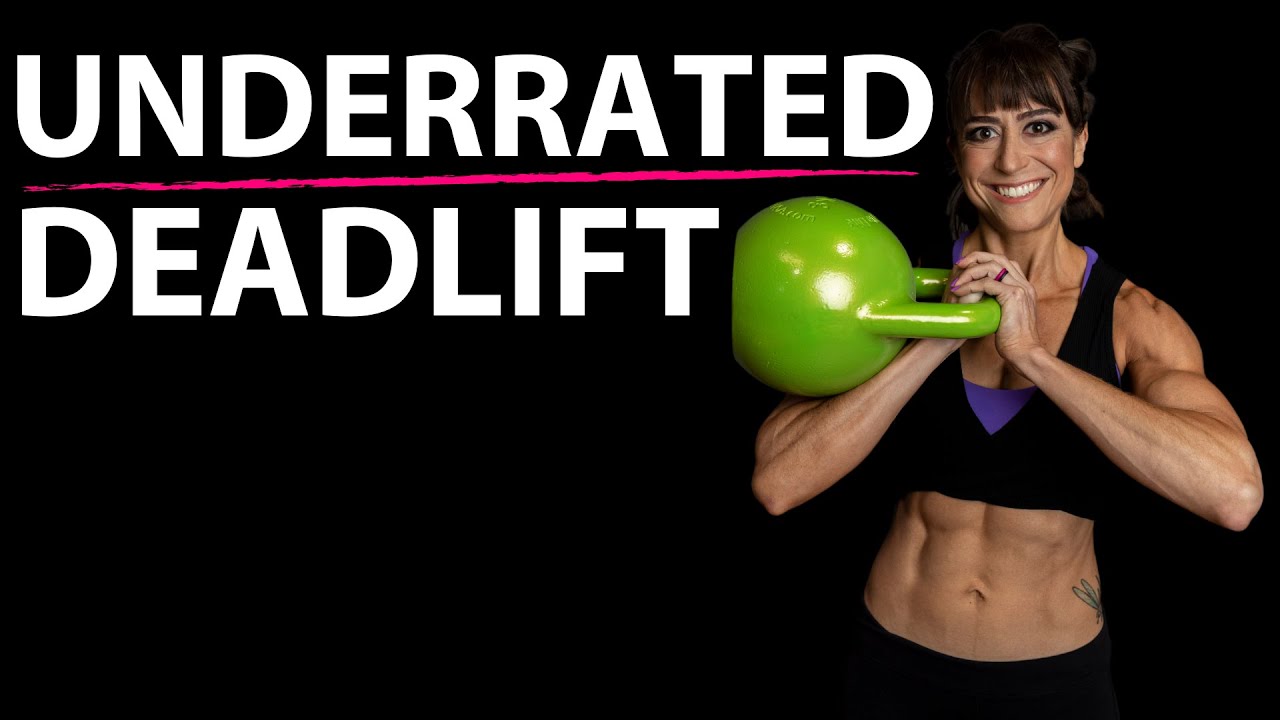
The Single Leg Deadlift.

All too often we avoid moves that challenge our balance because they make us feel uncomfortable in a way we don’t like and uncoordinated.

We may even dislike them because we feel we have to regress the movement instead of being able to beast mode out heavy loads like we can with other bilateral deadlift variations.

But for the exact reasons we often don’t like unilateral balance moves, like the single leg deadlift, we need to include them MORE.

They are super key to helping us stay strong as we get older!

Unilateral balance moves are a great way to correct any imbalances between both sides. They help us strengthen our weaker side without our stronger side compensating.

They help us avoid perpetuating the imbalance, which we can often do when lifting heavy with a bilateral move because, to move the weight, we simply rely on that stronger side.

So if you do want to beast mode out heavier deadlifts, the single leg deadlift is a great accessory move to help you build up.

It will still target your glutes and hamstrings to train that hip hinge movement pattern but in a way that will help you correct underlying recruitment issues!

And it will also help you become more focused and intentional about your foots connection to the ground. So much of powering that deadlift really does come from us pushing the ground away. And this focus on our foundation will pay off in terms of improving our stability and balance even in other moves.

The Single Leg Deadlift is a key exercise to help us focus on improving our stability from the ground up while improving that mind-body connection.

We have to remember a big part of lifting heavier is the strength of our mind-body connection. Our ability to recruit muscles efficiently and effectively allows us to lift more.

It’s why we want to include moves like this to really allow us to focus in on what we feel working and strengthen those weak links!

So how can you improve your Single Leg Deadlift form to embrace and master this amazing movement?

Here’s how I cue the move to help clients dial in their form…

To do the Single Leg Deadlift, start standing tall and shift your weight to one leg with the toe of your opposite foot touching down. As you shift your weight, think about the foot of your standing leg as a tripod, two points in the ball of your foot and one in your heel all pushing down into the ground as hard as you can.

Then instead of focusing on lifting that other leg toward the wall behind you, think about pushing the glute of your standing leg back.

As you sit back, your other leg will raise toward that wall to balance out your chest hinging over.

Do not reach toward the ground.

Soften your knee as you hinge to allow you to really load that glute and hamstring. You will even feel a stretch down your hamstring.

As you hinge, you want your hands to reach back toward the instep of your foot instead of reaching out. If you use weights, you want to lower the weights back toward your instep. This helps you load that standing leg and avoid overloading your lower back.

Keep your hips square to the ground as you hinge and don’t just try to reach lower and end up bending at the waist.

After hinging over to about parallel, think about pushing the ground away to stand back up. Too often we lose this focus on our foot’s connection to the ground which leads to us losing balance and even shifting our weight forward.

This shift or rock forward is also what can lead to lower back pain with deadlifts.

Drive that ground away to stand up tall and squeeze your standing glute at the top. Don’t be afraid to touch the other foot down when fully standing, but don’t use it to push back up.

While you can definitely modify this move by holding on to something if that helps you focus in more on what you feel working and your foot’s connection to the ground, I actually prefer to first try the single leg slider deadlift variation.

This is a great way to add stability to this unilateral move while allowing you to focus on the hip hinge movement.

It also teaches you to really sit back in that standing glute while worrying less about how high you lift that back leg.

With this modification, you will slide the foot back on the slider only as far as needed to counterbalance the hinge. Do not turn this into a lunge.

You can also use the variation as a progression for the single leg deadlift because sometimes the same but different can be the variety we need to move forward.

You can add loads to this single leg slider deadlift to make it just as challenging in a different way!

If you want to even create more of a challenge for yourself using the single leg deadlift, instead of adding loads, try different loading placements. Try a unilaterally loaded deadlift or even a front loaded one.

These may not create progression through heavier weights but they do by changing the activation of the muscles of your core and the instability created.

SUMMARY:

As uncomfortable and awkward as unilateral balance moves can be, they are key to helping us build functional strength.

Moves like the single leg deadlift will help keep you young while being a great accessory lift to improve your deadlifts not to mention your running!


3 Moves To FIX Hip Pain – The Ankle-Butt Connection

3 Moves To FIX Hip Pain – The Ankle-Butt Connection

Suffering from hip pain?

Frustrated because you feel like you’re doing all the proper rehab work, foam rolling and stretching the muscles around your hips while activating your glutes, but nothing seems to be adding up?

What if that’s because the original culprit of your pain, the area that lead to the overload, is not anywhere near your hip?

What if you keep overloading the same muscles because of a mobility restriction or instability at your foundation?

What if it’s even the result of an ache or pain from over a decade ago?

Like say that ankle sprain you never really did anything about and just rested until it felt better?

What if the whole cause of your hip pain is due to that Ankle-Butt Connection?!

Before I discuss how to improve your ankle mobility and stability to alleviate and prevent your hip aches and pains, I want to discuss that ankle-butt connection and why it’s so important.

The Importance Of The Ankle Butt Connection:

Your feet and ankles are your foundation.

Immobility or instability there can create movement compensations up your entire kinetic chain, resulting in not only hip but even knee, lower back and SI joint aches and pains.

Especially immobility or instability due to a previous injury.

When we get injured, there is a disruption to our natural recruitment patterns or our mind-body connection.

We often aren’t able to call on muscles as efficiently or effectively as we once could, unless we take time to rebuild.

Also, we often compensate as we avoid using the area to rest it, limping around or using crutches, and then, when we first get back to training, we all too often just jump right back in as if nothing happened.

But there have been changes potentially to our ankle range of motion and our ability to stabilize that we can’t ignore, even if there is no longer pain.

It’s why an ankle injury from years ago we’ve forgotten about can later lead to hip pain.

Without knowing it, we’ve created a crack in our foundation that is now affecting our entire structure.

It’s why you NEED to make sure to re-establish that proper mind-body connection.

And in the case of previous ankle injuries and issues, that means addressing not only your ankle mobility and stability but also the impact that ankle injury had on your GLUTES!

A 2006 study found that subjects with chronic ankle sprains had weaker hip abduction strength on the involved side. (1)

We have to remember that everything is connected. And perpetual overuse builds up to issues over time.

So while you may be wishing you could go back in time right now and address the injury when it happened, it’s still not to late to do the prehab work you need!

What are 3 moves you can do to improve your ankle mobility and stability so all of your glute activation work actually pays off?

3 Ankle Mobility And Stability Moves:

Move #1: Peroneal Foam Rolling:

Peroneal tightness can be linked to flat feet and ankle mobility restrictions which can lead to your knee collapsing in during exercises like the squat.

This compensation can lead to your TFL becoming overloaded and overworked and your glute medius activation work not paying off!

It is an important muscle to pay attention to because if just one side becomes short and overactive, which is why foam rolling is so important for this muscle, it can lead to a functional leg length discrepancy (you may “think” one leg is shorter when it is actually muscle tightness causing the symptoms) and a weight shift during bilateral, or two-legged, movements.

To roll out your Peroneal, a ball or small roller works best although you can use a larger foam roller.

Take a ball and place it on the ground with the side of your lower leg on top, starting just below the outside side of your knee.

Press your lower leg down into the ball with your hand.

Hold and relax. You can even circle your foot and ankle to help the muscle relax and release.

Then move it to another spot slightly lower down on your lower leg.

Move #2: Bear Squat To Foot Stretch:

What we often don’t realize is that even our BIG TOE can get “locked up.”

And that lack of mobility can not only impact our lunging but even our walking and running.

That’s why the Bear Squat to Foot Stretch is so key to include.

It will stretch our your toes and improve your calf flexibility and ankle mobility, improving specifically your dorsiflexion (your ability to bring your toes closer to your shin).

This stretch can even help you SQUAT deeper if you’ve felt like your range of motion when squatting is limited.

To do this stretch, start kneeling on the ground with your feet flexed. Sit back on your heels. Rock side to side to stretch your feet.

Then lean forward and place your hands down on the ground. Push your butt up into the air, driving your heels down to the ground.

Relax your calves and try to get your heels down to the ground. You can pedal your feet to focus on each side independently.

Pause then lower your knees back down to the ground and sit back on your heels.

Make sure that as you drive your butt up, you are pressing yourself back so that your driving your heels down.

You can walk your hands in just a little bit closer to your knees to help you feel the stretch a little bit more too.

If you can’t sit back on your heels from that kneeling position, you can do a version of this against the wall barefoot. Place the ball of your foot on the wall to extend your toes.

Then drive your knee forward toward the wall keeping your heel on the ground. Pause then relax out and repeat.

Move #3: Calf Raise Circles:

When you do the basic calf raise, have you ever noticed you tend to rock out on your feet? Or maybe you slightly rock in?

These compensations can result in there still being instability, or even overworked muscles, in your lower leg.

That’s why I love Calf Raise Circles.

This variation is a great way to make sure you’re improving your ankle stability while addressing each aspect of your lower leg.

To do Circle Calf Raises, start standing with your feet about hip-width apart. You can face a wall or table or hold on to a pole if you need a little help balancing so that you can really focus on circling.

Don’t get ego in this move and end up rushing through just because you’re trying not to hold on.

Then start to circle by rocking to the outside of your feet. Slowly come forward toward your pinky toe. Then come up onto your toes slowly circling from your pinky toe toward your big toe.

Come up as high onto your toes/balls of your feet as you can.

Then reach your big toe and circle in toward the inside of your feet as you lower your heel down.

Then come back up, this time starting with the big toe and circling out toward your pinky toe before coming down on the outsides of your feet.

Repeat circling back up and in.

To progress this move, try extending the range of motion, performing it off a plate weight or step.

But really focus on feeling each part of that circle!

SUMMARY:

Create a solid foundation by using these 3 moves to improve your foot and ankle mobility and stability. It can help you prevent the overload perpetuating your hip pain!

For a great 5 minute foot and ankle mobility series using these 3 moves, and some other bonus ones, check out this series – The 5-Minute Foot And Ankle RStoration Series.

Exercises For Hip Pain RELIEF (5 Daily Hip Pain Moves)

Exercises For Hip Pain RELIEF (5 Daily Hip Pain Moves)

Unfortunately hip pain is an all too common complaint.

And the best rehab is prehab – preventing those injuries before they really build up by recognizing and addressing those “minor” aches and pains.

Too often we simply try to push through a sore hip. We accept a limited range of motion.

We just keep training hard because it “loosens up” as we go or “only hurts at specific times.”

But those little nagging aches and pains are what end up resulting in injuries.

That’s why I wanted to share 5 moves you could include in your warm ups and weekly routine to prevent those annoying little aches and pains from ever resulting in an injury!

Best to act BEFORE the problems really occur!

So what are those 5 prehab moves?


5 Exercises For Hip Pain:

Rectus Femoris Foam Rolling:

The psoas is the sexy hip flexor muscle to talk about, but this hip flexor muscle, which is also a quad muscle, can directly impact both the hip AND the knee so it is a key muscle to pay attention to – it’s the Rectus Femoris.

Tightness of this muscle will not only hinder proper glute activation but lead to lower back, hip and knee issues.

It may be why you had a knee issue on one side and now have hip pain!

So because of the impact this muscle has on multiple joints it is a key muscle to include in your prehab routine.

Usually this muscle becomes short and overactive, which is why it is key you start by relaxing and releasing it through foam rolling.

That will then allow you to better activate your glutes and improve your hip extension and mobility.

If you have had issues or injuries on only one side, you may find you only need to address tightness on one side.

To roll out the Rectus Femoris, place a ball in the middle of your quad. You can also use a roller to reduce the pressure on the muscle. While you want to apply pressure to help the muscle relax as you hold, if the pressure is too much and you tense against it, you won’t benefit. So start with a softer ball or foam roller instead.

Hold and then even tense the muscle and relax as you hold to help it release.

Spend at least 30 seconds on any tight spots you find and hold up to 1 minute.

Piriformis Foam Rolling:

Piriformis issues are all too common these days and are often linked with the fact that we simply spend far too much time seated. Not to mention many of us even choose to do exercise activities, like cycling that still keep us in that seated position!

So it is key we address the fact that this muscle can become tight and shortened and then lead to issues like hip pain and even sciatic compression BEFORE the problems really occur.

That’s why I like to include some foam rolling for the piriformis in my prehab or warm up routines.

A ball works best to really apply more pressure, but you can use a roller especially starting out. You want to find the spot where the top of your back jean pocket would be.

If you use a roller, cross one ankle over the other knee to really help address tightness of the muscle as you lean into that side.

You can then push your knee open and relax out as you hold on the spot.

If you’re using a ball, you may find it helpful to lift and lower the leg as you hold.

Just make sure you breathe and relax as you hold.

Single Leg Hip Thruster:

After starting to relax overactive muscles, you want to start to stretch and work the hip through a full range of motion.

And a great way to do this while also activating our glutes, which are commonly UNDERACTIVE is through activation moves like the Single Leg Hip Thruster with Knee Hug!

Activation moves like this stretch out tight hip flexors through a process called reciprocal inhibition. Basically by engaging your glute to drive your hip into extension you stretch out that shortened hip flexor.

So especially if you’re short on time, you can use this move to stretch and activate all in one!

To do this move, you’ll hug one knee in toward your chest as you set up with your back on a bench. You can look down slightly toward your knees. This cervical flexion can actually help with glute engagement and can help you avoid arching your back.

Use that posterior pelvic tilt to brace your abs as you drive up. Squeeze your glute to extend your hip and avoid arching your lower back to get up higher.

Relax back down and repeat.

Unilateral moves like this are key if you have one side that is weaker or tighter; however, it also makes the exercise harder.

You may find you start with the glute bridge variation of this OR even an 80/20 hip thruster so that you reduce the resistance on that single leg.

You want to make sure your glute is the prime mover and that you don’t feel your hamstrings or quads compensating instead.

Hinged 3-Way Hip Circles:

It’s key we not only work on hip extension but also abduction and even flexion. Basically we want to make sure we mobilize our hip through a full range of motion while building stability through that full ROM.

That’s why this Hinged 3-Way Hip Circle move is so amazing.

You can do a version of this move fully standing and balancing, which is a great option IF you really want to focus on that balance element. You can also do it quadruped.

Even implementing all three over a progression can help you get the best results.

I find using the balance assist and slightly hinged position though really helps to better activate the glute through both the extension and even abduction for most people.

Lean forward against a wall or on a chair or bar for support.

Drive your leg back first. Think less about how high you kick up and almost think about stopping the lift with your glute. Feel yourself squeeze your glute.

Then bend your knee as you lift your leg out to the side. Focus on really feeling that glute lift over rotating away to lift up higher.

Fight to keep your lower leg parallel to the ground. We tend to either want to raise our foot up higher and internally rotate our hip (use the TFL) or externally rotate our hip (which can utilize more piriformis) so really focus on that glute medius.

Then with the knee bent, drive your knee in toward your chest and even round slightly to feel your abs.

We aren’t just mobilizing the hip but also activating muscles to improve our hip stability!

With this move you’re hitting your glute max, medius and even your abs!

Side Lying Series:

The glute medius is key to improving our hip stability and even our glute max activation, which is why it’s essential we include activation exercises for it.

Strengthening this muscle will help us avoid hip pain and even help us lift more and run faster!

One of the simplest but most killer activation series for it, is the Side Lying Series. It is key though that you avoid letting your TFL take over.

Using a slight internal rotation of that lower leg, so turning the toe down toward the ground is key.

Do not let your body rotate open. AND if you’ve had piriformis issues, definitely be careful you don’t start to turn that toe open or externally rotate your hip.

So often we want to allow our TFL or piriformis to compensate for that glute medius.

You’ll then lift the leg up at least 8-10 inches off the bottom leg. This will engage the glute before you even start.

You’ll then run through all, or a combination of side lying moves on one side before switching. Do not rush through or disengage by lowering your leg.

You can do the side lying leg raise, front kicks, back kicks, front to back kicks and then even the bicycle.

All of these hit different aspects of the glute medius AND work it while in both hip flexion and extension.

This series is amazing for runner’s especially using the bicycle because it works on that hip mobility through a full gait motion.

SUMMARY:

The best way to avoid annoying chronic hip pain is to do prehab or those mobility and activation moves to address common postural distortions or previous injuries BEFORE pain adds up.

These moves can be used in your warm up to even help you get more out of your workouts by improving your range of motion and helping you prep proper recruitment patterns BEFORE you lift or run.

If you’re looking to prevent ankle, knee, hip and lower back aches and pains, check out my BOOTY BURNER program!

–> LEARN MORE


the Most Underrated Glute Exercise

the Most Underrated Glute Exercise

The stronger your mind-body connection is?

The more you can lift, the faster you can run and the further you can cycle!

Basically the STRONGER YOU ARE!

Strength is not just about brute force but also about neuromuscular efficiency – how quickly can you recruit the CORRECT muscles to perform a movement and produce force.

That’s why it is key we include exercises to really improve that mind-body connection and make sure we are able to engage the correct muscles whenever we need.

Because as much as we focus on form, proper form does NOT always mean you’re engaging the correct muscles.

Actually often the more experienced a lifter you are and the more athletic you are, the more you can mimic a proper looking movement pattern while compensating and recruiting the incorrect muscles to do so.

This can not only result in injury but often holds us back from lifting as much as we truly can.

It prevents us from being as strong as possible because we aren’t using muscles efficiently together. We aren’t making the correct muscles pull their own weight.

That’s why you need to include some isolation moves to activate those underactive muscles and make sure you’re engaging the correct muscles at the proper times.

One muscle that often needs to be the focus of our activation work is our GLUTES.

Our glutes are commonly underactive due to our modern lifestyle.

So focused activation work can help us improve our mind-body connection to better recruit our glutes during compound lifts and when we run or cycle.

One of my favorite moves, and a very basic and often underutilized move, is the Single Leg Bent-Knee Reverse Hyper.

This move is fundamental if you want to improve your hip extension and focus on isolating those glutes.

And it’s a really great way to test if your hamstrings tend to want to take over and compensate for your glutes.

Often our hamstrings can become synergistically dominant for underactive glutes and that can result in hamstrings strains, lower back, hip and knee pain.

So if you tend to feel your hamstrings even during moves like glute bridges? You need to give this reverse hyper variation a try.

To first test your glute activation, lie face down on the ground. You can relax your chin on your hands as you straighten both legs out. Then bend one knee to about 90 degrees. Flex that foot. Do not curl the heel in toward your butt as this will engage your hamstrings.

Then drive your heel toward the ceiling and extend your hip.

What do you feel firing first? Do you feel your hamstring first or your glute?

Do you feel both? Or can you just isolate your glute?

If you can just isolate your glute fabulous! Do 15-20 reps and pause at the top to really establish that mind-body connection and even get a little pump going.

If you can’t feel your glutes, try adjusting how you’re cueing and performing the move.

Here are a few tweaks to try.

#1: Focus on driving your hip down into the ground as you drive the heel back so you don’t rotate open. Think about almost pushing your hip bone down into the ground instead of just lifting up.

#2: Think about STOPPING the lift with your glute over just trying to lift up higher. You want to focus on that glute engagement over the movement itself.

#3: Kick just slightly out as you lift. Remember not to curl your heel in toward your butt. Our hamstrings are worked by that knee flexion so avoiding it can help. However, going too straight with your leg can also make it harder for some to focus on their glutes.

#4: Slightly abduct your knee or move it out to the side before you lift. This can better engage the glute medius to help engage that glute max. Just be careful you don’t rotate your hip open. Just slightly move the knee out to the side.

Try one of these tweaks at a time to see what helps. You may even find you need to combine all the cues to get that glute firing without the hamstring trying to take over.

As silly as it may seem, sometimes just changing how we cue ourselves to perform a movement with a very slight adjustment can really help us better establish that mind-body connection when we’ve struggled in the past.

Just don’t rush through the movement. Pause and assess. Be intentional with the exercise over just trying to get through the reps.

Doing the “right moves” without feeling the correct muscles working won’t get you the results you want.

Focus on activating your glutes.

SUMMARY:

Use this underrated glute isolation move as both an activation exercise but also a test of hamstring compensation. It is a great way to make sure your hamstrings aren’t trying to take over and work when your glutes truly should be.

Be conscious of what you feel working during your workouts and do not simply go through the motions.

The more we can truly create proper recruitment patterns and use the correct muscles efficiently and effectively, the stronger we will be.

Sometimes we need to take things back to basics to get results.

We are never above those simple fundamentals!

Working to improve your glute activation?

Check out my Booty Burner Program!

–> LEARN MORE