You don’t need fancy equipment or to spend hours at the gym working out to get results.
When you’re short on time, all you need is your own bodyweight and 10 minutes.
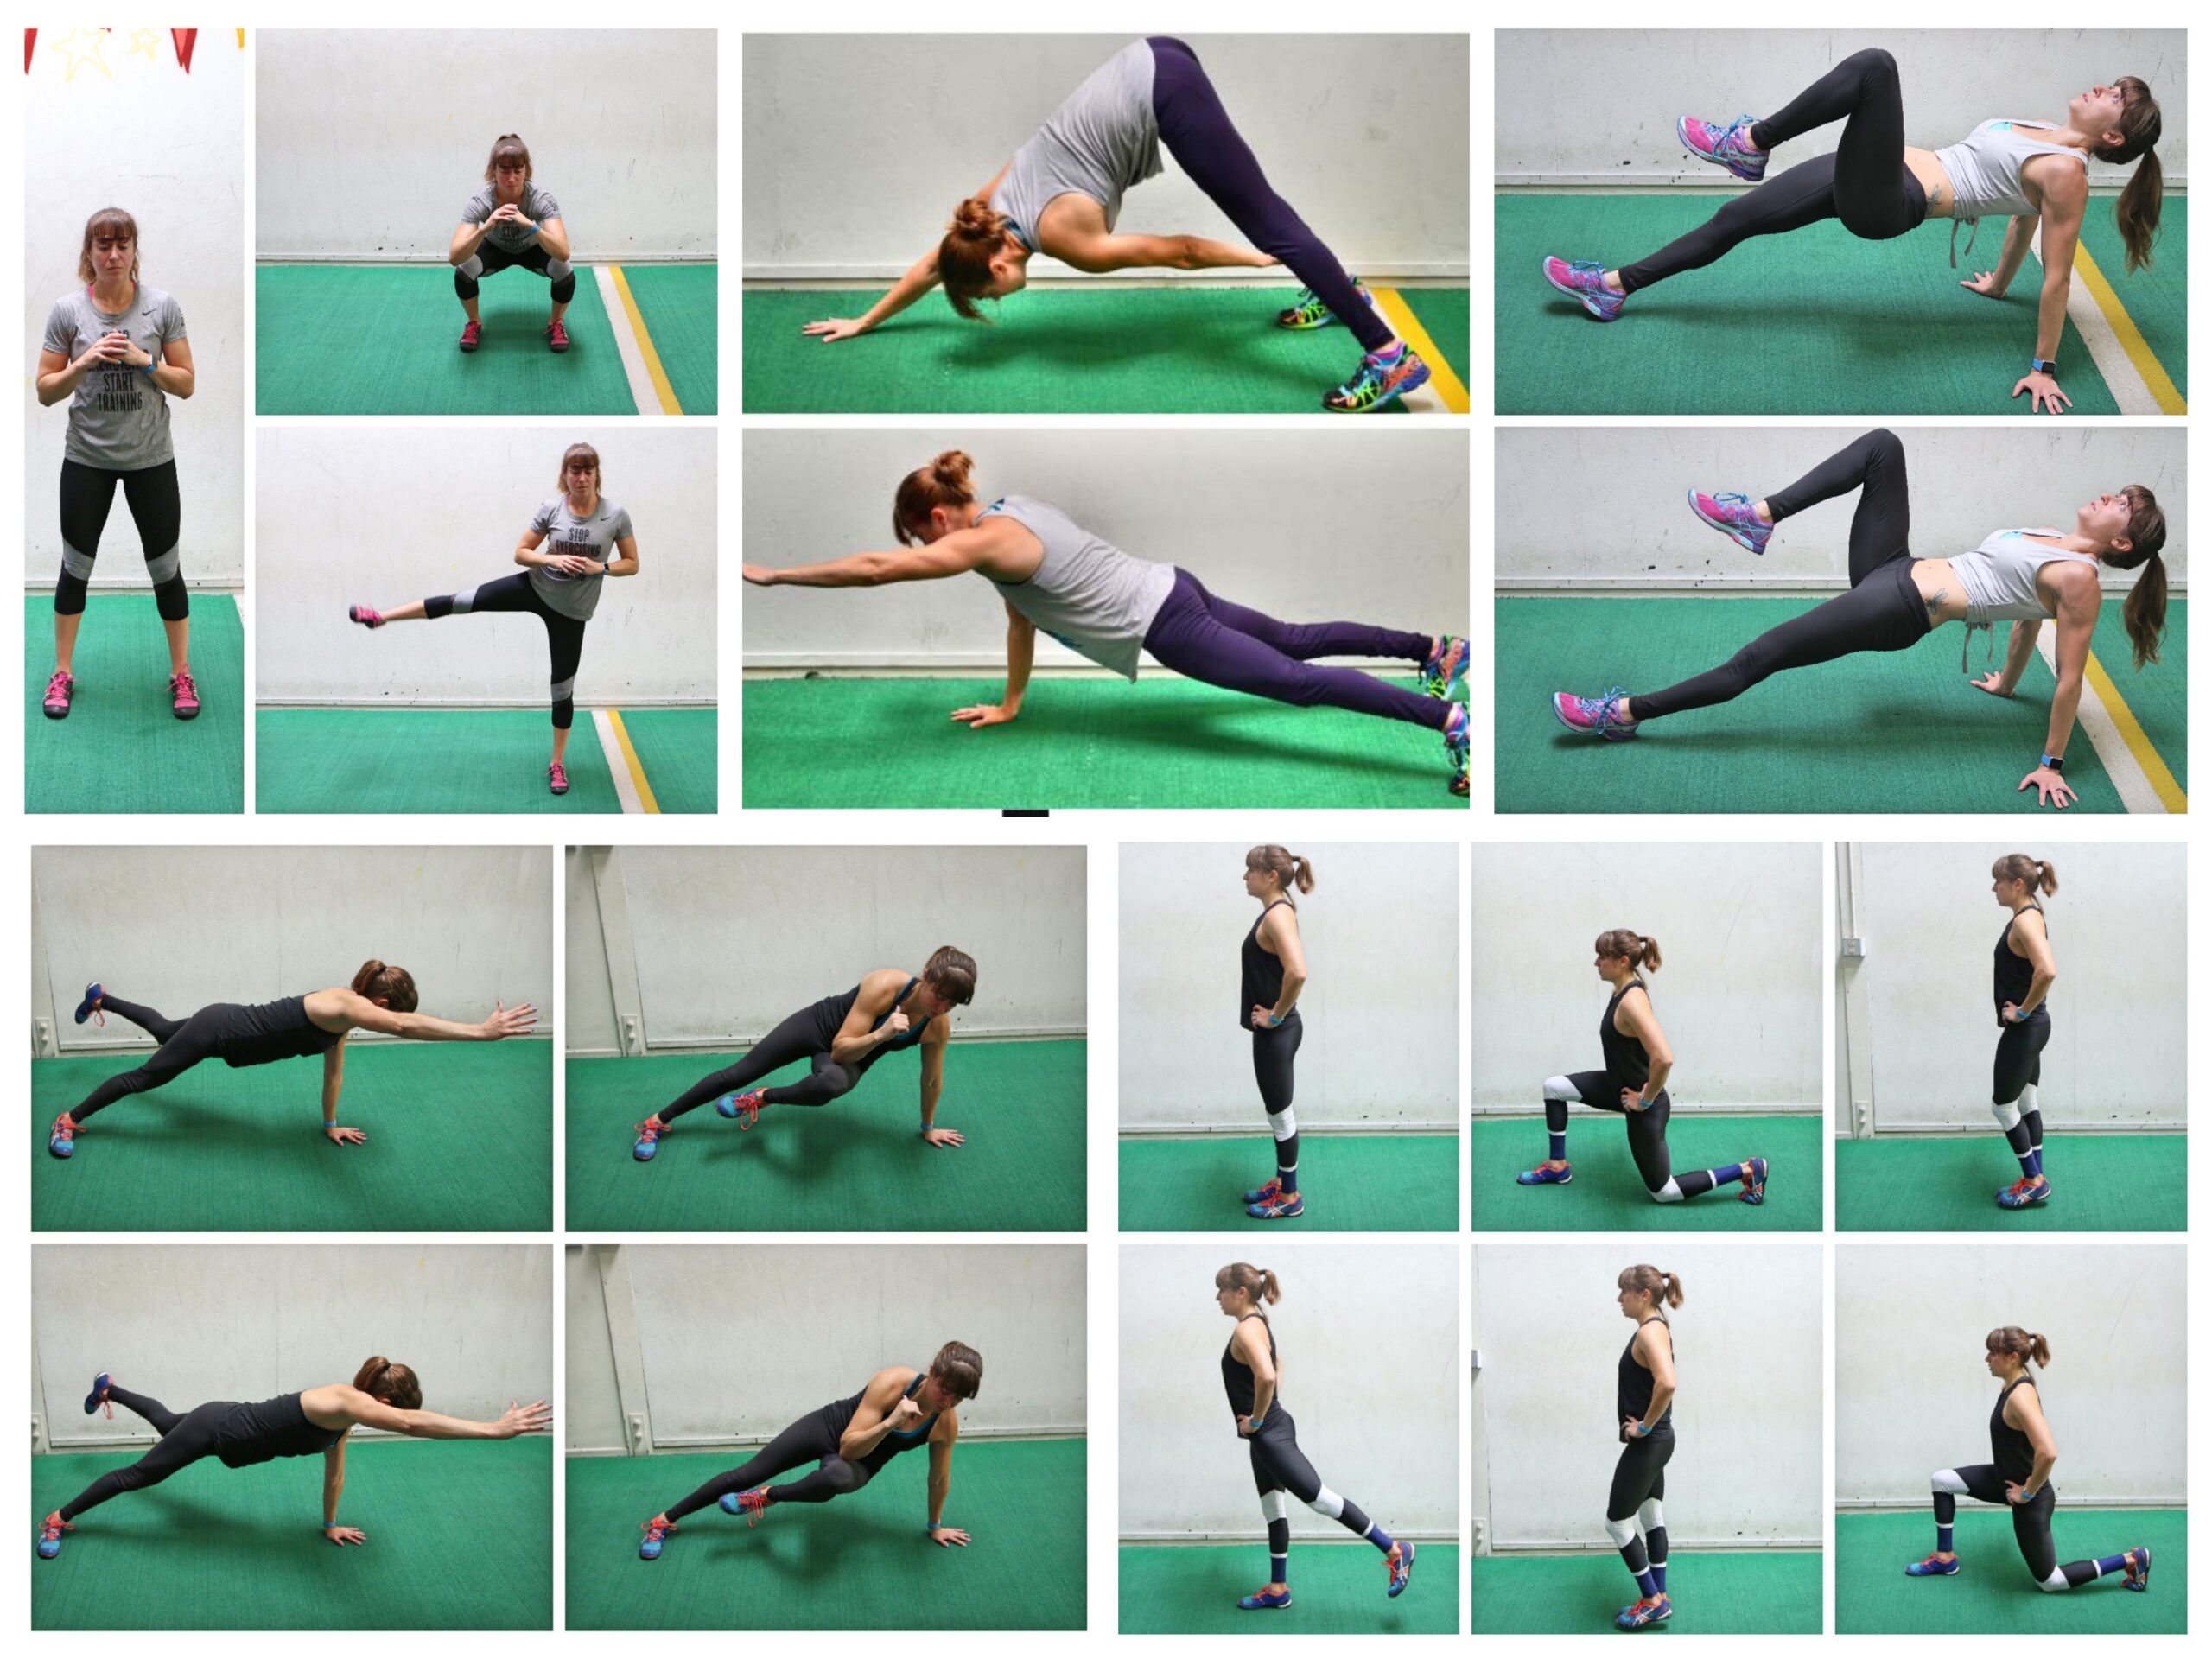
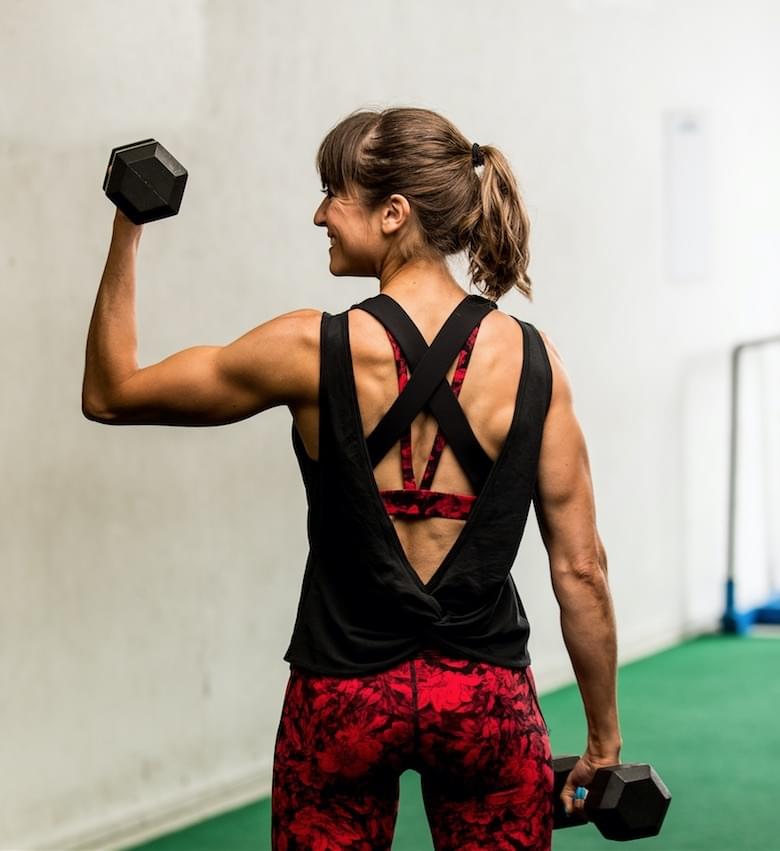
In that time you can get in a killer workout to strengthen your ENTIRE core – everything down your frontside AND your backside.
And while this workout is called the Backside Burner it targets more than just your back, hamstrings and butt. It will also work your abs, serratus anterior, obliques, quads and shoulders!
Complete 3 rounds of each circuit, moving right from one exercise to the next. After you finish the first circuit, perform 40 seconds of active rest before moving on to the second circuit. Beginners can fully rest between circuits instead of performing the active rest. Click on each exercise below to see a video demonstration and more information!
(PLEASE NOTE….this is of course a discussion about “healthy” overall alcohol intake and a “healthy” relationship to drinking so if discussing alcohol is a trigger, please ignore this post and know I will love you for doing so.)
I get asked if I drink it…
YES.
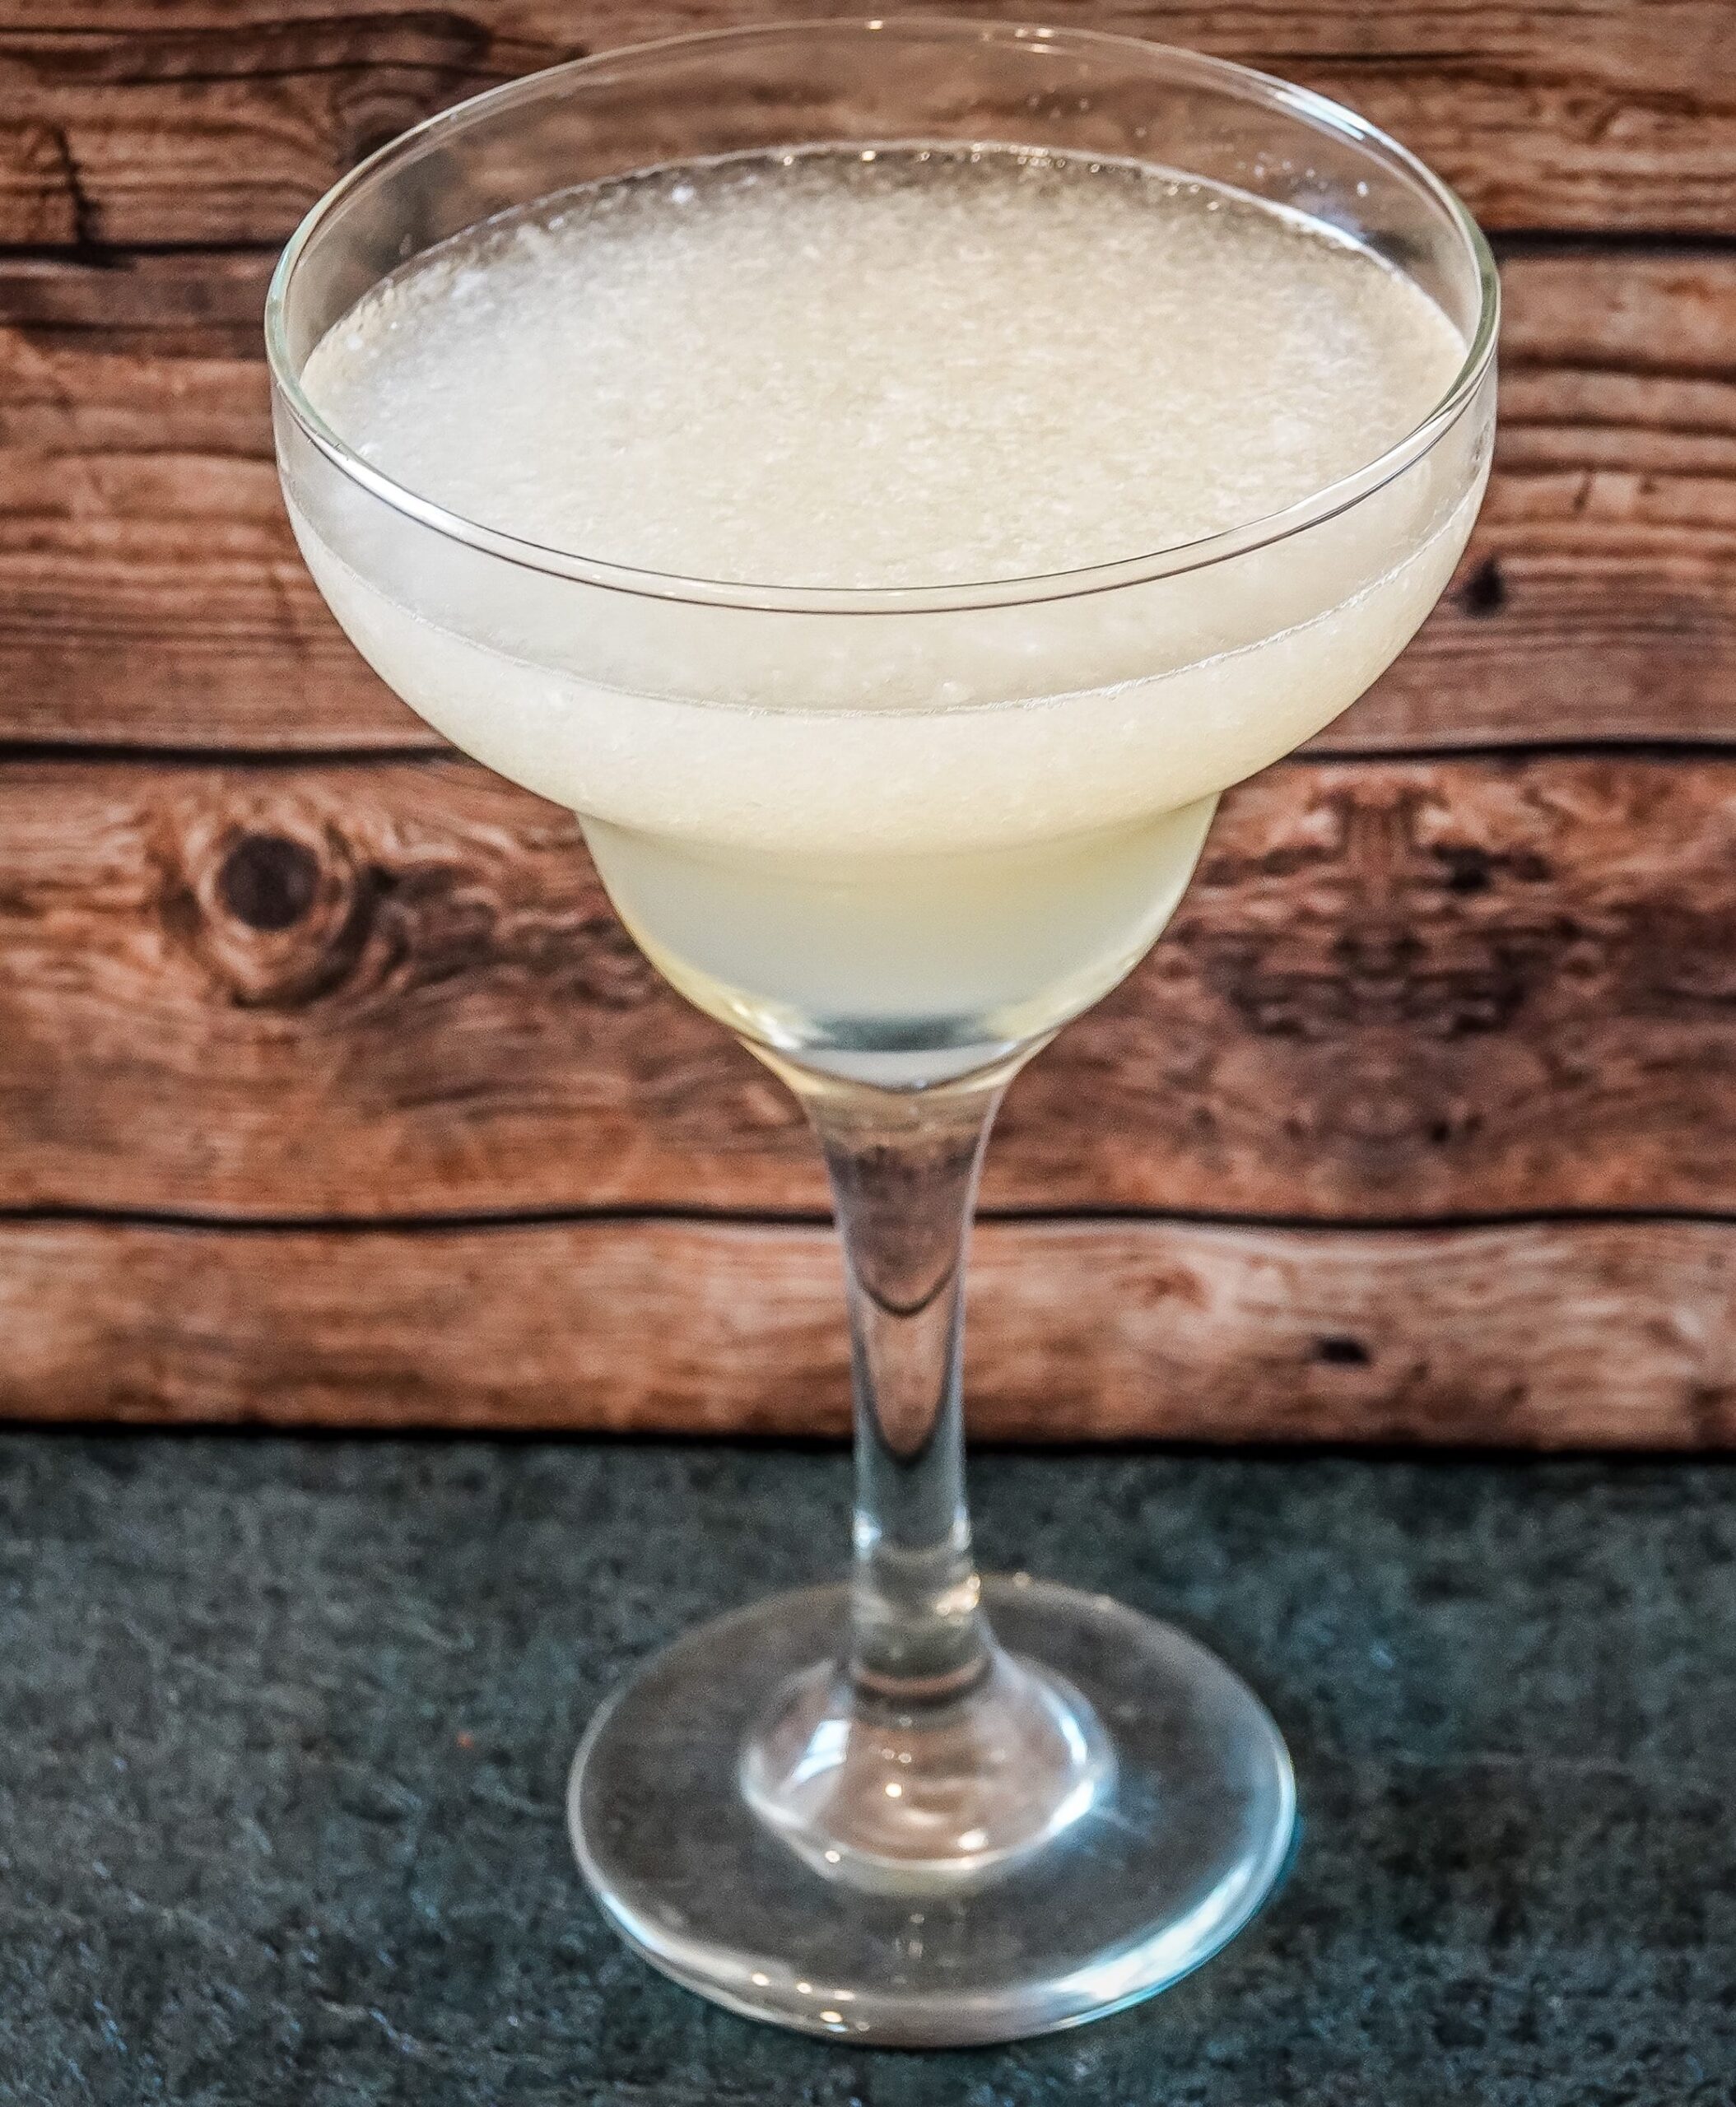
Beer?…meh. Wine?…meh. Craft cocktails and margaritas?
Hells to the YEAH!
I also get asked about how it fits into the macro cycling program and a healthy lifestyle in general.
I’ll tell you right now…
NO alcohol is healthy.
Now don’t go trying to defend the health benefits of your wine…Cause that just really isn’t all that it’s touted to be.
First off, most of us DO NOT actually get those supposed benefits.
And secondly, most of us aren’t really consuming wine for it’s health benefits in the EXTREMELY moderate amounts it should be consumed.
Basically studies showed the healthiest amount of alcohol was ZERO.
Sorry to break it to you, but as I jokingly say all of the time – Alcohol is a toxin.
Drink it knowing this.
But that doesn’t mean there can’t be a reason to ENJOY alcohol.
I would argue the only real “benefit” of alcohol is that you ENJOY it and life is meant to be enjoyed.
And that by relaxing, and enjoying a couple of drinks with friends, you can lower stress levels, which may, in the end, do much more to benefit your overall health than a few drinks will do to negatively impact it.
Because STRESS does play a major role in our overall health. Much more of one than we give it credit for.
So if alcohol is a part of your lifestyle, it doesn’t have to be eliminated.
But how do you TRACK alcohol if you’re counting macros?
I do tell clients though that when they are starting out with tracking their macros to keep it to their “cheat day” or at least 1-2 set days.
Logging alcohol is an interesting thing.
While beer and wine will register a few carbs, alcohol will register as calories but not really a macro since it’s…well…it’s own macro.
So if you’re trying to track and log, you can count it as either a fat or carb, whichever you have more of with the ratio you are using.
You will then divide the calories in your alcohol by 4 for carbs or 9 for fat to get the grams of each you would have consumed. (No you can’t count it as protein :-P)
If you can, I do recommend counting it as a fat because alcohol suppresses fat oxidation.
So alcohol can fit into a balanced lifestyle even while you’re tracking to get a specific result.
I will tell you though that if you want FASTER RESULTS, eliminating alcohol, if even just for a time, can be key.
Let’s face it…most of us get a few drinks in us and want some not so healthy treats!
Plus, even if you avoid overindulging, alcohol can also negatively impact the benefits you see from your training done PRIOR TO drinking by inhibiting protein synthesis and lipolysis (or fat loss).
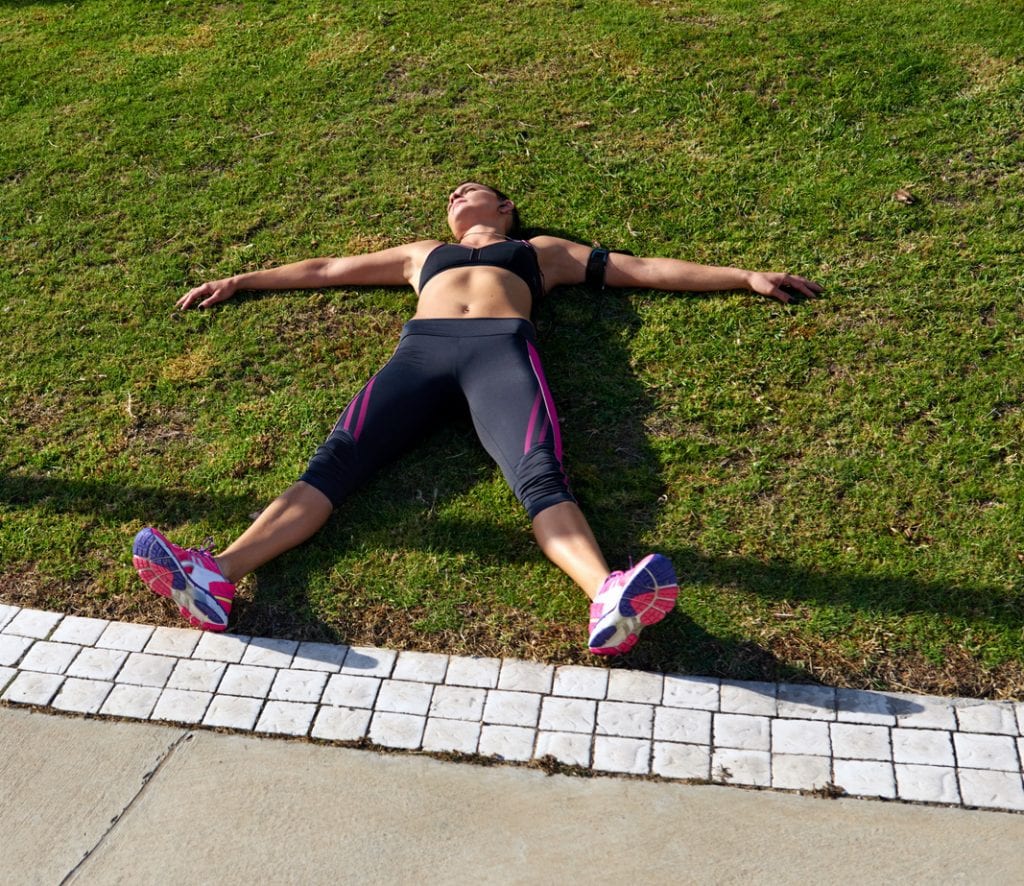
Not to mention it usually makes for a crappier training session the next day (hehe this picture below cracks me up)!
And dudes…you have it worse as drinking negatively impacts your testosterone levels too!
Plus, it can perpetuate and create inflammation, which can not only make you feel aches and pains more but be detrimental to your workouts AND your recovery!
So, while I’m sure this sounded negative, my overall feeling is that you can find a balance and that alcohol doesn’t have to be something you eliminate.
Just go in with your eyes wide open when you do decide to indulge.
Find that lifestyle balance that helps you eat according to your goals!
And all too often the point of pain is NOT where the problem is.
That is why, when you have aches and pains, especially nagging ones that you can’t seem to get rid of, you need to start searching further away from the point of pain.
Often the first “rehab” exercises we start to include focus on shoulder mobility and strengthening of those muscles around the joint.
And this is a great place to start!
But what if, despite you doing all of the proper rehab work, things just aren’t fully getting better?
Or what if you continue to suffer from flare ups that don’t seem to be triggered by any specific upper body exercises that you can identify?
What if the actual culprit of your shoulder pain is an issue at your lumbo-pelvic-hip complex?
That’s right…what if that lower back pain or anterior pelvic tilt or SI joint issue you’ve been having is CONNECTED to your shoulder pain?!
What if your lower back, hips and shoulders have a shared “enemy”?
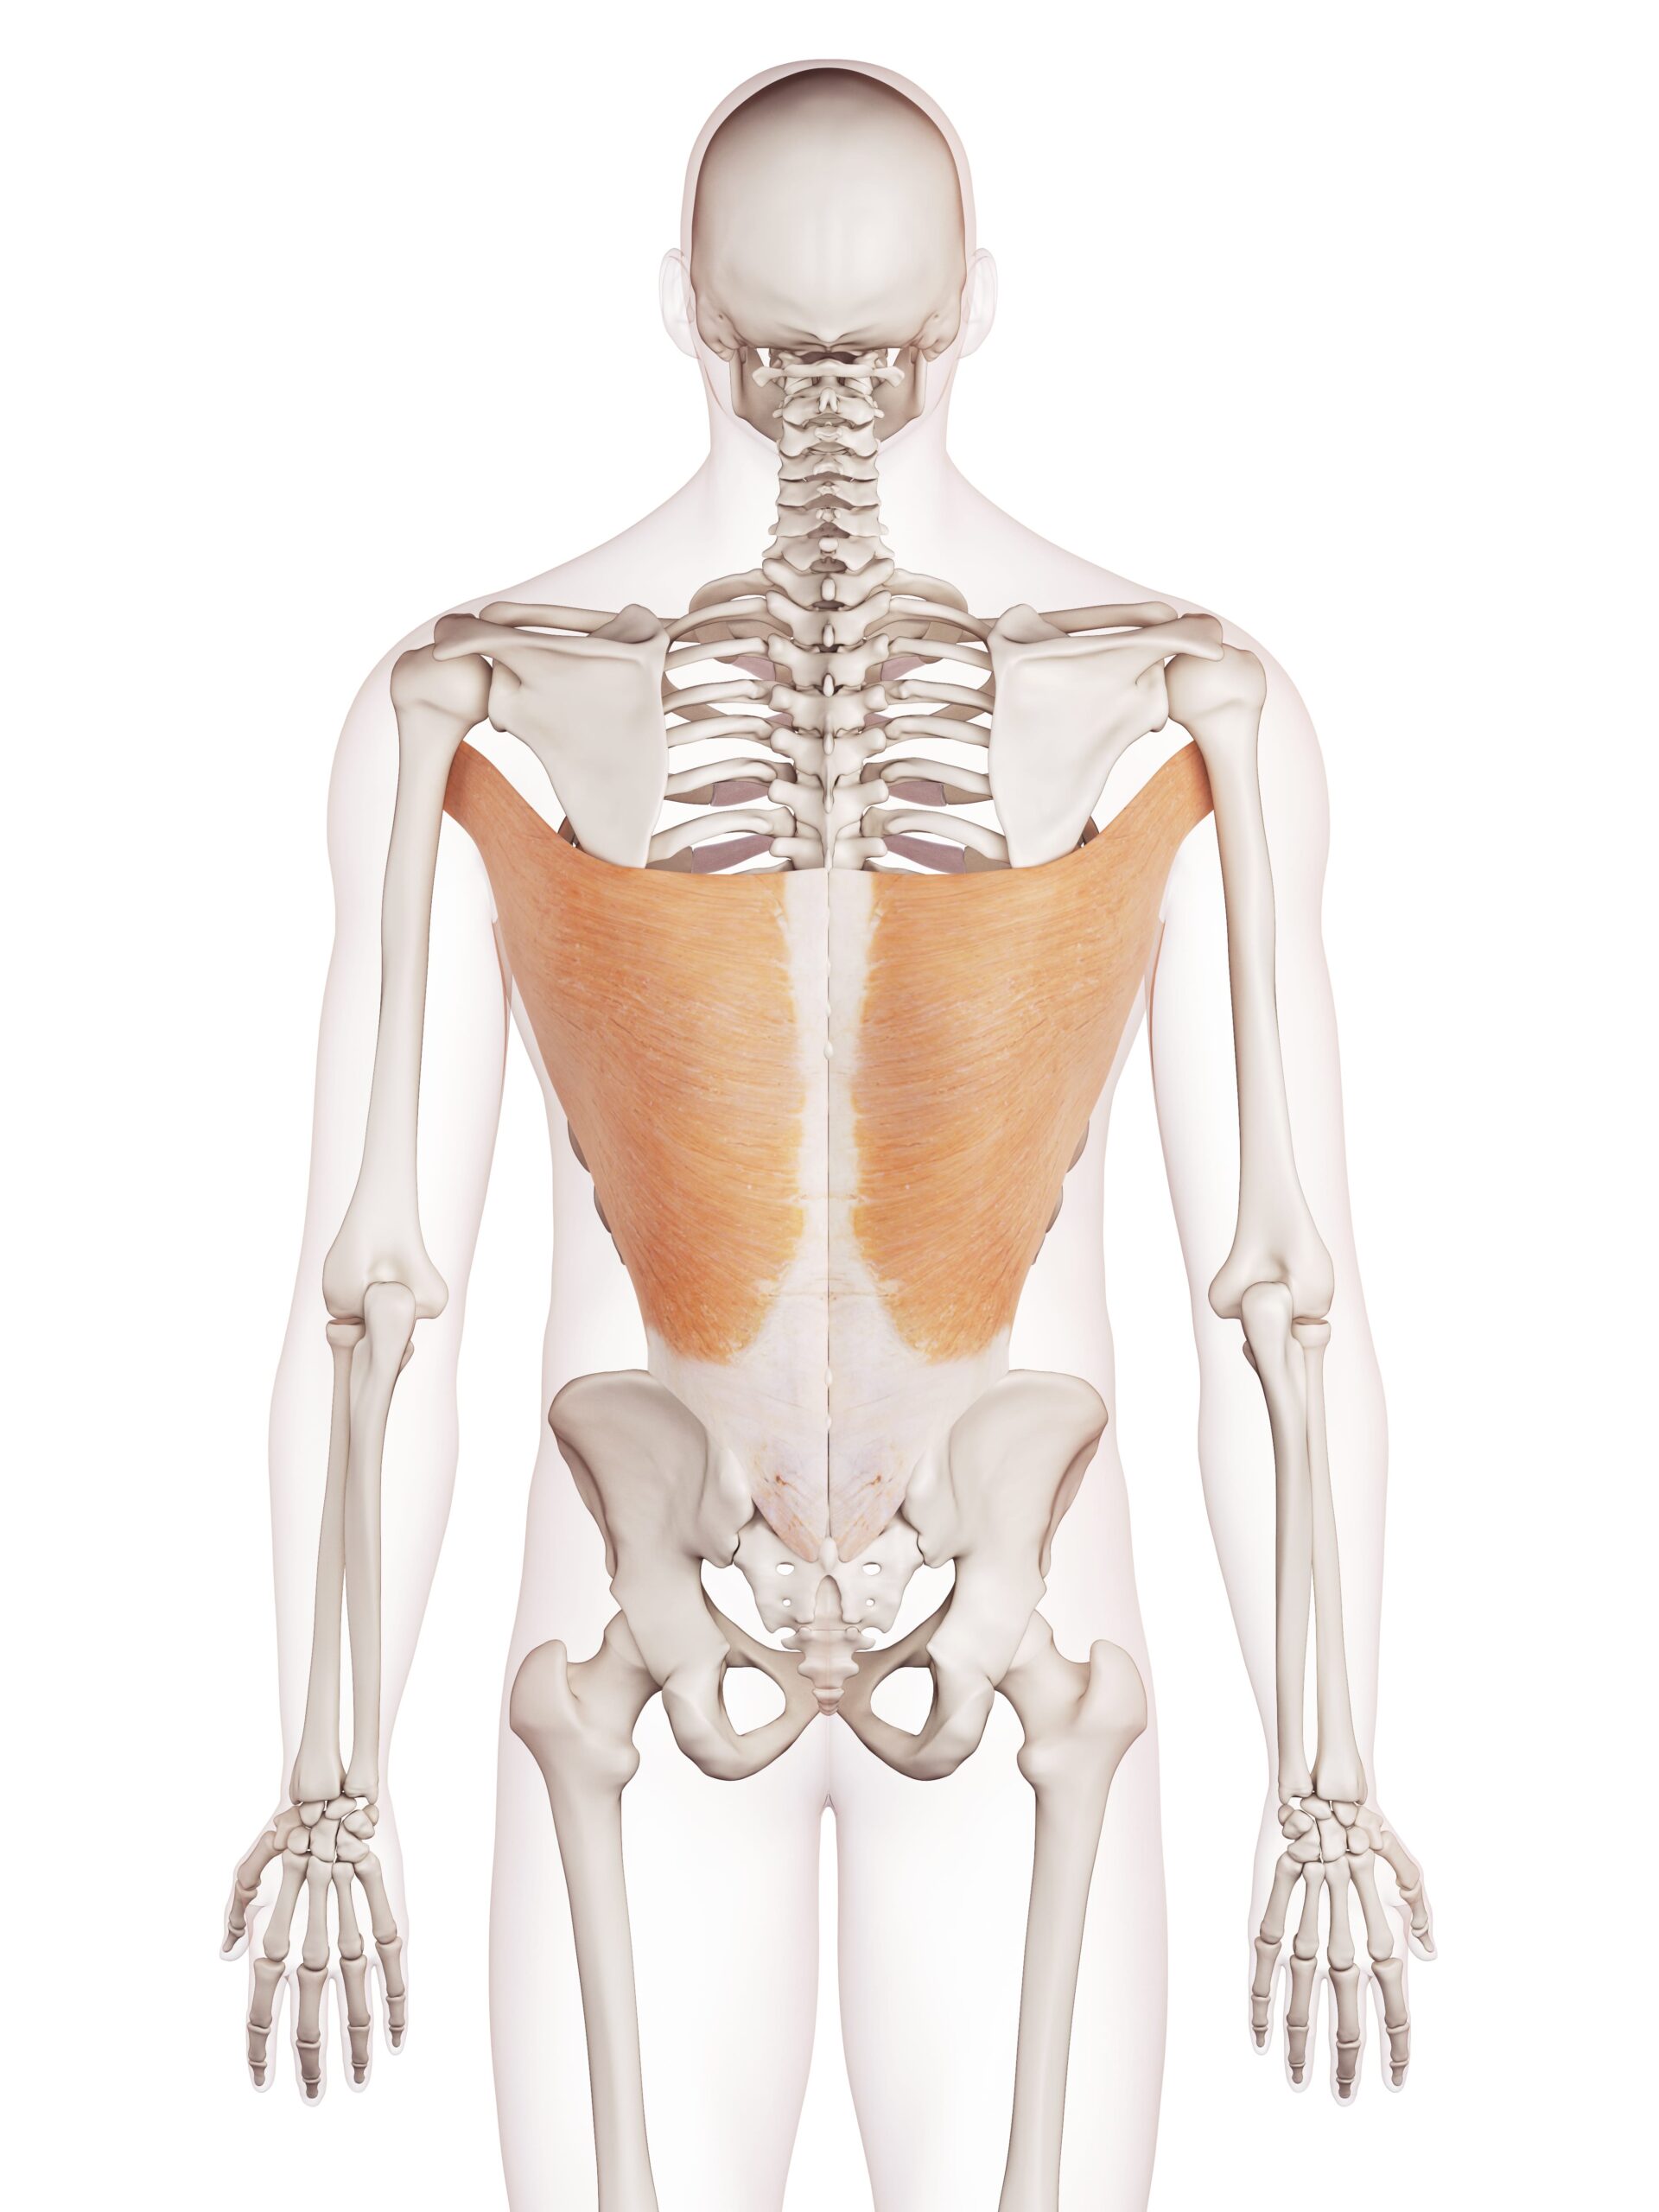
And what if that shared “enemy” is your LATS or the Latissimus Dorsi!
Because BOTH of these areas are affected by that one muscle.
YUP!
While we often just think of our lats as a big back muscle, playing a role in our upper body functioning, they can also affect our SI joint via their attachment to the thoracolumbar fascia and even affect the alignment of our pelvis!
So while it may seem crazy, working to correct imbalances at your hip complex could help relax tight and overactive lats and help you alleviate your shoulder aches and pains!
(BONUS…lat tightness and overactivity may be perpetuating your hip, lower back and SI joint pain so relaxing and stretching that muscle will only help!)
So how exactly are the lats a common enemy of both your hip complex AND your shoulders and what can you do to start correcting the problem?
The Lat Connection:
Ok…your lats aren’t really your enemy…
It’s almost the case of you “blame the messenger”…or the messenger becoming more involved than they should be!
Because our lats are really a bridge between our upper and lower body.
They play a role in stabilizing our shoulders, scapulae (shoulder blades), lumbar spine, sacroiliac joint (SI joint through the thoracolumbar fascia) as well as our pelvis.
The lats have a far reaching impact and affect a TON of structures and movements!
They are a bridge that can perpetuate distortions and compensations from one hemisphere to the other.
They can become tight and overactive due to other muscular imbalances and weaknesses and then lead to aches and pains in the other region.
And for this reason they can be a common “enemy” of both our upper body and lumbo-pelvic-hip complex and SI joint.
Of course the real “enemy” is our rounded-shoulder, flexed posture created by sitting hunched over our technology for 9 hours a day.
A posture that leads to muscles, like the lats becoming tight and overactive, and muscles, like our glutes, becoming underactive.
Underactive glutes can lead to anterior pelvic tilt, hip hikes (if one side is underactive especially) and tight, overactive lats that perpetuate the pain and create upper body dysfunction as well.
Lat tightness can itself create a hip hike on the same side as the tight lat and anterior pelvic tilt and SI joint issues as well.
Both the glute and lat need to work together to protect us and make sure we have the proper mobility and stability.
If these muscles aren’t working well together, this distortion can show up as upper body, specifically even, shoulder aches and pains.
And the lats also can have a DIRECT impact on our shoulder health.
Tight lats can contribute to internally rotated shoulders, or that rounded shoulder posture, as well as restricted shoulder flexion aka your ability to reach overhead.
Ever wonder why you struggle to get your arms overhead to press and end up arching your lower back to compensate?
Tight lats may be part of the problem.
Tight, overactive lats can restrict proper shoulder mobility, negatively impact your shoulder stability, and even impact your scapular mobility as well (and this may be holding you back too from achieving that first full pull up not to mention a culprit of shoulder, upper back and even neck pain!)
Basically, you need to address lat tightness, both tightness of both lats and even an imbalance between the two, and then further investigate if there are distortions at your hip complex or SI joint or actually in your upper body, that may be perpetuating the tightness!
Below are three moves to help you get started making sure this “bridge” is functioning well!
3 Moves To Try Today To Improve Your Shoulder Health:
These 3 moves will start addressing lat tightness and overactivity while also working to engage them in a productive way to help alleviate and prevent shoulder aches and pains.
These are perfect moves to include as a restorative session after a long day at work or as part of your warm up for you upper body, or potentially even LOWER BODY, lifting session.
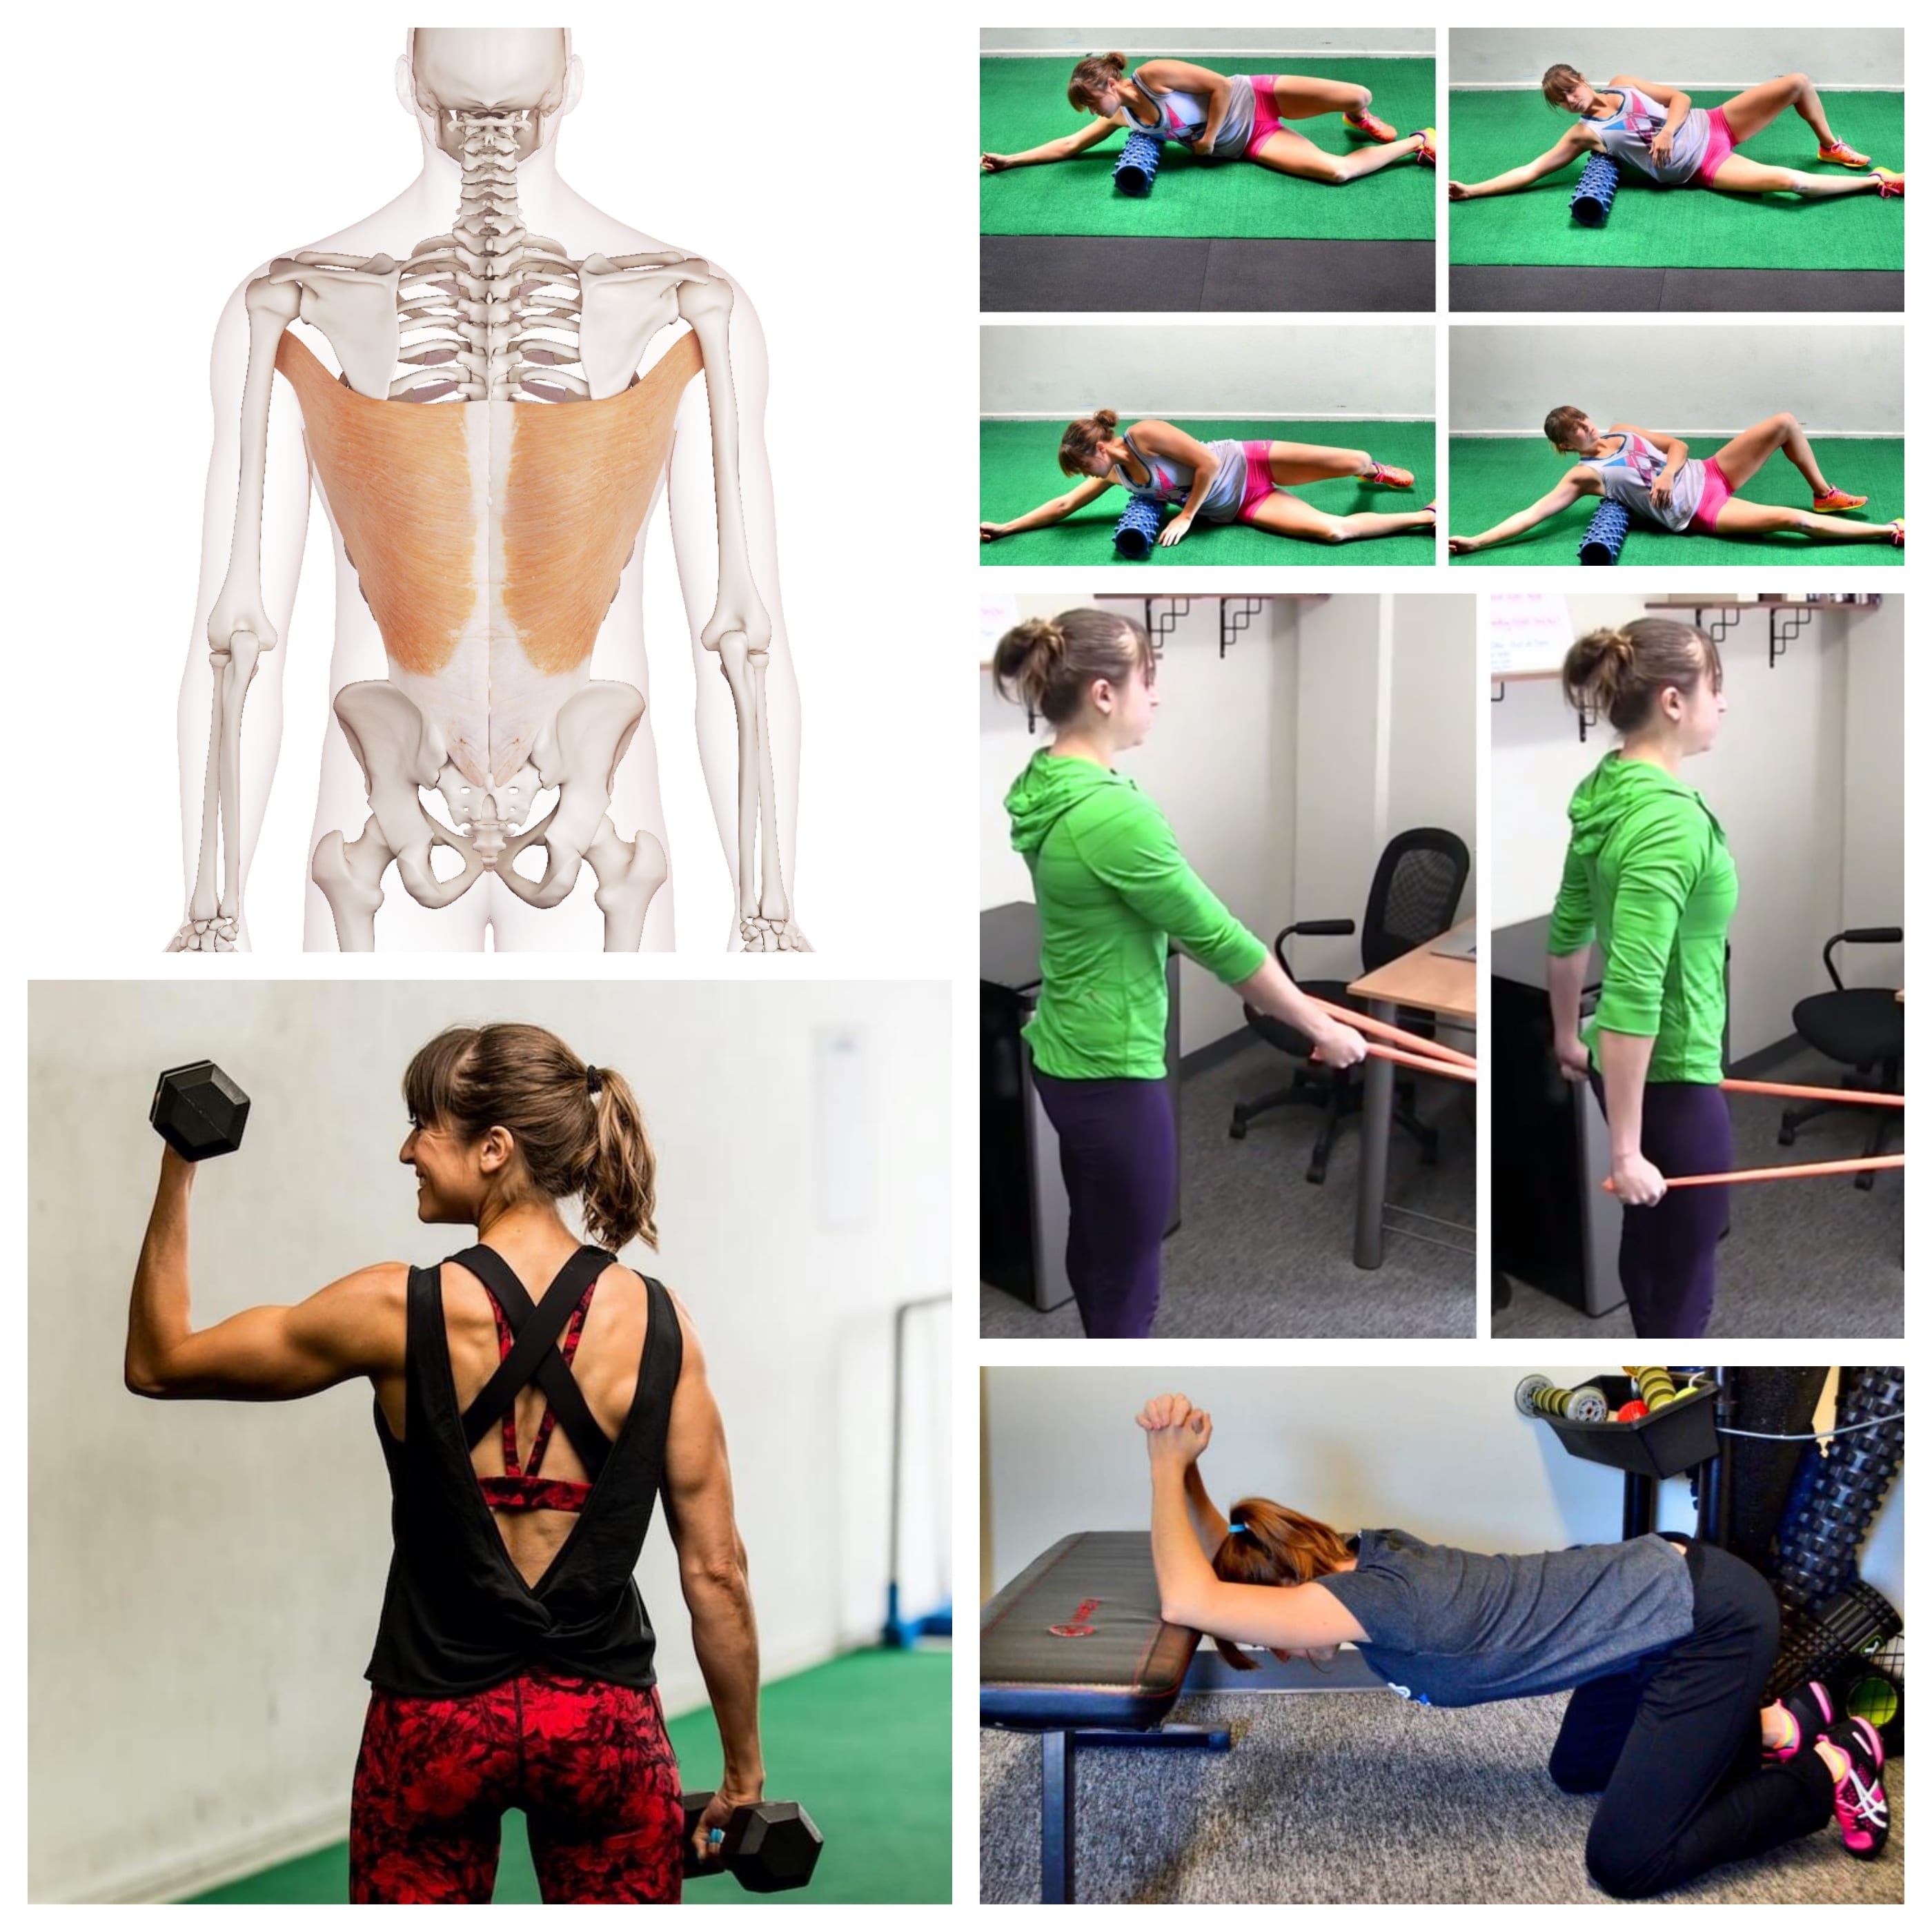
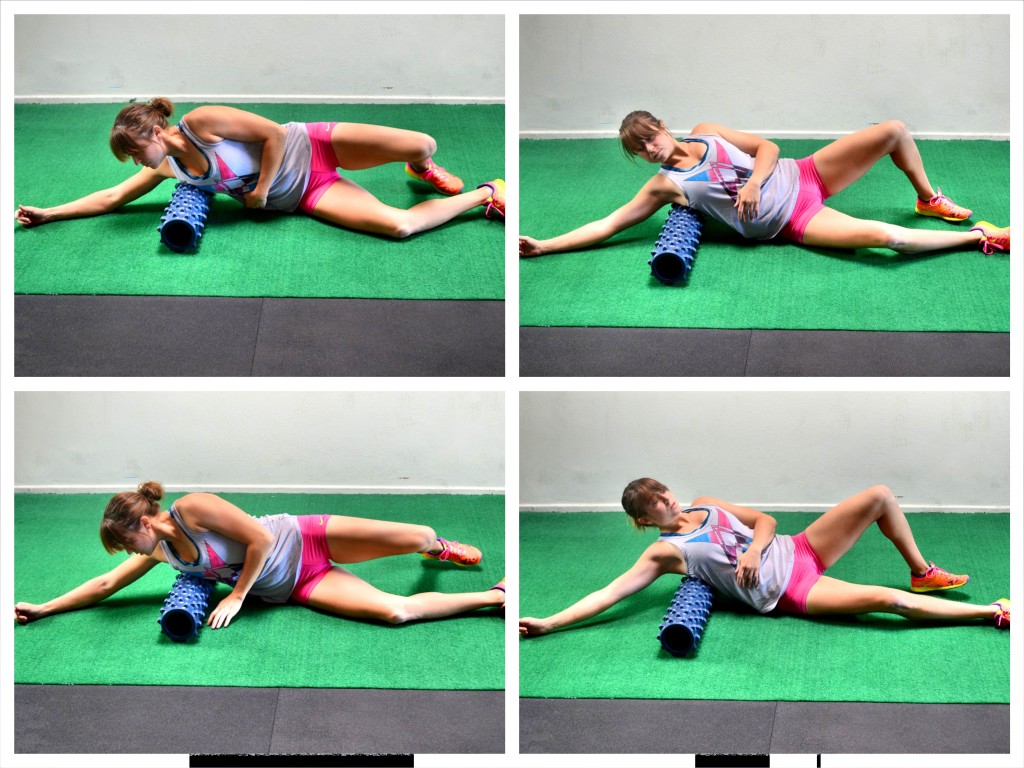
Lat Foam Rolling:
This is a great move to start relaxing tight lats, and even its partner in crime the teres major (which assists the lat with shoulder internal rotation, adduction and extension).
To roll out your lats a roller is best although you can use a foam ball or even a tennis ball.
Start by lying on your side with a roller under one armpit. Extend the arm on the side with the roller up above the roller. Then rock forward and backward on the roller, rotating your chest toward the ground and then up toward the ceiling as you roll on the roller so it hits toward your ribs and then toward your back.
Hold on any tight spots you find then move it lower down the side of your back. Hold on any tight spots as you go and make sure to rock forward and backward as you make your way down your side.
As you work down your side, you will want to rotate slightly more toward your back, even bringing the roller to hit under your shoulder blade.
Work all the way from your armpit to about the end of your rib cage.
Be careful when rolling lower down your back into your low back. You do not want to arch over the roller and hyperextend your low back.
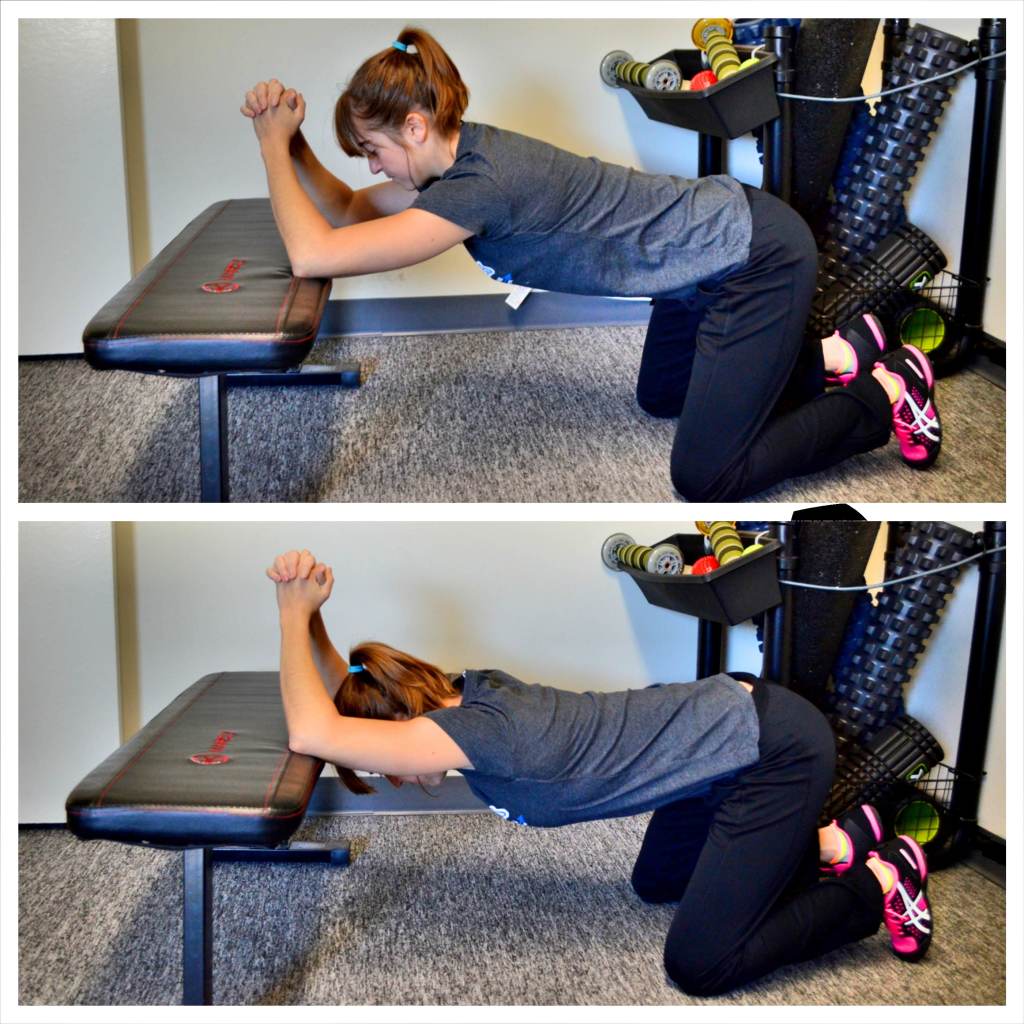
Kneeling Thoracic Extension And Lat Stretch:
This is a must-do stretch if you want to stretch your lats across the expanse of the muscle while also stretching your triceps and working on your shoulder flexion and thoracic extension.
Basically, it’s a multipurpose stretch we HAVE to include if we have a desk job!
To do the Kneeling Thoracic Extension and Lat Stretch, place your elbows up on a bench about shoulder-width apart and kneel on the ground in front of the bench. Make sure you are back far enough that you have room to lean forward and over and drop your head between your elbows.
Then with your elbows on the bench, relax your chest and head over, sitting your butt back just slightly. Press your chest toward the ground and feel a nice stretch down your triceps and lats as well as through your thoracic spine. Try to extend your back as much as possible as you press your chest toward the ground.
You can either hold here and breathe to stretch deeper or you can come out of the stretch and then relax back into it and try to get further with each rep. If you’re using this as part of your warm up, perform reps instead of holding.
Just make sure you don’t simply ARCH your lower back to compensate which won’t help you stretch those lats!
Holding a dowel or towel between your hands to pull out on and to hold with your palms facing you (to put your shoulders into external rotation) can also be an added bonus to stretch everything out and improve your posture!
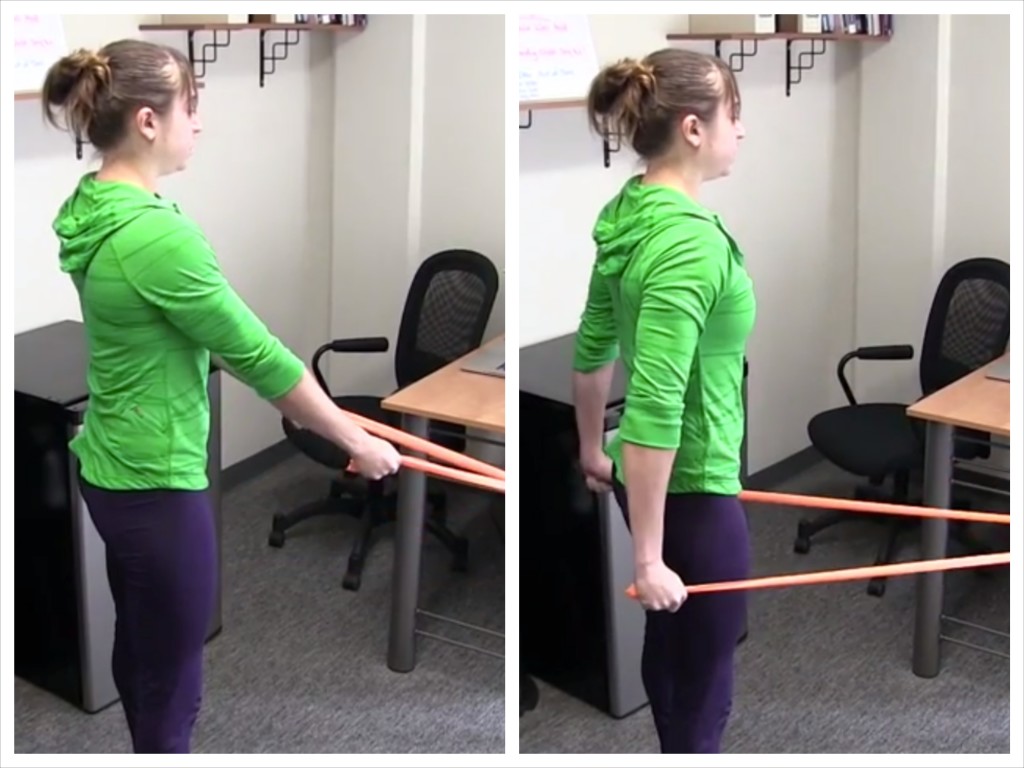
Straight Arm Shoulder Extensions:
This move will strengthen your lats as you work to improve your posture and your scapular mobility.
It’s also a great move to strengthen your posterior deltoid or the back of your shoulder.
If you sit all day, this is a great move to get your back working while working on a nice tall posture and wide shoulders…the opposite basically of how we sit all day!
To do the Straight-Arm Shoulder Extension, anchor a resistance band below chest height and hold one end in each hand. You can grab with a neutral grip or even palms facing up to put your shoulder into external rotation.
Set up facing the anchor point but far enough away that there is tension in the band when your arms are down straight and your hands are in front of you. Stand up nice and tall with your feet about hip-width apart. Make sure you aren’t shrugging your shoulders and that your chest is pressed out. Think wide shoulders. Even feel the muscles between your shoulder blades already starting to engage before you even extend your arms back.
Keeping your arms straight and chest pressed out, pull back on the band, extending your shoulders as you pull your hands back toward your hips.
Feel your back and the backs of your shoulders extending your shoulder to pull the band back. You may even feel the back of your arm a little, but you shouldn’t feel your neck or upper traps at all.
Do not shrug as you pull back or jerk the band back and lean forward in an attempt to perform a bigger range of motion. Make sure your shoulders don’t just tilt forward to pull the band back further.
This won’t be a huge movement. Just focus on your back pulling the band back as your arms stay straight. Pinch your shoulder blades together as you pull back.
Hold for a second or two then relax your arms back forward and repeat.
Make sure you maintain a nice tall posture as you pull the band back. You must focus and think about your back working as you do the movement. Do not just go through the motions!
BONUS:
So a BONUS! move seemed appropriate since a potential culprit perpetuating lat tightness is weak glutes!
And because often ONE SIDE can become tight, it is key we have a unilateral glute activation move to address that!
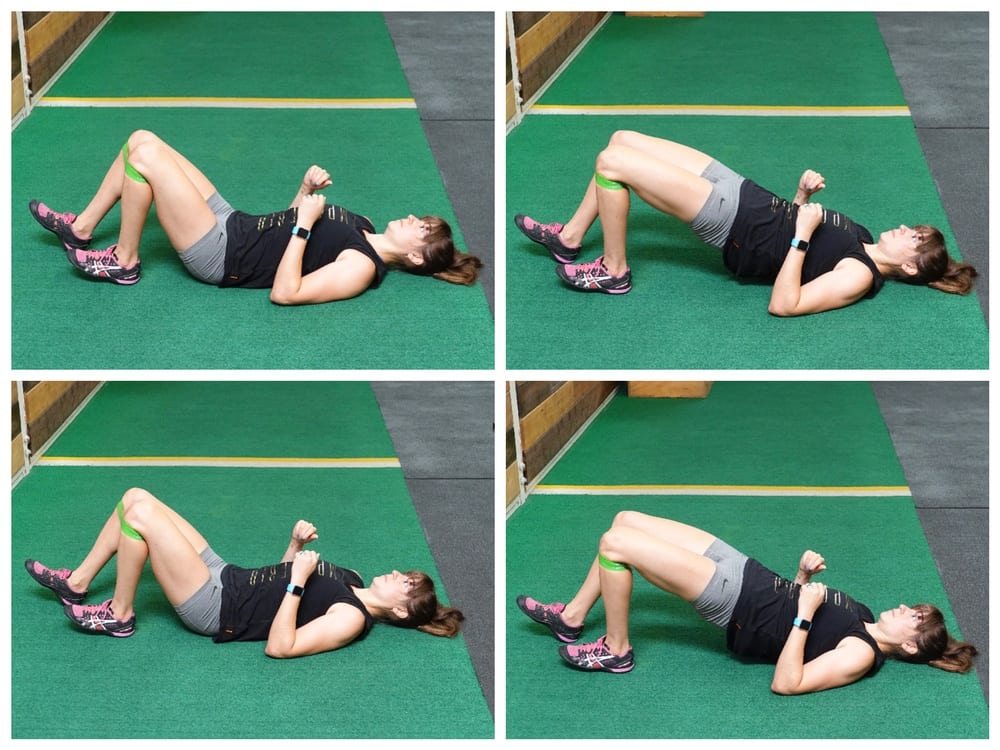
The 80/20 Glute Bridge:
This move is a great way to isolate each side even if you’re not yet ready for the full single leg glute bridge, which is a very advanced bridge variation!
Plus, because of the band, this bridge will get your glute medius engaged and firing, which, in turn, will help your glute maximus fire better. WIN WIN!
To do the 80/20 Glute Bridge, place a mini band right below your knees and lie on your back with your knees bent and feet flat on the ground. Then slide one leg out and away a bit from your butt and lift your toes. This foot should be about at the instep to toe of your other foot. Bend your elbows to 90 degrees and drive your upper arms into the ground. Posteriorly tilt your pelvis if needed then bridge up.
When you bridge up, you will be driving primarily off the foot flat on the ground, using the other foot for assistance so you can make sure to feel your glutes driving the move. Make sure your hips, knees and ankles all stay in line as you bridge up and lower down. Do not let your knees cave in with the band. Press out against the band the entire time.
Lower down and repeat the bridge on that side until all reps are complete. Then switch and move the other foot out, driving only through the heel so you can focus on bridging with your other side. This variation can help you make sure you can properly perform a more unilateral bridge!
Now…Are you ready to build a bulletproof body?
Get A Full-Body Program To Address All Your Mobility And Strength Needs:
I don’t care what your dietary preference is…Protein is key if you want to lose fat and build lean muscle.
(By dietary preference I mean Vegan, Vegetarian, Paleo, Gluten-Free…)
While you can lose weight by simply cutting calories to some extent that doesn’t guarantee you that lean, cut look we’re usually striving for when we’re trying to lose weight.
To get that lean look, you need to make sure to increase your protein intake while in a calorie deficit.
And for my non-meat eating friends?
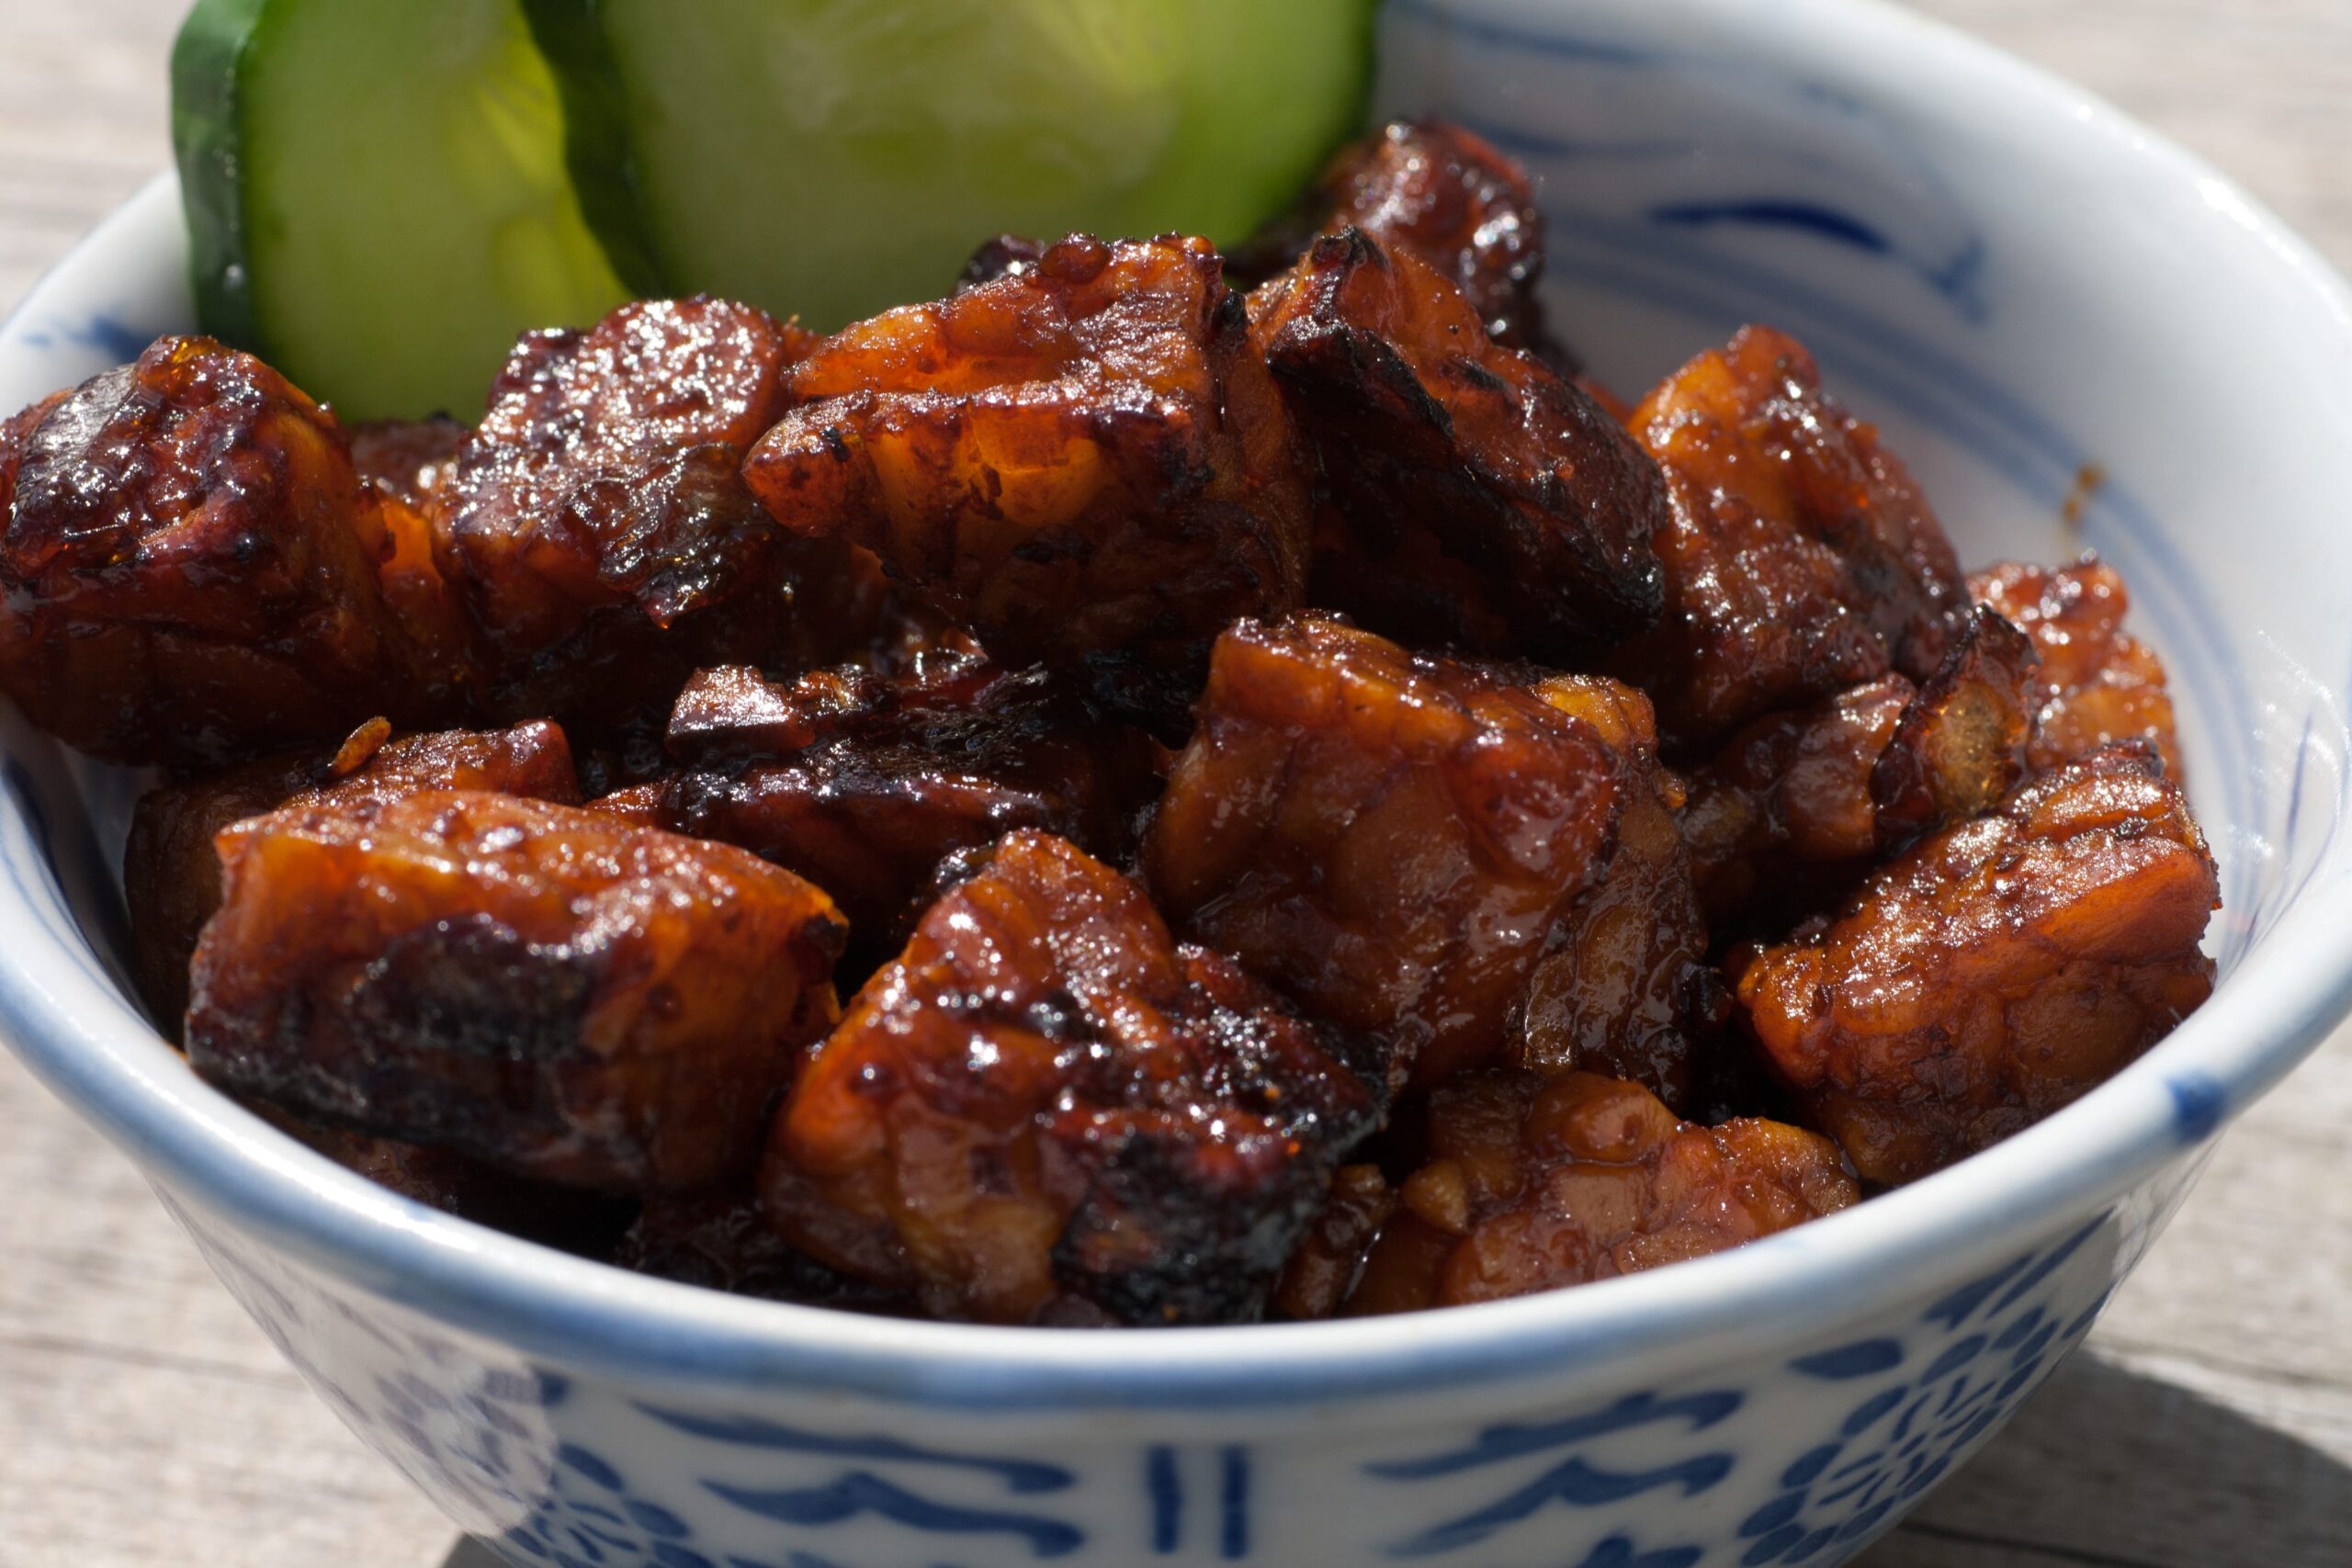
It can be a bit more challenging, which is why I wanted to share one of the Vegetarian recipes from my 4-Week Macro Cycling Accelerator.
In a large nonstick, skillet, add half the garlic and ginger, cook for 1 minute, stirring frequently.
Add crumbled tempeh.
Cook for about 7 minutes; only stir 1-2 times (the goal is to attain browning). Add 2 tablespoons coconut aminos and Sriracha, stir to evenly mix.
Cook for another 7 minutes, again, don’t stir too much. Once browned well, set aside.
While tempeh is cooking prepare glaze.
In a small sauce pan, heat honey, 1 teaspoon of coconut aminos and the other half of the garlic and ginger over medium heat. Honey should bubble and boil. Let cook for 1 minute.
Let cool slightly then add sesame oil.
To prepare each wrap, add a bit of carrot, scoop of tempeh mixture to a piece of lettuce and top with a drizzle of glaze. ENJOY!
Often when we think about getting in a killer cardio workout, we eliminate as much rest as possible and put in longer work intervals.
But guess what happens when you rest less?
Your power, speed, quickness, intensity all DROP.
If you don’t have as much time to recover, while you may be going “all out” every round, your output will still dip.
So sometimes including a bit MORE rest can allow you to actually work HARDER during the intervals of work and keep your output higher throughout the entire workout.
While I love workouts that shorten rest, giving you half or even just a quarter of the time you worked to recover, there is also something to be said for workouts that allow you to rest equal to the time you worked.
That equal work to rest setup allows you to go harder each and every work interval so your intensity stays higher throughout!
You may even find you include extra rest between rounds to keep your intensity higher!
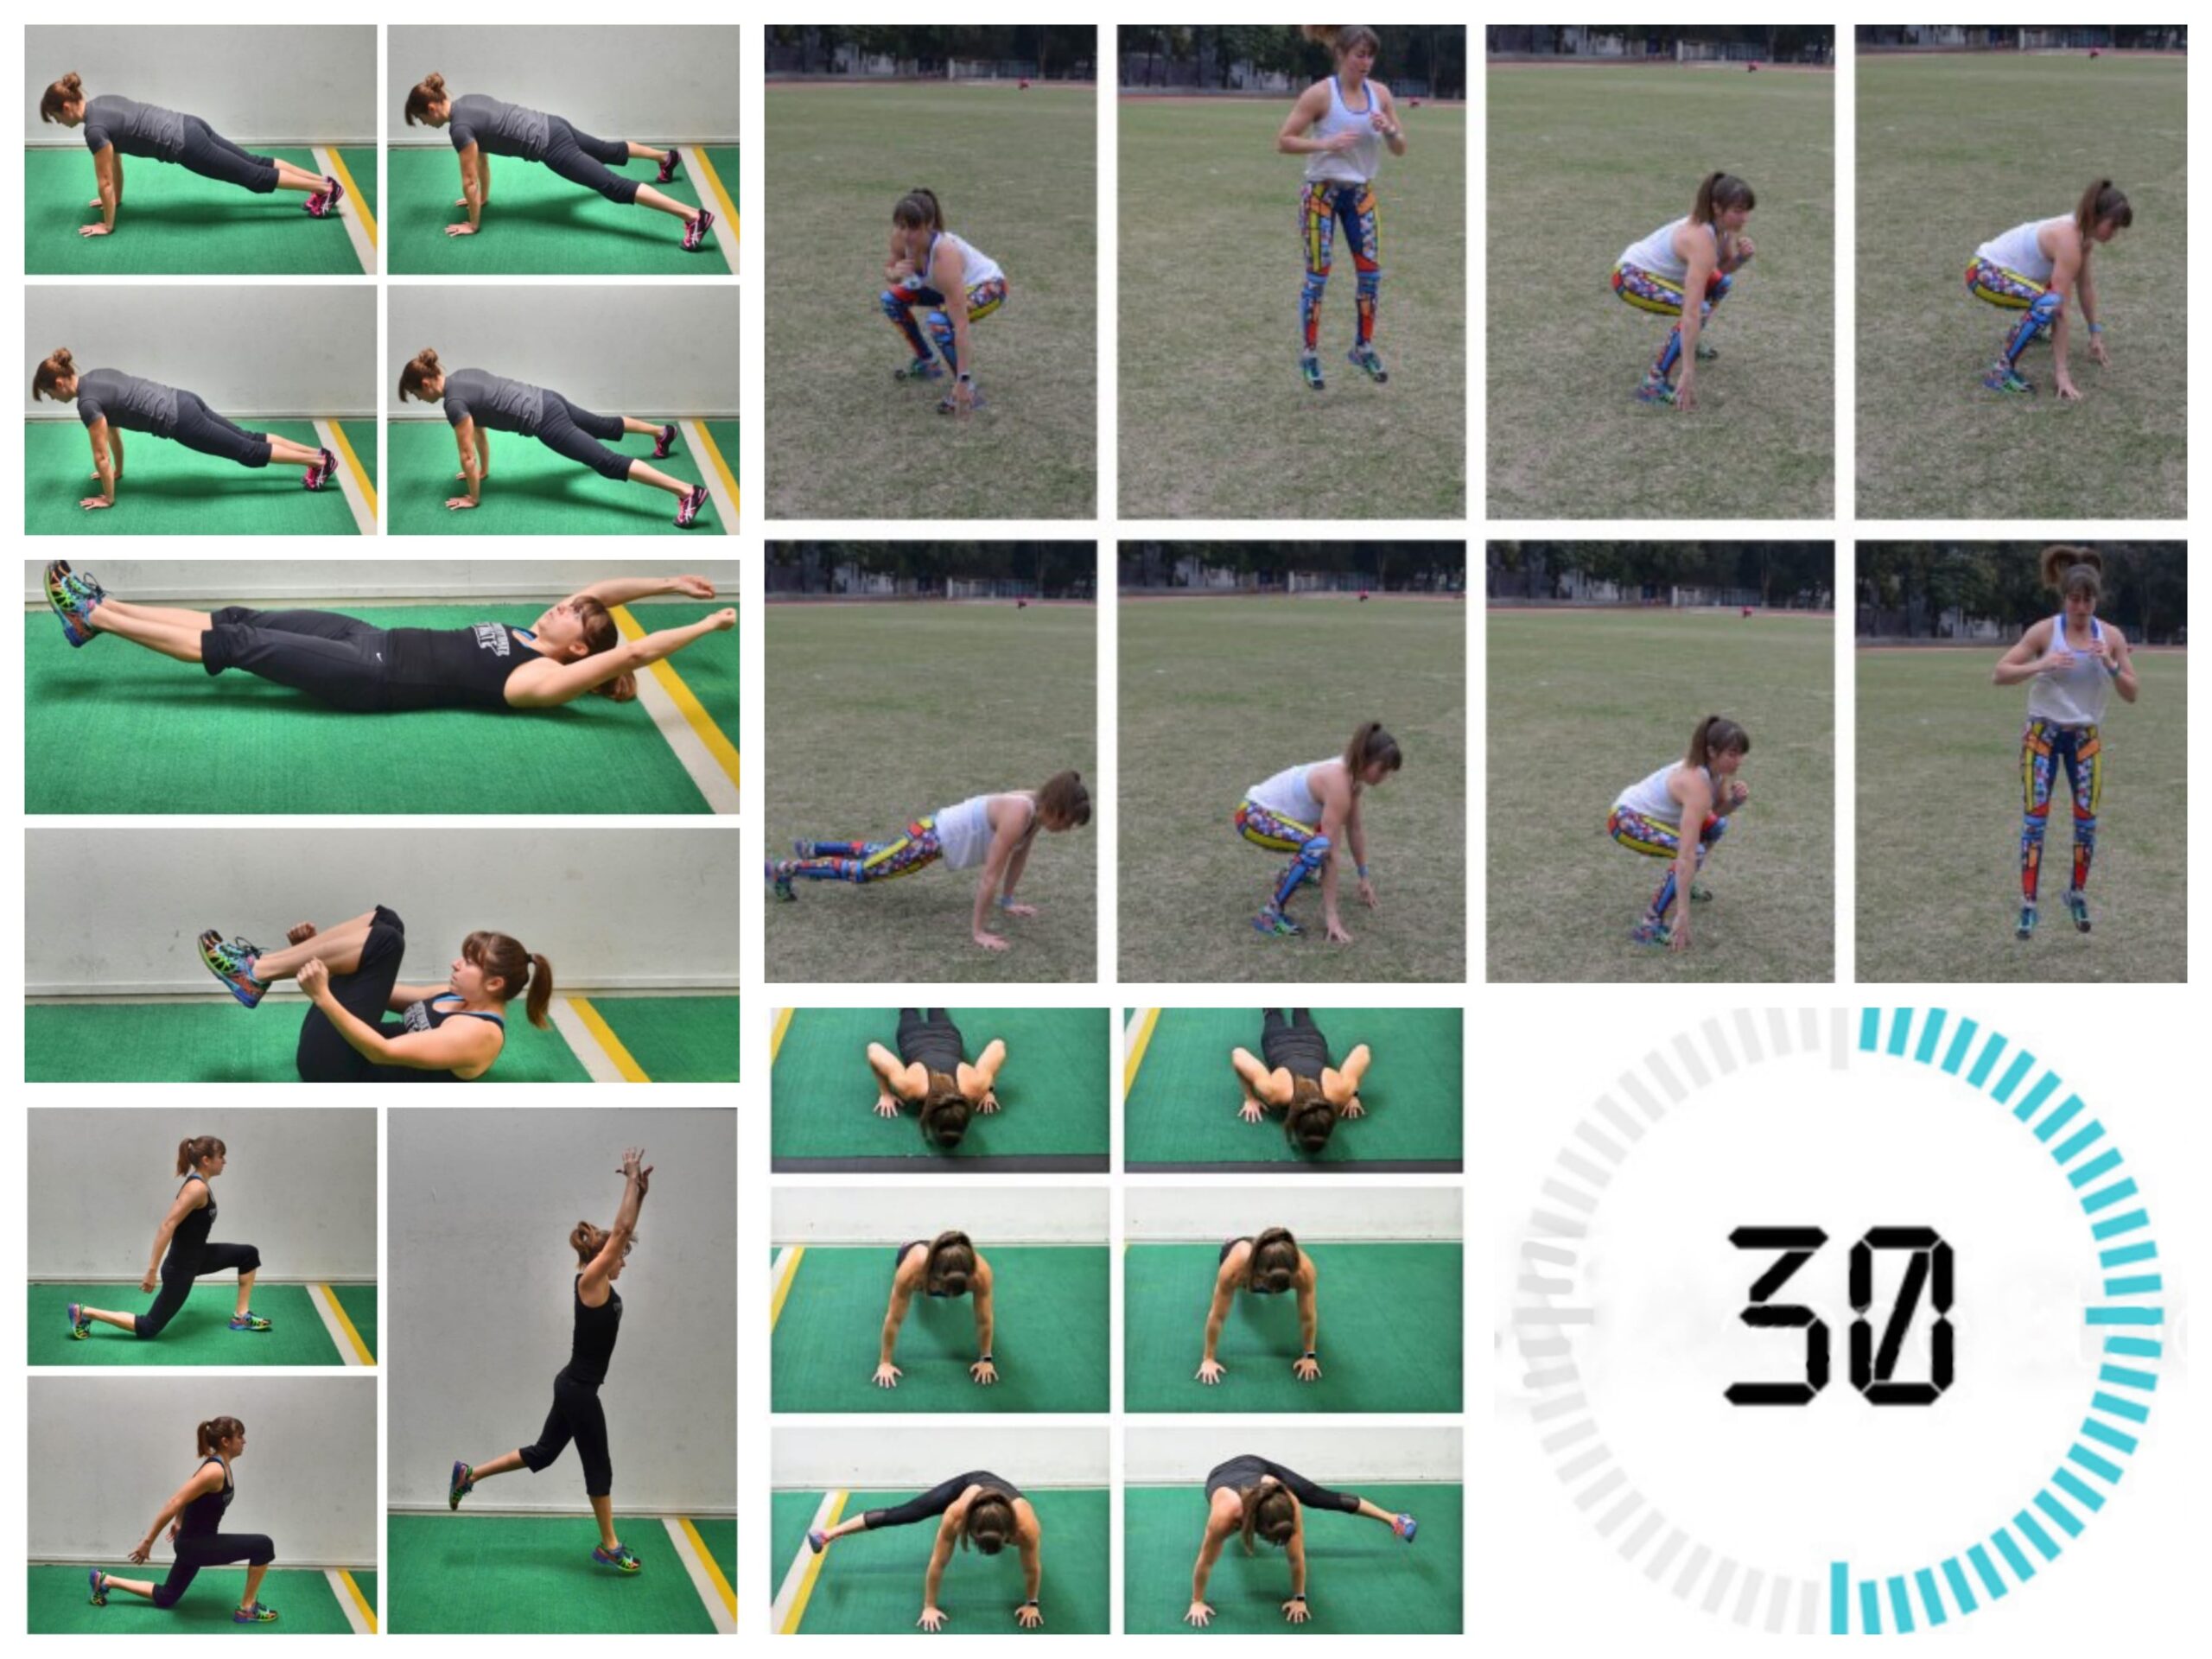
But if you’re looking for a great cardio killer that gives you a bit of extra rest so you can get even MORE out of the session, try this 30/30 Bodyweight Cardio Workout.
WORKOUT: Set a timer for 30 second intervals. You will work for 30 seconds then rest for 30 seconds before moving on to the next exercise. Go through the circuit, resting 30 seconds between moves. Do not rest extra between rounds although beginners can rest 1 minute if needed between rounds. Complete 3-6 rounds. If you are short on time, just complete 3 rounds.
DO NOT SHORTEN REST. Get in more reps during the intervals of work. Intensify variations. But do not shorten rest to make things harder. If it doesn’t feel hard, you need to push yourself harder during those work intervals! You should feel like you NEED the rest to fully recover whether from your muscles burning or your heart rate elevating.