by Cori Lefkowith | Dec 14, 2021 | Blog, Bodyweight, Butt, Core, Exercises, Functional Fitness, Pain Relief, Runner's, Workouts
If you want to strengthen and build your hamstrings, you want to include both hip extension and knee flexion movements.
For hip extension, think Romanian Deadlift or Good Morning for example and for knee flexion think about those hamstring curl machines.
But how can you work and even isolate those hamstrings if you don’t have any equipment at home?
So many of those go to moves require gym access or at least more equipment…
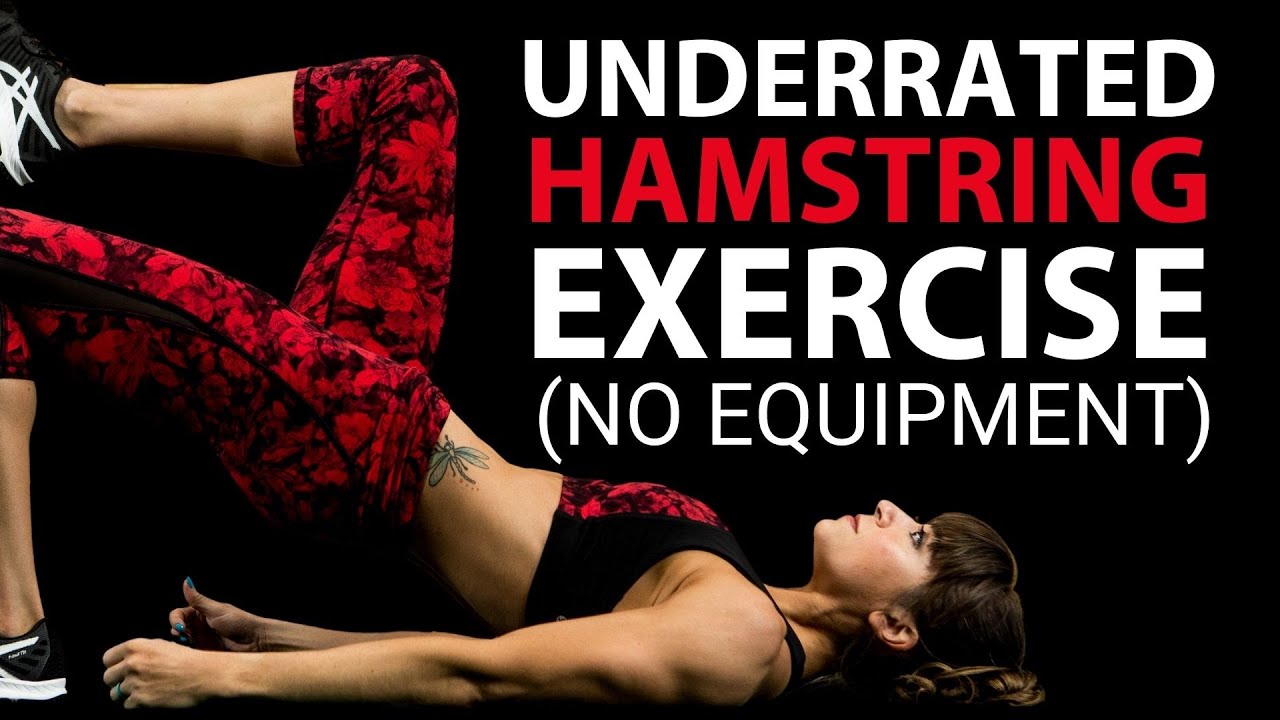
That’s why I wanted to share one of my go-to knee flexion hamstring moves, whether you have no tools while training at home or access to a full gym – The Glute Bridge And Curl.
I love this move because it can help you really target those hamstrings through knee flexion or bending your knees to curl your heels toward your butt while also activating and working your glutes.
It is also easy to progress and regress in a variety of ways without adding loads to match your needs and goals. And if you do have a gym, you can even progress through the same but different by using a variety of tools to change the instability and even range of motion.
But before I go into some of the different variations, I want to chat about the basic form of the glute bridge and curl and how you can do this amazing move at home…
How To Do The Basic Glute Bridge And Curl:
To do the Glute Bridge And Curl without any fancy equipment, you can use towels on a hardwood or tiled floor or paper plates on carpet. If you even have a simple set of sliders or furniture movers those can work as well.
Place a towel under each foot, making sure your heel is on the towel, as you lie on your back with your knees bent and feet flat on the ground. Bend your elbows to drive your arms down into the ground. Perform a posterior pelvic tilt, slightly tilting your pelvis up toward your ribs. This will make sure you don’t arch your back as you perform the move.
Bridge up, squeezing your glutes.
Holding this bridge, slide your feet out to straighten your legs. You will lower your butt toward the ground as you lengthen but don’t lose that posterior pelvic tilt.
After fully extending your legs, curl your heels back in toward your butt to lift back up into the bridge. Almost think about trying to drag up the flooring as you curl back in so that you are creating tension to really work those hamstrings.
Return to the bridge and repeat the move.
Make sure you do not arch to lift up higher. You want to really use your glutes and abs to brace and support during this move so you can focus on those hamstrings powering the knee flexion.
Also, move slowly as you extend out to work your hamstrings through the eccentric portion of this move as well!
Modifications Of The Glute Bridge And Curl:
Now as simple as this move may seem, it is more challenging for our hamstrings than we actually give it credit for.
The great part is, this move is easy to modify to meet our needs. And, by modifying, we can even focus on each side independently to correct any strength imbalances we may have.
To modify this move, you can start by extending one leg at a time to focus on each side working. You can alternate curls or simply stay on one side.
Once you feel ready to progress from here, you can start with just using the two-leg bridge and curl for the eccentric portion.
You will extend both legs out slowly together, then curl one in at a time. Alternate which you curl in first and stay focused on that drag back in to really make your hamstring work.
If you do want to advance the move and get a unilateral focus, try a single leg bridge and curl with your other leg lifted up off the ground so it can’t assist.
Do not progress the move though if you feel your lower back compensating. You want to make sure to use those glutes in the bridge up and keep your abs engaged through that posterior pelvic tilt!
Equipment Variations Of The Glute Bridge And Curl:
If you do have access to different tool, you can even progress this move through doing the same but different.
You can create more instability from the version off of towels or sliders by using the suspension trainer. Or you can even increase the challenge by using a bigger stability ball which increases the height you have to bridge up!
If you have a rower you can even have some fun using that instead.
So many ways to vary a move and make it work for us.
What is your favorite way to perform the glute bridge and curl?
Want to stay up to date with all of the latest and greatest from Redefining Strength?
Join my FREE daily newsletter:
–> Join RS!

by Cori Lefkowith | Jul 10, 2018 | Blog, Bodyweight, Core, Exercises, Travel Workouts, Workouts
All too often we think we need lots of jumping, burpees, and well, cardio in general, if we want to lose fat.
And while all of those moves and exercises should have a place in our routine, overdoing those things may actually be holding us back.
Sometimes those workouts that look “easy,” that seem simple, that won’t have you gasping for air, are the essential workouts we are MISSING.
They are hard in a different way and require you to establish an efficient mind-body connection to build your foundation.
They create proper recruitment patterns to keep you injury free and help your body work well so you can get even more out of all of your workouts.
And while these routines may seem easy, they will challenge your body in a new way and lead to killer results. Hey they can even burn so good!
So if you haven’t ever done a Density Interval Workout, you should try this one below!
By pairing together a basic movement and an isometric, we can not only get the correct muscles working but even build functional, full-body strength!
The Full-Body Density Interval Workout
Complete 3-4 rounds of the following circuit, resting up to 30 seconds between rounds. If the move is done on one side, do the hold then the reps on that side before switching and moving on.
After the circuit, complete 2-3 rounds of the Core Burner with 30 seconds rest between rounds. If one sided, do both moves, the hold and the reps, on that side before moving on. Then stretch and roll out.
CIRCUIT:
30 seconds each side Warrior III
30 seconds each side Warrior III Squats
30 seconds Push Up Holds
30 seconds Climber Push Ups
30 seconds Wall Sit
30 seconds Squats
30 seconds Glute Bridge Hold
30 seconds Glute Bridges
CORE BURNER:
30 seconds each side Side Plank
30 seconds each side Side Plank Oblique Twists
30 seconds Forearm Front Plank
30 seconds Plank Hip Dips
35 minutes. No equipment needed! –> The 10-Week Slim Down!

by Cori Lefkowith | Mar 16, 2018 | Blog, Bodyweight, Exercises, Push Ups
Stop wasting time on bicep curls and isolated tricep extensions. If you want strong, and sexy arms, it’s time you started focusing on HYBRID exercises.
These moves will get you better results in less time because they work more muscles at once, including the larger muscle groups of our upper bodies!
And as much as I love weights, you don’t even need weights to build killer functional upper body strength.
Using your own bodyweight, you can get in a great upper body workout AND even work your core! Try these 5 Hybrid Bodyweight Upper Body Exercises that you’ll be sure to feel the next day!
5 Bodyweight Upper Body Exercise (no equipment needed!)
Below are 5 Hybrid Exercises to work your arms, chest, shoulders and even back. Try including these in your next upper body workout, especially if you need something quick at home!
These are some of my favorite moves from my 6-Week Bodyweight Shred to not only work the upper body, but also the CORE!
Climber Push Ups:
This core-intensive push up variation will work not only your chest, but really target your triceps and shoulders as well!

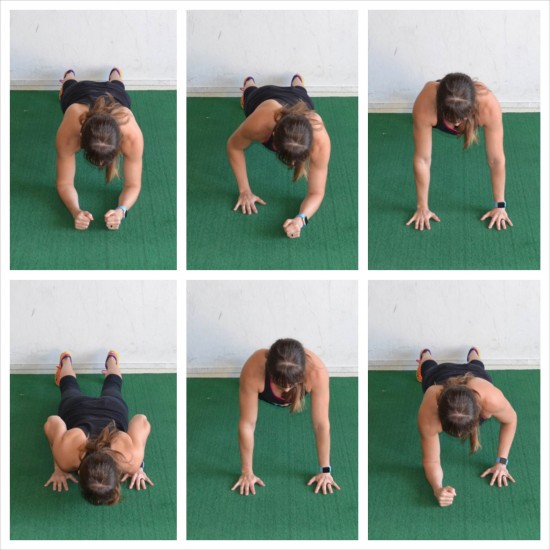
To do the Climber Push Up, start in a plank from your forearms. You can set your feet wider apart if needed to create a more stable base. Make sure your body is in a nice straight line from your head to your heels and that your shoulders are stacked over your elbows while on your forearms.
Engage your abs and, keeping your body in a nice straight line, climb one hand at a time up to a plank position from your hands. Place your hands right below your shoulders, but outside your chest as you climb up. Try to wiggle your hips as little as possible as you climb and don’t let your butt go up in the air or your hips sag toward the ground as you climb up.
Then at the top perform a push up. Keep your body in a nice straight line as you drop your chest between your hands and down toward the ground. Press all the way back up.Then climb back down, placing your elbows right below your shoulders. Repeat, climbing back up. Make sure to alternate or switch which hand leads the climb at some point.
Beginners can do the whole thing from their knees or even just drop to their knees for the push up.
Push Up Leg Kick:
This Push Up is a great way to work your obliques and really toast your entire core!

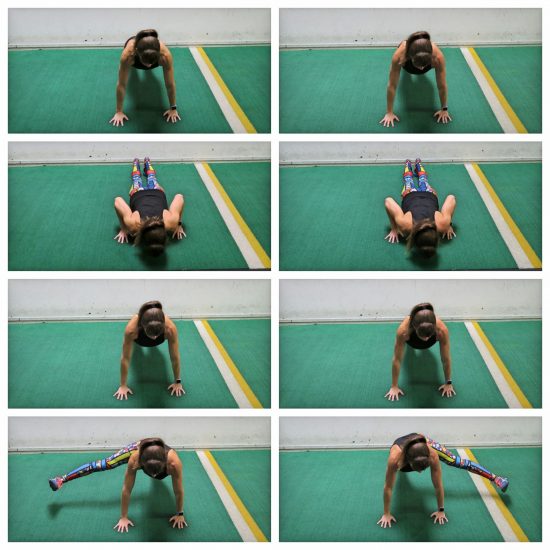
To do the Push Up Leg Kick, set up in a high plank position with your hands under your shoulders and outside your chest and your feet close together. Your body should be in a nice straight line with your abs braced and glutes and quads engaged.
Then lower down to the bottom of the push up, keeping your body in a nice straight line. Press back up and at the top, kick one leg out to the side toward your elbow. Your hips may rotate slightly as you kick, but your butt shouldn’t go up in the air.
Kick your leg up as close to your elbow as you can and then lower it back down and place your foot back on the ground. Once your foot is back down, repeat the push up then kick the other leg out to the side toward your elbow. Keep your leg as straight as you can as you kick it out. Place your foot back and repeat the push up before repeating on the first side.
You can modify the move by doing it from your knees then come up onto your toes for the kick. You can also do it with your hands up on an incline. To advance the move further, perform the kick at the BOTTOM of the push up!
Scapular Wall Hold/Reps:
This move is a must-do if you have a desk job. Whether you perform the isometric or the reps, it is a great way to work your back and open up your chest.

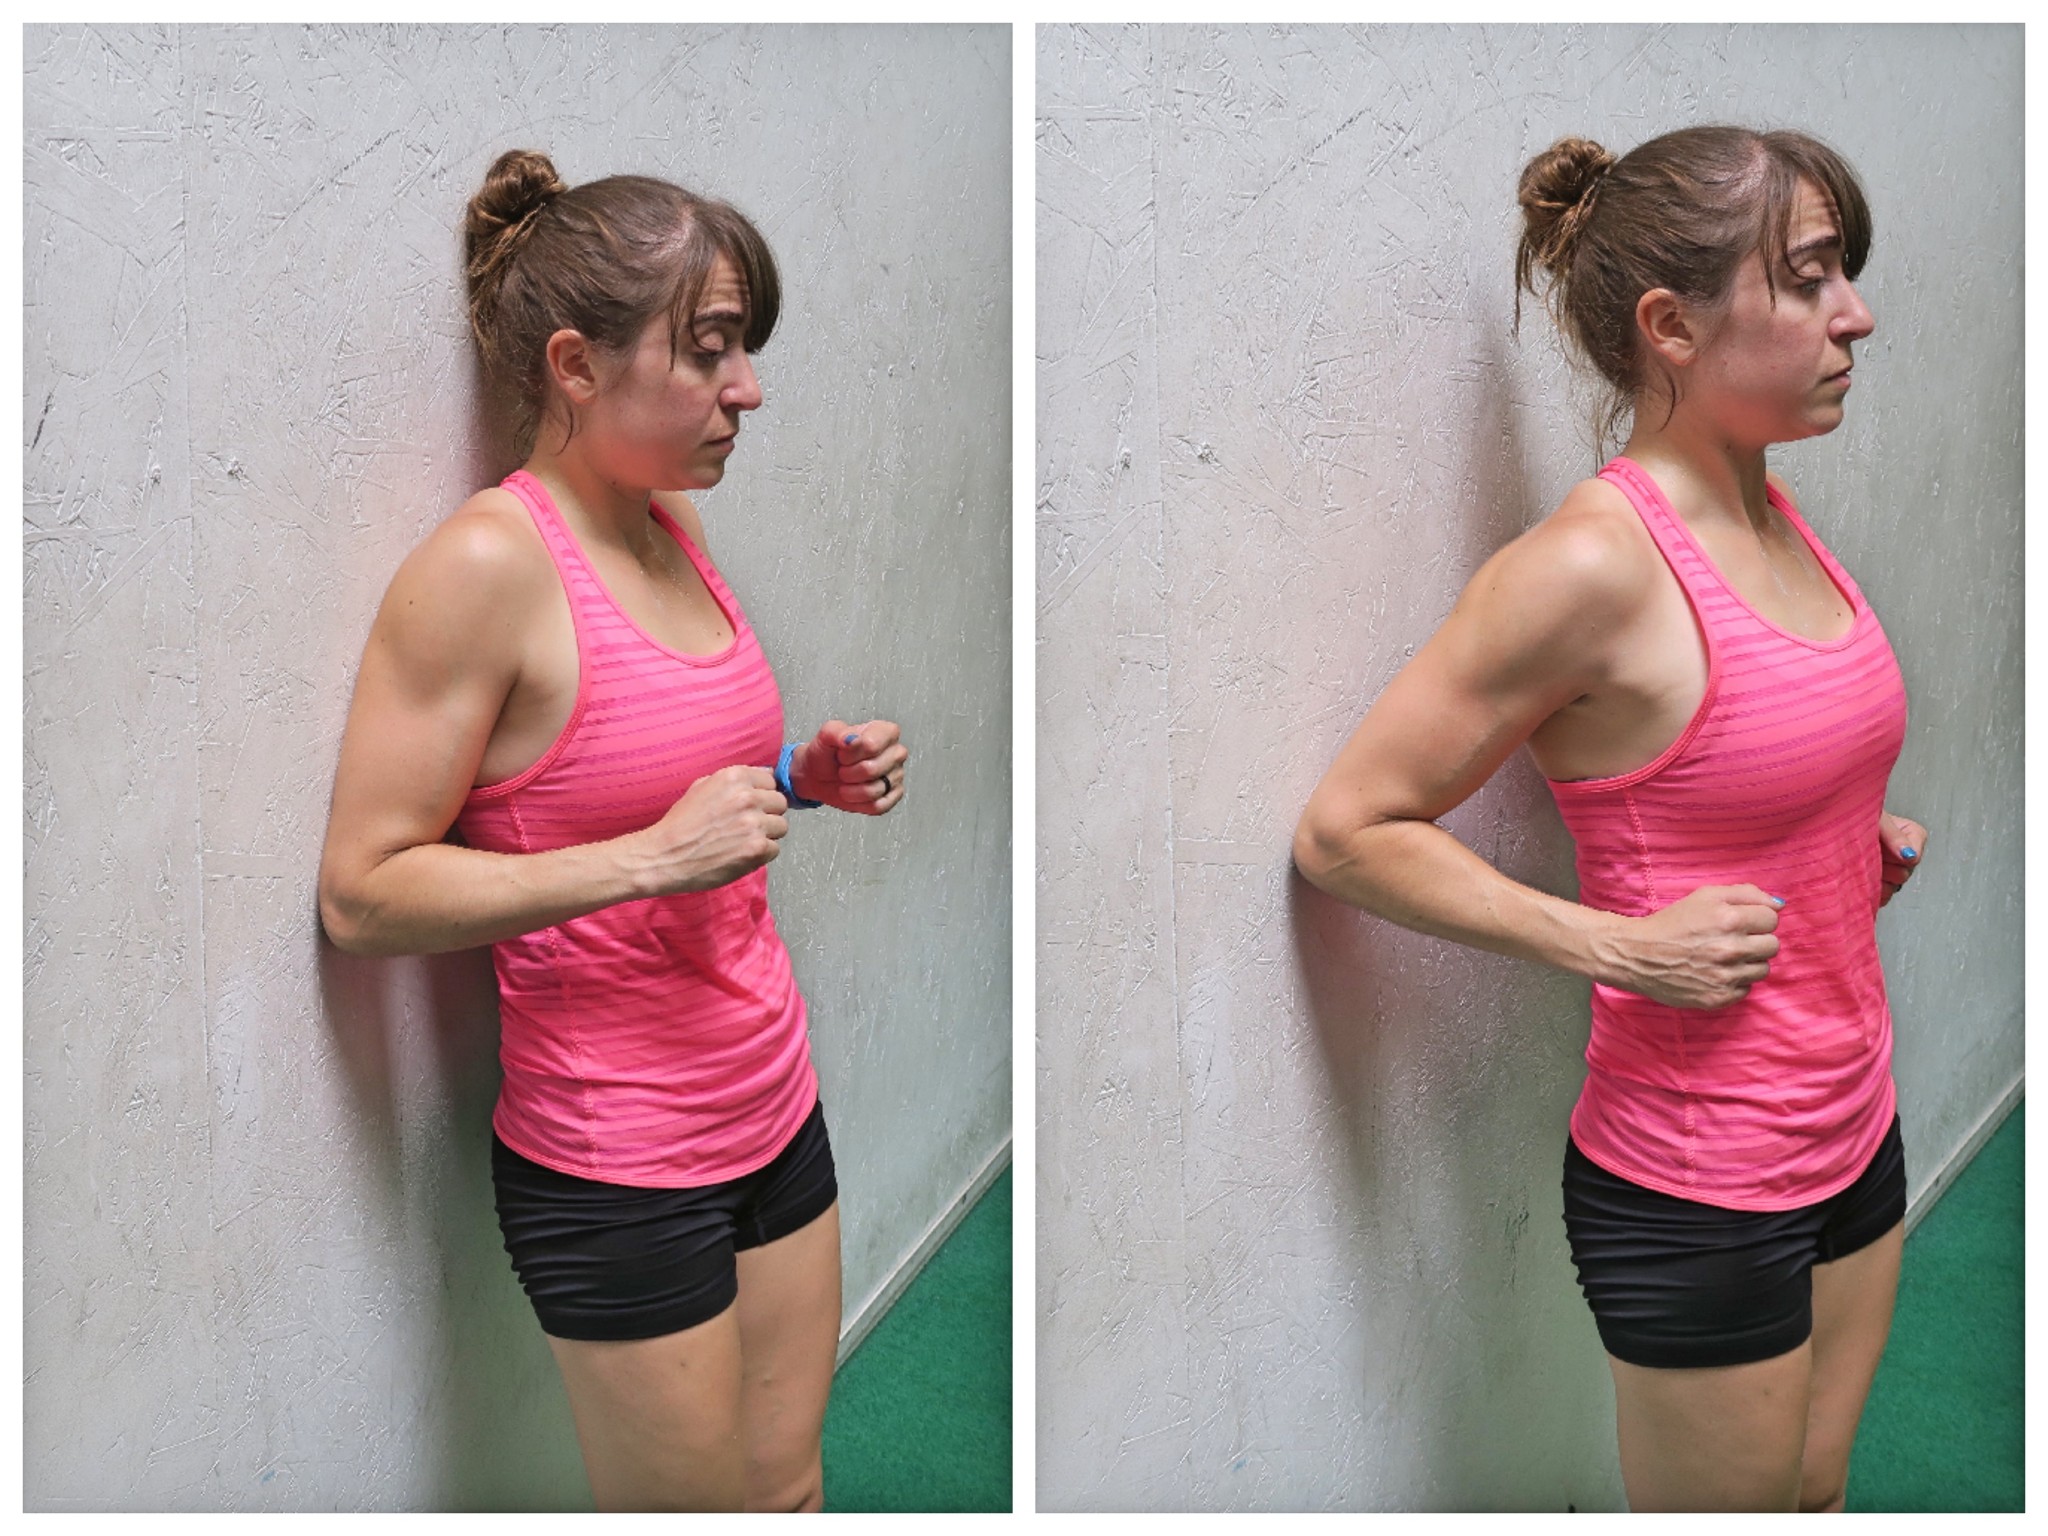
To do the Scapular Wall Hold Reps, stand with your back relaxing against the wall and your feet about six inches away. Bend your arms and drive your elbows back into the wall. With your body in a nice straight line, drive off the wall with your elbows, pressing your chest out and pinching your shoulder blades down and back. Brace your core and squeeze your glutes so your body moves as one unit.
Relax back into against the wall, keeping your body in a nice straight line from your head to your heels. Do not let your hips drop. Then repeat the press out, driving off your elbows. Do not arch your low back as you press out. Also, make sure not to shrug your shoulders. The further from the wall that you walk your feet out, the harder the move will be.
To do the hold, you would simply hold pressed out. That is a great activation move even before your pull up work!
Row Push Up:
This anti-rotational core move will work not only your abs, but also your chest, back, arms and shoulders. Talk about a move that works EVERYTHING!

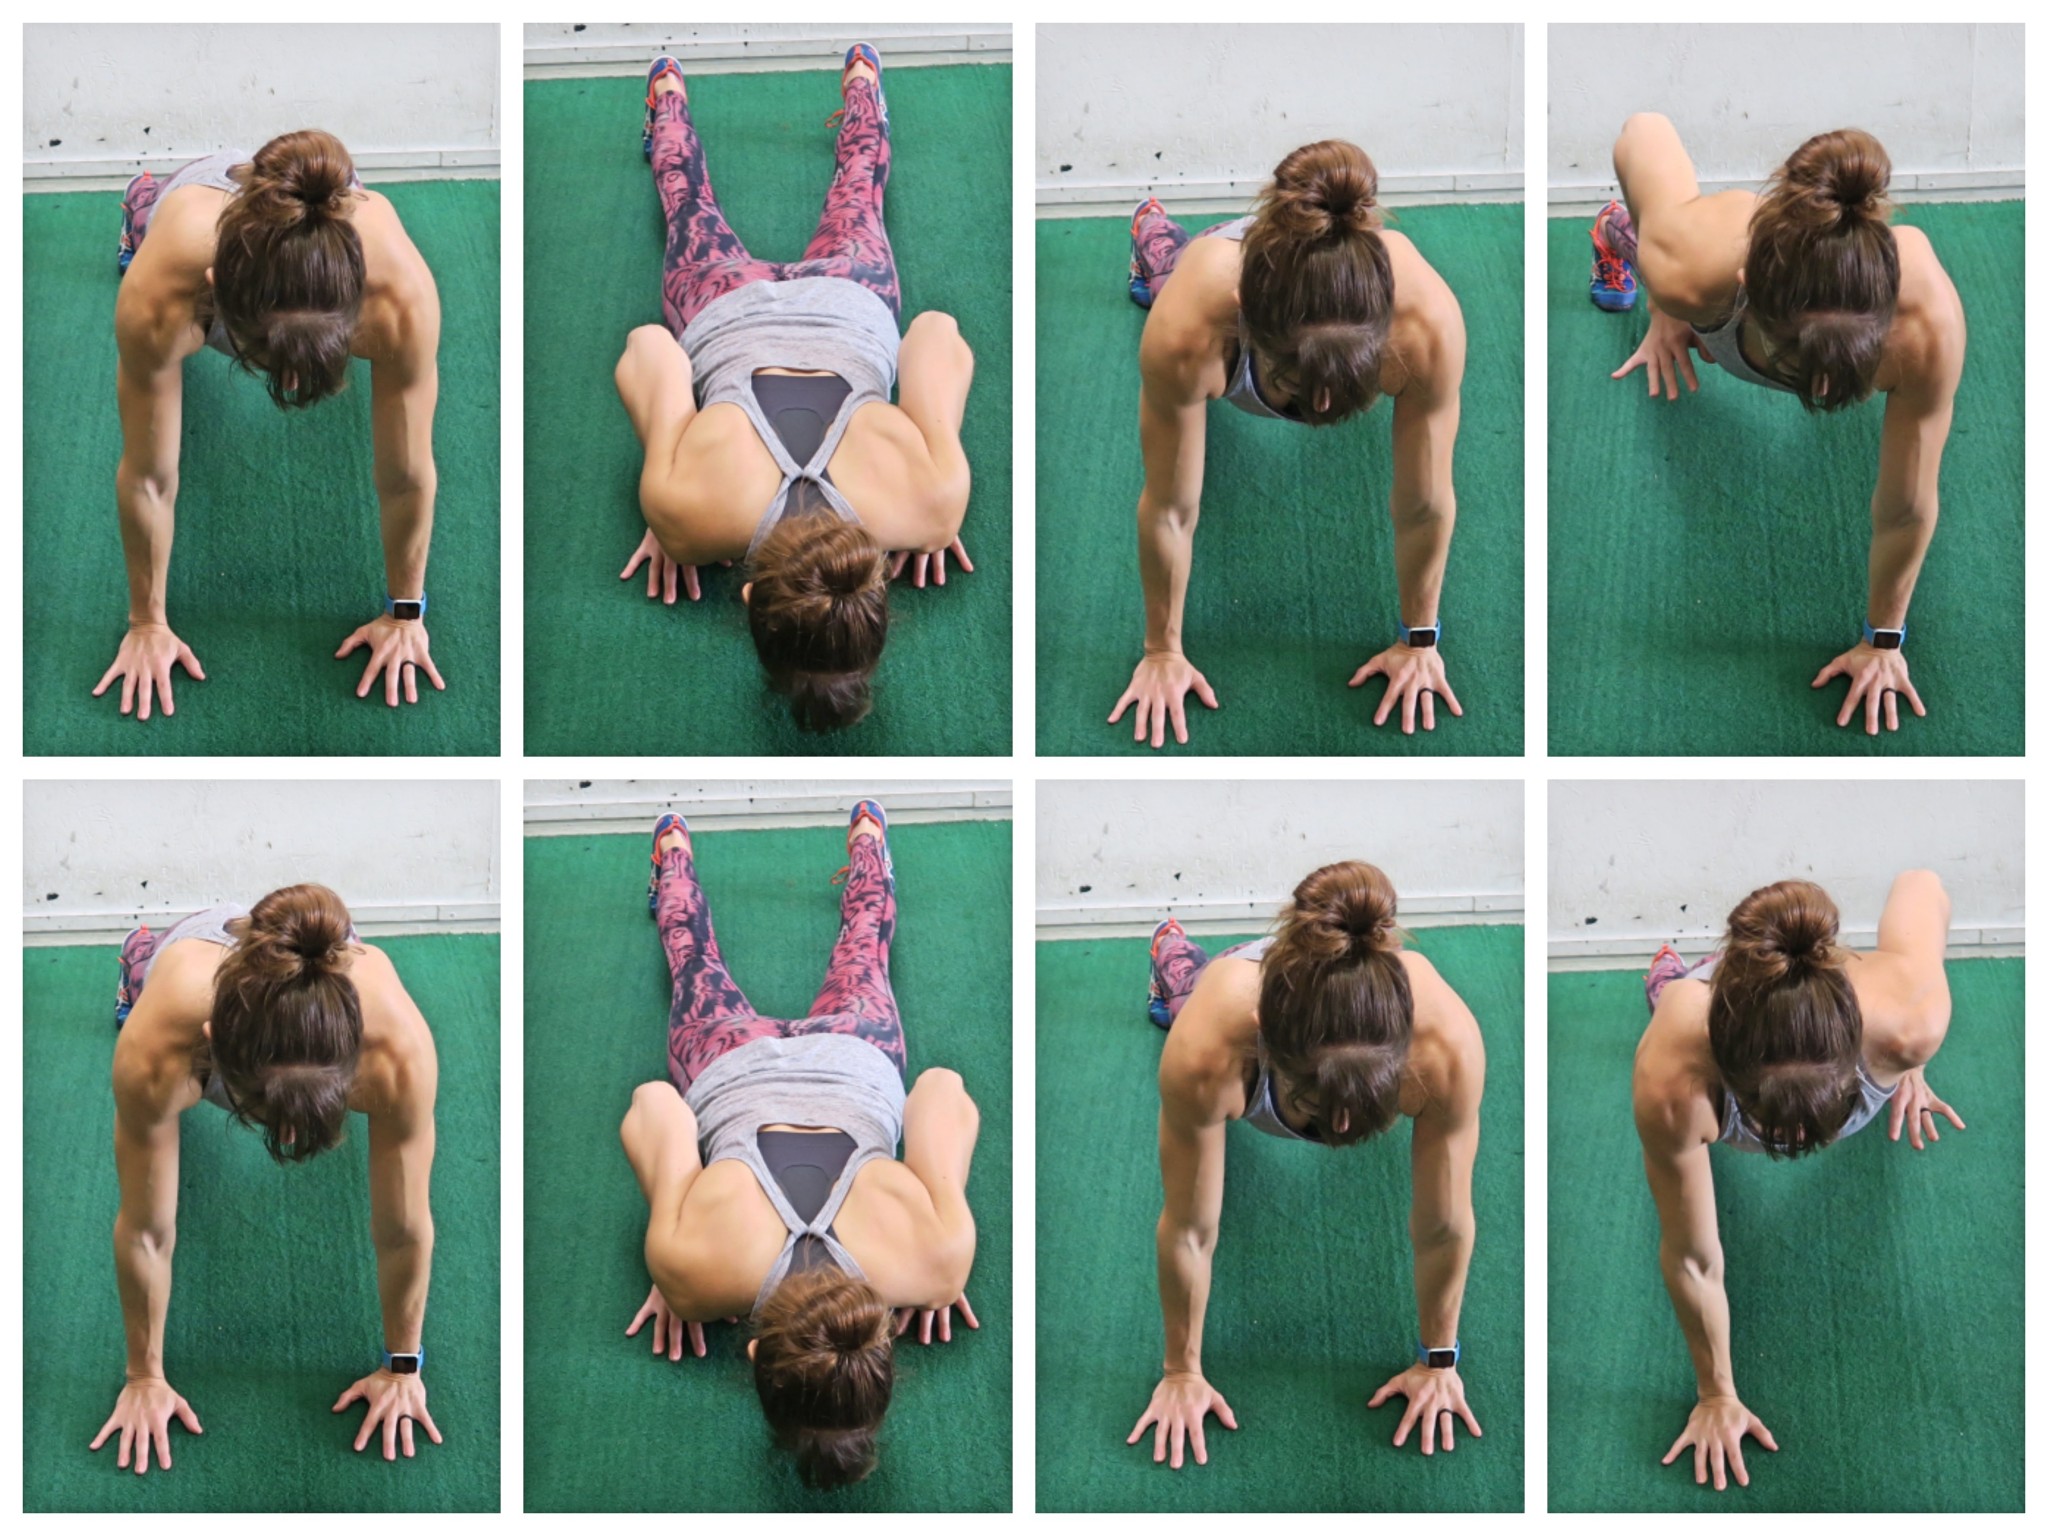
To do the Row Push Up, set up in a high plank position with your feet about hip-width apart and your hands outside your chest (beginners can do this from their knees). Then perform a push up, lowering your chest to the ground as your body moves as one unit. Do not let your butt go up in the air or your head jut forward. Also, make sure your arms create an arrow shape (–>) with your body instead of flaring way out.
Press back up, again keeping your body in a nice straight line. At the top of the push up, row one arm up. Lift the hand off the ground as you drive your elbow down and back toward the ceiling. Feel your back work to lift your arm. Bring your hand to about chest height then place it back down and repeat the push up.
At the top of the push up, row the other hand up. Try not to let your body rotate as you row. Also, do not let your butt go up in the air. You want to keep your body square to the ground as fighting the rotation works your core more.
If you have weights and really want to use them, you may also do the Renegade Row Push Up.
Push Up Walk Back:
This push up variation is going to work your arms, shoulders and abs and get your blood pumping. It is also a great way to work on your mobility with the walk back! (Hey a little extra lower body work never hurts!)

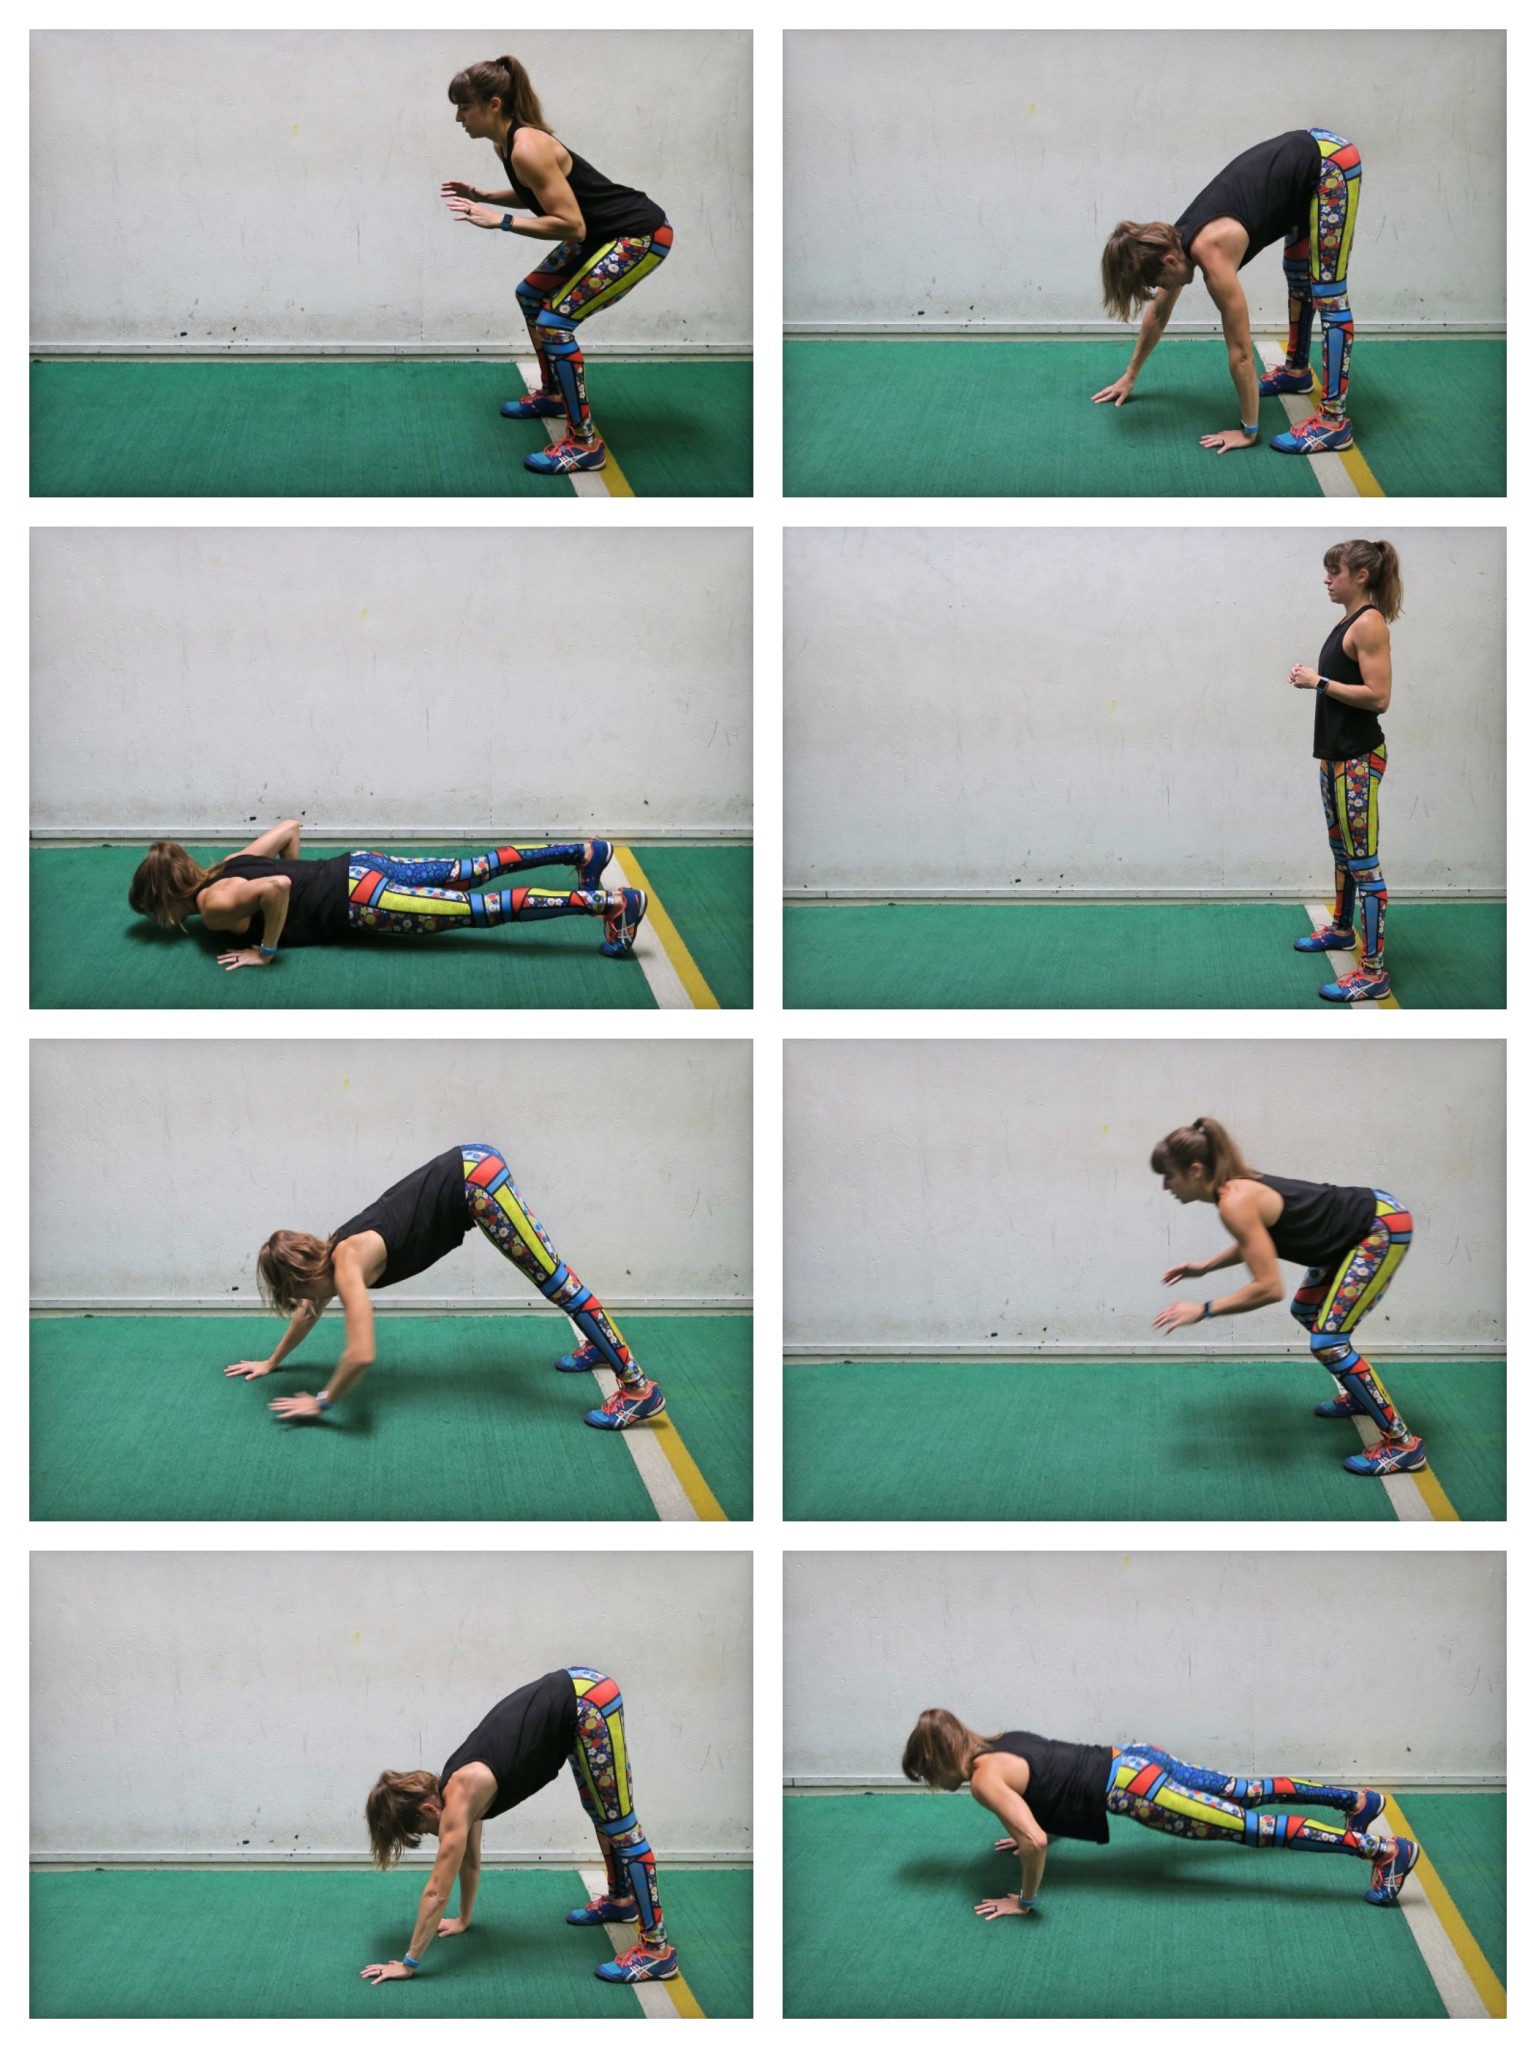
To do the Push Up Walk Back, start standing with your feet close together. Then bend your knees and squat down slightly. Rock forward to “dive out” and extend into a push up.
As you dive out and catch yourself, bend your elbows to absorb the shock of landing. You will perform a push up as you catch yourself and lower your chest to the ground. Push back up to a plank position and then, keeping your legs straight, walk your hands back in toward your feet.
Stand all the way back up and then squat down to repeat the dive back out and push up. This is an advanced move. Beginners may need to walk out instead and go down to their knees for the push up.
Ready to build full-body strength as you burn fat WITHOUT using any equipment?
Learn more about my Bodyweight Shred!


by Cori Lefkowith | Jul 22, 2015 | Blog, Bodyweight, Exercises
Working out can definitely be more fun with a friend. It can also hold you accountable and make you push harder.
Plus, a friend can be all the equipment you need to get in a great full-body workout.
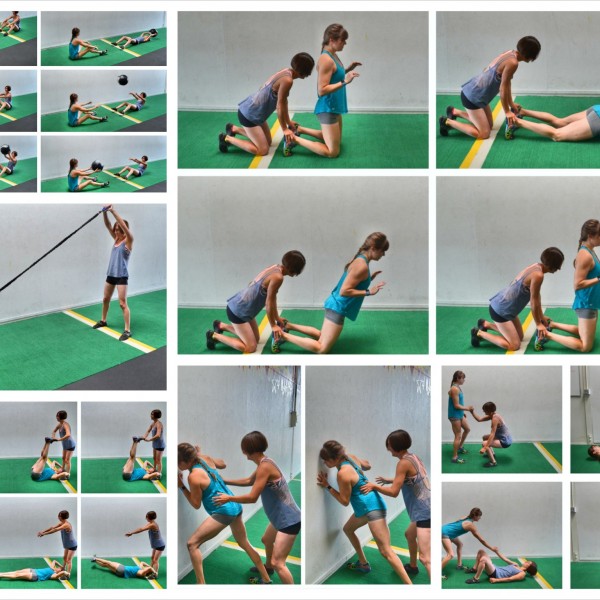
With these 20 Partner Exercises, you can build strength, get in a great cardio workout and even improve your coordination.
And if you are looking for a great Partner Workout, check out the ones at the bottom!
(more…)
