by Cori Lefkowith | Oct 31, 2018 | Blog, Butt, Core, Pain Relief, Warm Up, Workouts
If you want to stay injury free, it isn’t enough to just rest and then return to your normal routine.
You’ve got to CORRECT the problem that caused the pain to occur aka address the movement distortions, compensations and imbalances that lead to the overload.
And in the case of our lower backs, this is generally tight hip flexors, an immobile spine, overstretched hamstrings and weak abs and glutes.
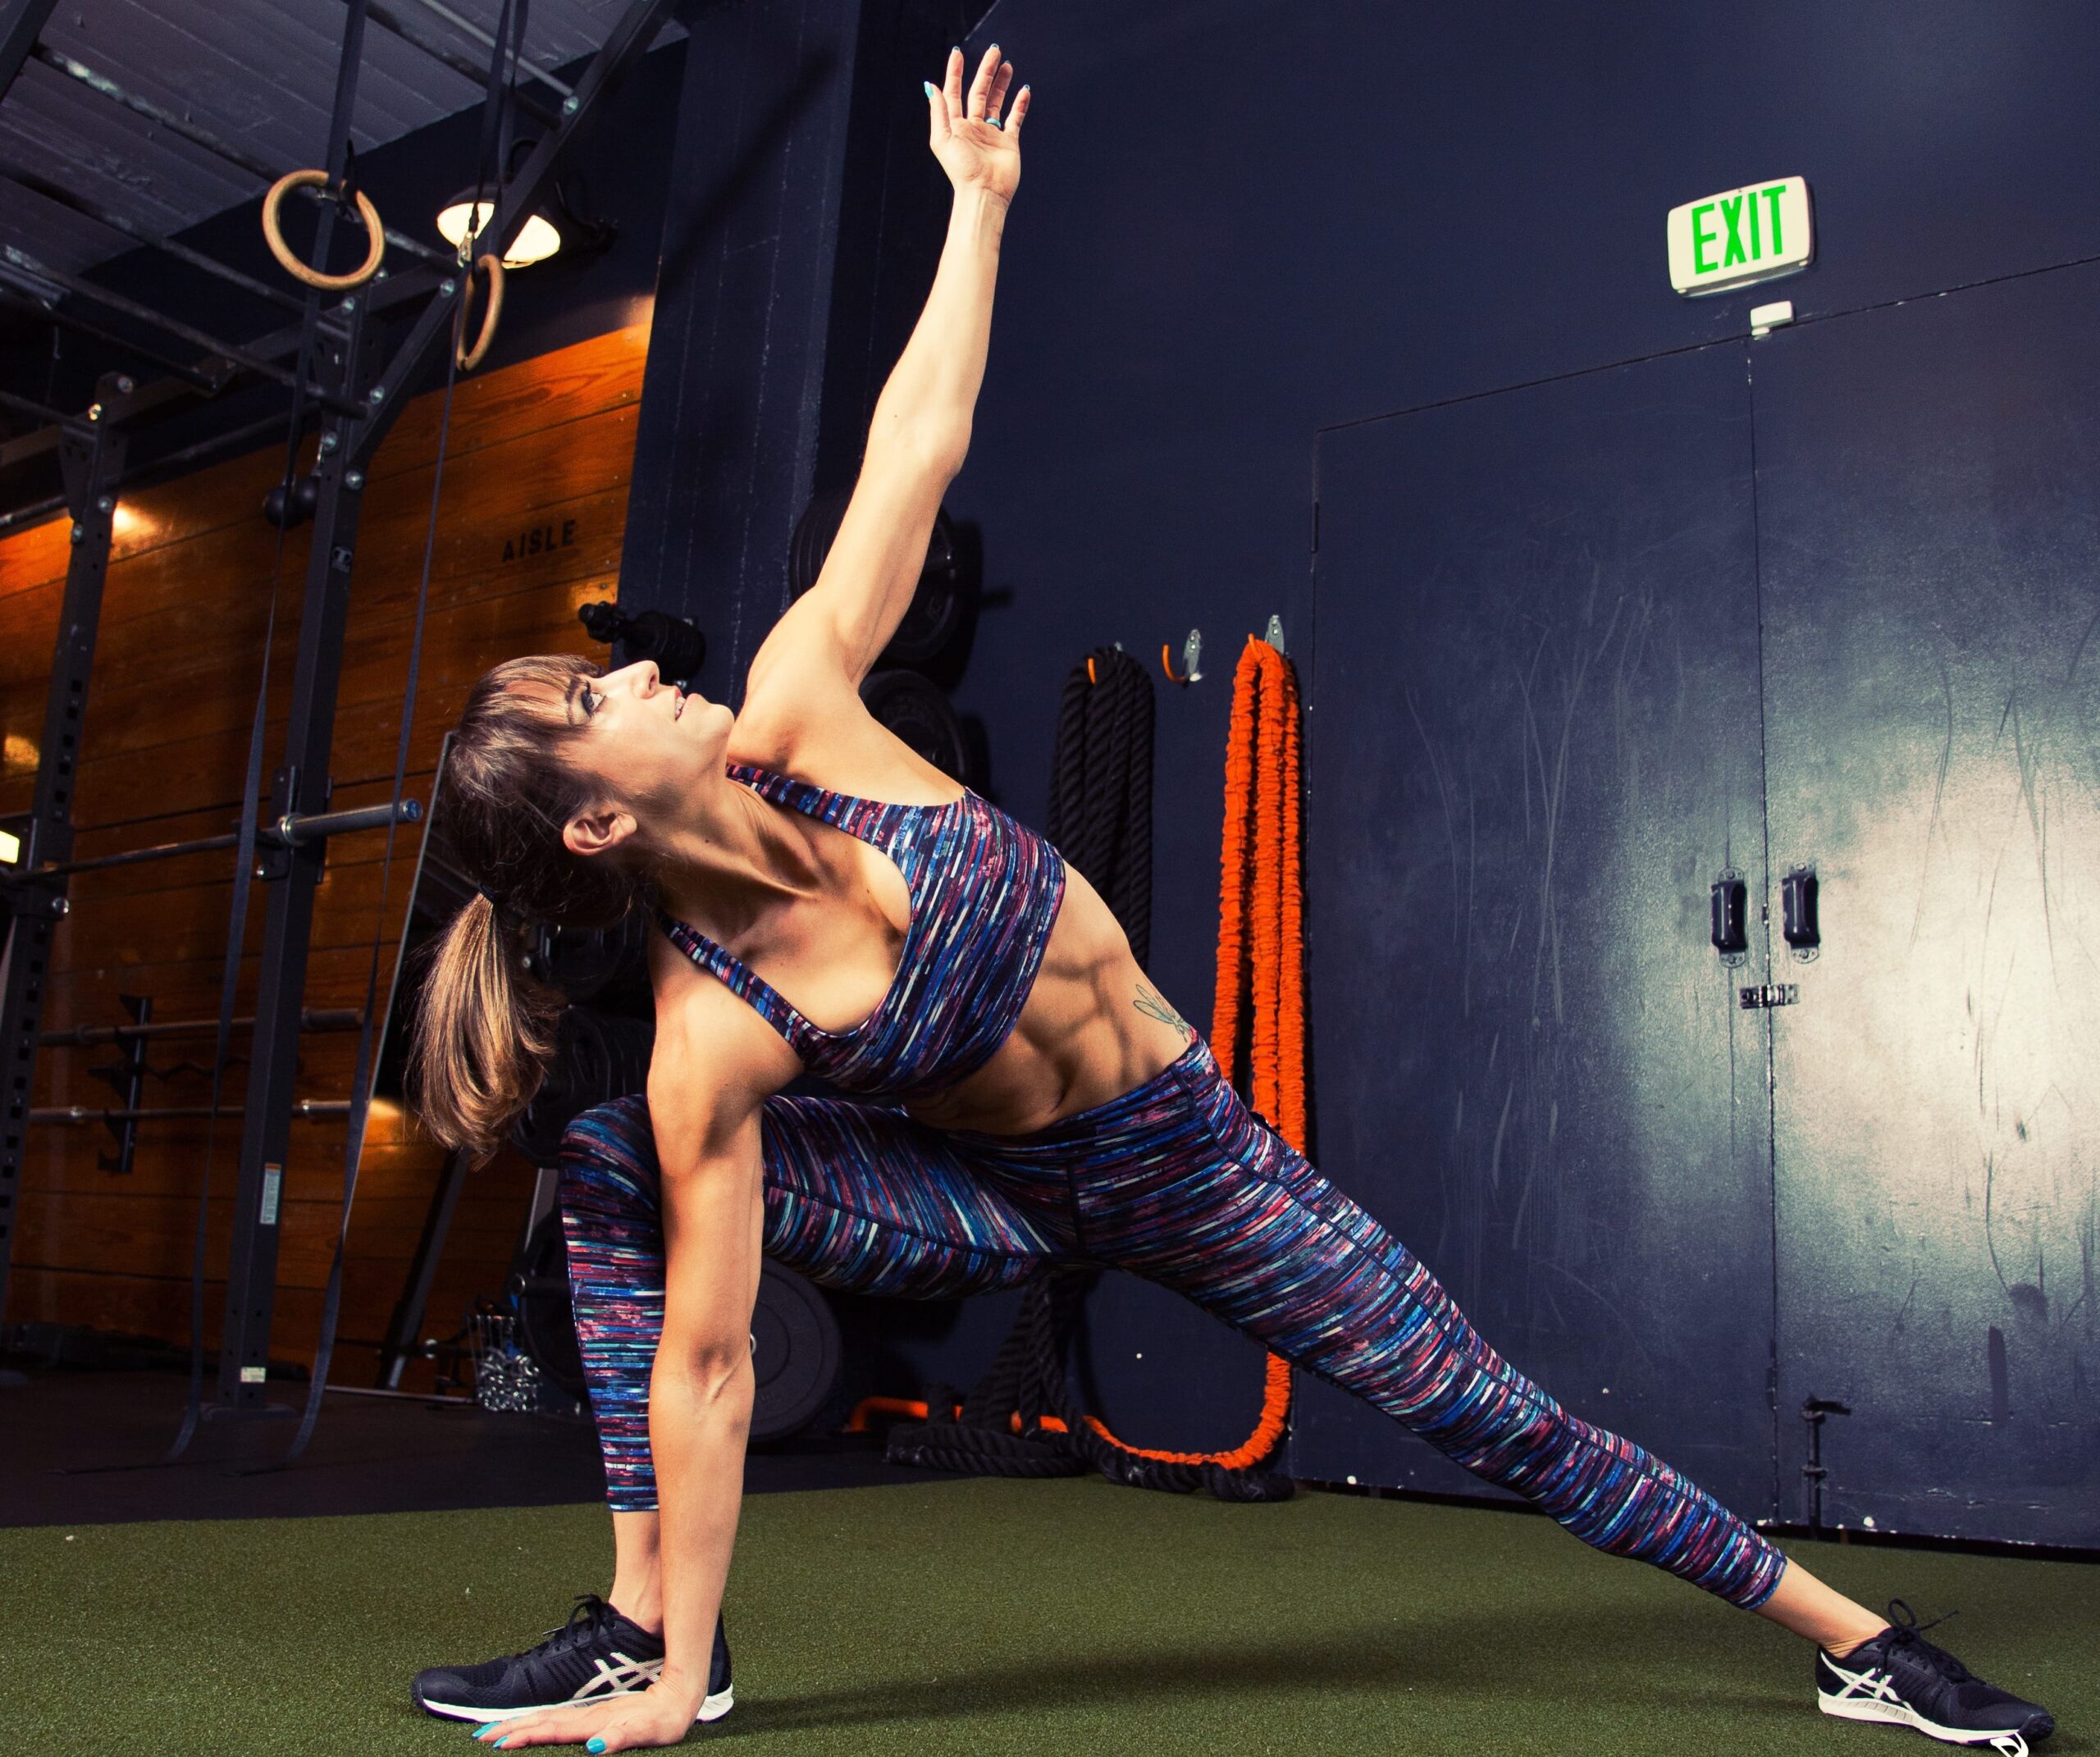
This is why you need a 3 step approach to improving your movement patterns as well as your mobility and stability so you can prevent the pain from reoccurring – you need to Foam Roll, Stretch and Activation, not only as rehab or prehab but also as part of your WARM UP to your runs, rides or lifts.
If you’re ready to get those glutes and abs activated as you improve your spinal and hip mobility to prevent lower back and even hip and knee pain, check out my RStoration program!
The Prevent Lower Back Pain Workout
FOAM ROLLING:
Complete 1 round through the series, holding on any tight spots you find instead of rolling quickly back and forth. If something isn’t tight, you don’t need to roll it. But if something is tight, don’t hesitate to spend an extra 10-15 seconds on that area.
CIRCUIT:
30 seconds Peanut Foam Rolling
30 seconds per side Psoas Foam Rolling
30 seconds per side Adductor Foam Rolling
30 seconds per side TFL/Glute Foam Rolling
STRETCHING:
Complete 1 round through this series, spending more time on any tight areas. You can do these for about 20-40 seconds per move or side or up to 10 reps per side. Your focus is on improving your range of motion over the reps or time.
CIRCUIT:
4-6 reps per side Child’s Pose with Reaches
5-10 reps per side Active Foam Roller Star Stretch
10 reps per side Half Kneeling Hip and Quad Stretch
5-10 reps per side World’s Greatest Stretch
ACTIVATION:
Complete 2-4 rounds of each triset, resting up to 30 seconds between rounds if needed. Rest up to 1 minute between trisets as needed. If you are doing this as part of a warm up, 1-2 rounds of each is more than enough.
TRISET #1:
20 seconds Vomiting Cat
20 seconds Glute Bridge with Rocks
20 seconds Swimmers
TRISET #2:
20 seconds Thoracic Bridge with Sit Thru
20 seconds Bulldog Shoulder Taps
20 seconds Frog Bridge
With the stretching and rolling, focus on your areas of tightness even skipping areas that aren’t tight especially if you are short on time!
by Cori Lefkowith | Oct 23, 2018 | Blog, Diet, Recipes
I believe eating well is a balance…and sometimes that balance even means having no balance aka what I consider “cheat days.”
But for those days you don’t fully feel like indulging but do have a hankering for some of those not so healthy treats, it can be fun to come up with macro-friendly alternatives.
These macro-friendly recipes help keep you on track while still satisfying your cravings so that you don’t want to binge.
They are a great way to find balance with eating well so that you don’t feel deprived and can still stay focused on your goals.
They help you create that oh so elusive LIFESTYLE so many people talk about.
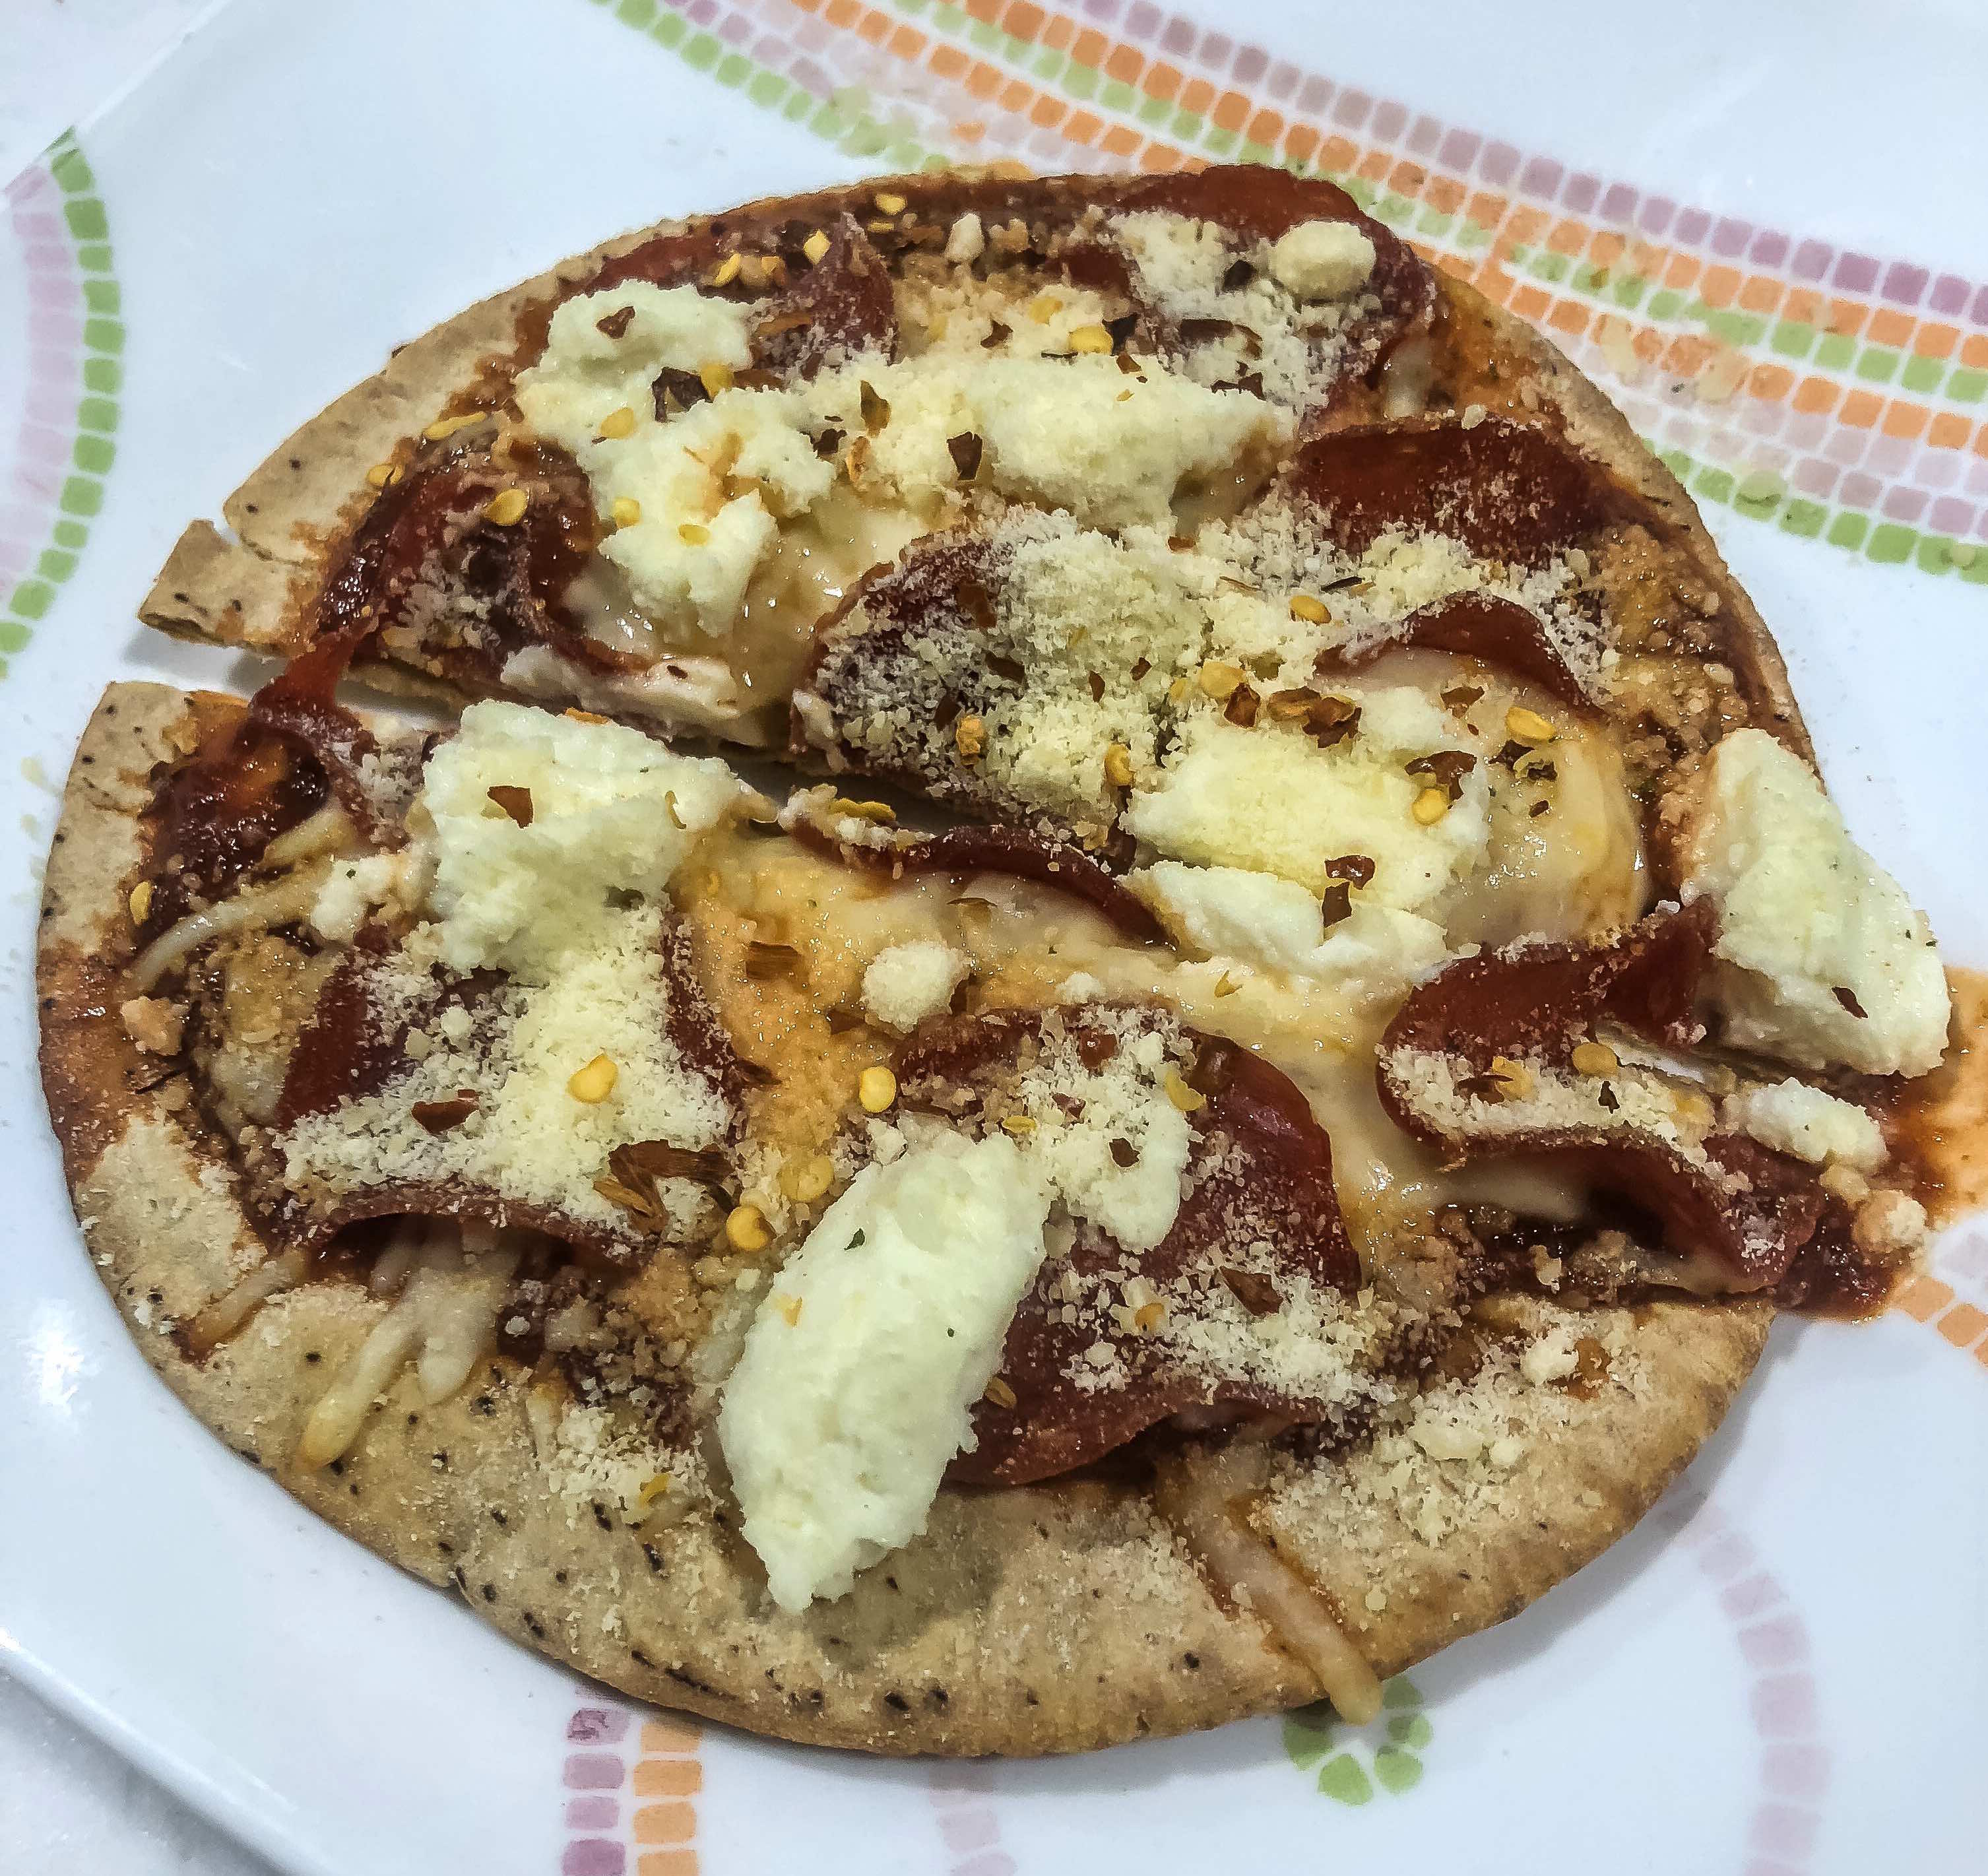
And one of my favorite macro-friendly treats is this Pita Pepperoni Pizza!
No this isn’t the cleanest meal you’ll ever eat, but guess what?! Sometimes you NEED that!
So if you’re craving some pizza but want to stay on track, and potentially trigger worse cravings, try this Macro-Friendly Pizza alternative!
The Pita Pepperoni Pizza
SERVINGS 1-2
INGREDIENTS:
2 pitas (Joseph’s Flax Oat Bran & Whole Wheat Pita Bread)
16 slices Turkey Pepperoni (65% Less Fat)
1/2 cup Mozzarella Cheese Shredded
1/2 cup Italian Herb Organic Pasta Sauce
1/2 cup Ricotta Cheese, Low-Fat
1 tbsp Parmesan & Romano Grated Cheese
Sprinkling of Red Pepper Flakes
DIRECTIONS:
Preheat the oven to 350 and place the pita bread on the middle rack for 3-4 minutes just till it starts to get crispy but not brown.
Then remove from the oven and split the ingredients between the two pitas. I like to measure as I put the toppings on, especially if I’m not eating both at that meal.
Top first with tomato sauce. Then the pepperoni. Then sprinkle with the mozzarella before spooning on chunks of the ricotta. You can also spread the ricotta on if you don’t want bigger chunks.
Place in the oven again on a baking sheet and cook till the edges of the pita start to brown and the cheese is melted.
Then remove from the oven and top with parmesan and red pepper. Enjoy!
You can of course place any other toppings on that you like. Others that are good include olives, onions, spinach, mushrooms…The options are endless! Just make sure to adjust the macros below based on the ingredients you use!
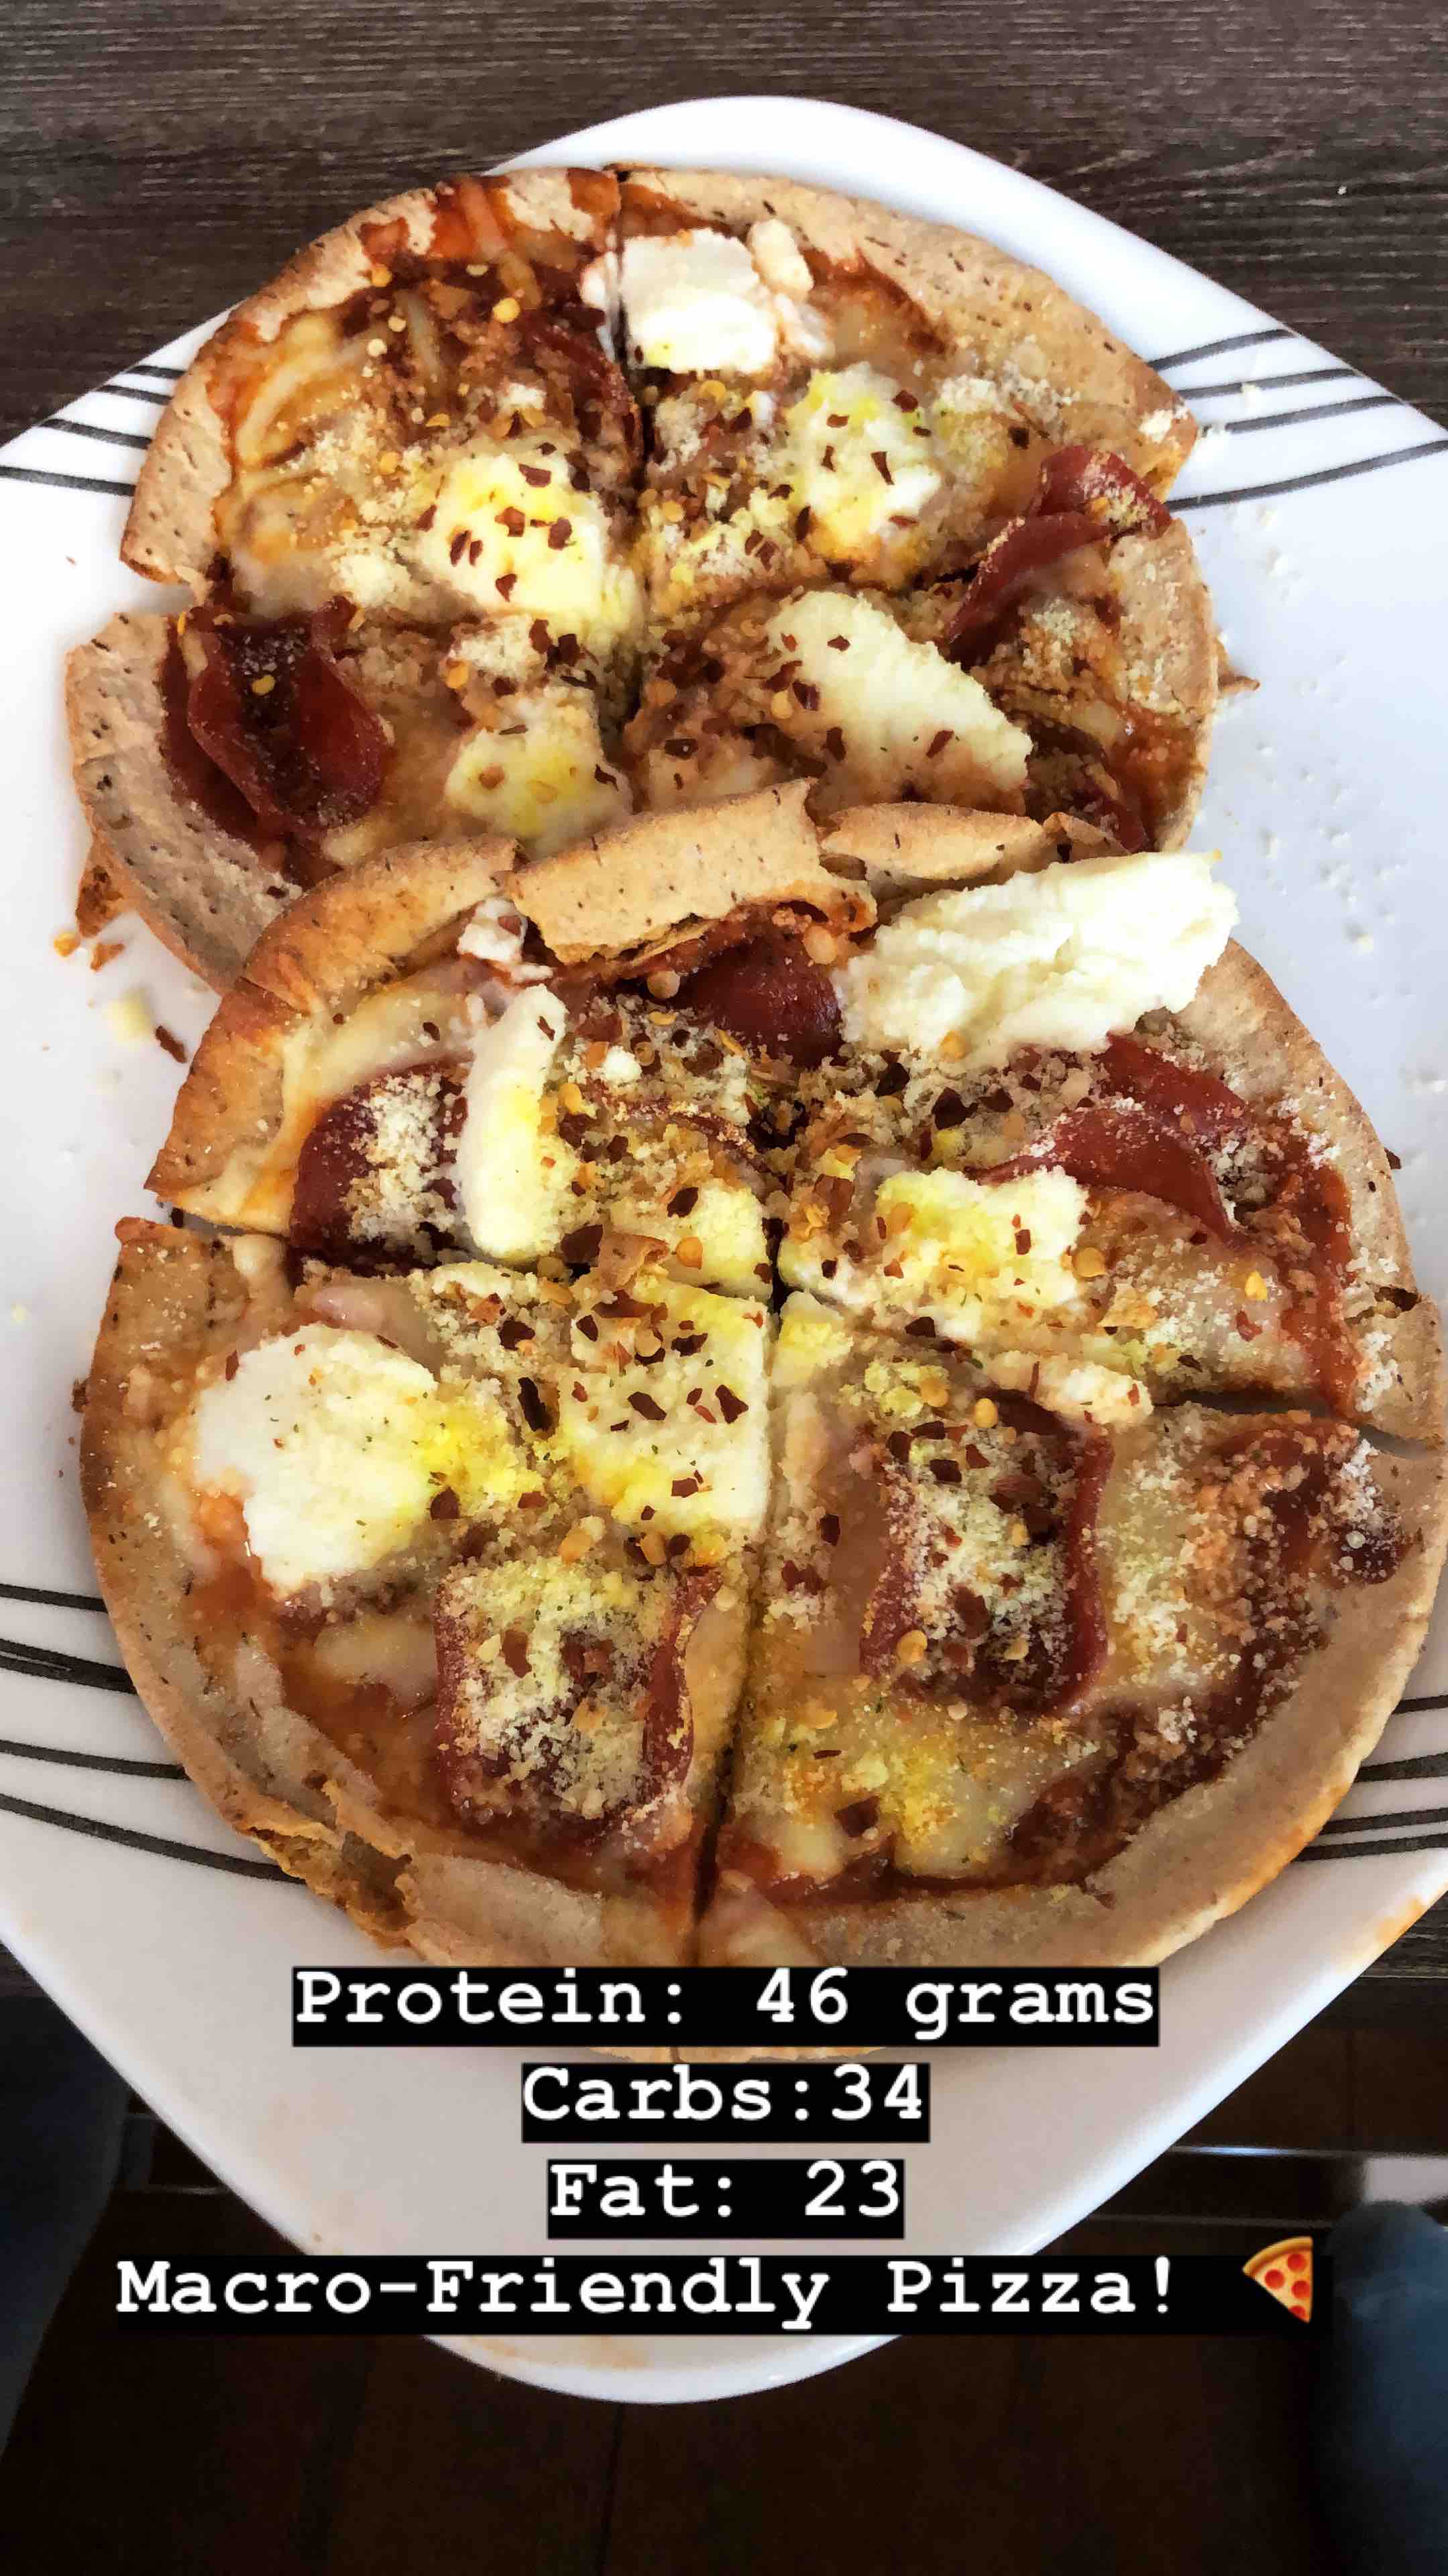
MACROS FOR BOTH PITA PIZZAS:
Calories: 475
Protein: 46 grams
Carbs: 34 grams
Fat: 23 grams
FOR A SINGLE PITA PIZZA….just in case you wanted to be lazy and not do the math ;-):
Calories: 237.5
Protein: 23 grams
Carbs: 17 grams
Fat: 11.5 grams
Ready to strike a balance between indulging in the foods you love and eating clean and according to your goals?
Sick of trying to find a “lifestyle” when most diets force you to cut out the foods you love?
It’s time you learned a bit more about Macro Cycling. CLICK HERE!
by Cori Lefkowith | Oct 15, 2018 | Blog, Diet
So one of my male clients told me a few of his female co-workers wanted to start losing some weight. He told them they should eat more protein.
And they said back to him, “But we don’t want to get bulky!”
WHAAAAAAAT!?!
I was a bit stunned when he told me this.
They thought that by eating protein, since they so often saw MEN consuming protein powders and higher protein to gain muscle, that eating too much protein would make them BULKY!
BULKY…It’s a word so many women fear.
It’s a word that holds many women back from even starting to weight train. And now I find out it is a word that holds women back from even eating the protein that they should!
Let me set the record straight…
PROTEIN WILL MAKE YOU BULKY.
FALSE!!
Protein absolutely, positively will NOT make you bulky, ladies. NOT AT ALL!
What protein WILL DO is:
- Help you look lean and toned like you want
- Help you feel energized to power through your workouts
- Help you LOSE WEIGHT WITHOUT FEELING HUNGRY
- Did I say look strong, sexy and LEAN!?!
Protein is the KEY…Literally the KEY to getting the results you want.
So a bit more about WHY protein so key for us LADIES and WHY it won’t make you bulky….
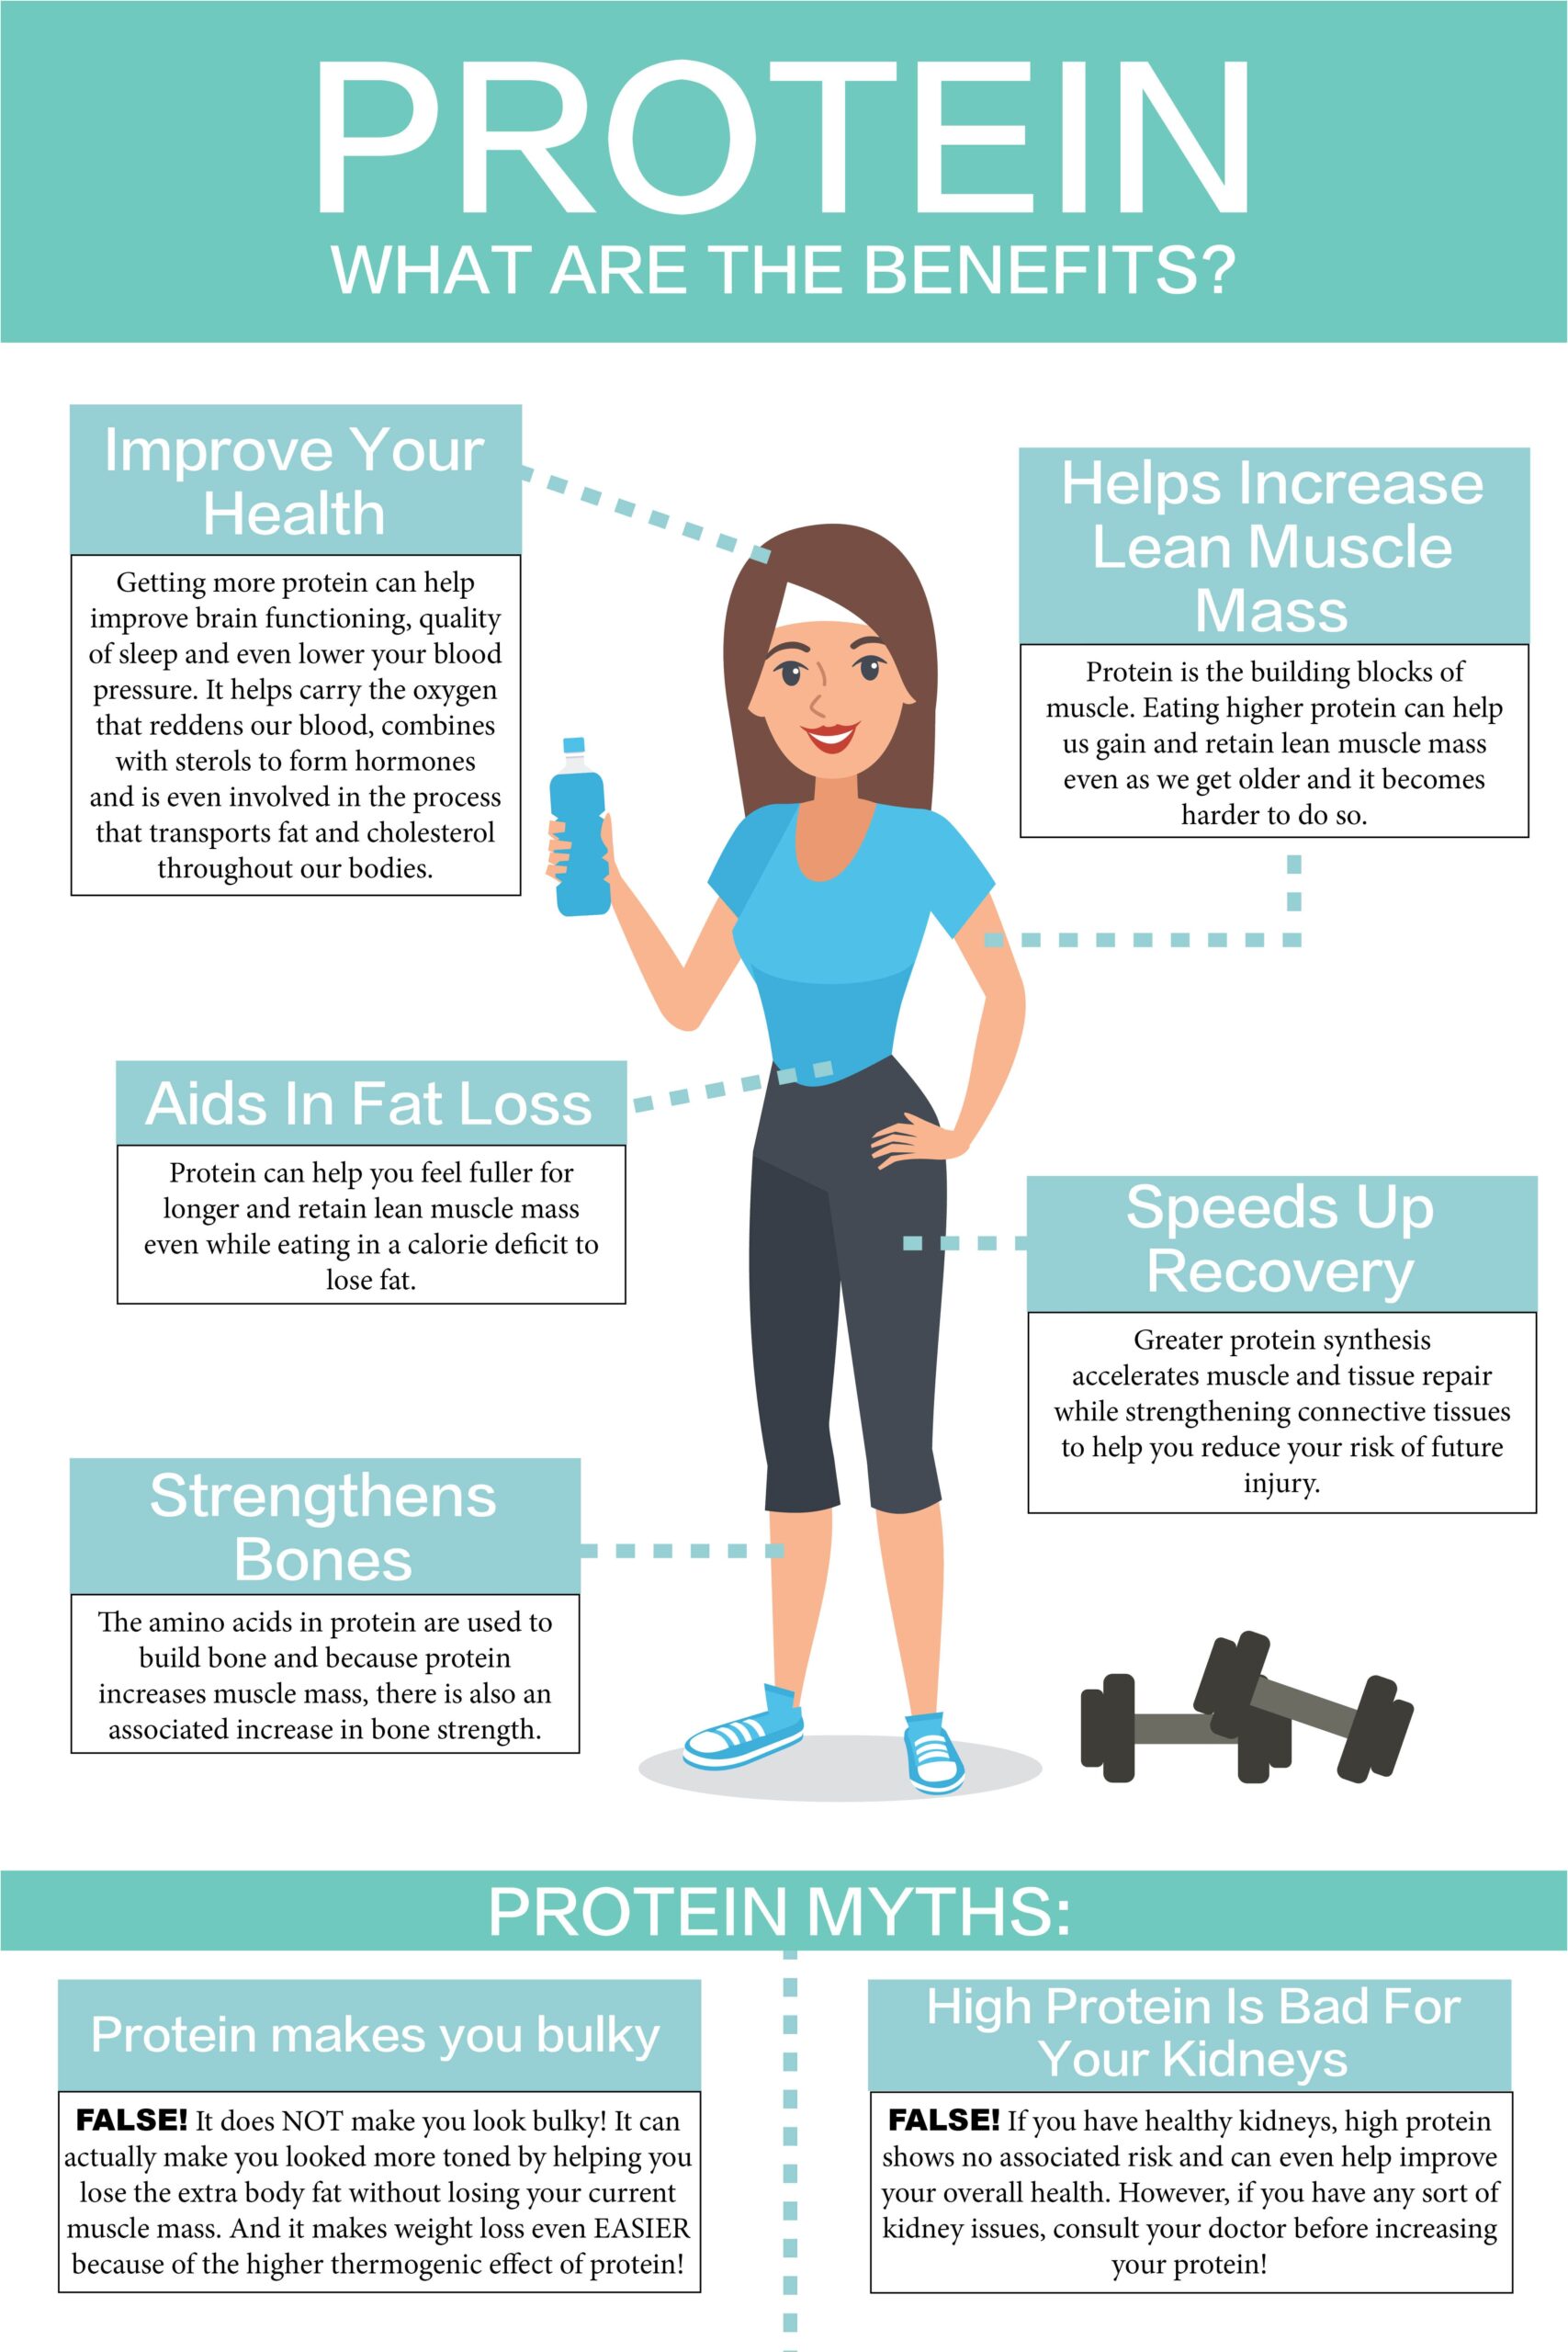
- It’s the building blocks of muscle. Not only will you preserve your lean muscle mass while potentially dieting in a calorie deficit BUT you can also build lean muscle to help you look more toned! AND as we get older, especially us ladies, it can be harder and harder to retain and even GAIN muscle. A diet high in protein helps! Plus, when we are injured, we often think we need less protein, BUT a diet higher in protein can help us prevent muscle loss while we are out and restricted from training.
- Keeps you feeling fuller for longer. Protein keeps you satisfied so that you don’t end up feeling like you are starving even if you’re trying to lose weight.
- It makes weight loss EASIER! The thermogenic effect of protein makes it EASIER to lose weight and drop body fat on a protein rich diet EVEN if you “overeat.” A study 2014 study showed that even on a hypercaloric diet, people didn’t gain weight due to the high protein. Plus, because it preserves lean muscle mass, you will tend to burn more calories even at rest and your metabolism will stay healthy.
- Improves recovery and muscle repair. You will provide your muscles with the building blocks they need to repair. AND the increase in protein can also help your tendons and connective tissues repair. Greater protein synthesis accelerates tissue repair and strengthens connective tissues to reduce your risk for injury.
- Can improve bone density and prevent osteoporosis. It is actually a common misconception that high protein is bad for your bones and this “myth” is based on a misunderstanding of bone metabolism. Actually the amino acids in protein are used to build bone AND because protein increases muscles mass, there is an increase in bone strength! (1)
- And studies of protein rich diets have even shown to improve brain functioning, quality of sleep AND even lower blood pressure!
And speaking to those ladies going through menopause and post-menopause struggling to keep the weight off…PROTEIN IS KEY TO RETAIN THAT LEAN MUSCLE MASS and keep our skin, hair and nails healthy and strong! It is the building blocks!
During and post-menopause, protein can help keep our hormones in check and help us avoid that dreaded weight gain! It can help improve our body composition as well as our overall body functioning.
In menopause your hormone levels change and even specific hormones decrease, so if you don’t get enough protein, you’re going to have a harder time maintaining hormonal balance, which is what can affect muscle retention and cause weight gain. It can also affect our digestive system, thyroid and bone health!
So really ladies I should be asking, “Why WOULDN’T you eat more protein!?!”
If you’ve been struggling to get the results you want, track your food and you’ll notice that you probably are low on protein!
Protein doesn’t lead to bulk. It leads to that strong, lean muscle that helps us move better, feel better and even LOOK BETTER!
Ready to take control of your diet and get the lean, strong body you’ve always wanted?
Join my Metabolic Shred!
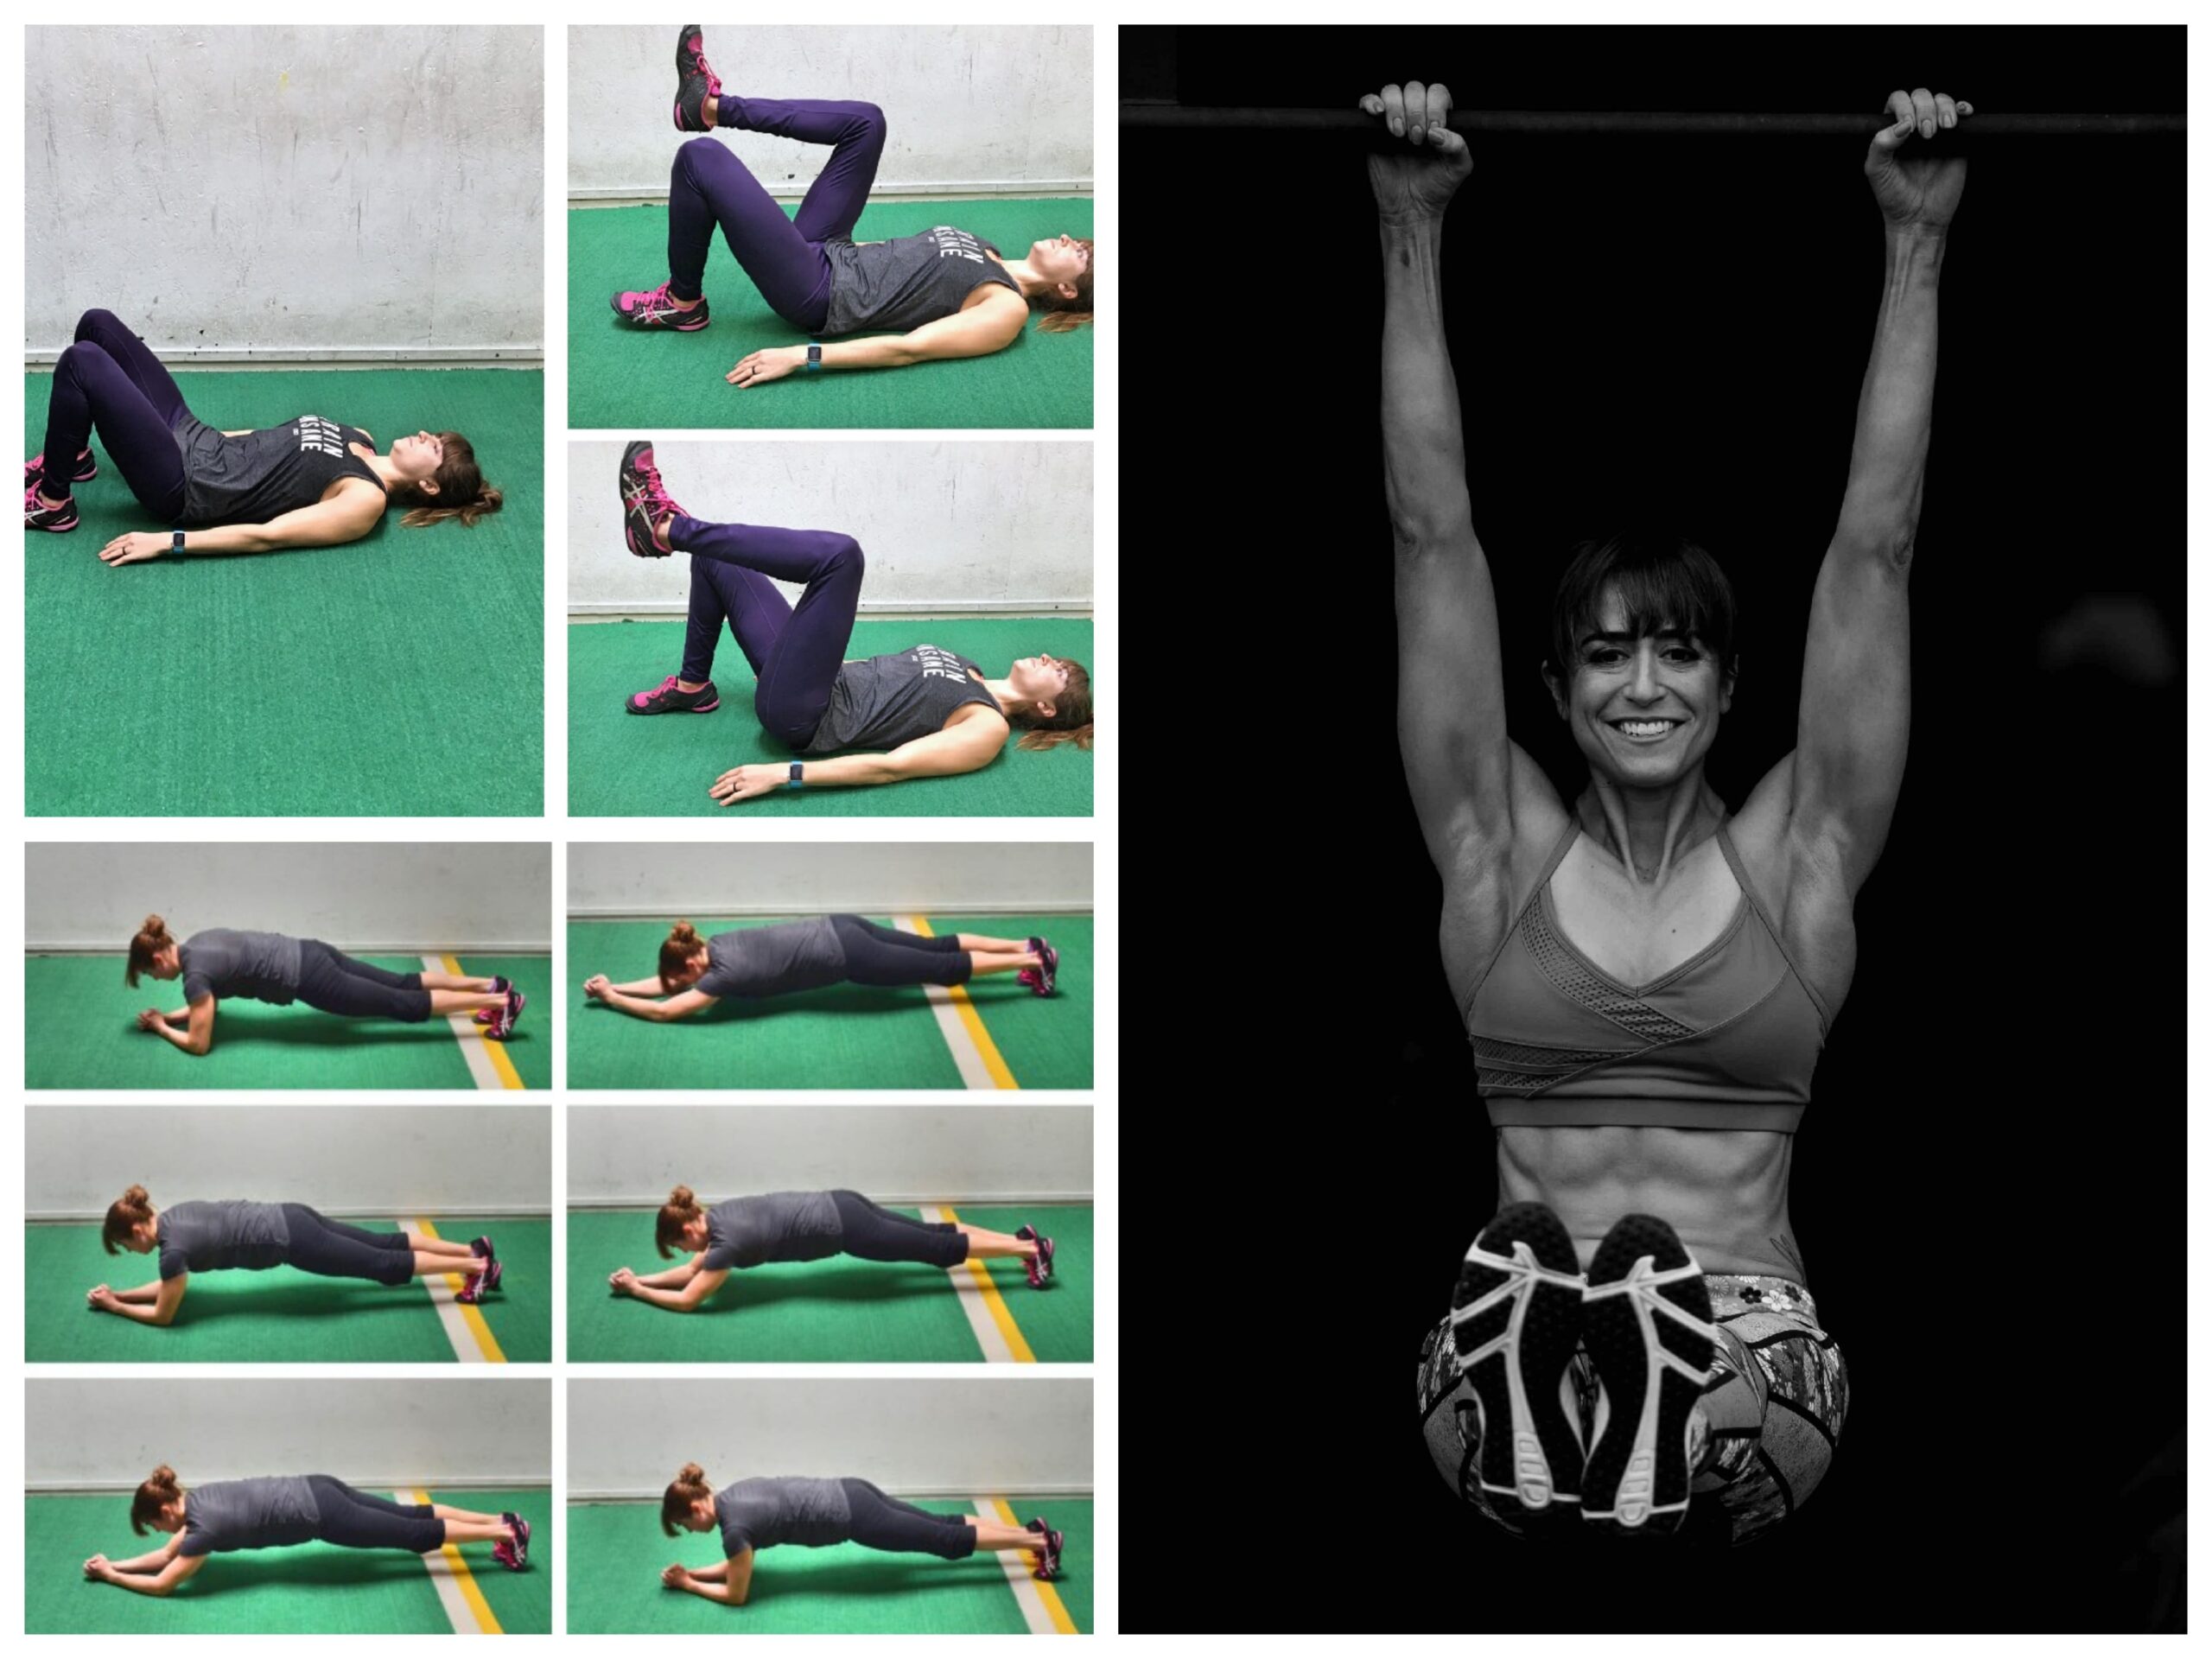
by Cori Lefkowith | Oct 4, 2018 | Blog, Bodyweight, Core, Exercises
GASP! Maybe there is something to this LOWER AB thing!
Fitness elitists will get really mad if you utter the term “lower abs.”
Because technically there is no lower ab muscle.
Technically it is all the same muscle the rectus abdominis that we are usually targeting with our core work, especially if we want six pack abs.
(I’ve had to turn away when another trainer tries to lecture me on using the term lower abs to secretly roll my eyes. I guess I could lecture them back…but why?)
Anyway…
All those “lower ab moves” we used to use started to get written off as simply hip flexor exercises since most of those moves done for lower abs include leg lower type movements.
And yes…your hip flexors DO work during those leg lowers.
But I just couldn’t fully accept that they had no impact on the “lower abs.”
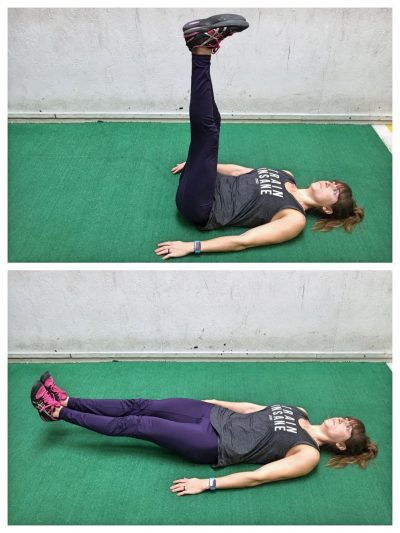
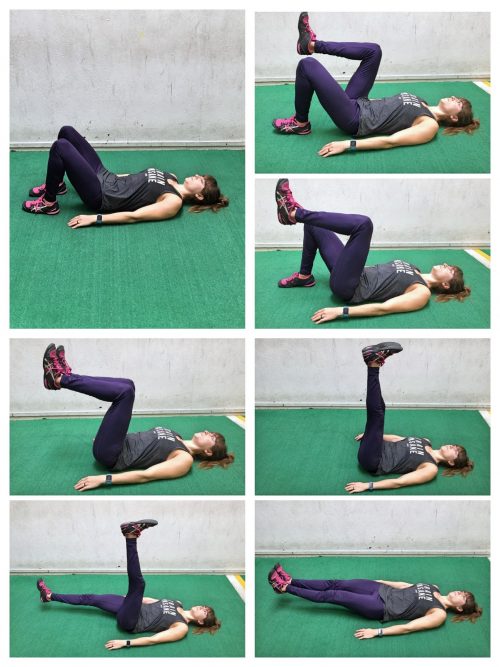
My “lower ab” definition was best when doing more leg lower movements after learning the pelvic tilt and after doing hanging abs.
I felt the lower ab region really WORKING during those moves and I’m always extra conscious when testing movements to feel WHERE is activating.
Because guess what? Doing the right moves even without feeling the correct muscles working is going to do NOTHING except put you at risk for injury!
So feeling my “lower abs” working led me to include hanging abs and the posterior pelvic tilt in my Killer Core program.
If you feel the muscles activating, and have clients agree with those finding and feel their “lower abs” like never before, SOMETHING is going on.
So that led me to hours of pouring over studies trying to see if I could figure out what I, and my clients, were feeling.
Were we simply mistaking this feeling in our “lower abs” for our psoas working?
That’s when I found studies showing that different ab exercises DID, in fact, activate portions of the URA and LRA (upper and lower rectus abdominis) to different extents. (Study 1)
Which frankly makes sense considering we’ve shown, and even more widely accept, that exercises activate upper or lower pec fibers differently and even upper and lower glute max fibers differently.
Another interesting results I found in a study was that POSTERIOR PELVIC TILT actually had HIGHER LRA for groups that learned to perform it correctly and were even more active AKA all of us who’ve trained a lot and are looking for that true engagement! (Study 2)
This also made me realize how important it was to correctly teach the posterior pelvic tilt progression – a progression we often skip to jump right to the hardest leg lower move.
Ever feel your lower back taking over during leg lowers? Ever put your hands behind your lower back to correct this?
Well this is just putting a bandaid on the problem. This is why we end up only working our hips and quads, and maybe even lower backs, with these moves.
It’s why we DON’T work our lower abs to the extent these moves can work them.
When you want to work your lower abs, you need to focus on what is working. REGRESS the posterior pelvic tilt progression to maybe a single leg lower or bent knee march or even just a simple HOLD.
But regress until you can properly feel your abs working and then slowly progress!
Ok so maybe you’re now thinking “I buy the whole activating different aspects of the muscles, BUT leg raise movements are STILL hip flexor moves….”
Well guess what!?!
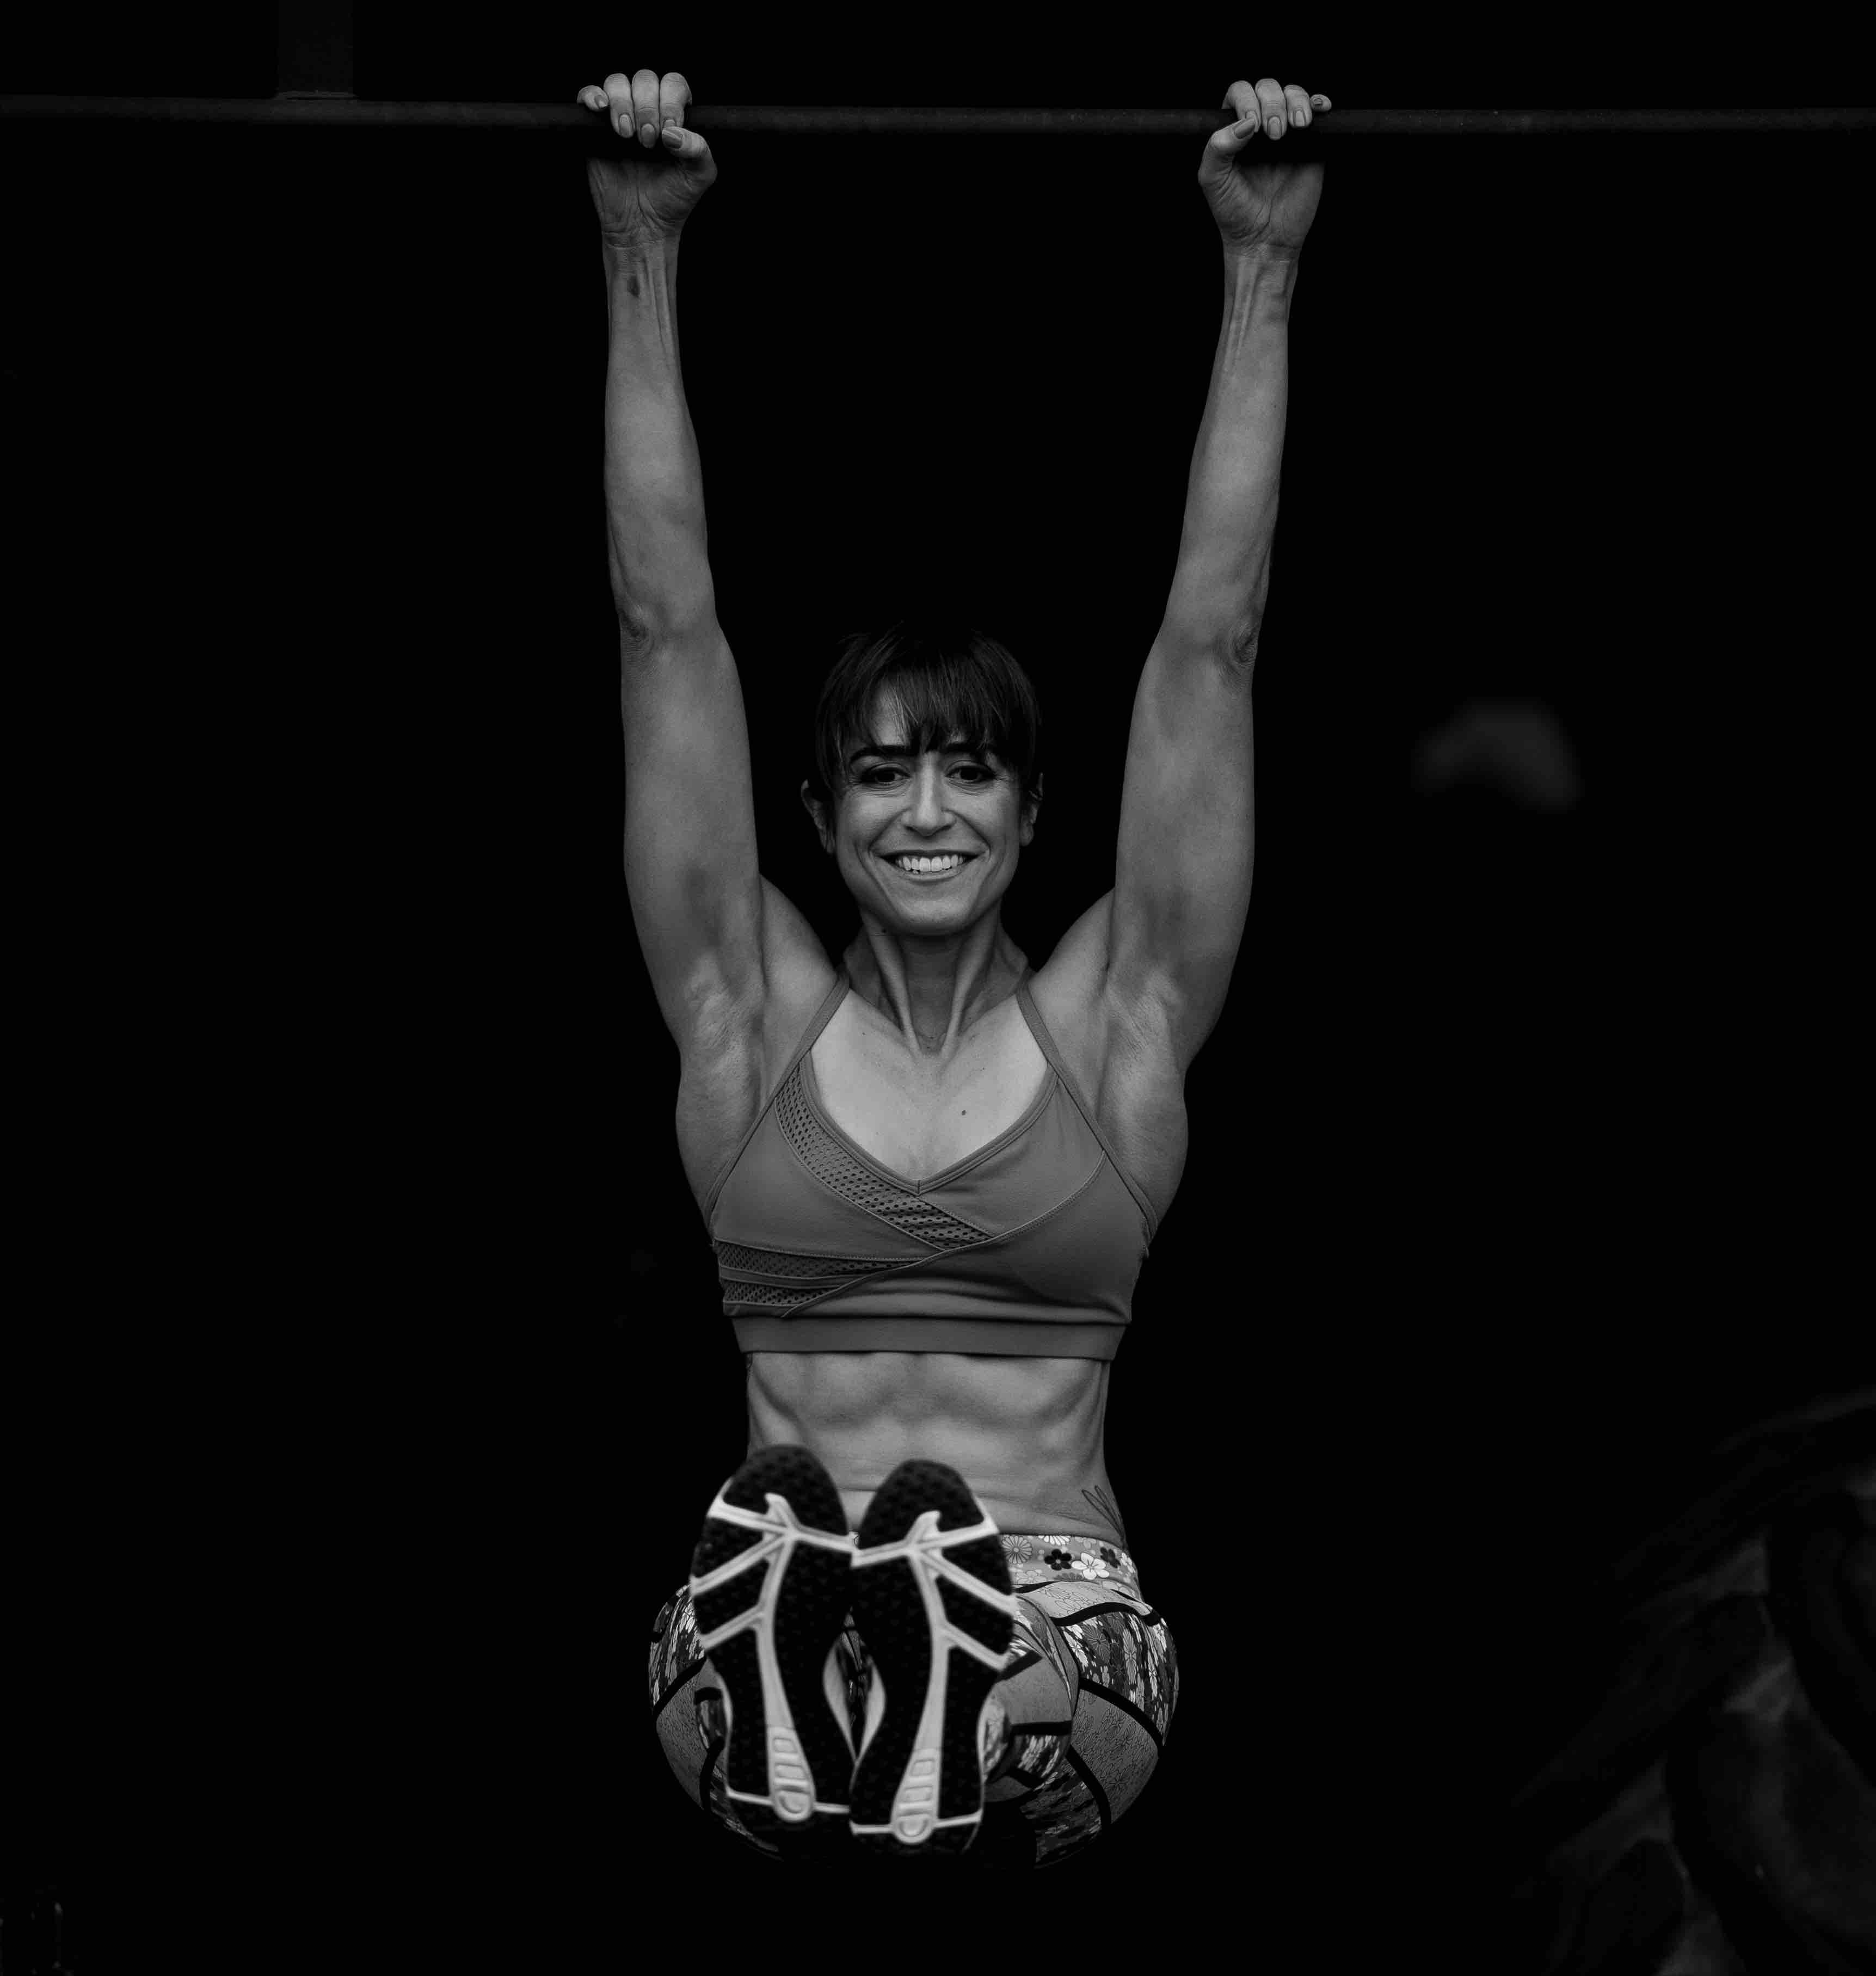
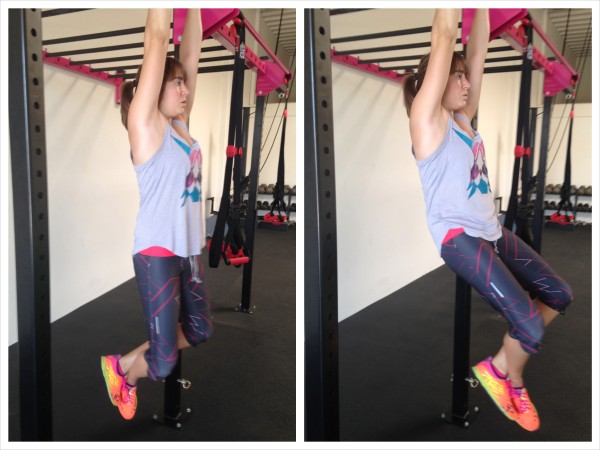
Hanging Leg Raises actually have the highest mean AND peak activation of the rectus abdominis! (Oh and this article not only confirms that but also the existence of differences in activation between the Upper and Lower RA!)
I would say it looks like my abs are working pretty hard here…as well as some other important muscles of my core!
So for you that are non-believers adamantly against any leg raise type movement who annoyingly try to correct anyone who even utters the words Lower Abs, just be open to the differences in activation!
And also realize that part of what makes a difference is what you force your body to feel working and how you even cue and coach the moves. Just like the double leg lowers…You sometimes need to regress to progress.
It may mean starting with a Hanging Pelvic Tilt to learn how to engage the abs to then help assist in the Hanging Leg Raises. Or it may be doing a bent knee raise to start. But the key is being conscious of what is working as you utilize these moves!
I almost feel like this adamant “there are no lower abs” makes us cut off our noses to spite our faces.
Why miss out on moves that can only HELP!?!
Don’t miss out on using these moves because the term we use is referring to a region of a muscle not a separate muscle.
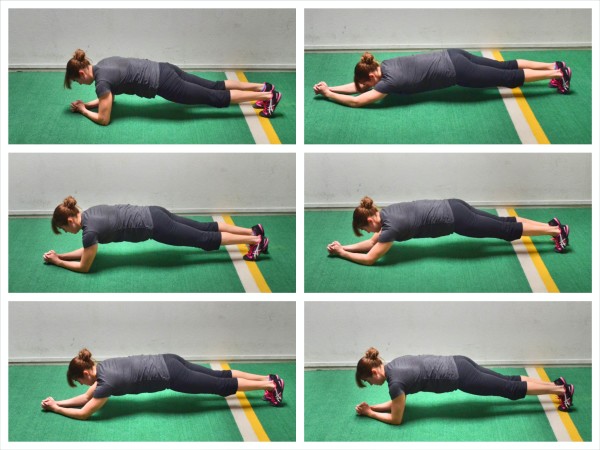
Hanging Leg Raises, Pelvic Tilt…oh and even the Body Saw (a study also showed a longer lever plank like the Body Saw was great for the core!) are KILLER ab moves you NEED to be including!
Let’s not miss chances to get the results we want when we can FEEL something working!
It’s also another reason to THINK about what you actually feel working and constantly assess your recruitment patterns!
So take some time today and test out those moves!
Ready to work not only your LOWER ABS but your entire core?
Ready to implement some Hanging Abs, Pelvic Tilt and even long lever planks into your routine?
Start the 30-Day Killer Core Challenge! All you need is your own bodyweight and a bar!